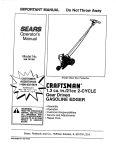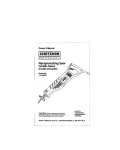
1
Instruction
Manual
14" WEEDWACKER ELECTRIC
DUAL LINE TRIMMER
Mod_-I
74R:_R
•
& CAUTION:
• Operation
• Maintenance
Before using this product,
read this manual and follow
all its Safety Rules and
Operating Instructions.
Sears, Roebuck
Safety
• Parts List
• Espafiol,
and Co., Hoffman
Estates,
p. 12
IL 60179 U.S.A.
www.sears.comlcraftsman
Form No. 581180-02
Rev 1
FEB.
' 04
Printed in Czech Republic
idr=11_l_l=l__!_1_'[-=]_
Main Handle
_F_,_e]-._I_I
-
I-4
Iger Lever
Secondary
Handle
Cable
- 5
Restraint
Line Storage
Handle
Knob
-
- 1
- 3
Pouch
Storage
- 14
Position
_ 16
Jbe - 15
Cable
Adj.
Knob
Storage
Hooks
- $
- 7 ----Guard
- 10
Line Trimming
Blade
Head - 9
_
Spool
Housing
_
- 11
Heavy Duty
Line Cassette
- 25
Line - 13
FULL ONE YEAR WARRANTY ON CRAFTSMAN
TRIMMER
If this Craftsmanproductfails due to a defect in materialor workmanshipwithinone
year from the date of purchase,return it to your nearestSears store or Craftsman
outlet to have it replaced free of charge.
This warranty appliesonly while thistrimmer/ edger is used in the United States.
This warranty givesyou specificlegal rights,and you may atsohave other rightswhich
vary from state to state.
Sears, Roebuck and Co., Dept. 817WA, Hoffman Estates, IL 60179
SAVE THESE INSTRUCTIONS
TO REDUCE RISK OF INJURY:
• Beforeany use, be sure everyoneusing
thistool readsand understandsall safety
instructionsand otherinformation
containedin thismanual.
• Savethese instructionsandreview
frequentlypriorto use and in instructing
others.
. ALWAYS WEAR EYE PROTECTION Wear safety spectacles or gogglesat
all times when this tool is plugged in.
- GUARD - Do not use thistool without
guard attached.
• DRESS PROPERLY - Do notwear
loose clothingor jewelry.They can be
caught in movingparts. Rubber gloves
and substantialrubbersoled footwear
are recommendedwhen working
outdoors. Don't operate the toolwhen
&WARNING: When usingelectric
gardeningappliances,basic safety
precautionsshouldalwaysbefollowed
to reduce riskof fire,electricshock,and
personalinjury,includingthe following:
READ ALL INSTRUCTIONS.
barefoot or wearingopen sandals.
Wear long pantsto protect your legs.
Wear protectivehair coveringto contain
long hair.
NYLON LINE - Keep face, hands and
feet clear of rotatingnylonline at all
times.
THE ROTATING LINE PERFORMS A
CUTTING FUNCTION - Use care
when trimmingaround screensand
desirable plantings.
• KEEP ALL BY-STANDERS AWAY -At
a safe distancefrom work area,
especiallychildren.
• IMPORTANT - When being used as an
Edger, stones, pieces of metal and
other objects can be thrownout at high
speed by the line. The tool and guard
are designed to reducethe danger.
However, the following special
precautionsshouldbe taken:
• MAKE SURE that other personsand
pets are at least 100 feet away.
• TO REDUCE THE RISK of rebound
(ricochet)injury,work goingaway from
any nearby solidobject suchas wall
steps, large stone, tree, etc. Use great
care when workingcloseto solidobjects
and where necessary,do edgingor
trimmingby hand.
• AVOID ACCIDENTALLY STARTING Don't carry plugged-intool with finger on
trigger.
• DO NOT FORCE THE TOOL -At a rate
faster than the rate at which it is able to
cut effectively.
• USE THE RIGHT TOOL - Do not usa
this tool for any job exceptthat for
which it is intended.
• DON'T OVERREACH - Keep proper
footing and balance at all times.
• DON'T ABUSE CORD - Don't yank
cord from powersupply.Keep cordfrom
heat, oil, and sharp edges.
• DAMAGE TO UNIT - If you strikeor
become entangledwith a foreign object,
stoptool immediately,unplug,check for
damage and have any damage repaired
before further operationis attempted.
Do not operate with a brokenhub or
spool.
• DAMAGE TO CORD - Keep power
cordaway from rotatingline. If you
damage the cord, unplugit from the
power supply beforemovingthe tool or
examiningthe damage. A damaged cord
must be replaced before further use.
• DISCONNECT TOOL- When not in
use, when replacing line, or priorto
cleaning.
• AVOID DANGEROUS
ENVIRONMENTAL CONDITIONS - Do
not use electrictools in damp or wet
locations. Followall instructionsin this
InstructionManual for properoperation
of yourtool.Don't use the toolin the rain.
- DO NOT OPERATE portableelectric
tools in gaseousor explosive
atmospheres. Motors in these tools
normally spark, and the sparks might
ignite fumes.
• STORE IDLE TOOLS INDOORS When not in use, tools should be stored
indoorsin a dry, locked-upplace out of
reach of children.
• GROUND FAULT CIRCUIT
INTERRUPTER (GFCI) protection
shouldbe providedon the circuitsor
outletsto be used for the gardening
appliance. Receptacles are available
having builtin GFCI protectionand may
be used for thismeasure of protection.
• SECURE EXTENSION CORD usingthe
cord retainershownin Figure 4.
• STAY ALERT - Watch what you are
doing. Use common sense. Do not
operate tool when you are tired.
° MAINTAIN APPLIANCES WITH CARE
- Followinstructionsfor lubdceting and
changingaccessories, inspectextension
cordsperiodicallyandreplace if damaged.
Keep handlesdry, clean and free from
oil and grease.
• CHECK DAMAGED PARTS - Before
further use of the appliance, a guard or
other part that is damaged shouldbe
carefullycheckedto determinethat it
will operate properlyand performits
intendedfunction. Check for alignment
of movingparts, bindingof moving
parts, breakage of parts, mounting,and
any other condition that may affect its
operation.A guardor other part that is
damaged shouldbe properlyrepaired or
replaced by a qualified servicefacility
unlessotherwiseindicatedelsewhere in
thismanual.
&WARNING: When servicing double
insulatedtools, USE ONLY IDENTICAL
REPLACEMENT PARTS. Repiace or
repair damaged cords.
_WARNING: To prevent electricalshock
hazard, use onlywith an extension
cordsuitablefor outdooruse. Always
connectextensioncordsto a fused line
or one protectedby a circuitbreaker.
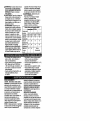
• EXTENSION CORDS. Make sure your
extensioncordis in goodcondition.When
usingan extensioncord, be sure to use
one heavyenoughto carry the current
your productwilldraw.An undersized
extensioncord wiltcause a drop in line
voltage resultingin lossof powerand
overheating.Thetable belowshowsthe
correct
size to usedepending on cord
length and nameplate ampere rating.If
in doubt,usethe nextheavier gauge.
The smallerthe gauge number,the
heavierthe cord.To reducethe riskof
disconnectionof the appfiancefrom the
extensioncordduringoperation,use the
extensioncordretainerdescribedin this
manual.
& WARN ING:
Outdoor use extension cords:
To reduce the risk of electric shock, use
only with an extension cord intended for
outdoor use, such as an extension cord of
type SW-A, SOW-A, STW-A, STOW-A,
SJW-A, SJOW-A, SJTW-A, or SJTOW-A.
• The guard must be installed before
trimming or edging - if not, the motor
will overheat.
- When repl_cing the AFS ouffe_,_J !ine,
use only .060" diameter TWISTED line
- otherwise the unit will not function
properly.
• When replacing the HDL fixed line use
only Craftsman line item #85876.
DOUBLE
INSULATION
(DNOTE: This symbol denotes Double
Insulation. Double insulated tools are
constructed throughout with two
separate layers of electrical insulation or
one double thickness of insulation
between you and the tool's electrical
system. Tools built with this insulation
system are not intended to be grounded.
As a result, your tool is equipped with a
two prong plug which permits you to use
extension cords without concem for
maintaining a ground connection.
NOTE: Double insulation does not take
the place of normal safety precautions
when operating this tool. The insulation
system is for added protection against
injury resulting from a possible electrical
insulation failure within the tool.
REPLACEMENT
PARTS: When
servicing all tools, USE IDENTICAL
REPLACEMENT
PARTS.
POLARIZED
PLUGS
Repair or replace damaged cords.
To reduce the risk of electric shock, this
equipment has a polarized plug (one
Minimum
Gage for Extension
120 VAC Toots
Total Cord Length
Amp.Ratin 9
More than 0
Not More than 6
More than 6
Not More than 10
More than 10
Not more than 12
More than 12
0-25
AWG
18
2_50
AWG
16
Cords (AWG)
51-100
AWG.
16
105-150
AWG
14
18
16
14
12
16
16
14
12
"14
12
Not more than 16
Not
Recommended
- Do not bump the feed head against the
ground - it will disrupt the feed mechanism.
- Angle tool slightly (5" to 10") when
trimming.
• Always use the cord retainer.
. Wear long pants and substantial
footwear to protect yourself from injury
caused by flying debris. This is
especially important when edging with
the appliance.
blade is wider than the other). This
equipment must be used with a suitable
3 wire outdoor extension cord. Polarized
connections will fit together only one
way. Make sure that the receptacle end
of the extension cord has large and small
blade slot widths. If the plug does not fit
fully into the extension cord, reverse the
plug. If it still does not fit, obtain a
suitable extension cord. If the extension
cord does not fit fully into the outlet,
contact a qualified electrician to install the
proper outlet. Do not change the tool plug
or extension cord in any way.
SPECIFIC
WARNING
&WARNING: Some dust created by this
product containschemicalsknown tothe
State of Californiato cause cancer, birth
defects or other reproductive harm.
Some examplesof these chemicalsare:
o compounds in fertilizers
• compounds in insecticides,herbicides
and pesticides
• arsenic and chromiumfrom
chemicallytreated lumber
To reduceyour exposureto these
chemicals,
wear
approved
safety
equipment suchas dust masksthat are
speciallydesignedtofilteroutmicroscopic
particles.
A WARNING: This productcontains
chemicals,includinglead, knownto the
State of California to cause cancer, and
birth defects or other reproductive harm.
Wash hands after handling.
SAVE THESE INSTRUCTIONS
V,.E,."T:]
_ _'d=]I_'j_=]
L'_,.']
ASSEMBLY
A WARNING: To avoid seriousinjury,
make sure that the tool is switchedoff
and unpluggedbeforeassembly.
_o_
i__
. ii_'
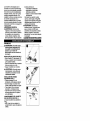
FITTING THE GUARD (FIG, 1)
• Remove the screw (17) from the guard
(10).
• Place the guard onto the tool as shown,
• Firmly press the guard until it snaps
into place.
• Secure the guard with the screw,
#,WARNING: To avoid serious injury,
never use the tool unless the guard is
properlyfitted.
FITTING THE SE,CONDARY HANDLE (FIG. 2)
• Place the handle (5) on the tool as
shown.
• Adjust the handle to the most
comfortable position. Use the markings
as a guide.
• Pass the bolt (6) through the secondary
handle and the main handle.
• Screw the bolt into the far side of the
secondary handle, Do not overtighten
the bolt,
@
STORING THE CASSETFE NOT IN USE
(FIG.3)
19/25
The tool has two cutting system cassettes:
- AFS: Autofeed System twin line for
light trimming and edging.
• HDL: Heavy Duty Line cutting system
for more overgrown areas.
The cutting system cassette not in use
can be stored in the position provided (16),
• Align the tabs on the cassette with the
cut outs (28) at the underside of the
handle.
* Push the cassette into the handle until
it snaps securely into place.
StOm_ _mEHEAVY
_
UNE(F_ 3)
* The unit is supplied with several pieces
of spare heavy cutting line.
- The extra pieces of heavy cutting line
can be stored securely in the recess in
the handle (14).
RELEASING THE CUTTING LINE
For shipmentpurposes,the cuttingline is
taped to the spoolhousing.
, Remove the tape holdingthe cutting
line (13) to the spoolhousing (12).
CONNECTING THE TOOL (FIG. 4)
- Connect the female plug of a suitable
extension cord to the power inlet (4).
• Loop the cord through the cord
restraint (3).
• Insert the plug into a receptacle,
A WARNING:
Outdoor
useextension
cords:
Toreduce the risk of electric shock,
O
use
only with an extension cord intended for
outdoor use, such as an extension cord
of type SW-A, SOW-A, STW-A, STOW-A,
SJW-A, SJOW-A, SJTW-A, or SJTOW-A.
& CAUTION: To avoidtool damage, let
the tool work at itsown pace. Do not
overload.
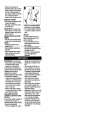
SETTING THE TOOL TO TRIMMING OR
EDGING MODE (FIG. 5, 6 & 7)
The tool can be used in trimmingmode
as shown in Fig. 5 or in edgingmode to
trim overhanginggrass along tawnedges
and flower beds as shown in Fig. 6.
A. CAUTION: To avoid tool damage, do
not use the heavy duty cuttingsystem
for edging.
TRIMMING MODE (FIG. 5 & 6)
For trimming,the trimmer head shouldbe
in the position shown in Fig. 5. If it is not:
• Depress the adjustmentbutton(7).
• Rotate the head (9), while releasingthe
button.
• When the head is in position,the
buttonwill lock intoplace.
Note: The head will onlyrotate in one
direction.
EDGING MODE (FIG, 6)
For edging, the trimmer head should be
in the position shown in Fig. 6. If it is not:
. Depress the adjustment button (7).
• Rotate the head (9), while releasing the
button.
• When the head is in position, the
button will lock into place.
Note: The head will only rotate in one
direction.
ACAUTION:
To avoid tool damage, do
not use the heavy duty cutting system
for edging.
ADJUSTING
i®i
O
15
_*_*_
• Depress the adjustment button (7).
• Gently pull the tube (15) in or out of the
motor housing (9) to the desired height,
while releasing the button.
- When the tube is in position, the button
wilt lock into place.
SWITCHING ON AND OFF
- To switchthe tool on, squeeze the
triggerlever (1).
• To switchthe tool off, release the
triggerlever.
£WARNING: To avoid seriousinjury,
never attempt to lock the
triggerlever in the on position.
THE HEIGHT OF THE
TOOL (FIG. 7)
This tool has a telescopic mechanism,
allowing you to set it to a comfortable
height. There are three height settings.
To adjust the height setting, proceed as
follows:
HINTS FOR OPTIMUM USE
GENERAL
• In order to achieve optimum cutting
results, only cut dry grass.
TRIMMING
• Holdthe tool as shown
•
•
•
•
in Fig. 5.
Gent swing the _dmmer fn:x-nside to side.
When cutting long grass, work in
stages from the top. Take small cuts.
Keep the tool away from hard objects
and delicate plants.
If the tool starts running slowly, reduce
the load.
& WARNING: To avoid seriousinjury,
switch offand unplugthe tool before
performingany maintenance.
Your tool has been designed to operate
over a long periodof timewith a minimum
of maintenance. Continuoussatisfactory
operation depends upon propertool care
and regular cleaning.
• Regularlyclean the ventilationslots in
yourtool usinga softbrushor drycloth,
• Regularlyclean the cuttingline and
spoolusing a soft brush or dry cloth.
• Regularlyuse a bluntscraperto remove
gr_s._ _nd dirt from the underneath of
the guard,
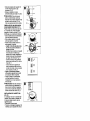
Frn'ING A NEW SPOOL OF AFS
currlNG LINE (FIG. 8 & 9)
Complete cassettescontaininga spoolof
cuttingline are available from your
Craftsman dealer (item no. 85878).
• Unplugthe tool,
° Depressthe tabs (18) and removethe
cassette (19) from the cassette housing
(12) in the trimmer head. Fig. 8.
° Grasp empty spool(20) with one hand
and cassette with other hand and pull
spoolout from cassette. If lever in base
of cassette becomes dislodged, replace
in correct position before insertingnew
spoolinto cassette.
• Remove any dirt and grass from the
cassette and housing.
• Takethe new spool and push it onto
the boss (Fig. 9) in the cassette. Rotate
the spoolslightlyuntilit isseated.
• Unclipthe end of oneof the cuttinglines
and guidethe line intooneof the eyelets
(21). Fig.9. The line shouldprob'ude
approx.4-3/8 in.from the cassette.
° Unclip the end of the other cutting line
and guide the line into the other eyelet.
The line shouSdprotrude approx.
4-3/8 in. from the cassette.
• Align the cassette tabs (18) withthe
slots(22) inthe housing.Fig.8.
• Push the cassette onto the housing
until it snaps securely into place.
A CAUTION: To avoid tool damage, If
the cutting lines protrude beyond the
trimming blade (11), cut them off so
that they just reach the blade.
EDGING
Optimum cuttingresults are achieved on
edges deeper than 2 inches.
° Do not use the toolto create edges. To
create edges, use an edgingspade.
• Guide the toolwith edge guide on hard
surface as shownin Fig, 6.
• To make a closercut,slightlytiltthe tool.
.11
O
....
O
\
Boss _
tg__
20
!
Lever
2t
WINDING NEW LINE ONTO AN EMPTY
SPOOL (FIG. 10 &11)
You may wind new cuffing line onto an
empty spool. Replacement packs of
0.050" cutting line are available from your
Craftsman dealer.
• Remove the empty spool from the tool
as described above.
• Remove any remaining cutting line
from the spool.
• First wind new line onto the
uppermost part of the spool.
- Feed 3/4 inch of cutting line into one
of the line anchoring slots.
- Wind the cutting line onto the spool in
the direction of the arrow on the spool.
Make sure to wind the line on neatly
and in layers. Do not criss-<_'_s.
Fig. 10.
- When the wound cutting line reaches
the recesses (24), cut the line. Fig. 11.
-Temporarily
park
the line in the holding
slots (23) on one side of the spool as
shown in the inset in Fig. 11.
• Repeat the above procedure for the
second cutting line on the lower
section of the spool.
- Fit the spool onto the tool as described
in Fitting a New Spool of Cutting Line.
IlL CAUTION: Before you begin trimming,
only use the appropriate type of
Craftsman cutting line. Ensure that
cutting line is present in both sections
of the spool. Fig. 9.
_
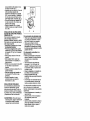
FITTING A NEW PIECE OF HEAVY
DUTY CUTTING LINE (FIG. 12)
Replacement pieces of heavy duty
cutting line are available from your
Cr_,ffsman ,.l_i_. ,,ll,....
85876) "r^ _,,,
a new piece of cutting line, proceed as
follows:
• Unplug the trimmer from its power
source.
• Depress the tabs (28) and remove the
HDL cassette (25) from the cassette
housing (!2, Fig. 8) in the trimmer
head.
• Remove the used piece of line from
the cassette.
• Remove any dirt and grass from the
cassette and housing.
• Thread a new piece of line (26)
through the holes in each side of the
cassette.
• Place the metal ferrule (27) in position
as shown.
° Align the cassette tabs with the slots
(22, Fig 8) in the housing.
o Push the cassette onto the housing
until it snaps securely into place.
1•
X
24
=5-'!
>
'
.
i
28
!
FITTING THE HDL CASSETTE (FIG. 12)
Yourtrimmer is shipped with the AFS
cassette installed.To fit the HDL (Heavy
Duty Line) cassette, proceed as follows:
- Unplugthe tool.
- Keep the tabs (16) depressed and
remove the AFS cassette (19) from the
cassette housing(12) in the trimmer
head. Fig. 8.
- Make sure a piece of heavy cuttingline
is correctlyfittedto the HDL cassette,
as describedin Fittinga New Piece of
Heavy Duty CuttingLine below. Fig. 12.
- Align the tabs on the HDL cassette
with the slots (22, Fig. 8) in the
cassette housing.
• Push the HDL cassette into the housing
untilit snaps securely into place,
TROUBLESHOOTING
If your tool does not seem to operate
properly, follow the instructions below. If
this does not solve the problem, please
contact your nearest Sears Parts & Repair
Center.
& WARNING: To avoid serious injury,
switch off and unplug the tool before
performing any maintenance.
Tool runs slowly
• Check that the cassette housing (12)
can rotate freely. Carefully clean it if
necessary.
• Check that the cutting line does not
protrude more than 4-3/8 in. from the
cassette. If it does, cut it off so that it
just reaches the line trimming blade.
Automatic line feed does not work
• Keep the tabs depressed and remove
the cassette from the cassette housing
in the trimmer head.
• Pull the cutting line until it protrudes
4-3/8 in. from the cassette. If
spool, install a new spool of cutting
line.
• Align the tabs on the cassette with the
cut outs in the housing.
• Push the cassette onto the housing
until it snaps securely into place.
• If the cutting tine protrudes beyond the
trimming blade, cut it off so that it just
reaches the blade.
If the automatic line feed still does not
work or the spool is jammed, try the
following suggestions:
• Carefully clean the cassette and
housing.
• Remove the spool and check if the
lever in the cassette can move freely.
• Remove the spool and unwind the
cutting line, then wind it on neatly
again. Replace the spool into the
cassette.
le]f-,Te]:,T_,_ff-,1
lm]=Ilr;1_o]l_F_£o]IAIIl
Mango
principal
-2
Ir-,1mI_]I_-_
_i_,__J_able
de alimentecibn
._f__Palanca
Mango
sacunoario
_'_
- b'----. &_'___
_._\
./
Perilla de ajuste
del mango
_/
- 6 _
_
de ajuste
- 7
_
/
de
_
motor
{cabeza)
protectora
carfare
- 12
_ujetador
"
Bol.
\
del cable
- 3
de almacenamlento
_Posicl6n
_,
dsl carrete
Ganchos
para
- 4
- t
de |a linea - 14
de almacenamiento
- 16
almacenamiento
del cable
- 8
_//
Oa,
a°rote.ore
Caja
t
_
_._"
//
Bot6n
_"
_\
tipo gatillo
- 9_
__
del ,_--__
v
_
Protector
10
Cuchilla
.....
podadora
/
_ _:_
!,_i
_---_-_LInea
de corte
de linea
....
- 11
_
:=-L|nea
de cot-re para
trabajos
pesados-25
- 13
GARANTtA COMPLETA POR UN N;IO PARA LA PODADORA CRAFTSMAN
Si este producto Craftsman presenta fallas debido a material o mano de obra
defectuosos, durante el transcurso deL primer aSo a partir de ta fecha de compra,
u=vu_,v==,u _ ,_=tienda Sears o CrafLsman mas cercar, a para que se Io, .....
==,,,p,_,c=,'
...., _,,'-,
costo alguno.
Esta garantia es vdlida solamente si esta podadora/orifladora se utiliza en los Estados
Unidos.
Esta garantia le etorga derechos legales espec[ficos y otros derechos que pueden
variar dependiendo del estado.
Sears, Roebuck and Co., Dept. 81TWA, Hoffrnan Estates, IL 60179
GUARDE ESTAS INSTRUCCIONES
_ ADVERTENCIA: Siempre que utilice
PAPAREDUClRELPJESGODE LF_SIONF_S: aparatoselectricos de jardineriadebe
seguir ciertasprecaucionesbasicasde
• Antes de cualquieruso,asegdreseque
seguridad entretasqua se encuentran
cualquierpersonaque vaya a utilizar
las siguientes,a fin de reducirlos
esta herramientalea y comprendatodas
desgos de incendio,choqueeldctricoy
las instruccionesde seguddady demds
lesiones corporales
informacibncontenidaen este manual
LEA
TODAS LAS INSTRUCClONES
• Conserveestas instruccionesy repaselas
confrecuenciaantesde usar la
herramientay al insltuira otraspersonas
• UTILICE SIEMPRE PROTECCION
OCULAR - Utilicelentes o galas de
seguridadsiempreque esta herramienta
est8 enchufada
• PROTECTOR- Noutiliceesta herramienta
si notiene instaladoel protector
• VJSTASEDE MANEP,_.ADECUADA Nose vistaconprendassueltasni
articulosde joyeHa Estospuedenquedar
atrapados en las piezas m6viles. Se
recomienda el empleo de guantes de
goma y de calzado resistente con suela
de goma cuando trabaje a la intemperie.
No opere la herramienta con los pies
descalzos o con sandalias abiertas.
Utilice pantalones largos para proteger
sus piemas. C_brase el cabello si to tiene
largo.
• dNEA DE NYLON- Conservela cara,
las manosy lospiesalejadosde la linea
de nylongiratodaentodomomento.
• LA LINEA DE GIRATORIAEFECTOA
UNA FUNCl6N DE CORTE - Tenga
cuidadocuandorecortealrededorde
biombosy plantasquedesea conservar.
• CONSERVE ALEJADOSA
ESPEC't'ADORES.A unadistanciasegura
del _rea de trabajo.Especialmenlea los
nifios.
• IMPORTANTE- Cuandoutilicela unidad
comoorilladora,tengacuidadoya que la
linea puededespedirpiedras,piezasde
metal y otrosobjetosa alta velocidad.La
herramientay el protector°stUn
disefiadospara disminuireste peligro.Sin
embargo,debe tomarlas siguientes
precaucionesespeciales:
° ASEGORESE que otraspersonasy
mascotas est_n a por Io menos30,5
metros(t00 pies)de distancia.
• PARA REDUClR EL RIESGO de
°
•
•
•
•
•
•
de,_le cualquierobjeto,_Yklocomoun
muro,escalones,piedrasgrandes,
drboles, etc., haciaafueraTengamucho
cuidadocuandotrabajecercade este
tipo de objetosy, cuandosea necesario,
orilie o pod° a mano.
EVITE EL ENCENDIDOACCIDENTAL No transportela unidadenchufadaconel
dedo en el gatillo.
NO FUERCE LA HERRAMIENTA- A una
velocidadmayora ta queutilizapara
cortarconeficacia.
EMPLEE LA HERRAMIENTA
ADECUADA- No utiliceesta herrarnienta
en tareaspara las queno ruedisefiada.
NO SE SOBREEX'rlENDA- Conserve
siernpre
el equilibdo
y lospiesbienapoyados.
NO MALTRATEEL CABLE - No tiredel
cablepara desconectadode la tomade
cordente.Cons_rveloalejadode calor,
gra_sas
y cantosafilados.
DANOS A LA UNIDAD - Si golpeala
unidado esta se atascacon aig_nobjeto
extrafio,ap_guelainmediatamente,
desenchdfelay verifiquesise produjeron
dafios.Si los hay,haga reparar la unidad
antes de intentar volvera usarla.No la
utilicasi el carreteo el cubose rompen.
DANOS AL CABLE - Conservealejado
at cable de la lineagiratoda.Si da_a el
cable el_ctrico,desconectefode la toma
de cordenteantesde moverla unidado
examinarel dafio. El cable daffadodebe
reemplazarseantes de userde nuevola
herramienta.
DESCONECTE LA HERRAMIENTACuandono la use, cuandocambie ta
lineao antesde limpiar la unidad.
EVITE CONDICIONES AMBIENTALES
PELIGROSAS - No utiliceherramientas
elL_lricasen lugaresh_medoso mojados.
Siga todas las instrucciones contenidas
eneste manual para el funcionamiento
adecuado de su herramienta. No utilice la
unidad bajo la lluvia.
NO OPERE herramientas el_ctdcas
port,tiles en atm6sferas gaseosaso
explosivas. Los motores de estas
herramientas producen chispas en
condiciones normales y estas chispas
pueden provocar la ignicibnde los gases.
GUARDE SUS HERRAMIENTASBAJO
TECHO CUANDO NO LAS EMPLEE Las herramientasque no se emplean
debenguardarsebajotechoenun Fugar
secoy bajoilave,fuera del alcancede
los nifios,
Se debe proteger los circuitos o tomas de
°
m
de jardineriaconINTERRUPTORESDE
ClRCUn'O EN CASO DE FALl_ASDE
CONEXlON A TIERRA (GFCl). Existen
tomasde corrientecon protecci6nGFCI
integraday se puedenutilizarpara esta
rnedida de seguddad.
ASEGURE EL ALARGADOR conel
sujetadorde cable ilustradoen la Figura4.
ESTE ALERTA - Conc6ntreseen Io que
est_ haciendo.Utiticeel senUdocom_n.
No opere la herramientacuandoest_
cansado.
CUIDE SUS APARATOS- Siga las
instrucciones
de lubdcaciSny cambiode
accesonos.Revisesus alargadoros
peribdicamentey c&mbielossi estdn
dafiados.Conservelos mangos secos,
limpiosy libresde aceitey 9rasa.
REVISE LAS PARTESDANADAS,Antes
de seguirempleandocualquieraparato,
es indispensable revisar conmucho
cuidadopara determinarsi un protectoru
otra part° dafiada podraoperarde la
maneraadecuadapara cumplirconsu
funcibn. Reviselas partesmSviles para
vet que est6n bienalineadas,no
trancadasni rotasni montadasunasobre
otra o que presentencualquierotra
condici6nque pudieraafectarsu
operaci6n.Un protectoru otra parte
dafiadadeberia repararsedebidamenteo
cambiarse enun centrode servicio
calificado,a menosque se indiqueotra
cosaen este manual.
_ADVERTENCIA:
Cuando efect_e servicio
capacidad.Para reducirel riesgode que
a herramientas con doble aisiamiento,
el aparatose desconectedel alargador
UTILICE UNICAMENTE REPUESTOS
durantela operacibn,utiliceel sujetador
ORIGINALES, Repare o reemplace
de cablequese descdbeen este manual.
cables da_ados.
AADVERTENClA: Extensiones para
uso a la intemperie:
A ADVERTENCIA: Para evitar el desgo de
Para reducir los riesgos de choque
choque electdco, utilica solamente con
el_ctdco,0nicamente utilice
un alargador para uso a la intempefie.
alargadoresfabricados para trabajo a
Conecte siempre los alargadores a una
ta intempede,como los tipos SW-A,
I{nea protegida por un fusible o por un
SOW-A, STW-A, STOW-A, SJW-A,
interruptor de circuito.
SJOW-A, SJTW-A b SJTOW-A.
• ALARGADORES. Aseg_rese que su
alargador est_ en buenas condiciones.
Calibrem|nimoparaalargadores
(AWG)
Hermmientas a|20 VCA
Cuando utilice un alargador, aseg_rese
de que tenga el calibre necesano para
Longitud total
soportar la corriente que su unidad
delcable
0-7,6
7,6-15,2 15,2-30,5 30,5-45,7
requerir_. Un alargador con calibre
Amperaje
_WG AWG
AWG
AWG
insuflciente ocasionard una caida en el
Masde0
18
16
16
14
voltaje de la linea, causando p_rdida de
Nom_sde6
potencia y sobrecalentamiento. La tabla
M_sde6
18
16
14
12
que sigue muestra el calibre correcto
No m_LSde 10
para emplearse dependiendo de la
M_sde 10
16
16
14
12
Iongitud del cable y el amperaje
-_,_..-._=!__,__
en ! . _
"
"
"
-Si t]ene alguna duda, utilice el calibre
M_s de 12
14
12
No se
superior siguiente. Mientms menor sea
Nomas
Recomienda
el n_mero del calibre, mayor ser& su
de 16
lif-1Blvj :1:111:1
_ [t] Y-I.1 ILV_l
"Jo]3 Ir:1_11:1[,.1".]:I:/z|o] _]II 1:I tIo] :_:%1H _ | I_I_|
• El protector debe instalarse antes de
. No golpee la cabeza de alimentaci6n
podar u orillar- de Io contrario,el
contra el suelo pues afectar'& al
motor se sobrecalentarb.
mecanismo de alimentaci6n.
, Cuando cambiela lineade alimentacibn
• Incline la unidad ligeramente (5 ° a 10")
AFS, utilice soloI[nea TORCIDA de
cuando pode.
1,65 mm (0.060 pulg.)de dibmetro - de
o Utilice siempre el sujetador de cable.
otra manera, la unidadno funcionar_
• Vista pantalones largos y calzado
adecuadamente.
resistente para protegerse de lesiones
• Cuando cambie la linea flja HDL, use
ocasionadas por objetos despedidos.
sblo I{nea Craftsman, articulo
Esto es de especial importancia
no. 85876.
cuando orille con el aparato.
J,
_ID__[i
_
DOBLE AISLAMIENTO
[] NOTA: Este s[mbolo indica doble
aislamlento, Las herramientascon doble
aislamientoestanconstruidascon dos
capas diferentesde aislamientoelectdco
o una capade aislamientode espesor
doble entre ustedy el sistemaeLL=ctdco
de
ta herramienta.Las herramientascon
doble aislamientono necesitan
conectarsea tierra.Como resultado,su
herramientaest&equipada con un
enchufe de dospatas que le permite
utilizaralargadoressin preocuparsede
mantener la conexibna tierra.
NOTA: El doble aislamientono reemplaza
las precaucionesnormaiesde seguddad
cuando se opere la herramienta.El
ID]€I_."]::[elIK!IDT:IB]
sistema de aistamientoIe proporciona
pmteccibn adicionatcontralas lesiones
resultantesde posiblesfallas en el
aislamientoelectricode la herramienta.
REPUESTOS: EMPLEE REPUESTO
ORIGINALES cuandohaga servicioa
toda herramienta.
ENCHUFES POLARIZADOS
Cambie o reparecables daSados.
Este equipocuentacon un enchufe
polarizado(con una pata mas ancha que
la otra) para reducirel riesgo de choque
ei_ctdco.El equipodebe utitizarseconun
alargadoradecuado para trabajo a la
intemperiede 3 hilos. Las conexiones
polarizadassolamentepuedenser
conectadasde una manera. Aseg_rese
que el extremo del alargador que i_
enchufado en Ja toma de corriente tenga
ranuras con anchos grandes y pequeP,os.
Si el enchufe no entra completamente a]
alargador, invi_rtalo. Si aen asi no entra,
consiga un alargador adecuado. Si et
atargador no entra per completo a la toma
de cordente comunfquese con un
electdcista calificado para que le instale
la toma de corriente adecuada. Pot ningOn
motivo altere el enchufe o el alargador en
ninguna manera.
ADVERTENCIA
ESPECIFICA
AADVERTENCIA:
Parte del polvo
originado por este producto contiene
quimicos queen el estado de California
se consideran como causantes de
c&ncer, defectos congenitos u otros
daSos reproducUvos. Algunos ejemplos
ll_[,.'tll;,]l[_ti[e]_-,_
de estos quimicos son:
• compuestos en fertilizantes
• compuestos en insecticidas,
herbicidas y pesticidas
• arsenico y cromo de madera tratada
quimicamente
Para reducir su exposiciSn a estos
quimicos, utilice equipo de seguddad
aprobado como mascaras contra polvo
diseSadas especificamente
para filtrar
A partfculas microscbpicas.
ADVERTENCIA:
Este producto
contiene quimicos, incluyendo plomo,
queen el estado de California se
consideran como causantes de c_ncer,
defectos cong_nitos u otros daSos
reproductivos. Lave sus manos despu_s
de manejarlo.
GUARDE ESTAS INSTRUCCIONES
I_J]_I_[,."Y-'ILvd:]!T-'!IL::]
ENSAMBLAJE
& ADVERTENCIA:
Para evitar causar
lesiones graves, asegurese que ei
conmutador de la herramienta est6
apagado y que el cable este
desenchufado antes de ensambtar la
herramienta.
1
INSTALACK_N DEL PROTECTOR (FIG.l)
• Quite el tomillo (17) del protector (10).
• Coloque el protector en la herramienta,
como aparece ilustrado.
• Presione firmemente sobre el protector
hasta que encaje en su sitio.
• Asegure el protector con el tornillo.
10
& ADVERTENClA:
Para evitar causar
lesiones graves, nunca utilice esta
herramienta si el protector no estd
debidamente instalado.
INSTALACI_)N DEL MANGO
SECUNDARIO
(FIG. 2)
° Coloque el mango (5) en la
herramienta, como aparece ilustrado.
• Ajuste el mango a Ia posici6n mas
cornoda. UUlice las marcas como guias.
• Pase el pemo (6) per el mango
secundado y el mango principal
• Atornilie el pemo en el otto extremo
del mango secundario. No ajuste el
perno demasiado.
ALMACENAMIENTO
DEL CASSETTE
QUE NO ESTA EN USO (FIG. 3)
La herramienta tiene dos cassettes de
corte:
• AFS: Linea doble con sistema de
autoalimentaci6n, para cortes ligeros y
orillado.
0
_"_'_
_
L,
19/25
• HDL: Sistema de corte para trabajo
pesado, para aquellas &reas que
requieren mas code.
El cassette de corte que no este en uso
puede ser almacenadoen el lugar
proporcionado(16).
• Alinee tas leng(Jetasdel cassette con
los orificios(28) que se encuentran en
la parte inferiordel mango.
• Empuje el cassette en el mangohasta
que encaje flrmemente en su sitio.
ALMACENAMIENTO DE LA LINEA DE
CORTE PARA TRABAJO PESADO
(FIG. 3)
• La unidad viene con varias piezas de
lineas de corte adicionales.
• Las piezas adicionalesde linea de
corte para trabajo pesado pueden
almacenarse en forma segura en ta
hendiduradel mango (14).
LIBERACI6N DE LA LiNEA DE CORTE
Para su transporte,la tinea de corte
viene pegada con cinta adhesiva a la
CONEXlON DE LA HERRAMIENTA
(FIG. 4)
• Conecte el enchufe hembra de un
alargadorapropiado a la entrada de
corriente(4).
• EnroUeel cable en el sujetador de1
cable (3).
• Inserteel enchufeen fatoma decordente.
& ADVERTENClA:
Alargadores para el exterior:
Para reducirel riesgo de descargas
etectricas,use s61oconun alargador
apropiado para usoen el exterior,tales
como fos de tipo SW-A, SOW-A,
STW-A, STOW-A, SJW-A, SJOW-A,
SJTW-A 6 SJTOW-A.
!o
• Quite la cinta adhesivaque sujeta la
I[neade corte (13) a la caja protectora
del carrete (12).
& PRECAUCI(_N: Para evitar causar
dafios a la herramienta, deje que esta
haga su trabajo a su propia velocidad.
No sobrecarguela unidad.
MODALIDAD DE PODADO U
ORILLADO (FIG. 5, 6 y 7)
Esta herramientapuede utilizarseen
modalidadde podado, como io muestra
la Fig. 5 6 de orilladopara podar pasto
que sobresalgade los bordes del jardin
y de jardineras,como Io muestra la Fig.6.
& PRECAUGION: Para evRarcausar
dafios a la herramienta, no utiliceel
sistema de corte para trabajo pesado
cuandoorille.
MODALIDAD DE PODADO (FIG. 5 y 6)
Para podar,el cabezal de corte deberia
encontrarseen la posici6nilustradaen la
Fig. 5. Si no to est&,
• Presioneel bot6n de ajuste (7).
• Gire el cabezat (9), al tiempo que
suelta el bot6n.
• Cuando el cabezal est6 en posicibn,el
bot6nencajara en su sitio.
Nota: El cabezal s61ogira en una
direccibn.
MODALIDAD DE ORILLADO (FIG. 6)
Para odllar,el cabezal de corte deber[a
encontrarseen la posici6nilustradaen la
f
Fig.6.Sino Ioest&,
° Pmsione el botbnde ajuste (7).
, Gire el cabezal (9), al tiempo que
suelta el bot6n.
• Cuando el cabezat est_ en posicibn,el
bot6n encajara en su sitio.
Nora: El cabezai s61ogira en una
direcci6n.
& PRECAUCION: Para evitar causar
daSos a la herramienta, no utiliceel
sistemade corte para trabajo pesado
cuandoorille.
AJUSTE DE LAALTURA
HERRAMIENTA (FIG. 7)
Esta herramienta tiene un
telescopico que le pennite
altura de mayor comodidad
Existen tres configuraciones
Para ajustar la altura, siga
pasos:
DE LA
mecanismo
fljaria a una
para usted.
de altura,
los siguientes
- Presione el bot6n de ajuste (7).
• Suavemente deslice el tubo (15) hacia
adentro o afuera de la caja protectora
del motor (9) hasta que quede a la
altura deseada, al tiempoque suelta el
bot6n. Cuando el tubo este en
posicibn, el botbnencajar_en su sitio.
ENCENDIDO Y APAGADO
• Para encender la herramienta,apriete
la palanca tipo gatillo(1).
• Para apagar la herramienta, suelte la
palanca tipo gatillo.
A,ADVERTENClA: Para evitar causar
lesiones graves, nuncatrate de dejar
bloqueada la palancatipo gatiltoen la
posici6nencendida.
CONSEJOS PARA SU USO _)PTIMO
GENERAL
• Para poder Iograrresultados 6ptimos
en sus cortes, no corte pastomojado.
PODADO
• Sostenga la herramientacomo Io
• OscUela cortadorasuavemente,de
lado a lado.
- Cuando corte pastolargo, trabaje en
etapas empezando por las puntas.
Haga cortes pequetios.
AADVERTENClA: Para evitar causar
lesiones graves, apague y desenchufe
la herTamientaantes de realizar
cualquiertipo de mantenimiento.
Su herramienta ha sido disetada para
que opere por periodoslargos de tiempo
necesitando s_lo un minimode
mantenimiento. Su operaci6n
satisfactoriadepende det cuidadodebido
y fa limpieza de la herramienta.
• Limpie en forma regular las rejillasde
ventitaci6nen su herramienta usando
una escobillasuave o un patio seco.
• Limpie en forma regular la linea de
corte y el carrete con una escobilla
suave o un paso seco.
• UUlice en forma regular un raspador
romo para quitadeel pastoy la tierra a
la parte inferiordel protector.
INSTALACl6N DE UN NUEVO
CARRETE DE L[NEA AFS DE CORTE
(FIG. 8 y 9)
Podr_ encontrarcassettescompletos con
un carrete de linea de corte en su
distribuidorCraftsman(articulono. 85878)
° Desenchufeia herramienta.
• Presione Jasleng0etas (18) y quite el
Mantenga la herramienta afejada de
objetos dums y de plantas delicadas.
• Si la herramientaempieza a disminuir
su velocidadde operacibn,reduzca la
carga.
ORILLADO
Los mejores resultadosde corte se
Iogran en bordesde m_lsde 5 crn(2
pulg.) de profundidad.
• No use la herramienta para crear
bordes. Para crear bordes use una
pala de odUado.
....
__1
.......
.,'.. +j.+
Gu+e ,'ah._+,=,,.+,t,,_
,.....,,+a_u,m
u+
orilla sobre una superflciedura, como
se muestra en la Fig. 6.
Para hacer un corte m&s apegado al
suelo, inclineligeramente la
herramienta+
•
•
•
•
•
cassette (19) de la caja protectora del
cassette (12) en el cabezal de corte.
Fig. 8
Tome el carrete vac_o (20) con una
mano y el cassette con la otra y tire
del carrete para sacado del cassette.
Si la palanca de la base del cassette
se sale, p6ngala de regreso en la
posicibn correcta antes de insertar el
carrete nuevo en el cassette.
Quite cualquier tierra y pasto que
pueda encontrar en el cassette y su
caja protectora.
Tome el carrete nuevo y empl_jeto en
el cubo (Fig. 9) del cassette. Gire
ligeramente el carrete hasta que est_ =
debidamente asentado.
Desenganche el extremo de una de las
lineas de corte y guie la linea por uno
de los ojetes (21). Fig. 9. La I[nea
deberia sobresalir aproximadarnente
11 cm (4-318 pulg,) del cassette.
Desenganche el extremo de la otra
linea de corte y guie la linea por el
otro ojete. La Einea deberia sobresalir
aproximadarnente
11 cm (4-3/8 pulg+)
del cassette.
• Alinee
laslengLietas
del cassette
(18)
con las ranuras (22) de la caja
protectora. Fig. 8.
• Empuje el cassette en la caja
protectora hasta que encaje en su sitio.
& PRECAUCl6N'.
Para evitar causar
daP,os a la herramienta, recorte las
lineas de code siestas sobresalen mas
alia de la cuchilla de code (11), de
modo que apenas alcancen la cuchilla.
ENROLLADO
DE UNA LiNEA NUEVA
EN UN CARRETE VACiO (FIG. 10 Y 11)
Puede enrollar una linea nueva de corte
en un carrete vacio. Podra encontrar
paquetes de ifnea de code de 0,13 cm
(0,050 pulg.) en su distfibuidor Craftsman.
• Quite el carrete vacfo de la herramienta,
como se describe mas arriba.
• Quite cualquier pedazo de linea de
corte que quede en el carrete.
• Primero enroJle la linea nueva en la
parte superior del carrete,
- lnsett_ 1:gcm (3/4 pulg.) de la tine_
de corte en una de las ranuras de
anclaje de la tinea.
- Enrolle la linea de code en el cassette
en la direcci6n de la flecha que
aparece en el carrete. Aseg0rese de
enrollar la linea en forma ordenada,
por capes. No entrecruce. Fig. 10.
- Cuando ta tinea de corte enrollada
alcance las hendiduras (24), code la
I{nea. Fig. 11.
- Use las ranuras de sujeci6n (23)
para temporalmente fijar la linea en
un lado del carrete, como se muestra
en el recuadro de la Fig. 11.
• Repita el procedimiento sefialado
erriba para la segunda linea de corte
de la secci6n inferior del carrete.
• Ponga el carrete en la herramienta,
como se describe en la secci6n
'lnstalacibn de un nuevo carrete de
linea de code.
&PRECAUCl(SN:
Antes de comenzar a
cortar, use s61o el tipo apropiado de
I{nea de corte Craftsman. Aseg_rese
que la tinea de corte est_ presente en
ambas secciones del carrete. Fig. 9.
INSTALACI6N DEL CASSETTE HDL
(FIG. 12)
Su cortadora viene con el cassette AFS
instalado.Para insta[ar el cassette HDL
(Linea para trabajo pesado), siga los
siguientespesos:
° Desenchufe ta herramienta,
° Presione y sostenga las lengLietas(18)
mientrassaca el cassette AFS (19) de
\
22
O
2O
21
X
O
la caja protectora del cassette (12) en
el cabezal de code. Fig 8.
• Aseg_rese que una pieza de la linea de
corte para trabajo pesado este
debidamente insertadaen el cassette
HDL, comose describeen 'lnstalaci6n
de una pieza nueva de linea de corte
para trabajopesado',mas abajo. Fig. t2.
• Alinee las lengL}etasdel cassette HDL
con las ranuras(22, Fig. 8) de la caja
protectoradel cassette.
• Empuje el cassette HDL en la caja
protectorahasta que encaje firmemente
en su sitio.
INSTALACION DE UNA PIEZA NUEVA
DE LINEA DE CORTE PARA TRABAJO
PESADO (FIG. 12)
Podr_ encontrarrepuestosde linea de
corte para trabajopesado en su
distribuidor Craftsman(articulono 85876)
Para insertaruna nueva pieza de lineade
code, haga Io siguiente:
, Desenchufe la podadorade su fuente
de alirnentacion eiectrica,
• Presione las lengSetas(28) y quite el
cassette HDL (25) de la caja protectora
de! cassette (12, Fig 8) en el cabezal
de corte
• Quite la pieza usada de la linea del
cassette.
• Quite cualquiertierra y pasto que
pueda encontrar en el cassette y su
caja protectora
• Enhebre una nueva pieza de Ifnea (26)
por losorificiosa cada lado del
cassette.
• Coloque la contera de metal (27) en la
posici6nindicada
• Alinee las leng_etas del cassette con
las ranuras(22, Fig.8) de la caja
protectora.
• Empuje el cassette en la caja
protectora hasta que enganche
firmemente en su sitio.
RESOLUCI6N DE PROBLEMAS
Si su herramienta no pareciera estar
funcionando debidamente, siga las
instruccionesde m_s abajo. Si esto no
resuelve el problema,por favor p6ngase
en contacto consu Centro de Repuestos
y ReparacionesSears mas cercano.
&ADVERTENCIA: Para evitarcausar
lesionesgraves, apague y desenchufe
la herramienta antes de realizar
cualquiertipo de mantenimiento
";"
28
Si la herramienta anda demasiado lenta
• Reviseque la caja protectoradel cassette
(12) pueda girar libremente.Limpiela
con mucho cuidadosi es necesario.
• Revise que la linea de corte no
sobresalga m&s de 11 cm (4-318 pulg.)
de modo que apenas alcance la cuchiUa
podadora de linea.
Si la alimentacibn autom:_tica de la
linea no funciona
• Mantenga presionadas las lengi3etasy
saque el cassette de la caja protectora
del cassette en el cabezal de la
cortadora.
• Tire de la Ifnea de code basra que
sobresalga11 cm (4-3f8 pulg) del
cassette. Si queda poca linea de corte
en el carrete, instale un carrete nuevo
de !fnea de corte.
• Alinee las fengBetas en el cassette con
los odficiosde la caja protectora.
• Empuje el cassette en la caja
protectorahasta que encaje firmemente
en su sitio
• Si la Iinea de corte sobresalernas alla
de la cuchilla podadora,recbrtela de
modo que apenas alcance la cuchilla.
Si la alimentacibnautom._ticade la Ifnea
a_n no funciona o si el carrete esta
trancado, pruebe alguna de las siguientes
sugerencias:
• Limpiecuidadosamenteel cassette y la
caja protectora.
• Quite el carrete y revise si la palanca
del cassette se puede mover
libremente.
• Quiteel carrete y desenrolle la lineade
corte, luego enrSllelanuevamente, en
forma ordenada. Vueiva a poner el
carrete en el cassette
Parts List for 74528 Type 1
Item Number
Part Number
Description
Qty Required
101
583316-02
MOTOR
1
102
579318-00
SWITCH
1
103
579820-01
TRIGGER
1
104
575462-00
SPOOL
105
585525-00
CORDSET
1
106
580826-00
SPRING
1
107
806603-00
CORD PROTECTOR
1
108
579807-02
CLAMSHELL
SET
1
109
579806-02
CLAMSHELL
SET
1
110
583934-01
BRUSH
112
581162-00
RETAINING
t t3
581237-00
SPOOL
HOUSING
1
115
575648-03
SPOOL
COVER
1
116
587129-00
GUARD
117
584059-00
TUBE
118
585526-00
MOTOR
119
579838-01
COVER
120
580203-03
HEAVEY
121
586832-00
AUX.HANDLE
122
830762-00
NUT
1
123
580098-00
BOLT
1
124
583836-01
KNOB
1
125
579822-01
ACTUATOR
1
126
580936-00
SPRING
1
127
747329-00
SCREW
17
128
580469-00
CABLE
129
821032-00
SCREW,_
COPYRIGHT':'
2_X13 DEWALT.
All Rights ReserveJ.
The t(,Ibwmg
ASSY.
& LINE
1
KIT
1
RING
1
ASSEMBLY
1
ASSM.
1
CABLE
1
ASSY.
1
DUTY
LINE
ASSY
subject
1
GUIDE
1
X 1/2
are trademarks
4
f_._rtree or m(_re DEWALT
The yell_)w a+ld black color _x,hcme: the "D"-shaped air intake grill; the anay of pyramids _n the hattdgfip:
and the away _: iLJzenge-shaped humps on tile suMace ot: the tt+ol.
Parts Iisl, pricir+g, and availability
1
to ¢harl+ge. Please visit w_w.tlewaltserviceaet.com
Power Tools and Accessories:
tile kit box c,_nfiguration:
for current pans
infi_rmafion.
Parts List for 74528 Type 1
Item Number
Part Number
Description
Qty Required
130
585704-00
IDENT LABEL
1
131
586834-00
BRAND LABEL
1
132
585702-00
NAMEPLATE
1
133
585703-00
BRAND LABEL
1
135
586900-00
SCREW
1
I37
586835-00
WARNING LABEL
t
COPYRIGHT
_ 2_303 DEWALT
All Rights
Reserved.
The |olk_wing
are _rademarks
for one or more DEWALT
The yellow and black color scheme: tile "D'_-shaped air intake grill; the anay of pyramids <tn the handgri_:
and the away o1"lozenge-shaped
humps on the sur!;ace ot' the 1ool.
Par_s lisl, pricing, and avaiIabilit_
subjecl
Io change.
Please visit wwsv,dewaltser_dcenet.com
Power Tools and Accessories:
tile kit box configuration:
tbr curren_ palls inf,_rmation.
127 --
l
133
IT
109
127
o
116--
128
115 --
Your Home
i(
!_7_ _::7_
For repair- in your home - of all major brand appliances,
lawn and garden equipment, or heating and cooling systems,
no matter who made it, no matter who sold it!
For the replacement parts, accessories and
ownerfs manuals that you need to do-it-yourself+
For Sears professionalinstallationof home appliances
;:,!;7
;:'U_L
and items like garage door openers and water heaters.
1-800-4-MY-HOME
®
(1-800-469-4663)
www,sears,com
Anytime, day or night
(U.S+A+ and Canada)
w'ww.sears.ca
Our Home
:'_!!7i!
For repair of carry-in products like vacuums, lawn equipment,
and electronics, call or go on-line for the nearest
Sears Parts and Repair Center.
1-800-488-1222
÷VT:
Anytime, day or night (U.S+A. only)
www,sears.com
£:;57:_5
:2÷i{:?;
To purchase a protection agreement (U.S.A+)
or maintenance agreement (Canada) on a product serviced by Seam:
1-800-827-6655
(u.s_)
1-800-361-6665
(Canada)
?::ff
:";5:;.
,,,,
",::
"+;
Para pedirserviciode repa_
a domicitio, y pare ordenar plazas:
1.888.SU.HOGARSM
:!:::
(1+888+784-6427)
® Registered
Trademark
f +mTrademark
/ sm Service
Mark of Sears,
Roebuck
and Co,
® Marca Ragistrada / TM Ma_ca de F_bdca I sm Marca de Servicio de Seats, Roebuck
m13Marque de commerce / MO Marque d+pos+e de Seers, Roebuck and Co.
and Co,