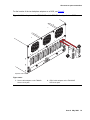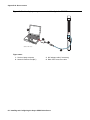
1
Installing and Configuring the
Avaya S8400 Server
Release 5.2
03-300678
Release 5.2
May 2009
Issue 4
© 2010 Avaya Inc.
All Rights Reserved.
Notice
While reasonable efforts have been made to ensure that the information in this
document is complete and accurate at the time of printing, Avaya assumes no
liability for any errors. Avaya reserves the right to make changes and
corrections to the information in this document without the obligation to notify
any person or organization of such changes.
Documentation disclaimer
Avaya shall not be responsible for any modifications, additions, or deletions to
the original published version of this documentation unless such modifications,
additions, or deletions were performed by Avaya.
End User agree to indemnify and hold harmless Avaya, Avaya's agents,
servants and employees against all claims, lawsuits, demands and judgments
arising out of, or in connection with, subsequent modifications, additions or
deletions to this documentation, to the extent made by End User.
Link disclaimer
Avaya is not responsible for the contents or reliability of any linked Websites
referenced within this site or documentation(s) provided by Avaya. Avaya is not
responsible for the accuracy of any information, statement or content provided
on these sites and does not necessarily endorse the products, services, or
information described or offered within them. Avaya does not guarantee that
these links will work all the time and has no control over the availability of the
linked pages.
Warranty
Avaya provides a limited warranty on this product. Refer to your sales
agreement to establish the terms of the limited warranty. In addition, Avaya’s
standard warranty language, as well as information regarding support for this
product, while under warranty, is available to Avaya customers and other
parties through the Avaya Support Website: http://www.avaya.com/support.
Please note that if you acquired the product from an authorized Avaya reseller
outside of the United States and Canada, the warranty is provided to you by the
said Avaya reseller and not by Avaya.
Licenses
The software license terms available on the Avaya Website,
http://support.avaya.com/licenseinfo/ are applicable to anyone who downloads,
uses and/or installs Avaya software, purchased from Avaya Inc., any Avaya
affiliate, or an authorized Avaya reseller (as applicable) under a commercial
agreement with Avaya or an authorized Avaya reseller. Unless otherwise
agreed to by Avaya in writing, Avaya does not extend this license if the
software was obtained from anyone other than Avaya, an Avaya affiliate or an
Avaya authorized reseller, and Avaya reserves the right to take legal action
against you and anyone else using or selling the software without a license. By
installing, downloading or using the software, or authorizing others to do so,
you, on behalf of yourself and the entity for whom you are installing,
downloading or using the software (hereinafter referred to interchangeably as
“you” and “end user”), agree to these terms and conditions and create a
binding contract between you and Avaya Inc. Or the applicable Avaya affiliate
(“Avaya”).
Avaya grants End User a license within the scope of the license types
described below. The applicable number of licenses and units of capacity for
which the license is granted will be one (1), unless a different number of
licenses or units of capacity is specified in the Documentation or other
materials available to End User. “Designated Processor” means a single
stand-alone computing device. “Server” means a Designated Processor that
hosts a software application to be accessed by multiple users. “Software”
means the computer programs in object code, originally licensed by Avaya and
ultimately utilized by End User, whether as stand-alone products or
pre-installed on Hardware. “Hardware” means the standard hardware originally
sold by Avaya and ultimately utilized by End User.
License types
•
Designated System(s) License (DS):
End User may install and use each copy of the Software on only
one Designated Processor, unless a different number of
Designated Processors is indicated in the Documentation or other
materials available to End User. Avaya may require the Designated
Processor(s) to be identified by type, serial number, feature key,
location or other specific designation, or to be provided by End
User to Avaya through electronic means established by Avaya
specifically for this purpose.
•
Concurrent User License (CU):
End User may install and use the Software on multiple Designated
Processors or one or more Servers, so long as only the licensed
number of Units are accessing and using the Software at any given
time. A “Unit” means the unit on which Avaya, at its sole discretion,
bases the pricing of its licenses and can be, without limitation, an
agent, port or user, an e-mail or voice mail account in the name of a
person or corporate function (e.g., webmaster or helpdesk), or a
directory entry in the administrative database utilized by the
•
•
Software that permits one user to interface with the Software. Units
may be linked to a specific, identified Server.
Named User License (NU):
End User may: (i) install and use the Software on a single
Designated Processor or Server per authorized Named User
(defined below); or (ii) install and use the Software on a Server so
long as only authorized Named Users access and use the
Software. “Named User” means a user or device that has been
expressly authorized by Avaya to access and use the Software. At
Avaya's sole discretion, a “Named User” may be, without limitation,
designated by name, corporate function (for example, webmaster
or helpdesk), an e-mail or voice mail account in the name of a
person or corporate function, or a directory entry in the
administrative database utilized by the Software that permits one
user to interface with the Software.
Shrinkwrap License (SR):
Customer may install and use the Software in accordance with the
terms and conditions of the applicable license agreements, such as
“shrinkwrap” or “clickthrough” license accompanying or applicable
to the Software (“Shrinkwrap License”). (See Third-party
Components for more information).
Copyright
Except where expressly stated otherwise, no use should be made of materials
on this site, the Documentation(s) and Product(s) provided by Avaya. All
content on this site, the documentation(s) and the product(s) provided by
Avaya including the selection, arrangement and design of the content is owned
either by Avaya or its licensors and is protected by copyright and other
intellectual property laws including the sui generis rights relating to the
protection of databases. You may not modify, copy, reproduce, republish,
upload, post, transmit or distribute in any way any content, in whole or in part,
including any code and software. Unauthorized reproduction, transmission,
dissemination, storage, and or use without the express written consent of
Avaya can be a criminal, as well as a civil, offense under the applicable law.
Third Party Components
Certain software programs or portions thereof included in the Product may
contain software distributed under third party agreements (“Third Party
Components”), which may contain terms that expand or limit rights to use
certain portions of the Product (“Third Party Terms”). Information regarding
distributed Linux OS source code (for those Products that have distributed the
Linux OS source code), and identifying the copyright holders of the Third Party
Components and the Third Party Terms that apply to them is available on the
Avaya Support Website: http://support.avaya.com/Copyright.
Preventing toll fraud
“Toll fraud” is the unauthorized use of your telecommunications system by an
unauthorized party (for example, a person who is not a corporate employee,
agent, subcontractor, or is not working on your company's behalf). Be aware
that there can be a risk of toll fraud associated with your system and that, if toll
fraud occurs, it can result in substantial additional charges for your
telecommunications services.
Avaya fraud intervention
If you suspect that you are being victimized by toll fraud and you need technical
assistance or support, call Technical Service Center Toll Fraud Intervention
Hotline at +1-800-643-2353 for the United States and Canada. For additional
support telephone numbers, see the Avaya Support Website:
http://www.support.avaya.com/.
Suspected security vulnerabilities with Avaya products should be reported to
Avaya by sending mail to:[email protected].
Trademarks
Avaya® and Avaya Aura™ are trademarks of Avaya Inc.
The trademarks, logos and service marks (“Marks”) displayed in this site, the
documentation(s) and product(s) provided by Avaya are the registered or
unregistered Marks of Avaya, its affiliates, or other third parties. Users are not
permitted to use such Marks without prior written consent from Avaya or such
third party which may own the Mark. Nothing contained in this site, the
documentation(s) and product(s) should be construed as granting, by
implication, estoppel, or otherwise, any license or right in and to the Marks
without the express written permission of Avaya or the applicable third party.
All non-Avaya trademarks are the property of their respective owners.
Downloading documents
For the most current versions of documentation, see the Avaya Support
Website: http://www.avaya.com/support.
Contact Avaya Support
Avaya provides a telephone number for you to use to report problems or to ask
questions about your product. The support telephone number is
1-800-242-2121 in the United States. For additional support telephone
numbers, see the Avaya Website: http://www.avaya.com/support.
Copyright 2010, Avaya Inc.
All Rights Reserved
Notice
Every effort was made to ensure that the information in this document
was complete and accurate at the time of printing. However, information
is subject to change.
Warranty
Avaya Inc. provides a limited warranty on this product. Refer to your
sales agreement to establish the terms of the limited warranty. In
addition, Avaya’s standard warranty language as well as information
regarding support for this product, while under warranty, is available
through the following Web site: http://www.avaya.com/support.
Preventing Toll Fraud
"Toll fraud" is the unauthorized use of your telecommunications system
by an unauthorized party (for example, a person who is not a corporate
employee, agent, subcontractor, or is not working on your company's
behalf). Be aware that there may be a risk of toll fraud associated with
your system and that, if toll fraud occurs, it can result in substantial
additional charges for your telecommunications services.
Avaya Fraud Intervention
If you suspect that you are being victimized by toll fraud and you need
technical assistance or support, in the United States and Canada, call the
Technical Service Center's Toll Fraud Intervention Hotline at
1-800-643-2353.
Disclaimer
Avaya is not responsible for any modifications, additions or deletions to
the original published version of this documentation unless such
modifications, additions or deletions were performed by Avaya. Customer
and/or End User agree to indemnify and hold harmless Avaya, Avaya's
agents, servants and employees against all claims, lawsuits, demands
and judgments arising out of, or in connection with, subsequent
modifications, additions or deletions to this documentation to the extent
made by the Customer or End User.
How to Get Help
For additional support telephone numbers, go to the Avaya support Web
site: http://www.avaya.com/support. If you are:
•
Within the United States, click the Escalation Contacts link
that is located under the Support Tools heading. Then click
the appropriate link for the type of support that you need.
•
Outside the United States, click the Escalation Contacts link
that is located under the Support Tools heading. Then click
the International Services link that includes telephone
numbers for the international Centers of Excellence.
Providing Telecommunications Security
Telecommunications security (of voice, data, and/or video
communications) is the prevention of any type of intrusion to (that is,
either unauthorized or malicious access to or use of) your company's
telecommunications equipment by some party.
Your company's "telecommunications equipment" includes both this
Avaya product and any other voice/data/video equipment that could be
accessed via this Avaya product (that is, "networked equipment").
An "outside party" is anyone who is not a corporate employee, agent,
subcontractor, or is not working on your company's behalf. Whereas, a
"malicious party" is anyone (including someone who may be otherwise
authorized) who accesses your telecommunications equipment with
either malicious or mischievous intent.
Such intrusions may be either to/through synchronous (time-multiplexed
and/or circuit-based), or asynchronous (character-, message-, or
packet-based) equipment, or interfaces for reasons of:
•
Utilization (of capabilities special to the accessed equipment)
•
Theft (such as, of intellectual property, financial assets, or toll
facility access)
•
Eavesdropping (privacy invasions to humans)
•
Mischief (troubling, but apparently innocuous, tampering)
•
Harm (such as harmful tampering, data loss or alteration,
regardless of motive or intent)
Be aware that there may be a risk of unauthorized intrusions associated
with your system and/or its networked equipment. Also realize that, if
such an intrusion should occur, it could result in a variety of losses to your
company (including but not limited to, human/data privacy, intellectual
property, material assets, financial resources, labor costs, and/or legal
costs).
Responsibility for Your Company’s Telecommunications Security
The final responsibility for securing both this system and its networked
equipment rests with you - Avaya’s customer system administrator, your
telecommunications peers, and your managers. Base the fulfillment of
your responsibility on acquired knowledge and resources from a variety
of sources including but not limited to:
•
Installation documents
•
System administration documents
•
Security documents
•
Hardware-/software-based security tools
•
Shared information between you and your peers
•
Telecommunications security experts
To prevent intrusions to your telecommunications equipment, you and
your peers should carefully program and configure:
•
Your Avaya-provided telecommunications systems and their
interfaces
•
Your Avaya-provided software applications, as well as their
underlying hardware/software platforms and interfaces
•
Any other equipment networked to your Avaya products
TCP/IP Facilities
Customers may experience differences in product performance, reliability
and security depending upon network configurations/design and
topologies, even when the product performs as warranted.
Product Safety Standards
This product complies with and conforms to the following international
Product Safety standards as applicable:
•
IEC 60950 or IEC 60950-1, including all relevant national
deviations as listed in the IECEE Bulletin—Product Category
OFF: IT and Office Equipment.
•
CAN/CSA-C22.2 No. 60950 / UL 60950 or CAN/CSA-C22.2
No. 60950-1 / UL 60950-1.
This product may contain Class 1 laser devices.
•
Class 1 Laser Product
•
Luokan 1 Laserlaite
•
Klass 1 Laser Apparat
Electromagnetic Compatibility (EMC) Standards
This product complies with and conforms to the following international
EMC standards, as applicable:
•
CISPR 22, including all national standards based on CISPR
22.
•
CISPR 24, including all national standards based on CISPR
24.
•
IEC 61000-3-2 and IEC 61000-3-3.
Avaya Inc. is not responsible for any radio or television interference
caused by unauthorized modifications of this equipment or the
substitution or attachment of connecting cables and equipment other
than those specified by Avaya Inc. The correction of interference caused
by such unauthorized modifications, substitution or attachment will be the
responsibility of the user. Pursuant to Part 15 of the Federal
Communications Commission (FCC) Rules, the user is cautioned that
changes or modifications not expressly approved by Avaya Inc. could
void the user’s authority to operate this equipment.
Federal Communications Commission Part 15 Statement:
For a Class A digital device or peripheral:
Note: This equipment has been tested and found to comply with
the limits for a Class A digital device, pursuant to Part 15 of the
FCC Rules. These limits are designed to provide reasonable
protection against harmful interference when the equipment is
operated in a commercial environment. This equipment
generates, uses, and can radiate radio frequency energy and, if
not installed and used in accordance with the instruction
manual, may cause harmful interference to radio
communications. Operation of this equipment in a residential
area is likely to cause harmful interference in which case the
user will be required to correct the interference at his own
expense.
For a Class B digital device or peripheral:
Note: This equipment has been tested and found to comply with
the limits for a Class B digital device, pursuant to Part 15 of the
FCC Rules. These limits are designed to provide reasonable
protection against harmful interference in a residential
installation. This equipment generates, uses, and can radiate
radio frequency energy and, if not installed and used in
accordance with the instruction manual, may cause harmful
interference to radio communications. However, there is no
quarantee that interference will not occur in a particular
installation. If this equipment does cause harmful interference
to radio or television reception, which can be determined by
turning the equipment off and on, the user is encouraged to try
to correct the interference by one or more of the following
measures:
•
Reorient or relocate the receiving antenna.
•
Increase the separation between the equipment and
reveiver.
•
Connect the equipment into an outlet on a circuit different
from that to which the reveiver is connected.
•
Consult the dealer or an experienced radio/TV technician
for help.
Equipment With Direct Inward Dialing (“DID”):
Allowing this equipment to be operated in such a manner as to not
provide proper answer supervision is a violation of Part 68 of the FCC’s
rules.
Proper Answer Supervision is when:
A. This equipment returns answer supervision to the public switched
telephone network (PSTN) when DID calls are:
•
answered by the called station,
•
answered by the attendant,
•
routed to a recorded announcement that can be administered
by the customer premises equipment (CPE) user
•
Routed to a dial prompt
B. This equipment returns answer supervision signals on all (DID) calls
forwarded back to the PSTN.
Permissible exceptions are:
•
A call is unanswered
•
A busy tone is received
•
A reorder tone is received
Avaya attests that this registered equipment is capable of providing users
access to interstate providers of operator services through the use of
access codes. Modification of this equipment by call aggregators to block
access dialing codes is a violation of the Telephone Operator Consumers
Act of 1990.
Automatic Dialers:
When programming emergency numbers and (or) making test calls to
emergency numbers:
•
Remain on the line and briefly explain to the dispatcher the
reason for the call.
•
Perform such activities in the off-peak hours, such as early
morning or late evenings.
Toll Restriction and least Cost Routing Equipment:
The software contained in this equipment to allow user access to the
network must be upgraded to recognize newly established network area
codes and exchange codes as they are placed into service.
Failure to upgrade the premises systems or peripheral equipment to
recognize the new codes as they are established will restrict the
customer and the customer’s employees from gaining access to the
network and to these codes.
For equipment approved prior to July 23, 2001:
This equipment complies with Part 68 of the FCC rules. On either the
rear or inside the front cover of this equipment is a label that contains,
among other information, the FCC registration number, and ringer
equivalence number (REN) for this equipment. If requested, this
information must be provided to the telephone company.
For equipment approved after July 23, 2001:
This equipment complies with Part 68 of the FCC rules and the
requirements adopted by the Administrative Council on Terminal
Attachments (ACTA). On the rear of this equipment is a label that
contains, among other information, a product identifier in the format
US:AAAEQ##TXXX. If requested, this number must be provided to the
telephone company.
The REN is used to determine the quantity of devices that may be
connected to the telephone line. Excessive RENs on the telephone line
may result in devices not ringing in response to an incoming call. In most,
but not all areas, the sum of RENs should not exceed 5.0. To be certain
of the number of devices that may be connected to a line, as determined
by the total RENs, contact the local telephone company. For products
approved after July 23, 2001, the REN for this product is part of the
product identifier that has the format US:AAAEQ##TXXX. The digits
represented by ## are the REN without a decimal point (for example, 03
is a REN of 0.3). For earlier products, the REN is separately shown on
the label.
Means of Connection:
Connection of this equipment to the telephone network is shown in the
following table:
Manufacturer’s FIC Code
Port Identifier
Off premises
OL13C
station
DID trunk
02RV2.T
CO trunk
Tie trunk
Basic Rate
Interface
1.544 digital
interface
120A4 channel
service unit
02GS2
02LS2
TL31M
02IS5
SOC/ REN/A.S. Network Jacks
Code
9.0F
RJ2GX, RJ21X,
RJ11C
AS.2
RJ2GX, RJ21X,
RJ11C
0.3A
RJ21X, RJ11C
0.3A
RJ21X, RJ11C
9.0F
RJ2GX
6.0F, 6.0Y
RJ49C
04DU9.BN
04DU9.1KN
04DU9.1SN
04DU9.DN
6.0F
6.0F
6.0F
6.0Y
RJ48C, RJ48M
RJ48C, RJ48M
RJ48C, RJ48M
RJ48C
If this equipment causes harm to the telephone network, the telephone
company will notify you in advance that temporary discontinuance of
service may be required. But if advance notice is not practical, the
telephone company will notify the customer as soon as possible. Also,
you will be advised of your right to file a complaint with the FCC if you
believe it is necessary.
The telephone company may make changes in its facilities, equipment,
operations or procedures that could affect the operation of the
equipment. If this happens, the telephone company will provide advance
notice in order for you to make necessary modifications to maintain
uninterrupted service.
If trouble is experienced with this equipment, for repair or warranty
information, please contact the Technical Service Center at
1-800-242- 2121 or contact your local Avaya representative. If the
equipment is causing harm to the telephone network, the telephone
company may request that you disconnect the equipment until the
problem is resolved.
A plug and jack used to connect this equipment to the premises wiring
and telephone network must comply with the applicable FCC Part 68
rules and requirements adopted by the ACTA. A compliant telephone
cord and modular plug is provided with this product. It is designed to be
connected to a compatible modular jack that is also compliant.
Connection to party line service is subject to state tariffs. Contact the
state public utility commission, public service commission or corporation
commission for information.
Installation and Repairs
Before installing this equipment, users should ensure that it is
permissible to be connected to the facilities of the local
telecommunications company. The equipment must also be installed
using an acceptable method of connection. The customer should be
aware that compliance with the above conditions may not prevent
degradation of service in some situations.
Repairs to certified equipment should be coordinated by a representative
designated by the supplier. It is recommended that repairs be performed
by Avaya certified technicians.
FCC Part 68 Supplier’s Declarations of Conformity
Avaya Inc. in the United States of America hereby certifies that the
equipment described in this document and bearing a TIA TSB-168 label
identification number complies with the FCC’s Rules and Regulations 47
CFR Part 68, and the Administrative Council on Terminal Attachments
(ACTA) adopted technical criteria.
Avaya further asserts that Avaya handset-equipped terminal equipment
described in this document complies with Paragraph 68.316 of the FCC
Rules and Regulations defining Hearing Aid Compatibility and is deemed
compatible with hearing aids.
Copies of SDoCs signed by the Responsible Party in the U. S. can be
obtained by contacting your local sales representative and are available
on the following Web site: http://support.avaya.com/DoC.
Canadian Conformity Information
This Class A (or B) digital apparatus complies with Canadian ICES-003.
Cet appareil numérique de la classe A (ou B) est conforme à la norme
NMB-003 du Canada.
This product meets the applicable Industry Canada technical
specifications/Le présent materiel est conforme aux specifications
techniques applicables d’Industrie Canada.
European Union Declarations of Conformity
Avaya Inc. declares that the equipment specified in this document
bearing the "CE" (Conformité Europeénne) mark conforms to the
European Union Radio and Telecommunications Terminal Equipment
Directive (1999/5/EC), including the Electromagnetic Compatibility
Directive (2004/108/EC) and Low Voltage Directive (2006/95/EC).
Copies of these Declarations of Conformity (DoCs) can be obtained by
contacting your local sales representative and are available on the
following Web site: http://support.avaya.com/DoC.
European Union Battery Directive
Avaya Inc. supports European Union Battery Directive 2006/66/EC.
Certain Avaya Inc. products contain lithium batteries. These batteries are
not customer or field replaceable parts. Do not disassemble. Batteries
may pose a hazard if mishandled.
Japan
The power cord set included in the shipment or associated with the
product is meant to be used with the said product only. Do not use the
cord set for any other purpose. Any non-recommended usage could lead
to hazardous incidents like fire disaster, electric shock, and faulty
operation.
本製品に同梱または付属している電源コードセットは、本製品専用で
す。本製品以外の製品ならびに他の用途で使用しないでください。火
災、感電、故障の原因となります。
If this is a Class A device:
This is a Class A product based on the standard of the Voluntary Control
Council for Interference by Information Technology Equipment (VCCI). If
this equipment is used in a domestic environment, radio disturbance may
occur, in which case, the user may be required to take corrective actions.
この装置は,情報処理装置等電波障害自主規制協議会(VCCI)の基準
に基づくクラス A 情報技術装置です。この装置を家庭環境で使用すると電波
妨害を引き起こすことがあります。この場合には使用者が適切な対策を講ず
るよう要求されることがあります。
If this is a Class B device:
This is a Class B product based on the standard of the Voluntary Control
Council for Interference from Information Technology Equipment (VCCI).
If this is used near a radio or television receiver in a domestic
environment, it may cause radio interference. Install and use the
equipment according to the instruction manual.
この装置は,情報処理装置等電波障害自主規制協議会(VCCI)の基
準に基づくクラス B 情報技術装置です。この装置は,家庭環境で使用
することを目的としていますが,この装置がラジオやテレビジョン受信
機に近接して使用されると,受信障害を引き起こすことがあります。取
扱説明書に従って正しい取り扱いをして下さい。
Downloading documents
For the most current versions of documentation, see the Avaya Support
Web site:
http://www.avaya.com/support
Contents
Chapter 1: Introduction . . . . . . . . . . . . . . . . . . . . . . . . . . .
11
Audience . . . . . . . . . . . . . . . . . . . . . . . . . . . . . . . . . . . . . . . .
11
How to use Avaya installation documents
12
. . . . . . . . . . . . . . . . . . . . .
Preinstallation tasks to complete at the customer site . .
Verifying that all the required equipment is on site . .
Ensuring that the preinstallation tasks are complete .
Equipment specifications . . . . . . . . . . . . . . . .
.
.
.
.
.
.
.
.
.
.
.
.
.
.
.
.
.
.
.
.
.
.
.
.
.
.
.
.
.
.
.
.
.
.
.
.
.
.
.
.
.
.
.
.
.
.
.
.
.
.
.
.
13
13
13
14
About server port connections . . . . . . . . . . . . . . .
Ethernet ports . . . . . . . . . . . . . . . . . . . . . .
Server cable adapter . . . . . . . . . . . . . . . . . .
Ethernet connectivity with the TN8412AP circuit pack
Services access port . . . . . . . . . . . . . . . . . .
.
.
.
.
.
.
.
.
.
.
.
.
.
.
.
.
.
.
.
.
.
.
.
.
.
.
.
.
.
.
.
.
.
.
.
.
.
.
.
.
.
.
.
.
.
.
.
.
.
.
.
.
.
.
.
.
.
.
.
.
.
.
.
.
.
15
15
15
17
20
About modem connections . . . . . . . . . . . . . . . . . . . . . . . . . . . . .
Modem options . . . . . . . . . . . . . . . . . . . . . . . . . . . . . . . . . .
22
22
About media gateways . . . . . . . . . . . . . . . . . . . . . . . . . . . . . . . .
22
About Processor Ethernet . . . . . . . . . . . . . . . . . . . . . . . . . . . . . .
22
About SSH . . . . . . . . . . . . . . . . . . . . . . . . . . . . . . . . . . . . . . .
23
Chapter 2: SNMP configuration . . . . . . . . . . . . . . . . . . . . . .
25
Configuring the SNMP modules in the UPS . . . . . . . . . . . . . . . . . . . . .
25
Administering the SNMP module on page 27Prerequisites for configuring the SNMP
module . . . . . . . . . . . . . . . . . . . . . . . . . . . . . . . . . . . . . .
26
Administering the SNMP module . . . . . . . . . . . . . . . . . . . . . . . .
27
Setting selected traps (alarming) . . . . . . . . . . . . . . . . . . . . . . . .
27
Chapter 3: Communication Manager installation . . . . . . . . . . . . .
29
Clearing the ARP cache on the laptop . . . . . . . . . . . . . . . . . . . . . . . .
29
Connecting the CD/DVD-ROM drive to the server . . . . . . . . . . . . . . . . . .
29
Applying power to the server
. . . . . . . . . . . . . . . . . . . . . . . . . . . .
30
Accessing the server . . . . . . . . . . . . . . . . . . . . . . . . . . . . . . . . .
31
Configuring Telnet for Windows 2000 and Windows XP . . . . . . . . . . . . . .
31
Installing Communication Manager . . . . . . . . . . . . . . . . . . . . . . . . .
31
Chapter 4: Server configuration . . . . . . . . . . . . . . . . . . . . . .
33
Methods of Configuring a server . . . . . . . . . . . . . . . . . . . . . . . . . . .
33
Opening the System Management Interface . . . . . . . . . . . . . . . . . . . . .
Creating a super-user login . . . . . . . . . . . . . . . . . . . . . . . . . . . .
34
34
Copying license and authentication files to the server . . . . . . . . . . . . . . .
35
Installing and Configuring the Avaya S8400 Server
May 2009
7
Contents
Installing the license and authentication files . . . . . . . . . . . . . . . . . .
Installing the license file. . . . . . . . . . . . . . . . . . . . . . . . . . . .
Installing the authentication file . . . . . . . . . . . . . . . . . . . . . . .
35
35
36
Configuring the server manually . . . . . . . . . . . . . . . .
Setting the date, time, and time zone. . . . . . . . . .
Rebooting the server . . . . . . . . . . . . . . . . . . . .
System Management Interface configuration screens
Ethernet interface assignments. . . . . . . . . . . . .
Performing the manual configuration . . . . . . . . . . .
.
.
.
.
.
.
.
.
.
.
.
.
.
.
.
.
.
.
.
.
.
.
.
.
.
.
.
.
.
.
.
.
.
.
.
.
.
.
.
.
.
.
.
.
.
.
.
.
.
.
.
.
.
.
.
.
.
.
.
.
.
.
.
.
.
.
36
36
37
37
38
39
Avaya Installation Wizard . . . . . . . . . . . .
About the Avaya Installation Wizard . .
Running the Avaya Installation Wizard.
Verifying the MPC IP information . . . .
.
.
.
.
.
.
.
.
.
.
.
.
.
.
.
.
.
.
.
.
.
.
.
.
.
.
.
.
.
.
.
.
.
.
.
.
.
.
.
.
.
.
.
.
40
40
41
41
Upgrading MPC firmware . . . . . . . . . . . . . . . . . . . . . . . . . . . . . . .
41
Verifying the server connection to the customer LAN (if provided) . . . . . . . .
42
Configuring the modem
. . . . . . . . . . . . . . . . . . . . . . . . . . . . . . .
43
Enabling firewall settings . . . . . . . . . . . . . . . . . . . . . . . . . . . . . . .
43
Enabling network time servers . . . . . . . . . . . . . . . . . . . . . . . . . . . .
44
Release the server
. . . . . . . . . . . . . . . . . . . . . . . . . . . . . . . . . .
45
Administering Communication Manager Messaging . . . . . . . . . . . . . . . .
45
Chapter 5: IP interface translations
.
.
.
.
.
.
.
.
.
.
.
.
.
.
.
.
.
.
.
.
.
.
.
.
.
.
.
.
.
.
.
.
. . . . . . . . . . . . . . . . . . .
47
Inputting initial system translations . . . . . . . . . . . . . . . . . . . . . . . . .
47
Adding media gateways . . . . . . . . . . . . . . . . . . . . . . . . . . . . . . .
48
Enabling the SIPI . . . . . . . . . . . . . . . . . . . . . . . . . . . . . . . . . . .
49
Adding the SIPI to the system . . . . . . . . . . . . . . . . . . . . . . . . . . . .
49
Setting the alarm activation level . . . . . . . . . . . . . . . . . . . . . . . . . .
50
.Saving translations . . . . . . . . . . . . . . . . . . . . . . . . . . . . . . . . . .
50
Verifying connectivity to the server . . . . . . . . . . . . . . . . . . . . . . . . .
50
Verifying that the SIPI is translated . . . . . . . . . . . . . . . . . . . . . . . . .
51
Upgrading the SIPI firmware version (if necessary) . . . . . . . . . . . . . . . .
51
Enabling control of the SIPI . . . . . . . . . . . . . . . . . . . . . . . . . . . . .
51
Verifying the license status . . . . . . . . . . . . . . . . . . . . . . . . . . . . . .
52
Chapter 6: IP interface configuration . . . . . . . . . . . . . . . . . . .
53
SIPI address configuration . . . . . . . . . . . . . . . . . . . . . . . . . . . . . .
Programming the SIPI for static addressing
. . . . . . . . . . . . . . . . .
53
53
Setting the VLAN and diffserv parameters . . . . . . . . . . . . . . . . . . . . .
56
8
Installing and Configuring the Avaya S8400 Server
May 2009
Contents
Chapter 7: Postinstallation administration . . . . . . . . . . . . . . . .
59
Verifying translations . . . . . . . . . . . . . . . . . . . . . . . . . . . . . . . . .
59
Setting rules for daylight savings time . . . . . . . . . . . . . . . . . . . . . . .
60
Setting locations (if necessary) . . . . . . . . . . . . . . . . . . . . . . . . . . .
61
Verifying the date and the time (main server only) . . . . . . . . . . . . . . . . .
62
Clearing and resolving alarms . . . . . . . . . . . . . . . . . . . . . . . . . . . .
63
Enabling alarms to INADS by way of a modem . . . . . . . . . . . . . . . . . . .
63
Enabling alarms to INADS by way of the SNMP module . . . . . . . . . . . . . .
63
Backing up files to the compact flash media . . . . . . . . . . . . . . . . . . . .
64
Before leaving the site . . . . . . . . . . . . . . . . . . . . . . . . . . . . . . . .
65
Chapter 8: Installation verification . . . . . . . . . . . . . . . . . . . . .
67
Testing the SIPI circuit pack . . . . . . . . . . . . . . . . . . . . . . . . . . . . .
67
Testing the license file . . . . . . . . . . . . . . . . . . . . . . . . . . . . . . . .
67
Additional server LED information . . . . . . . . . . . . . . . . . . . . . . . . . .
68
TN8400 Server LEDs . . . . . . . . . . . . . . . . . . . . . . . . . . . . . . . . .
Faceplate interfaces . . . . . . . . . . . . . . . . . . . . . . . . . . . . . . .
LED descriptions . . . . . . . . . . . . . . . . . . . . . . . . . . . . . . . . .
69
70
71
UPS LEDs . . . . . . . . . . . . . . . . . . . . . . . . . . . . . . . . . . . . . . .
73
TN8412AP SIPI LEDs
. . . . . . . . . . . . . . . . . . . . . . . . . . . . . . . .
74
Appendix A: Server access . . . . . . . . . . . . . . . . . . . . . . . . .
77
Accessing the command line interface of the server with SSH . . . . . . . . . .
77
Connecting to the server directly . . . . . . . . . . . . . . . . . . . . . . . . . .
79
Connecting to the server remotely over the network . . . . . . . . . . . . . . . .
81
Connecting to the server remotely over a modem . . . . . . . . . . . . . . . . .
81
Accessing the System Management Interface . . . . . . . . . . . . . . . . . . .
82
Accessing the SAT. . . . . . . . . . . . . . . . . . . . . . . . . . . . . . . . . . .
83
Logins for Avaya technicians and Business Partners . . . . . . . . . . . . . . .
83
Configuring the network for Windows 2000 and XP . . . . . . . . . . . . . . . .
84
Setting the browser options for Internet Explorer 6.0 . . . . . . . . . . . . . . .
85
Appendix B: Installation troubleshooting . . . . . . . . . . . . . . . . .
87
Troubleshooting the installation of the server hardware . . . . . . . . . . . . . .
87
Troubleshooting the configuration of the server hardware . . . . . . . . . . . .
88
Troubleshooting the installation of the license file and
the Avaya authentication file . . . . . . . . . . . . . . . . . . . . . . . . . . . .
90
Installing and Configuring the Avaya S8400 Server
May 2009
9
Contents
Index
10
. . . . . . . . . . . . . . . . . . . . . . . . . . . . . . . . . .
Installing and Configuring the Avaya S8400 Server
91
May 2009
Chapter 1: Introduction
Use these procedures to install Communication Manager and configure a new Avaya S8400
Server and the associated components.
To configure the server, use the Avaya Installation Wizard. To configure gateways and other
hardware components, use the following two administration interfaces:
l
l
The System Management Interface.
The command line interface, either directly or through Secure Shell (SSH), Telnet, or a
terminal emulation program such as Avaya Native Configuration Manager.
This installation document includes the following information:
l
Preinstallation tasks to complete at the customer site on page 13
l
Configuring the SNMP modules in the UPS on page 25
l
Server configuration on page 33
l
IP interface translations on page 47
l
IP interface configuration on page 53
l
Postinstallation administration on page 59
l
Installation verification on page 67
l
Server access on page 77
l
Installation troubleshooting on page 87
Audience
This documentation is for the following people who install and configure the server components:
l
Trained field installation and maintenance personnel
l
Technical support personnel
l
Authorized business partners
Issue 8 May 2009
11
Chapter 1: Introduction
How to use Avaya installation documents
Use this document as a guide to install and configure the S8500 Avaya servers. For information
about a particular task, use the index or the table of contents to locate the page on which the
information is described. You also need information from other Avaya documents. This section
lists those documents and tells you when to use them.
To complete this installation:
l
In this document, see:
- Preinstallation tasks to complete at the customer site on page 13. This section
describes the tasks that you must complete before you start the installation.
- Equipment specifications on page 14 for the technical specifications for the hardware.
l
l
For how to install and connect the hardware, see Quick Start for Hardware Installation:
Avaya S8400 Server (03-300705).
Return to this document and see the remaining sections in the following sequence to
install the components of the server. If you are not to install certain components, skip the
procedures for those components.
- Configuring the SNMP modules in the UPS on page 25
- Server configuration on page 33
- IP interface translations on page 47
l
See the appropriate sections in the following documents to install the port networks and
the media gateways:
-
Installing the Avaya G650 Media Gateway (03-300144)
Installation and Configuration for the Avaya G150 Media Gateway (03-300395)
Quick Start for Hardware Installation: Avaya G250 Media Gateway (03-300433)
Quick Start for Hardware Installation: Avaya G350 Media Gateway (03-300148)
Quick Start for Hardware Installation: Avaya G430 Media Gateway (03-603236)
Installing and Upgrading the Avaya G430 Media Gateway (03-603233)
Quick Start for Hardware Installation: Avaya G450 Media Gateway (03-602053)
Installing and Upgrading the Avaya G250 Media Gateway (03-300434)
Installing and Upgrading the Avaya G350 Media Gateway (03-300394)
Installing and Upgrading the Avaya G450 Media Gateway (03-602054)
Quick Start for Hardware Installation: Avaya S8300 Server and Avaya G700 Media
Gateway (555-233-150)
- Installation and Upgrade for the Avaya G700 Media Gateway and Avaya S8300 Server
(555-234-100)
- Installation and Initial configuration of Avaya Aura™ Communication Manager
Messaging
12 Installing and Configuring the Avaya S8500-Series Server
Preinstallation tasks to complete at the customer site
- Return to this document and see: IP interface configuration on page 53 to program the
IP interface. Postinstallation administration on page 59
- Installation verification on page 67
- Server access on page 77
- Installation troubleshooting on page 87 if problems occur during the installation.
Preinstallation tasks to complete at the customer site
You must complete the following preinstallation tasks before you start the installation.
Verifying that all the required equipment is on site
Compare the list of items that were ordered to the contents of the boxes to verify that you have
all the equipment. Your project manager can give you an inventory list. Do not rely on the
packing slips inside the boxes for the correct information.
Ensuring that the preinstallation tasks are complete
The preinstallation team completes the following tasks. If these tasks are not complete, do not
continue with the installation.
l
l
Verify that the required number of open, customer-supplied, EIA-310D (or equivalent)
standard 19-in. (48-cm) 4-post equipment rack(s) is(are) properly installed and solidly
secured. Ensure that the screws that come with the racks are present. If you use an
enclosed rack cabinet, ensure that the cabinet has adequate ventilation.
Verify that the equipment racks are grounded per local code. See Job Aid: Approved
Grounds (555-245-772).
Issue 8 May 2009
13
Chapter 1: Introduction
l
Verify that the customer-provided AC power to the rack is from a nonswitched outlet.
Equipment specifications
The control network components of the S8400 Server consist of a G650 Media Gateway with a
TN8400AP circuit pack that is installed in slot 2, a TN8412AP (SIPI) that is installed in slot1, and
one UPS. The physical specifications for the S8400 control network are shown in Table 1.
Table 1: S8400 control network components specifications
Component
Dimensions
English
Dimensions
Metric
Height
(u)
Weight
(lb/kg)
(height x width x depth
in inches)
(height x width x depth
in centimeters)
G650 Media Gateway
14 x 17.5 x 22
35.5 x 44 x 56
8
39/18
UPS:
1500 VA
3.5 x 17 x 24
9 x 43 x 61
2
50/23
Table 2 shows the specifications of the TN8400AP circuit pack.
Table 2: TN8400AP specifications
Feature
Specifications
Microprocessor
Intel Celeron M (600 MHz)
Memory
512 MB RAM
Storage
IDE SSD, 2 GB
IDE hard drive
Note:
Note:
Values of some parameters may change with future versions of the TN8400.
Table 3: TN8400BP specifications
Feature
Specifications
Microprocessor
Intel Celeron M (600 MHz)
Memory
1 GB RAM
Storage
4 GB Serial ATA (SATA) hard drive
14 Installing and Configuring the Avaya S8500-Series Server
About server port connections
!
Important:
Important:
The TN8400BP cicuit pack is compatible with Communication Manager Release
4.0.3 and later.
S8400 environmental specifications are shown in Table 4.
Table 4: S8400 environmental specifications
Parameter
Specifications
Air Temperature
Server on:
41.0°F to 104.0°F (5°C to 40°C)
altitude: -1,257 ft to 10,617 ft
(-383 m below sea level to 3,286 m above sea level)
Humidity
10% to 90%
Voltage and Current
Requirements
+5 VAC, 10 A
About server port connections
The following section explains how to connect the Ethernet ports on the back of the server.
Ethernet ports
One or more of the ethernet ports on the server cable adapter are used to support S8400
configuration.
For control and adjunct connectivity, the S8400 Server supports the internal Processor Ethernet
(PE) or separate C-LAN. Messaging and administration use the customer link. If LAN
connectivity is required for administration only, PE is not required.
Server cable adapter
The server cable adapter is mounted on the rear of the TN8400 Server circuit pack
(Figure 1: Server cable adapter on page 16). The server cable adapter provides the connection
between the backplane pins and the RJ-45 connectors for:
Issue 8 May 2009
15
Chapter 1: Introduction
l
Four backplane Ethernet ports
l
One backplane USB port
Figure 1: Server cable adapter
1
ETH-A
USB
2
3
ETH-B
4
ETH-D
ETH-C
5
addp84bk LAO 112905
Figure notes:
1. USB modem connector
2. Connection to the TN8412AP circuit pack
3. Connection to the LAN
4. (Optional) Used with S8400 as an ESS
5. (Optional) Used with S8400 as an ESS
16 Installing and Configuring the Avaya S8500-Series Server
About server port connections
Table 5: port labeling on the server cable adapter on page 17describes the connections for the
server cable adapter.
Table 5: port labeling on the server cable adapter
Location (from the top
of the adapter)
Port name
Adapter
label
Function
USB
Backplane USB
modem port
USB
Provides power to the USB modem,
can be used to perform a hard reset
of the USB modem, and provides a
USB modem interface to support
Services remote alarming and
access.
Top Ethernet
Ethernet
connectivity with
the TN8412AP
circuit pack
ETH-A
A 10/100BaseT Mbps Ethernet
Interface for the control link that
uses a cross-over cable to connect
directly to the SIPI.
Second Ethernet
Ethernet
connectivity with
the LAN
ETH-B
A 10/100BaseT Mbps Ethernet
Interface to the customer LAN that
can be used for:
l Messaging over IP
l Connections to adjuncts and IP
endpoints
l Remote administration over IP
Third Ethernet
Not applicable
ETH-C
Not used.
Bottom Ethernet
Not applicable
ETH-D
Not used.
Ethernet connectivity with the TN8412AP circuit pack
The S8400 Server supports connectivity with the TN8412AP (SIPI) circuit pack. This interface is
for control signaling only. No bearer traffic is carried over this connection.
The physical connection between the TN8412AP and the TN8400 circuit packs is made by
either:
l
l
(Preffered method) A 10/100 BaseT Ethernet cross-over cable that directly interconnects
the appropriate backplane pins of the two circuit packs. This cable plugs into the TN8400
cable adapter RJ45 ETH-A port and the TN8412AP IPSI-2 adapter RJ45 control port.
Connecting the TN8412 and TN8400 to the customer LAN. Figure 2: IPSI-2 cable
adapter on page 18shows the IPSI-2 cable adapter for the S8412AP SIPI circuit pack.
Issue 8 May 2009
17
Chapter 1: Introduction
Figure 2: IPSI-2 cable adapter
10
/1
00
bT
ET
HE
RN
ET
1
2
addpipsi LAO 112905
Figure notes:
1. D9 connector
2. RJ45 for connection to the TN8400 or LAN
18 Installing and Configuring the Avaya S8500-Series Server
About server port connections
For the location of the two backplane adapters on a G650, see Figure 3.
Figure 3: Cable adapters on the TN8412AP and the TN8400 circuit packs in a G650
2
US
B
ET
HA
RS
23
2D
UG
EB
ET
HB
1
ET
H-
C
00bT
10/1
ETHE
RN
ET
ET
HD
h2dp650b LAO 121605
Figure notes:
1. Server cable adapter on the TN8400
Server circuit pack
2. IPSI-2 cable adapter on the TN8412AP
SIPI circuit pack
Issue 8 May 2009
19
Chapter 1: Introduction
Services access port
The S8400 Server has one port for Services access. The service port is on the face plate of the
TN8400 circuit pack. Use this port to directly access the server and the MPC using the services
laptop. For more information on connecting to the Services port on the S8400 and for the
location of the Services port on the S8400 Server, Connecting to the server directly on page 79.
Table 6: Services access on the MPC on page 20 lists the Services access protocols. The MPC
receives Service requests on two TCP ports, 10022 (SSH access) and 10443 (Secure Web
access).
Note:
Note:
With Release 4.0 or later of Communication Manager, Telnet is disabled, so you
must use SSH to access servers after Communication Manager software
Release 4.0 or later is installed.
Table 6: Services access on the MPC
Access
method
Service
requested
IP address
TCP
port
Service granted
Services laptop
HTTPS
192.11.13.6
10443
Secure Web access to the MPC
Services laptop
SSH
192.11.13.6
10022
SSH access to the MPC
Services laptop
SSH
192.11.13.6
22
Secure Shell access to the
server
HTTPS
192.11.13.6
443
Secure Web access to the
server
Services laptop
Telnet
192.11.13.6
23
Access to the server
Services laptop
Telnet
192.11.13.6
5023
Access to the SAT on the server
PPP>SSH
Modem IP
address
5022
Secure access to SAT on host
Modem dial-in
PPP>SSH
Modem IP
address
10022
Secure Shell access to the MPC
Modem dial-in
PPP>HTTPS
Modem IP
address
10443
Web HTTPS access to the MPC
Modem dial-in
PPP>SSH
Modem IP
address
22
Secure Shell access to the
server
Modem dial-in
PPP>HTTPS
Modem IP
address
443
Secure Web access to the
server
Services laptop
Modem dial-in
1 of 2
20 Installing and Configuring the Avaya S8500-Series Server
About server port connections
Table 6: Services access on the MPC (continued)
Access
method
Service
requested
IP address
TCP
port
Service granted
Modem dial-in
PPP>Telnet
Modem IP
address
23
Access to the server
Modem dial-in
PPP>Telnet
Modem IP
address
5023
Access to the SAT on the server
Modem dial-in
PPP>SSH
Modem IP
address
5022
Secure access to the SAT on the
server
2 of 2
Issue 8 May 2009
21
Chapter 1: Introduction
About modem connections
Note:
You cannot connect USB modems to rotary lines. A touch tone line is required.
Note:
The TN8400 Server circuit pack supports a USB modem. The modem communicates directly to
the maintenance processor or tunnels through to the Communication Manager processor
application. The modem provides Avaya Services with remote alarming and dial-in and dial-out
access.
Connect the USB modem to the port that is labeled USB on the server cable adapter. The
adapter is mounted on the rear of the TN8400 Server circuit pack.
Modem options
You set the modem options when you configure the server. You must not set options on the
modems themselves. For information about modem option settings, see Installation, Upgrades
and Additions for Avaya CMC1 Media Gateways (555-233-118).
About media gateways
In a new installation, the S8400 Server can be installed in the Avaya G650 Media Gateway,
MCC or SCC cabinet.
In a migration, the server is installed only in the following Avaya Media Gateways:
l
G600
l
CMC1
The servers also work with Avaya G150, G250, G350, G430, G450, and G700 Media
Gateways. These gateways register with the server either through the Processor Ethernet
interface or through a TN799DP C-LAN circuit pack.
About Processor Ethernet
Like a C-LAN circuit pack, Processor Ethernet provides connectivity to IP endpoints, gateways,
and adjuncts. The PE interface is a logical connection in the Communication Manager software
that uses a port on the NIC in the server. No additional hardware is needed to implement PE.
22 Installing and Configuring the Avaya S8500-Series Server
About SSH
Starting with Release 3.1 of Communication Manager, the PE interface is enabled on the S8400
Server to allow enhanced flexibility to connect to gateways, endpoints, and adjuncts.
Table 7 lists the possible uses of the PE interface for an S8400.
Table 7: Use of the PE interface on the S8400 Server
Possible functions of
the PE interface
Status of the function
on the S8400 Server
Administration needed?
Registration
The PE interface is
always enabled for
registration.
No. The Communication Manager
software automatically enables the use
of the PE interface for registration.
H.248 gateway
registration
H.248 gateway
registration is enabled by
default.
No. The H.248 gateway enabled field
on the ip-interface procr screen
defaults to yes on an S8400 Server. To
disable the H.248 registration, you can
change the H.248 gateway enabled
field on the ip-interfaces procr screen
to no.
H.323 endpoint
registration
H.323 endpoint
registration is enabled by
default.
No. The H.323 endpoint enabled field
on the ip-interface procr screen
defaults to yes on an S8400 Server. To
disable H.323 endpoint registration,
change the H.323 enabled field on the
ip-interfaces procr screen to no.
Adjunct connectivity
Adjunct connectivity is
enabled by default.
Yes. You must administer adjuncts on
the S8400 Server.
About SSH
Secure Shell (SSH) is both a computer program and an associated network protocol that you
use to log in to and run commands on a networked computer. SSH provides secure encrypted
communications between two untrusted hosts over an insecure network. Avaya strongly
recommends that you use SSH instead of Telnet for most interactive connections to the Avaya
servers and other devices on a customer network.
To use SSH, a third-party SSH client must be installed on your computer. PuTTY is one such
client. You can download PuTTY from http://www.putty.nl/download.html.
Issue 8 May 2009
23
Chapter 1: Introduction
You can use SSH to access the following devices:
l
The S8300, S8400, S8500, and S8700-series Servers on Release 3.1 or later of
Communication Manager
l
A Maintenance Processor Complex (MPC), which is used with the S8400 Server
l
A TN2312BP IPSI that is running firmware version 20 or higher
l
A TN8412AP SIPI
l
A TN2602 IP Media Resource that is running the latest firmware version. To find the latest
firmware version, visit support.avaya.com
l
An Expanded Meet-Me Conferencing (EMMC) server
l
A SIP Enablement Services (SES) server
l
G250, G350, and G450 media gateways
l
C360 Ethernet switches
!
Important:
Important:
You cannot use SSH with the G700. From within the Linux command line of a
server, you can use SSH to access the G250, 350, and G450, but you must use
Telnet to access the G700.
24 Installing and Configuring the Avaya S8500-Series Server
Configuring the SNMP modules in the UPS
Chapter 2: SNMP configuration
After you install and connect the control network equipment, you must configure the SNMP
modules in each Avaya-supplied UPS to send alarms or traps to the servers. This process
requires that you also configure the SNMP subagent in the Avaya-supplied Ethernet switch.
!
Important:
Important:
Use the procedures in this section to configure Avaya-supplied equipment only.
Configuring the SNMP modules in the UPS
!
Important:
Important:
These procedures apply only to a new, Avaya-supplied uninterruptible power
supply (UPS) with a Simple Network Management Protocol (SNMP) module. Do
not use these procedures to set traps on a UPS that Avaya does not supply. For
non Avaya supplied UPS hardware, see manuals supplied with the UPS for
instructions on how to configure those UPS devices.
You must configure the SNMP module in the UPS to report alarms to the server when hardware
problems occur. The module reports an alarm if commercial power is lost or battery resources
are depleted.
For the SNMP module to properly report alarms, you must configure a unique IP address for the
UPS on both the SNMP module and the server. This IP address can be a customer-provided
address or the Avaya-provided default address. At a minimum, you must configure the following
items:
l
The IP address
l
The subnet mask
l
The gateway IP address
l
The trap receiver IP address
l
The community string (get, set, trap)
The brand, the model, or the firmware load of the SNMP module that Avaya supplies can
change without notice because a third-party manufactures the SNMP module. For this reason,
this document does not provide specific instructions on how to connect to and configure the
SNMP module. For more information, see the documentation that comes with the SNMP
module. For the default password and the configuration commands, see the local configuration
section of that user guide.
Issue 8 May 2009
25
Chapter 2: SNMP configuration
Administering the SNMP module
on page 27Prerequisites for configuring the
SNMP module
Before you configure the SNMP module, you must complete the following prerequisites:
l
l
l
Your Services laptop computer is plugged into the correct administration port on the SNMP
module on the UPS.
The UPS is plugged into a nonswitched electrical outlet.
The communication protocol on your computer has the following port settings so that you
can use your terminal emulation program:
- 9600 baud
- No parity
- 8 data bits
- 1 stop bit
- No flow control
Note:
Avaya Terminal Emulation and HyperTerminal are supported terminal emulation
applications.
Note:
l
If a Network Management System (NMS) is used to monitor the UPS, you must coordinate
the assignment of community names with the network administrator. If an NMS is not
used, you can set the community names to any unique string values.
!
SECURITY ALERT:
SECURITY ALERT:
The Get and Set community name strings are initially configured with the default
values of Public and Private, respectively. These community name strings
function as passwords for their respective SNMP operation. Avaya recommends
that you change these community name strings to something other than the
default values. If you leave the defaults in place, a serious security issue can
result.
For information about which traps to set, see Setting selected traps (alarming) on page 27.
l
If the control network is nondedicated, ensure that the 162/udp port for input to server is
enabled and the default is disabled. If you do not enable the 162/udp port and disable the
default, the server cannot receive the traps from either UPS. See Enabling firewall
settings on page 43.
26 Installing and Configuring the Avaya S8500-Series Server
Configuring the SNMP modules in the UPS
Administering the SNMP module
Note:
Use the default IP addresses.
Note:
1. Connect the RS-232 serial port of your Services laptop computer to the DB-9 connector on
the back of the SNMP module for UPS1. Use the DB-9 to DB-9 serial cable that is supplied
with the SNMP module.
2. Open a VT-100 terminal emulation session on your computer.
3. Set the IP address for the UPS.
4. Set the subnet mask for the UPS.
5. Set the gateway address for the UPS.
6. Set the IP address of the trap receiver for the UPS.
7. Set the SNMP community name string for Get, Set, and Trap. For information on which
traps to set, see Setting selected traps (alarming) on page 27.
8. When you finish, disconnect your computer from the UPS.
9. Connect one end of a CAT5 straight-through cable to the RJ45 connector on the UPS
SNMP module and the other end of the cable to the next available port on the Ethernet
switch for Control Network A (CNA).
For a connectivity guide, see the Quick Start for Hardware Installation: Avaya S8400
Server in an Avaya G650 Media Gateway (03-300705).
After you configure the SNMP module in the UPS, you must configure the SNMP subagent on
the Avaya Ethernet switch.
Setting selected traps (alarming)
The default is to set all traps, which can result in large log entries. To avoid this problem, Avaya
recommends that you set only the following traps:
l
UPS on Battery—Indicates an AC power failure. Based on the level of battery reserve, a
shutdown is pending.
l
UPS in Bypass—The UPS failed or is overloaded.
l
Replace battery—The battery failed the 28-day battery test and must be replaced.
For the menus and commands to set these traps, see the user guide that comes with the SNMP
module.
Issue 8 May 2009
27
Chapter 2: SNMP configuration
28 Installing and Configuring the Avaya S8500-Series Server
Clearing the ARP cache on the laptop
Chapter 3: Communication Manager
installation
A new server comes with a blank hard disk drive and a blank solid state disk (SSD). Use the
bootable software distribution CD-ROM to install the Linux operating system and
Communication Manager.
This chapter covers the following tasks:
l
Clearing the ARP cache on the laptop on page 29
l
Connecting the CD/DVD-ROM drive to the server on page 29
l
Applying power to the server on page 30
l
Accessing the server on page 31
l
Configuring Telnet for Windows 2000 and Windows XP on page 31
l
Installing Communication Manager on page 31
Clearing the ARP cache on the laptop
Depending on the operating system of your Services laptop computer, you might need to clear
the Address Resolution Protocol (ARP) cache before you enter a new IP address. If you enter
an IP address and your computer cannot connect, perform the following procedure to clear the
cache.
1. On your computer, click Start > Run to open the Run dialog box.
2. Type command and press Enter to open an MS-DOS command line window.
3. Type arp -d 192.11.13.6 and press Enter to clear the ARP cache in the laptop.
If the ARP cache does not contain the specified IP address, the system displays the The
specified entry was not found message. You can ignore this message.
4. Type exit and press Enter to close the command line window.
Connecting the CD/DVD-ROM drive to the server
There are three external USB CD/DVD-ROM drives that support the S8400 Servers:
Issue 8 May 2009
29
Chapter 3: Communication Manager installation
l
Panasonic Digistor 73082 or 73322:
- The switch must be turned to the ON position.
- Instead of AC power, the Panasonic uses Lithium ION battery for additional power.
USB 2.0 readers draw more power than the standard USP ports that are available on
the S8400 Servers can supply. To compensate for this shortfall, the Digistor drive
contains an internal Lithium ION battery that makes up the current difference between
what the USB port can provide and what the drive requires.
The internal ION battery must be fully charged for the drive to operate properly. If the
ION battery is depleted and the drive attempts to operate, the red LED on the top of
the case lights and the system displays a CD-ROM mount failure message. The red
LED is not bright so careful observation is required. The ION battery can be charged
by plugging the CD-ROM drive in a USB port for approximately 30 minutes. The ION
battery charges faster if the ON/OFF switch is set to OFF. To preserve the battery,
keep the ON/OFF switch in the OFF position until you are ready to use the Digistor
drive.
l
TEAC: The TEAC CD reader still works but is no longer available for purchase.
l
Addonics (not available through Avaya):
- Requires AC power to operate.
- The switch must be set to EXTernal to operate.
Note:
Note:
The CD/DVD-ROM drive must be placed on a surface within 5 degrees of the
horizontal level.
To connect the CD/DVD-ROM drive to the S8400 Server:
1. If this is an Addonics drive, plug one end of the CD/DVD-ROM power cord into the drive
and plug the other end of the cord into an electrical outlet.
2. Set the power switch to "EXT" (Addonics) or to ON (Panasonic). The TEAC drive does not
have a switch.
3. Connect the USB cable to the USB port on the faceplate of the server and the other end of
the USB cable to the CD/DVD-ROM drive (all 3 readers).
4. Place the Communication Manager CD-ROM into the external CD/DVD-ROM drive.
Applying power to the server
Note:
Note:
The G650 media gateway must have its power turned on before starting this
procedure.
30 Installing and Configuring the Avaya S8500-Series Server
Accessing the server
1. Pull the TN8400 circuit pack out far enough to extinguish all LEDs.
2. Carefully slide the circuit pack back into the slot to reboot the system.
Accessing the server
1. Use a cross-over cable to connect your laptop computer to the Services port on the
faceplate of the server.
2. At the command prompt window on your services laptop, type ping -t 192.11.13.6 and
press Enter.
The -t causes the ping to repeat continuously. When you get a response, in approximately
three minutes, wait an additional 30 seconds before you start a Telnet session to access
the information on the CD-ROM.
Configuring Telnet for Windows 2000 and Windows XP
The Microsoft Telnet application might be set to send a carriage return (CR) and a line feed (LF)
whenever you press Enter. The Communication Manager installation program sees this as two
separate key presses. If you are running Windows 2000 or Windows XP, you must correct this
setting before you copy the Remaster Program to the solid state disk (SDD).
1. Click Start > Run to open the Run dialog box.
2. Type telnet and press Enter to open a Microsoft Telnet session.
3. Type unset crlf and press Enter.
4. Type display and press Enter to verify that you see the message Line feed mode Causes return key to send CR.
5. Type q and press Enter to exit the telnet session.
Installing Communication Manager
Use a Telnet session to access the information on the CD-ROM.
1. On your Services laptop computer, click Start > Run to open the Run dialog box.
Issue 8 May 2009
31
Chapter 3: Communication Manager installation
2. Type telnet 192.11.13.6 and press Enter to view the first screen.
Note:
Note:
To navigate on these screens, use the arrow keys to move to an option, and then
press the spacebar to select the option. Press Enter to submit the information on
the screen.
3. Select Install, ensure that <OK> is highlighted, and press Enter.
4. On the Select Release Version screen, ensure that the Build line and <OK> are
highlighted. Then press Enter.
5. On the Select Messaging Options screen, select <OK> if you want to install
Communication Manager Messaging (CMM) concurrently with Communication Manager.
Select No if you do not.
Note:
Note:
Note:
Starting with Communication Manager release 5.2, IA 770 is called
Communication Manager Messaging.
Note:
If you do not install CMM concurrently with Communication Manager at this time,
and decide later to install it, you must reinstall Communication Manager.
6. Press Enter to format and partition the hard disk drive and the SSD.
The program starts the installation and displays the progress. This process takes
approximately 20 minutes to complete.
7. When the server is ready to reboot, the drawer of the CD-ROM drive opens. At this time,
the CD must be removed from the CD drive. The reboot can take approximately three
minutes. The Telnet session drops automatically when the reboot starts.
l
Using Avaya Enterprise Survivable Server (ESS) guide.
32 Installing and Configuring the Avaya S8500-Series Server
Methods of Configuring a server
Chapter 4: Server configuration
After you install the Communication Manager software, you must configure the server.
This section covers the following tasks:
l
l
Installing the license and authentication files on page 35
l
Configuring the server manually on page 36
l
Running the Avaya Installation Wizard on page 41
l
Verifying the server connection to the customer LAN (if provided) on page 42
l
Enabling firewall settings on page 43
l
Enabling network time servers on page 44
l
Note:
Note:
Creating a super-user login on page 34
Administering Communication Manager Messaging on page 45
Note:
Ensure that you have the completed Electronic Preinstallation Worksheet (EPW)
before you start this process.
Note:
Ensure that your networking and Web browser settings are correct. For more
information, see Configuring the network for Windows 2000 and XP on page 84.
Methods of Configuring a server
The server can be configured using one of the following methods:
1. Configuring the server manually on page 36 using System Management Interface
2. The Avaya Installation Wizard with the Electronic Pre-installation Worksheet (EPW)
3. The Avaya Installation Wizard interactively
Issue 8 May 2009
33
Chapter 4: Server configuration
Opening the System Management Interface
Use the System Management Interface to copy license files and authentication files, service
packs, and MPCupdate files from the Services laptop to the server. For how to open the System
Management Interface, see Accessing the System Management Interface on page 82.
Creating a super-user login
Note:
Note:
A craft level login can create the super-user login in Release 4.0 or later.
Make sure you have a login name and password that the customer would like for the super-user
login. If you are a business partner, you can also repeat this procedure to add the dadmin login.
Use the System Management Interface to create a super-user login.
To create a login:
Note:
Note:
Make sure the customer can change this login, its password, or its permissions
later.
1. On the System Management Interface, click Administration > Server (Maintenance) >
Administrator Accounts.
2. Select Add Login.
3. Select Privileged Administrator and click Submit.
The Administrator Accounts -- Add Login: Privileged Administrator screen appears.
4. In the Login name field: Type a login name for the account.
5. In the Primary group field: susers appears.
6. In the Additional groups (profile) field: prof18 appears (prof18 is the code for the
customer super-user).
7. In the Linux shell field /bin/bash appears.
8. In the Home directory field: /var/home/login name appears (login name is the name you
choose in step 4).
9. Skip the Lock this account and Date on which account is disabled-blank to ignore
fields.
10. In the Select type of authentication section: Choose Password.
Note:
Note:
Do not lock the account or set the password to be disabled.
34 Installing and Configuring the Avaya S8500-Series Server
Copying license and authentication files to the server
11. In the Enter key or password field and the Re-enter key or password field: Enter the
password.
12. In the Force password/key change on next login section: Leave the default to no.
13. Click Submit.
Copying license and authentication files to the server
1. Log on to the System Management Interface and click Administration > Server
(Maintenance) > Download Files.
2. Select File(s) to download from the machine I’m using to connect to the server.
3. Click Browse next to the top field to open the Choose File window on your computer. Find
the files that you need to copy to the server.
4. Click Download to copy the lilcense and the authorization files to the server.
The files are automatically copied to the default file location /var/home/ftp/pub.
Installing the license and authentication files
This section describes the procedure to install the license file and the Avaya authentication file
on the active S8400 server.
Installing the license file
1. Log on to the System Management Interafce and click Administration > Server
(Maintenance) > License File. The system displays the License File Web page.
2. Do one of the following:
l
l
If you have already downloaded the file to this server, select Install the license file I
previously downloaded.
If you have not downloaded the file to this server, select Install the license file
specified below, and perform one of the following steps:
l
l
In the File Path box, browse to the directory where the license file is located.
In the URL box, enter the location of the license file and in the Proxy Server box,
complete the proxy server information.
3. Click Submit.
Issue 8 May 2009
35
Chapter 4: Server configuration
Installing the authentication file
1. Log on to the System Management Interface and click Administration > Server
(Maintenance) > Authentication File. The system displays the Authentication File Web
page.
2. Perform one of the following tasks:
l
l
Select Install the Authentication file I previously downloaded, if you already
downloaded the file to this server.
Select Install the Authentication file specified below, and follow these steps:
a. In the File Path box, browse to the directory where the authentication file is
located.
b. Enter the URL where the authentication file is located, and complete the proxy
server information.
3. Click Install. The system responds with a message that installation of authentication file is
successful.
Configuring the server manually
Note:
Note:
If you are configuring the server as a main server, the license files and the
authentication files must be downloaded on the server. See Installing the license
and authentication files on page 35.
Setting the date, time, and time zone
!
Important:
Important:
Be sure to set the date, time, and time zone before manually configuring the
server. Failure to do so may cause network problems.
To set the date, time, and time zone:
1. From the Main Menu, under Server, click Server Date/Time.
2. In the Server Date/Time window, verify the date and time are correct. If the date and time
are incorrect:
a. Enter the date in the format mm/dd/yyyy.
b. Enter the time in 24 hour format (hh:mm).
c. Enter the time zone.
d. Click Submit.
36 Installing and Configuring the Avaya S8500-Series Server
Configuring the server manually
e. Reboot the server: For more information, see Rebooting the server on page 37.
Rebooting the server
1. Click Shutdown Server under the Server heading.
2. Select Delayed Shutdown and Restart server after shutdown.
3. Click Shutdown.
You will be logged off the server when it reboots. When you are waiting for the system to
reboot, enter ping -t 192.11.13.6 from a command prompt window on your services laptop
computer to start a continuous ping command.
System Management Interface configuration screens
The following list shows the web pages you may need to complete for manual server
configuration of the S8400.
l
Set Identities
l
Configure Interfaces
l
(Only if Server Role is ESS) Configure ESS
l
Configure Switches
l
Set DNS/DHCP
l
Set Static Routes
l
Configure Time Server
l
Set Modem Interface
l
Configure MPC
The following describes each of the configuration pages:
l
Server Role — Use the Specify Server Role page to assign the server one of the
following roles:
- Main server
- Enterprise survivable server (ESS)
- Local survivable server (LSP)
Note:
Note:
You must download and install the appropriate license file to complete the server
role change.
Issue 8 May 2009
37
Chapter 4: Server configuration
l
l
l
l
l
l
l
l
l
l
Set Identities — Use this page to assign Avaya server host names and to assign server
functions to a physical Ethernet interface. The options are pre populated with defaults, but
should be changed as needed for the customer’s configuration. See Ethernet interface
assignments on page 38 for a guide to assigning functions to Ethernet interfaces.
Configure Interfaces — Use this page to enter the IP address, subnet mask, gateway,
and speed for the management LAN and control network.
(only if Server Role is ESS) Configure ESS — Use this page to configure the server as a
primary controller for the system, an Enterprise Survivable Server (ESS). For an ESS use
this page to define the memory configuration as Standard or Extra Large. For more
information on installing an S8400 as an ESS, see Using the Avaya Enterprise Survivable
Servers (ESS)(03-300428).
Configure LSP — Use this page to configure the server as a Local Survivable Server
(LSP).
Configure UPS — Use this page to specify the number of UPS units and the IP address
for any Ethernet adjuncts that the Avaya server controls, that are connected to the server
over a private LAN.
Set DNS/DHCP — Use this page to enable the different devices (endpoints) in your Avaya
call-processing system to communicate over the corporate LAN. Most corporate networks
have one or more domain name service (DNS) servers that associate an IP address with
the name of a device. When you administer the DNS with the Avaya server names, you
can access the servers by name and by IP address over the corporate network.
Set Static Routes — Use this page only if the network administrator instructs you. If the
administrator does not specify a particular route for the server to send information over the
network, leave the options blank and click Continue.
Configure Time Server — Use this page to specify the time source that the Avaya server
uses to set the time of day.
Set Modem Interface — Use this page to enable Avaya services or another
trouble-tracking service to monitor the Avaya server for alarms. Technical-support
representatives can dial in to this interface to fix problems as they occur.
Configure MPC — Use this page to configure the Maintenance Processor Complex.
Ethernet interface assignments
Note:
Note:
Use the following table as a guide for assigning server functions to physical
Ethernet interfaces.
38 Installing and Configuring the Avaya S8500-Series Server
Configuring the server manually
Table 8: S8400 Server Ethernet assignments
Note:
S8400 with dedicated
control
S8400 with
non-dedicated control
Control network A
eth2
eth3
LAN
eth3
eth3
Note:
Eth1 is not assignable and is dedicated to the Maintenance Processor Complex.
For information on mapping these assignments to the server cable adapter, see
Figure 1: Server cable adapter on page 16.
Performing the manual configuration
To configure the server using the manual method:
1. Log on to the System Management Interface.
2. From the Installation menu, click Configure Server.
3. Read and click through the Review Notices to get to the Select Method for Configuring
Server page.
4. Select Configure all services using the wizard and click Continue to get to the Set
Server Identities page.
5. Fill in the fields on the Set Identities page and subsequent pages:
l
Configure Interfaces
l
Configure Switches
l
Set DNS/DHCP
l
Set Static Routes
l
Configure Time Server
l
Set Modem Interface
l
Configure MPC
l
Update System
Use your pre-installation planning forms to enter information on these pages. For more
information on these pages, see Configuring the server manually on page 36 or click Help
at the bottom of each page.
Issue 8 May 2009
39
Chapter 4: Server configuration
!
CAUTION:
CAUTION:
If the S8400 is hosting a CMM Application with Digital Networking, the server
name must be 10 characters or less.
6. When you complete all the fields, click Continue on the Update System page. The Update
System page displays each configuration task as it completes it and the system displays
following message:
System modifications completed.
Avaya Installation Wizard
About the Avaya Installation Wizard
Use the Avaya Installation Wizard to:
l
Set the date, the time, and the time zone
l
Configure the server
l
Configure the Maintenance Processor Complex
l
Install the RFA license file
Note:
To install the license file the server does not have to be connected to the SIPI.
However, you have only 30 minutes before the system checks the serial number
on the SIPI. To add another 30 minutes, type reset system 1 and press Enter
in a SAT session to restart the Communication Manager software.
Note:
l
Install the Avaya authentication files
l
Install software updates
l
Set the product ID
l
Set the alarming
To use the Installation Wizard, you can either:
l
l
Import the data from the completed Electronic Preinstallation Worksheet (EPW). When the
Installation Wizard prompts you to import the Preinstallation Worksheet, click Import EPW
and browse to the location of the EPW file on your Services laptop computer. The
Installation Wizard opens the EPW and uploads the configuration data.
Type the information manually with the completed EPW as a guide. The Installation Wizard
prompts you to enter the configuration data for each step in the Configure Server section.
40 Installing and Configuring the Avaya S8500-Series Server
Upgrading MPC firmware
Running the Avaya Installation Wizard
1. Open a browser on your services laptop computer that is connected to the services port on
the front panel of the TN8400 board and type https://192.11.13.6
The system displays the Logon page.
2. In the Logon ID box, type craft and click Logon. The system displays the Password box.
3. In the Password box, type craft and click Logon. The system displays the Legal Notice
page for Communication Manager System Management Interface.
4. From the Installation menu, click Avaya Installation Wizard.
5. Follow the prompts. For more information use Help on each page.
!
WARNING:
WARNING:
If the time zone is set in the Avaya Installation Wizard (AIW), you must reboot the
server after AIW completes.
6. Reboot the server: For more information, see Rebooting the server on page 37.
Verifying the MPC IP information
The Maintenance Processor Complex (MPC) page is under Optional Services in the
Installation Wizard configuration process. Verify that the Installation Wizard retrieved the IP
information from the EPW. If the information is not there, complete all fields manually.
To allow Services access to the MPC through a cross-over cable, verify the information in the
following fields:
l
IP Address 192.11.13.6
l
Subnet Mask 255.255.255.252
If the information is not there, complete the fields manually.
Upgrading MPC firmware
You might need to upgrade the MPC firmware if the most current version is not installed.
Information about the versions that require updates should be included in your project planning
information.
For how to upgrade MPC software, see Maintenance Procedures for Avaya Communications
Manager 4.0, Media Gateways and Servers.
1. Check the firmware version:
a. Use SSH to access the server and log in.
Issue 8 May 2009
41
Chapter 4: Server configuration
b. Type sampcmd samp-update status and press Enter.
c. Check the firmware version displayed.
2. If you need to update the firmware, log on to the System Management Interface and click
Administration > Server (Maintenance) > Download Files.
3. Enter the information to copy the firmware file to the server.
4. Use SSH to access the server and log in.
5. To start the update process, type sampupdate and press Enter.
The update process takes approximately 5 minutes.
Verifying the server connection to the customer LAN (if
provided)
1. Log on to the System Management Interface and click Administration > Server
(Maintenance) > Ping.
2. Select Host Name Or IP Address and type the IP address of a computer on the network.
3. Click Execute Ping.
4. Verify that the ping was successful and indicates that the server is connected to the
customer network.
5. If DNS is administered, type the host name of a computer on the network.
6. Click Execute Ping.
7. Verify that the ping was successful and indicates that DNS is working.
If possible, have a customer representative perform the following test from a computer on the
network:
1. Click Start > Run to open the Run dialog box.
2. Type command and click OK to open an MS-DOS command window.
3. Type ping serveripaddress and press Enter, where serveripaddress is the IP
address of the server.
4. Verify that the ping was successful.
5. If DNS is administered, type ping servername and press Enter, where servername is
the host name of the server.
6. Verify that the ping was successful.
42 Installing and Configuring the Avaya S8500-Series Server
Configuring the modem
Configuring the modem
1. From the Installation menu of the System Management Interface, click Configure
Server.
2. Click Continue until you get to the Specify how you want to use this wizard page.
3. Select Configure individual services and click Continue.
4. On the menu on the left, click Set Modem Interface.
5. Select Change Modem Setting and click Continue.
6. In the Extra Modem Initialization Commands window, type the initialization commands that
are appropriate for your modem and the country of operation. Click Help for help on what
to enter.
For example, to change the country code to Japan, type AT%T19,0,10.
7. Click Change.
The system displays a message that indicates that a modem route was added
successfully.
8. Click Close Window.
Enabling firewall settings
For the server to receive SNMP traps from the UPS and the Avaya Ethernet switch, you must
enable the snmptrap,162/udp port. The default is disabled.
1. Log on to the System Management Interface and click Administration > Server
(Maintenance) > Firewall.
2. Scroll down to the snmptrap 162/udp row and select (check) the Input to Server box.
The Output to Server box can be left as is, either checked or clear.
3. Click Submit.
Issue 8 May 2009
43
Chapter 4: Server configuration
Enabling network time servers
!
Important:
Important:
Avaya strongly recommends that you enable Network Time Protocol (NTP) and
configure at least one network time server. If a network time server is not used the
Date/Time settings on the server must be reset regularly, at least monthly, using
the System Management Interface. The network time strategy is determined by
the network administrator.
With NTP, you can specify one, two, or three network time servers to provide the accurate time
of day data to the clocks on the servers. The network time servers, in turn, get their source
timing from one of several highly accurate time services that are available on the Internet.
To use a network time server, the NTP service must be enabled. The Avaya Installation Wizard
prompts you to enable the NTP service. If you do not use the Installation Wizard, use the
Configure Server function on the System Management Interface to configure the network time
servers.
1. From the Installation menu of the System Management Interface, click Configure
Server.
2. On the Review Notices page and the Backup Up Data page, click Continue.
3. On the "Specify how you want to use this wizard" page, select Configure individual
services and then click Continue.
4. In the menu on the left side of the Configure Server page, click Configure Timer Server.
5. Enter the NTS information on the Configure Time Server screen and click Change.
6. On the main menu, under Security, click Firewall.
7. In the "Output from Server" column, select ntp 123/udp.
Note:
Note:
It is not necessary to enable the "Input to Server" ntp service. If this service is
already enabled, you do not need to disable it.
When the Avaya Installation Wizard prompts you for information about the network time
servers, enter the DNS name or the IP address for the primary network time server and the
secondary and the tertiary time servers if any. If you enter a DNS name instead of an IP address
for the network time server, you must specify the IP address of the DNS server on the DNS/
DHCP Web page. For more information, see About the Avaya Installation Wizard on page 40.
For more information about NTP, see RFC 958.
44 Installing and Configuring the Avaya S8500-Series Server
Release the server
Release the server
Unplug the cross-over cable from the Services port on the faceplate.
Note:
Note:
Secure-services will be "OFF" if not implemented.
For example, secure-services 0/ 2 OFF.
Administering Communication Manager Messaging
If the customer uses the optional CMM messaging software, a number of administration tasks
must be performed to allow CMM embedded messaging to work. For detailed information on
these tasks, see Avaya IA 770 INTUITY AUDIX Messaging Application: Administering
Communication Manager Servers to Work with IA 770.
Issue 8 May 2009
45
Chapter 4: Server configuration
46 Installing and Configuring the Avaya S8500-Series Server
Chapter 5: IP interface translations
To administer SIPI circuit packs, use a terminal emulation program to issue Communication
Manager SAT commands.
For Communication Manager terminal emulation, use a program such as Avaya Native
Configuration Manager, Avaya Terminal Emulation, or HyperTerminal.
You also can use Avaya Site Administration to issue SAT commands. To administer some of the
features in the latest release of Communication Manager, you must use the latest version of
Avaya Site Administration.
Perform these tasks to administer SIPI circuit packs:
l
Inputting initial system translations on page 47
l
Adding media gateways on page 48
l
Enabling the SIPI on page 49
l
Adding the SIPI to the system on page 49
l
Setting the alarm activation level on page 50
l
.Saving translations on page 50
l
Verifying connectivity to the server on page 50
l
Verifying that the SIPI is translated on page 51
l
Upgrading the SIPI firmware version (if necessary) on page 51
l
Enabling control of the SIPI on page 51
l
Verifying the license status on page 52
Inputting initial system translations
1. Open a SAT session. See Accessing the SAT on page 83.
2. Enter translations:
If the system translations were prepared offsite, enter the translations and reset the server.
If the translations are not available, enter minimal translations to verify connectivity to the
port networks.
3. After you enter the translations, type save translation and press Enter to save the
translations to the hard disk drive.
Issue 8 May 2009
47
Chapter 5: IP interface translations
4. Type reset system 4 and press Enter to have the software read the copied
translations.
Adding media gateways
Note:
Note:
If system translations have been loaded on the server, media gateways do not
need to be added to administer the SIPI.
1. Type add cabinet n and press Enter, where n is the cabinet number, for each stack of
media gateways that is controlled by one TN8412AP SIPI circuit pack.
A cabinet is defined as a group of up to five G650 Media Gateways that are mounted in a
rack and TDM-connected.
2. Fill in the carrier location letter and the carrier type for each media gateway in the cabinet.
add cabinet 1
Page
CABINET
CABINET DESCRIPTION
Cabinet:
Cabinet Layout:
Cabinet Type:
Number of Portnetworks:
Survivable Remote EPN?
Location:
Cabinet Holdover:
Room:
1
G650-rack-mount-stack
expansion-portnetwork
1
n
1
IP Network Region:1
A-carrier-only
Floor:
CARRIER DESCRIPTION
Carrier
Carrier Type
E
D
C
B
A
not-used
not-used
not-used
G650-port
G650-port
Number
PN
PN
PN
PN
PN
48 Installing and Configuring the Avaya S8500-Series Server
09
09
09
09
09
Building:
1 of
1
Enabling the SIPI
Enabling the SIPI
1. Type change system-parameters ipserver-interface and press Enter.
2. On the IP Server Interface System Parameters screen, verify that the primary control
subnetwork address is correct.
The control subnetwork addresses typically match the most significant three octets of the
IP addresses of the server for the media gateway. The most significant three octets are the
first three groups of digits in the IP address. Select the configure server command on
the System Management Interface to see the IP address of the server.
An asterisk (*) to the right of the Control Subnet Address field means that
Communication Manager does not have the subnetwork information and the subnetwork
address displayed is incorrect.
3. If the information in the Control Subnet Address field is incorrect, use the System
Management Interface to change the server configuration to match the Server IP address
in configure server. From the Installation menu, click Configure Server to change
the server configuration. Then return to this procedure.
4. Set the Switch Identifier field to the switch ID letter. Acceptable switch ID letters are A
through J. A is the default setting.
5. Set the IPSI Control of Port Networks field to enabled.
6. Press Enter to save the changes.
Adding the SIPI to the system
1. Use the IP Server Interface Administration - Port Network SAT screen to add a SIPI.
Type add ipserver-interface PNnumber and press Enter.
Issue 8 May 2009
49
Chapter 5: IP interface translations
2. In the Host field, enter the IP address for the SIPI that is listed in the Location field.
add ipserver-interface 8
IP SERVER INTERFACE (IPSI) ADMINISTRATION - PORT NETWORK 3
IP Control? y
Encryption? n
Ignore Connectivity in Server Arbitration? n
PRIMARY IPSI
DHCP? No
Location:3A01
Subnet Mask: /24
IP Address:
Gateway:
QoS AND ETHERNET SETTINGS
Use System Level Parameter Values? y
802.1p: 6
DiffServ: 46
Auto? y
3. Set the IP Control field to y.
4. Verify that all the other fields are populated and submit the screen to save the changes.
5. Repeat this procedure for each port network.
Setting the alarm activation level
1. At the SAT, type change system-parameters maintenance and press Enter.
2. In the CPE Alarm Activation Level field, enter none, warning, minor, or major,
according to the customer request.
3. Submit the screen to save the changes
.
Saving translations
To save the translations to the hard disk drive, at the SAT, type save translation and press
Enter.
Verifying connectivity to the server
1. Open the System Management Interface and log on as craft.
50 Installing and Configuring the Avaya S8500-Series Server
Verifying that the SIPI is translated
2. From the Administration menu, click Server (Maintenance).
3. On the left navigation menu, click Ping and select All IPSIs, UPS(s) to verify connectivity
to these units.
4. Click Execute Ping.
5. Verify that all endpoints respond correctly.
Verifying that the SIPI is translated
1. Use SSH to open a SAT session on the server.
2. Type list ipserver-interface and press Enter.
3. Verify that the SIPI circuit pack is translated.
Upgrading the SIPI firmware version (if necessary)
You might need to upgrade the firmware on the SIPI.
1. Log on to the System Management Interface and click Administration > Server
(Maintenance) > IPSI Version.
2. Select Query All and click View.
3. Verify the firmware release for the SIPI.
4. If an upgrade is required, follow the procedures in Firmware Download Procedures at the
Download Center on the Avaya Support Web site.
Enabling control of the SIPI
1. Ensure that the SIPI has the current firmware.
2. On the SAT, type change system-parameters ipserver-interface and press
Enter.
3. Ensure the IPSI Control of Port Networks: field is set to enabled.
4. Submit the screen to save the changes.
Issue 8 May 2009
51
Chapter 5: IP interface translations
Verifying the license status
Log on to the System Management Interface and click Administration > Server
(Maintenance) > License File and verify that the license mode is now normal.
52 Installing and Configuring the Avaya S8500-Series Server
Chapter 6: IP interface configuration
This chapter covers the following tasks:
l
SIPI address configuration on page 53
l
Programming the SIPI for static addressing on page 53
l
Setting the VLAN and diffserv parameters on page 56
You must program the TN8412AP Server IP Interface (SIPI) so that the system does not enter
No License Mode.
SIPI address configuration
The SIPI circuit pack usually uses static IP addressing only. See Programming the SIPI for static
addressing on page 53.
Programming the SIPI for static addressing
You administer the static IP address for the circuit pack directly through the Ethernet port
connection on the faceplate. See Figure 4.
Issue 8 May 2009
53
Chapter 6: IP interface configuration
Figure 4: Connecting the laptop directly to the SIPI
CLK
1
S
E
R
V
I
C
E
N
E
T
W
O
R
K
2
3
cadlipsi KLC 031502
4
Figure notes:
1. Services laptop computer
2. PCMCIA Network Interface Card (NIC)
Note:
3. NIC adapter cable (if necessary)
4. CAT5 crossover cable to SIPI
Note:
Ensure that you have the password before proceeding.
Depending on the operating system on the Services laptop computer, you might need to clear
the Address Resolution Protocol (ARP) cache before entering a new IP address. If you enter an
IP address and your computer cannot connect, try clearing the cache.
1. On your laptop computer, click Start > Run to open the Run dialog box.
2. Type command and click OK to open a MS-DOS Command Line window.
3. Clear the Address Resolution Protocol (ARP) cache in the laptop.
4. To log into the SIPI, use SSH and the IP address 192.11.13.6.
For information on how to use SSH, see Accessing the command line interface of the
server with SSH on page 77.
54 Installing and Configuring the Avaya S8500-Series Server
SIPI address configuration
Note:
Note:
While connected to the SIPI, type help or ? to obtain online help. Most
commands have two or three letter abbreviations.
5. Type ipsilogin and press Enter.
Note:
Note:
The craft login used on the SIPI has a different password from the craft login used
on the servers.
6. Log in as craft.
Prompt = [IPADMIN]:
7. Type show control interface and press Enter and then type show port 1 and
press Enter to see the current control interface settings.
8. To set the control interface, type set control interface ipaddr netmask and
press Enter, where ipaddr is the customer-provided IP address and netmask is the
customer provided subnet mask.
9. Type quit and press Enter to save the changes and exit the SIPI session.
10. Log back in to the SIPI using SSH.
11. Type show control interface and press Enter.
The system displays IP address, subnet mask, and default gateway information.
Verify that the proper information was entered.
12. If a default gateway is used, enter the gateway IP address with
set control gateway gatewayaddr, where gatewayaddr is the customer-provided
IP address for their gateway.
13. Type quit and press Enter to save the changes and exit the SIPI session.
Issue 8 May 2009
55
Chapter 6: IP interface configuration
14. Log back in to the SIPI using SSH.
15. Use show control interface to verify the administration.
16. Type exit and press Enter.
Setting the VLAN and diffserv parameters
1. Connect to the SIPI and log in as craft.
2. To display the quality of service values, type show qos and press Enter.
3. Use the set commands in the list below to set the VLAN, diffserv, and port parameters. If
the customer does not specify different values, use these recommended values.
Note:
Note:
Use Help to obtain syntax guidelines for these commands.
!
Important:
The settings for these parameters on the SIPIs must be consistent with the
settings on the servers and other network devices such as Ethernet switches.
l
set vlan priority 6
l
set diffserv 46
l
set vlan tag on
l
set port negotiation 1 disable
l
set port duplex 1 full
l
set port speed 1 100
Important:
4. Type show qos and press Enter to check the administered values.
5. Type reset and press Enter to capture the updated parameter values.
The reset terminates the administration session and automatically logs you out.
6. Log in again and use the show qos command to ensure that the parameter settings are
correct.
7. Disconnect the laptop from the SIPI faceplate.
8. Check the LED on the SIPI faceplate. Verify that the display shows the letters I and P and
a filled-in V at the bottom. (See Figure 5).
56 Installing and Configuring the Avaya S8500-Series Server
Setting the VLAN and diffserv parameters
Figure 5: SIPILED display for static address
1
2
CLK
S
E
R
V
I
C
E
ledlip1 KLC 030502
N
E
T
W
O
R
K
Figure notes:
1. SIPI has a static IP address
2. SIPI has connectivity and an IP address
Issue 8 May 2009
57
Chapter 6: IP interface configuration
58 Installing and Configuring the Avaya S8500-Series Server
Chapter 7: Postinstallation administration
This section covers the following tasks:
l
Verifying translations on page 59
l
Setting rules for daylight savings time on page 60
l
Setting locations (if necessary) on page 61
l
Verifying the date and the time (main server only) on page 62
l
Clearing and resolving alarms on page 63
l
Backing up files to the compact flash media on page 64
l
Enabling alarms to INADS by way of a modem on page 63
l
Enabling alarms to INADS by way of the SNMP module on page 63
l
Before leaving the site on page 65
Verifying translations
1. Open a SAT session on the server.
2. To view all the administered circuit packs in the system, type list configuration all
and press Enter.
IPSI For more information, see your planning documents and check the administration status
on the following items:
l
list station
l
list trunk-group
l
list hunt-group
Issue 8 May 2009
59
Chapter 7: Postinstallation administration
Setting rules for daylight savings time
Use the System Management Interface to set the date, time, and time zone on the server. You
must use SAT commands to set the rules for daylight savings time.
Note:
Note:
The default setting of the daylight-savings-rules SAT screen reflect the US and
Canada rules effective in 2007.
1. Type change daylight-savings-rules and press Enter.
2. In the Change Day, Month, Date, Time, and Increment columns, type the appropriate
start and stop information for each rule. For example, 1:00 in the Increment field means to
move the clock forward or back by one hour at the transition point.
You can set up to 15 customized daylight savings time rules. If you have media gateways
in several different time zones, you can set up rules for these media gateways on a
per-location basis. A daylight savings time rule specifies the exact time when you want to
transition to and from daylight savings time. The rule also specifies the increment at which
to make the transitions.
Note:
Note:
The default daylight savings rule is 0, which means that no daylight savings
transition occurs. You can change any rule except rule 0. You cannot delete a
daylight savings rule if the rule is in use on either the Locations screen or the
Date and Time screens.
3. When you finish, submit the screen to save the changes.
60 Installing and Configuring the Avaya S8500-Series Server
Setting locations (if necessary)
Setting locations (if necessary)
After you set the rules for daylight savings time, you must set the locations for all port networks.
Port networks can be in different time zones. Use SAT commands to set the locations for the
port networks.
1. Type change locations and press Enter.
change locations
Page
1 of
5
LOCATIONS
ARS Prefix 1 Required For 10-Digit NANP Calls? y
Number
1
2
3
4
5
6
7
8
9
10
11
Name
Main
CA
Timezone
Offset
+ 00:00
- 02:00
:
:
:
:
:
:
:
:
:
Daylight-Savings
Rule
0
0
Number Plan
Area Code
2. In the ARS Prefix 1 Required for 10-Digit NANP Calls? field, type y.
The system displays the location information.
3. Click Submit to save the changes.
Note:
Note:
The location of a port network is defined on the Cabinet SAT screen (change
cabinet X). The location of a network region is defined on the
ip-network-region SAT screen (change ip-network-region X).The
location of an H.248 media gateway is defined on the change media-gateway
SAT screen (change media-gateway X). The Location field in the
ip-network-region SAT screen is part of the association to the
daylight-savings-rule by which a IP phone behaves.
Issue 8 May 2009
61
Chapter 7: Postinstallation administration
Verifying the date and the time (main server only)
Use SAT commands to verify the date and time.
1.Type display time and press Enter.
display time
Page
1 of
1
DATE AND TIME
DATE
Day of the Week: Friday
Day of the Month: 9
Month: June
Year: 2006
TIME
Hour: 14
Minute: 19
Second: 36
Type: Standard
Daylight Savings Rule: 0
WARNING: Changing the date or time may impact BCMS, CDR, SCHEDULED
2. Verify that the date and the time of day are correct.
If the date and the time of day are correct, go to 5.
If the date and time of day are not correct, proceed to step 3.
3. Verify connectivity to any administered Network Time Server:
a. On the System Management Interface, from the Administration menu,
click Server (Maintenance).
b. On the left navigation panel, click Network Time Sync. The Network Time Sync
screen confirms synchronization to any administered Network Time Server.
c. Resolve any connection or administration issues related to the Network Time Server. If
the Network Time Server is not administered:
1. On the left navigation menu, click Server Date/Time.
2. Set the correct date and the correct time. Verify that the time zone is correct.
!
Important:
Important:
If you change the time zone, you must reboot the server. For more information,
Rebooting the server on page 37.
4. Repeat this procedure, beginning with step 1.
5. Verify that the Daylight Savings Rule field is correct.
l
0 if this server is in a location that does not use daylight savings time
62 Installing and Configuring the Avaya S8500-Series Server
Clearing and resolving alarms
l
Note:
1-15 use an administered rule. The rule is administered using the SAT command
daylight-savings-rules. For more information on the daylight-savings-rules, see Setting
rules for daylight savings time on page 60.
Note:
The daylight savings rule setting on this screen is the rule that is utilized by the
Communication Manager software. Additional daylight savings rules can be
implemented for the specific locations of hardware supported by the
Communication Manager software. For more information, see Setting locations (if
necessary) on page 61.
Clearing and resolving alarms
1. Log on to the System Management Interface and click Administration > Server
(Maintenance) > Current Alarms.
You can resolve alarms on the active server only.
2. Select the server alarms to clear and click Clear.
Note:
Note:
Use SAT commands or other standard troubleshooting procedures, to resolve
any major alarms.
Enabling alarms to INADS by way of a modem
1. Start an SSH session on the server.
2. Type almenable -d b and press Enter.
3. To verify that the alarms are enabled, type almenable and press Enter.
Enabling alarms to INADS by way of the SNMP module
Note:
Note:
Perform this procedure only if the installation includes a Secure Service Gateway
(SSG).
To enable alarms on the servers:
Issue 8 May 2009
63
Chapter 7: Postinstallation administration
1. Start an SSH session on the server.
2. Type almsnmpconf -d ipaddress -c communityname and press Enter, where
ipaddress is the trap receiver address for the SSG device and communityname is the
community string name that the SSG device requires.
3. Type almsnmpconf and press Enter and verify that the correct information is entered.
4. Type almenable -s y and press Enter.
5. Type almenable and press Enter and verify that alarm origination is enabled on the
SNMP module. If used, also verify that alarm origination by way of a modem is still
enabled.
6. Log off.
Backing up files to the compact flash media
Note:
Note:
Avaya requires the use of industrial grade compact flash media.
1. Insert the compact flash media into the compact flash slot on the server faceplate.
2. Log on to the System Management Interface and click Administration > Server
(Maintenance) > Backup Now.
3. Select all applicable data sets.
4. To back up the data onto the compact flash media, select Local PC Card.
To format a new media card, also select Format PC Flash.
Note:
Note:
You must format the compact flash media before the first use only.
5. Click Start Backup. The system displays a message when the format is completed, which
takes approximately 10 seconds.
!
CAUTION:
If you click Start Backup without media in the compact flash drive, you cause a
system error. In this case, repeat the steps beginning with Step 1.
!
WARNING:
Do not remove the Compact Flash card when the Compact Flash in use LED
(yellow) is ON. Doing so may corrupt the data on the Compact Flash card.
CAUTION:
WARNING:
6. To view the status of the backup, click Backup Status.
64 Installing and Configuring the Avaya S8500-Series Server
Before leaving the site
Before leaving the site
l
l
Provide the default LAN security settings to the customer.
Ensure that the customer knows that remote access to the server is available only if the
following services are enabled on the Firewall screen:
- SSH must be enabled
- https must be enabled to access the System Management Interface
- def-sat must be enabled to access the SAT commands
- 162/udp must be enabled to receive SNMP traps from the UPS and the Avaya
Ethernet switch
Issue 8 May 2009
65
Chapter 7: Postinstallation administration
66 Installing and Configuring the Avaya S8500-Series Server
Chapter 8: Installation verification
This chapter provides the following information about how to verify the server installation and
configuration:
l
Testing the SIPI circuit packs
l
Testing the license file
l
Checking LED status indicators
- Servers
- Uninterruptible power supplies (UPSs)
- Circuit packs
Testing the SIPI circuit pack
The following steps test the clock and packet interface components within the TN8412AP SIPI
circuit pack.
1. In a SAT command line, type test ipserver-interface UUC and press Enter,
where UUC is the cabinet and the carrier in which the circuit pack is located.
2. Verify that the Test Results screen shows PASS in the Results column.
Testing the license file
!
Important:
Important:
Wait at least 30 minutes after you install the Communication Manager license
before you run this test.
1. On a SAT command line, type test license and press Enter.
2. Verify that the Test Results screen shows PASS in the Results column.
Issue 8 May 2009
67
Chapter 8: Installation verification
Figure 6:
Additional server LED information
For more information on server LEDs, see
Maintenance Procedures for Avaya Aura™ Communication Manager, Media Gateways and
Servers, 03-300432.
68 Installing and Configuring the Avaya S8500-Series Server
TN8400 Server LEDs
TN8400 Server LEDs
Figure 7 shows the faceplate of the TN8400 Server circuit pack.
Figure 7: TN8400 Server faceplate
1
13
12
11
10
2
3
9
4
8
5
6
04J247701575
HV0
700327604
TN8400AP
ckdf8400 LAO 112905
AVAYA
7
Figure notes:
1.
2.
3.
4.
5.
6.
7.
TN8400 circuit pack failure LED
Shutdown button
OK to remove circuit pack LED
Major alarm status LED
Not used
Services Ethernet link status LED
Removal latch
8. Services RJ45 connection to the Services laptop
computer
9. Compact flash in use LED
10. Compact flash slot
11. USB port for the USB CD-ROM drive
12. Application Up/Test LED
13. Server active LED
Issue 8 May 2009
69
Chapter 8: Installation verification
Faceplate interfaces
The TN8400 Server maintenance complex has the following faceplate interfaces
(Figure 7: TN8400 Server faceplate on page 69):
l
TN8400 circuit pack failure LED (red)
- This LED is on during a turn-on sequence and during a reset. When the turn-on
sequence or the reset is complete and no failures exists, the LED turns off.
- When lit, this LED indicates that a failure exists on the TN8400 circuit pack.
- (When S8400 is deployed as an ESS). The S8400 ESS raises a major alarm when it
becomes active. The raising of this alarm also lights the red alarm LED on the
faceplate of the S8400 circuit pack.
l
l
Shutdown button - Press the shutdown button for 2 seconds to start a shutdown. The
Communication Manager Processor Complex remains shutdown until power is removed
and then reapplied. This switch gracefully turns off the operating system and the file
system. Data is preserved.
OK to remove circuit pack LED - This green LED gives a status of the shutdown
process.
- Off indicates that the system is operational.
- Flashing indicates that the shutdown is in progress.
- Solid indicates that you can safely remove the TN8400 Server circuit pack from the
carrier or turn off the carrier where the TN8400 resides.
l
l
l
l
l
l
l
Major alarm status LED - This red LED indicates that a major alarm condition is detected.
Services Ethernet link status LED - This green LED shows the status of the Services
Ethernet link. The LED is on when the link is in service. The LED flashes any time that data
transitions are detected.
Services RJ45 connection to the Services laptop computer - This Ethernet port
provides access to a single 10/100 BaseT Ethernet interface by an RJ-45 connector. This
port is connected, using a cross-over cable, to the Services computer to provide on-site
Services access to the system.
Compact flash in use LED - This yellow LED indicates that the compact flash memory is
being accessed.
Compact flash slot - This slot is an interface for compact flash media for storage of
translations and application data.
USB port for the USB CD-ROM drive - This port is used to communicate with peripheral
equipment such as a USB CD-ROM or DVD-ROM for software and firmware updates. Do
not connect the modem to this port.
Server active LED - This green LED:
- Is On when the Maintenance Processor detects that the primary application of the
Communication Manager Processor is loaded and running.
70 Installing and Configuring the Avaya S8500-Series Server
TN8400 Server LEDs
- Is Off during a power-on reset or when the system is shutting down.
- Flashes when a diagnostic test or self test is running.
l
Application Up/Test LED - This yellow LED indicates that the S8400 has an active
communication path that is interactively communicating with the TN8412 SIPI.
LED descriptions
Table 9: Avaya S8400 Server LED descriptions on page 71 describes each LED on the
faceplate of the S8400 Server.
Table 9: Avaya S8400 Server LED descriptions
LED name
Color
Power
on
reset
BIOS
boot
OS and
SW boot
OS running1
App active
Shutdown
in
progress
Shutdown
complete
TN8400 circuit
pack failure2
Red
On
On
On
Off - software3
Maintains
current status
Maintains
current
status
Maintains
current
status
OK to remove
Green
Off
Off
Off
Off
Off
Flash
On
Major alarm
status
Red
On
On
Off - SW
Off - software
Maintains
current status
Maintains
current
status
Maintains
current
status
Services
Ethernet link
status
Green
Off
N/A
N/A
Link Status
Link Status
Unknown
Off
Compact flash
in use
Yellow
On
On
Off
Off4 - software
Off*
Off*
Maintains
current
status
Application is
Up/Test
Green
On5
Off
Off
Off
When
Communicati
on Manager
is running,
LED is on
Off - SW
Off
Server active6
Yellow
Off
Off
Off
On when
communication
is established
with the SIPI
Maintains
current status
Off
Off
1. The Communication Manager Processor complex is running with its operating system.
2. The LED is on when on-board hardware or software detects an S8400 failure or during a reboot of the
Communication Manager Processor.
3. The Maintenance Processor turns on the S8400 circuit pack failure LED when the Maintenance Processor detects
that the Communication Manager Processor is booting. When the Communication Manager Processor is finished
booting, the processor sends the Maintenance Processor a message to request that the S8400 Failure LED be
turned off. This LED is turned off unless the hardware or the software detects a failure on the circuit pack.
4. The LED is on when the compact flash media is accessed.
Issue 8 May 2009
71
Chapter 8: Installation verification
5. The LED is on during power-up self tests.
6. The LED is on when the S8400 has an active communication path that is communicating with the TN8412AP SIPI.
72 Installing and Configuring the Avaya S8500-Series Server
UPS LEDs
UPS LEDs
The UPS LEDs flash briefly after the UPS is plugged in. The normal mode LED flashes after a
self-test to indicate that the UPS is in standby mode.
For more information, see the UPS user guide for the Powerware UPS.
Figure 8: LEDs on the Powerware 9125 UPS
ledlups KLC 030102
1
2
8
7
3
4
5
6
Figure notes:
1.
2.
3.
4.
Normal mode indicator
Battery mode indicator
Bypass mode indicator
Test/Alarm reset button
5.
6.
7.
8.
Off button
On button
Bar graph indicators
Alarm indicators
Issue 8 May 2009
73
Chapter 8: Installation verification
TN8412AP SIPI LEDs
Note:
The TN8412AP SIPI faceplate is the same as the TN2312BP IPSI faceplate.
Note:
TN8412AP Server IP Interface (SIPI) circuit pack LEDs include:
l
Standard LEDs and connector slots
l
A programmable LED display, which indicates:
l
l
The type of SIPI IP address. For a static address, the display shows IP
Connectivity. If SIPI has connectivity and an IP, the LED panel shows a solid
downward pointing triangle (see Figure 10).
For more information on troubleshooting the configuration of the server harware, see
Appendix B: Installation troubleshooting on page 87.
74 Installing and Configuring the Avaya S8500-Series Server
TN8412AP SIPI LEDs
Figure 9: TN8412AP SIPI circuit pack faceplate (graphic shows IPSI)
1
10
2
3
9
4
CLK
8
5
6
N
E
T
W
O
R
K
7
01DR06142246
700060643
TN2312AP IPSI
ckdfips2 KLC 091403
AVAYA
S
E
R
V
I
C
E
Figure notes:
1. Red LED (ON indicates power up/failure)
2. Green LED (ON indicates circuit pack in use)
3. Amber LED (ON indicates maintenance diagnostics/
testing)
4. Yellow LED (tone clock status)
5. Emergency transfer LED
6.
7.
8.
9.
10.
Services RJ45 connector
Network control RJ45 connector
Four-character LED display
Pushbutton switch
Slot for the maintenance cable
Issue 8 May 2009
75
Chapter 8: Installation verification
Figure 10: SIPI LED display for a static IP address
1
CLK
S
E
R
V
I
C
E
2
ledlip1 KLC 030502
N
E
T
W
O
R
K
Figure notes:
1. The SIPI has a static IP
address.
2. The SIPI has connectivity and an IP
address.
76 Installing and Configuring the Avaya S8500-Series Server
Appendix A: Server access
Use a personal computer or a Services laptop computer that is equipped with a network
interface card (NIC), a terminal emulation program, and a Web browser to access a server for
initial configuration, aftermarket additions, and continuing maintenance.
You can access the server:
l
Directly
l
Remotely over the customer network
l
Remotely over a modem (for Avaya maintenance access only)
Steps to access a server include:
l
Connecting to the server directly on page 79
l
Connecting to the server remotely over the network on page 81
l
Connecting to the server remotely over a modem on page 81
l
Logins for Avaya technicians and Business Partners on page 83
l
Configuring the network for Windows 2000 and XP on page 84
Accessing the command line interface of the server with
SSH
The procedure in this section shows how to use SSH to log on to the server from a Services
laptop computer. SSH is the recommended method for server access. To use this procedure
with a cross-over cable connection from the computer to the Services port, you must configure
the computer for the network connection. If the S8400 is connected to the local LAN, it is also
possible to log into the server using the local LAN.
To use SSH, a third-party SSH client must be installed on your computer. PuTTY is one such
client. You can download PuTTY from http://www.putty.nl/download.html. The following
procedure describes, as an example of SSH access, how to log on to the server command line
with PuTTY.
Note:
Note:
Many Avaya products support access with SSH. However, Avaya does not
provide support for third-party clients that are used for SSH access. Problems
with an SSH client, including PuTTY, are the responsibility of the user or the SSH
client vendor.
Issue 8 May 2009
77
Appendix A: Server access
Use the following instructions if you are using PuTTY as the SSH client.
1. On your computer, click the PuTTY desktop link or click Start > Programs > PuTTY >
PuTTY.
The system displays the PuTTY Configuration window with the Session dialog box open.
2. In the Host Name or IP address field, type 192.11.13.6 if you want to connect to the
Services port. For access over the LAN or WAN, type the IP address or the host name of
the server.
3. In the Port field, type 22.
4. Under Protocol, select SSH.
5. In the PuTTY menu on the left, click Connection > SSH.
6. In the Preferred SSH protocol version field, select 2.
7. In the Encryption options window, use the up and down arrows to set AES (SSH-2) as the
top option and 3DES as the second option.
Note:
Note:
You can also customize the PuTTY tool with other settings, such as for color. For
documentation on PuTTY, see http://www.putty.nl/docs.html.
8. In the Backspace key area, select Control-H.
This activates the backspace key while you are using the SAT.
9. Click Open.
Note:
Note:
If you have not connected to this particular server before, SSH prompts you to
accept the server’s host key. If you save this key when prompted, you will not be
prompted if you connect again later. If you do not save the key, PuTTY prompts
you the next time you connect to this server.
When you connect though the interface on the Services laptop computer, if you save
the host key, the host is identified as 192.11.13.6. If you later connect to a different
server through the laptop interface, this new host also shows as 192.11.13.6, but it has
a different key. You get a prompt in this case because it appears that the host key has
changed.
10. If necessary, click Yes to accept the server’s host key.
The system displays the PuTTY window.
11. Log in as craft.
78 Installing and Configuring the Avaya S8500-Series Server
Connecting to the server directly
Connecting to the server directly
To access the server directly, use a computer with the following minimum specifications:
l
A Windows 2000 or Windows XP operating system
l
32-MB of RAM
l
40-MB of available disk space
l
An RS-232 port connector
l
A network interface card (NIC) with a 10/100BaseT Ethernet interface
l
l
A 10/100 BaseT Ethernet, category 5 or better, cross-over cable with an RJ45 connector
on each end (MDI to MDI-X)
A CD-ROM drive
1. Plug one end of the CAT5 cross-over cable into the Services access port on the server
faceplate. For more information, see Services laptop computer connected directly to the
S8400 Server on page 80.
2. Plug the other end of the CAT5 cross-over cable into the NIC on your computer. Use a NIC
adapter if necessary.
3. Configure your network connection
l
IP address: 192.11.13.5
l
Subnetwork mask: 255.255.255.252
For specific information, see Configuring the network for Windows 2000 and XP on
page 84.
Once you connect, use a terminal emulation program or a Web browser to administer the
server.
Issue 8 May 2009
79
Appendix A: Server access
Figure 11: Services laptop computer connected directly to the S8400 Server
1
AVAYA
2
04J247701575
TN8400AP
cadl8400 LAO 113005
HV0
700327604
3
4
Figure notes:
1. Services laptop computer
2. Network interface card (NIC)
3. NIC adapter cable (if necessary)
4. Black CAT5 cross-over cable
80 Installing and Configuring the Avaya S8500-Series Server
Connecting to the server remotely over the network
Connecting to the server remotely over the network
You can use any computer to connect to the server through a LAN. The security settings on the
LAN must allow remote access.
1. Open a Web browser or a terminal emulation application.
2. In the address field, enter the IP address or the DNS host name that is assigned to the
server that you want to access.
Connecting to the server remotely over a modem
Note:
Note:
Remote access over a modem is for Avaya services support access only and not
for routine administration. Because the server uses the same modem line to
report alarms, the server cannot report new alarms while the line is in use.
You can access the server through an analog modem. The remote connection requires a
minimum data speed of 33.5 kilobits per second.
1. Launch the dial-up connection program, which varies depending on your operating
system. Generally, you can access the program through the My Computer or the Control
Panel folders. For more information, see the Help system of your computer.
2. To open the New Connection wizard, double-click Make New Connection.
3. Within the wizard, depending on your operating system, you may be asked to:
l
Assign a name to the connection.
l
Select dial-up to the network for the network connection type.
l
Select the modem you will be using for the dial-up connection.
l
l
Enter the appropriate telephone number to access the active server. For the
customer-supplied telephone numbers, see the completed Electronic Preinstallation
Worksheet.
Under Advanced, select PPP and log on manually. You might have to type a user
name and password, depending on whether or not the server that you are dialing into
has a non-null CHAP secret key. If you need a user name and a password, use craft
for the user name and ignore the password field.
4. Click the connection name or icon, if created. Wait for connection.
5. When prompted, enter your remote access login name and password.
6. When the system displays the Start PPP now message, click Done. When you see the
Connection Complete dialog box, your computer is connected to the server.
Issue 8 May 2009
81
Appendix A: Server access
7. Open an SSH session using PuTTY or other client.
See Accessing the command line interface of the server with SSH on page 77 for more
information.
8. Within the SSH client, type the IP address of the active server.
Accessing the System Management Interface
You can administer the server through the System Management Interface. Access the System
Management Interface when connected:
l
l
Over the customer network with MS Internet Explorer 6.0 or 7.0.
Directly to the Services port on the server. For more information, see Services laptop
computer connected directly to the S8400 Server on page 80.
To access the System Management Interface, you must first bypass any proxy servers.
1. In Internet Explorer, click Tools > Internet Options.
2. Click the Connection tab.
3. Click LAN Settings in the lower right, then click Advanced.
4. In the Exceptions box after the last entry, type 192.11.13.6
5. Click OK to close each of the dialog boxes.
6. Open the MS Internet Explorer Web browser to access the System Management Interface.
l
l
Note:
If you are connected directly, in the Address field, type 192.11.13.6.
If you are connected remotely through a modem, in the Address field, type in the IP
address or the DNS host name of the server.
Note:
The first time that you log in, you see a message that asks you to install a security
certificate. Follow the instructions for your particular browser to accept the
certificate. You can also install the certificate on your computer with the
instructions in the online Help for your browser.
7. When prompted, log in.
8. When the system displays a message Do you want to suppress alarms?, select
Yes.
9. From the Administration menu, click Server (Maintenance).
82 Installing and Configuring the Avaya S8500-Series Server
Accessing the SAT
Accessing the SAT
Use a remote Secure Shell (SSH) or terminal emulation session to access the Communication
Manager SAT command line prompt.
Type of connection
Procedure
Using SAT with SSH:
See Accessing the command line interface of the server with
SSH on page 77.
Using SAT with Terminal
Emulation
To use a command line interface in a terminal emulation window,
open your terminal emulation application. Configure the terminal
emulation program port settings as follows:
l Speed: 115200 baud or 9600 baud if you use a serial
modem connection
l No parity
l 8 data bits
l 1 stop bit
l No flow control
NOTE: Avaya Native Configuration Manager, Avaya Terminal
Emulation, and HyperTerminal are the only terminal emulation
programs that Avaya supports.
Logins for Avaya technicians and Business Partners
Avaya field technicians and Business Partners must use a Services login such as craft or
dadmin to perform initial configuration and upgrades. An Avaya field technician can use a
unique password that is assigned to the customer system.
After the Avaya authentication file is installed, Communication Manager has a password for the
craft login that is unique to the customer system and available when you are connected directly
to the server. If the system is configured without ASG, then all security authentications are
through passwords. If ASG is turned on, then all authentication is through ASG except for logins
over the service port which require a password. The revised password is recorded by RFA and
is obtained from ASG Conversant at 1-800-248-1234 or 1-720-444-5557.
Customers can set up their own logins to access Avaya servers. You must have superuser
permission to create or change logins and passwords. NOTE: do not start login IDs with a
number. For more information, see the Avaya Communication Manager Basic Administration
Quick Reference (03-300363).
Issue 8 May 2009
83
Appendix A: Server access
Configuring the network for Windows 2000 and XP
!
Important:
Important:
Write down the original settings for use in case you need to revert to the original
configuration.
1. On your computer that is connected to the services port, right-click My Network Places
and left-click Properties to display the Network Connections window.
Windows 2000 or Windows XP should automatically detect the Ethernet card in your
system and create a LAN connection. More than one connection might appear.
2. Right-click the correct Local Area Connection and left-click Properties to display the
Local Area Connection Properties dialog box.
3. Select Internet Protocol (TCP/IP).
4. Click Properties to display the Internet Protocol (TCP/IP) Properties dialog box.
5. On the General tab, select Use the following IP address.
6. Make a note of any IP addresses or other entries that you have to clear. You might need to
restore them later to connect to another network
Enter the following:
l
IP address: 192.11.13.5
l
Subnet mask: 255.255.255.252
7. Select Use the following DNS server addresses. The entries for Preferred DNS server
and Alternate DNS server should both be blank.
8. Click Advanced at the bottom of the dialog box to display the Advanced TCP/IP Settings
dialog box.
9. Click the DNS tab. Ensure no DNS server is administered. The address field should be
blank.
10. Click OK and Close to close all the windows.
84 Installing and Configuring the Avaya S8500-Series Server
Setting the browser options for Internet Explorer 6.0
Setting the browser options for Internet Explorer 6.0
A connection session to a server might time out when connected through a proxy server. To
avoid having the server time out during a session, add the server host names or IP addresses to
the list of host names and IP addresses.
To set browser options for Internet Explorer 6.0:
1. In Internet Explorer 6.0, click Tools > Internet Options.
2. Select the Connection tab.
3. Click LAN settings, then click Advanced.
4. In the Do not use proxy server for addresses beginning with field, type the IP address
for each server you intend to access remotely.
If the IP addresses have the first or first and second octets the same, you can shorten the
addresses to xxx.xxx.* (example, 135.9.*).
5. Click OK to close each dialog box.
Issue 8 May 2009
85
Appendix A: Server access
86 Installing and Configuring the Avaya S8500-Series Server
Appendix B: Installation troubleshooting
This section provides some simple strategies to help you troubleshoot an installation of a
server. This section includes:
l
Troubleshooting the installation of the server hardware on page 87
l
Troubleshooting the configuration of the server hardware on page 88
l
Troubleshooting the installation of the license file and the Avaya authentication file on
page 90
Troubleshooting the installation of the server hardware
.
Problem
Panasonic CD/
DVD-ROM does
not work
No power to the
UPS
Possible solution
l
l
l
l
No power to the
server
l
l
l
l
The SIPI LEDs
flash
l
l
l
Ensure that the ION battery is charged by checking the LED on the
drive. If the battery is not charged you see a red LED and get a failed
to mount CD-ROM error message. To charge the ION battery, turn the
drive off and plug it into a USB port (approximately 30 minutes).
Ensure that the UPS is plugged into the outlet.
Ensure that the outlet has power.
For other solutions, see the user guide for the UPS.
Ensure that the circuit pack is seated.
Ensure that the media gateway is plugged into the UPS.
Ensure that the gateway power supply is properly installed and
seated.
Ensure that the UPS has power.
Ensure that the SIPI is in the correct slot. Use slot 1 for the G650
Media Gateway.
Ping the SIPI from server.
Ping the server from the SIPI.
Issue 8 May 2009
87
Appendix B: Installation troubleshooting
Troubleshooting the configuration of the server hardware
Troubleshooting the configuration of the server hardware
Problem
Cannot log in to the
UPS subagent
Possible solution
l
l
l
l
Cannot log in to the
server
l
l
l
l
l
l
l
Cannot access the
Avaya Installation
Wizard
l
l
l
l
l
Cannot use SAT
commands
l
l
l
Cannot ping out to
the customer network
l
Ensure that the SNMP subagent is installed in the UPS.
Ensure that you are connected to the correct Ethernet port.
Ensure that you have the correct login ID and password. For
more information, see the user guide for the SNMP subagent.
Ensure that the network card on the laptop computer is
configured correctly.
Check the link LED on the server. If the LED is off, a cable or
hardware problem exists.
Ensure that you are using SSH and not telnet.
Ensure that you are connected to the Services Ethernet port.
Ensure that you are using a cross-over cable between the
Services laptop computer and the server.
Ensure that the ARP cache is cleared on the Services laptop
computer. In an MS-DOS window, type arp -d 192.11.13.6
and press Enter.
Ensure that you have connectivity. In an MS-DOS window, type
ping 192.11.13.6 and press Enter.
Ensure that the NIC on the Services laptop computer is
configured correctly.
Ensure that you are plugged into the Services port.
Ensure that you are using SSH and not telnet.
Ensure that you are using the correct IP address, 192.11.13.6
Ensure that you are using the correct login and password.
Ensure that the NIC on the laptop is configured correctly.
Ensure that you are using the correct IP address, 192.11.13.6
and port 5023.
Ensure that you are using SSH and not telnet.
Ensure that you are using the correct login and password.
Ensure that in the LAN security settings “output from server” for
icmp is enabled.
1 of 2
88 Installing and Configuring the Avaya S8500-Series Server
Troubleshooting the configuration of the server hardware
Troubleshooting the configuration of the server hardware (continued)
Problem
Cannot ping the
server from the
customer network
Cannot access the
server remotely
The LED display on
SIPI is flashing
Cannot access the
SIPI for static
addressing
No “V” shows on the
SIPI LED
The “V” on the SIPI
LED is not filled in
The system
generates an alarm
when first connect to
SIPI
Possible solution
l
l
l
l
l
l
l
l
l
Ensure that in the LAN security settings “input to server” for icmp
is enabled.
Ensure that in the LAN security settings “input to server” is
checked for SSH (Linux commands), https (Web access), and
def-sat (SAT commands access). Change the LAN security
settings on the Web interface with a direct connection to the
server.
An IP address is not assigned to the SIPI LED (static IP
addressing).
Ensure that you are plugged into the Services (top) port on the
SIPI.
Ensure that the ARP cache is cleared on the Services laptop
computer. In an MS-DOS command window, type arp -d
192.11.13.6 and press Enter.
The SIPI is not connected to the Ethernet switch or the network.
Connect a cross-over cable between the RJ45 SIPI adapter and
Eth-A on the S8400 adapter, or connect the cable to the bottom
port on the faceplate and to the Ethernet switch or the customer
network.
An IP address is not assigned to the SIPI.
The SIPI is not administered.
The SIPI does not have the current firmware. Upgrade the
firmware.
2 of 2
Issue 8 May 2009
89
Appendix B: Installation troubleshooting
Troubleshooting the installation of the license file and
the Avaya authentication file
Problem
Cannot get files from the RFA site
Possible solution
l
l
Cannot install the license file
l
l
l
The server is in no-license mode
l
l
Cannot use the administration
commands
ASG does not work
Cannot install the authentication
file
l
Provide the correct SAP number.
Provide the serial number for the SIPI.
Ensure that two license files do not exist on the server.
If so, delete one of the files.
The file might be corrupt. Download the file again from
the RFA site.
Use binary mode to upload the file.
The license file does not have an IP address yet. This
situation is normal when the license file is first installed
because the file cannot see the SIPI.
After 30 minutes, the license file has not located the
SIPI. In a SAT session, type reset system 1 and
press Enter to reset the 30-minute clock.
The server might be in no license mode because the
30-minute timer lapsed. In a SAT session, type reset
system 1 and press Enter to reset the 30-minute
clock.
l
Re-install the Avaya authentication files.
l
Administer a super-user login on the active server.
90 Installing and Configuring the Avaya S8500-Series Server
Index
Index
A
D
access server
directly . . . . . . . . . . . . . . .
remotely over modem . . . . . . . .
remotely over network . . . . . . .
accessing . . . . . . . . . . . . . . .
accessing System Management Interface
accessing the server . . . . . . . . . .
add
IP interface information . . . . . . .
media gateways . . . . . . . . . .
AIW. See Avaya Installation Wizard
alarm activation level
setting . . . . . . . . . . . . . . .
alarms
enabling to INADS via SNMP . . . .
setting selected traps . . . . . . . .
to INADS by way of modem, enabling
viewing. . . . . . . . . . . . . . .
ARP cache, clearing . . . . . . . . . .
Avaya Installation Wizard, using . . . .
.
.
.
.
.
.
.
.
.
.
.
.
.
.
.
.
.
.
.
.
.
.
.
.
.
.
.
.
.
.
.
.
.
.
.
.
79
81
81
82
82
31
. . . . . . 49
. . . . . . 48
. . . . . . 50
.
.
.
.
.
.
.
.
.
.
.
.
.
.
.
.
.
.
.
.
.
.
.
.
. . 63
. . 27
. . 63
. . 63
. . 29
. 36, 40
B
backing up files to compact flash . . . . . . . . . . 64
C
cable adapter for server . . . . .
CD/DVD-ROM drive
connecting to the media server
clearing ARP cache . . . . . . .
command line interface . . . . . .
Communication Manager
installing software . . . . . . .
compact flash, backing up to . . .
configure
modem. . . . . . . . . . . .
server . . . . . . . . . . . .
UPS . . . . . . . . . . . . .
connect to customer network . . .
connection to LAN, verifying . . .
copy files to server . . . . . . . .
customer network, connecting to .
. . . . . . . . . 15
. . . . . . . . . 30
. . . . . . . . . 29
. . . . . . . . . 83
. . . . . . . . . 29
. . . . . . . . . 64
.
.
.
.
.
.
.
.
.
.
.
.
.
.
.
.
.
.
.
.
.
.
.
.
.
.
.
.
.
.
.
.
.
.
.
.
.
.
.
.
.
.
.
.
.
.
.
.
.
. . 43
. 33, 47
. . 25
. . 15
. . 42
. . 35
. . 15
Installing and Configuring the Avaya S8400 Server
date and time, verifying . .
daylight savings rules
location . . . . . . . .
setting . . . . . . . .
diffserv parameters, setting
direct access to server . .
disconnecting from server .
. . . . . . . . . . . . . 62
.
.
.
.
.
.
.
.
.
.
.
.
.
.
.
.
.
.
.
.
.
.
.
.
.
.
.
.
.
.
.
.
.
.
.
.
.
.
.
.
.
.
.
.
.
.
.
.
.
.
.
.
.
.
.
.
.
.
.
.
.
.
.
.
.
61
60
56
79
45
E
Ethernet interface assignments . . . . . . . . . . . 38
Ethernet ports . . . . . . . . . . . . . . . . . . . 15
F
faceplate
S8400 interfaces . . .
TN8400 circuit pack . .
TN8412AP circuit pack
firewall settings . . . . . .
.
.
.
.
.
.
.
.
.
.
.
.
.
.
.
.
.
.
.
.
.
.
.
.
.
.
.
.
.
.
.
.
.
.
.
.
.
.
.
.
.
.
.
.
.
.
.
.
.
.
.
.
70
69
74
43
I
IA 770 installation. . . . . . . . . . .
INADS
enabling alarms to by way of modem
inputting translations . . . . . . . . .
installation
troubleshooting . . . . . . . . . .
using the Wizard . . . . . . . . .
installing
Communication Manager software .
translation file . . . . . . . . . . .
IP address
set static . . . . . . . . . . . . .
IP address, set static . . . . . . . . .
IP interface
enabling control . . . . . . . . . .
LEDs . . . . . . . . . . . . . . .
upgrading firmware version . . . .
verify translations . . . . . . . . .
IP interface information
adding to translations . . . . . . .
. . . . . . . 45
. . . . . . . 63
. . . . . . . 47
. . . . . . . 87
. . . . . 36, 40
. . . . . . . 31
. . . . . . . 50
. . . . . . . 53
. . . . . . . 53
.
.
.
.
.
.
.
.
.
.
.
.
.
.
.
.
.
.
.
.
.
.
.
.
.
.
.
.
51
74
51
51
. . . . . . . 49
May 2009
91
Index
L
LED
additional information . . .
LEDs
IP interface . . . . . . . .
S8400 . . . . . . . . . .
UPS . . . . . . . . . . .
license file, testing . . . . . .
license, verifying status . . . .
location
setting for media gateways
login, super-user . . . . . . .
. . . . . . . . . . . 68
.
.
.
.
.
.
.
.
.
.
.
.
.
.
.
.
.
.
.
.
.
.
.
.
.
.
.
.
.
.
.
.
.
.
.
.
.
.
.
.
.
.
.
.
.
.
.
.
.
.
.
.
.
.
.
74
71
73
67
52
. . . . . . . . . . . 61
. . . . . . . . . . . 34
M
manual configuration
configuration, manual method .
media gateways, adding . . . . .
modem
access to server . . . . . . .
configuring . . . . . . . . . .
connect to server . . . . . . .
modem options, setting . . . . . .
modem, enabling alarms to INADS
. . . . . . . . . 36
. . . . . . . . . 48
.
.
.
.
.
.
.
.
.
.
.
.
.
.
.
.
.
.
.
.
.
.
.
.
.
.
.
.
.
.
.
.
.
.
.
.
.
.
.
.
.
.
.
.
.
81
43
22
22
63
.
.
.
.
.
.
.
.
.
.
.
.
.
.
.
.
.
.
.
.
68
50
42
36
20
.
.
.
.
.
.
.
.
.
.
.
.
.
.
.
.
.
.
.
.
50
60
27
53
53
. . . . 53
. . . . 53
. . . . 26
. . . . 27
. . . . 31
. . . . 23
. . . . 53
. . . . 53
. . . . 34
T
N
network time server (NTP), enabling . . . . . . . . 44
P
post installation tasks . . . . . . . . . .
power
applying to server . . . . . . . . . . .
pre-installation tasks at the installation site
Processor Ethernet . . . . . . . . . . .
. . . . . 65
. . . . . 30
. . . . . 13
. . . . . 22
R
remote access to server
over modem . . . . . . . . . . . . . . . . . . 81
over network . . . . . . . . . . . . . . . . . . 81
S
saving translations . .
server
accessing . . . .
applying power . .
configuring . . . .
copying files to . .
disconnecting from
92
LED, additional information . . . . . . .
verify connectivity . . . . . . . . . . . .
verifying LAN connection. . . . . . . . .
server configuration, manual method. . . . .
Services access port . . . . . . . . . . . .
set
alarm activation level . . . . . . . . . .
daylight savings rules . . . . . . . . . .
selected traps (alarming) . . . . . . . . .
static IP address . . . . . . . . . . . .
set static IP address . . . . . . . . . . . .
SIPI
address configuration . . . . . . . . . .
programming a static address . . . . . .
SNMP
preparing to configure . . . . . . . . . .
SNMP modules
administering . . . . . . . . . . . . . .
software, installing Communication Manager .
SSH
about . . . . . . . . . . . . . . . . . .
static IP addressing
setting . . . . . . . . . . . . . . . . .
static IP addressing, setting . . . . . . . . .
super-user login . . . . . . . . . . . . . .
. . . . . . . . . . . . . . 47, 50
.
.
.
.
.
.
.
.
.
.
.
.
.
.
.
.
.
.
.
.
.
.
.
.
.
.
.
.
.
.
.
.
.
.
.
.
.
.
.
.
.
.
.
.
.
.
.
.
.
.
.
.
.
.
.
.
.
.
.
.
.
.
.
.
.
. . 31
. . 30
. 33, 47
. . 35
. . 45
Telnet
configuring for Win2000/XP . .
terminal emulation . . . . . . . .
testing
license file . . . . . . . . . .
server installation . . . . . . .
TN2312BP . . . . . . . . . .
TN2312BP, testing . . . . . . . .
TN8400
faceplate . . . . . . . . . . .
LEDs . . . . . . . . . . . . .
TN8400AP
LEDs . . . . . . . . . . . . .
TN8412AP
faceplate . . . . . . . . . . .
LEDs . . . . . . . . . . . . .
TN8412AP, Ethernet connectivity .
translation file
installing . . . . . . . . . . .
translations
inputting . . . . . . . . . . .
IP interface . . . . . . . . . .
saving . . . . . . . . . . . .
verifying . . . . . . . . . . .
troubleshooting, server installation .
Installing and Configuring the Avaya S8400 Server
. . . . . . . . . 31
. . . . . . . . . 83
.
.
.
.
.
.
.
.
.
.
.
.
.
.
.
.
.
.
.
.
.
.
.
.
.
.
.
.
.
.
.
.
.
.
.
.
67
67
67
67
. . . . . . . . . 69
. . . . . . . . . 69
. . . . . . . . . 71
. . . . . . . . . 74
. . . . . . . . . 74
. . . . . . . . . 17
. . . . . . . . . 50
.
.
.
.
.
.
.
.
.
.
.
.
.
.
.
.
.
.
.
.
.
.
.
.
.
.
.
.
.
.
.
.
.
.
.
. . 47
. . 47
47, 50
. . 59
. . 87
May 2009
Index
U
upgrading
IP interface firmware version
UPS
LEDs . . . . . . . . . . .
security alert . . . . . . . .
SNMP module . . . . . . .
UPS, configuring . . . . . . . .
using this documentation . . . .
. . . . . . . . . . 51
.
.
.
.
.
.
.
.
.
.
.
.
.
.
.
.
.
.
.
.
.
.
.
.
.
.
.
.
.
.
.
.
.
.
.
.
.
.
.
.
.
.
.
.
.
.
.
.
.
.
73
25
25
25
12
.
.
.
.
.
.
.
.
.
.
.
.
.
.
.
.
.
.
.
.
.
.
.
.
.
.
.
.
.
.
.
.
.
.
.
.
.
.
.
.
.
.
.
.
.
.
.
.
.
.
.
.
.
.
.
.
.
.
.
.
.
.
.
.
.
.
.
.
.
.
.
.
.
.
.
.
.
.
.
.
50
62
51
52
42
59
63
56
V
verify
connectivity to servers .
date and time . . . . . .
IP interface translated . .
license status . . . . . .
server connection to LAN
translations . . . . . . .
view alarms . . . . . . . .
VLAN parameters, setting .
.
.
.
.
.
.
.
.
.
.
.
.
.
.
.
.
W
Wizard, installation . . . . . . . . . . . . . . . . 36, 40
Installing and Configuring the Avaya S8400 Server
May 2009
93
Index
94
Installing and Configuring the Avaya S8400 Server
May 2009