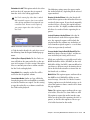
1
®
®
®
Pro Tools Avid Unity MediaNetwork Guide
Version 10.0
Legal Notices
This guide is copyrighted ©2011 by Avid Technology, Inc.,
(hereafter “Avid”), with all rights reserved. Under copyright
laws, this guide may not be duplicated in whole or in part
without the written consent of Avid.
003, 96 I/O, 96i I/O, 192 Digital I/O, 192 I/O, 888|24 I/O,
882|20 I/O, 1622 I/O, 24-Bit ADAT Bridge I/O, AudioSuite,
Avid, Avid DNA, Avid Mojo, Avid Unity, Avid Unity ISIS,
Avid Xpress, AVoption, Axiom, Beat Detective,
Bomb Factory, Bruno, C|24, Command|8, Control|24, DCommand, D-Control, D-Fi, D-fx, D-Show, D-Verb, DAE,
Digi 002, DigiBase, DigiDelivery, Digidesign,
Digidesign Audio Engine, Digidesign Intelligent Noise
Reduction, Digidesign TDM Bus, DigiDrive, DigiRack,
DigiTest, DigiTranslator, DINR, DV Toolkit, EditPack, Eleven,
EUCON, HD Core, HD Process, Hybrid, Impact, Interplay,
LoFi, M-Audio, MachineControl, Maxim, Mbox,
MediaComposer, MIDI I/O, MIX, MultiShell, Nitris, OMF,
OMF Interchange, PRE, ProControl, Pro Tools M-Powered,
Pro Tools, Pro Tools|HD, Pro Tools LE, QuickPunch, RectiFi, Reel Tape, Reso, Reverb One, ReVibe, RTAS, Sibelius,
Smack!, SoundReplacer, Sound Designer II, Strike, Structure,
SYNC HD, SYNC I/O, Synchronic, TL Aggro, TL AutoPan,
TL Drum Rehab, TL Everyphase, TL Fauxlder, TL In Tune,
TL MasterMeter, TL Metro, TL Space, TL Utilities, Transfuser,
Trillium Lane Labs, Vari-Fi, Velvet, X-Form, and XMON are
trademarks or registered trademarks of Avid Technology, Inc.
Xpand! is Registered in the U.S. Patent and Trademark Office.
All other trademarks are the property of their respective
owners.
Product features, specifications, system requirements, and
availability are subject to change without notice.
Guide Part Number 9329-65115-00 REV A 10/11
Documentation Feedback
At Avid, we are always looking for ways to improve our
documentation. If you have comments, corrections, or
suggestions regarding our documentation, email us at
[email protected].
Contents
Chapter 1. Introduction . . . . . . . . . . . . . . . . . . . . . . . . . . . . . . . . . . . . . . . . . . . . . . . . . . . . . . . . . 1
Avid MediaNetwork Capabilities . . . . . . . . . . . . . . . . . . . . . . . . . . . . . . . . . . . . . . . . . . . . . . 1
Avid Interplay. . . . . . . . . . . . . . . . . . . . . . . . . . . . . . . . . . . . . . . . . . . . . . . . . . . . . . . . . . . . 1
Overview of a MediaNetwork System . . . . . . . . . . . . . . . . . . . . . . . . . . . . . . . . . . . . . . . . . . 2
AAF, OMF, and MXF Basics . . . . . . . . . . . . . . . . . . . . . . . . . . . . . . . . . . . . . . . . . . . . . . . . . 3
Embedded Media and Linked Media . . . . . . . . . . . . . . . . . . . . . . . . . . . . . . . . . . . . . . . . . . . 6
Frame-Rate Accurate Video Editing and Sample-Rate Accurate Audio Editing . . . . . . . . . . . . 6
System Requirements and Compatibility . . . . . . . . . . . . . . . . . . . . . . . . . . . . . . . . . . . . . . . . 8
About Avid Unity MediaNetwork Guides . . . . . . . . . . . . . . . . . . . . . . . . . . . . . . . . . . . . . . . . 8
Support for Avid Unity MediaNetwork . . . . . . . . . . . . . . . . . . . . . . . . . . . . . . . . . . . . . . . . . . 9
Conventions Used in This Guide . . . . . . . . . . . . . . . . . . . . . . . . . . . . . . . . . . . . . . . . . . . . . . 9
About www.avid.com . . . . . . . . . . . . . . . . . . . . . . . . . . . . . . . . . . . . . . . . . . . . . . . . . . . . . 10
Chapter 2. Preparing a Pro Tools Workstation For MediaNetwork . . . . . . . . . . . . . . . . . . . . . 11
Installation Overview . . . . . . . . . . . . . . . . . . . . . . . . . . . . . . . . . . . . . . . . . . . . . . . . . . . . . 11
Installing Pro Tools . . . . . . . . . . . . . . . . . . . . . . . . . . . . . . . . . . . . . . . . . . . . . . . . . . . . . . 11
Installing MediaNetwork Client Hardware . . . . . . . . . . . . . . . . . . . . . . . . . . . . . . . . . . . . . . 11
Installing MediaNetwork Client Software . . . . . . . . . . . . . . . . . . . . . . . . . . . . . . . . . . . . . . . 14
Chapter 3. Configuring a Pro Tools System as a MediaNetwork Client . . . . . . . . . . . . . . . . . 17
Getting Started Using a Workstation as a MediaNetwork Client . . . . . . . . . . . . . . . . . . . . . . 17
Logging into a MediaNetwork System . . . . . . . . . . . . . . . . . . . . . . . . . . . . . . . . . . . . . . . . . 17
Assigning the Workspace Drive Letter . . . . . . . . . . . . . . . . . . . . . . . . . . . . . . . . . . . . . . . . . 18
Mounting and Unmounting Workspaces . . . . . . . . . . . . . . . . . . . . . . . . . . . . . . . . . . . . . . . 19
Configuring Pro Tools Session Settings for a New Session . . . . . . . . . . . . . . . . . . . . . . . . . 19
Performance Characteristics. . . . . . . . . . . . . . . . . . . . . . . . . . . . . . . . . . . . . . . . . . . . . . . . 21
Sharing Files . . . . . . . . . . . . . . . . . . . . . . . . . . . . . . . . . . . . . . . . . . . . . . . . . . . . . . . . . . . 22
Destructive Editing . . . . . . . . . . . . . . . . . . . . . . . . . . . . . . . . . . . . . . . . . . . . . . . . . . . . . . . 23
Contents
iii
Chapter 4. Avid Unity MediaNetwork Workflows for Pro Tools . . . . . . . . . . . . . . . . . . . . . . . 25
Exporting Audio and Video from Media Composer . . . . . . . . . . . . . . . . . . . . . . . . . . . . . . . 25
Importing Audio and Video into Pro Tools . . . . . . . . . . . . . . . . . . . . . . . . . . . . . . . . . . . . . . 31
Editing Audio in Pro Tools . . . . . . . . . . . . . . . . . . . . . . . . . . . . . . . . . . . . . . . . . . . . . . . . . 34
Exporting Audio from Pro Tools for Avid Editing Applications . . . . . . . . . . . . . . . . . . . . . . . . 34
Importing Pro Tools Audio Files Back into the Avid Video Editing Application . . . . . . . . . . . . 37
Index . . . . . . . . . . . . . . . . . . . . . . . . . . . . . . . . . . . . . . . . . . . . . . . . . . . . . . . . . . . . . . . . . . . . . . 39
iv
Pro Tools Avid Unity MediaNetwork Guide
Chapter 1: Introduction
This guide explains how to configure a system
running Pro Tools ® software as a Unity MediaNetwork ® client within an Avid ® MediaNetwork
system. It also explains how to exchange audio
and video media between Pro Tools and Avid
video editing application clients (such as
Media Composer and Symphony) attached to a
MediaNetwork system.
Avid Interplay
Avid Interplay with the Pro Tools Avid Interplay ® option lets Pro Tools and Avid users work
within the same asset management system.
Refer to the Pro Tools Avid Interplay
Guide for detailed information.
Systems running non-HD Pro Tools software can also act as MediaNetwork clients,
but media streaming is not supported in this
configuration.
This guide is written for Avid network administrators, Pro Tools users, and Avid video editor
users.
Avid MediaNetwork
Capabilities
Avid Unity MediaNetwork is a Fibre Channel
shared storage system that lets users of Avid editing applications and Pro Tools share the same
media, as follows:
• Stream audio and video media in real time.
• Configure multiple users on the same
MediaNetwork system.
• Share AAF and OMF sequences, and OMF and
MXF audio and video media.
• Share AAF sequences, and MXF media, using
the Avid Interplay asset management system
(Avid Interplay system required).
Chapter 1: Introduction
1
Overview of a MediaNetwork
System
This guide describes how to configure and work
with a Pro Tools client within an Avid MediaNetwork system. The MediaNetwork installations addressed in this guide typically comprise
the following components:
MediaNetwork System Entire set of components
within an individual MediaNetwork installation.
MEDIASwitch One or more central routers directing communication between different components within a MediaNetwork system.
PortServer or PortServer Pro (Optional) One or
more servers that let Avid workstations access
MediaNetwork workspaces through an Ethernet
connection (without a Fibre Channel connection).
Avid Interplay Assist or Avid Unity MediaManager
Select (Optional) Client that allows real-time
logging and annotating of any media right at the
desktop.
Avid Interplay Engine or Avid Unity MediaManager Server (Optional) Server that manages the
metadata stored on the File Manager server.
Clients One or more Avid or Pro Tools workstations configured to be able to exchange data
with other clients attached to the MediaNetwork
system.
Pro Tools
client
Interplay
Media
Composer
client
Port
Server
backup server) that functions as the heart of the
Unity MediaNetwork file system by maintaining
location information for media stored on drives.
JBOD/IBOD Chassis that contains the drives that
File
Manager
Interplay
Access
client
store the actual data.
Avid Interplay Transcode and/or Avid DMS ProEncode (Optional) Engine that distributes proces-
sor-intensive tasks to network servers in order
to allow MediaNetwork clients (such as Avid
and Pro Tools workstations) to proceed without
interruption.
Avid Interplay Access or Avid Unity MediaManager (Optional) Media asset management client
application that enables facility-wide searching,
sorting, cataloging, management, and retrieval
of media.
2
Pro Tools Avid Unity MediaNetwork Guide
Interplay
Assist
client
Distributed
Media
Services
(DMS)
SWITCH
File Manager One or more servers (including a
JBOD/IBO
D chassis
Avid Unity
TransferEngine
Avid Unity MediaNetwork system (solid lines
represent physical connections, while dotted lines
represent connections through the switch)
AAF, OMF, and MXF Basics
AAF and OMF files are mechanisms for storing
and retrieving media data and metadata so that
projects can be freely exchanged between different applications and platforms (such as between
Pro Tools and Avid video editing applications).
Media data and metadata enable an application
that receives AAF and OMF sequence files to automatically and quickly reassemble the composition. A simple metaphor for this approach is
that media data files are the pieces of a puzzle
and metadata is the set of instructions for assembling the puzzle.
In the simplest case, only an AAF or OMF sequence is exchanged. If this sequence points to
existing media files, the size of the sequence file
is relatively small and the export/import process
is relatively fast.
AAF and OMF sequences can also have media
data embedded in them. This creates a single,
larger file that is slower to export and import,
but which may be easier to manage than thousands of files stored on different volumes.
Pro Tools supports AAF and OMF sequences
that contain embedded audio media.
Pro Tools does not support AAF or OMF sequences containing embedded video media, except if you are importing such sequences into a
video satellite track. In such cases, video metadata is imported into the track.
MXF
MXF is a media file format. There are MXF video
files and MXF audio files, but there are no “MXF
sequences.” An AAF sequence may refer to or include MXF media files, but OMF sequences cannot refer to or include MXF files.
Avid Support for MXF Media
Avid video editing applications support MXF
media as follows:
• Creation of MXF media when capturing,
transcoding, rendering, or using other methods to create media
• Import of MXF media files created in other
Avid applications
• Export of MXF audio and video files
Pro Tools Support for MXF Media
Pro Tools supports MXF media as follows:
• Import of MXF video and audio media
• Export of MXF audio media
Pro Tools cannot export video files of any type.
Video files digitized in Pro Tools are technically
of the MXF format, but are intended only for use
in Pro Tools and are not tested for compatibility
with other applications.
Chapter 1: Introduction
3
AAF
OMF
AAF sequences are the best way to exchange
projects and maintain valuable metadata. An
AAF sequence can refer to OMF and/or MXF media files, or have OMF and MXF media files embedded within them. There is no such thing as
an AAF audio or video media file.
OMF is both a media file and sequence format.
OMF media files can be audio or video.
Avid Video Editing Application Support
for AAF Sequences
Avid video editing applications support AAF sequences as follows:
• Import and export of AAF sequences with embedded video files (MXF or OMF) and/or audio files (MXF, WAV, or AIFF)
• Import and export of AAF sequences that refer
to external (linked) video files (MXF or OMF)
and/or audio files (MXF, WAV, or AIFF)
Pro Tools Support for AAF Sequences
Pro Tools supports AAF sequences as follows:
• Import and export of AAF sequences that contain embedded or refer to external (linked)
MXF, WAV, or AIFF audio files
• Import of AAF sequences that refer to external
(linked) MXF or OMF video files
• Video satellite systems only: Import of AAF
sequences containing embedded video to a
satellite track, in which case Pro Tools imports only the metadata (cuts and clip names)
and not the video
Pro Tools does not export video files, tracks or
metadata as part of AAF sequences.
Avid Video Editing Application Support
for OMF Media and Sequences
Avid video editing applications support OMF
media and sequences as follows:
• Import and export of OMF sequences with embedded OMF video files and WAV or AIFF audio files
• Import and export of OMF sequences that refer to external (linked) OMF video files and
WAV or AIFF audio files
Pro Tools Support for OMF Media and
Sequences
Pro Tools supports OMF media and sequences
as follows:
• Import of OMF video files created by
Media Composer or other Avid applications
• Export of OMF audio files
• Import and playback of OMF sequences that
refer to external (linked) audio files or contain
embedded audio files
• Import and playback of OMF sequences that
refer to external (linked) OMF video files
• Export of OMF sequences that refer to external (linked) audio files or contain embedded
audio files
• Video satellite systems only: Import of OMF
sequences containing embedded video to a
satellite track, in which case Pro Tools imports only the metadata (cuts and clip names)
and not the video
Pro Tools does not export video files, tracks or
metadata as part of OMF sequences.
4
Pro Tools Avid Unity MediaNetwork Guide
Embedded Media
Exporting to OMF or AAF with embedded media
results in one large OMF or AAF file containing
both the metadata and all associated media files.
Media Data (Media Files)
Media data represents raw audio or video material and is stored in individual media files. Every
time you record a piece of video or audio material into an application, you are creating a media
file containing media data. Audio media data is
stored as samples (such as 44,100 or 48,000 samples per second of recording) while video media
is typically stored as frames (24, 25, or 30 frames
per second of recording).
The size of each media file depends on how
much audio or video material it contains. For
example, if you record ten minutes of continuous video material at a high resolution, you
might end up with a video media file that is
1.8 GB in size, whereas a one minute recording
at the same resolution might result in a 180 MB
file. Media files tend to be large, since high quality audio and video signals are data intensive.
Video data generally requires considerably
more storage than audio data.
MXF Media Data Locations On the volumes you
have designated for media storage, Avid editing
applications store all MXF media:
This guide refers to the root folder name (Avid
MediaFiles) whenever referencing this folder.
OMF Media Data Locations On the volumes you
have designated, Avid editing applications store
all OMF media in the OMFI MediaFiles folder.
Metadata
Metadata is used to describe:
• Information about each media file. This
may include sample rate, bit depth, clip
names, the name of the videotape from
which the media file was captured, and
even timecode values that specify where a
file was used in a Pro Tools session.
• Information about Pro Tools sessions or
other sequences, including what files are
used, where they appear in a Timeline, and
automation.
• For AAF or OMF sequences, metadata also
includes information about unrendered
AudioSuite effects (such as real-time EQ)
on Avid workstations. Pro Tools skips unrendered effects on import. Rendered effects are media files, that can be imported
or skipped on import into Pro Tools.
• For AAF or OMF sequences, information
about automation (clip-based gain or keyframe gain).
• When stored locally, MXF media is placed in
the Avid MediaFiles/MXF/1 folder. The Avid
editing application can also read MXF media
located at Avid MediaFiles/MXF/2, Avid MediaFiles/MXF/3, and so on.
• When stored in a shared environment, MXF
media is placed in a folder called
Avid MediaFiles/MXF/client.1 (where client
represents the name of the client computer).
Chapter 1: Introduction
5
Embedded Media and Linked
Media
There are two ways to handle media files when
exporting AAF or OMF files:
• Embedded media (in which the media files are
embedded in an AAF or OMF sequence)
• Linked media (in which media files are referenced by an AAF or OMF sequence)
Pro Tools lets you import AAF or OMF sequences containing embedded audio files. You
can also import AAF or OMF sequences containing embedded video files, but only if you are importing them to a video satellite track. In such a
case, only the video metadata is imported.
Frame-Rate Accurate Video
Editing and Sample-Rate
Accurate Audio Editing
Avid video editing applications edit with frame
accuracy. This means that in a 30-fps project,
you can edit at 30 different locations for every
one second of video. Pro Tools edits with sample
rate accuracy. In a 48 kHz session, there are potentially 48,000 locations to edit for every second of audio.
When Pro Tools exports an AAF or OMF composition destined for an Avid video editing application, it must ensure that the audio files line up
on frame boundaries. To do this, it might have
to split an existing audio clip into three separate
clips. For example, Figure 1 on page 7 shows a 5frame video clip and a corresponding audio clip.
In Pro Tools, the audio clips might not line up
on video frame boundaries.
In order to export frame accurate audio clips,
Pro Tools splits the audio media on frame
boundaries and fills any gaps with silence.
Figure 2 on page 7 shows the resulting audio
clips that are exported to Avid. See
When you use Export Selected Tracks as
OMF/AFF to export tracks from Pro Tools with
Enforce Avid Compatibility enabled, a number
of additional media files labeled Sample Accurate Edit appear in the Avid bins. These are the
additional media files that Pro Tools creates to
ensure that the Avid editing application receives
frame-accurate audio. You also see the sampleaccurate edit media files if you zoom in on the
imported audio in the Timeline.
6
Pro Tools Avid Unity MediaNetwork Guide
One Pro Tools audio clip
5 frame video clip
The original audio clip does not line up on video frame boundaries
Figure 1. Original audio clip
New audio clip padded
with silence
New audio clip padded
with silence
Three exported audio clips
5 frame video clip
Exported audio clips line up on video frame boundaries
Figure 2. Exported audio clip
Chapter 1: Introduction
7
System Requirements and
Compatibility
About Avid Unity
MediaNetwork Guides
Using Pro Tools within a Unity MediaNetwork
system requires the following;
PDF versions of Avid Read Mes are installed automatically with Avid Unity MediaNetwork software. Also, searchable online help files containing the same information are accessible from the
Help menus in the Interplay Access and Interplay Administrator applications.
• A qualified Mac computer running Mac OS X
or PC running Windows 7
• Pro Tools HD software
Systems running non-HD Pro Tools software can also act as MediaNetwork clients,
but media streaming is not supported in this
configuration.
• An available expansion slot for a Fibre Channel host bus adapter (HBA), and Fibre Channel
connectivity to the Avid Unity MediaNetwork
server
• MediaNetwork client installation software
Avid can only assure compatibility and provide
support for hardware and software it has tested
and approved.
For complete system requirements and a list of
qualified computers, operating systems, hard
drives, and third-party devices, visit:
www.avid.com/compatibility
8
Pro Tools Avid Unity MediaNetwork Guide
You can use any of the following guides as supplementary information for this guide.
• Avid Site Preparation Guide contains information that helps you prepare your site for installing MediaNetwork system hardware.
• Avid Unity MediaNetwork Management Guide
provides information for the setup and day-today management of an Avid Unity Media-Network system and system.
• Avid Unity MediaNetwork Windows Fibre
Channel Client Setup Guide provides information for setting up MediaNetwork client hardware, installing and configuring
MediaNetwork client software, and creating a
network of MediaNetwork clients and other
systems.
These guides and other Avid documentation can
be found on the Avid Knowledge Base. You can
reach the Knowledge Base by clicking Help >
Pro Tools Knowledge Base in Pro Tools, or by
visiting www.avid.com/onlinesupport. To view
or print PDF guides, use Adobe Acrobat Reader.
About the Pro Tools Avid
Interplay Guide
The Pro Tools Avid Interplay Guide describes
how to set up Pro Tools as a client within an
Avid Interplay system, as well as use Pro Tools
and Interplay to exchange sequences between
Avid and Pro Tools users. Please refer to the
Pro Tools Avid Interplay Guide for information
on working with Interplay and Pro Tools.
Support for Avid Unity
MediaNetwork
For support on Avid Unity MediaNetwork, visit
Avid’s online Knowledge Base. You can reach
the Knowledge Base by clicking Help >
Pro Tools Knowledge Base in Pro Tools, or by
visiting www.avid.com/onlinesupport.Online
services are available 24 hours per day, 7 days
per week. Search this online Knowledge Base to
find answers, to view error messages, to access
troubleshooting tips, to download updates, and
to read or join online message-board discussions.
For support on Pro Tools HD, see “About
www.avid.com” on page 10.
Conventions Used in This
Guide
Pro Tools guides use the following conventions
to indicate menu choices and key commands:
:
Convention
Action
File > Save
Choose Save from the
File menu
Control+N
Hold down the Control key
and press the N key
Control-click
Hold down the Control key
and click the mouse button
Right-click
Click with the right
mouse button
The names of Commands, Options, and Settings
that appear on-screen are in a different font.
The following symbols are used to highlight
important information:
User Tips are helpful hints for getting the
most from your system.
Important Notices include information that
could affect your data or the performance of
your system.
Shortcuts show you useful keyboard or
mouse shortcuts.
Cross References point to related sections in
this guide and other Avid guides.
Chapter 1: Introduction
9
About www.avid.com
The Avid website (www.avid.com) is your best
online source for information to help you get the
most out of your Pro Tools system. The following are just a few of the services and features
available.
Product Registration Register your purchase
online.
Support and Downloads Contact Avid Customer
Success (technical support); download software
updates and the latest online manuals; browse
the Compatibility documents for system requirements; search the online Knowledge Base
or join the worldwide Pro Tools community on
the User Conference.
Training and Education Study on your own using
courses available online or find out how you can
learn in a classroom setting at a certified
Pro Tools training center.
Products and Developers Learn about Avid
products; download demo software or learn
about our Development Partners and their
plug-ins, applications, and hardware.
News and Events Get the latest news from Avid
or sign up for a Pro Tools demo.
10
Pro Tools Avid Unity MediaNetwork Guide
Chapter 2: Preparing a Pro Tools Workstation
For MediaNetwork
This chapter is for Unity administrators and describes how to install and configure individual
Pro Tools workstations for use as clients of an
Avid Unity MediaNetwork system.
Installing MediaNetwork
Client Hardware
Installation Overview
• One optical SFP (for the Server switch)
Installing the hardware and software involves
the following process:
Make sure that Pro Tools software is installed
on the workstation.
1
2
Install the MediaNetwork client hardware.
3
Install the MediaNetwork client software.
.
When you update the client software, ensure
that you update the Fibre Channel HBA
drivers and firmware to the versions supported with your current version of MediaNetwork.
Installing Pro Tools
If you plan to configure a Pro Tools workstation
as a MediaNetwork client, ensure that Pro Tools
software (and any audio hardware) are properly
installed. For detailed information, see the
Pro Tools Installation Guide.
The Avid Unity MediaNetwork client hardware
consists of:
• One of the following qualified Fibre Channel
HBA (Host Bus Adapter) cards:
• ATTO Celerity FC-41XS 4 GB HBA
• ATTO Celerity FC-41ES 4 GB HBA
You will need to purchase optical cables separately.
For a complete, current list of qualified
host bus adapters please consult Avid
support.
The cable needs LC optical cable connectors
at both ends.
If a Fibre Channel HBA has ever been installed on your Windows system, you
must remove any unused ATTO .INF files
before installing the ATTO Fibre Channel
HBA. If you do not know how to do this,
please contact your Windows system administrator.
Chapter 2: Preparing a Pro Tools Workstation For MediaNetwork
11
To install the Fibre Channel HBA in a client
workstation:
Shut down and power off your computer and
expansion chassis (if one is present).
1
Open your computer according to the instructions included with it.
2
Plug the optical cable connector into the Fibre
Channel HBA. The connector and the Fibre
Channel HBA are keyed and only fit together one
way. You should hear a click when the cable is
properly seated.
3
Do not try to force the LC optical cable connector into the Fibre Channel HBA connector. There should be no resistance as you
make the connection. If you feel that the optical cable connector does not fit into the Fibre Channel HBA connector, turn the optical cable connector 180 degrees and try to
insert the optical cable connector into the
Fibre Channel HBA connector again.
Release any static electricity by touching the
power supply, or another grounded item.
3
4 Remove the Fibre Channel HBA from the antistatic bag, being careful to handle it only by the
edges.
Determine the correct PCI/PCIe card slot order (visit www.avid.com for the latest information).
5
Fibre Channel HBA
Line up the Fibre Channel HBA with the installation slot, and slide the card into place gently so
the PCI/PCIe connector is aligned with the correct PCI/PCIe slot.
6
Green and Yellow LEDs
Press down firmly on the card with even pressure. The connector should click into place in
the PCI/PCIe slot.
7
optical cable
To attach the card bracket to the computer
mounting bracket, fasten the card in place using
a screw or latch down the securing bracket if one
is built in.
8
LC optical connector
Connecting the optical cable to the Fibre Channel
HBA
If the other end of the cable is not yet connected to the MEDIASwitch, do so now. For detailed instructions, see the Avid Unity
MediaNetwork Configuration Guide and the Avid
Unity MediaNetwork Site Preparation Guide.
4
To connect a Fibre Channel optical cable to the
Fibre Channel HBA:
Locate the optical cable with the LC optical cable connector (dual plug) on the end.
1
2 Remove the protective covers from the following:
• LC optical connector on the optical cable
• Fibre Channel HBA in your computer
12
Pro Tools Avid Unity MediaNetwork Guide
Fibre Channel HBA LED States
The LEDs on the Fibre Channel HBA indicate
whether or not the card is functioning correctly.
Table 1. ATTO Celerity FC-41ES and FC-41XS 4 Gb Fibre Channel HBA LED states
LED
LED State
Meaning
Link
Green
Indicates that a supported hardware driver is loaded for the ATTO
Celerity card in its host system, and that another hardware device is
detected at the other end of the connected fibre cable.
2 GB
Green
Indicates that the HBA is running in 2Gb mode.
4 GB
Amber or Green
Indicates that the HBA is running in 4Gb mode.
Chapter 2: Preparing a Pro Tools Workstation For MediaNetwork
13
Installing MediaNetwork
Client Software
Double-click the Avid Unity Installer icon. A
login dialog opens.
3
Type a user name and password for a user account with administrator permissions. The Avid
splash screen opens.
4
The MediaNetwork client software lets the Mac
or Windows Fibre Channel-equipped client log
in to the MediaNetwork File Manager and to
map accessible workspaces. The client software
is supplied on the MediaNetwork Release DVDROM in the Mac or Windows client kit.
You must have a supported version of Mac
OS X or Windows 7 installed before you install the MediaNetwork client software.
Installing MediaNetwork client software involves the following steps:
1
Install the Fibre Channel Controller driver.
2
Install the MediaNetwork client software.
5
Click Continue.
6 Read the license agreement and click Accept.
The Avid Unity Install window opens. If you
click Decline, then the installation ends.
Select the Easy Install option to install all the
necessary software on the Avid drive.
7
8 Click Install. A dialog opens, stating that no
other applications can be running while the installation is in progress.
Click Continue. All applications running on the
workstation quit and a dialog opens, asking
which client software you want to install.
9
Installing the Fibre Channel
Controller Driver
10
• If you are installing the MediaNetwork software on an Avid, click MediaNetwork, and
then click Install. The MediaNetwork software is installed in the Avid Unity folder on
the Macintosh HD drive.
After you install the Fibre Channel adapter
board in the client, you need to install the latest
Fibre Channel adapter driver. The Avid Unity
MediaNetwork DVD-ROM contains an ATTO™
driver specific for your board. See the Avid Unity
Media Engine and Avid MEDIArray XT ReadMe
for the instructions on loading the driver and
firmware if needed.
Installing the MediaNetwork
Client Software
To install the MediaNetwork client software (Mac):
Insert the MediaNetwork DVD-ROM into the
OS X client DVD-ROM drive. The MN x.x DVDROM icon appears on the desktop, where x.x is
the software version number.
1
2 Double-click the MN x.x DVD-ROM icon. The
MN x.x window opens.
14
Pro Tools Avid Unity MediaNetwork Guide
Do one of the following:
• If you are installing the MediaNetwork software on a Pro Tools Mac client, click MediaNetwork for Pro Tools, and then click
Install. The MediaNetwork software is installed in the Avid Unity folder on the Macintosh HD drive.
11 Click OK. A dialog opens, asking if you would
like to Continue, Quit, or Restart the Mac OS X
client.
12
Click Restart. The Mac OS X client reboots.
To install the MediaNetwork client software
(Windows):
Insert the MediaNetwork DVD-ROM in the
DVD-ROM drive. The DVD-ROM is set to start
automatically and open the Avid Unity Installation window. If the DVD-ROM does not start automatically, start the installation manually as
follows:
1
• Double-click the My Computer icon on the
desktop. The My Computer window opens.
• Right-click the DVD-ROM icon, and select
Play. The Avid Unity Installation window
opens.
2
Click Product Installers.
Setting the Date and Time
You need to correctly set the date, time, time
zone, and daylight savings time on your computer to be able to use the Synchronize Time
with Server function for your MediaNetwork client.
To set the date, time, and time zone on Mac OS X:
Select Apple System Preferences. The System
Preferences window opens.
1
Click the Date & Time icon. The Date & Time
window opens.
2
Click the Date & Time tab. The date and time
properties appear.
3
Click MediaNetwork Components on the list of
available products.
4
Click Install Fibre Attached Client on the list of
MediaNetwork installers. The Question dialog
opens, listing the prerequisite software needed
for installation.
5
3
4
In the Today’s Date section, click the arrows
before and after month and year to change the
month and year values.
Click the correct day of the month in the calendar.
In the Current Time section, click the hours,
minutes, or seconds, and then click the up or
down arrow to change the time values.
• If all the software is installed, click Next
and continue with step 5. The InstallShield
Wizard dialog opens.
6
• If some of the software is not installed,
click Cancel to exit the installer. Install the
prerequisite software, and go to step 1 to
begin the MediaNetwork installation again.
7 Click the Time Zone tab. The time zone map
appears.
Accept the default values presented by the InstallShield Wizard. The Setup Status screen appears, showing the installation progress
indicator while the software is being installed.
The InstallShield Wizard Complete opens.
5
Click the map near your location to highlight
the time zone.
8
Click the Network Time tab. The network time
properties appear.
9
10
Close the Date & Time window.
11
Reboot the client.
Select “Yes, I want to restart my computer
now,” and then click Finish to complete the client
software installation.
6
7
Reboot the client.
Chapter 2: Preparing a Pro Tools Workstation For MediaNetwork
15
To set the date, time and time zone on Windows 7:
Right-click the clock icon on the taskbar. A
menu will appear.
1
2 Choose Adjust Date/Time from the menu. The
Date and Time dialog will appear.
3
Click the Change date and time... button.
4
Set the date and time to the correct values.
5
Press OK to close the window.
6 Click the Change Time Zone button and select
the correct time zone.
Make sure that “Automatically adjust clock for
Daylight Saving Time” is selected.
7
8 Click OK to save your changes, then close the
Date and Time Control Panel.
16
Pro Tools Avid Unity MediaNetwork Guide
Chapter 3: Configuring a Pro Tools System as
a MediaNetwork Client
This chapter describes how to use MediaNetwork client software to establish your Pro Tools
workstation as a MediaNetwork client, and also
contains additional details on using Pro Tools in
a MediaNetwork system.
Getting Started Using a
Workstation as a
MediaNetwork Client
Logging into a MediaNetwork
System
After installing MediaNetwork hardware and
client software to your workstation, you must
log into the MediaNetwork system in order to
configure and mount MediaNetwork drives.
MediaNetwork administrators should provide users of each Pro Tools client with an
individual username and password. If you
do not have a password, contact your administrator.
To get started using your workstation as a
MediaNetwork client, follow these steps:
Log into MediaNetwork: See “Logging into a
MediaNetwork System” on page 17.
1
Assign the workspace drive letter: See “Assigning the Workspace Drive Letter” on page 18.
2
Mount a workspace on your Pro Tools client:
See “Mounting and Unmounting Workspaces” on
page 19.
3
To log into the MediaNetwork system:
1
Do one of the following:
Mac: If the Connection Manager alias icon is not
available, select Go > Applications, and then double-click the AvidUnity folder. In this folder,
double-click the UnityConnectionManager file.
Windows: If the Connection Manager icon is
not available in the Windows taskbar, select
Start > All Programs > AvidUnity > Avid Unity Connection Manager.
Chapter 3: Configuring a Pro Tools System as a MediaNetwork Client
17
2
Do one of the following:
Mac: Double-click the Connection Manager
alias icon on the desktop, or double-click the
Connection Manager alias icon in the dock, and
then select Connections > Manage Connections.
Windows: Click the Connection Manager icon
in the Windows taskbar, and select Manage Connections.
If you are not logged in with a valid MediaNetwork user name and password, you are
prompted to supply them before the Avid Unity
Connection Manager dialog opens.
3
In the Network Logon dialog (Macintosh) or the
Login dialog (Windows), type a valid MediaNetwork user name, password, and Domain name
(if necessary), and click OK.
The Avid Unity Connection Manager dialog
opens and displays a list of all the MediaNetwork workspaces to which you have access.
Assigning the Workspace
Drive Letter
(Windows Only)
MediaNetwork workspaces (drives) are automatically assigned a sequential series of alphabetical letters starting with the letter f. For example, a MediaNetwork system containing three
workspaces would be assigned the drive letters f,
g, and h, respectively.
If your MediaNetwork client contains any local
drive that shares a letter (such as f) with a Unity
workspace, you must re-map the Unity workspaces so that drive letters on the Pro Tools client do not overlap with drive letters on Unity
workspaces.
18
Pro Tools Avid Unity MediaNetwork Guide
To re-map workspace drive letters:
Click the MediaNetwork taskbar icon, and
choose Configure from the pop-up menu.
1
In the Avid Ethernet Attached Client dialog,
click Advanced. The Advanced Connection Manager Options dialog appears.
2
From the “Assign Workspace Drive Letters
Starting With” pop-up menu, select the letter to
which the first workspace will be assigned.
(Make sure to select a letter whose range of sequential letters does not include any letters assigned to drives on your Pro Tools client.)
3
Select “Synchronize the System Clock with the
Server Clock.” This is necessary to help prevent
time-related title creation and access problems
by synchronizing the time of the MediaNetwork
client to the time of MediaNetwork File Manager.
4
5 If you want to be notified when the status of a
workspace connection is lost, select the relevant
option.
6
Click OK to apply changes.
Mounting and Unmounting
Workspaces
Mounting a workspace to your Pro Tools workstation is equivalent to connecting to a network
drive or mounting a FireWire drive to your computer. Once the drive is mounted, you can connect to that workspace, stream media from it,
save media to it, and unmount it.
To mount or unmount Unity workspaces using
your Pro Tools client:
1
New Session dialog
Open the Connection Manager.
2 In the Connection Manager window, select the
Workspaces that you wish to mount or unmount.
If mounting a workspace, and you want the
Pro Tools client to automatically mount these
workspaces each time you log into the MediaNetwork system, select the option at the bottom
of the dialog.
3
3 In the New Session dialog, select an Audio File
Type for the session that is compatible across all
workstations.
Select a Sample Rate for the session that is
compatible across all workstations.
4
Select a Bit Depth for the session that is compatible across all workstations.
5
6
4
Click OK.
Click Apply.
Configuring Pro Tools
Session Settings for a New
Session
The following describes the recommended session settings for creating a new Pro Tools session when working in a MediaNetwork system.
Pro Tools Session Naming dialog
Name the session and save it to an Avid Unity
MediaNetwork workspace.
7
To create a new Pro Tools session for Avid Unity
MediaNetwork:
1
In Pro Tools, choose File > New Session.
2
If the Quick Start dialog opens, s
Chapter 3: Configuring a Pro Tools System as a MediaNetwork Client
19
Audio File Type
Bit Depth
Pro Tools supports AIFF and BWF (.WAV) audio files natively. The BWF sub-formats RF64
and WAVE Extended are also supported.
It is preferable for all participants in the system
to agree on a standard, universal bit depth for
the sake of compatibility and to avoid media
conversion. Many facilities standardize on 24bit audio, which offers higher audio quality than
16-bit, and is more universally supported than
32-bit floating point audio.
Avid video editing applications do not support RF64 audio files. Standard.WAV format is recommended when working in a
shared media environment with video.
All Sound Designer II files must be converted to a Windows-compatible format.
For the best media compatibility between
Pro Tools workstations and Avid workstations,
you should choose to work with Broadcast WAV
media files. Make sure the Audio File Type popup menu in the New Session dialog is set to BWF
(.WAV) when you are creating a new session.
The WAV file format is required when working with audio files containing field recorder metadata.
Sample Rate
Pro Tools HD supports sample rates up to
192 kHz, but other Pro Tools and Avid workstations only support lower sample rates. Therefore, when working in mixed MediaNetwork systems, it is vital to use sample rates for shared
media that are supported on all workstations.
It is preferable for all participants in the system
to agree on a standard, universal sample rate for
the sake of compatibility and to avoid media
conversion. Many facilities choose 48 kHz,
which is the industry standard for post production and broadcast applications.
20
Pro Tools Avid Unity MediaNetwork Guide
For current compatibility information on
supported Pro Tools systems and Avid Unity
MediaNetwork, visit www.avid.com.
Performance Characteristics
You should experience no functional difference
between working with Pro Tools attached to a
Unity MediaNetwork system or working with
Pro Tools attached to local storage. However,
due to the architectural differences between
Unity and local storage, some subtle differences
may be noticeable.
Disk Cache Performance
Enhancements
Pro Tools HD software version 10 adds a RAMbased Disk Cache system. With it, audio is
loaded into RAM for instant playback, increasing performance significantly, especially with
networked storage (such as a MediaNetwork
system).
Pro Tools 10 also lets you use Elastic Audio
with MediaNetwork.
Allocating a generous amount of RAM to Disk
Cache allows for higher track counts over Unity,
closer to standard Pro Tools system maximums.
When playing back large or complex sessions
(especially from networked storage), performance is significantly improved by caching all
audio in the timeline to RAM, so it can be useful
to know how much of the audio has been cached.
To check Disk Cache status:
Open the System Usage dialog by clicking
Windows > System Usage.
1
2 The Timeline Cached gauge displays the percentage of audio in the timeline that has been
cached to RAM. If the Timeline Cached gauge is
at 100%, all audio in the Pro Tools timeline has
been cached to RAM.
The amount of audio that can be cached to
RAM is dependent on the amount of RAM
allocated to Disk Cache in the Playback
Engine dialog in Pro Tools. In cases where
the total size of all audio on the timeline
exceeds the amount of allocated RAM, the
Timeline Cached gauge will not reach
100%.
For more information on Disk Cache and how to
configure it, see the Pro Tools Reference Guide.
Sharing Allocation Groups and
Media
Audio and video files can be shared among several MediaNetwork clients. However, keep in
mind the following restrictions when sharing
Allocation Groups and files:
• Placing audio files for Pro Tools clients in a
separate allocation group from the video files
can yield higher throughput and performance,
but is not necessary under most circumstances.
• Pro Tools clients cannot use files that are in a
shared uncompressed allocation group.
• Each Avid video editing client that is using
dual-stream 1:1 video must have dedicated access to the single-user allocation group containing the video files. No other clients can
share the video files while these clients are using them.
Pro Tools System Usage dialog
Chapter 3: Configuring a Pro Tools System as a MediaNetwork Client
21
• Only one Pro Tools client can access a finishing allocation group containing 1:1 video files.
The allocation group may not be used simultaneously by a video editing client, and the
Pro Tools client can only play a single stream
of video.
• Up to three Pro Tools clients and one video editing client can access an allocation group containing 3:1 or lower compressed video files.
• In an environment with at least one Avid
Media Composer client running two streams
at 1:1 video resolution, the maximum number
of clients that can normally be supported is
seven.
• Each finishing video allocation group must
connect directly to a MEDIASwitch port.
Opening Files
Pro Tools periodically opens and closes files (for
example, to buffer them for playback). When using MediaNetwork storage, the file open process
is somewhat slower than with local storage. This
is most noticeable when first opening an existing session.
22
Pro Tools Avid Unity MediaNetwork Guide
Sharing Files
Sharing Session Files
To avoid machine conflicts among multiple users and avoid general performance problems, no
two Pro Tools clients should open the same session at the same time. Only one Pro Tools client
should have a particular session open at any
given time.
Sharing Video Files
Pro Tools clients with Avid video peripherals
(such as Avid Mojo, Avid Mojo SDI, and AVoption|V10) can share JFIF and MXF video files
with other MediaNetwork clients. Pro Tools
cannot destructively modify video files.
Sharing Audio Files
Pro Tools clients can share audio files in an allocation group with other MediaNetwork clients. When working with shared audio files, it is
recommended that you use the Duplicate command to make a copies before applying any destructive edits.
MXF and OMF Files
Destructive Editing
The following Pro Tools features can destructively modify audio files:
• Pencil Tool
• AudioSuite in Overwrite Files mode
Rendering an AudioSuite effect in Overwrite
Files mode will destructively modify the affected clips, however, fades and metadata
are preserved.
• Destructive Record
• Compact Selected
Pro Tools treats all MXF and OMF media that
are both created by Avid and stored on Unity
shared storage as read-only. Consequently, destructive editing tools cannot be used to modify
MXF and OMF media files. However, you can delete or overwrite MXF and OMF files.
Because Pro Tools creates both MXF/OMF and
non-MXF/OMF media files, these destructive
editing tools can be used on non-MXF/OMF media created by Pro Tools. When you are working
in a MediaNetwork system, you should always
create a copy of an audio file before applying a
destructive change.
• DestructivePunch Record
• DigiBase metadata entry/editing
When working with shared audio files, it is recommended that you use the Duplicate command
to substitute copies before applying any destructive edits. This avoids the problem of modifying a file referenced by another session.
Use the Duplicate or Consolidate commands
in Pro Tools to make non-OMF copies of audio files for destructive editing.
To substitute a copy of a shared file:
In Pro Tools, select the clip you want to copy in
the Edit window.
1
2
Choose Edit > Duplicate.
Chapter 3: Configuring a Pro Tools System as a MediaNetwork Client
23
24
Pro Tools Avid Unity MediaNetwork Guide
Chapter 4: Avid Unity MediaNetwork
Workflows for Pro Tools
This chapter covers workflows for using an Avid
editing application (such as Media Composer)
and Pro Tools to exchange AAF and OMF sequences using MediaNetwork shared storage, as
follows:
• Exporting audio and video from
Media Composer
Exporting Audio and Video
from Media Composer
To export sequences from Avid video editing applications for import into Pro Tools, you can
choose from the following methods:
• Importing audio and video into Pro Tools
• Using the Send To Templates to export an
AAF or OMF sequence
• Exporting audio from Pro Tools for Avid
video editing applications
• Manually exporting an AAF or OMF sequence
• Importing audio into an Avid video editing
application from Pro Tools
• Checking a sequence into Avid Interplay for
Pro Tools (Avid Interplay system required)
• Synchronizing audio with an Avid sequence
For more information on exporting Avid sequences, see the documentation that came
with your Avid editing application.
For information on working with Interplay,
see the Pro Tools Avid Interplay Guide.
Chapter 4: Avid Unity MediaNetwork Workflows for Pro Tools
25
Using the Send To Templates to
Export an AAF or OMF Sequence
from Media Composer
The Send To Templates let you create one AAF
sequence that references audio and video files
used in the sequence, and save it to the volume
selected in your Avid Preferences.
To use the Send To Pro Tools templates:
1
Select a sequence in a bin.
Choose File > Send To > Pro Tools on Unity,
then choose one of the following options:
2
Link to Audio and Video Creates an AAF se-
quence that links to existing audio and video
wherever possible and only creates new media
files for effects that have not been rendered.
This is the fastest and most storage-efficient
way to export a sequence.
Choose this option for a scenario in which
Pro Tools will link to the same media files as the
current Avid sequence. Use this setting if the
media files are currently stored on volumes that
are suitable for Pro Tools media playback.
QuickTime–Link to Audio Creates an AAF sequence that links to existing audio, and creates a
new QuickTime movie. Choose this option when
exporting a sequence for a Pro Tools system that
does not have an Avid video peripheral attached.
3 If you want to view or change export settings,
click the Options button, and then make any
changes. If you make any changes, you can use
the Save As Template button to create a new template.
This workflow assumes that you use the default values. This means that you are exporting using the Project sample rate, audio
file format, and sample bit depth.
4
Click Set.
Navigate to the location where you want the
AAF or OMF files to reside.
5
Click OK.
Video Mixdown–Link to Audio Creates an AAF
6
sequence that links to existing audio and includes editing metadata as well as a video mixdown in the video format defined by Media Creation settings. When imported into Pro Tools,
the video mixdown and metadata are displayed
in two separate video tracks on the Timeline.
The Avid video editing application exports the
files to the destination volume. If the Avid video
editing application has to transcode video files
to a new resolution, render effects, or perform
audio file conversions, a new sequence appears
in the bin with the name filename.Export.01,
and a new master clip appears in the bin with the
name filename.new.01.
Choose this option for any scenario in which
Pro Tools will link to the same media files as the
current Avid sequence.
26
Send To dialog (LInk to Audio and Video options
shown)
Pro Tools Avid Unity MediaNetwork Guide
Manually Exporting an AAF
Sequence from Media Composer
Manually exporting an AAF sequence from an
Avid editing application involves more steps
than using the Send To Templates, but it provides more flexibility.
You will need to render all video effects before manually exporting the sequence.
Once all effects have been rendered, export the
sequence as an AAF sequence.
To manually export an AAF sequence:
1
Select the sequence in the bin.
2
Select File > Export.
Type a name and select a location for the exported sequence.
3
Select Export to Pro Tools from the Export Settings menu at the bottom of the Export As dialog.
4
5 Click the Options button to open the Export to
Pro Tools Settings dialog. Verify the settings:
• For Export As, select AAF.
• Select the Include All Video Tracks in Sequence option. When the sequence is imported into Pro Tools. All of the video
tracks will be “flattened” so that the imported sequence shows only a single video
stream.
Export Settings–Export To Pro Tools dialog,
Video/Data Details tab
6 In the Video/Data Details tab, select one of the
following from the Export Method pop-up
menu:
Link to (Don’t Export) Media The Pro Tools session will link to the same video files as the current Avid sequence. Use this setting if the video
files are currently stored on a volume suitable
for Pro Tools video playback.
Copy All Media New complete video files will be
created on the designated volume.
Consolidate Media Similar to Copy All Media,
but only the parts of the video clips which are
actually used in the Timeline are copied. Use
this setting to copy the video files to a volume
suitable for Pro Tools video playback.
Chapter 4: Avid Unity MediaNetwork Workflows for Pro Tools
27
Video Mixdown The exported AAF sequence will
reference a video mixdown. This setting lets you
have a choice of whether to export the video
mixdown alone or the video mixdown along with
additional video track edits. The choice depends
largely on the version of Pro Tools to which you
are exporting. Pro Tools 7.2 and higher can
show the video mixdown alongside video edits;
in this case, you should select both the video
mixdown and the video edits. For versions of
Pro Tools lower than 7.2, you should export the
video mixdown by itself.
The following settings may also appear under
the Video Details tab, depending on the selected
export method:
While new video files are typically stored in the
OMFI MediaFiles folder (for OMF) or the Avid
MediaFiles folder (for MXF), some workflows let
you choose a different target destination for
video in the Media Destination section of the
Video Details tab, as follows:
Media Destinations Choose where to store cop-
Media Drive This option exports media to the
ied video files.
OMFI MediaFiles folder or Avid MediaFiles
folder on a connected storage drive. Select the
Use Media Creation Settings option to use the
default settings, or deselect that option to
choose a media drive from the pop-up menu.
Handle Length Extends the beginning and end of
the consolidated file by the specified number of
frames. This lets you trim edits later, though the
sequence would need to be re-edited in the Avid
video editing application.
Render Video Effects Always select Render
Video Effects. If you already manually rendered
effects, selecting this option will not create new
files. It is highly recommended that all effects be
rendered manually before exporting the sequence.
Transcode Video To Use this only if you need to
change the video resolution. Pro Tools supports
most SD resolutions supported by Avid, and
even supports mixed resolutions in the
Pro Tools Timeline, so in most cases there is no
need to spend extra time transcoding the video.
However, if you have video of a resolution which
is not currently supported by Pro Tools, use this
setting to transcode it to a supported resolution.
28
If your Pro Tools system is running on a
slower computer, you may be able to reduce
some of the CPU load in Pro Tools by
transcoding the video to 1:1 on export. 1:1
video is uncompressed, and consequently it
does not need to be decompressed before
playing back. However, 1:1 video requires
significant amounts of storage space.
Pro Tools Avid Unity MediaNetwork Guide
Folder This option exports video media to a spe-
cific folder. Select the Use Same Folder as AAF
File option to export the video media into the
same folder you designated for exporting the
AAF sequence, or deselect this option to select a
specific folder location for the media.
Embedded in AAF This option embeds the video
media in the AAF sequence that is exported
from the Avid video editing application.
Pro Tools cannot play video that is embedded in an AAF sequence, but it can read the
video editing metadata when imported into
a satellite track. Do not use this option if
you want to import the video itself into
Pro Tools.
The following settings may also appear under
the Audio Details tab, depending on the selected
export method:
Render All Audio Effects Select the Render All
Audio Effects option so that all audio effects are
rendered before export. If you already manually
rendered effects, selecting this option will not
create new files. It is highly recommended that
all effects be rendered before exporting the sequence.
Include Rendered Audio Effects Select the In-
Media Destination section of the Video Details tab
Click the Audio Details tab, and select one of
the following from the Export Method pop-up
menu:
7
Link to (Don’t Export) Media The Pro Tools session will link to the same audio files as the current Avid sequence. Use this setting if the audio
files are currently stored on a volume suitable
for Pro Tools audio playback.
Copy Media New complete audio files will be
created on the designated volume.
Consolidate Media Similar to Copy All Media,
but only the parts of the audio which are actually
used in the Timeline are copied. Use this setting
to copy the audio files to a volume suitable for
Pro Tools audio playback.
clude Rendered Audio Effects option. Otherwise, the exported sequence will include the
original audio files without any AudioSuite effects from the original sequence—even if those
effects were previously rendered.
Convert Audio Sample Rate/Bit Depth/File Format Select Project for any of these, and the cur-
rent Audio Project Setting will be used.
While new audio files are typically stored in the
OMFI MediaFiles folder (for OMF) or the Avid
MediaFiles folder (for MXF), some workflows let
you choose a different target destination for audio in the Media Destination section of the Audio Details tab, as follows:
Media Drive This option exports audio media to
the OMFI or Avid MediaFiles folder on connected storage. Select the Use Media Creation
Settings option to use the default settings, or deselect that option to choose a media drive from
the pop-up menu.
Folder This option exports audio media to a spe-
cific folder. Select the Use Same Folder as AAF
File option to export the media into the same
folder you designated for exporting the AAF sequence, or deselect this option to select a specific folder location for the media.
Chapter 4: Avid Unity MediaNetwork Workflows for Pro Tools
29
Embedded in AAF This option embeds the audio
media in the AAF sequence that is exported
from the Avid video editing application. Unlike
embedded video, Pro Tools can import and play
audio which is embedded in an AAF sequence.
Embedding audio within the AAF sequence
makes file management much simpler because
there is only one file to move—the sequence.
There is a limit of 2 GB for embedded AAF.
Pro Tools cannot play video that is embedded in an AAF sequence, but it can read the
video editing metadata when imported into
a satellite track. Do not use this option if
you want to import the video itself into
Pro Tools.
8 Click Save or Save As in the Export Settings
dialog:
• Click Save to use the specified settings
whenever Export to Pro Tools is selected
from the Export Settings menu. These settings will also be used when choosing any
of the options located at File > Send To >
Pro Tools to Unity.
• Click Save As to save these settings as a
preset with a different name. These settings
can then be recalled in the Export dialog. If
you click Save As instead of Save, the Export to Pro Tools settings will not be
changed.
9 Click Save in the Export As dialog. (The Export Settings cannot be saved until you have selected a target drive for both audio and video.)
When the export is complete, you are ready to
import the file into Pro Tools.
30
Pro Tools Avid Unity MediaNetwork Guide
For more information on opening and importing AAF sequences in Pro Tools, see
“Importing Audio and Video into
Pro Tools” on page 31. For more information on the Import Session dialog, see the
Pro Tools Reference Guide .
Checking In Sequences to
Interplay for Pro Tools Clients
The Avid Interplay media management system
can be used in tandem with an ISIS network to
manage media sharing between Pro Tools and
Avid video editing application clients. For more
information on checking in sequences to Interplay for Pro Tools users, see the Pro Tools
Avid Interplay Guide.
Importing Audio and Video
into Pro Tools
5
The New Session From dialog will appear.
To import sequences exported from Avid video
editing applications into Pro Tools, you can
choose from the following methods:
• Importing an AAF or OMF sequence as a
Pro Tools session
• Importing an AAF or OMF sequence into an
existing Pro Tools session
• Importing a video mixdown into Pro Tools
• Importing an AAF sequence into Pro Tools
from Interplay (Pro Tools Avid Interplay
Option and an Avid Interplay system required)
New Session From dialog
Select the I/O Settings to use for the session.
Several pre-configured I/O Settings are included
with your system, or you can select a custom I/O
Setting that you have created.
6
7
Click OK.
Name your session in the subsequent dialog
box.
8
Importing an AAF or OMF
Sequence as a Pro Tools
Session
The easiest way of using Pro Tools to edit a sequence exported from an Avid video editing application is to open it as a new session.
9
Click Save.
The Import Session Data dialog appears.
To open an AAF (or OMF) sequence as a Pro Tools
session:
1
Launch Pro Tools.
2
Choose File > Open Session.
In the Open Session dialog, navigate to the
AAF or OMF sequence you want to import.
3
4
Click Open.
Import Session Data dialog
Chapter 4: Avid Unity MediaNetwork Workflows for Pro Tools
31
Pro Tools lets you open and import OMF or
AAF sequences that reference audio files
with mixed sample rates and/or bit depths.
Files with sample rates other the than the
sample rate set in the New Session dialog
will be converted to the correct rate.
Importing an AAF or OMF
Sequence into an Existing
Session
You can import an AAF or OMF sequence containing audio and video media into an existing
Pro Tools session.
Any video imported into Pro Tools must be
the same frame rate as video already placed
in the Timeline.
From the Audio Media Options pop-up menu,
choose how you want to import audio files into
Pro Tools:
10
• If the audio files reside on a volume from
which Pro Tools can play back audio, select
Link to Source Media (Where Possible).
• If the audio files reside on a volume from
which Pro Tools cannot play back audio, select Copy from Source Media to copy all audio to the Pro Tools audio storage or
Consolidate from Source Media to copy
only the portions of the audio used in the
Pro Tools Timeline to the Pro Tools audio
storage.
From the Video Media Options pop-up menu,
choose how you want to import video files into
Pro Tools:
11
• If the video files reside on a volume from
which Pro Tools can play back video, select
Link to Source Media.
• If the video files reside on a volume from
which Pro Tools cannot play back video, select Copy from Source Media to copy all
video to the Pro Tools video storage.
12
Change other parameters as desired.
13
Click OK.
Pro Tools will create a new Audio Files folder, a
Video Files folder, a cache.wfm file, and a session file at the designated locations.
32
Pro Tools Avid Unity MediaNetwork Guide
To open and import audio and/or video tracks from
an OMF or AAF sequence:
1
Open an existing Pro Tools session.
Choose File > Import > Session Data, and
choose the AAF or OMF sequence that you wish
to import.
2
Pro Tools cannot play video that is embedded in an AAF or OMF sequence, but it can
read the video editing metadata when imported into a satellite track. Do not use this
option if you want to import the video itself
into Pro Tools.
You can also open an AAF or OMF sequence
by dragging it from any location on your
computer or the DigiBase browser to the
Pro Tools Timeline.
3 From the Audio Media Options pop-up menu,
choose how you want to import audio files into
Pro Tools:
• If the audio files reside on a volume from
which Pro Tools can play back audio, select
Link to Source Media (Where Possible).
• If the audio files reside on a volume from
which Pro Tools cannot play back audio, select Copy from Source Media to copy all audio to the Pro Tools audio storage or
Consolidate from Source Media to copy
only the audio used in the session to the
Pro Tools audio storage.
From the Video Media Options pop-up menu,
choose how you want to import video files into
Pro Tools:
4
• If the video files reside on a volume from
which Pro Tools can play back video, select
Link to Source Media.
• If the video files reside on a volume from
which Pro Tools cannot play back video, select Copy from Source Media to copy all
video to the Pro Tools video storage.
5 In the Import Session Data dialog, deselect any
source tracks that you do not want to be imported. (If you are importing Session Data from
AAF or OMF sequences, all tracks are selected by
default. If you are importing tracks from a
Pro Tools session, no tracks are selected by default.)
6
Click OK.
If there are any errors or clip name truncations, a dialog will appear asking you if you
want a detailed report of the changes. Click
Yes and choose where you want to save the
log.
7 If your audio or video source media is on a volume that is not suitable for playback (shown as a
Transfer volume in the Workspace browser) or if
your MediaNetwork workspace privileges are
read-only, Pro Tools displays a dialog that
guides you to copy the media to a volume designated for Playback or Record. (Click Yes.)
Pro Tools imports the audio and video media to
the Timeline. Audio tracks with sample rates
different than the sample rate of the current
Pro Tools session are converted to the correct
rate.
Now you are ready to edit the audio files in
Pro Tools.
Drive Selection When Importing
Session Data
When using the Import Session Data dialog to
import audio files with Copy or Consolidate
Source selected in the Audio Media Options
pop-up menu, all new audio files are stored on
the volumes designated for their respective target tracks in the Disk Allocation dialog.
Selecting a Unity Workspace When
Importing Session Data
When using the Import Session Data dialog to
import audio files with Copy or Consolidate
Source selected in the Audio Media Options
pop-up menu, all new audio files are stored on
the volumes designated for their respective target tracks in the Disk Allocation dialog.
When importing video files (such as from a CD),
the video files are copied by default to the same
volume that holds the session file. To have the
files copied to another volume, open the Workspace browser, and select T in the volume designation column for all volumes except the volume
where you want the video to be stored. To ensure
that the files are not copied to the root level of
Chapter 4: Avid Unity MediaNetwork Workflows for Pro Tools
33
the volume, create a folder with the session
name on the desired Unity workspace, then create a folder within that session folder named
Video Files.
Exporting Audio from
Pro Tools for Avid Editing
Applications
Importing Sequences into
Pro Tools from Interplay
In Pro Tools, you can export audio tracks for use
in the Avid video editing application using any
of the following commands:
The Avid Interplay media management system
can be used in tandem with an ISIS network to
manage media sharing between Pro Tools and
Avid video editing application clients. For more
information on importing a sequence into
Pro Tools from Interplay, see the Pro Tools
Avid Interplay Guide.
• Exporting selected tracks as an AAF or
OMF
• Bouncing to disk
• Exporting selected clips as files
• Exporting edited audio tracks to Interplay
from Pro Tools (Avid Interplay system required)
Editing Audio in Pro Tools
For other export methods, see the Pro Tools Reference Guide.
Audio files created in the Avid video editing application are either OMF or MXF files, which
Pro Tools cannot edit destructively.
Exporting Tracks as OMF/AAF
Sequences
When you use Pro Tools to perform a destructive edit (such as using AudioSuite processing to
replace the original sound), it creates a new copy
of the file and leaves the original untouched.
See the Pro Tools Reference Guide for detailed information on editing audio files in
Pro Tools.
Use Export Selected Tracks as OMF/AAF to export individual tracks or an entire Pro Tools
session in AAF or OMF format.
Tracks are exported in their entirety and
time selections are ignored.
Volume and pan automation is not retained
on export if Quantize Edits to Frame Boundaries is enabled (Avid Compatibility Mode).
The Movie track cannot be exported to AAF
or OMF from Pro Tools.
34
Pro Tools Avid Unity MediaNetwork Guide
To export selected audio tracks from Pro Tools as
an AAF (or OMF) sequence:
An OMF sequence cannot reference MXF
media files. In the Export Selected Tracks as
OMF/AAF dialog, MXF is only available
when AAF is selected in the Export As popup menu
In Pro Tools, select the tracks you want to export in the Pro Tools session by Shift-clicking
the names of each track.
1
2
Choose File > Export > Selected Tracks as
OMF/AAF.
3
The Export to OMF/AAF dialog will appear.
Ensure that the Target Project Timecode Format pop-up menu displays the correct frame rate
for the Avid project.
6
7
Click OK.
In the Publishing Options dialog, type the
Pro Tools Comment and Sequence Name.
8
Pro Tools Publishing Options dialog
9
Click OK.
Pro Tools will create a sequence with the name
you supply. (The Pro Tools comment appears in
the Avid bin in a Pro Tools Comment column.)
In the Name the AAF/OMF File to Export dialog, navigate to a folder where you can easily locate the Pro Tools composition when it is time to
import it into the Avid video editing application.
10
Export to OMF/AAF dialog
Under OMF/AAF Options, choose AAF (or
OMF) from the Export As pop-up menu.
4
5
Do not save the sequence to the OMFI Media
Files folder or the Avid Media Files folder.
Select Enforce Avid Compatibility.
Enforce Avid Compatibility creates frame-accurate edits, wraps the files as OMFI (unless you
choose MXF), and limits the sample rate options
to 44.1 or 48 kHz. Dithering without noise shaping will be applied to files being exported from
24-bit to 16-bit.
11
Click Save.
In the Please Choose a Folder for Converted
Audio Files dialog, do one of the following:
12
Chapter 4: Avid Unity MediaNetwork Workflows for Pro Tools
35
• If you are exporting to the same storage
that Avid video editing application will be
accessing, navigate to the OMFI MediaFiles
folder (AIFF or WAV files) or the Avid MediaFiles folder (MXF files).
– or –
• If you are exporting to a location that is not
directly accessible to the Avid video editing
application, navigate to a location where
you can easily find the audio files when you
need to copy them over to the Avid computer.
Click Use Current Folder (Windows) or
Choose (Mac).
13
Pro Tools exports the following files:
• The AAF or OMF sequence is saved to the
folder you designated.
• If you exported audio files directly to the
Avid video editing application’s video storage, related media is saved to the appropriate volume and folder (OMFI MediaFiles or
Avid MediaFiles) accessible to the Avid
video editing application.
14
Exporting Audio Files Using
Bounce to Disk
Use the Bounce to Disk command to create premixed files of the current Pro Tools session.
This does not export all of the individual files on
the Timeline, but it does guarantee that the mix
you hear in the Avid video editing application
will be identical to the mix you hear in
Pro Tools, including all panning, effects and automation.
To export audio files using Bounce to Disk:
1
In Pro Tools, finalize the mix.
Select the time range of the session that you
want to export. (All audible tracks in that time
range will be included in the bounce, whether
they are selected or not.)
2
3
Choose File > Bounce to > Disk.
4
In the Bounce to Disk dialog, select the Enforce
Avid Compatibility option.
Do one of the following:
• If you are using the Avid video editing application on the same computer as
Pro Tools and are ready to use it to import
the files you just exported from the Avid
video editing application, exit Pro Tools.
– or –
• If you were unable to save the audio portion
of the AAF sequence directly to storage that
is accessible from the Avid video editing
application, copy the audio files from their
saved location to the OMFI MediaFiles
folder (for AIFF or WAV media) or Avid
MediaFiles folder (for MXF media) on a
drive connected to your Avid system.
36
Pro Tools Avid Unity MediaNetwork Guide
Bounce to Disk dialog
Enforce Avid Compatibility creates frame-accurate edits, wraps the files as OMFI (unless you
choose MXF), and limits the sample rate options
to 44.1 or 48 kHz. Dithering without noise shaping will be applied to files being bounced from
24-bit to 16-bit.
Choose a file type from the File Type pop-up
menu.
5
6
Click Bounce.
In the Publishing Options dialog, type the
Pro Tools Comment and Clip Name.
7
If you selected more than one clip for export, the
Clip Name field will not be available and the
names of the clips will be used for the exported
files.
Importing Pro Tools Audio
Files Back into the Avid
Video Editing Application
After you have checked out the completed audio
stems to the Pro Tools sequence on the Interplay
server, you may want to import the sequence
back into the Avid video editing application.
For more information on importing Pro Tools
audio into an Avid application with Interplay,
see the Pro Tools Avid Interplay Guide.
Publishing Options dialog
8
Choose the Target Project Timecode Format.
9
Click OK.
10 In the Save Bounce As dialog, navigate to the
volume you will use for audio playback in the
Avid video editing application.
• For MXF audio files, ensure the file is saved
to the Avid MediaFiles folder.
• For all other audio files, ensure the file is
saved to the OMFI MediaFiles folder.
11
Click Save.
All audible audio in the selection will be exported to two multi-mono audio files.
Chapter 4: Avid Unity MediaNetwork Workflows for Pro Tools
37
38
Pro Tools Avid Unity MediaNetwork Guide
Index
Symbols
.INF files
removing 11
Numerics
16-bit audio 21
A
AAF
and embedded media 6
Avid support for 4
definition of 4
Pro Tools support for 4
AAF/OMF sequences
exporting from Pro Tools audio tracks 42
from Media Composer 29, 28
importing as a new session 37, 38
about this guide 1
accuracy
frame rate 6
sample rate 6
AIFF audio files 20
allocation groups
and media files 23
Apple Mac Pro
PCI/PCIe slot configurations 60
assigning
drive letter to workspaces 18
ATTO Celerity FC-41ES 4 GB HBA card
LED states 13
system requirements 11
ATTO Celerity FC-41XS 4 GB HBA card
LED states 13
system requirements 11
ATTO FC 3300 2 GB HBA card
LED states 13
system requirements 11
audience of this guide 1
audio file type 20
audio files
and allocation groups 23
compatibility between Pro Tools and Avid
applications 20
editing in Pro Tools 41, 44
importing into Avid from Interplay 45
synchronizing with an Avid sequence
audio stems
exporting to Interplay from Pro Tools 44
importing into Avid from Interplay 45
synchronizing with an Avid sequence
audio streaming 1
audio tracks
cutting into original Avid sequence 46
exporting to Interplay from Pro Tools 44
synchronizing with an Avid sequence
AudioSuite effects
and metadata 5
Avid
compatibility information 8, 10
Avid applications
AAF support for 4
and frame-rate accuracy 6
MXF support for 3
OMF support for 4
Avid DMS ProEncode 2
Avid Interplay Access 2
Avid Interplay Assist 2
Avid Interplay Engine 2
Avid Interplay Transcode 2
Avid Interplay, see Interplay
Avid MediaFiles folder
location 5
Avid Unity Connection Manager dialog 18, 19
Avid Unity MediaManager 2
Avid Unity MediaManager Select 2
Avid Unity MediaManager Server 2
Avid Unity MediaNetwork Management Guide 8
Avid Unity MediaNetwork Site Preparation Guide 8
Index
39
Avid Unity MediaNetwork Windows Fibre Channel
Client Setup Guide 8
Avid Unity MediaNetwork, see MediaNetwork
Avid Unity Transfer Engine 2
B
bit depth 21
Bounce to Disk
exporting audio tracks with 44
BWF (.WAV) audio files 20
C
clients
assigning workspace drive letters to 18
configurations 22, 11, 2
installing hardware for 11, 14
maximum number allowed in MediaNetwork
system 21, 19
possible number of users with MediaNetwork 1
system requirements 8
unmounting a workspace from 19, 17
compatibility 8
between Pro Tools and Avid applications 20
general information 8
components
diagram of 2
configuring
Pro Tools session settings 20
slot configurations 53
workstation as a MediaNetwork client 17
connecting
Fibre Channel HBA to optical cable 12
optical cable to Fibre Channel HBA 12
controls
using Source Monitor controls 33
customer service
Avid contact information 8
40
Pro Tools Avid Unity MediaNetwork Guide
D
date, setting (for use with MediaNetwork) 15
definition
AAF 4, 2
embedded media 6
File Manager 2
IBOD 2
JBOD 2
linked media 6
media data 5
MediaNetwork system 2
metadata 5
MXF 3
PortServer 2
workspace 18
destructive editing 25
diagram
MediaNetwork system 2
optical cable to Fibre Channel HBA 12
Source Monitor controls 33
documentation
PDF 8
drive letters
assigning to workspaces 18
drive requirements 22
drive selection, when importing session data 39
E
embedded media
definition of 6
vs. linked media 6
embedded video
and support for video satellite systems 4
Export Settings dialog 29
Exported Selected Tracks as OMF/AAF command
42
exporting
a portion of a sequence 32
AAF/OMF sequences (manually)
from Media Composer 29, 28
audio tracks in Pro Tools
as an AAF/OMF sequence 42
to Interplay 44
using Bounce to Disk 44
F
Fibre Channel HBA 11
installing in workstation 12
LED states 13
file locations
MXF media files 5
OMF media files 5
File Manager 2
Forward control 33
frame-rate accuracy (Avid applications) 6
G
graphics
update speeds 23
guide
who this guide is written for 1
guide conventions 10
H
hardware
installing on MediaNetwork clients 11
HP xw8400
slot configurations 59
HP Z400
slot configurations 55
HP Z800
slot configurations 56
I
IBODs 2, 22
Import Session Data dialog 37
importing
AAF/OMF sequences
as a new Pro Tools session 37
into an existing Pro Tools session 38, 45
audio and video
as a new Pro Tools session 37
into an existing Pro Tools session 38, 45
INF files
removing 11
installing
Fibre Channel HBA in workstation 12
MediaNetwork client hardware 11, 14
Interplay
after check-in 35, 44
delivering audio stems for 44, 8
exporting audio tracks to Interplay from
Pro Tools 44
handling after check-in 35
importing edited audio stems from Interplay
back into an Avid application 45
location of files after checking in to Interplay for
Pro Tools 35
MediaNetwork capabilities 1
Interplay browser 45
J
JBODs 2, 22
L
linked media
definition of 6
vs. embedded media 6
locations
MXF media files 5
sequence after check-in to Interplay for
Pro Tools 35
logging into a MediaNetwork system 17
M
manually exporting sequences
from Media Composer 29
Mark In control 33
Mark Out control 33
media
embedded 6
linked 6
media compatibility
between Pro Tools and Avid applications 20
Media Compose
exporting AAF/OMF sequences
manually 29
Media Composer
exporting AAF/OMF sequences
via Send To Templates 28
media data
definition of 5
media file locations
MXF 5
OMF 5
media files 5
allocation groups 23
Index
41
MediaNetwork
additional documentation 8, 23, 1
capabilities 1, 8, 19, 20, 11
diagram of system components 2
installing client hardware for 11, 14
logging into 17
number of configurable users 1
performance guidelines 21
support information 9, 2, 8
using clients in the system 17
MEDIASwitch 2
connecting to optical cable 12
metadata
and AudioSuite effects 5
definition of 5
mounting workspaces 19
MXF
Avid support for 3
definition of 3, 25
editing 25
media file locations 5
Pro Tools support for 3
N
New Session dialog 37
O
OMF
and embedded media 6
Avid application support 4
destructive editing 25
editing 25
media file locations 5
Pro Tools support 4
OMFI MediaFiles folder
location 5
optical cable 11
connecting to Fibre Channel HBA 12
purchasing 11
overview
documentation 1
guide 1
installing MediaNetwork client 11
MediaNetwork system 2
Overwrite button 33
42
Pro Tools Avid Unity MediaNetwork Guide
P
Pause control 33
PCI cards 53
for Apple Mac Pro 60, 59, 55, 56
PCIe cards 53
for Apple Mac Pro 60, 59, 55, 56
PDF documentation 8
performance characteristics, with MediaNetwork 23
performance guidelines 21
Play control 33
Playback Engine
configuring for use with MediaNetwork 19
Please Choose a Folder for Converted Audio Files
dialog 43
PortServer 2
PortServer Pro 2
Pro Tools Avid Interplay Guide 9
Pro Tools Export to OMF/AAF dialog 42
Pro Tools Publishing Options dialog 43
Pro Tools
AAF support 4
and sample-rate accuracy 6
configuring
session settings for MediaNetwork 20
19
editing audio files 41, 44
importing
AAF/OMF sequence as a new session
37, 38
MXF support 3
number of configurable users 1
OMF support 4
Pro Tools TDM 5.1.3 21
Pro Tools|24 MIX 21
Pro Tools
configuring
client with MediaNetwork system 2
mounting a workspace 19
system requirements 8
unmounting a workspace 19
R
real time audio or video streaming 1
re-mapping workspace drive letters 18
removing .INF files 11
Rewind control 33
S
U
Sample Rate 20
sample rates
for use with Pro Tools and Avid applications
together 20
sample-rate accuracy (Pro Tools) 6
scrubbing, in Source Monitor 33
Send To dialog 28
Send To Templates
using to export AAF/OMF sequences from
Media Composer 28
sequences
exporting manually
a portion of a sequence 32
from Media Composer 29, 28
Interplay handling after check-in 35
session data
drive selection 39
selecting a Unity workspace when importing
39
sessions
importing an AAF/OMF sequence as a new
session 37, 38
setting
date and time 15
slot configurations 53
for HP xw8400 59, 55, 56
Sound Designer II files 20
Source Monitor controls 33
Splice-In button 33
Step Backward 1 Frame control 33
Step Forward 1 Frame control 33
supported audio file types 20
supported sample rates 20
synchronizing exported Pro Tools audio with Avid
sequence
system requirements 8
unmounting workspaces 19
user interface, update speeds 23
using
client in MediaNetwork system 17
Source Monitor controls 33
V
video files
allocation groups 23
video streaming 1
visual changes, with MediaNetwork 23
W
website 10
workspaces
and mounting automatically 19, 18
definition of 18
mounting 19
selecting when importing session data 39
unmounting 19
workstations
configuring as MediaNetwork clients 17
mounting a workspace 19
unmounting a workspace 19
T
technical support 10
time, setting (for use with MediaNetwork) 15
Timeline
audio tracks cut into original sequence 46
Index
43
Avid
Technical Support (USA)
Product Information
2001 Junipero Serra Boulevard
Daly City, CA 94014-3886 USA
Visit the Online Support Center at
www.avid.com/support
For company and product information,
visit us on the web at www.avid.com