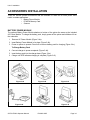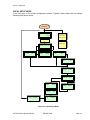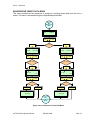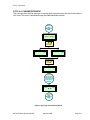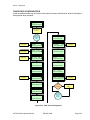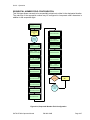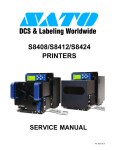
1
HT200e
Direct Thermal Printer
OPERATOR MANUAL
PN 9001103B
SATO America, Inc.
10350A Nations Ford Road
Charlotte, NC 28273
Main Phone: (704) 644-1650
Technical Support Hotline: (704) 644-1660
Technical Support Fax: (704) 644-1661
E-Mail: [email protected]
www.satoamerica.com
© Copyright 2003
SATO America, Inc.
All rights reserved. No part of this document may be reproduced or issued to third parties in any form
whatsoever without the express permission of SATO America, Inc. The materials in this document is
provided for general information and is subject to change without notice. SATO America, Inc. assumes no
responsibilities for any errors that may appear.
Warning: This equipment complies with the requirements in Part 15 of FCC rules for a Class B computing
device. Operation of this equipment in a residential area may cause unacceptable interference to radio
and TV reception requiring the operator to take whatever steps are necessary to correct the interference.
TABLE OF CONTENTS
INTRODUCTION
About This Manual
General Description
Primary Components
Connection Ports
Control Features
Keypad Buttons
1-2
1-3
1-3
1-3
1-5
1-5
TECHNICAL DATA
Physical Characteristics
Power
Processing
Enviromental
Print
Media
Sensing
Interface Modules
Character Font Capabilities
Charcater Control
Symbologies
Other Features
Accessories
Regulatory Approvals
2-2
2-2
2-2
2-2
2-2
2-3
2-3
2-3
2-3
2-3
2-4
2-4
2-4
2-4
INSTALLATION
Unpacking & Parts Identification
Printer Installation
Site Location
Media Selection
Media Loading
Interface Selection
RS232 Serial Interface Specifications
RS232 Interface Signals
RS232 Cable Requirements
Accessories Installation
Battery Power Module
PCMCIA Memory Card
Scanner Connection
PN 9001103B
3-2
3-3
3-3
3-3
3-3
3-5
3-5
3-5
3-5
3-6
3-6
3-7
3-7
OPERATION
Printer Configuration
Entering Alphanumerics & Symbols
Initial Setup Mode
User Mode
Data Maintenance Mode
Copy Print Parameters Mode
Send/Receive Preset Data Mode
Copy Preset Data Mode
Copy Font Mode
Copy Table Data Mode
Copy All Parameters Mode
Country Code Mode
Memory Card Clear Mode
Select Currency Mode
Fixed Formats
PLU Barcodes
Non PLU Bracodes
Price Reductions
Simple Data and Price
VAT Calculation
Shelf Edge Label
Unit Pricing
Euro Pricing
Customizing Label Formats
Configuration Breakdown
Programming Process
Beginning A Customized Label
Normal Field Configuration
Table Field Configuration
Sequential Number Field Configuration
Price Field Configuration
Calendar Field Configuration
Barcode Field Configuration
Copy Configuration
Print Quantity Configuration
Discount Rate Configuration
Tax Rate Configuration
Operational Modes
Online Mode
Table Data Mode
Preset Data Mode
Preset Data Storage
Suspending A Print Job
Reprinting A Label
Data Entry Edit
Operational Adjustments
Eye-Mark Adjustment
Dispenser Sensor Adjustment
Pitch Adjustment
Dispense Stop Position
LCD Brightness Adjustment
PN 9001103B
4-2
4-3
4-4
4-5
4-6
4-7
4-8
4-9
4-10
4-11
4-12
4-13
4-14
4-15
4-15
4-15
4-17
4-18
4-18
4-18
4-19
4-19
4-20
4-20
4-21
4-22
4-23
4-25
4-27
4-29
4-31
4-33
4-35
4-36
4-37
4-38
4-39
4-39
4-40
4-41
4-42
4-43
4-44
4-45
4-46
4-46
4-47
4-48
4-49
4-49
TROUBLESHOOTING
LCD Error Signals
Troubleshooting Table
RS232 Serial Interface Troubleshooting
Hex Dump Printing
ASCII Dump Mode
Check Online Connection
Check Scanner Operation
Test Module Usage
Test Module Dial
5-2
5-3
5-4
5-5
5-6
5-7
5-8
5-9
5-10
MAINTENANCE
Cleaning Procedures
Replacement Procedures
Print Head
Power Switch
Memory Backup Battery
Adjustment Procedures
Print Head Alignment
Print Head Balance
Belt Tension
Eye-Mark Sensor
Dispenser Sensor
Pitch
Dispenser Stop Position
LCD Brightness
Service Modes
Service Mode
Hex Dump Mode
ASCII Dump Mode
Print Head & Life Counter Clear
Test Print Mode
SRAM Clear Mode
6-2
6-3
6-3
6-4
6-4
6-5
6-5
6-5
6-6
6-7
6-8
6-9
6-10
6-10
6-11
6-11
6-12
6-13
6-14
6-15
6-16
PN 9001103B
PN 9001103B
INTRODUCTION
•
•
•
•
SATO HT200e Operator Manual
About This Manual
General Description
Primary Components
Control Features
PN 9001103B
Page 1-1
Unit 1: Introduction
ABOUT THIS MANUAL
This manual is laid out consistent with the product discussed and provides all of the information
required for general printer installation, configuration, troubleshooting, and maintenance. For
specialized programming, refer to the Programming Manual provided with the product.
Step-by-step maintenance instructions are provided with typical problems and solutions. Become
familiar with each section before installing and maintaining the printer.
This manual also incorporates the use of special information boxes. Examples of these boxes
and the type of information provided in each, are below.
WARNING: PROVIDES INFORMATION THAT, IF UNHEEDED, MAY
RESULT IN PRESONAL INJURY.
CAUTION: PROVIDES INFORMATION THAT, IF UNHEEDED, MAY
RESULT IN EQUIPMENT DAMAGE.
NOTE: Provides helpful hints to assist in performing the tasks at hand.
LCD DISPLAY: Provides the specific display that should be visible on
the LCD at that point.
A comprehensive Table Of Contents provided at the front of this manual facilitates rapid
movement within. The contents identify the different Units, Chapters, and Sections. Each
references the page number of their commencement.
The pages of this manual have embedded headers and footers to assist the user in identifying
his or her exact position within the manual. The header provides the section number followed by
its name. The footer identifies the product on the left, the manual’s part number in the center, and
the page number to the right side of the page.
Page enumeration is two-part with each separated by a hyphen. The first character set
references the Unit and the second identifies the page number. Page numbers begin with the
numeral (1) one at the commencement of a new unit and ascends sequentially.
SATO HT200e Operator Manual
PN 9001103B
Page 1-2
Unit 1: Introduction
GENERAL DESCRIPTION
The HT200e is a small, compact printer designed specifically for point-of-usage labeling
applications. It can be used as a stand alone printer with predefined formats or connected to a
PC using an RS232C communications for variable labeling applications.
Figure 1-1a, Primary Components
Figure 1-1b, Primary Features & Components
SATO HT200e Operator Manual
PN 9001103B
Page 1-3
Unit 1: Introduction
Figure 1-1b, Primary Components
CONNECTION PORTS
TYPE
Power
Serial Port
Scanner Port
Test Terminal
FUNCTION
Electrical cord provided with the product. Permits source electrical supply
to the printer for operation.
Permits an RS232C cable to be connected for host computer interface. Is
used for remote configuration and operation.
Allows a barcode scanner to be connected and used in conjunction with
the printer.
Permits a SATO Test Module and/or multimeter to be connected to
troubleshoot electrical circuitry and to measure electrical values when
adjusting potentiometers.
SATO HT200e Operator Manual
PN 9001103B
Page 1-4
Unit 1: Introduction
CONTROL FEATURES
KEYPAD BUTTONS
KEY NAME FULL NAME
0 TO 9
Numeric Keys
Cursor Keys
FNC1
Function1
FNC2
Function2
SET
FEED
FMT
Set
Paper Feed
Format
RCL
Recall
DATE
Date
S/S
PGUP
Start/Stop
Page Up
SHIFT
Shift
DEL
AC
ENTR
Delete
All Clear
Enter
FUNCTION
For entry of numerals, alphabets, and symbols. Keys [1] and [.] are used
for input of symbols.
For scrolling through screen options and moving the cursor.
Sets usage of British Pound (GMP) and unit volume. During input of print
format number, displays menu for managing table data management. In
the print density menu, allows user to change black and red density.
Sets discount rate, exchange rate, and consumption tax. In the print
format input menu, displays name for label and format.
Switches between input of numeric and alphabetical characters.
Feeds media forward one label at a time.
Allows selection of label format.
Calls up the preset menu for management of presets. During input of
alphabetical code data, calls up the code-entry menu for inserting special
symbols. During input of a table item number, allows user to preview the
item’s contents to check for accuracy.
Displays calendar information. Allows adjustment of the calendar when
pressed during Power On.
Allows user to start and stop printing.
Returns user to the previous screen.
Switches between upper and lower case input. Selects the other functions
of a dual-function key.
Deletes data entered one character at a time.
Clears all input data on the screen.
Confirms current action and proceeds to the next step.
SATO HT200e Operator Manual
PN 9001103B
Page 1-5
Unit 1: Introduction
SATO HT200e Operator Manual
PN 9001103B
Page 1-6
TECHNICAL DATA
•
•
•
•
•
•
•
•
•
•
•
•
•
•
•
SATO HT200e Operator Manual
Physical Characteristics
Power
Processing
Enviromental
Print
Media
Sensing
Interface Modules
Processing
Character Font Capabilities
Character Control
Symbologies
Other Features
Accessories
Regulatory Approvals
PN 9001103B
Page 2-1
Unit 2: Technical Data
TECHNICAL DATA
All technical data deemed pertinent has been tabulated below for quick reference. Find the
relative section header and then locate the specific type of technical data in the left column.
PHYSICAL CHARACTERISTICS
Width
5.2 Inches (132 mm)
Height
5.94 Inches (151 mm)
Depth
9.06 Inches (230 mm)
Weight
5.5 Pounds (2.5 Kg)
POWER
Adapter Voltage
Autoswitching 100-120/200-240 VAC, 50-60 Hz
Battery Supply
NiMH, 8.4VDC 2.4 AH
PROCESSING
CPU
32 Bit RISC
FLash ROM
512K Bytes
SRAM
2 Mega-Bytes
ENVIRONMENTAL
Operating Temperature
41° to 104°Fahrenheit (5° to 40°C)
Storage Temperature
-4° to 104°Fahrenheit (-5° to 45°C)
Storage Humidity
Operating Humidity
Maximum 90% RH, Non-Condensing
15 to 80% RH, Non-Condensing
PRINT
Type
Speed
Direct Thermal Only
2.4 Inches Per Second (60 mm/s) Battery Operated
Up to 3 Inches Per Second (80 mm/s) AC Adapter
Resolution
203 Dots Per Inch (8 d/mm)
Print Module (Dot Size)
0.0049 Inches (0.125 mm)
Maximum Print Width
1.89 Inches (48 mm)
Maximum Print Length
3.78 Inches (96 mm)
SATO HT200e Operator Manual
PN 9001103B
Page 2-2
Unit 2: Technical Data
MEDIA
Type
Die-Cut & Fan-Fold Labels, Tags (Face Up Stack), Continuous
Minimum Width
1.1 Inches (28 mm)
Minimum Length
0.63 Inches (16 mm)
Maximum Width
2.0 Inches (51 mm)
Maximum Length
4.0 Inches (103 mm)
Maximum Caliper
0.007 Inches (0.18 mm)
Maximum Roll Diameter
2.95 Inches (75 mm) Wound Face-In
Minimum Core Diameter
1.0 Inches (25.4 mm)
SENSING
Reflective
Eye-Mark
Continuous Form
Sensor not used.
INTERFACE MODULES
RS232C, 4800 to 19.2K BPS
Hardware Ready/Busy Flow Control
Sftware X-On/X-Off Flow Control
Serial Port
Scanner Input
RS232C or TTL
CHARACTER FONT CAPABILITIES
MATRIX FONTS
X1
20 dots W x 50 dots H
X2
8 dots W x 20 dots H
X3
13 dots W x 21 dots H
OCR-B
20 dots W x 24 dots H
Price
16 dots W x 24 dots H (Numeric Only)
Outline 1
28 dots W x 48 dots H (Numeric Only)
Outline 2
48 dots W x 68 dots H (Numeric Only)
Outline 3
26 dots W x 56 dots H (Numeric Only)
CHARACTER CONTROL
Expansion
Rotation
Up to 4X in either the X or Y coordinates
0, 90, 180, or 270 Degrees
Pitch
SATO HT200e Operator Manual
0 to 90 dots
PN 9001103B
Page 2-3
Unit 2: Technical Data
SYMBOLOGIES
Linear
UPC-A/E, EAN-8/13, Code 39, I 2/5, Codabar, Code 128B/C
OTHER FEATURES
Sequential Numbering
Sequential numbering of both numerics and bar codes.
Custom Characters
Graphics
Up to 24 Currency Marks
BW Graphic files in BMP format
Real-Time Clock
Formats
Day, Month, Year
29 Fixed Formats
6 User defined (30 fields/format std, 200 fields/format w/2M)
ACCESSORIES
Battery Pack
NiMH Battery Pack and Charger
Wand Scanner
For scanning input fields
CCD Scanner
For scanning input fields
REGULATORY APPROVALS
Safety
UL, CE, TUV
RFI/EMI
FCC Class B
SATO HT200e Operator Manual
PN 9001103B
Page 2-4
INSTALLATION
•
•
•
•
•
SATO HT200e Operator Manual
Unpacking
Parts Identification
Printer Installation
Interface Selection
Accessories Installation
PN 9001103B
Page 3-1
Unit 3: Installation
UNPACKING & PARTS IDENTIFICATION
Unpack the printer as directed in the following procedure.
1 Place the shipping container (box) upright on a solid, flat surface.
2 Open the box, remove any loose items and the first layer of packing material.
3 Carefully lift the printer and accessories from the box and place them on a solid flat surface.
4 Remove the plastic covers from the packed items and visually inspect for physical damage.
5 Ensure the following components are present:
6 Report damaged property.
PACKED COMPONENTS
Printer (Figure 3-1a)
Power Cord (Figure 3-1b)
Media Spool (Figure 3-1c)
Operator Manual
Programming Manual
(Figure 3-1d)
Software Disk (Figure 3-1e)
SATO HT200e Operator Manual
PN 9001103B
Page 3-2
Unit 3: Installation
PRINTER INSTALLATION
SITE LOCATION
•
Stationed on a solid flat surface
•
Stationed away from hazardous conditions
•
Stationed within operational distance of the host based on interface specificaitons
POWER SUPPLY
Figure 3-2a
Figure 3-2b
Figure 3-2c
MEDIA SELECTION
The size and type of the labels or tags to be printed should have been taken into consideration
before printer purchase. Ideally, the media width will be equal to, or just narrower than, the print
head. Using media that does not cover the print head, will allow the platen roller to tread on it and
wear it out. The media edge will also wear a groove in the platen roller effecting print quality.
MEDIA LOADING
1
Unlatch top housing cover (Figure 3-2a).
2
Lift top housing cover into a vertical position (Figure 3-2b).
3
Apply media to the printer’s media spool (Figure 3-2c).
4
Place the media spool onto the printer’s holder (Figure 3-2d).
5
Unwind approximately one (1) foot of media from the roll (Figure 3-2e).
6
Adjust the media guides loosely against each side of the media (Figure 3-2f).
7
Close the printer and begin operation (Figure 3-2g).
With Dispenser Function
8
Remove approximately 6 inches of labels from backing (Figure 3-2h).
9
Open dispenser cover (Figure 3-2i).
10 Feed media through slot beneath cover (Figure 3-2j).
11 Close top housing cover (Figure 3-2k).
12 Close dispenser cover and begin operation (Figure 3-2l).
SATO HT200e Operator Manual
PN 9001103B
Page 3-3
Unit 3: Installation
Figure 3-3a
Figure 3-3b
Figure 3-3c
Figure 3-3d
Figure 3-3e
Figure 3-3f
Figure 3-3g
Figure 3-3h
Figure 3-3i
Figure 3-3j
Figure 3-3k
SATO HT200e Operator Manual
PN 9001103B
Figure 3-3l
Page 3-4
Unit 3: Installation
INTERFACE SELECTION
The HT200e has two integrated interface connectors accessible on the printer’s left front side.
One is a RS232C serial used for interfacing with a host computer and the other is for use with an
optional scanner to input variable data by reading barcode symbols from a menu sheet.
RS232C SERIAL INTERFACE SPECIFICATIONS
Asynchronous ASCII
Half-duplex communication
Ready/Busy Hardware Flow Control
Pin 9, DTR Control
Pin 4, RTS Error Condition
X-On/X-Off Software Flow Control
Bi-Directional Communication
4800, 9600, 19200 bps
8 bit (selectable)
1 or 2 bits (selectable)
ODD, EVEN, NONE (selectable)
1 Start Bit (fixed), 7 or 8 bits (selectable)
DB9S (female)
DB-9P (male), 50 feet maximum length.
High = +5V to +12V, Low = -5V to -12V
Data Transmission Rate
Data Length
Stop Bit
Parity Bit
Character Format
Connector
Cable
Signal Levels
RS232 INTERFACE SIGNALS
PIN
DIRECTION
SIGNAL DEFINITION
1
2
3
4
6
7
9
Reference
To Host
To Printer
To Host
To Printer
Reference
To Host
FG (Frame Ground)
TD (Trnasmit Data) - Data from the printer to the host computer. X-On/X-Off.
RD (Receive Data) - Data to the printer from the host computer.
RTS (Request To Send) - Always high.
DSR (Data Set Ready) Always high.
SG (Signal Ground)
DTR (Data Terminal Ready) - This signal applies to Ready/Busy flow control.
The printer is ready to receive data when this pin is high. It goes low when the
printer is Busy or off line due to an error condition.
RS232 CABLE REQUIREMENTS
DB9 DB25
HOST
CONNECTION
DB9
PRINTER
1
FG (Frame Ground)
Bi-Directional
1
FG (Frame Ground)
2
3
RD (Receive Data)
To Host
2
TD (Transmit Data)
3
2
TD (Transmit Data)
To Printer
3
RD (Receive Data)
8
5
CTS Clear To Send)
To Printer DB9 - 6
4
RTS (Request to Send)
4
20
DTR (Data Terminal Ready)
To Printer DB9 - 4
6
DSR (Data Set Ready)
6
6
DSR (Data Set Ready)
To host
9
DTR (Data Terminal Ready)
5
7
SG (Signal Ground)
Bi-Directional
7
SG (Signal Ground)
SATO HT200e Operator Manual
PN 9001103B
Page 3-5
Unit 3: Installation
ACCESSORIES INSTALLATION
There are several optional accessories that are available to make the HT200e printer more
useful in certain applications.
• Battery Power Module
• PCMCIA Memory Card
• Scanner
BATTERY POWER MODULE
The optional Battery Power Module attaches to bottom of the printer the same as the included
AC Power Module. To charge the battery pack, simply power off the printer and withdraw it from
the underside.
1
Remove AC Power Module (Figure 3-4a).
2
Insert Battery Power Module in its place (Figure 3-4b).
3
Power on printer to operate. Power off to remove battery pack for charging (Figure 3-4c).
To Charge Battery Pack
4
Connect charger to power receptacle (Figure 3-4d).
5
Insert battery pack into the charger base (Figure 3-4e).
6
Charge until LED indicates charging is complete (Figure 3-4f).
Figure 3-4a
Figure 3-4d
SATO HT200e Operator Manual
Figure 3-4b
Figure 3-4c
Figure 3-4e
Figure 3-4f
PN 9001103B
Page 3-6
Unit 3: Installation
PCMCIA MEMORY CARD
This purchase option provides memory expansion up to 2MB. Perform the procedure below to for
memory card installation.
1
Lift memory card cover (Figure 3-5a).
2
Insert memory card into slot (Figure 3-5b).
3
Press button to eject memory card as necessary (Figure 3-5c).
Figure 3-5a
Figure 3-5b
Figure 3-5c
SCANNER CONNECTION
The scanner option can be used to input variable data by reading barcode symbols from a menu
sheet.
1
Open the interface cover (Figure 3-6a).
2
Connect the scanner to the scanner connector (Figure 3-6b).
Figure 3-6a
SATO HT200e Operator Manual
Figure 3-6b
PN 9001103B
Page 3-7
Unit 3: Installation
SATO HT200e Operator Manual
PN 9001103B
Page 3-8
OPERATION
•
•
•
•
•
•
SATO HT200e Operator Manual
Printer Configuration
Configuration Modes
Fixed Formats
Customizing Label Formats
Operational Modes
Operational Adjustments
PN 9001103B
Page 4-1
Unit 4: Operation
PRINTER CONFIGURATION
The printer may be configured for specific jobs via the operator panel located on the top surface
of the printer. The operator panel is comprised of a keypad and a LCD panel.
Once the printer has been configured, the settings are retained in the battery backup memory.
For additional information regarding the operator panel, refer to Unit 1: Introduction.
ENTERING ALPHANUMERICS & SYMBOLS
Each numeric key of the keypad can also input
alphabets when the SET or SHFT key has been
pressed.
For example, pressing the SET key and then
pressing 2 once yields an A. Pressing 2 again
yields a B.
Refer to the table below.
FNC1
FMT
PG UP
7
8
9
FNC2
RCL
SHFT
4
5
6
SET
DATE
DEL
1
2
3
FEED
S/S
AC
.
0
ENTR
Figure 5-1, Operator Panel
KEY
DEFAULT
WITH SET KEY PRESSED
.
.
()<>,-:;‘
()<>,-:;‘
0
0
Y Z space ½ ¼
y z space ½ ¼
1
1
£*+!&%$=/°
£*+!&%$=/°
2
2
ABC Ä Å Æ Ç
abc ä å æ ç
3
3
DEF Ë É
def ë é
4
4
GHI
ghi
5
5
JKL
jkl
6
6
MNO Ñ Ö Ø
mno ñ ö ø
7
7
PQR
pqr
8
8
STU ß Ü
stu ü
9
9
VWX
vwx
SATO HT200e Operator Manual
PN 9001103B
WITH SHFT KEY PRESSED
Page 4-2
Unit 4: Operation
INITIAL SETUP MODE
Is the first menu in the printer configuration process. Typically, these values will not change
following initial printer setup.
POWER ON
FORMAT NO.
[..]
Use arrow keys to
cursor. Press
ENTR to advance.
HT200e
00
Power = Off
STR/RCL PRESET
INT/RAM OPT CARD
CHECK LABEL
YES
NO
PRINT
NORMAL
DEMAND
REAL-TIME PRINT
ON
OFF
PRE-EDITED PRINT
ON
OFF
GUARD BAR
NORMAL
LONG
CALENDAR PRINT
NO PRINT PRINT
PRICE POSITION
UPPER
LOWER
CALENDAR EXP
DDMMYY MMDDYY
PRICE FONT SIZE
NORMAL
BIG
PRINT PRESET NO.
PRINT NO PRINT
PRICE FORMAT
UK
EUROPE
Figure 4-2, Initial Setup Mode
SATO HT200e Operator Manual
PN 9001103B
Page 4-3
Unit 4: Operation
USER MODE
This menu, like the Initial Setup Mode, allows certain values to be set based on the user/
operator’s needs that typically will not change.
3 + POWER
DATA BIT SETTING
7 BITS
8 BITS
PRINT DARKNESS
L 1 2 3 4 5 D
PRINT SPEED
600 MM/SEC
800 MM/SEC
Use arrow keys to
cursor. Press
ENTR to advance.
PARITY SETTING
ODD EVEN NONE
PROTOCOL
READY/BUSY
XON/OFF
Power = Off
AUTO POWER OFF
ON
OFF
FIXED FORMAT
NO [ . . ]
99: CLEAR
STARTUP DISPLAY
MANUAL ONLINE
CALENDER SETTING
DDMMYY
XX:XX
I/F SETTING
4800 BPS 9600 BPS
800 BPS
HEAD CHECK
NORMAL BARCODE
HEAD CHECK
ON
OFF
BEEP SETTING
ON
OFF
CODE PAGE SET
858
852
PROTO CODE
STANDARD
NON-STANDARD
NON-STANDARD
ETX: 03 HEX
EURO CALC
CM=E
E=CM
REPRINT FUNC
YES
NO
NON-STANDARD
STX: 02 HEX
NON-STANDARD
DEFAULT USER SET
NON-STANDARD
ESC: 1B HEX
NON-STANDARD
EOT: 04 HEX
CALENDAR DISP
NO
YES
NON-STANDARD
SOH: 01 HEX
Figure 4-3, User Mode
SATO HT200e Operator Manual
PN 9001103B
Page 4-4
Unit 4: Operation
DATA MAINTENANCE MODE
Is the primary menu for the maintenance of print data. This chart provides the route to more
specific menus for the transfer and storage of data.
6 + POWER
PARAMETER COPY
PRINTER
CARD
Refer to
Copy All
Parameters
Mode
Refer to
Enter Country
Code Mode
Press
ENTR
Press
Press
EAN COUNTRY CODE
50
Press
Press
To go back.
Press
ENTR
Refer to
Copy Print
Parameters
Mode
DATA STORE / RCALL
PRINTER
HOST
Press
To go back.
Press
PRESET STR / RCALL
CARD CLEAR
Press
ENTR
Press
ENTR
Press
Refer to
Send/Receive
Preset Data
Mode
Press
To go back.
PRESET COPY
PRINTER
Press
ENTR
Refer to
Memory Card
Clear
Mode
Refer to
Copy Preset
Data
Mode
Press
ENTR
Press
To go back.
Press
CARD
Press
Press
To go back.
Press
TABLE STR / RCALL
PRINTER
HOST
Refer to
Copy Font
Mode
Press
ENTR
Press
To go back.
Press
FONT STORE / RCALL
PRINTER
HOST
Press
ENTR
Refer to
Select
Currency
Mode
Press
To go back.
Refer to
Copy Table
Data Mode
Press
To go back.
Press
CURRENCY SELECT
Figure 4-4a, Data Maintenance Mode
SATO HT200e Operator Manual
PN 9001103B
Page 4-5
Unit 4: Operation
COPY PRINT PARAMETERS MODE
This menu provides the flow sequence of copying print parameters from the host and sending
them to the printer or copying from the printer and sending them to the host.
This menu is accessed through the Data Maintenance Mode.
Refer to
Data
Maintenance
Mode
DATA SEND / REC
HT HOST HOST
HT
Determine direction and
press
to scroll.
Press ENTR.
HT
HOST
SEND OK?
Y/N
HOST
HT
REC OK?
Y/N
Press
to scroll options.
Press
to scroll options.
Yes / No
Yes / No
Press ENTR
Press ENTR
Press ENTR
Returns to
Data
Maintenance
Mode
RECEIVING
ITEM: 0000
RECEIVING
ITEM: 0000
Press ENTR
Returns to
Data
Maintenance
Mode
Figure 4-4b, Copy Print Parameters Mode
SATO HT200e Operator Manual
PN 9001103B
Page 4-6
Unit 4: Operation
SEND/RECEIVE PRESET DATA MODE
This menu provides the flow sequence of sending or receiving preset data from the host or
printer. This menu is accessed through the Data Maintenance Mode.
Refer to
Data
Maintenance
Mode
SEND / REC DATA
SEND
RECEIVE
Determine direction and
press
to scroll.
Press ENTR
Send / Receive
Press ENTR
STR / RCL DATA
INT RAM
OPT CARD
STR / RCL DATA
INT RAM
OPT CARD
Determine direction and
press
to scroll.
Determine direction and
press
to scroll.
Int Ram / Opt Card
Int Ram / Opt Card
Press ENTR
Press ENTR
HT
HOST
SEND OK?
HOST
HT
REC OK?
Y/ N
Y/ N
Confirm action and
press
to scroll.
Confirm action and
press
to scroll.
Yes / No
Yes / No
Press ENTR
Press ENTR
Press ENTR
SENDING
ITEM: 0000
Press ENTR
RECEIVING
ITEM: 0000
Returns to
Data
Maintenance
Mode
Figure 4-4c, Send/Receive Preset Data Mode
SATO HT200e Operator Manual
PN 9001103B
Page 4-7
Unit 4: Operation
COPY PRESET DATA MODE
This menu provides the flow sequence of copying preset data from the host to the printer or vice
versa. This menu is accessed through the Data Maintenance Mode.
Refer to
Data
Maintenance
Mode
SEND / REC DATA
SEND
RECEIVE
Determine direction and
press
to scroll.
Press ENTR
Send / Receive
Press ENTR
STR / RCL DATA
INT RAM
OPT CARD
STR / RCL DATA
INT RAM
OPT CARD
Determine direction and
press
to scroll.
Determine direction and
press
to scroll.
Int Ram / Opt Card
Int Ram / Opt Card
Press ENTR
Press ENTR
HT
HOST
SEND OK?
HOST
HT
REC OK?
Y/ N
Y/ N
Confirm action and
press
to scroll.
Confirm action and
press
to scroll.
Yes / No
Yes / No
Press ENTR
Press ENTR
Press ENTR
SENDING
ITEM: 0000
Press ENTR
RECEIVING
ITEM: 0000
Returns to
Data
Maintenance
Mode
Figure 4-4d, Copy Preset Data Mode
SATO HT200e Operator Manual
PN 9001103B
Page 4-8
Unit 4: Operation
COPY FONT MODE
This menu provides the flow sequence of copying font types from the host to the printer and vice
versa. This menu is accessed through the Data Maintenance Mode.
Refer to
Data
Maintenance
Mode
FONT SEND / REC
HT HOST HOST
HT
Determine direction and
press
to scroll.
Press ENTR
HT
Host / Host
HT
Press ENTR
HT
HOST
SEND OK?
HOST
HT
REC OK?
Y/ N
Press
Y/ N
to scroll.
Press
Yes / No
Press ENTR
to scroll.
Yes / No
Press ENTR
Press ENTR
SENDING
ITEM: 0000
Press ENTR
RECEIVING
ITEM: 0000
Returns to
Data
Maintenance
Mode
Figure 4-4e, Copy Font Mode
SATO HT200e Operator Manual
PN 9001103B
Page 4-9
Unit 4: Operation
COPY TABLE DATA MODE
This menu provides the flow sequence of copying table data from the host to the printer or vice
versa. This menu is accessed through the Data Maintenance Mode.
Refer to
Data
Maintenance
Mode
DATA SEND / REC
HT HOST HOST
HT
Determine direction and
press
to scroll.
Press ENTR
HT
HOST
HT
Host / Host
SEND OK?
HT
Press ENTR
HOST
HT
REC OK?
Y/ N
Press
Y/ N
to scroll.
Press
Yes / No
Press ENTR
to scroll.
Yes / No
Press ENTR
Press ENTR
SENDING
ITEM: 0000
Press ENTR
RECEIVING
ITEM: 0000
Returns to
Data
Maintenance
Mode
Figure 4-4f, Copy Table Data Mode
SATO HT200e Operator Manual
PN 9001103B
Page 4-10
Unit 4: Operation
COPY ALL PARAMETERS MODE
This menu provides the flow sequence of copying print parameters from the host to the printer or
vice versa. This menu is accessed through the Data Maintenance Mode.
Refer to
Data
Maintenance
Mode
PARAMETER COPY
HT CARD CARD
HT
Press
to scroll options.
Press ENTR
HT
CARD
COPY OK?
Y/N
CARD
HT
COPY OK?
Y/N
Press
to scroll options.
Press ENTR
COPYING
Copying
while the screen
above is displayed.
Complete when the
screen below is
displayed.
PARAMETER COPY
PRINTER
CARD
Refer to
Data
Maintenance
Mode
Figure 4-4g, Copy All Parameters Mode
SATO HT200e Operator Manual
PN 9001103B
Page 4-11
Unit 4: Operation
SELECT COUNTRY CODE MODE
This menu provides theflow sequence for selecting the applicable Country of use. By selecting
the applicable Country; specific symbols, features, and calculations are automatically initiated as
part of the operational function. Each Country is assigned a two-digit code for this selection
process.
This menu is accessed through the Data Maintenance Mode.
Refer to
Data
Maintenance
Mode
EAN COUNTRY CODE
50
Determine which country is applicable
and enter its code from this table.
01 Holland
02 Euro
03 USA
04 France
05 Swiss
06 Spain
07 Italy
08 Germany
09 Austria
10 Poland
11 Czech
12 Romania
13 Slovenia
14 Slovakia
15 Russia
16 Hungary
17 Finland
18 Greece
19 Belgium
20 Scandinavia
Press ENTR
Figure 4-4h, Country Code Mode
SATO HT200e Operator Manual
PN 9001103B
Page 4-12
Unit 4: Operation
MEMORY CARD CLEAR MODE
Allows the selected values stored on the memory card to be cleared from its memory. This menu
is accessed through the Data Maintnenance Mode.
Refer to
Data
Maintenance
Mode
CARD TYPE
PRESET
BACKUP
Press
to scroll.
Select Presets if card
has presets.
Select Backup if card
contains fonts, table
data, firmware, etc.
Press ENTR
CURRENCY
HOLLAND
Press
CR 1
[f]
to scroll.
Press ENTR
Returns to
Data
Maintenance
Mode
Figure 4-4i, Memory Card Clear Mode
SATO HT200e Operator Manual
PN 9001103B
Page 4-13
Unit 4: Operation
SELECT CURRENCY MODE
Allows the desired currency to be selected independently of the Country previously selected.
Typically, the currency selected will be representative of the Country selected.
Refer to
Data
Maintenance
Mode
CURRENCY SELECT
DEFAULT
USER
Determine direction and
press
to scroll.
Press ENTR
Default / User
Press ENTR
CURRENCY
HOLLAND
Press
CR 1
[f]
to scroll.
Press ENTR
Returns to
Data
Maintenance
Mode
Figure 4-4j, Select Currency Mode
SATO HT200e Operator Manual
PN 9001103B
Page 4-14
Unit 4: Operation
FIXED FORMATS
This unit identifies and defines the 29 pre-programmed label designs that are part of the HT200e
printer package. These fixed formats are suitable for a wide variety of general uses.
NOTE: The folowing text references PLU. PLU (Price Lookup) is the
process by which a bar coded item number is decoded and seached
for in a database so the price information can be sent back to the
scanning location.
PLU BARCODES
Format 01
Format 02
Format 03
Format 04
EAN 8 Barcode. Has
price and three-digit
human readable code.
EAN 8 Barcode. Flag
50 is fixed. Includes
price and three-digit
human readable code.
EAN 13 barcode. Has
price and three-digit
human readable code.
EAN 13 barcode. Flag
50 is fixed. Includes
price and three-digit
human readable code.
Format 05
Format 06
Format 07
Format 08
EAN 8 Barcode. Needs
a Non PLU flag. Has
price and three-digit
human readable code.
EAN
13
Barcode.
Needs a Non PLU flag.
Has price and threedigit human readable
code.
EAN
13
barcode.
Needs a Non PLU flag.
Has price and threedigit human readable
code.
EAN
13
barcode.
Needs a Non PLU flag.
Has price and threedigit human readable
code.
NON PLU BARCODES
SATO HT200e Operator Manual
PN 9001103B
Page 4-15
Unit 4: Operation
NON PLU BARCODES
Format 09
Format 11
Format 12
EAN 13 Barcode. Needs a Non
PLU flag. Has four-digit item
code and six-digit price. Also
has human readable code.
EAN 13 Barcode. Needs a Non
PLU flag.
Has five-digit item
code and five-digit price. Human
readable code not included.
EAN 13 barcode. Needs a Non
PLU flag. Has four-digit item
code and six-digit price. Human
readable code not included.
Format 14
Format 15
Two EAN 8 barcodes. Not normally PLU. Includes
price and three-digit human readable code.
Two EAN 13 barcodes. Not normally PLU. Has
price and three-digit human readable code.
SATO HT200e Operator Manual
PN 9001103B
Page 4-16
Unit 4: Operation
PRICE REDUCTIONS
Format 16
Format 17
Format 18
Enter the non-discounted (WAS)
price. The printer calculates the
discounted (NOW) price.
Enter the EAN 13 Barcode and
non-discounted (WAS) price.
The discounted (NOW) price is
calculated automatically.
Enter the EAN 13 Barcode and
non-discounted (WAS) price.
The discounted (NOW) price is
calculated automatically.
The EAN 13 and the “NOW”
price are added into the new
barcode (Code128). A prefix
“10” is added to act as an
application identifier.
The EAN 13 and the “NOW”
price are added into the new
barcode (Code128). A prefix
“10” is added to act as an
application identifier.
Format 19
Format 25
Enter the non-discounted (WAS) price. The printer
calculates the discounted (NOW) price.
Enter the non-discounted (WAS) price. The printer
calculates the discounted (NOW) price. The
discounted rate is also printed on the label.
SATO HT200e Operator Manual
PN 9001103B
Page 4-17
Unit 4: Operation
SIMPLE DATA AND PRICE
Format 10
Format 13
Contains 15 alphanumeric characters and the
price.
Contains two lines of 15 alphanumeric charcters
and the price.
VAT CALCULATION
Format 23
Format 24
Enter the pre-tax amount. The printer automatically calculates the VAT and payable amount.
Enter the pre-tax amount and the EAN 13 barcode
data. The printer automatically calculates the VAT
and payable amount., and creates or copies the
barcode.
SHELF EDGE LABEL
Format 22
Contains one line of 20 alphanumeric characters,
plus tow of ten digits, a price, and the EAN 13
barcode.
SATO HT200e Operator Manual
PN 9001103B
Page 4-18
Unit 4: Operation
UNIT PRICING
Format 26
Format 27
When promted to enter “Unit Voles”, press [FNC1]
to select the number of units. Press Enter.
At the “Pack Size” screen, enter a numeric value,
the pack price, two line of sixteen-digit alphanumeric code, and the symbol of the weight/volume
unit (Kg, g). To complete the label, enter the number of days to add the current date.
When promted to enter “Unit Voles”, press [FNC1]
to select the number of units. Press Enter.
At the “Pack Size” screen, enter a numeric value,
the pack price, two line of sixteen-digit
alphanumeric code, and the symbol of the weight/
volume unit (Kg, g).
EURO PRICING
Format 20
Format 21
Enter the local currency. The printer calculates the
Euro value. Data is needed for the EAN 13
barcode.
SATO HT200e Operator Manual
Similar to Format 20 but excludes the barcode.
PN 9001103B
Page 4-19
Unit 4: Operation
CUSTOMIZING LABEL FORMATS
Customized Label Formats allow label layout and format to be customized by the user. A label
format consists of a single or multiple printable areas called fields. For each field and field type,
predetermined configuaration attributes must be programmed. Regardless of the field type, to
customize a label format, a total of 46 numerical programming entries must be made for each
established field. These numerical programming entries are refered to as parameters.
Before beginning to create a customized label, determine the label size, the number of
fields within the label, and their contents. It is recommended that a sample label be
drawn on a piece of paper displaying the location of each field and its field type before
commencing. Figure 7-1 displays a sample label.
Since all programming is numerical, the format name, the label name, and all
configuration entries will be made by using the printer’s keypad. The following procedure
generalizes the programming sequence when prompted by the LCD:
1
Enter a format number for the label.
2
Enter a label name.
3
Configure label size.
4
Create and configure each field one at a time.
•
Field number
•
Field type
•
Parameters
Figure 7-2 is a visual image of how programming entries are broken down into three primary
categories: Field Designation & Font Type (1-3), Field Configuration (4-21), and Copy
Configuration (22-46). Each time a parameter is configured, its configuration numeral replaces a
“0”, or series of ”0” ‘s, in the bottom row of the LCD.
BOTTOM ROW OF LCD WHEN CONFIGURING LABEL
000 000000000000000000 0000000000000000000000000
1 to 3
22 to 46
4 to 21
46 Data Entry Characters Required (Replace the Zeroes with the Required Numerals)
Figure 4-6, Configuration Breakdown
SATO HT200e Operator Manual
PN 9001103B
Page 4-20
Unit 4: Operation
Figure 7-3 is an example of a LCD display. Notice that the field parameter to be configured on
that LCD is FONT TYPE and that the configuration entry 03 is displayed to its left. Whichever
option is chosen (0, 1, 2) will replace the third character from the left on the bottom row.
Field Parameter
01
03: FONT TYPE
0: X1
1: X2 2: X3
1000000000000000000
Configuration Options
Configuration Entry will Display
here.
Figure 4-7, Sample LCD Display
Figure 7-4 displays the programming process for creating a customized label.
Create Label Format
&
Field Names
Chart 7-5
Normal Field
Configuration
Table & Chart
7-6
Field
Type
Normal/Table
/Seq. No.
Normal Field
Configuration
Entries 1-21
Table Field
Configuration
Entries 1-21
Seq. Number
Configuration
Entries 1-21
Entries 22-46
Leave as 0
Entries 22-46
Leave as 0
Entries 22-46
Leave as 0
Print Configuration
Table & Chart
7-13
Print?
Yes / No
Price Field
Configuration
Table & Chart
7-9
Calendar Field
Configuration
Table & Chart
7-10
Barcode Field
Configuration
Table & Chart
7-11
Price Field
Configuration
Entries 1-21
Calendar Field
Configuration
Entries 1-21
Barcode Field
Configuration
Entries 1-21
Entries 22-46
Leave as 0
Copy Configuration
Entries 22-46
Table & Chart
7-12
Copy?
Yes / No
Figure 4-8, Programming Process
NOTE: A calendar field cannot be copied. For Normal/Table data, a
copy cannot be received.
SATO HT200e Operator Manual
PN 9001103B
Page 4-21
Unit 4: Operation
Figure 7-5 provides visual sequential instructions for beginning to create a customized label.
After completing those instructions, refer to the relative flow chart for Normal, Price, Calendar,
or Barcode fields configuration. Use those flow charts in conjunction with the tables that follow to
create a customized label.
POWER ON
FORMAT NO.
[..]
HT200e
Press SHFT,
then SET
PARAMETER
SETTING MODE
Press
ENTR
FORMAT No
[..] [..........]
[..........]
FMT
Enter number,
Press ENTR
Enter number,
Press SHFT
FORMAT NAME
[..] [..........]
[..........]
Enter number,
Press SHFT
SETTING MODE
PARAMETER
SET LABEL SIZE
PARAMETER,
Press ENTR
xx = FIELD No
Enter field number,
Press ENTR
xx = ITEM NAME
[..........]
SHFT to scroll
options, Press ENTR
LABEL NAME
[..] [..........]
[..........]
SET LABEL SIZE,
Press ENTR
LABEL TYPE
NORMAL
Enter number,
Press ENTR
Enter number,
Press SHFT
OPTION
NORMAL
Press ENTR
PRINT POS OFFSET
V[
00] dot
H[
00] dot
Enter a value less
than 41 for each.
Press ENTR
OPTION
Press ENTR
LABEL PITCH
16 MM
20 MM
25 MM
8 MM
Select option,
Press ENTR
Refer to
relative table
& chart to
continue.
Figure 4-9a, Beginning a Customized Label
SATO HT200e Operator Manual
PN 9001103B
Page 4-22
Unit 4: Operation
NORMAL FIELD CONFIGURATION
Normal fields may easily be defined as any that does not possess the characteristics of any of
the other field types. Typically, it will contain text or graphic that is stable or unchanging.
XX XX: FLD TYPE
X: ***********
000000000000000000000
Enter numeral/s at
each screen to
configure.
Numeral
will display on
bottom row of
LCD.
XX
15: H - EXPANSE
XXXXXXXXXXXXXXX0
Press SHFT to
scroll options.
XX 01: FLD TYPE
1: NORMAL
X00000000000000000000
XX 16: INPUTCHECK
0: NO CHECK
XXXXXXXXXXXXXXXX
Press SHFT to
scroll options.
XX 02: DATA TYPE
1: NORMAL
XX000000000000000000
XX
Press SHFT to
scroll options.
XX 03: FONT TYPE
0: X1 1: X2
2: X3
XXX00000000000000000
XX
XX
XX
Press SHFT to
scroll options.
17: SET TITLE
X00000000000000000000
18: 0 RESERVED
XX000000000000000000
04: V - POSITION
19: AUTO-INS
XXXX0000000000000000
XXX0000000000000000
XX
XX
07: H - POSITION
20: PRESET
XXXXXXX000000000000
XXXX000000000000000
XX
XX 21: COLOR
0: BLACK
3: RED
XXXXX0000000000000
10: ROTATION
XXXXXXXXXX000000000
XX
Press SHFT to
scroll options.
11: CHAR PITCH
Copy?
Yes / No
XXXXXXXXXXX00000000
XX
Press SHFT to
scroll options.
Press
FMT
12: CHAR COUNT
XXXXXXXXXXX00000000
XX
Refer to the
relative table
& chart to
continue.
14: V - EXPANSE
XXXXXXXXXXXXXX00
Figure 4-9b, Normal Field Configuration
SATO HT200e Operator Manual
PN 9001103B
Page 4-23
Unit 4: Operation
NORMAL FIELD CONFIGURATION
DIGIT POSITIONS
DESIGNATED ITEM
DESCRIPTION
1, 2
Normal
10: Normal
3
Font Type
0: X1
1: X2
2: X3
4: OCR-B
4, 5, 6
Vertical Position
001 to 784 dots: Vertical print position.
000: Entry only, where print is not required.
7, 8, 9
Horizontal Position
001 to 384 dots: Horizontal print position.
10
Rotation
0: 0 degrees
1: 90 degrees
2: 180 degrees
3: 270 degrees
11
Character Pitch
0 to 9 dots
12, 13
Character Count
01 to 32: Number of characters in the field.
14
Vertical Expansion
1 to 4: Magnification of horizontal/vertical
direction to character.
15
Horizontal Expansion
1 to 4: Magnification of horizontal/vertical
direction to character.
16
Input Check
0: No check
2: Mandatory entry.
5: Numeric only.
6: Numeric in all digits.
7: Non-zero numeric only; entry is manditory.
17
Title Setup
0: Not displayed in a title in printing preset.
2: Initially displayed as a title in printing preset
(for a format, one field set only).
18
Reserved
0: Determined
19
0
Insertion
(specifies
whether a leading or trailing
zeroes are inserted)
0: No 0 insertion.
1: 0 insertion in right aligned when copy is
required (i.e. 1=001).
20
Preset
0: No entry in printing preset (no display).
1: Entry in printing preset (displayed).
21
Font Color
0: Black
3: Red
4: Black and White reversal.
Table 4-9b, Normal Field Configuration
SATO HT200e Operator Manual
PN 9001103B
Page 4-24
Unit 4: Operation
TABLE FIELD CONFIGURATION
Fields of tabulated data may be stored in the printer’s memory and linked to another field type to
be displayed when scanned.
XX XX: FLD TYPE
X: ***********
000000000000000000000
Enter numeral/s at
each screen to
configure.
Numeral
will display on
bottom row of
LCD.
XX
15: H - EXPANSE
XXXXXXXXXXXXXXX0
Press SHFT to
scroll options.
XX 01: FLD TYPE
1: NORMAL
X00000000000000000000
XX 16: INPUTCHECK
0: NO CHECK
XXXXXXXXXXXXXXXX
Press SHFT to
scroll options.
XX 02: DATA TYPE
1: TABLE
2: SEQ
XX000000000000000000
XX
Press SHFT to
scroll options.
XX 03: FONT TYPE
0: X1 1: X2 2: X3
XXX00000000000000000
XX 18: TABLE No
1: TABLE 1
XX000000000000000000
XX
XX
17: SET TITLE
X00000000000000000000
04: V - POSITION
19: 0 AUTO-INS
XXXX0000000000000000
XXX0000000000000000
XX
XX 20: PRESET
0: OFF
1: OM
XXXX000000000000000
07: H - POSITION
XXXXXXX000000000000
Press SHFT to
scroll options.
XX
10: ROTATION
XX 21: COLOR
0: BLACK
3: RED
XXXXX0000000000000
XXXXXXXXXX000000000
XX
Press SHFT to
scroll options.
11: CHAR PITCH
Copy?
Yes / No
XXXXXXXXXXX00000000
XX
Press SHFT to
scroll options.
Press
FMT
12: CHAR COUNT
XXXXXXXXXXX00000000
XX
Refer to the
relative table &
chart to
continue.
14: V - EXPANSE
XXXXXXXXXXXXXX00
Figure 4-9c, Table Field Configuration
SATO HT200e Operator Manual
PN 9001103B
Page 4-25
Unit 4: Operation
TABLE FIELD CONFIGURATION
DIGIT POSITIONS
DESIGNATED ITEM
DESCRIPTION
1, 2
Table
11: Table
3
Font Type
0: X1
1: X2
2: X3
4: OCR-B
4, 5, 6
Vertical Position
001 to 784 dots: Vertical print position.
000: Entry only, where print is not required.
7, 8, 9
Horizontal Position
001 to 384 dots: Horizontal print position.
10
Rotation
0: 0 degrees
1: 90 degrees
2: 180 degrees
3: 270 degrees
11
Character Pitch
0 to 9 dots
12, 13
Character Count
01 to 32: Number of characters in the field.
14
Vertical Expansion
1 to 4: Magnification of horizontal/vertical
direction to character.
15
Horizontal Expansion
1 to 4: Magnification of horizontal/vertical
direction to character.
16
Input Check
0: No check
2: Mandatory entry
17
Title setup
0: No display as a title in printing preset.
1: Initially display as a title in printing preset for a
format, one field set only).
18
Table number setup
1: Table 1 data
2: Teble 2 data
3: Table 2 data
19
0 Insertion
0: No 0 insertion.
1: 0 insertion in right aligned when copy is
required (i.e. 1=001).
20
Preset
0: No entry in printing preset (no display).
1: Entry in printing preset (displayed)
21
Font Color
0: Black
3: Red
4: Black and White reversal.
Table 4-9c, Table Field Configuration
SATO HT200e Operator Manual
PN 9001103B
Page 4-26
Unit 4: Operation
SEQUENTIAL NUMBER FIELD CONFIGURATION
This field type allows numerals to be sequentially printed onto a label in the designated location.
The make-up of the sequential number may be configured to incorporate other characters in
addition to the sequential digits.
XX XX: FIELD TYPE
X: ***********
000000000000000000000
Enter numeral to
designate field
number & field
type.
Numeral
is displayed
on bottom
row of LCD.
XX
15: H - EXPANSE
XXXXXXXXXXXXXXX0
XX 16: INPUTCHECK
6: FULL NUMERIC
XXXXXXXXXXXXXXXX
XX 01: FIELD TYPE
1: NORMAL
X00000000000000000000
XX 17: SEQ
0: SEQUENCE NONE
X00000000000000000000
XX 02: DATA TYPE
1: TABLE 2: SEQ
XX000000000000000000
XX
XX 03: FONT TYPE
0: X1 1: X2
2: X3
XXX00000000000000000
XX
XX
XXXX0000000000000000
XX 20: PRESET
0: OFF
1: ON
XXXXX0000000000000
XX
XX
04: V - POSITION
07: H - POSITION
XXXXXXX000000000000
18: 0 RESERVED
XXXX000000000000000
19: 0 AUTO - INS
XXXXX0000000000000
21: 0 RESERVED
XXXXX0000000000000
XX 10: ROTATION
0: 0
1: 90
XXXXXXXXXX000000000
XX
Copy?
Yes / No
Press
FMT
11: CHAR PITCH
XXXXXXXXXXX00000000
XX
12: CHAR COUNT
Refer to the
relative table
& chart to
continue.
XXXXXXXXXXX00000000
XX
14: V - EXPANSE
XXXXXXXXXXXXXX00
Figure 4-9d, Sequential Number Field Configuration
SATO HT200e Operator Manual
PN 9001103B
Page 4-27
Unit 4: Operation
SEQUENTIAL NUMBER FIELD CONFIGURATION
DIGIT POSITIONS
DESIGNATED ITEM
DESCRIPTION
1, 2
Normal
12: Normal
3
Font Type
0: X1
1: X2
2: X3
4: OCR-B
4, 5, 6
Vertical Position
001 to 784 dots: Vertical print position.
000: Entry only, where print is not required.
7, 8, 9
Horizontal Position
001 to 384 dots: Horizontal print position.
10
Rotation
0: 0 degrees
1: 90 degrees
2: 180 degrees
3: 270 degrees
11
Character Pitch
0 to 9 dots
12, 13
Character Count
01 to 32: Number of characters in the field.
14
Vertical Expansion
1 to 4: Magnification of horizontal/vertical
direction to character.
15
Horizontal Expansion
1 to 4: Magnification of horizontal/vertical
direction to character.
16
Input Check
0: No check
2: Mandatory entry.
5: Numeric only.
6: Numeric in all digits.
7: Non-zero numeric only; entry is manditory.
17
Title Setup
0: Not displayed in a title in printing preset.
2: Initially displayed as a title in printing preset
(for a format, one field set only).
18
Reserved
0: Determined
19
0
Insertion
(specifies
whether a leading or trailing
zeroes are inserted)
0: No 0 insertion.
1: 0 insertion in right aligned when copy is
required (i.e. 1=001).
20
Preset
0: No entry in printing preset (no display).
1: Entry in printing preset (displayed).
21
Font Color
0: Black
3: Red
4: Black and White reversal.
Table 4-9d, Sequential Number Field Configuration
SATO HT200e Operator Manual
PN 9001103B
Page 4-28
Unit 4: Operation
PRICE FIELD CONFIGURATION
This field type allows for a price to be printed onto a label in the designated location and
orientation. The price printed will be represented in the currency type selected.
XX XX: FIELD TYPE
X: ***********
000000000000000000000
Enter numeral/s at
each screen to
configure.
Numeral
will display on
bottom row of
LCD.
Press SHFT to
scroll options.
Press SHFT to
scroll options.
Press SHFT to
scroll options.
XX
15: H - EXPANSE
XXXXXXXXXXXXXXX0
XX 01: FIELD TYPE
2: PRICE
X00000000000000000000
XX 16: INPUTCHECK
5: NUM ONLY
XXXXXXXXXXXXXXXX
XX 02: DATA TYPE
0: STANDARD 1: POP
XX000000000000000000
XX 17: INP METHOD
0: LEFT
1: RIGHT
X00000000000000000000
XX 03: FONT TYPE
0: X1 1: X2
2: X3
XXX00000000000000000
XX 18: INSERTION
0: NON 1: CM 2: CM&.
XX000000000000000000
XX
XX
04: V - POSITION
19: 0 AUTO-INS
XXXX0000000000000000
XXX0000000000000000
XX
XXXXXXX000000000000
XX 20: PRESET
0: OFF
1: ON
XXXX000000000000000
XX
XX
07: H - POSITION
10: ROTATION
XXXXXXXXXX000000000
XX
21: RESERVED
XXXXX0000000000000
11: CHAR PITCH
Copy?
Yes / No
XXXXXXXXXXX00000000
XX
Press SHFT to
scroll options.
Press
FMT
12: CHAR COUNT
XXXXXXXXXXX00000000
XX
Refer to the
relative table
& chart to
continue.
14: V - EXPANSE
XXXXXXXXXXXXXX00
Figure 4-9e, Price Field Configuration
SATO HT200e Operator Manual
PN 9001103B
Page 4-29
Unit 4: Operation
PRICE FIELD CONFIGURATION
DIGIT POSITIONS
DESIGNATED ITEM
DESCRIPTION
1, 2
Price
20: Normal
3
Font Type
Normal:
0: X1
1: X2
2: X3
5: Price character
21: POP
POP:
0: POP1
1: POP2
2: POP3
4, 5, 6
Vertical Position
001 to 784 dots: Vertical print position.
000: Entry only, where print is not required.
7, 8, 9
Horizontal Position
001 to 384 dots: Horizontal print position.
10
Rotation
0: 0 degrees
1: 90 degrees
2: 180 degrees
3: 270 degrees
11
Character Pitch
0 to 9 dots
12, 13
Character Count
01 to 10: Number of characters in the field.
(excludes curency marks, commas, decimals)
14
Vertical Expansion
1 to 4: Magnification of horizontal/vertical
direction to character (1 to 3 for POP fonts).
15
Horizontal Expansion
1 to 4: Magnification of horizontal/vertical
direction to character (1 to 3 for POP fonts).
16
Input Check
5: Numeric Only.
6: Numeric in all digits.
7: Numeric is accepted, but no currency mark. 0
and non-entry are not allowed.
17
Input Method
0: Left aligned format.
2: Right aligned format.
18
Insertion
0: None
1: Currency mark.
2: Currency mark and decimal point.
5: Currency mark and comma.
6: Currency mark, comma, and decimal point.
7: Comma and decimal point.
19
0 Insertion
0: No 0 insertion.
1: With 0 insertion, right aligned (i.e. 1=001).
20
Preset for general/Euro
currency mark.
0: General currency mark is not shown.
1: Entry required. Show general currency mark.
8: Euro currency mark is not shown.
9: Entry required. Euro currency mark is shown.
21
Reserved
0: Determined
Table 4-9e, Price Field Configuration
SATO HT200e Operator Manual
PN 9001103B
Page 4-30
Unit 4: Operation
CALENDAR FIELD CONFIGURATION
This field type permits a date and/ot time to be printed in the designated location and orientation
of a label. Typical applications of this feature is to identify the date of manufacture, inspection, or
expiration.
XX XX: FIELD TYPE
X: ***********
000000000000000000000
Enter numeral/s at
each screen to
configure.
Numeral
is displayed
on bottom
row of LCD.
XX
15: H - EXPANSE
XXXXXXXXXXXXXXX0
Press SHFT to
scroll options.
XX 01: FIELD TYPE
3: CALENDAR
X00000000000000000000
XX 16: INPUTCHECK
6: NUMBER ONLY
XXXXXXXXXXXXXXXX
XX 02: DATA TYPE
0: DATE
1: TIME
XX000000000000000000
XX
Press SHFT to
scroll options.
17: INCREMENT
X00000000000000000000
XX 03: FONT TYPE
1: X2
2: X3
XXX00000000000000000
XX
Press SHFT to
scroll options.
Press SHFT to
scroll options.
XX 19: SEPARATOR
0: NONE
1: /
XXX0000000000000000
Press SHFT to
scroll options.
04: V - POSITION
XXXX0000000000000000
XX
XX 18: DISP METHD
0: ddmmyy
XX000000000000000000
07: H - POSITION
XXXXXXX000000000000
XX 20: PRESET
0: OFF
1: ON
XXXX000000000000000
XX 10: ROTATION
0: 0
1: 90
XXXXXXXXXX000000000
XX
21: 0 RESERVED
XXXXX0000000000000
XX
11: CHAR PITCH
XXXXXXXXXXX00000000
Copy?
Yes / No
XX
Press
FMT
12: CHAR COUNT
XXXXXXXXXXX00000000
XX
Refer to the
relative table
& chart to
continue.
14: V - EXPANSE
XXXXXXXXXXXXXX00
Figure 4-9f, Calendar Field Configuration
SATO HT200e Operator Manual
PN 9001103B
Page 4-31
Unit 4: Operation
CALENDAR FIELD SETUP
DIGIT POSITIONS
DESIGNATED ITEM
DESCRIPTION
1, 2
Calendar
30: Date
31: Time
3
Font Type
1: X2
2: X3
4, 5, 6
Vertical Position
001 to 784 dots: Vertical print position.
000: Entry only, where print is not required.
7, 8, 9
Horizontal Position
001 to 384 dots: Horizontal print position.
10
Rotation
0: 0 degrees
1: 90 degrees
2: 180 degrees
3: 270 degrees
11
Character Pitch
0 to 9 dots
12, 13
Character Count
01 to 32: Number of characters in the field.
14
Vertical Expansion
1 to 4: Magnification of horizontal/vertical
direction to character.
15
Horizontal Expansion
1 to 4: Magnification of horizontal/vertical
direction to character.
16
Input Check
6: Numeric in all digits.
7: Numeric is accepted, but no currency mark. 0
and non-entry are not allowed.
17
Addition
0: No addition.
1: Addition
Date and time should be arranged separately in
each field per format.
18
Presentation Format
0: ddmmyy
1: mmddyy
2: yymmdd
3: ddmmyyyy
4: mmddyyyy
5: yyyymmdd
0: 24 hour format
1: AM/PM before time
2: AM/PM after time
19
Symbol
for
calendarr data
separating
0: None
1: “/”
2: “-”
3: ”.”
20
Preset
0: No entry in printing preset (not displayed).
1: Entry in printing preset (displayed).
21
Reserved
0: Determined
Table 4-9f, Calendar Field Configuration
SATO HT200e Operator Manual
PN 9001103B
Page 4-32
Unit 4: Operation
BARCODE FIELD CONFIGURATION
Allows a barcode to be printed onto a label in the specified location and orientation. This menu
permits all barcode values and variables to be configured.
XX XX: FIELD TYPE
X: ***********
000000000000000000000
Enter numeral/s at
each screen to
configure.
Numeral
will display on
bottom row of
LCD.
XX
15: BAR EXPANS
XXXXXXXXXXXXXXX0
XX 01: FLD TYPE
7: BARCODE
X00000000000000000000
XX
Press SHFT to
scroll options.
XX 02: DATA TYPE
0: HUMAN FONT OFF
XX000000000000000000
XX 19: CHECK DGT
0: OFF
1: ON
X00000000000000000000
Press SHFT to
scroll options.
XX 03: SYMBOLOGY
0: NW7 1: CODE39
XXX00000000000000000
XX 20: PRESET
0: OFF
1: ON
XXXX000000000000000
XX
XX
XXXXXXXXXXXXXXXX
04: V - POSITION
XXXX0000000000000000
Press SHFT to
scroll options.
XX
16: BAR HEIGHT
Press SHFT to
scroll options.
21: 0 RESERVED
XXXXX0000000000000
07: H - POSITION
XXXXXXX000000000000
Copy?
Yes / No
Press
FMT
XX 10: ROTATION
0: 0
2: 180
XXXXXXXXXX000000000
XX
11: CHAR PITCH
Refer to the
relative table
& chart to
continue.
XXXXXXXXXXX00000000
XX
12: CHAR COUNT
XXXXXXXXXXX00000000
Press SHFT to
scroll options.
XX 14: BAR RATIO
0: FIXED
1: 1-2
XXXXXXXXXXXXXX00
Figure 4-9g, Barcode Field Configuration
SATO HT200e Operator Manual
PN 9001103B
Page 4-33
Unit 4: Operation
BARCODE FIELD SETUP
DIGIT POSITIONS
DESIGNATED ITEM
DESCRIPTION
1, 2
Barcode
70: Readable>
71: Not readable.
3
Font Type
0: NW-7
1: CODE39
2: INT2of5
3: EAN13
4: EAN8
5: UPC-E
6: CODE128 (C Set)
7: CODE129 (B Set)
4, 5, 6
Vertical Position
001 to 784 dots: Vertical print position.
000: Entry only, where print is not required.
7, 8, 9
Horizontal Position
001 to 384 dots: Horizontal print position.
10
Rotation
0: 0 degrees
1: 90 degrees
2: 180 degrees
3: 270 degrees
11
Character Pitch
0 to 9 dots
12, 13
Character Count
01 to 22: Number of digits in the barcode.
14
Bar Ratio
0: Invalid (EAN, UPC-A, UPC-E)
1: 1:2
2: 1:2.5
3: 1:3
15
Bar Expansion
2 to 4: For bar ratio of 1: 2.5, enlargement is
restricted to 2x and 4x only.
16, 17, 18
Bar Height
001 to 240 dots.
19
Check digit (when Code
128 is being set, specify
“1”).
0: No CD
1: CD creation (computing)
2: CD Check (with input data)
3: Price CD (only for EAN13)
20
Preset
0: No entry in printing preset (not displayed).
1: Entry in printing preset (displayed).
21
Reserved
0: Determined
Table 4-9g, Barcode Field Configuration
SATO HT200e Operator Manual
PN 9001103B
Page 4-34
Unit 4: Operation
XX
Scroll through all
of the screens of
the established
field and begin
entering Copy data
with number 22.
31: COPY 2 - 1
XXXXXXXXXXXXXX0000
XX
33: COPY 2 - 2
X0000000000000000000
Configuration
numeral
is displayed on
bottom row of
LCD.
XX
35: COPY 2 - 3
Press
ENTR
XXX0000000000000000
XX 22: V - COPY
0: NONE
XXXXXX000000000000
XX
XX
XX
37: COPY 2 - 4
XXXXX00000000000000
23: COPY 1 - 1
39: COPY 3 - 1
XXXXXXX00000000000
XXXXXXX0000000000
XX
XX
25: COPY 1 - 2
41: COPY 3 - 2
XXXXXXXXX00000000
XXXXXXXXX0000000
XX
XX
27: COPY 1 - 3
43: COPY 3 - 3
XXXXXXXXXXX000000
XXXXXXXXXXX0000
XX
XX
29: COPY 1 - 4
XXXXXXXXXXXXX00000
Refer to the
relative table &
chart to
continue.
45: COPY 3 - 4
XXXXXXXXXXXXX0
Figure 4-9h, Copy Configuration
COPY SETUP
DIGIT
DESIGNATION
DESCRIPTION
22
Copy action
0: No copy.
1: Copy.
2: Receive a copy.
23, 24
Copy 1
01-32: Specify starting position to begin copying.
25, 26
01-32: Specify number of characters to copy.
27, 28
01-29: Specify where to send the characters.
29, 30
01-32: Starting postion to paste copied characters.
31, 32
Copy 2
01-32: Specify starting position to begin copying.
33, 34
01-32: Specify number of characters to copy.
35, 36
01-29: Specify where to send the characters.
37, 38
01-32: Starting postion to paste copied characters.
39, 40
Copy 3
01-32: Specify starting position to begin copying.
41, 42
01-32: Specify number of characters to copy.
43, 44
01-29: Specify where to send the characters.
45, 46
01-32: Starting postion to paste copied characters.
Table 4-9h, Copy Configuration
SATO HT200e Operator Manual
PN 9001103B
Page 4-35
Unit 4: Operation
PRINT CONFIGURATION
Print Configuration is treated as a field. Thusly, print configuration should always be the last field
for that label.
XX XX: FIELD TYPE
X: ***********
000000000000000000000
Enter numeral to
designate field
number & field
type.
Numeral
is displayed
on bottom
row of LCD.
XX 01: FIELD TYPE
0: QTY
X00000000000000000000
XX
03: FIXED QTY
XX000000000000000000
Press 0 until the
following screen is
displayed.
XX
16: DISP COUNT
XXX00000000000000000
Press 0 until
through screen 46.
Press ENTR
Refer
to the relative
table & chart
to continue.
Figure 4-9i, Print Quantity Configuration
PRINT QUANTITY CONFIGURATION
DIGIT POSITIONS
DESIGNATED ITEM
DESCRIPTION
1, 2
Print Quantity
00: Quantity.
3
Quantity
0: Not fixed. (default)
1: Fixed quantity
4 to 15
Reserved
All remains at 0
16
Count
0: Prints the quantity entered.
Other than 0: Prints freely.
Figure 4-9i, Print Quantity Configuration
SATO HT200e Operator Manual
PN 9001103B
Page 4-36
Unit 4: Operation
DISCOUNT RATE CONFIGURATION
Where applicable, this menu allows the discount rate to be configured.
POWER
FORMAT NO.
[..]
HT200e
Refer to relative
Fixed Formats
16, 17, 18, 19, 25.
Press ENTR.
[WAS
$......
25%]
*
Press
FNC2
DISCOUNT RATE
[..]%
Enter
discount rate.
Press
ENTR
Press AC
if incorrect
entry.
Figure 4-10, Discount Rate Configuration
SATO HT200e Operator Manual
PN 9001103B
Page 4-37
Unit 4: Operation
TAX RATE CONFIGURATION
Where applicable, this menu allows the tax rate to be configured.
POWER
FORMAT NO.
[..]
HT200e
Refer to relative
Fixed Formats.
Enter 23 or 24.
Press ENTR.
[VAT
$.......
15.00%]
*
Press
FNC2
VAT
[ 17.55 ] %
Enter four
digit tax rate.
Press
ENTR
Press AC
if incorrect
entry.
Figure 4-11, Tax Rate Configuration
SATO HT200e Operator Manual
PN 9001103B
Page 4-38
Unit 4: Operation
OPERATIONAL MODES
This unit provides instruction on the various modes used in operation.
ONLINE MODE
This operational mode permits printing activity when the print data is received from the host.
POWER
FORMAT NO.
[..]
HT200e
70
[ONLINE MODE]
Printer
awaits data from the
host. Starts printing
when data is
received.
PRINTING
Printing
completed.
Power = Off
Figure 4-12, Online Mode
SATO HT200e Operator Manual
PN 9001103B
Page 4-39
Unit 4: Operation
TABLE DATA MODE
This operational mode permits the configuration, data entry, modification, and deletion of table
data.
POWER ON
FORMAT NO.
[..]
HT200e
Use arrow keys to
cursor. Press
ENTR to advance.
FNC1
TABLE STORING
TABLE 1
TABLE 2
TABLE 3
STR
TABLE 1
MODIFY
DEL
STR TABLE NO.
[..]
COPY FROM [ . . . ]
TABLE 1
....................
....................
STR
TABLE 2
MODIFY
DEL
STR TABLE NO.
[..]
COPY FROM [ . . . ]
TABLE 1
....................
....................
Power = Off
STR
TABLE 3
MODIFY
DEL
STR TABLE NO.
[..]
COPY FROM [ . . . ]
TABLE 1
....................
....................
MODIFY TABLE NO.
[...]
MODIFY TABLE NO.
[...]
MODIFY TABLE NO.
[...]
DELETE TABLE NO.
[...]
DELETE TABLE NO.
[...]
DELETE TABLE NO.
[...]
TABLE DATA DEL
YES
NO
XXX
TABLE DATA DEL
YES
NO
XXX
TABLE DATA DEL
YES
NO
XXX
Figure 4-13, Table Data Mode
SATO HT200e Operator Manual
PN 9001103B
Page 4-40
Unit 4: Operation
PRESET DATA MODE
This operational mode permits the configuration, modification, and deletion of preset data.
RCL + POWER
[PRESET]
PRINT
STR MODIFY
DEL DUMP MODIFIER
Press
to scroll options.
Press ENTR
PRESET NO. INPUT
....
<PRINT>
Enter preset
number.
Press ENTR
PRESET NO. INPUT
....
<PRINT>
PRESET F-NO. [ . . ]
Enter preset
number.
Press ENTR
Refer to
Preset Data
Storage
Enter preset
number.
Press ENTR
[ ITEM
.........
]
Enter preset
number.
Press ENTR
[ PRICE
S.........
PRESET NO. INPUT
....
<MODIFY>
Enter preset
number.
Press ENTR
[ ITEM
.........
]
PRESET NO. INPUT
....
<DELETE>
Enter preset
number.
Press ENTR
PRESET DELETE OK
..-....
Y/N
DUMP FROM
INT RAM OPT CARD
PRESET NO. INPUT
…… - ...… <DUMP>
PRESET NO. INPUT
…… - ...… MASTER
Enter preset
number.
Press ENTR
Change data.
Press ENTR
]
Enter preset
number.
Press ENTR
[ QTY
....
]
Enter preset
number.
Press ENTR
Enter preset
number.
Press ENTR
PRESET DELETED
PRINTING
Figure 4-14, Preset Data Mode
SATO HT200e Operator Manual
PN 9001103B
Page 4-41
Unit 4: Operation
PRESET DATA STORAGE
This operational mode permits the storage of preset data.
POWER
FORMAT NO.
[..]
HT200e
Press
RCL
[ PRESET ]
PRINT STR
DEL DUMP
MODIFY
MASTER
Enter data as
required. Press
ENTR
Press
to scroll options.
Press ENTR
Prompted
to enter various
label format
data.
PRESET F-NO.
[..]
Enter a label
format number.
Press ENTR
[ ITEM
.........
PRESET NO. INPUT
*
....
< STORE >
]
Enter a number to
assign to the
following preset.
Press ENTR
Figure 4-15, Preset Data Storage
SATO HT200e Operator Manual
PN 9001103B
Page 4-42
Unit 4: Operation
SUSPENDING A PRINT JOB
This operational mode provides instruction on how to suspend a print job once initiated.
PRINTING
Continue?
Yes / No
Press
S/S
S/S PRINT
REMAIN QTY: 0001
Printing
ceases.
Press
S/S
Begin again?
Yes / No
Continue to
wait.
Figure 4-16, Suspending A Print Job
SATO HT200e Operator Manual
PN 9001103B
Page 4-43
Unit 4: Operation
REPRINTING A LABEL
This operational mode provides instruction on how to print a duplicate of a previously printed
label.
A
Format has
printed.
[ITEMSQ]
. . . . . . . . . . . . .C
Reprint?
Yes / No
*
Determine
what next. Refer
to charts to
execute.
Press
S/S
REPRINT W/ SEQNUM
ON
OFF
Reprints
the last label
with the sequential
variable incremented
or decremented
accordingly.
On / Off
Reprints
the last label
with exactly the
same sequential
variable.
PRINTING
Completes
printing the
label.
Figure 4-17, Reprinting A Label
SATO HT200e Operator Manual
PN 9001103B
Page 4-44
Unit 4: Operation
DATA ENTRY EDIT
The black blinking cursor indicates where the next typed character will appear. Use the arrow
keys on the printer keypad to move the cursor in the direction desired for entry or edit.
If an additional character was accidentally typed, move the cursor to the right of the accidental
character and press DEL once. The accidental character wil be replaced when the text moves
one space to the left.
If an incorrect character is typed, move the cursor onto that character and enter the desired one.
The incorrect character will be replaced by the one entered. Any additional charcters entered will
replace those to the right.
Use of the AC key of the keypad will replace will clear the entire set of characters entered.
Press the ENTR key to set the entries. Once the ENTR key has been pressed, data entry or edit
is not possible.
SATO HT200e Operator Manual
PN 9001103B
Page 4-45
Unit 4: Operation
OPERATIONAL ADJUSTMENTS
This unit covers adjustment of printer features and components to ensure proper function and
performance.
EYE-MARK SENSOR ADJUSTMENT
The penetrating sensitivity of the eye-mark sensor may be electrically adjusted through a
potentiometer integrated into the main circuit board. This potentiometer is externally accessible,
thusly dismantling of the printer is not required.
For proper performance, the sensor must have a voltage reading greater than 0.9V. If the
following procedure cannot achieve the required voltage, replace the memory backup battery in
accordance with its relative procedure located within the Replacement Procedures unit of this
manual. Also clean the sensor window located on the base frame assembly and the sensor’s
eye. If all else fails, the main circuit board will have to be replaced.
This adjustment procedure will require the use of a multimeter and the SATO Test Module. The
voltage level may also be checked by connecting the multimeter probes directly to the CH1a (-)
and the CH1b (+) pins of the test terminal and following steps 6 through 12 of the procedure
below.
Reference Figure 4-18, Test Module Usage
1
Remove the maintenance cover located on the right side of the printer.
2
Connect the test module to the terminal located to the left of the potentiometers.
3
Turn test module dial to position 4.
4
Connect the positive (+) probe of the multimeter to pin SIG on the test module.
5
Connect the negative (-) probe of the multimeter to GRD on the test module.
6
Ensure the multimeter is set for DC reading.
7
Turn the VR3 potentiometer fully clockwise.
8
Press and hold the [9] key while switching on the printer to enter the Service Mode.
9
Place a label without the eye-mark part in position to be read by the sensor and note the
multimeter reading.
10 Replace the label without the eye-mark with one that has the eye-mark and note the
multimeter reading.
11
Subtract the previous multimeter reading from the last reading. The difference should be
greater than 0.9V.
12 Set the difference to the maximum.
13 Disconnect the test module, load printer with media, and test print labels.
SATO HT200e Operator Manual
PN 9001103B
Page 4-46
Unit 4: Operation
DISPENSER SENSOR ADJUSTMENT
The dispenser sensor is comprised of two parts; the transmitter and the reciever. The
transmission and reception of the dispenser sensor may be electrically adjusted through a
potentiometer integrated into the main circuit board. This potentiometer is externally accessible,
thusly dismantling of the printer is not required.
For proper performance, the sensor must have both a low-level and a high-level voltage reading.
The low-level voltage must not be greater than 0.4V and the high-level voltage must not be less
than 2.0V. If the following procedure cannot achieve the required voltage, replace the two
components in accordance with their relative procedures located within the Replacement
Procedures unit of this manual. If all else fails, the main circuit board will have to be replaced.
This adjustment procedure will require the use of a multimeter and the SATO Test Module. The
voltage level may also be checked by connecting the multimeter probes directly to the CH1a (-)
and the CH2b (+) pins of the test terminal and following steps 6 through 12 of the procedure
below.
Reference Figure 4-18, Test Module Usage
1
Remove the maintenance cover located on the right side of the printer.
2
Connect the test module to the terminal located to the left of the potentiometers.
3
Turn test module dial to position 4.
4
Connect the positive (+) probe of the multimeter to pin SIG on the test module.
5
Connect the negative (-) probe of the multimeter to GRD on the test module.
6
Ensure the multimeter is set for DC reading.
7
Turn the VR4 potentiometer fully clockwise.
8
Press and hold the [9] key while switching on the printer to enter the Service Mode.
9
Place a label without the eye-mark part in position to be read by the sensor and note the
multimeter reading.
10 Replace the label without the eye-mark with one that has the eye-mark and note the
multimeter reading.
11
Subtract the previous multimeter reading from the last reading. The difference should be
greater than 0.9V.
12 Set the difference to the maximum.
13 Disconnect the test module, load printer with media, and test print labels.
SATO HT200e Operator Manual
PN 9001103B
Page 4-47
Unit 4: Operation
PITCH ADJUSTMENT
The pitch setting determines the print postion on the label in relation to the eye-mark reference.
The eye-mark sends a signal indicating the end of the prior label and the pitch adjustment is
based on the linear distance of feed from the time the signal was transmitted.
Reference Figure 4-18, Test Module Usage
1
Ensure the printer is turned off.
2
Remove the maintnenace cover located on the right isde of the printer.
3
Connect the test module located to the left side of the printers.
4
Turn test module dial to position 4.
4
Connect the positive (+) probe of the multimeter to pin SIG on the test module.
5
Connect the negative (-) probe of the multimeter to GRD on the test module.
6
Ensure the multimeter is set for DC reading.
7
Turn the VR2 potentiometer to the 12 o’clock position.
8
Press and hold the [9] key while switching on the printer to enter the Service Mode.
9
At the TEST PRINT screen, press ENTR to proceed to the test print options.
10 Use the arrow keys to select the NORMAL option. Press ENTR.
11
Input the correct pitch and width of the label and press ENTR to test print.
12 Press the S/S key to start and stop printing as necessary.
13 Turn the VR2 potentiometer as required to obtain the correct adjustment.
Figure 4-18, Test Module Usage
SATO HT200e Operator Manual
PN 9001103B
Page 4-48
Unit 4: Operation
DISPENSE STOP POSITION
The dispense stop postion determines how far a printed label is fed for dispense. The following
procedure provides guidance on this adjustment.
Load printer with media.
Remove maintenance cover.
Set VR1 potentiometer to 12 o’clock postion.
Turn printer on.
FORMAT No.
[00]
HT200e
Press ENTR twice.
PRINT
NORMAL
DEMAND
Press
to scroll.
Select DEMAND for the
dispenser mode.
Press ENTR.
REAL TIME PRINT
ON
OFF
Press
to scroll.
Select the OFF option.
Press ENTR.
PRE-EDITED PRINT
ON
OFF
Press
to scroll.
Select the OFF option.
Press ENTR repeatedly until the
following screen appears.
FORMAT No.
[00]
HT200e
Enter 01.
Press ENTR.
Press the [8] key seven times to set the barcode format. Press ENTR.
Press the [8] key three times to set the code format. Press ENTR.
Press the [8] key six times to set values for printing. Press ENTR.
Printing
commences.
Turn the VR1 potentiometer each time a label prints until the proper
adjustment is achieved.
Figure 4-19, Dispense Stop Adjustment
LCD BRIGHTNESS ADJUSTMENT
The brightness of the LCD panel may be adjusted through a potentiometer integrated into the
bottom side of the main circuit board. To access the VR5 potentiometer, remove the battery
cover located on the bottom of the printer chassis. Adjust the potentiometer to the desired result
and replace the cover.
SATO HT200e Operator Manual
PN 9001103B
Page 4-49
Unit 4: Operation
SATO HT200e Operator Manual
PN 9001103B
Page 4-50
TROUBLESHOOTING
•
•
•
•
SATO HT200e Operator Manual
LCD Error Signals
Troubleshooting Table
Troubleshooting Procedures
Test Module Usage
PN 9001103B
Page 5-1
Unit 5: Troubleshooting
LCD ERROR SIGNALS
ERROR MESSAGE
CAUSE
CORRECTIVE ACTION
MEDIA PITCH ERROR
Did not detect label edge.
No paper.
Improperly loaded paper.
Sensor adjustment.
COVER OPEN
Top cover not latched.
Latch cover.
Replace sensor.
CHARGE PWR PACK
Main battery low.
Charge battery.
Replace battery pack.
PRINT BATT LOW
Memory battery low.
Backup data and replace pcb battery.
CHNG PRINT BATT
Memory battery dead.
Replace battery (data may be lost).
NO CARD SET
PCMCIA Card not detected.
Insert card.
PLS CLEAR CARD
Data found on card.
Clear the card while
maintenance mode.
CARD BATT LOW
PCMCIA Card battery is low.
Backup data and replace battery.
CHNG CARD BATT
PCMCIA Card battery is dead.
Replace battery (data may be lost).
WRITE PROTECT ON
Cannot write to PCMCIA Card.
Ensure card is write protected.
CONFIRM CLEAR TYPE
Improper clear procedure.
Clear again.
BLANK FORMAT
Unregistered format number.
Ensure the format is registered in printer.
DATA ERR
Entered data exceeds limits.
Re-enter correct data.
NO UPLOAD DATA
No data to upload.
Re-enter correct check digit.
INTERFACE ERR
RS232C error.
Confirm host & printer RS232C settings.
HEAD ERR
Error in head detected.
Power off, clean head, reapply power.
HEAD OVERHEATED
Overheated head.
Switch printer off and allow to cool.
PRINTER H/W ERR
Problem in printer hardware.
Power off and then back on.
PRESET NO ERR
Invalid preset number.
Check the preset number and re-enter.
PRESET FULL
Preset data at max capacity.
Clear unused preset data.
NO DUMP ERR
Cannot dump presets.
Preset data not registered.
BLANK PRESET NO
Preset number is not registered. Check preset number and re-enter.
SATO HT200e Operator Manual
PN 9001103B
in
the
data
Page 5-2
Unit 5: Troubleshooting
TROUBLESHOOTING TABLE
IMAGE VOIDS
Poor label quality.
Use high quality label stock.
Damaged print head.
Replace print head.
Damaged platen.
Replace platen.
LIGHT PRINT IMAGE
Poor label quality.
Use high quality direct thermal label stock.
Low print head energy/darkness.
Adjust darkness level.
Foriegn material on print head.
Clean print head and platen roller.
Poor head alignment.
Align print head as required.
Excessive print speed.
Reduce print speed setting.
SMEARED PRINT IMAGE
Poor label quality.
Use high quality direct thermal label stock.
Foreign material on print head and platen Clean print head and platen roller.
roller.
Foreign material on labels.
Use high quality label stock.
Excessive print head energy.
Adjust darkness control.
Excessive print speed.
Adjust speed as required.
FUZZY PRINT IMAGE
Heat too high.
Adjust as required.
NO LABEL MOVEMENT
Loose or broken platen drive gears.
Adjust or replace platen drive gears as required.
Incorrect label pitch sensor selected.
Select the correct label sensor type.
NO PRINTED IMAGE
Print head is disconnected.
Ensure that print head wiring harness is connected on each
end.
Low voltage output.
Test power supply voltage and replace as necessary.
Damaged print head.
Replace print head.
Damaged electronics.
Replace circuit board.
WILL NOT GO ON-LINE
Defective power supply cord.
Ensure proper function or replace.
House power supply discontinued.
Test receptacle.
Battery pack power depleted.
Recharge or replace.
SATO HT200e Operator Manual
PN 9001103A
Page 5-3
Unit 5: Troubleshooting
TROUBLESHOOTING PROCEDURES
RS232 SERIAL INTERFACE TROUBLESHOOTING
•
Ensure the serial cable is thoroughly connected to the PC and the printer.
CAUTION: NEVER CONNECT OR DISCONNECT INTERFACE CABLES
(OR USE A SWITCH BOX) WITH POWER APPLIED TO EITHER THE
PRINTER OR THE HOST. THIS MAY CAUSE DAMAGE TO THE INTERFACE CIRCUITRY AND IS NOT COVERED BY WARRANTY.
•
Ensure the serial cable is not defective and that it is manufactured to specifications.
•
Ensure the RS232 Interface Module is properly installed.
•
Ensure the data stream is correct (all letters of command codes are in upper case and
without spaces).
•
Ensure the Baud Rate, Parity, Data Bits, and Stop Bits are consistent with that of computer.
Print a Configuration Test Label to determine the RS232 settings.
•
Ensure the printer is recieving from the computer using the Hex Dump Mode. Refer to that
procedure for instructions. The printer will print (only once) a hexadecimal dump of everything
it has received from the host computer. Each hexadecimal character represents a character
the printer received. Analyze and troubleshoot the data stream.
NOTE: A small label may produce a large amount of data when printed in
Hex Dump.
While checking the hex dump printout, look for ODh OAh (carriage return and line feed)
characters throughout. The command string should be continuous. CR or LF characters are
not allowed between the start command (<ESC>A) and the stop command (<ESC>Z). If
Basic is being used, it may be adding these characters automatically as the line wraps.
Adding a width statement to your program can help suppress these extra ODH OAH
characters by expanding the line length up to 255 characters.
If not programming in BASIC, check to see if the equivalent statement in language exists to
suppress extra carriage returns and line feeds from data being sent to the printer. The data
stream must be one complete line going to the printer.
SATO HT200e Operator Manual
PN 9001103B
Page 5-4
Unit 5: Troubleshooting
HEX DUMP PRINTING
The contents of the Print Buffer can be examined using the Hex Dump mode. In the left column,
each line of data received is numbered. The center column provides the data in hexadecimal
format. And in the right column, the same data is provided in the ASC II format. Follow the flow
chart provided below to perform this activity.
POWER
FORMAT NO.
[..]
HT200e
71
[HEX DUMP MODE]
Prints Label
Power = Off
Figure 5-1, Hex Dump Mode
SATO HT200e Operator Manual
PN 9001103A
Page 5-5
Unit 5: Troubleshooting
ASCII DUMP MODE
The ASCII Dump Mode prints all recieved data in ASCII format. The flow chart below provides
guidance.
POWER
FORMAT NO.
[..]
HT200e
72
[ASC DUMP MODE]
Prints Label
Power = Off
Figure 5-2, ASCII Dump Mode
SATO HT200e Operator Manual
PN 9001103B
Page 5-6
Unit 5: Troubleshooting
CHECK ONLINE CONNECTION
With the printer off, connect
host and printer with
RS232C interface.
Then turn printer on.
FORMAT No.
[ 00 ]
HT200e
Enter 70.
FORMAT No.
[ 70 ]
HT200e
Send test print from host.
[ ONLINE MODE ]
Printing?
Yes / No
Ensure interface
settings are correct.
Turn printer off.
3 + Power On
Press ENTR until
interface screen
appears.
I / F SETTING
4800BPS
9600BPS
19200BPS
Press
to scroll options.
Press ENTR.
DATA BIT SETTING
7bits
8bits
Press
to scroll options.
Press ENTR.
Power = Off
Figure 5-3, Check Online Connection
SATO HT200e Operator Manual
PN 9001103A
Page 5-7
Unit 5: Troubleshooting
CHECK SCANNER OPERATION
Connect scanner to printer.
Turn printer on.
FORMAT No.
[ 00 ]
HT200e
Enter 20.
FORMAT No.
[ 20 ]
HT200e
Press ENTR.
Scanning
begins. The
following screen
confirms scanner is
operational.
[ BARCODE ]
. . . . . . . . . . . .C
*
Figure 5-4, Check Scanner Operation
SATO HT200e Operator Manual
PN 9001103B
Page 5-8
Unit 5: Troubleshooting
TEST MODULE USAGE
The SATO TP Test Module is a purchase option specially designed and sold by SATO America
to assist in troubleshooting SATO Printers. The use of this device will facilitate the identification
and isolation of problem circuitry and for voltage adjustment.
1 Connect the harness from Test Module (FIgure 10-3) to the test connector.
2 Connect the multimeter ground probe to the pin identified as GND on the Test Module.
3 Connect the multimeter positive probe to the pin identified as SIG on the Test Module.
NOTE: The ground and positive probes of the multimeter may also be connected to the Test Module by inserting the probes into their respective connection ports (6) arranged vertically along the right front side of the Test
Module. If this method is used, the dial should be set at (0) zero. Refer to Figure 6-2 for connection port identification.
4 Turn on the printer and rotate the Test Module dial to the required position.
NOTE: Refer to Figure 6-2 for the correct Test Module position.
5 Record the multimeter values and confirm they are within specified tolerences.
NOTE: Voltage readings must be +/- 10% of specification for proper
operation.
6 Troubleshoot and/or replace components as directed in their respective procedures.
Figure 5-5, Test Module Usage
SATO HT200e Operator Manual
PN 9001103A
Page 5-9
Unit 5: Troubleshooting
TEST MODULE DIAL
MODULE DIAL
PIN ASSIGNMENT
SPECIFICATION
APPLICATION
0
3A / 1A
+4.8V to +5.3V
+5.0V Power Supply
1
4A / 1A
+3.1V to +3.5V
+2.0V Power Supply
2
5A / 1A
+1.9V to 2.1V
+3.3V Power Supply
3
6A / 1A
+8.2V to +8.7V
+24.0V Power Supply
4
SATO HT200e Operator Manual
Eye-Mark Sensor
PN 9001103B
Page 5-10
MAINTENANCE
•
•
•
•
SATO HT200e Operator Manual
Cleaning Procedures
Replacement Procedures
Adjustment Procedures
Service Modes
PN 9001103B
Page 6-1
Unit 6: Maintenance
CLEANING PROCEDURES
Cleaning of the printer is a necessary maintenance activity to ensure print quality and long printer
life. There are two basic types of cleaning involved; the removal of loose debris and the removal
of residue.
Use a soft cloth and/or a pneumatic blower (pressurized air) to remove debris from the printer.
This process should be performed prior to the removal of residue. To remove residue, apply
SATO Solvent or isopropyl alcohol to a clean cotton swab and gently wipe the entire surface of
the print head, platen roller, and dispenser roller until clean.
It is recommended that the printer be cleaned after the printing of every two rolls of labels.
WARNING: DISCONNECT POWER SUPPLY TO THE PRINTER AND
ALLOW TO COOL TO ROOM TEMPERATURE PRIOR TO CLEANING.
WARNING: EXCERSIZE CARE WHEN CLEANING TO PREVENT
PERSONAL INJURY. THE TEAR BAR HAS A VERY SHARP EDGE.
CAUTION: IF USING A PNEUMATIC BLOWER TO REMOVE DEBRIS
FROM THE PRINTER, EXCERSIZE CARE TO PREVENT PRINT HEAD
DAMAGE.
SATO HT200e Operator Manual
PN 9001103B
Page 6-2
Unit 6: Maintenance
REPLACEMENT PROCEDURES
The printer contains replaceable components and sub-assemblies that are subject to wear or
damage. This section provides step-by-step instructions for the removal and replacement of
those primary components and sub-assemblies approved for operator performance.
PRINT HEAD REPLACEMENT
If the print head becomes damaged or worn, it can be easily removed and replaced without
having to make critical adjustments. Before replacing the print head, check the head counter
values by printing a test pattern. Refer to the Troubleshooting unit for Diagnostic Label Printing
guidance.
1
Switch off the printer and disconnect the power supply.
2
Open the top housing cover to access print head (1, Figure 6-1).
3
Remove two screws (2) securing print head mounting plate (3) to top frame assembly (4).
4
Disconnect the print head wiring harness from print head (1).
5
Remove two screws (5) securing print head (1) to mounting plate (3).
6
Lift away damaged print head (1) and install replacement print head (1) in its place.
7
Secure replacement print head (1) to mounting plate (3) using two screws (5).
8
Connect the print head wiring harness to print head (1).
9
Secure mounting plate (3) to top frame assembly (4) using two screws (2).
10 Load printer with media, restore power, and test print.
5
4
1
3
2
Figure 6-1, Print Head Replacement
SATO HT200e Operator Manual
PN 9001103A
Page 6-3
Unit 6: Maintenance
POWER SWITCH REPLACEMENT
The power switch is located on the front of the printer to the left of the dispenser. The power
switch is of a simple on/off variety that completes the circuit when in the “on” position and breaks
the circuit when “off”. When in the “on” position, electrical current is allowed to flow from the
source to the main circuit board where it is regulated and dispensed.
The switch is compression fitted in the printer chassis and may be detached without the removal
of attaching hardware. To replace the power switch, simply pry the switch from the printer
chassis, mark each of the three leads connected to its terminals located in the rear, and then
disconnect them. Connect the leads to the replacement switch oriented as was removed and
then insert it into the printer chassis.
MEMORY BACKUP BATTERY REPLACEMENT
To remove the memory backup battery, simply remove the battery cover located on the bottom of
the printer chassis. Manually move the battery to the center of its holder and lift outward on the
free end.
To install a replacement battery, insert one end of the battery into its holder first, then work the
rest of the battery into the holder while centering the battery.
NOTE: A properly installed battery will be oriented so the writing on the larger
flat surface will face outward.
WARNING: AN INCORRECTLY INSTALLED BATTERY MAY EXPLODE
CAUSING MECHANICAL AND PERSONAL INJURY. ONLY REPLACE
THE
SUPPLIED
BATTERY
WITH
ONE
OF
EQUIVALENT
SPECIFICATIONS. REFER TO THE TECHNICAL DATA UNIT OF THIS
MANUAL OR THE PARTS LIST FOR SPECIFICATIONS.
CAUTION: DISPOSE OF ALL UNUSED BATTERIES IN ACCORDANCE
WITH FEDERAL AND MUNICIPAL REGULATIONS FOR THAT REGION.
SATO HT200e Operator Manual
PN 9001103B
Page 6-4
Unit 6: Maintenance
ADJUSTMENT PROCEDURES
This printer incorporates a series of sub-assemblies that, in conjunction, comprise the total
printer assembly. Many of these sub-assemblies are designed to be adjustable to maintain
optimum performance of the printer throughout its life. This chapter of the Operator Manual
addresses the proper technique for their adjustment.
It may be necessary to refer to this chapter following component replacement. Use the relative
procedure in that chapter to replace the component, test cycle the printer, and then adjust as
necessary in accordance to the relative procedures in this chapter.
PRINT HEAD ALIGNMENT
The print head may require alignment following its replacement. Poor alignment of the print head
with the platen roller will result in print that will drift from one side toward the opposite side. To
achieve print that is perpendicular with the media, slightly loosen the two screws securing the
print head mounting bracket to the top frame assembly and alter the position of the print head
until it appears to perfectly aligned with the upper perimeter of the top frame assembly. Retighten
the two screws with the print head held in that position, then test print labels to ensure a proper
alignment.
Print Head
Screw x2
Figure 6-2, Print Head Alignment
PRINT HEAD BALANCE ADJUSTMENT
Many printer models and makes require print head balance adjustment, this one does not. This
printer is designed to be self balancing through the utilization of dual torsion springs mounted in
the top frame assembly behind the print head. When the top housing cover is latched in the
closed position, pressure is applied to the print head against the platen roller. The two springs
enable the print head to flex ensuring full contact of the two components across their entire
length.
SATO HT200e Operator Manual
PN 9001103A
Page 6-5
Unit 6: Maintenance
BELT TENSION ADJUSTMENT
The printer has two timing belts that may require adjustment. The belt configuration transfers the
timing sequence from the drive motor to the platen roller. If the timing belts become loose
enough, media feeding will become erratic affecting print location from label to label. A properly
tensioned belt will be tight enough to prevent slippage, but loose enough to avoid undue lateral
pressure on the motor spindle and the platen roller shaft. Excessively tightened belts will result in
accelerated component wear due to drag and friction.
The methodogy of adjustment is determinant on which belt, or whether both, requires
adjustment.
Both Belts
Loosen the idle gear mounting screw and move the gear
upward or downward as required for proper tension and then
retighten the screw. The gear may be adjusted by applying
vertical pressure on the mounting screw.
Platen Belt
Loosen the idle gear mounting screw and move the gear
upward or downward as required for proper tension of the
platen belt and then retighten the screw. The gear may be
adjusted by applying vertical pressure on the mounting screw.
Loosen the motor mount screws and adjust the motor as
required to regain proper tension on that belt from the maladjustment created by the adjustment of the platen belt. The
motor may be adjusted by applying lateral pressure on its
mounting screws.
Motor Belt
Loosen the two motor mount screws and adjust the motor’s
position until proper tension is achieved, then retighten the
motor mount screws. The motor may be adjusted by applying
lateral pressure on its mounting screws.
If timing belt adjustment does not remedy the problem or if the belts have been adjusted to their
maximum length machanically allowed, the belts will require replacement. Refer to those relative
procedures located in the Replacement Procedures unit of this manual.
SATO HT200e Operator Manual
PN 9001103B
Page 6-6
Unit 6: Maintenance
EYE-MARK SENSOR ADJUSTMENT
The penetrating sensitivity of the eye-mark sensor may be electrically adjusted through a
potentiometer integrated into the main circuit board. This potentiometer is externally accessible,
thusly dismantling of the printer is not required.
For proper performance, the sensor must have a voltage reading greater than 0.9V. If the
following procedure cannot achieve the required voltage, replace the memory backup battery in
accordance with its relative procedure located within the Replacement Procedures unit of this
manual. Also clean the sensor window located on the base frame assembly and the sensor’s
eye. If all else fails, the main circuit board will have to be replaced.
This adjustment procedure will require the use of a multimeter and the SATO Test Module. The
voltage level may also be checked by connecting the multimeter probes directly to the CH1a (-)
and the CH1b (+) pins of the test terminal and following steps 6 through 12 of the procedure
below.
Reference Figure 6-3, Test Module Usage
1
Remove the maintenance cover located on the right side of the printer.
2
Connect the test module to the terminal located to the left of the potentiometers.
3
Turn test module dial to position 4.
4
Connect the positive (+) probe of the multimeter to pin SIG on the test module.
5
Connect the negative (-) probe of the multimeter to GRD on the test module.
6
Ensure the multimeter is set for DC reading.
7
Turn the VR3 potentiometer fully clockwise.
8
Press and hold the [9] key while switching on the printer to enter the Service Mode.
9
Place a label without the eye-mark part in position to be read by the sensor and note the
multimeter reading.
10 Replace the label without the eye-mark with one that has the eye-mark and note the
multimeter reading.
11
Subtract the previous multimeter reading from the last reading. The difference should be
greater than 0.9V.
12 Set the difference to the maximum.
13 Disconnect the test module, load printer with media, and test print labels.
SATO HT200e Operator Manual
PN 9001103A
Page 6-7
Unit 6: Maintenance
DISPENSER SENSOR ADJUSTMENT
The dispenser sensor is comprised of two parts; the transmitter and the reciever. The
transmission and reception of the dispenser sensor may be electrically adjusted through a
potentiometer integrated into the main circuit board. This potentiometer is externally accessible,
thusly dismantling of the printer is not required.
For proper performance, the sensor must have both a low-level and a high-level voltage reading.
The low-level voltage must not be greater than 0.4V and the high-level voltage must not be less
than 2.0V. If the following procedure cannot achieve the required voltage, replace the two
components in accordance with their relative procedures located within the Replacement
Procedures unit of this manual. If all else fails, the main circuit board will have to be replaced.
This adjustment procedure will require the use of a multimeter and the SATO Test Module. The
voltage level may also be checked by connecting the multimeter probes directly to the CH1a (-)
and the CH2b (+) pins of the test terminal and following steps 6 through 12 of the procedure
below.
Reference Figure 6-3, Test Module Usage
1
Remove the maintenance cover located on the right side of the printer.
2
Connect the test module to the terminal located to the left of the potentiometers.
3
Turn test module dial to position 4.
4
Connect the positive (+) probe of the multimeter to pin SIG on the test module.
5
Connect the negative (-) probe of the multimeter to GRD on the test module.
6
Ensure the multimeter is set for DC reading.
7
Turn the VR4 potentiometer fully clockwise.
8
Press and hold the [9] key while switching on the printer to enter the Service Mode.
9
Place a label without the eye-mark part in position to be read by the sensor and note the
multimeter reading.
10 Replace the label without the eye-mark with one that has the eye-mark and note the
multimeter reading.
11
Subtract the previous multimeter reading from the last reading. The difference should be
greater than 0.9V.
12 Set the difference to the maximum.
13 Disconnect the test module, load printer with media, and test print labels.
SATO HT200e Operator Manual
PN 9001103B
Page 6-8
Unit 6: Maintenance
PITCH ADJUSTMENT
The pitch setting determines the print postion on the label in relation to the eye-mark reference.
The eye-mark sends a signal indicating the end of the prior label and the pitch adjustment is
based on the linear distance of feed from the time the signal was transmitted.
Reference Figure 6-3, Test Module Usage
1
Ensure the printer is turned off.
2
Remove the maintnenace cover located on the right isde of the printer.
3
Connect the test module located to the left side of the printers.
4
Turn test module dial to position 4.
4
Connect the positive (+) probe of the multimeter to pin SIG on the test module.
5
Connect the negative (-) probe of the multimeter to GRD on the test module.
6
Ensure the multimeter is set for DC reading.
7
Turn the VR2 potentiometer to the 12 o’clock position.
8
Press and hold the [9] key while switching on the printer to enter the Service Mode.
9
At the TEST PRINT screen, press ENTR to proceed to the test print options.
10 Use the arrow keys to select the NORMAL option. Press ENTR.
11
Input the correct pitch and width of the label and press ENTR to test print.
12 Press the S/S key to start and stop printing as necessary.
13 Turn the VR2 potentiometer as required to obtain the correct adjustment.
Figure 6-3, Test Module Usage
SATO HT200e Operator Manual
PN 9001103A
Page 6-9
Unit 6: Maintenance
DISPENSE STOP POSITION
The dispense stop postion determines how far a printed label is fed for dispense. The following
procedure provides guidance on this adjustment.
Load printer with media.
Remove maintenance cover.
Set VR1 potentiometer to 12 o’clock postion.
Turn printer on.
FORMAT No.
[00]
HT200e
Press ENTR twice.
PRINT
NORMAL
DEMAND
Press
to scroll.
Select DEMAND for the
dispenser mode.
Press ENTR.
REAL TIME PRINT
ON
OFF
Press
to scroll.
Select the OFF option.
Press ENTR.
PRE-EDITED PRINT
ON
OFF
Press
to scroll.
Select the OFF option.
Press ENTR repeatedly until the
following screen appears.
FORMAT No.
[00]
HT200e
Enter 01.
Press ENTR.
Press the [8] key seven times to set the barcode format. Press ENTR.
Press the [8] key three times to set the code format. Press ENTR.
Press the [8] key six times to set values for printing. Press ENTR.
Printing
commences.
Turn the VR1 potentiometer each time a label prints until the proper
adjustment is achieved.
Figure 6-4, Dispense Stop Adjustment
LCD BRIGHTNESS ADJUSTMENT
The brightness of the LCD panel may be adjusted through a potentiometer integrated into the
bottom side of the main circuit board. To access the VR5 potentiometer, remove the battery
cover located on the bottom of the printer chassis. Adjust the potentiometer to the desired result
and replace the cover.
SATO HT200e Operator Manual
PN 9001103B
Page 6-10
Unit 6: Maintenance
SERVICE MODES
9 + POWER
TEST PRINT
LABEL TYPE
NORMAL
OPTION
Press
To scroll options.
Press ENTR
LABEL SIZE
P[000]
Press
ENTR
Press
To go back.
Press
Displays
battery
voltage.
Press
ENTR
W[00]mm
Enter the label
size. Press
ENTR
Press
To go back.
Press
RAM BACK BATTERY
Ram backup
battery
capacity.
(full/empty)
TEST PRINTING
BATTERY CHECK
Press
ENTR
Displays
Card Backup
Battery status
(full/empty)
Press
To go back.
Press
CARD BATTERY
A
single label
prints.
Press
To go back.
Print Again?
Yes / No
Press
S/S
Displays
the current
software
version.
Press
ROM Ver.
1W 0000
Press
PG UP
Press
To go back.
Press
To scroll options.
Press
To go back.
CALENDAR CHECK
ON
OFF
Press
ENTR
Press
CALENDAR CHECK
Press
Figure 6-5, Service Mode
SATO HT200e Operator Manual
PN 9001103A
Page 6-11
Unit 6: Maintenance
HEX DUMP MODE
The contents of the print buffer and the data received before it is placed into the print buffer may
be examined through the use of the Hex Dump Mode. Each line of the printed data is inumerated
in the first column, the second column contains the data in hexadecimal format, and the right
column contains the same data in ASCII format.
POWER
FORMAT NO.
[..]
HT200e
71
[HEX DUMP MODE]
Prints Label
Power = Off
Figure 6-6, Hex Dump Mode
SATO HT200e Operator Manual
PN 9001103B
Page 6-12
Unit 6: Maintenance
ASCII DUMP MODE
Allows printing of data in the ASCII format.
POWER
FORMAT NO.
[..]
HT200e
72
[ASC DUMP MODE]
Prints Label
Power = Off
Figure 6-7, ASCII Dump Mode
SATO HT200e Operator Manual
PN 9001103A
Page 6-13
Unit 6: Maintenance
PRINT HEAD & LIFE COUNTER CLEAR
Permits the print head and/or life counter to be cleared. This is typically performed following
component replacement or major service.
1 + DEL + POWER
COUNTER CLEAR?
LIFE
HEAD
Press
to scroll options.
Press
ENTR
Clear?
Yes / No
Press
ENTR
PASSWORD
[...]
Enter 310
and press
ENTR
Successful
clear.
Unsuccessful
clear.
FORMAT NO.
[..]
FORMAT NO.
[..]
HT200e
HT200e
POWER = Off
Figure 6-8, Print Head & Life Counter Clear
SATO HT200e Operator Manual
PN 9001103B
Page 6-14
Unit 6: Maintenance
TEST PRINT MODE
This mode allows the operator or service technician to print test labels for troubleshooting and for
verification of configuration settings.
9 + POWER
TEST PRINT
Press
ENTR
LABEL TYPE
NORMAL
OPTION
Press
to scroll options.
Press ENTR.
LABEL SIZE
P[ 000 ]
W[ 00 ]mm
Input label
size data.
Press ENTR
LABEL SIZE
P[ 000 ]
W[ 00 ]mm
A
single label
is printed.
Figure 6-9, Test Print Mode
SATO HT200e Operator Manual
PN 9001103A
Page 6-15
Unit 6: Maintenance
SRAM CLEAR MODE
Permits SRAM contents to be cleared.
6 + POWER
MEMORY CLEAR?
YES / NO
Press
to scroll options.
Press
ENTR
Clear?
Yes / No
Press
ENTR
PASSWORD
[...]
Enter 310
and press
ENTR
SRAM is
cleared.
FORMAT NO.
[..]
HT200e
POWER = Off
Figure 6-10, SRAM Clear Mode
SATO HT200e Operator Manual
PN 9001103B
Page 6-16