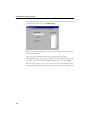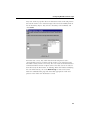
1
Mail-Gear Version 2.0 Implementation Guide ® Mail-Gear Version 2.0 Implementation Guide ® The software described in this book is furnished under a license agreement and may be used only in accordance with the terms of the agreement. Documentation version 2.0 PN: 02-30-00024 Copyright Notice Copyright 1998–2000 Symantec Corporation. All Rights Reserved. Any technical documentation that is made available by Symantec Corporation is the copyrighted work of Symantec Corporation and is owned by Symantec Corporation. NO WARRANTY. The technical documentation is being delivered to you AS-IS, and Symantec Corporation makes no warranty as to its accuracy or use. Any use of the technical documentation or the information contained therein is at the risk of the user. Documentation may include technical or other inaccuracies or typographical errors. Symantec reserves the right to make changes without prior notice. No part of this publication may be copied without the express written permission of Symantec Corporation, 20330 Stevens Creek Blvd., Cupertino, CA 95014. Trademarks Symantec, the Symantec logo, I-Gear, and Mail-Gear are U.S. registered trademarks of Symantec Corporation and its subsidiaries. Mail-Gear Web Client, AutoLock, AutoAlert, and the Mail-Gear logo are trademarks of Symantec Corporation and its subsidiaries. Sun, Sun Microsystems, the Sun logo, Solaris, Java, and Netra are trademarks or registered trademarks of Sun Microsystems, Inc. in the United States and other countries. SPARC is a registered trademark of SPARC International, Inc. Products bearing SPARC trademarks are based on an architecture developed by Sun Microsystems, Inc. Apple and Macintosh are trademarks of Apple Computer, Inc., registered in the U.S. and other countries. Microsoft, Windows, Windows NT, and the Windows logo are registered trademarks or trademarks of Microsoft Corporation in the United States and other countries. Netscape Navigator is a registered trademark of Netscape Communications Corporation in the United States and other countries. Intel and Pentium are registered trademarks of Intel Corporation. Lotus and Lotus Notes are registered trademarks of Lotus Development Corporation. Eudora is a registered trademark of QUALCOMM, Inc. Adobe, Acrobat, and Acrobat Reader are trademark of Adobe Systems Incorporated. THIS PRODUCT IS NOT ENDORSED OR SPONSORED BY ADOBE SYSTEMS INCORPORATED, PUBLISHERS OF ADOBE ACROBAT. Other brands and product names mentioned in this manual may be trademarks or registered trademarks of their respective companies and are hereby acknowledged. Two routines from an implementation by Eric Young of the Data Encryption Standard (DES) are included to encrypt access passwords. This DES code is Copyright (C) 1995-1997 Eric Young ([email protected]) All rights reserved. Redistribution and use in source and binary forms of DES, with or without modification, are permitted provided that the following conditions are met: 1. Redistributions of source code must retain the copyright notice, this list of conditions and the following disclaimer. 2. Redistributions in binary form must reproduce the above copyright notice, this list of conditions and the following disclaimer in the documentation and/or other materials provided with the distribution. 3. All advertising materials mentioning features or use of this software must display the following acknowledgement: “This product includes cryptographic software written by Eric Young ([email protected]).” The word “cryptographic” can be left out if the routines from the library being used are not cryptographic related. 4. If you include any Windows specific code (or a derivative thereof) from the apps directory (application code) you must include an acknowledgement: “This product includes software written by Tim Hudson ([email protected]).” DES code disclaimer: “THIS SOFTWARE IS PROVIDED BY ERIC YOUNG “AS IS” AND ANY EXPRESS OR IMPLIED WARRANTIES, INCLUDING, BUT NOT LIMITED TO, THE IMPLIED WARRANTIES OF MERCHANTABILITY AND FITNESS FOR A PARTICULAR PURPOSE ARE DISCLAIMED. IN NO EVENT SHALL THE AUTHOR OR CONTRIBUTORS BE LIABLE FOR ANY DIRECT, INDIRECT, INCIDENTAL, SPECIAL, EXEMPLARY, OR CONSEQUENTIAL DAMAGES (INCLUDING, BUT NOT LIMITED TO, PROCUREMENT OF SUBSTITUTE GOODS OR SERVICES; LOSS OF USE, DATA, OR PROFITS; OR BUSINESS INTERRUPTION) HOWEVER CAUSED AND ON ANY THEORY OF LIABILITY, WHETHER IN CONTRACT, STRICT LIABILITY, OR TORT (INCLUDING NEGLIGENCE OR OTHERWISE) ARISING IN ANY WAY OUT OF THE USE OF THIS SOFTWARE, EVEN IF ADVISED OF THE POSSIBILITY OF SUCH DAMAGE.” Printed in the United States of America. 10 9 8 7 6 5 4 3 2 1 3 SYMANTEC LICENSE AND WARRANTY READ THIS DOCUMENT CAREFULLY. THIS IS A LEGAL AGREEMENT BETWEEN YOU AND SYMANTEC. BY USING THIS SOFTWARE (“SOFTWARE”) AND THE DOCUMENTATION ACCOMPANYING THIS SOFTWARE (“DOCUMENTATION”), YOU ARE AGREEING TO BE BOUND BY THE TERMS AND CONDITIONS OF THIS AGREEMENT, INCLUDING WITHOUT LIMITATION THE DISCLAIMER OF WARRANTIES AND LIMITATION OF LIABILITY CONTAINED HEREIN. IF YOU ARE NOT WILLING TO BE BOUND BY THE TERMS OF THIS AGREEMENT, DO NOT USE THIS SOFTWARE AND PROMPTLY RETURN IT TO THE PLACE WHERE OR TO THE PERSON FROM WHOM YOU PURCHASED IT. The enclosed Software and Documentation are licensed, not sold, to you by Symantec. You shall inform all users of the Software of the terms and conditions of this Software License Agreement. 1. GRANT OF LICENSE; USE RESTRICTIONS. Symantec grants you a personal, nontransferable, and nonexclusive right to install the Software on a single server for your own internal use. You are allowed to use the Software on a network to scan the internet traffic and email messages for that number of your employees equal to the number of pre-paid licenses granted under this license. Alternatively, you can use the Software on the entire network, provided that you have a pre-paid licensed copy of the Software covering each computer that can access the Software over that network. You shall not permit any other party to use the Software or process or permit to be processed the data of any other party; provided, however, that if you are an “Internet Service Provider,” as hereinafter defined, you may install the Software on a single server to provide “ISP Services,” as hereinafter defined. If you are an ISP, you are allowed to use the Software to scan the internet traffic and email messages for that number of your subscribers equal to the number of pre-paid licenses granted under this license. You are an “Internet Service Provider” if you are a firm, company, or organization that provides for a fee Internet access or services to your subscribers, none of whom are under your immediate employ or the employ of any parent, subsidiary, or affiliate firm, company, or organization. “ISP Services” means content-managed Internet access service or electronic mail service provided by you as an Internet Service Provider to your subscribers using the Software. You agree that you shall not disassemble, reverse compile, reverse engineer, decrypt, reproduce, adapt, modify, translate, distribute, duplicate, copy, transfer possession of, loan, rent, lease, sublicense, resell for profit, create derivative works based upon, or make any attempt to discover the source code of, the Software or any portion thereof. The Documentation may be used for your internal use only. You may not duplicate, copy, or otherwise reproduce the Documentation nor may you distribute the Documentation to any third party. Prior to disposing of any media or apparatus containing the Software or Documentation, you will ensure that any Software or Documentation contained on such media or stored in such apparatus has been completely erased or otherwise destroyed. 2. OWNERSHIP. Symantec is the owner or licensee of all intellectual property in the Software and Documentation. You agree that no title to the Software or the Documentation, or to the intellectual property in any of the Software or Documentation or in any copy of the Software or Documentation, is transferred to you, and that all rights not expressly granted to you hereunder are reserved by Symantec. 3. LIMITED WARRANTY. Symantec warrants that the media on which the Software is distributed will be free from defects for a period of sixty (60) days from the date of delivery of the Software to you. Your sole remedy in the event of a breach of this warranty will be that Symantec will replace any defective media returned to Symantec within the warranty period. This Limited Warranty is void if failure of the Software media has resulted from accident, abuse, or misuse of the media. Symantec does not warrant that the Software will meet your requirements or that operation of the Software will be uninterrupted or that the Software will be error-free. 4. DISCLAIMER OF WARRANTIES. THE ABOVE WARRANTY IS EXCLUSIVE AND IN LIEU OF ALL OTHER WARRANTIES, WHETHER EXPRESS OR IMPLIED, INCLUDING WITHOUT LIMITATION ANY WARRANTIES OF MERCHANTABILITY, FITNESS FOR PARTICULAR PURPOSE, OR NONINFRINGEMENT. THE ENTIRE RISK AS TO THE QUALITY AND PERFORMANCE OF THE SOFTWARE IS WITH YOU. 5. LIMITATION OF LIABILITY. IN NO EVENT SHALL SYMANTEC BE LIABLE TO YOU FOR ANY DAMAGES WHATSOEVER, INCLUDING WITHOUT LIMITATION LOSS OF DATA, USE, PROFITS, OR GOODWILL, OR INDIRECT, SPECIAL, INCIDENTAL, EXEMPLARY, PUNITIVE OR CONSEQUENTIAL DAMAGES, ARISING FROM ANY CAUSE AND ON ANY THEORY OF LIABILITY INCLUDING WITHOUT LIMITATION CONTRACT, WARRANTY, STRICT LIABILITY, NEGLIGENCE OR OTHER TORT, BREACH OF ANY STATUTORY DUTY, PRINCIPLES OF INDEMNITY, THE FAILURE OF ANY LIMITED REMEDY TO ACHIEVE ITS ESSENTIAL PURPOSE, OR OTHERWISE, EVEN IF SYMANTEC HAS BEEN NOTIFIED OF THE POSSIBILITY OF SUCH DAMAGES. THESE LIMITATIONS SHALL APPLY NOTWITHSTANDING THE FAILURE OF THE ESSENTIAL PURPOSE OF ANY LIMITED REMEDY, AND REGARDLESS OF WHETHER YOU ACCEPT THE SOFTWARE. 6. EXPORT RESTRICTIONS. You agree that you shall not directly or indirectly export the Software. 7. TERMINATION. This license is terminated if you fail to perform or observe any covenant, condition, or term to be performed or observed under this Agreement. Symantec, at its sole option, may provide written notification of the termination of the License for any reason, and in addition to any other rights or remedies available to Symantec, you shall promptly return to Symantec the original and all copies of the Software and Documentation in your possession, in whole or in part, in any form, including partial copies or modifications, and within two weeks after any such termination you shall certify in writing to Symantec that you have done so. In addition, Symantec reserves the right to disable the Software remotely without any prior notification if you fail to perform or observe any covenant, condition, or term to be performed or observed under this Agreement, or in the event of non-payment of the license fee for the Software. 8. U.S. GOVERNMENT RESTRICTED RIGHTS. U.S. GOVERNMENT RESTRICTED RIGHTS LEGEND. Use, duplication or disclosure by the Government is subject to restrictions as set forth in the Commercial Computer Software-Restricted Rights clause at FAR 52.227-19(c)(1) and (2) or subparagraph (c)(1) of the Rights in Technical Data and Computer Software clause at DFARS 252.227-7013 or in similar or successor clauses in the FAR, or the DOD or NASA FAR Supplement, as applicable. Unpublished rights reserved under the Copyright Laws of the United States. Contractor/ manufacturer is Symantec, 20330 Stevens Creek Boulevard, Cupertino, California 95014, United States of America. 9. LAWS GOVERNING WARRANTIES AND LIABILITY. Some U.S. states do not allow the limitation or exclusion of liability for incidental or consequential damages, or allow the exclusion of implied warranties, so the above limitation and exclusion above may not apply to you, and you may have other rights which vary from state to state. In any event, Symantec’s liability shall not exceed the purchase price actually paid for the Software. 10. GENERAL. This Agreement shall be governed by and interpreted in accordance with the laws of California. You hereby submit to the jurisdiction of the courts of Santa Clara County, California, United States of America, and the District and Circuit Courts for the Northern District of California, and agree that these shall be the sole fora to resolve all disputes arising under this Agreement or connected in any way with the Software. You agree to pay all costs associated with any such action or suit, including Symantec’s costs and attorney's fees. This Agreement may only be modified by a written document which has been signed by both you and Symantec. You may not assign this Agreement or transfer the Software without Symantec's consent. The headings of the Sections of this Agreement are for convenience only and will not be of any effect in construing the meanings of the Sections. The right to require performance of any duty hereunder is not barred by any prior waiver, forbearance or dealing. If any provision of this Agreement is deemed invalid by a court of competent jurisdiction, it is to that extent to be deemed omitted, unless the court can modify said provision to make it valid and enforceable, in which case the provision shall be so modified. The remainder of the Agreement shall be valid and enforceable to the maximum extent possible. 6 C O N T E N T S Welcome to Mail-Gear Getting started ..................................................................................... 11 Chapter 1 Mail-Gear installation Overview ............................................................................................. 13 Minimum requirements ............................................................... 13 Preparing for installation .................................................................... 14 Upgrading from earlier versions ................................................. 14 Installing and configuring the operating system ........................ 15 Disabling any other SMTP and POP3 servers ............................ 15 Verifying DNS settings ................................................................. 15 Configuring the DNS server ........................................................ 17 Installing the software ........................................................................ 17 Supplying requested information for installation ....................... 18 Installing Mail-Gear ...................................................................... 19 Configuring the software .................................................................... 21 Configuring SMTP server options ............................................... 21 Configuring SMTP server options for mail relay ........................ 22 Uninstalling the software .................................................................... 23 Chapter 2 Mail relaying Mail relaying for external hosts .......................................................... 25 Mail-Gear as a filtering relay to local servers .................................... 28 Chapter 3 Mail-Gear design Mail-Gear objects ................................................................................ 31 Mail-Gear methods ............................................................................. 32 Hierarchy of permissions ................................................................... 33 Hierarchy of events ............................................................................ 34 Using casts .......................................................................................... 35 Chapter 4 Understanding address lists and dictionaries Lists ...................................................................................................... 37 Adding addresses to lists ............................................................. 38 List states ...................................................................................... 39 Dictionaries ......................................................................................... 40 7 Content scanning of messages ........................................................... 41 Handling of messages ........................................................................ 42 Masking of messages during events ........................................... 45 Disposition of blocked messages ................................................ 46 Notification messages .................................................................. 49 How address lists and dictionaries work together ............................ 52 Chapter 5 The Mail-Gear Web Client Overview ............................................................................................. 59 Requirements ...................................................................................... 59 Accessing the Mail-Gear Web Client ................................................. 60 Chapter 6 Administration Accessing the main administration page ........................................... 63 Search capability for user lists ............................................................ 66 Chapter 7 Working with clients Adding a client .................................................................................... 69 Deleting a client .................................................................................. 70 Modifying a client ............................................................................... 70 Scheduling a client ............................................................................. 70 Setting client defaults ................................................................... 71 Scheduling a daily event ............................................................. 78 Scheduling an event for a specific date ...................................... 79 Editing or viewing an existing event .......................................... 80 Deleting an existing event ........................................................... 80 Generating a report for a client ......................................................... 81 Chapter 8 Working with users Adding a user ...................................................................................... 87 Adding a single system user ........................................................ 88 Adding multiple system users simultaneously ........................... 89 Adding virtual users ..................................................................... 91 Adding a single relay user ........................................................... 94 Adding multiple relay users ........................................................ 95 Enabling existing users ................................................................ 96 Deleting a user ............................................................................. 98 Modifying a user ................................................................................. 99 Scheduling a user ............................................................................. 101 Generating a report for a user ......................................................... 102 8 Chapter 9 Working with casts Adding a cast .................................................................................... 104 Deleting a cast .................................................................................. 104 Modifying a cast ................................................................................ 105 Modifying cast membership ...................................................... 105 Modifying cast attributes ........................................................... 106 Scheduling a cast .............................................................................. 107 Generating a report for a cast .......................................................... 107 Chapter 10 Working with lists Adding a list ...................................................................................... 110 Deleting a list .................................................................................... 110 Modifying a list ................................................................................. 110 Generating a report for a list ............................................................ 112 Generating a report on list contents ......................................... 112 Generating an Access Report for a list ..................................... 113 Chapter 11 Working with dictionaries Adding a dictionary .......................................................................... 115 Deleting a dictionary ........................................................................ 116 Modifying a dictionary ...................................................................... 116 Adding words to the dictionary ................................................ 116 Deleting words from the dictionary .......................................... 117 Editing words in the dictionary ................................................. 118 Generating a report for a dictionary ................................................ 118 Chapter 12 Working with the system Modifying the system ....................................................................... 121 SMTP server options .................................................................. 121 SMTP server options for relaying .............................................. 123 POP server options .................................................................... 128 Built-in HTTP server options .................................................... 130 Other settings ............................................................................. 131 Scheduling the system ...................................................................... 133 Generating a report for the system .................................................. 134 Chapter 13 Using Mail-Gear: Some examples Configuring Mail-Gear (initial setup) ............................................... 135 Monitoring and controlling email use ............................................. 152 Mail relaying (initial setup) .............................................................. 157 9 Service and support solutions CD Replacement Form Index 10 Welcome to Mail-Gear This manual contains instructions for using the Mail-Gear version 2.0 software, hereafter referred to as Mail-Gear, as a high-performance, multithreaded client/server application for Web-based email for Microsoft® Windows NT® Server 4.0, Microsoft Windows® 2000 Server or Windows 2000 Advanced Server, and Sun® Solaris® version 2.6 or later. Mail-Gear effectively manages your technology resources to provide safe, flexible email access to your users. Mail-Gear filters incoming and outgoing email, lets you schedule the use of email tools, and monitors email access to ensure full accountability for responsible email use. Getting started Proper installation and setup help you achieve trouble-free operation of your Mail-Gear enabled network. Following the steps below is strongly recommended: 1 Install Mail-Gear on a Windows NT, Windows 2000, or Solaris server that meets the minimum requirements outlined in Chapter 1, “Mail-Gear installation” on page 13. 2 To understand Mail-Gear design and use the software more effectively, read “Mail relaying” on page 25, “Mail-Gear design” on page 31, and Chapter 4, “Understanding address lists and dictionaries” on page 37. In configuring Mail-Gear for your network, careful and thoughtful planning gives you the control you want and eliminates end-user confusion. 3 Use the Modify method for the System object to set parameters for your SMTP and POP servers and for external and local relaying. 11 Welcome to Mail-Gear 4 Use a client on your network to access the Mail-Gear administrative tools to add those users that are to have access to Mail-Gear. Also, use the Modify method for the User object to assign administrative permissions to appropriate users. 5 Use the Schedule method for the System object to establish the default settings for Mail-Gear. 6 Populate the Mail-Gear client database by manually adding clients or by using the Mail-Gear Web Client™. Further refine your network use by completing the following: 12 1 Create dictionaries to be used for filtering email messages for Mail-Gear objects. 2 Create lists to use for either bulk emailing, address filtering, or both. 3 Create casts based on groups of clients and users on your network. 4 Set default permissions for casts by using the Schedule method for the Cast object. 5 Schedule access rights for clients, users, or casts based on a daily event or a specific date and time. C H A P T E R Mail-Gear installation 1 Overview This chapter provides instructions on installing and configuring Mail-Gear® version 2.0 software, hereafter referred to as Mail-Gear. Mail-Gear is a high-performance, multithreaded client/server application for Web-based email for Microsoft® Windows NT® Server 4.0, Microsoft Windows® 2000 Server, and Sun® Solaris® version 2.6 or later. If you purchased Mail-Gear as part of a turnkey product, the Mail-Gear software might have been already installed for you. If in doubt, contact your supplier before proceeding with these instructions. Minimum requirements Server requirements Before attempting to install Mail-Gear, verify that your server meets the following requirements: ■ A SPARC®-based server running Solaris 2.6 or later or a PC based on an Intel® Pentium® or compatible processor running one of the following: ■ Microsoft Windows NT Server 4.0, with Service Pack 6 already installed ■ Microsoft Windows 2000 Server ■ Microsoft Windows 2000 Advanced Server Note: Mail-Gear 2.0 functions on Windows 2000 Server with the same level of compatibility as on Windows NT Server 4.0. However, Mail-Gear does not adhere to the Windows 2000 Logo Requirements. 13 Mail-Gear installation ■ Additional requirements: ■ 128 MB of memory, minimum. ■ 25 MB of available disk space for the Mail-Gear program files, on-line documentation, and configuration files. ■ Additional disk space as required for storage of user mailboxes and temporary storage of mail while it is being processed. The actual amount of additional disk space varies with the number of users, the amount of mail users are permitted to store on the server, and the volume of mail processed. ■ A CD-ROM drive (if you are installing Mail-Gear from CD-ROM). To install and activate the software, you also need the following: ■ Access to your server’s local Administrator password (Windows NT and Windows 2000) or your server’s root password (Solaris). ■ Direct Internet access and a Web browser. Suitable browsers include Netscape Navigator® 4.0 or later and Microsoft Internet Explorer 4.0 or later. Client requirements Suitable browsers for Web-based interface include: ■ Netscape Navigator® 4.0 or later ■ Microsoft Internet Explorer 4.0 or later Other Web browsers, including earlier versions of the above, might work, although possibly with reduced functionality. Preparing for installation Upgrading from earlier versions This Mail-Gear distribution might be used to upgrade a server running an earlier version of Mail-Gear. To upgrade an earlier version of Mail-Gear, install the distribution as described here. The installation process automatically upgrades your Mail-Gear installation to the release contained in this distribution. 14 Preparing for installation Warning: Do not uninstall the old version of Mail-Gear before upgrading. The new version of Mail-Gear should be installed over the old version. Uninstalling the older version of Mail-Gear may remove settings (such as scheduled events and list definitions) that you do not want to lose in upgrading. Installing and configuring the operating system Your server’s operating system software and applicable updates must be installed, configured, and working correctly before you install Mail-Gear. Consult your server’s documentation for more information. Installation of your operating system software and updates is outside the scope of this guide. Disabling any other SMTP and POP3 servers Because Mail-Gear is a Simple Mail Transfer Protocol (SMTP) server and a Post Office Protocol (POP3) server, it must have exclusive access to the TCP/IP ports that correspond to those services. No other SMTP or POP3 servers can be running on the same server on which Mail-Gear is installed. Disable these conflicting services before installing Mail-Gear. When installing Mail-Gear on a Solaris server, the installation program may detect conflicting programs commonly found on Solaris systems such as the Solaris sendmail program or POP3 servers being run out of inetd. If such programs are detected, the installation program issues a warning and offers to disable these programs automatically. Automatic disabling of these conflicting programs might fail, possibly leaving your server in an uncertain condition. Therefore, you might want to disable the conflicting programs before installing Mail-Gear. Verifying DNS settings Your server’s TCP/IP Domain Name Service (DNS) settings must be correct before installing Mail-Gear. To verify your DNS settings in Windows NT: 1 Open the Network control panel. 15 Mail-Gear installation 2 On the Protocols tab, click TCP/IP Protocol, then click Properties. Must not be left empty Must list at least one valid server 3 On the DNS tab, verify that both the Host Name and Domain fields contain the correct values, and verify that at least one valid DNS server is listed in the DNS Service Search Order list. Consult with your network administrator or Internet service provider if you are unsure of the values to be used. 4 Make any necessary changes, and restart your server if necessary. Solaris Your server must be configured as a DNS client before installing Mail-Gear. To verify your DNS settings for Solaris: 1 Examine the file /etc/resolv.conf. The file should contain lines similar to the following: domain yourdomain.here nameserver 192.168.1.2 nameserver 192.168.9.7 16 Installing the software 2 Verify that the specific domain name and name server addresses used in your file are correct for your site. Consult with your network administrator or Internet service provider if you are unsure of the values to be used. 3 Make any necessary changes. 4 If the /etc/resolv.conf file does not exist on your server, create it using the above example as a template. Be sure to replace the domain name and name server addresses with values that are correct for your site. Note: On Netra™ systems, the Web-based Netra Administration interface should be used to configure the system as a DNS client. After the settings have been established using the Netra Administration interface, verify the settings. Configuring the DNS server In addition to configuring your server to use DNS, the DNS zone for your site must be configured to contain at least the following records: ■ An A (address) record that corresponds to your server’s host name ■ A PTR (pointer) record that maps your server’s IP address to its host name, including domain name (that is, server.brightcorp.com) ■ If you are using an SMTP relay host, an A record that corresponds to that SMTP relay host Check with your DNS server administrator or Internet service provider if you are uncertain whether the necessary records have been installed on the DNS server you are using. Installing the software If you have completed the procedures in this chapter to prepare for Mail-Gear installation, you are now ready to install the software. 17 Mail-Gear installation Supplying requested information for installation If you are using Windows NT, Windows 2000, or Solaris, during the Mail-Gear installation process you are prompted to supply certain information. Installation directories The Mail-Gear software is organized into five directories, each containing specific kinds of files, as shown in the following table. Each directory contains specific kinds of files. To support sites with large, specialized disk configurations, the location of each of these directories can be specified as Mail-Gear is installed. As the program prompts you for the location of each directory during installation, a default location is shown. Unless you have a compelling reason to do otherwise, you should accept the default locations. If you are installing more than one Symantec product on the same server, each product should be installed in a separate directory. If more than one product is located in the same directory, at least one of the products might not function properly. The following table describes the Mail-Gear directories: 18 Directory Description InstallDir Contains the Mail-Gear program files and read-only data files. This directory requires approximately 5 MB of disk space. BoxDir Contains users’ mailboxes. The disk space required varies with the number of users and the volume of mail that is stored on the server. MailDir Contains messages in transit until these messages are either successfully delivered or returned to sender. The disk space required varies with the amount of mail that is sent through Mail-Gear. LocalDir Contains server-specific configuration files, such as list definitions and scheduled events. This directory usually requires less than 1 MB of disk space. LogDir Contains log files that record Mail-Gear activity. The disk space required depends on the amount of activity and the length of time log files are retained. Installing the software Built-in HTTP server port The Mail-Gear software is managed through a Web-based interface. This interface, along with the Mail-Gear Web Client user interface, is provided through a built-in HyperText Transfer Protocol (HTTP) server included with Mail-Gear. This HTTP server is independent of any existing HTTP server that already may be installed on your server and is not a general-purpose Web server. During the installation process, you are prompted for the TCP/IP port number on which this built-in HTTP server listens. The number you specify becomes the port number in the URLs you use to access the Mail-Gear Web Client and the main Mail-Gear administration page. The port number specified must be exclusive to Mail-Gear and must not already be in use by any other program or service. Because the built-in HTTP server is not a general purpose Web server, do not use port number 80 (the default port number for general purpose Web servers). Unless you have compelling reasons to do otherwise, you should use the default port number of 8003 to be consistent with the examples contained in this guide and in the Mail-Gear Web Client User’s Guide. If you choose a port number other than the default, do not forget which port number you chose. Initial administrative account A virtual administrative account is created at installation with a login name of virtadmin. You are prompted to provide a password for this account during the installation process. Do not forget this password. Initially, the virtual administrative account is the only account with privileges to manage Mail-Gear. You must log on using the virtual administrative account and delegate administrative privileges to other accounts. Installing Mail-Gear Windows NT and Windows 2000 To install Mail-Gear for Windows NT and Windows 2000: ■ If you were provided with a URL for retrieving the Mail-Gear distribution: a Use a Web browser to download the distribution file. b After the file has been downloaded, log on as Administrator. 19 Mail-Gear installation c ■ Double-click the downloaded file and follow the on-screen instructions. If you are installing Mail-Gear from CD-ROM: a Log on as Administrator and insert the Mail-Gear disk into the server’s CD-ROM drive. The CD-ROM on which Mail-Gear is distributed is configured to open a window that shows the contents of the disk. b Double-click the Setup icon to begin the installation process. Double-click the Setup icon to begin installation process c Follow the on-screen prompts to complete the installation. Solaris The Solaris version of Mail-Gear is distributed as a self-extracting, self-installing shell archive (shar) file, named mailgear.sh. To install Mail-Gear for Solaris: ■ If you were provided with a URL for retrieving the Mail-Gear distribution file: a Use a Web browser to download the file to your server and save the file as mailgear.sh. b After the file has been downloaded, log on as root, change directory to the location where the Mail-Gear distribution file was copied, and begin the installation process with the following command: # sh mailgear.sh ■ If you are installing Mail-Gear from CD-ROM: a Log on as root and insert the Mail-Gear disk into the CD-ROM drive. The Solaris volume manager automatically mounts the disk as /cdrom/mailgear b Change directory to /cdrom/mailgear and begin the installation process with the following command: # sh mailgear.sh 20 Configuring the software c Follow the on-screen prompts to complete the installation. A transcript of the installation is saved as /Mail-Gear-install.log. Configuring the software Configuring SMTP server options Before you can use Mail-Gear for processing email, it must be configured with the name of the local email domain for which it is handling mail, as well as the names of any additional domains that should be recognized as local. Messages addressed to domains designated as local are delivered locally (that is, to local users and lists configured in Mail-Gear). Messages addressed to domains not designated as local are forwarded to the appropriate SMTP server for the nonlocal domain. You must specify the SMTP port number for Mail-Gear’s SMTP server if this port number is different from the default SMTP port number of 25. To configure Mail-Gear SMTP server options: 1 On the main Mail-Gear administration page, under System, click Modify. 2 Click SMTP Server Options. 3 Click Next. 4 Make any changes, then click Finish. SMTP port number if different than default port number of 25 Primary local email domain Additional local email domains 21 Mail-Gear installation The domain specified as the primary local email domain is the domain that is appended to users’ login names to generate outgoing email addresses. For example, if the local email domain is specified as brightcorp.com, a message sent by user jpublic using the Mail-Gear Web Client shows the sender as [email protected]. Configuring SMTP server options for mail relay If you plan to use Mail-Gear as a filtering relay to other local mail servers running other email products, such as Lotus Notes® or Microsoft Exchange, rather than as a stand-alone mail server, configure Mail-Gear to act in a relay capacity. For information on configuring these settings, see “Mail relaying” on page 25. If Mail-Gear has been installed on a server located behind a firewall that prevents direct access to off-site SMTP servers, specify the name or address of a relay host through which outgoing SMTP messages can be forwarded for delivery to nonlocal recipients. To configure Mail-Gear SMTP server options for relaying: 22 1 On the main Mail-Gear administration page, under System, click Modify. 2 Click SMTP Server Options (Relay). Uninstalling the software 3 Click Next. 4 Make any changes, then click Finish. To properly configure the mail-relaying portions of this display, you must read and understand the sections of this guide on mail relaying Provide the relay host and port number (if different than the default port number of 25) if behind a firewall Uninstalling the software Uninstalling Mail-Gear might delete local settings, such as scheduled events and list definitions, and makes any mail stored in Mail-Gear at the time of uninstallation unavailable. To uninstall Mail-Gear for Windows NT and Windows 2000: 1 Open the Add/Remove Programs control panel. 2 Click the Mail-Gear program item, then click Add/Remove. 3 Follow the on-screen prompts to complete the uninstallation. 23 Mail-Gear installation To uninstall Mail-Gear for Solaris: ■ Log on as root and issue the following command: # pkgrm SYMCmailg Note: If Mail-Gear was permitted to automatically disable conflicting services when it was installed, an attempt is made to reenable the services that were disabled during installation. 24 C H A P T E R Mail relaying 2 Mail-Gear can be used in one of two ways to handle email traffic. In its standard configuration, Mail-Gear is used as a stand-alone mail server. Users log onto Mail-Gear via the Mail-Gear Web Client, and Mail-Gear controls the permissions for sending and receiving messages, and for applying filtering to messages. Mail-Gear also can be used as a filtering mail relay to route incoming mail to other local mail servers for delivery (that is, other mail servers under site control). This configuration lets Mail-Gear be used in conjunction with other email software products such as Microsoft Exchange or Lotus Notes®, which you might already use on your network. Mail-Gear settings let you specify local relay information if you are using the Mail-Gear server in this manner. Apart from the settings that control how the Mail-Gear server is configured to handle local email, Mail-Gear also provides settings for controlling the relay of mail from hosts that are external to the Mail-Gear server to other external hosts. These settings can be used to prevent the Mail-Gear server from being used to relay junk email. The Mail-Gear controls are divided into two separate aspects of mail relaying: external-to-external relaying and local relay routing. The settings for both aspects are controlled using the Modify method for the System object. Both aspects must be thoroughly understood so that Mail-Gear can be configured properly for your network. Mail relaying for external hosts The mail delivery component of Mail-Gear is an SMTP (Simple Mail Transfer Protocol) server used to send and receive mail using SMTP. When the Mail-Gear server receives an email message from an external host, the server examines the target address of the message. If the Mail-Gear server’s 25 Mail relaying address matches the message’s target address, the server places the message in the local mailbox for the target user. (Filtering that might result in the message being blocked is not considered for the purposes of this discussion.) If the server’s address does not match the message’s target address, the Mail-Gear server (in its default configuration, with no restrictions imposed on relaying) attempts to relay the message to the target address. This mail relay is accomplished by Mail-Gear in one of two ways, depending on the local network architecture. The local network might have a relay host responsible for all forwarding. In this case, the Mail-Gear Default Relay Host field under the Modify method for the System object should contain the address of the relay host, and the SMTP server forwards all relayed messages to the relay host. (The specified relay host presumably houses its own SMTP server via Mail-Gear or otherwise.) See page 123 for information on specifying a Default Relay Host in Mail-Gear. If no relay host is specified, the SMTP server attempts to make a direct Internet connection with the target address and sends the message. If the connection fails, the SMTP server replies to the original sender that the message could not be delivered. Host A attempts to send email addressed to Host B through Host C Host A Host B Host C attempts to relay message to intended recipients at Host B if, and only if, settings in Mail-Gear permit relaying for Host A Mail-Gear Host C One ramification of uncontrolled mail relaying is that A can send a message to B using another mail server as a relay. Most administrators will want to control who uses the local mail server as a relay because A might be a “spammer,” which B wants to avoid. Mail-Gear lets you control the remote hosts from which Mail-Gear accepts mail to be relayed. The default setting in Mail-Gear is to accept mail from any remote host. However, you 26 Mail relaying for external hosts can limit the hosts from which Mail-Gear accepts mail to only those hosts that you specifically designate or to none at all (that is, local email only). Note: When determining the originating host of a given email message (to determine whether the message can be relayed), Mail-Gear does not examine the From field of the incoming email message because this information easily can be falsified. Mail-Gear checks the socket connection to determine the originating host of a message. When the Mail-Gear server receives a message for which it determines that both the sender and receiver are remote, Mail-Gear checks the settings that have been established for external-to-external relay and handles the message accordingly. If a message is unable to be delivered, Mail-Gear replies to the original sender that the message cannot be delivered. Specify the manner in which Mail-Gear handles messages where neither the sender nor the receiver is local If you are allowing mail only from certain hosts, enter those specific hosts here Even if both the sender and the recipient of a message are remote, the Mail-Gear system default filtering settings still apply. If the Mail-Gear server is used as a filtering relay, however, other levels of filtering might apply to messages that are being relayed. For information on controlling mail relaying from external hosts in Mail-Gear, see “SMTP server options for relaying” on page 123. 27 Mail relaying Mail-Gear as a filtering relay to local servers Mail-Gear can be used as a filtering mail relay to route incoming and outgoing mail to and from other local mail servers (that is, other mail servers under site control). This configuration lets Mail-Gear be used in conjunction with other email software products running on other local servers. Host A sends message to relay user at Host C Host A Mail-Gear applies filtering and relays message to appropriate local email server Mail-Gear Host C User obtains message from appropriate email server using email software of choice Local email server Local email server Different types of users are added to Mail-Gear, depending on how you plan to use Mail-Gear on your network. Three types of users are recognized by Mail-Gear: system, virtual, and relay users. When Mail-Gear is used as a stand-alone mail server, virtual users and/or system users are used. Both virtual and system users can log onto Mail-Gear; these users have mailboxes in Mail-Gear and have both an account name and password for accessing their mailboxes, address books, and so on. If Mail-Gear is used as a filtering relay, those users for whom mail is to be relayed are relay users. The Mail-Gear account name for a relay user is the email address of the user. For incoming mail addressed to a relay user, Mail-Gear applies the filtering and then routes the incoming message to the local mail server for delivery. The relay user has no need to log on to the Mail-Gear server because no mail is stored on the server for the user. For 28 Mail-Gear as a filtering relay to local servers outgoing mail originating from a relay user, Mail-Gear applies the filtering and attempts delivery of the message. Note: All types of users can exist in Mail-Gear concurrently. However, the differences in functionality in regard to the type of user still apply. Instructions for relaying local mail are entered into the Relay Routing List. Mail-Gear treats all mail addressed to any hosts listed in this list as local email and routes the mail accordingly. Two types of entries for local routing can be entered in the routing table. If the table entry contains a “route from” host with no “route to” host specified, messages addressed to the specified host are routed to the initial host entry. If the table entry contains both a “route from” and a “route to” host, any email addresses that are addressed to the “route from” host are relayed to the “route to” host. For the purposes of mail relaying, those hosts for which mail is treated as local are entered in the Relay Routing List Indicate action for handling local mail for which neither the sender nor the recipient has been defined as a Mail-Gear user Mail-Gear routes mail for users who have accounts on local machines (designated in the Relay Routing List) but do not have relay user accounts in Mail-Gear. However, routed mail for users that have not been defined can only be delivered unfiltered, or these messages can be bounced back to the sender. Bounced messages are returned to the sender with a message indicating that the mail cannot be delivered. 29 Mail relaying 30 C H A P T E R Mail-Gear design 3 Mail-Gear objects The Mail-Gear design is based on an object-oriented approach. Each network has users, client computers, and servers that are all part of the network. Mail-Gear classifies each of these entities as objects and uses methods for manipulating these objects. The Mail-Gear objects are defined in the following table. Object Symbol Description Client A client is defined as a computer connected to the network with a unique IP address. User A user is defined as a person using your network. Users can be given unique permissions regardless of which computer on the network they use. Cast A cast is a group of users or clients that can be designated to operate in a specific manner. Casts can be scheduled to have different permissions, depending on the date and time of day. User and Client objects may belong to only one cast. List A list is a collection of addresses. Lists can be uniquely applied to clients, users, casts, or the System object by default or by date and time of day to allow or deny email messages to or from the addresses in the list. 31 Mail-Gear design Object Symbol Description Dictionary A dictionary is a collection of words or phrases that are used to dynamically score and potentially block email messages. System The system is the actual server running Mail-Gear. The default properties for Mail-Gear on your network are established using the System object. Mail-Gear methods Methods are used to change the permissions or the functionality for objects. Five methods can be applied to Mail-Gear objects: Modify Schedule Delete Add Report Client object Not all methods are available for each object. The following table describes each method available in Mail-Gear and the objects toward which each can be applied. 32 Method Object Description Add Client, User, Cast, List, Dictionary The Add method is used to add objects to Mail-Gear. Delete Client, User, Cast, List, Dictionary The Delete method is used to remove objects from Mail-Gear. Hierarchy of permissions Method Object Description Modify Client, User, Cast, List, Dictionary, System The Modify method is used to adjust the settings for defined objects. Schedule Client, User, Cast, System The Schedule method is used to define default access permissions, as well as to schedule access permissions based on date and time of day. Report Client, User, Cast, List, Dictionary, System The Report method is used to show the activity for various objects, as well as to review the contents of lists and dictionaries. Hierarchy of permissions Mail-Gear assigns priorities to the different access permissions that have been set for Mail-Gear objects. For example, if a client computer has filtered access but a user who tries to use that computer has unfiltered and open access permissions, which permission takes priority? The priority that Mail-Gear assigns to object access permissions is shown in the following table. Highest priority Client permissions Client’s cast permissions User permissions User’s cast permissions Lowest priority System permissions 33 Mail-Gear design For this example, the user, regardless of the access profile established for that user, would have filtered email access from the client computer because client permissions have a higher priority. Mail-Gear takes into consideration that the user’s default permissions (unfiltered) would normally allow receipt of any message, so messages in the user’s mailbox that are filtered as a result of the client settings remain in the user’s mailbox but are unavailable while the user is logged on to Mail-Gear from the filtered client. For information on how Mail-Gear handles this type of filtering of incoming and outgoing email, see Chapter 4, “Understanding address lists and dictionaries” on page 37. Because you can schedule events for each object in Mail-Gear, the events for objects with the highest priority supersede the events and default permissions for the objects below them. For example, if a user’s permissions are set to unfiltered access and a client cast called “Room 141” is scheduled for no email access, the user has no email access in Room 141 and has unfiltered permissions from other clients not in that cast. Any incoming email messages are still delivered to the user’s inbox, but the user has no access to their email from the clients in the Room 141 cast. Hierarchy of events In addition to the hierarchy of object permissions, types of events also have the following priorities: Higher priority Specific event Daily event Lower priority Defaults Specific events are scheduled for a specific date and time such as September 27, 1999, from 2:00 PM to 3:00 PM. A specific event has the highest priority. After a specific event is past, it drops from the system. Daily events reoccur each specified day such as every Monday and Wednesday from 11:00 AM to 1:00 PM. A daily event continues to occur as specified until you cancel it. Default settings apply when no other event is in effect. 34 Using casts Mail-Gear considers default settings and scheduled events differently for sending and receiving email. For more information on how Mail-Gear determines whether to deliver or block email messages, see Chapter 4, “Understanding address lists and dictionaries” on page 37. Objects, with the exception of the System object, are not required to have a default event. Clients, users, and casts inherit their default settings from the System defaults unless you change the default settings for that object. For example, you could schedule the computers in a school library to be filtered by default. Then you could schedule a daily event that prevents email access on Monday through Thursday from 10:00 AM to 2:00 PM while students are using library computers for online research. You could then schedule a specific event on Tuesday, September 14, 1999 for a faculty workshop with unfiltered email access from 11:00 AM to 1:00 PM. The event for Tuesday, September 14 would override the daily event that occurs every Tuesday. Using casts A cast is a grouping of users or clients. Casting of Client and User objects is a powerful feature in Mail-Gear. Creating and scheduling casts (rather than individual users and clients) can minimize your administrative work. The following guidelines should help you set up casts. For information on creating and scheduling casts, see “Working with casts” on page 103. ■ Casts should contain like objects when possible (that is, users and clients should not be mixed in the same cast). ■ Casts should be created when you want to give a group of users or clients a default setting (for example, filtering properties) that differs from the System default settings. For example, to give certain employees less restrictive email access after work hours and on weekends, you could create a cast that contains these users. Then, scheduling a single daily event for the entire cast is much more efficient than scheduling the same event for each user individually. ■ Casts should be created when a group of users or clients needs different permissions during specific times. For example, employee accounts can be filtered by default and scheduled to be Allow Only every day from 8:00 AM to 5:00 PM. ■ Casts for clients should be based on geographic location (for example, room number) or logical grouping (for example, teacher computers, summer employees). 35 Mail-Gear design If an object is a member of a cast and you want to change the object’s permissions, scheduling the object individually overrides the cast permissions. For example, a special student may have his email access time extended to 5:00 PM even though he belongs to a cast for which access is denied after 4:00 PM. 36 C H A P T E R Understanding address lists and dictionaries 4 Mail-Gear controls email access through a combination of address lists and dictionary terms (different access permissions can be scheduled at different times). You can manage email usage by specifying (through address lists) where mail can or cannot be received from and where it can or cannot be sent, and by regulating (through dictionaries) the content of the message itself. Lists Mail-Gear lists contain email addresses or parts of addresses. Address lists are used for two purposes. First, by scheduling address lists as either Allow or Deny, these lists can be used to restrict incoming and outgoing mail. For example, if an address list is placed in the Deny state for a particular user for both sending and receiving, that user is not permitted to send email to or receive any email from any address contained in that list. If the list is in the Allow state and the user is scheduled for Allow Only, then the user is allowed to send email to or receive email from only the addresses contained in that list. Second, lists can be used to deliver email messages to multiple users at once. An email message addressed to a list rather than to a single address is delivered to all valid email addresses contained in that list. For example, if your server handles mail for brightcorp.com, you could create a list called employees and then include in that list email addresses for all employees. Then, any email messages addressed to [email protected] are delivered to all employees whose email addresses are contained in that list. 37 Understanding address lists and dictionaries Note: The email address for a list is listname@localdomainname. Messages addressed to the list address are delivered to all valid email addresses contained in the list. The Postmaster list is the only list that exists when Mail-Gear is initially installed. The Postmaster list contains the virtadmin email address and cannot be deleted. You can create any number of additional lists and populate these lists with addresses as necessary. Adding addresses to lists Mail-Gear looks for the most specific match when checking an address against lists. By using specific address entries in lists and scheduling objects accordingly, you can block or allow email messages to and from entire domains and specific users, or you can restrict all email messages. The following table shows how different address entries contained in lists are interpreted by Mail-Gear. Entry format Sample entry Description user@domain [email protected] A specific user at a specific domain. @domain @brightcorp.com All users at a specific domain. user lamieux A user of a specific name at the local email domain. user@ lamieux@ A user of a specific name at any domain. @ @ Any user at any domain. Example 1: Create a list called BadList and place “@” in the list. Schedule a cast to have filtered email access and place the BadList list in the Deny state for both sending and receiving email. Cast members are not able to send or receive any email messages while the scheduled event is in effect. Example 2: Create a list called Grade12 and place the email addresses of all 12th-grade students in the list. Set the defaults for a particular cast for Allow Only access with the Grade12 list in the Allow (Dictionary Enabled) state for both sending and receiving email. This cast can only send messages to and receive messages from the users in the Grade12 list. 38 Lists List states Each address list is placed in one of four states for incoming and outgoing email: Allow (Dictionary Enabled), Allow (Dictionary Disabled), Deny, or Off. The state of each list is specified when establishing the default settings and scheduling events for specific objects. The state of each list can be different based on the email restrictions for individual users, clients, or casts. State Description Allow (Dictionary Enabled) Email messages sent to and received from addresses contained in Allow (Dictionary Enabled) lists are permitted, and the message content is scanned and scored using active dictionaries. Allow (Dictionary Disabled) Email messages sent to and received from addresses contained in Allow (Dictionary Disabled) lists are permitted, and the message content is not scanned and scored using active dictionaries. Deny Email messages sent to and received from addresses contained in Deny lists are not permitted. Off Email messages sent to and received from addresses contained in Off lists are not denied, and the message content is scanned and scored using active dictionaries. Allow lists Allow lists should contain addresses to which you want to let email be sent or received. You can choose either Allow (Dictionary Enabled) or Allow (Dictionary Disabled). Keep in mind that setting a list to Allow (Dictionary Disabled) allows unconditional delivery of the message regardless of the message content. Allow lists are generally intended to be used to restrict users or clients to receiving email from and sending email to only addresses that are contained in lists in this state. Objects (Users, Clients, or Casts) scheduled for Allow Only are limited to sending email to and receiving email from only those addresses contained in lists in either of the Allow states. 39 Understanding address lists and dictionaries Deny lists A Deny list should contain addresses to which you do not want to let email be sent or received. Objects (Users, Clients, or Casts) scheduled for Filtered Access are prevented from sending email to and receiving email from addresses contained in assigned Deny lists. Deny lists override Allow lists. If the same address is placed in two different lists and one list is in the Deny state and the other list is in an Allow state for a given user, email messages to and from this address are denied because at least one list in the Deny state contains the address. When a message is sent to or received from an address that is currently in a Deny list, Mail-Gear handles disposition of the message in the prescribed manner. See “Handling of messages” on page 42 for more information. Off lists The Off state is used to cancel the effect of a list. Messages to and from addresses contained in a list in the Off state are not denied and are still subject to content screening using any active dictionaries. In general, address lists that are created for the purpose of bulk mailing should remain in the Off state. Dictionaries Mail-Gear also has the ability to scan email messages for specific words. Mail-Gear dictionaries are created locally and should contain words and phrases that you want Mail-Gear to identify in email messages and attachments. Each word or phrase has an assigned score. Mail-Gear scores each message based on words or phrases in the message that match words or phrases in active dictionaries. Depending on the total score of the message, Mail-Gear can optionally block delivery of a message based on the total score. Review the chapter entitled “Working with dictionaries” on page 115 for detailed information on creating and building dictionaries. Mail-Gear blocks email messages to specific users, clients, or casts, based on an established dictionary threshold. Setting the dictionary threshold specifies the highest score a message can receive before delivery to the intended recipient is denied. The total score for a message is determined by totaling the individual scores for all words or phrases in the message that are contained in any active dictionaries. (Dictionaries can be placed in the On or Off state. Active dictionaries are those that are in the On state for a given object.) Review the section entitled “Scheduling a client” on 40 Content scanning of messages page 70 of this manual for more information on establishing dictionary states and dictionary thresholds. Content scanning of messages Mail-Gear uses active dictionaries to scan both the body of an email message and any files that have been attached to the message. If the total score for the body of the message and the attachments is equal to or exceeds the applicable threshold score, the message is blocked. Mail-Gear is able to scan the following attachment file types: ■ Microsoft® Word (.doc) ■ Microsoft Excel (.xls) ■ Text files (.txt) ■ Microsoft PowerPoint® (.ppt) ■ Adobe Acrobat® (.pdf) The Mail-Gear software includes a decomposer that enables scanning of nested levels of files within a given attachment. Compressed files, which are frequently used for email attachments, may contain other compressed files. Mail-Gear lets you select, using the Modify method for the System object, the number of nested levels of files that the software scans in filtering the content of all email attachments. You can also disable attachment scanning using the same setting. For information on changing the decomposition limit for attachment scanning, see page 133. The Mail-Gear decomposer handles the following compression formats: ■ ArcManager (.amg) ■ ARJ (.arj) ■ GZIP (.gz) ■ LHA (.lha) and LZH ■ MIME (Multipurpose Internet Mail Extensions) ■ OLESS (Object Linking and Embedding Structured Storage for Microsoft Office documents) ■ TAR (.tar) ■ UUEncode (.uue) ■ ZIP (.zip) 41 Understanding address lists and dictionaries In the event that content scanning of an attachment fails, Mail-Gear also lets you select at the system level the method for disposing of messages. This type of failure may occur, for example, if Mail-Gear cannot identify a particular file type or if an attached file is corrupt. You can choose to have Mail-Gear deliver the message without scanning the attachment or have the message bounced to the sender. Handling of messages Email filtering parameters for objects are established in Mail-Gear using the Schedule method. In establishing default settings and in scheduling different events for a particular object, you can specify the states of the various lists and turn dictionaries on and off. Blocking for a given message in Mail-Gear can occur as a result of list restrictions or as a result of content restrictions (based on active dictionaries). Mail-Gear can block a message as it is being sent, based on the sender’s permissions for sending mail, or as it is being received, based on the recipient’s permissions for receiving mail. Different events can be scheduled to provide different levels of email access at different times. When a user sends or receives mail, Mail-Gear reacts to different events that apply to the sender and to the recipient in determining whether or not to send or deliver a message. Some differences exist in how Mail-Gear applies the filtering guidelines in sending email versus receiving email. When a user tries to send a message, Mail-Gear checks the event that is currently in effect for the sender (and only that event) to determine whether the email message can be sent. If the email message is able to be 42 Handling of messages sent, Mail-Gear sends it; if the message is not able to be sent, Mail-Gear disposes of the message as specified in the settings for the event. User tries to send a message Mail-Gear checks event currently in effect for user Message able to be sent? NO Message blocked and disposed of as indicated YES Message sent When Mail-Gear is attempting to deliver a message to a particular user, however, Mail-Gear checks both the default settings that apply to the recipient and the event that is currently in effect for the recipient (if applicable). Mail-Gear first checks the default settings for the recipient to determine whether the message is able to be received at all. If the message is not able to be received based on the default settings, the message is blocked and disposed of as specified in the default event. For the purposes of this discussion, a message that is not deliverable as a result of filtering is 43 Understanding address lists and dictionaries called a blocked message. Several methods for disposition of blocked messages are available in Mail-Gear. Mail-Gear receives message for delivery to local recipient Mail-Gear checks default settings for recipient Message able to be delivered? NO Message blocked and disposed of as indicated YES Mail-Gear deposits message in recipient’s inbox Mail-Gear checks for any scheduled event that is currently in effect Other scheduled event in effect? NO New message displayed in inbox YES Mail-Gear checks current event settings to determine whether recipient can view message during event Message able to be viewed YES 44 NO Message masked in User’s inbox until scheduled event expires Handling of messages If the message is able to be delivered, Mail-Gear deposits the message in the user’s inbox. Then, Mail-Gear checks for any other event that may be in effect for the user at the time of delivery (if applicable) to determine whether the message should be made immediately available to the user. If a scheduled event in effect at the time restricts the user from viewing the message, the message is masked in the user’s inbox by Mail-Gear. That is, the message is in the user’s inbox but cannot be seen until the restricting event has expired. When you are establishing default settings and scheduling events in Mail-Gear remember that Mail-Gear makes decisions on whether to mask or block messages based on the user’s applicable default settings. The default settings for an object should be the least restrictive and should contain permissions that you want to apply all the time. Scheduled events should be more restrictive and contain permissions that you want to apply only at certain times. For example, if you want your users to have unrestricted email access after hours but want to limit access at other times during the day, your default settings should be set for unrestricted access. More restrictive settings for during the day should be scheduled. That way, if a message arrives during a scheduled event and is not able to be viewed by the recipient based on the event settings (but the applicable default settings are such that the message would not be blocked), the message can be delivered to the recipient’s inbox but remains unavailable until the event expires. Masking of messages during events Users may sometimes be restricted as a result of a scheduled event from receiving messages they would by default be able to receive. If a user’s default settings would normally let a user receive a particular email message, but access to the message is not permitted at the time the message arrives because of a scheduled event, Mail-Gear masks the email message in the user’s mailbox. Because mail is not stored on the system for relay users, the masking feature is not applicable to relay users. When Mail-Gear is relaying a message to a relay user, Mail-Gear checks only the filtering event that is currently in effect for the relay user to determine whether to relay the message. If the message is not able to be delivered to the relay user as a result of this event, Mail-Gear blocks and disposes of the message regardless of the applicable default settings. 45 Understanding address lists and dictionaries Masked messages do not show up in the actual list of messages in a user’s inbox. The message total at the top of the list indicates that certain messages are currently unavailable. The total at the top of the message list indicates whether any messages are currently being masked Disposition of blocked messages If a message is denied based on the user’s default settings, the message is blocked and disposed of in one of several ways. Several choices for disposition of blocked messages are available to the Mail-Gear 46 Handling of messages administrator. These methods can be scheduled differently for different events. See “Scheduling a client” on page 70 for more information. The method for disposing of blocked messages is selected using the Schedule method for an object The three methods of disposition are described in the following table. Method of Disposition of Blocked Messages Description Bounce to Sender Bounced messages are automatically returned to the sender with a message informing the sender that the message will not be delivered. Drop Dropped messages are not delivered and are dropped from the system. When blocked messages are set to be dropped from the system and notification on blocked messages has been selected, the notified user has the choice of completely deleting the message from the system, bouncing the message (that is, sending a message to the sender indicating that the message will not be delivered), or approving the message and forwarding it on to the intended recipient. See the section entitled “Notification messages” on page 49 for additional information. 47 Understanding address lists and dictionaries Method of Disposition of Blocked Messages Description If blocked messages are set to be dropped from the system and no notification message is scheduled to be sent, the message is deleted from the system. That is, the sender is not notified of nondelivery, the administrator is not informed of a blocked message, and the user does not receive the message. The message is noted in the activity log, but only the sender and subject of the message are reported (that is, the body of the message is not available). Deliver Delivered messages are delivered to the intended recipient despite the filtering settings, but the violation is recorded in the activity logs. A bounced message is returned to the sender with notification of nondelivery and the reason that the message was blocked 48 Handling of messages Notification messages Independent of the method of disposition of messages, you can also select whether or not you (or another user or list of users) should be notified for a given object regarding all messages sent and received, regarding only blocked messages sent or received, or not at all. For example, you could decide to monitor all email traffic for a particular student or employee. Notification messages are sent to the specified users as indicated. You can specify whether to be notified on all messages or on blocked messages for a given object using the Schedule method for that object The three notification options are described in the table below. Notification Option Description Notify on All Messages The notified user receives email notification of all messages that are sent and received by a given object. Notify on Blocked Messages The notified user receives email notification of any blocked messages that are sent or received by a given object. When blocked messages are set to be dropped from the system and notification on blocked messages has been selected, the notified user has the choice of completely deleting the message from the system, bouncing the message (that is, sending a message to the sender indicating that the message will not be delivered), or approving the message and forwarding it on to the intended recipient. None No notification email is sent. The notification message contains a copy of the body of the message and the reason the message was blocked (if applicable). 49 Understanding address lists and dictionaries In addition, if blocked messages are set to be dropped from the system and notification messages are to be sent to a notified user, the notified user must indicate the manner in which the message is to be dispensed, as described in the table below. 50 Notified User’s Options for Dispensing with Messages Description Bounce Bounced messages are returned to the sender with a message informing the sender that the message will not be delivered. Delete Deleted messages are deleted from the system and are not delivered to the intended recipient. Approve Approved messages are delivered to the intended recipient, but the violation is recorded in the activity logs. Handling of messages This type of notification message is displayed in the notified user’s inbox with a question mark to indicate that a decision must be made, as shown below. The notification message is displayed in the notified user’s mailbox with a question mark to indicate that a decision must be made The notified user must decide whether to delete the message, bounce the message, or approve the message (that is, forward the message on to its intended recipient) If you have established settings for a given object such that more than one user is to be notified regarding messages and you have also set blocked messages for this object to be dropped from the system (that is, the notified users have the option to select whether to completely delete the message, bounce the message back to the sender, or forward the message on to its 51 Understanding address lists and dictionaries intended recipient), all notified users have this option in their notification message. If each notified user makes a decision on how to dispose of the message, each action takes place. (For example, if three users are notified and all three decide to bounce the message back to the sender, the sender of the message receives three separate messages that the message is undeliverable.) You should ensure that some coordination exists between these notified users as to who makes the decisions regarding blocked message handling for the object. If blocked messages are set to be dropped from the system and no notification message is scheduled to be sent, the message is deleted from the system. That is, the sender is not notified of nondelivery, the administrator is not informed of a blocked message, and the user does not receive the message. The message is noted in the activity log, but only the sender and subject of the message are reported (that is, the body of the message is not available). How address lists and dictionaries work together This section is intended to clarify the use of address lists and dictionaries to achieve desired degrees of filtering and control of incoming and outgoing email. Examples are included in this section to demonstrate the steps that Mail-Gear follows in determining whether to deliver or block a message. The unique filtering capability of Mail-Gear is a result of the combined effectiveness of address lists and dictionaries. You control where email can be sent or received by placing lists in one of four states discussed earlier. Depending on the state of a particular list, email to and from addresses contained in the list may be restricted or allowed, and active dictionaries may or may not be used to score message content. The following examples illustrate each decision point reached by Mail-Gear, subject to filtering currently in effect, in determining whether to deliver or block a message. In each example, user jsmith sends or receives a message. The basic filtering that applies to the user is given for each example. When an email message is addressed to more than one recipient, Mail-Gear considers delivery to each recipient separately. If a message is addressed to four recipients and three of these recipients are not allowed to receive mail based on applicable filtering settings, the fourth individual still receives the email message. The following discussion assumes that either the sender or the recipient of a message is local to the server running Mail-Gear (that is, the sender or 52 How address lists and dictionaries work together recipient has a system or virtual user account on the Mail-Gear server), so that the full filtering capability of Mail-Gear is applicable. In the case of local routed mail (that is, the Mail-Gear server is acting only as a relay for messages addressed to defined relay users), filtering may be applicable only to incoming mail messages depending on how the local network has been set up. Example 1: User jsmith’s company disseminates a large volume of information to their customers via the Internet each afternoon. This transfer of information uses a significant amount of bandwidth across their connection to the Internet for a couple of hours each day. To reduce the amount of bandwidth consumed by other processes during this time, the company has configured Mail-Gear to restrict email to internal use each afternoon. The employees have unrestricted access at all other times. All employee casts have an Allow Only daily event scheduled; all employee email addresses have been added to a list that is in the Allow (Filtering Enabled) state for sending messages. There are no restrictions established for receiving mail, and no dictionaries are active. During the scheduled event, user jsmith forwards a message to a coworker and copies the message to a friend outside the company. Example 2: User jsmith’s company has no established restrictions on sending and receiving email; however, company policy has necessitated the use of several dictionaries to control the language content of incoming and outgoing email messages. The system defaults have been configured accordingly. Some dictionaries have been established and turned on, and the dictionary threshold is 50. User jsmith receives a message from a sender outside the network. The message content includes a joke, which contains some potentially offensive language. Example 3: User jsmith is a member of the Grade12 cast. The settings for this cast restrict members to exchanging email only with other 12th graders (members of the same cast). The filtering state is Allow Only, and the address list containing the email addresses of the 12th-grade students is in the Allow (Filtering Enabled) state. Several dictionaries are active for the Grade12 cast, including one entitled “cheating.” The dictionary threshold is 50. User jsmith sends an email message to anelson (also in the Grade12 53 Understanding address lists and dictionaries cast). At the time the message is sent, user anelson is currently affected by a two-hour scheduled event that does not permit any access to email. Mail-Gear’s action Result Step 1: If the sender is local to the server running Mail-Gear, Mail-Gear first checks to see if the sender is allowed to send mail to the intended recipients. If the sender of a message is local to the server running Mail-Gear, Mail-Gear checks the settings that are currently in effect for the sender (taking into account the order of precedence for events) to ensure that the sender is able to send email to the intended recipients. If the message is not allowed to be sent, disposition of the message is handled by Mail-Gear as indicated. If the message is allowed to be sent, Mail-Gear goes on to the next step. Example 1: Mail-Gear checks the settings for the event that is currently in effect for jsmith to see if this user is allowed to send mail to the coworker and to the friend outside the company. (Note that Mail-Gear treats these two recipients independently in determining whether to deliver the message.) Because user jsmith is restricted at this time to mailing only other employees (Allow Only) and only the coworker’s address appears in the list in the Allow (Filtering Enabled) state, Mail-Gear blocks the copy of the message that is bound for the friend outside the company. Mail-Gear goes on the next step to continue to try to deliver the message to the coworker. Example 2: Because the sender of the message is not local to the server running Mail-Gear, no Mail-Gear settings apply to the sender. Mail-Gear skips steps 1 and 2 and checks the settings that apply to the recipient of the message (step 3). Example 3: Mail-Gear checks the settings that are currently in effect for jsmith to see if this user is allowed to send mail to anelson. Because user jsmith is restricted to sending email to only members of the Grade12 cast and anelson is a member of this cast, Mail-Gear goes on to the next step. 54 How address lists and dictionaries work together Mail-Gear’s action Result Step 2: If the sender is allowed to send mail to the intended recipient(s), Mail-Gear scores the message using all dictionaries that are active for the sender (if any). The message is scored using the active dictionaries (if any) that apply to the sender. Note, however, that if the recipient’s address is contained in an address list that is in the Allow (Filtering Disabled) state for the sender, the message content is not scored. Example 1: No dictionaries are active for the event, so the message is not scored. Mail-Gear goes on to the next step. Example 2: Because the sender of the message is not local to the server running Mail-Gear, no Mail-Gear settings apply to the sender. Mail-Gear skips steps 1 and 2 and checks the settings that apply to the recipient of the message (step 3). Example 3: Mail-Gear scores the content of the message because the recipient’s address is in an address list in the Allow (Filtering Enabled) state for the sender. The message receives a score of 15 because the word “test” appears once in the message (and the “cheating” dictionary contains the word “test” with a score of 15 points for each occurrence). The score for this message does not exceed the established threshold of 50, so Mail-Gear goes on to the next step. Step 3: If the recipient is local to the server running Mail-Gear, Mail-Gear checks to see if the message is deliverable. If the recipient of a message is local to the server running Mail-Gear, Mail-Gear checks the default settings that apply to the recipient to ensure that the recipient is able to receive email from the sender of the message. If, based on these settings, the message is able to be received, Mail-Gear goes on to the next step. Example 1: Mail-Gear checks the settings that are currently in effect for the coworker to see if this user is allowed to receive mail from jsmith. Because the event in effect places no restriction on the receipt of mail, Mail-Gear goes on to the next step. 55 Understanding address lists and dictionaries Mail-Gear’s action Result Example 2: Mail-Gear checks the default settings that are currently in effect for jsmith. No defaults have been established at the user or cast level, so Mail-Gear checks the system default settings and finds no restrictions in regard to the receipt of mail. Mail-Gear goes on to the next step. Example 3: Mail-Gear checks the settings that are currently in effect for anelson to see if this user is allowed to receive mail from jsmith. Because user anelson’s default settings restrict this user to receiving email from only other members of the Grade12 cast and jsmith is a member of this cast, Mail-Gear goes on to the next step. 56 How address lists and dictionaries work together Mail-Gear’s action Result Step 4: If the message is able to be delivered to the recipient, Mail-Gear scores the message using all dictionaries that are active for the recipient (if any). If a message is able to be received by the recipient, the message is scored using active dictionaries (if any) that apply to the recipient. If, however, the sender’s address is contained in an address list that is in the Allow (Filtering Disabled) state for the recipient, the message content is not scored. If the score for the message does not exceed the established threshold, the message is delivered to the recipient’s inbox. (In some cases, a scheduled event for the recipient may be in effect at the actual time of delivery, which prevents the recipient from viewing the message until the event has expired. In this case, the message is masked in the recipient’s inbox until the event has expired.) Example 1: No dictionaries are active for the scheduled event, so the message is not scored. Mail-Gear delivers the message to the coworker. Example 2: Mail-Gear scores the content of the message because several dictionaries are active. The message receives a score of 95, which exceeds the established threshold of 50. Mail-Gear does not deliver the message. Disposition of the message is handled as specified in the system default settings. Example 3: Mail-Gear scores the content of the message because the sender’s address is in an address list in the Allow (Filtering Enabled) state for the recipient. The message again receives a score of 15 because the word test appears once in the message (the cheating dictionary is active for anelson as well). The score for this message does not exceed the established threshold of 50, so Mail-Gear delivers the message to anelson’s inbox. However, a scheduled event is currently in effect for user anelson that restricts all access to email for a 2-hour time period. The message is masked in the recipient’s inbox until the event expires. 57 Understanding address lists and dictionaries 58 C H A P T The Mail-Gear Web Client E R 5 Overview The Mail-Gear Web Client provides dependable email access to users without dedicated desktop computers and without having to install any software other than a Web browser on client computers. The Mail-Gear Web Client features an easy-to-use interface from which users can access their mailboxes and address books and compose messages. Users can use an Apple® Macintosh® at one location and then move to a Microsoft Windows® 95-based computer at another location and still have access to email via the Mail-Gear Web Client. Note: Relay users do not have access to the Mail-Gear Web Client. Requirements The Mail-Gear Web Client requires the use of a suitable Web browser. Recommended browsers include Netscape Navigator® 4.0 or later and Microsoft® Internet Explorer 4.0 or later. 59 The Mail-Gear Web Client Accessing the Mail-Gear Web Client You can access the Mail-Gear Web Client with the following URL: http://<servername>:8003/ The <servername> is the host name or IP address of the server running Mail-Gear. The appropriate <servername> for your network can be obtained from the network administrator. Your network administrator also may have chosen a port number other than 8003. Consult your administrator for the exact URL that should be used to access the Mail-Gear Web Client. Users are required to provide a user name and password. After logging in to Mail-Gear, users are presented with their Mailbox display. 60 Accessing the Mail-Gear Web Client The Mail-Gear Web Client consists of five virtual file folders, which represent the various Mail-Gear Web Client functions. To access a different Mail-Gear Web Client function, click the appropriate file folder tab. Tabs For more information on each of the Mail-Gear Web Client functions, see the Mail-Gear Web Client User’s Guide. 61 The Mail-Gear Web Client 62 C H A P T E R Administration 6 Accessing the main administration page The main Mail-Gear administration page must be accessed with a suitable Web browser. Netscape 4.0 or later and Microsoft Internet Explorer 4.0 or later are suitable browsers. To access the main administration page: 1 After installing Mail-Gear, launch a Web browser on any client on your network that can access the server running Mail-Gear. 2 Access the main Mail-Gear administration page with the following URL: http://<servername>:8003/admin The <servername> is the host name or IP address of the server running Mail-Gear. 63 Administration 3 Enter your login name and password. At installation, Mail-Gear creates a virtual account with all administrative privileges set. Initially, you must log on using this account to create your account and grant administrative privileges to this account. The user name for the virtual account is virtadmin. At installation, if you followed the on-screen prompts, you should have entered a password for this account. The Mail-Gear main administration page displays an icon for each object. 64 Accessing the main administration page 4 Click any of the object icons to display the object page. From the object page, you can access any method for that object. If you do not have permission to perform a particular method for an object, the method is dimmed on both the main administration page and the object page. Object page Modify Client shortcut 65 Administration A trailing tool bar located at the bottom of most administration pages lets you quickly access Mail-Gear administrative functions. Mail-Gear administration page Logout System methods Dictionary methods List methods Cast methods User methods Client methods Search capability for user lists For those Mail-Gear functions that require administrators to select users from a list (for example, deleting users, modifying users, and so on), Mail-Gear features a convenient search capability. This search capability eliminates the need to scroll through a long list of names to locate a particular account and can be particularly useful for sites that are supporting large numbers of users. This search capability can be turned on and off for convenience. If the feature is turned on, the search fields display automatically wherever necessary in the appropriate Mail-Gear displays. When turned off, the search fields do not display. For instructions on activating this feature, see the section entitled “Modifying the system” on page 121. The search parameters are described in the table below. 66 Parameter Description Accounts Starting With Mail-Gear searches for all account names that start with given text. Accounts Containing Mail-Gear searches for all account names that contain given text. Last Names Starting With Mail-Gear searches for all user last names that start with given text. Last Names Containing Mail-Gear searches for all user last names that contain given text. Search capability for user lists Parameter Description Full Names Starting With Mail-Gear searches for all user names (including first names) that start with given text. Full Names Containing Mail-Gear searches for all user names (including first names) that contain given text. To use the search capability: 1 Enter a search parameter in the field provided. The search parameters are supplied in a drop-down list. In this case, Show All is the default setting; the complete list of users is displayed by default If the default setting was Show None, the list of users would be blank until search results were returned The Show All and the Show None settings are the possible default settings for the user list (these two settings are not search parameters). The choice to Show All or Show None by default is available and is set at the same time the search capability is activated. For guidance on choosing whether or not to display the complete list of users by default, see the section entitled “Modifying the system” on page 121. 2 On the right side of the search display, enter the accompanying text for which Mail-Gear is to search. 67 Administration 3 Click Search. Enter the desired search parameter and text, and then click Search In this case, Mail-Gear returns one user whose last name contains the entered text “price” The returned results appear in the list field If user Terri Price is the user that you indeed want to modify, highlight the user as shown, and click Next: If more than one entry is returned, highlight the appropriate user, and then click Next Mail-Gear displays the search results in the user list field. 4 68 Click a user, then click Next to continue your administrative activity for the selected user. C H A P T E R Working with clients 7 A Client object is any workstation connected to the network that can access Mail-Gear. Adding a client Client objects are added to Mail-Gear in one of two ways: ■ Automatically, when the client POPs email from Mail-Gear or accesses the Mail-Gear Web Client for the first time ■ Manually, through the Mail-Gear administration pages To manually add a client: 1 On the main Mail-Gear administration page, under Client, click Add. 2 In the IP Address Or Client Name field, type the IP address or host name of the client to be added. 3 Click Add. The new client is added to the Existing Clients list. 4 Click Back To Top to return to the main Mail-Gear administration page. 69 Working with clients Deleting a client To delete a client 1 On the main Mail-Gear administration page, under Client, click Delete. 2 Select one or more clients to delete, and click Finish. Mail-Gear provides confirmation that your changes have been made successfully. Modifying a client The Modify method for the Client object lets you specify a cast for a client. To modify a client: 1 On the main Mail-Gear administration page, under Client, click Modify. 2 Select the client to be modified, then click Next. 3 Select a cast for the client, then click Finish. If you select the blank option, Mail-Gear removes the client from its current cast, and it becomes unassigned. Note: A client may belong to only one cast at a time. Scheduling a client The Schedule method functions in the same manner for the Client, User, Cast, and System objects. However, to schedule effectively, you must understand the precedence of object permissions, as discussed in the “Hierarchy of permissions” on page 33. In addition to the precedence of 70 Scheduling a client objects, individual events also have a specific precedence, as shown in the following diagram: Higher priority Specific event Daily event Lower priority Defaults Specific events are scheduled for a specific date and time, such as 10/28/ 1999 from 2:00 PM to 3:00 PM. Daily events reoccur each specified day, such as every Monday and Wednesday from 11:00 AM to 1:00 PM. Default settings apply when no other event is in effect. Setting client defaults Only the System object must have default settings. Other objects can be scheduled for specific or daily events and then return to the relay default settings when no other event is in effect. However, if you set a default event for a particular object, the default settings established for that object (rather than the system default settings) apply when no other scheduled event is in effect. When you are establishing default settings and scheduling events, Mail-Gear makes decisions on whether to mask or block messages based on the user’s applicable default settings. The default settings for an object should be the least restrictive and should contain permissions that you want to apply all the time, and scheduled events should be more restrictive as necessary and contain permissions that you want to apply only at certain times. To establish default event settings for a client: 1 On the main Mail-Gear administration page, under Client, click Schedule. 2 Select the client to schedule from the list of clients. 71 Working with clients 3 Under Function, click Set Defaults, then click Next. 4 Under Inactivity Timeout, select the period of inactivity after which users of the selected client are automatically logged out of Mail-Gear. The possible selections for this period of time range from 1 minute to 12 hours. The automatic refresh feature (activated by users via the Mail-Gear Web Client) causes the Web browser to contact Mail-Gear at a specified time interval to refresh the main mailbox display (to show whether the user has new mail). If the inactivity timeout period is greater than the 72 Scheduling a client automatic refresh interval selected by the user, the user is not logged out based on the inactivity timeout period. 5 6 Under Filtering State, select the level of filtering for the client: ■ Filtered: Active lists and dictionaries are applied. ■ Unfiltered: No filtering is applied. ■ Allow Only: Users at the selected client workstation are permitted to send email messages to and receive email messages from only those addresses appearing in lists in the Allow (Dictionary Disabled) or Allow (Dictionary Enabled) states. (List states are defined later in this chapter.) Under Permitted Server Access Methods, select one or more of the following options: ■ SMTP: Check this option to let email be sent via any tool loaded on the client that supports SMTP. Uncheck this option to require users to use the Mail-Gear Web Client to compose messages. The Mail-Gear Web Client does not permit users to forge email messages. Because the Mail-Gear Web Client requires users to log on, Mail-Gear can identify a user and prefill the From field for the user whenever that user composes a message. ■ POP: Check this option to let users check their email messages via any tool loaded on a client supporting POP. Uncheck this option to require users to use the Mail-Gear Web Client to check for messages in their mailboxes. ■ Mail-Gear Web Client: Check this option to give users access to the Mail-Gear Web Client. It is recommended that the SMTP, POP, and Mail-Gear Web Client check boxes all remain checked at the system level. 7 Under Blocked Messages, select the method of disposition for messages that have been denied as a result of the filtering settings in effect: ■ Bounce To Sender: Messages are automatically sent back to the sender with a note stating that the message has not been delivered. ■ Drop: Messages are not delivered and are removed from the system. ■ Deliver: Messages are sent to the intended recipient despite the filtering settings, but the violation is recorded in the logs. 73 Working with clients 8 Select whether you want Mail-Gear to send notification messages, and designate a recipient for the notification messages. You can designate users to be notified regarding all messages sent or received for a particular object, or just regarding blocked messages for that object. If a message is blocked (and the disposition is set to drop the message from the system), a notification message is sent and the user has the option to approve the message and forward it on to the intended recipient. For more information, see “Notification messages” on page 49. 9 Click Next. 10 If you selected Filtered or Allow Only as the filtering state, select the lists that are to be applied to email messages being sent. To control where mail can be sent, address lists must be placed in appropriate list states. To place a list in a different state, select the list and click one of the following options. For more detailed information 74 Scheduling a client about address lists and list states, see “Lists” on page 37 and “List states” on page 39. List state Definition Allow (Dictionary Disabled) Lets the user send email messages to and receive email messages from only addresses found in lists in this state and does not apply content filtering using active dictionaries. Allow (Dictionary Enabled) Lets the user send email messages to and receive email messages from only the addresses found in lists in this state, and applies dictionary filtering to these messages. Blocks messages if necessary. Deny Does not let the user send email messages to or receive email messages from the addresses contained in lists in this state. If a list is left in the Use Defaults field for a client, the state for that list is determined by the settings established for other objects, based on Mail-Gear’s hierarchy of permissions. If a client has been scheduled such that the lists for that client are set to Use Defaults, Mail-Gear looks at the client’s cast permissions, the user and user cast permissions, and the relay default settings to determine how to apply those lists. See “Hierarchy of permissions” on page 33 for information on the order of precedence for Mail-Gear objects. 75 Working with clients 11 Click Next. Click the Copy From Sending button if you want to apply the same settings to the receipt of mail 12 Select the lists that are to be applied to email messages being received. To apply the same list configuration for receiving mail that was applied to sending mail, click Copy from Sending. To control where mail is received from, address lists must be placed in appropriate list states. Lists can be moved to different states (that is, Allow (Dictionary Disabled), Allow (Dictionary Enabled), and Deny) in the same manner as for controlling mail that is sent. 76 Scheduling a client 13 Click Next. Additional filter settings 14 Specify additional filtering settings that apply to messages for the scheduled object. Here you can indicate those dictionaries to be used to scan the body of each message and any attachments, select a dictionary threshold, indicate specific MIME types you wish to block, and activate the AutoLock feature. These filtering settings are as follows: ■ Dictionary Options: Activate dictionaries to be used for filtering both incoming and outgoing messages by highlighting the appropriate dictionary in the list on the left and clicking On. Dictionaries that have been turned on are used to filter both the body of the message and any attachments to the message. For more information on using dictionaries in Mail-Gear, see “Dictionaries” on page 40. If you have placed any address lists in the Allow (Dictionary Enabled) state, at least one dictionary must be on for dictionary filtering to occur. 77 Working with clients ■ Dictionary Threshold: Select the score that must be reached or exceeded for a message to be blocked. The score of a message is determined by adding the point values for all words found in the message that are contained in active dictionaries (that is, those in the On state) for a total score. ■ Block MIME Type: Select any types of media that are not permitted in email messages. ■ AutoLock: Activate the AutoLock feature if appropriate. If AutoLock is activated (that is, this setting is set to Yes) and a user attempts to send the selected number of blocked email messages in the prescribed amount of time, the user is prevented from using Mail-Gear. To AutoLock a user, Mail-Gear schedules a default event in which the Permitted Server Access Methods for that user (the SMTP, POP, Mail-Gear Web Client check boxes) are not checked. To unlock an AutoLocked user, you can either delete the default event for the user or edit the default event for the user using the Schedule method. 15 When you have selected the appropriate filtering settings, click Finish. Scheduling a daily event Schedule a daily event to override the default access permissions for a client. Daily events reoccur for the scheduled client as specified until the event is deleted. For example, you can set a particular client to be Filtered by default and then schedule a daily event to permit Allow Only access at certain times on selected days. To schedule a daily event: 78 1 On the main Mail-Gear administration page, under Client, click Schedule. 2 Select the client to schedule. 3 Under Function, click Schedule A Daily Event, then click Next. Scheduling a client 4 Select the days of the week on which the event is to occur and the range of time for the event, then click Next. The remaining pages for scheduling a daily event are identical to those described in “Setting client defaults” on page 71. Refer to the guidelines in that section to finish scheduling a daily event. Scheduling an event for a specific date To schedule an event for a specific date: 1 On the main Mail-Gear administration page, under Client, click Schedule. 2 Select the client to schedule. 3 Under Function, click Schedule An Event For A Specific Date, then click Next. 4 Select the date and time of day for the event. 5 Select the number of days that the specific event repeats. You can have the event repeat for up to 14 days. Specific events are automatically deleted when they have concluded. 6 Click Next. The remaining pages for scheduling a specific event are identical to those described in “Setting client defaults” on page 71. Follow the 79 Working with clients guidelines in that section to finish scheduling an event for a specific date. Editing or viewing an existing event You cannot change an event from one type to another such as from a daily event to a specific event. To edit or view an existing event for a client: 1 On the main Mail-Gear administration page, under Client, click Schedule. 2 Select the client to schedule. 3 Under Function, click Edit/View An Existing Event, then click Next. A list displays all events that have been scheduled for the selected client. The lowest priority event, which is the default setting for the client, is listed first, and any higher priority events, which include any daily or specific events, are listed at the bottom. 4 Select the event to edit, then click Next. 5 Modify the settings as necessary, using the procedures for scheduling the particular type of event. Deleting an existing event 80 1 On the main Mail-Gear administration page, under Client, click Schedule. 2 Select the client to schedule. Generating a report for a client 3 Under Function, click Delete An Existing Event, then click Next. 4 Select the events to be deleted, then click Delete. Generating a report for a client The Report method functions in the same manner for the Client, User, Cast, and System objects. The Report method lets you generate reports on all email activity for a particular object. Email activity includes both the sending and receiving of email messages, as well as any actions taken on email messages for a given object. Note: Faster systems generate reports more quickly. Also, reports can quickly generate large amounts of information that may crash some Web browsers. If this occurs, try limiting the scope of your report. To generate a report for a client: 1 On the main Mail-Gear administration page, under Client, click Report. 2 Select the client for which you want to generate the report, and click View Usage. If no clients are selected, all clients are included in the report. 3 Select the date and time ranges to be covered by the report. 81 Working with clients 4 82 Select the type of information to be included in the report, based on the descriptions contained in the following table. Action Realm Description Login Web Client POP All login activity for the selected objects is reported. Logoff Web Client POP All logout activity for the selected objects is reported. Connected to SMTP All connections made by Mail-Gear to a remote server are reported. Connection from SMTP All SMTP connections received by Mail-Gear are reported. Disconnected POP SMTP All incidents in which Mail-Gear is disconnected from a remote system are reported. Message accepted SMTP All messages accepted for processing are reported. Message rejected SMTP All messages rejected by Mail-Gear (due to server failure [disk full, write error, etc.], detection of a message loop, locked user or client) are reported. Processing completed SMTP All message processing that is successfully completed is reported. Delivery failed SMTP All failed attempts to deliver a message are reported. Message delivered SMTP All message deliveries (either to a local user’s inbox or to a remote server for further processing) are reported. Message bounced SMTP All returned messages are reported. Message dropped SMTP All dropped messages are reported. Message read Web Client POP All messages that are read (that is, the state of the message changed from unread to read) or retrieved (via POP) are reported. Message deleted Web Client POP All messages that are removed from a user’s trash [Web Client] or deleted from the inbox via POP [POP] are reported. Generating a report for a client Action Realm Description Message moved Web Client All messages that are moved from one mailbox to another (including moving email to the trash mailbox) are reported. Message edited Web Client All messages that are edited are reported. Protocol violation POP SMTP All instances in which the remote end of a service connection (SMTP, POP) issues a request that violates the protocol for that service (that is, issuing commands out of sequence, missing or invalid parameters, etc.) or issues an unrecognized request [POP, SMTP] are reported. Content violation SMTP All messages with inappropriate content that are detected are reported. Access violation Admin Web Client POP SMTP All attempted actions for which a user did not have appropriate permissions are reported. Object added Admin Web Client All objects added to Mail-Gear (User, Client, List, Cast, Dictionary, or mailbox) are reported for the selected objects. Object deleted Admin Web Client All objects deleted from Mail-Gear (User, Client, List, Cast, Dictionary, or mailbox) are reported for the selected objects. Object modified Admin All modified objects are reported for the selected objects. Object scheduled Admin All scheduled objects are reported for the selected objects. Object renamed Web Client All mailboxes that have been renamed are reported. 83 Working with clients Action Realm Description Message approval Web Client SMTP All messages that are approved or bounced as a result of a notification message are reported. AutoLocked Admin All activity that results in a user being AutoLocked is reported. Note: If no check boxes are checked, all types of activity are included in the report. Selecting specific realms or actions limits the report to only the selected types of records. The search field is provided so that you can search for particular text (for example, to see how many connections were attempted for a particular remote location, you enter the location in the search field, and the report displays any entries containing that text). 5 When you have finished defining the scope of the report, click Generate Report. In the Access Report, each access is reported on one to three lines, depending on the amount of data available. The first line contains the date and time the reported action occurred, the realm (for example, 84 Generating a report for a client Administration, POP, SMTP, or Web Client), the action (for example, login, message accepted, message rejected, object scheduled, or content violation). Other information is included where applicable, such as the message identification number, the sender of the message, the recipient, the subject of the message, the mailbox to which the message was delivered, and so on. 85 Working with clients 86 C H A P T E Working with users R 8 Adding a user Three types of users can be added to Mail-Gear: system users, virtual users, and relay users. System and virtual users must be added to Mail-Gear before they can log in to Mail-Gear. If you plan to store mail on the Mail-Gear server and let users log in to Mail-Gear and use the Mail-Gear Web Client or POP their mail to another machine, these users must have system or virtual user accounts. Relay users do not need to log in. This type of user is added if the Mail-Gear server is being used as a filtering relay to other servers that are running other mail products such as Microsoft Exchange. If a user already has an account on the same domain as the server running Mail-Gear (or, for Windows NT, any other trusted domain), that account can be automatically added to Mail-Gear (system user). Virtual users can also be created in Mail-Gear. The virtual user account is recognized only by Mail-Gear—they do not have corresponding system accounts. Valuable network resources are not used to maintain numerous system accounts for users who use only Mail-Gear. Virtual users do not have access to other parts of the system, minimizing security risks associated with large numbers of system accounts. Relay users are known only to Mail-Gear (like virtual users) and are identified in Mail-Gear by the user’s email address. Mail-Gear acts as a relay for mail passing to relay users (and applies filtering in the process). No mailboxes are created in Mail-Gear for relay users because no mail is stored on the Mail-Gear server. Relay users do not log in to Mail-Gear and do not use the Mail-Gear Web Client. 87 Working with users If you are using the information-sharing capability between more than one Symantec product and users are already known to another product (either system users or virtual users), these users can be added to Mail-Gear by enabling these accounts. Adding a single system user To add a single system user: 1 On the main Mail-Gear administration page, under User, click Add. 2 Under Method, click One At A Time, then click Next. 3 From the Current System Users list (system accounts for the same domain as the server running Mail-Gear and, for Windows NT, any other trusted domains), select the account to be added to Mail-Gear, or type the account name in the System Account field. If you are using Windows NT, domain names are shown in addition to user names. For Windows NT, the default Mail-Gear account name contains only the user name: the domain name is left off. For example, if the system account name is ballen in domainA (that is, DomainA\ballen), the default Mail-Gear user name is ballen. If you prefer a different name for the Mail-Gear account, enter the account name in the space provided. For example, if you (system user ballen) want your Mail-Gear account name to be Administrator2, you would select your system account and then enter Administrator2 in the Mail-Gear Account Name field. 4 88 After you have entered the information, click Add. Adding a user The new Mail-Gear user account name (in the above example, Administrator2) appears in the Current System Users list. 5 Click Back to Top to return to the main administration page. Note: The password from the system account is the password for the Mail-Gear account. Passwords for Mail-Gear system user accounts must be changed at the system level. Adding multiple system users simultaneously To add multiple system users simultaneously: 1 On the main Mail-Gear administration page, under User, click Add. 2 Under Method, click Multiple Users At Once, then click Next. 3 From the Current System Users list (system accounts for the same domain as the server running Mail-Gear and, for Windows NT, any other trusted domains), select the accounts to be added to Mail-Gear. If you are using Windows NT, domain names are shown in addition to user names. 89 Working with users For Windows NT, the default Mail-Gear account name contains only the user name: the domain name is left off. For example, if the system account name is asmith in domainA (that is, DomainA\asmith), the default Mail-Gear user name is asmith. 4 Indicate whether you want Mail-Gear to create the default mailboxes for each of these accounts at this time. Mail-Gear can be set to automatically create four standard mailboxes (Inbox, Drafts, Sent Mail, and Trash) as each new system user is added. However, adding large numbers of system users at once is faster if you do not select this option. If you choose not to have these mailboxes created while users are being added, they are created automatically when the user visits a mailbox for the first time. 5 When you have finished making your selections, click Add. The new Mail-Gear user account names appear in the Current System Users list. The number of current Mail-Gear users is updated whenever new Mail-Gear users are added Note: When system users are added to Mail-Gear, the passwords for the Mail-Gear accounts are the same as for the system accounts. User passwords must be changed at the system level. 90 Adding a user Adding virtual users To add a virtual user: 1 On the main Mail-Gear administration page, under User, click Add. 2 Under Method, click Create One Virtual User, then click Next. 3 Enter the user’s full name in the space provided. 4 Optionally, select a cast for the user. 5 Optionally, specify a Mail-Gear login name and password. If you do not specify an account name and password, Mail-Gear generates these for you. 6 When you finish entering information on the new account, click Create. Mail-Gear provides confirmation of the creation of the new virtual user account. 7 Click Done to return to the main administration page. Note: If a virtual user forgets a password, an administrator with the Modify User permission can issue a new password for a virtual user account using the Modify method for the User object. (The Modify User pages for a virtual user account let the administrator enter and verify a new password.) Virtual users with permission to change their own password can still do so via the Mail-Gear Web Client; however, in order to change their own passwords, users must know their old passwords. 91 Working with users To add multiple virtual users: 1 Create a file that contains a block of information about each virtual user you wish to add. In this file, the information for each user must be on a separate line and formatted as follows: Full name,account name,password,cast The full name is mandatory; all other boxes are optional. If you do not specify an account name or password, Mail-Gear generates these for you. Type all three commas even if you do not specify any information other than the full name. Examples: Joe Smith,smith,boat,xyz Jane Smith,,, 92 2 When the file is complete, on the main administration page, under User, click Add. 3 Under Method, click Create Multiple Virtual Users, then click Next. 4 Direct the file to the server in one of the following ways: ■ If the file is already located on the server, in the Use A File Already On The Server section, enter the path name of the file in the space provided. Indicate whether you want the default Mail-Gear mailboxes to be created at this time, then click the corresponding Go! button. ■ If the file is located on the machine you are currently using, under Upload File from Client enter the path name of the file in the space provided or click Browse to browse for the file. (This option requires a browser capable of file uploads.) Indicate whether you want the default Mail-Gear mailboxes to be created at this time, then click the corresponding Go! button. Adding a user ■ Enter or paste the file into the Enter Information Here field. Indicate whether you want the default Mail-Gear mailboxes to be created now, then click the corresponding Go! button. Provide path name to file on server Or Provide path name to file on client Or Enter or paste account information Mail-Gear provides confirmation that the specified virtual user accounts have been created. 5 Click Done to return to the main administration page. Note: If a virtual user forgets a password, an administrator with the Modify User permission can issue a new password for a virtual user account using the Modify method for the User object. (The Modify User pages for a virtual user account let the administrator enter and verify a new password.) Virtual users with permission to change their own password can still do so via the Mail-Gear Web Client; however, in order to change their own passwords, users must know their old passwords. 93 Working with users Adding a single relay user When you create a relay user in Mail-Gear, Mail-Gear automatically adds the appropriate host to the Relay Routing List if the host name does not already appear in that list. Mailboxes are not created in Mail-Gear when you create a relay user because no mail is stored on the Mail-Gear server for relay users. To add a single relay user: 1 On the main Mail-Gear administration page, under User, click Add. 2 Under Method, click Create One Relay User, then click Next. Enter the user’s full name (optional) Enter a cast for the relay user (optional) Enter the email address for the relay user Click Create 3 4 Optionally, enter the following information: ■ In the Full Name field, type the user’s full name. ■ In the Cast drop-down list, select a cast for this user. In the Email Address field, type the relay user’s full email address. The user’s email address is the Mail-Gear account name for the relay user. If you have large numbers of users or the email addresses entered into Mail-Gear are not particularly reflective of users’ actual names, you may want to include the full names of users so that you can easily search for and identify users. 94 Adding a user 5 Click Create. Mail-Gear provides confirmation of the creation of the new relay user. 6 Click Done to return to the main administration page. Adding multiple relay users When you create a relay user in Mail-Gear, Mail-Gear automatically adds the appropriate host to the Relay Routing List if the host name does not already appear in that list. Mailboxes are not created in Mail-Gear when you create relay users because no mail is stored on the Mail-Gear server for relay users. To add multiple relay users: 1 Create a file containing a block of information about each relay user you wish to add. In this file, the information for each user must be on a separate line and formatted as follows: full name,account name,cast The user’s account name (the user’s email address) is mandatory; all other boxes are optional. You must type both commas even if you do not specify any information other than the email address, for example: Joe Smith,[email protected],marketing, [email protected],, 2 When the file is complete, on the main Mail-Gear administration page, under User, click Add. 3 Under Method, click Create Multiple Relay Users, then click Next. 4 Direct the file to the server in one of the following ways: ■ If the file is already located on the server, in the Use A File Already On The Server section, enter the path name of the file in the space provided, then click the corresponding Go! button. ■ If the file is located on the machine you are currently using, under Upload File from Client enter the path name of the file in the space provided or click Browse to browse for the file. (This option requires a browser capable of file uploads.) Then click the corresponding Go! button. 95 Working with users ■ Enter or paste the file into the Enter Information Here field, then click the corresponding Go! button. Provide pathname to file on server OR Provide path name to file on client OR Enter or paste account information Mail-Gear provides confirmation that the specified relay user accounts have been created. 5 Click Done to return to the main administration page. Enabling existing users If you need to add a user that is already known to Mail-Gear (you have deleted this user from Mail-Gear previously) or if you are adding a user that is already using another Symantec product running on the same server, the user account can be enabled. 96 Adding a user When system or virtual users are deleted from Mail-Gear, the mailboxes for those users are also deleted. New mailboxes are created in Mail-Gear when system or virtual users are enabled. To enable existing user accounts: 1 On the main Mail-Gear administration page, under User, click Add. 2 Under Method, click Enable Existing Users, then click Next. 3 From the list of Existing (Disabled) Users, select the users to enable. 4 Indicate whether you want the default Mail-Gear mailboxes for these users to be created at this time (mailboxes are not created for relay users), then click Enable. The newly enabled user accounts appear in the Enabled Mail-Gear Users list. 5 Click Back to Top to return to the main administration page. 97 Working with users Deleting a user To delete a user: 1 On the main Mail-Gear administration page, under User, click Delete. 2 Select one or more users to delete. 3 Indicate whether you want to delete the users from Mail-Gear only or completely delete the users from all Symantec applications. Removing a user from Mail-Gear completely removes the user’s mailboxes and mailbox contents, all scheduled events, and any other applicable Mail-Gear settings. If you are running any other Symantec products (for example, I-Gear) on the same machine as Mail-Gear, removing a user from Mail-Gear does not affect the settings in any other Symantec product. Deleting a user from all Symantec applications permanently removes that user’s mailboxes, scheduled events, and other settings from Mail-Gear and also deletes that user and the applicable settings from all other Symantec applications installed on that machine. 4 Click Finish. Mail-Gear provides confirmation that your changes have been made successfully. 5 98 Click Done to return to the main administration page. Modifying a user Modifying a user The Modify method for the User object lets you specify a cast for the user, as well as set permissions for the user on whether they can change their password. Mail-Gear administrative permissions are granted using the Modify method (relay users cannot be granted administrative permissions). You can also change the password for a virtual user account. To view and change the permissions of other users, you must have the Can Grant Permissions permission and the permission to Modify Users (that is, the Modify Objects and User check boxes must be checked, as well as the Can Grant Permissions check box). You cannot change the permissions for your own account. Log on using the virtadmin account or another account with the Can Grant Permissions permission to change the permissions for your own account. To modify a user: 1 On the main Mail-Gear administration page, under User, click Modify. 99 Working with users 2 Select the user account to be modified, then click Next. If the user account to be modified is a relay account, some of the boxes are not applicable and do not appear If the account to be modified is that of a virtual user, the user’s full name and the option to change the user’s password appears on this screen 3 Optionally select a cast for the user. Selecting the blank space puts the user in a state of not belonging to any cast. 4 Set the permission for whether the user can change their own password via the Mail-Gear Web Client. If you retain Use Default Settings, the user’s cast settings or the system default settings for changing passwords apply. Changing passwords is not applicable to relay users (because relay users do not log into Mail-Gear); these settings only display if the user to be modified is a system or virtual user. 5 Specify the total amount of disk space available for the user’s mailboxes. The settings for disk quota are not applicable to relay users and do not appear on the display for relay accounts. 100 Scheduling a user If a user reaches the set quota, any messages sent to that user are bounced back to the sender. 6 Optionally enter a new password for the user. The option for the administrator to change a password is displayed only if the user account being modified is a virtual account. Passwords for system user accounts must be changed at the system level. Relay users do not have passwords. This setting lets an administrator change a password for a virtual user in the event that the user forgets their password. Users who have permission to change their own passwords are still able to do so using the Mail-Gear Web Client, but to do so they must be able to enter their old passwords. 7 Select any administrative permissions the user should have (see the table below) and the objects for which the user can apply those permissions, and click Finish. Administrative permissions cannot be given to relay users. Permission Description Can grant permissions User with this permission can grant or change the permissions of other users Add objects User with this permission can use the Add method for specified objects Delete objects User with this permission can use the Delete method for specified objects Report on objects User with this permission can use the Report method for specified objects Modify objects User with this permission can use the Modify method for specified objects Schedule objects User with this permission can use the Schedule method for specified objects Scheduling a user The Schedule method is the same for Client, User, Cast, and System objects. Refer to “Scheduling a client” on page 70 for information on scheduling events. Remember that user permissions travel with users regardless of the machine they use on the network (however, user permissions can be affected depending on the settings that have been established for the client machine used). 101 Working with users When scheduling events for users, do not forget that client and client cast permissions have a higher priority (see “Mail-Gear design” on page 31 for a discussion on the hierarchy of permissions). An event scheduled for a user might be affected by permissions that have been set for a particular client or cast of clients. When you are scheduling relay users, remember that although filtering for relay users can be applied to incoming and outgoing mail, effective filtering for outgoing mail is dependent on configuring your network properly to ensure that outgoing mail is routed through the Mail-Gear server and on taking appropriate measures to ensure that users are not forging the From field for outgoing email. Generating a report for a user The Report method is the same for the Client, User, and Cast objects. Refer to “Generating a report for a client” on page 81 for information on generating reports. 102 C H A P T E Working with casts R 9 A cast is a grouping of users or clients in Mail-Gear. Creating and scheduling casts (rather than scheduling individual users and clients) can minimize your administrative work. Use the following guidelines to set up casts: ■ Casts should contain similar objects where possible (users and clients should not be mixed in the same cast). ■ Casts should be created when you want to give a group of users or clients a different default behavior (for example, filtering properties). ■ Casts should be created when a group of users or clients need different permissions at specific times. ■ Casts for clients should be based on geographic location (for example, room number) or logical groupings (for example, teacher computers, summer employees). If you are running more than one Symantec product on the same machine, information may be shared between the products. If you have set up a cast structure in a product, this structure (if applicable) must be the same across all Symantec products: a user cannot be a member of one cast in one product and another cast in another product. 103 Working with casts Adding a cast To add a cast: 1 On the main Mail-Gear administration page, under Cast, click Add. 2 Under New Cast Name, type the name of the cast to be added, then click Add. 3 Click Back To Top to return to the main administration page. To populate the new cast with users or clients, see “Modifying a cast” on page 105. Deleting a cast Deleting a cast causes all members of that cast (users and clients) to belong to no cast. To delete a cast: 104 1 On the main Mail-Gear administration page, under Cast, click Delete. 2 Under Existing Casts, select the casts to be deleted, then click Finish. 3 Click Back To Top to return to the main administration page. Modifying a cast Modifying a cast The Modify method for the Cast object lets you place User and Client objects into casts and to change the attributes of casts. To modify a cast: 1 On the main Mail-Gear administration page, under Cast, click Modify. 2 Select the cast you want to modify, select the desired function, then click Next. 3 Make any changes as required. Modifying cast membership To assign users or clients to a cast: 1 On the main Mail-Gear administration page, under Cast, click Modify. 2 Select the cast to modify, select the Modify Membership function, then click Next. 3 In the Unassigned Users and Unassigned Clients lists, select the users or clients to be added to the cast, then click Add. The users and clients are added to the list of cast members. Highlight users you want to add to the selected cast, and click Add Highlight clients you want to add to the selected cast, and click Add Highlight any clients or casts you want to remove from the selected cast and click Remove 4 Click Back To Top to return to the main administration page. 105 Working with casts Note: Objects can belong to only one cast at a time. Only those objects not currently assigned to a cast are displayed in the Unassigned Users and Unassigned Clients lists. To remove users or clients from a cast: 1 On the main Mail-Gear administration page, under Cast, click Modify. 2 Select the cast to modify, select the Modify Membership function, then click Next. 3 In the Cast list, select those users or clients to remove, then click Remove. The users and clients removed move to the Unassigned Users and Unassigned Clients lists. 4 Click Back To Top to return to the main administration page. Modifying cast attributes To modify the attributes for a cast: 1 On the main Mail-Gear administration page, under Cast, click Modify. 2 Select the cast to modify, select the Modify Attributes function, then click Next. 3 Set the permission for whether cast members can change their own passwords through the Mail-Gear Web Client. If you retain Use Default Settings, the system default settings for changing passwords applies. Changing passwords is not applicable to relay users (because relay users do not log onto Mail-Gear). 4 Specify the total amount of disk space available for each user’s mailbox. The settings for disk quota are not applicable to relay users because no mail is stored on the system for relay users. If you retain the Use 106 Scheduling a cast Default Quota setting, the system default settings for quota apply for cast members. If a user has reached their default quota, any messages sent to that user are bounced back to the sender. 5 Click Finish to save your settings. Mail-Gear provides confirmation that your changes have been made. Scheduling a cast The Schedule method is the same for Client, User, Cast, and System objects. Refer to the section entitled “Scheduling a client” on page 70 for detailed procedures on scheduling events. When scheduling events for casts, remember that the permissions for individual clients or users have priority over those for the cast in which the user or client is a member. Client and client cast permissions have priority over user and user cast permissions. Generating a report for a cast The Report method is the same for the Client, User, Cast, and System objects. See “Generating a report for a client” on page 81 for detailed procedures on generating reports. 107 Working with casts 108 C H A P T E Working with lists R 10 Mail-Gear lists contain email addresses or parts of addresses. You can create any number of additional lists and populate these lists with addresses as necessary. Address lists are used for two purposes. First, by scheduling address lists as either Allow or Deny for given objects, these lists can be used to restrict incoming and outgoing mail. Second, lists can be used to deliver email messages to multiple users at once. An email message addressed to a list rather than to a single address is delivered to all valid email addresses contained in that list. (The email address for a list is listname@localdomainname. Messages addressed to the list address are delivered to all valid email addresses contained in that list.) For a more information on using address lists in Mail-Gear, see “Understanding address lists and dictionaries” on page 37. The Postmaster list is the only list that exists when Mail-Gear is initially installed. The Postmaster list contains the virtadmin email address and cannot be deleted. 109 Working with lists Adding a list To add a list to Mail-Gear: 1 On the main Mail-Gear administration page, under List, click Add. 2 Under New List Name, enter the name of the list to be added, then click Add. 3 Click Back To Top to return to the main Mail-Gear administration page. To populate the new list with addresses, see “Modifying a list” on page 110. Deleting a list Deleting a list completely removes the list and its contents from Mail-Gear. To delete a list: 1 On the main Mail-Gear administration page, under List, click Delete. 2 Select one or more lists to be deleted, then click Finish. Modifying a list The Modify method for the List object lets you add and delete addresses from lists. To modify a list: 110 1 On the main Mail-Gear administration page, under List, click Modify. 2 Select the list to be modified, then click Next. Modifying a list 3 Select any Mail-Gear users to be added to the list from the list of users, then click List Members. The List Members box updates to reflect your changes. 4 To add other lists, select any lists to add to the selected list, then click List Members. If an email message is addressed to a list, a copy of the sent message is sent to all list members with valid email addresses. And if a list is contained in another list, all of the valid addresses contained in the embedded list receives a copy of all email addressed to the top-level list. 5 Select users or lists to own the list, then click Owners. The owner of a list is notified if something is wrong with the list, for example, an incorrect address contained in the list. You can have more than one owner for a given list. Select any users to be added to the list, and click List Members Select any lists to be added to the list, and click List Members Select an owner (users or lists) for the list and click Owners Manually enter any addresses not shown, and click List Members or Owners 6 To manually add to lists any addresses not listed, type the email address in the Address field, then click either List Members or Owners. 111 Working with lists The acceptable values for the Address field are listed below. 7 Term Example Description user@domain [email protected] A specific user at a specific domain. @domain @brightcorp.com All users at a specific domain. user lamieux A user of a specific name at the local email domain. user@ lamieux@ A user of a specific name at any domain. @ @ Any user at any domain. To remove an address from a list, select the address from the List Members or the List Owners, then click Remove. Note: An address may be categorized as both a List Member and a List Owner. Generating a report for a list The Report method for the List object lets you generate reports on the email activity for the addresses contained in a particular list and to review the addresses contained in a list. Generating a report on list contents To generate a report for list contents: 112 1 On the main Mail-Gear administration page, under List, click Report. 2 Select the List Contents option, then click Next. Generating a report for a list 3 Select the lists for which you want to view the contents, then click View Lists. Generating an Access Report for a list To generate an Access Report for a list: 1 On the main Mail-Gear administration page, under List, click Report. 2 To view the email activity for the addresses contained in a particular list, select the Access Reports option, then click Next. 113 Working with lists 3 Select the lists on which to report, then click View Usage. If no lists are selected, all activity for all lists is included in the report. The options for this Access Report are the same as those for reporting on Users, Casts, Clients, or the System object. See “Generating a report for a client” on page 81 for information on this reporting tool. 114 C H A P T Working with dictionaries E R 11 Mail-Gear can scan email messages for specific words that are contained in locally created dictionaries. Mail-Gear dictionaries contain words and phrases that you want Mail-Gear to identify in email messages. Each word or phrase has an assigned score. Mail-Gear evaluates each message based on the words in the message that match words in active dictionaries. Depending on the total score of the message, Mail-Gear can block delivery of a message based on the total score. Adding a dictionary To add a dictionary: 1 On the main Mail-Gear administration page, under Dictionary, click Add. 115 Working with dictionaries 2 In the New Dictionary Name field, type the name of the dictionary to be added, then click Add. 3 Click Back To Top to return to the main administration page. To populate a new dictionary with words and phrases, see “Modifying a dictionary” on page 116. Deleting a dictionary Deleting a dictionary completely removes the dictionary and its contents from Mail-Gear. To delete a dictionary: 1 On the main Mail-Gear administration page, under Dictionary, click Delete. 2 Under Existing Dictionaries, select one or more dictionaries to delete, then click Finish. Modifying a dictionary Using the Modify method for the Dictionary object, you can add, delete, and edit words in a dictionary. Adding words to the dictionary To add a word to a dictionary: 1 On the main Mail-Gear administration page, under Dictionary, click Modify. 2 Under Existing Dictionaries, select the dictionary to modify, then click Next. 3 In the Word field, enter the new word or phrase. 4 Under the Score drop-down list, select a score for the new word or phrase. The higher the score, the more likely an email message is to be blocked if the message contains that word. 116 Modifying a dictionary In assigning point values to words you have added to a dictionary, you can use negative scores for words to offset blocking. For example, if you found that the Cheating dictionary was blocking routine email messages sent by teachers to their students reminding them of upcoming tests, you could try adding the phrase “do not forget” or some other phrase used frequently in this type of reminder. You could then assign the phrase a negative score to potentially offset the blocking of these particular messages. Once you alter a dictionary, you should experiment with sending sample messages to determine whether the dictionary is performing appropriately. 5 Click Add. The new word and its score are added to the Words In Dictionary (Score) list. 6 Click Back To Top to return to the main administration page. Deleting words from the dictionary To delete a word from a dictionary: 1 On the main Mail-Gear administration page, under Dictionary, click Modify. 2 Under Existing Dictionaries, select the dictionary to modify, then click Next. 117 Working with dictionaries 3 Select the words or phrases to be deleted from the dictionary, then click Delete. The Words In Dictionary list updates to reflect your changes. 4 Click Back To Top to return to the main administration page. Editing words in the dictionary To edit a word in a dictionary: 1 On the main Mail-Gear administration page, under Dictionary, click Modify. 2 Under Existing Dictionaries, select the dictionary to modify, then click Next. 3 To change the spelling or score of a word already in the dictionary, either delete the word and add it again with a new score, or enter the word, select the new score, then click Add. The Words In Dictionary list updates to reflect your changes. 4 Click Back To Top to return to the main administration page. Generating a report for a dictionary The Report method for the Dictionary object lets you review the words and phrases in a dictionary and the associated scoring properties. To generate a report for a dictionary: 1 118 On the main Mail-Gear administration page, under Dictionary, click Report. Generating a report for a dictionary 2 Select the dictionaries for which you want the report, then click View Dictionaries. 119 Working with dictionaries 120 C H A P T E Working with the system R 12 Modifying the system The Modify method for the System object is used to establish the system settings. Using the Modify method for the System object, you can modify the standard and relay SMTP server options, the POP server options, the built-in HTTP server, and other system attributes. For several system settings, you can specify numbers of simultaneous connections. Larger numbers of connections require more system resources (such as memory), so setting the number of connections too high can actually slow processing. Additional connections are queued when the system is already processing the maximum number allowed. SMTP server options To modify the system SMTP server options: 1 On the main Mail-Gear administration page, under System, click Modify. 2 Select SMTP Server Options, then click Next. 3 Make the appropriate changes to the SMTP server options, modifying any of the following settings as required: ■ Maximum number of outgoing connections: Mail-Gear is confined to the specified number of simultaneous outgoing email messages. ■ Maximum number of incoming connections: Mail-Gear is confined to the specified number of simultaneous incoming email messages. 121 Working with the system 4 122 ■ SMTP port number: Enter the port number on which the SMTP server listens. If the port number entered is not unique, the SMTP port number reverts to the previously assigned port number. The default SMTP port number is port 25. ■ Local email domain: The local email domain (the server that is running Mail-Gear) is the domain automatically included as part of the email address if the user name is the only portion of an email address specified in the To field of a composed message. For example, if the local email domain is set to brightcorp.com, entering lamieux in the To field in composing a message would be equivalent to entering [email protected] in the To field. Messages addressed to user@localdomain are delivered to the inboxes of appropriate system or virtual users who have accounts on the Mail-Gear server. ■ Other local domains: Domain names listed here are also considered local (other domain names by which the Mail-Gear server may be identified). Messages addressed to these domains are delivered to the local system or virtual users. Enter only one domain per line. After you have made the necessary changes, click Finish. Modifying the system SMTP server options for relaying To modify the system SMTP server options for relaying: 1 On the main Mail-Gear administration page, under System, click Modify. 2 Select the SMTP Server Options (Relay) option, then click Next. 3 Configure your settings as required, following the information provided in the next two sections: Modifying External-to-External Relay Settings and Modifying Relay Routing Settings. Modifying external-to-external relay settings Mail-Gear lets you specify whether Mail-Gear’s SMTP server can be used to relay messages for which neither the sender nor the receiver is local. This feature can be used to prevent the Mail-Gear server from being used to relay junk email for another host. The external-to-external relay settings that you select here may apply to some local email as well. If you have system or virtual users that use Mail-Gear in conjunction with other client email software (and you want to restrict relaying to local mail only), you must set the external-to-external relay settings accordingly. Most client email software packages retrieve mail from Mail-Gear via POP and forward outgoing messages via SMTP. A client workstation accessing the Mail-Gear server to send a message composed in Netscape Mail, for example, is viewed by Mail-Gear as an external-to-external relay unless the host is specified appropriately. When determining the originating host of a given email message (to determine whether the message can be relayed), Mail-Gear does not examine the From field of the incoming email message because this information easily can be falsified. Instead, Mail-Gear checks the actual socket connection to determine the originating host of a message. To modify external-to-external relay settings: 1 Under Incoming Relay Options, select one of the following options: ■ Always allowed: No restrictions are placed on relaying messages for external hosts. Email from any remote host can be relayed through the Mail-Gear server. Always Allowed is the default setting for external-to-external relaying. 123 Working with the system ■ Not allowed: No external-to-external relaying is permitted. This setting allows only outgoing email originating from the Mail-Gear Web Client to be sent. Outgoing email messages composed in Netscape Mail, Microsoft Outlook, or Eudora cannot be relayed through the Mail-Gear server. If you have system or virtual users who use Mail-Gear in conjunction with other client email software and access the Mail-Gear server to send mail, you must use the Allowed Only From Specified Hosts setting. See the information for that setting. ■ Allowed only from specified hosts: Only email from specified hosts can be relayed. If you select this option, you must enter in the text field provided the host names or IP addresses of those hosts for which you want to permit mail relaying. Enter one host name per line. If you have system or virtual users who use Mail-Gear in conjunction with other client email software and access the Mail-Gear server to send mail, use this setting and type the host information in the text field provided. Mail-Gear views an outgoing message from a client workstation as an external-to-external relay unless the host is designated here. Specify the manner in which Mail-Gear handles messages where neither the sender nor the receiver is local If you are allowing mail from only specified hosts, enter these hosts in the text field provided 2 124 If you have selected Allowed Only From These Hosts, type the names of those hosts in the text field. Modifying the system You can use a wild card to designate multiple hosts or IP addresses with a single entry. Use an asterisk at the beginning of a host name to designate all hosts with the same ending or at the end of an IP address to designate a range of IP addresses, as shown: *.brightcorp.com 169.123.12.* Modifying relay routing settings In addition to its standard configuration as a stand-alone mail server, Mail-Gear also can be used as a filtering relay to other local mail servers that may be running other mail products such as Microsoft Exchange or Lotus Notes. If Mail-Gear is being used as a filtering relay, local servers to and from which mail is relayed must be entered in the Relay Routing field. Mail-Gear treats as local any messages that originate from or are addressed to the hosts specified here. The Relay Routing List settings should provide local routing information, not subject to the external-to-external routing restrictions. If you are not using Mail-Gear in a relaying capacity, you do not need to modify relay routing settings. To modify relay routing settings: 1 Enter the appropriate routing information in the Relay Routing List field, using any of the following settings as required: ■ Routed Host Address (route from host): Enter the name of any local host or domain for which mail is routed through the Mail-Gear server. For example, if server1.brightcorp.com is a local mail server and incoming and outgoing mail for this host is to be routed through the Mail-Gear server, include server1.brightcorp.com as a Route From entry. For a given entry in the Relay Routing List, if email is to be addressed directly to the routed host, you need only include a Route From entry. Then, mail addressed directly to the host is routed to that host (you do not need to enter the same entry in the Target Host Address field). For the above example, email addressed directly to server1 is routed to server1. If a given host may be identified by any other names, each alternate host name should be provided as a separate entry in the Relay Routing List with both Routed Host and Target Host information (see below). 125 Working with the system ■ Target Host Address (optional route to host): If a local host may be identified by any other name, the alternate host name must be provided to Mail-Gear also. For example, if all mail addressed to brightcorp.com should be delivered to server1.brightcorp.com, then as a Route From entry, enter brightcorp.com, and as a Route To entry, enter server1.brightcorp.com. Note that server1 must be configured to accept mail for brightcorp.com. A separate entry in the Relay Routing List should be included for each alternate host name. ■ Target Host Port (optional route to port): If the Target Host is listening on a port other than the default port number, enter the port number in this field. The default port number is 25. For local relay routing, you must indicate those hosts for which mail is treated as local You must also indicate the appropriate handling for messages where neither the sender nor the receiver has been defined as a user in Mail-Gear Add, delete, or change information in the Relay Routing List as necessary: 126 ■ To add an entry to the Relay Routing List, click Add, enter the information in the fields provided, then click Save. ■ To delete an entry, select the entry, then click Delete. Modifying the system ■ To modify an existing entry, click the entry, click Edit, make the necessary changes, then click Save. If the Relay Routing entry appears as shown here (with no route to entry), then appropriately addressed email is routed to the initial host entry To add a new entry to the Relay Routing List, click Add Add the Routed Host Address as shown, and then add the Target Host Address and port number if needed (the default port number is port 25) For the new entry shown here, any email messages that are addressed to user@ brightcorp.com are relayed to server1. brightcorp.com via port 25 (provided that server1 has been configured to accept mail for brightcorp.com) Users whose mail will be relayed and filtering applied are entered into Mail-Gear as relay users. When you create a relay user using the Add method for the User object, Mail-Gear automatically adds the appropriate host to the Relay Routing List if the host name does not already appear. Mail-Gear also can route mail for users who have accounts on local machines but do not have relay user accounts in Mail-Gear. If you elect to forward messages for users that have not been defined, these 127 Working with the system messages are delivered unfiltered. You can bounce these messages back to the sender (with a message indicating that the mail could not be delivered). 2 Under Blocked Relay Routes, select the proper disposition of routed local mail for which neither the sender nor the receiver is a defined relay user in Mail-Gear. 3 Optionally, if your network is set up so that all outgoing email is relayed from the Mail-Gear server through another email host rather than delivered directly, type the name of the host that accepts all outgoing SMTP traffic in the Default Relay Host field. This setting is optional but may be required if Mail-Gear is installed behind a firewall on your network. Type the port number for the Default Relay Host if this number differs from the default port number of 25. If you leave this field blank, Mail-Gear defaults to port 25 automatically. Indicate the default relay host through which all outgoing mail must be routed Enter the port number for the default relay host if the port number differs from the default port 25 4 After you have made the necessary changes, click Finish. POP server options To modify the POP server options: 1 128 On the main Mail-Gear administration page, under System, click Modify. Modifying the system 2 Select POP Server Options, then click Next. 129 Working with the system 3 Make the appropriate changes to the POP server options, modifying any of the following settings as required: ■ Maximum number of simultaneous connections: Mail-Gear is confined to the specified number of simultaneous incoming POP sessions. ■ POP port number: Enter the port number on which the POP server listens. If the port number entered is not unique, the POP port number reverts to the previously assigned port number. The default POP port number is port 110. 4 When you have finished making changes, click Finish. Built-in HTTP server options To modify the built-in HTTP server options: 130 1 On the main Mail-Gear administration page, under System, click Modify. 2 Select Built-in HTTP Server, then click Next. 3 Make the appropriate changes to the built-in HTTP server options, modifying any of the following settings as required: ■ Maximum number of simultaneous connections: Mail-Gear is confined to the specified number of simultaneous HTTP requests. ■ HTTP port number: Enter the port number on which the HTTP server listens. This number should be distinct from all other HTTP servers on a given machine. The HTTP port number reverts to the previously assigned port number if the port number entered is not unique. Modifying the system ■ 4 Use keep alives: If you select Yes, the server attempts to reuse a single connection for multiple requests. Large sites should set this option to No to prevent all of the connections from being used. When you have finished making the necessary changes, click Finish. Other settings To modify other system settings: 1 On the main Mail-Gear administration page, under System, click Modify. 2 Select Other Settings, then click Next. 3 Make the appropriate changes, modifying any of the following settings as required: ■ Activity logging: Disable or enable logging of Mail-Gear activity. If logging is enabled, select the desired length of time that activity logs are retained by the system. Many report functions do not operate if activity logging is disabled. Activity logging should not be disabled unless you have a compelling reason to do so. In addition to the reporting capability, activity logs can be useful for other purposes, for example, tracing undelivered messages. ■ Can users change their passwords: Select the system default setting for whether users can change their passwords. This setting may be overridden by modifying individual user or cast permissions for changing passwords. ■ Default quota: Specify the system default value for the amount of disk space permitted for each user’s mailbox. This value may be overridden by modifying individual user or cast quotas. This setting is not applicable to relay users. If you are using Mail-Gear only as a filtering relay, you do not need to worry about this setting. However, if you have some system or virtual users that must store email on the Mail-Gear server, this setting is applicable and should be established accordingly. If an object reaches the established default quota, any message sent to that object are bounced back to the sender. 131 Working with the system ■ Enable searchable user boxes when available: Select whether to enable the search capability for functions that include lists of users (for example, the Delete User display). The search capability lets you search for all user accounts that begin with the letter “a,” for example. If you do not want the search boxes to be displayed, select No. If you want to enable the search capability and automatically display the search boxes wherever possible, two options are available: you can elect to show all users by default (that is, all users are listed by default in the user list) or you can elect to show no users by default (that is, no users are initially listed in the user list). For information on using the search capability, see “Search capability for user lists” on page 66. For sites with large numbers of users, selecting the Yes (Show All Users by Default) option to activate the search capability may cause Mail-Gear to take more time in loading lists of user accounts. ■ Show user’s full name in user box: Select whether to display in brackets next to the account name the user’s full name for those Mail-Gear functions that include lists of accounts, such as the Delete User function. If this feature is turned off, lists of accounts include only the actual account name, for example, ayates. If this feature is turned on, then the display shows the following entry for the same account: ayates [Andrew Yates]. The Mail-Gear account name for a relay user is the user’s email address. If the email addresses do not intuitively indicate the actual relay users, this feature should be activated so that the user’s full name appears beside the email address in user account lists. (Even if this feature is activated, Mail-Gear is not able to display a full name for a relay user unless this information was provided when the relay user was created in Mail-Gear. Adding the user’s full name is optional, although a field is provided for it.) For sites with large numbers of system users, selecting the Yes option to display users’ full names may cause Mail-Gear to take more time in loading lists of user accounts because Mail-Gear must request this information from the system. 132 Scheduling the system ■ Debugging: Select whether to enable or disable the debugging feature. When the debugging feature is enabled, Symantec Service and Support can connect to the system to obtain access to error messaging to resolve a problem. During normal operation of Mail-Gear, the debugging feature should be disabled. This setting should be enabled only when requested by Symantec Service and Support personnel and should be disabled immediately after the problem has been resolved. ■ Attachment Scanning Failure: Indicate how messages that contain attachments should be handled by Mail-Gear if content scanning of an attachment fails. This type of failure may occur in some cases, for example, if Mail-Gear cannot identify a particular file type or if an attached file is corrupt. You can elect to have Mail-Gear deliver the message without scanning the attachment or have the message bounced back to the sender. For more detailed information on Mail-Gear’s attachment scanning feature, see “Content scanning of messages” on page 41. ■ Decomposition Limit (for attachment scanning): Select from the drop-down list the number of nested levels of files Mail-Gear scans in filtering the content of all email attachments, or select No Attachment Scanning to turn off attachment scanning. Compressed files, which are frequently used for email attachments, may contain other compressed files. Mail-Gear decomposes any nested levels of files to the selected limit to scan the content of attached files. For more detailed information on Mail-Gear’s attachment scanning feature, see “Content scanning of messages” on page 41. If you select Direct Attachments, Mail-Gear does not scan nested files (only direct attachments are scanned). If you set the decomposition limit to 1, Mail-Gear scans individual documents within a .zip or .tar file, and so on. The default setting for the decomposition limit is 10. 4 When you have finished making changes, click Finish. Scheduling the system The Schedule method functions in almost the same manner for Client, User, Cast, and System objects. The System object must have default settings; other objects can be scheduled for specific or daily events and fall back to the system defaults 133 Working with the system when no other event is in effect. You cannot delete the System object’s default settings. When establishing or changing the system defaults, remember that settings for specific clients, users, and casts can be inherited from the system defaults unless they have been specifically scheduled otherwise. For information on scheduling events for objects, see “Scheduling a client” on page 70. Generating a report for the system The Report method for the System object functions in almost the same manner as for the Client, User, and Cast objects. The only difference in system reporting is discussed in the note below. For information on reporting on a given object, see “Generating a report for a client” on page 81. For system reporting, you can report on any number of Client, User, and Cast objects simultaneously. You can select the specific objects on which to report from the lists of clients, casts, and users. Note that if no objects are selected the system report includes information on all objects. 134 C H A P T E R Using Mail-Gear: Some examples 13 This section provides some sample scenarios to help you maximize Mail-Gear’s effectiveness. Although these scenarios involve specific settings, for example, a corporate or school setting, the information contained in the scenarios can be more generally applied. Configuring Mail-Gear (initial setup) Amy is Brightschool’s computer expert. She has installed Mail-Gear on the school’s server and has carefully followed the instructions in this manual for installing and configuring Mail-Gear. During installation, Amy accepted the default port number of 8003 for Mail-Gear. Her next task is to configure Mail-Gear specifically for Brightschool. The name of the server running Mail-Gear is server1, so Amy accesses the main Mail-Gear administration page by visiting http://server1:8003/admin Amy must first log on using the virtadmin account because initially this account is the only account with administrative permissions. She uses the password she entered during the Mail-Gear installation. Amy could grant administrative permissions to her own account and then configure 135 Using Mail-Gear: Some examples Mail-Gear using her account, but she decides to use the virtadmin account for now. First, Amy needs to make some adjustments to the system settings, so she selects the Modify shortcut for the System object. She selects SMTP Server Options from the menu, then clicks Next. Amy sets the number of incoming and the number of outgoing SMTP connections and the SMTP port number Amy enters the local domain, and then enters any other local domains Because Brightschool is small with only a few users, Amy sets the maximum number of outgoing connections to 5 connections and the maximum number of incoming connections to 15 connections. Mail-Gear’s SMTP port number is the default SMTP port number of 25, so she leaves the SMTP port number setting alone. She next enters the local domain, brightschool.k12.va.us in the Local Email Domain field. She also enters the other local domain in the Other Local Domains field. To save her changes, Amy clicks Finish. 136 Configuring Mail-Gear (initial setup) Amy now needs to modify the relay options. She selects the Modify shortcut for the System object, selects SMTP Server Options (Relay) from the menu, and clicks Next. Brightschool wants to ensure that their mail server is not used to illegally relay spam mail for remote hosts, so Amy sets the External-to-External relaying to Allowed Only from these Hosts. Because the teachers might use Mail-Gear in conjunction with other client email products, she enters the IP addresses of the teacher machines in the field provided. She also could select Not Allowed (local email only) to prevent external relaying of email, but the teachers would be unable to send mail composed in other email software products through the Mail-Gear server. Brightschool is not using Mail-Gear as a filtering relay, so Amy does not enter anything under Relay Routing. Furthermore, outgoing SMTP 137 Using Mail-Gear: Some examples messages do not forward through a relay host, so Amy leaves the Default Relay Host field empty as well. Amy clicks Finish to save her changes. Amy sets the External-to-External Relay setting to Allowed Only from Selected Hosts, and enters the appropriate hosts in the field provided Brightschool is not using Mail-Gear as a filtering relay, so Amy does not need to enter anything in the Relay Routing table Outgoing mail is not forwarded through a relay host before delivery to a remote host, so Amy does not need to enter a default relay host Amy next needs to modify the POP server options. She selects the Modify shortcut for the System object, selects POP Server Options, and clicks Next. Because most of the users at the school will be using the Mail-Gear Web Client, Amy sets the maximum number of simultaneous connections to 5. She does not need to change the POP port number from the default value of 110, so she leaves this setting alone. Amy clicks Finish to save her changes. 138 Configuring Mail-Gear (initial setup) Amy selects the number of simultaneous connections and the POP port number Amy next modifies the HTTP server options. She clicks the Modify shortcut for the System object, selects Built-in HTTP Server Options from the menu, and clicks Next. Amy selects the number of connections for the built-in HTTP server, and leaves the default port number of 8003 (if she had selected another port number at installation, she would need to enter that port number here) Amy sets the maximum number of simultaneous connections to 30, and enters the HTTP port number selected at installation. She leaves the Use Keep Alives setting alone for now. She clicks Finish to save her changes. Amy’s last modification to the system settings is to attributes that are listed under Other Settings. She again clicks Modify in the System object section, selects Other Settings, and clicks Next. The school’s server has plenty of disk space, so Amy enables activity logging and sets the system so that log files are removed after 6 months. She knows that log files are required for reporting functions to work correctly. Amy selects Yes to let users change their passwords. (Amy knows she can override this system default setting at the cast or user level if necessary.) 139 Using Mail-Gear: Some examples Because Brightschool is so small, Amy sets the amount of space for each user for storage of email messages to No Quota. Because Brightschool is so small, Amy does not activate searchable user boxes, and she chooses not to have users’ full names displayed beside the account names in user lists. If Brightschool’s enrollment grows significantly at a later date, she can activate these features to make locating specific accounts easier. Amy wants Mail-Gear to scan attachments. She decides to leave the attachment scanning decomposition level set at its default level of 10 for now. She chooses to have messages for which attachment scanning fails bounced back to the sender. Amy clicks Finish to save her changes. Amy now wants to organize the clients into casts. First she must add the clients on the school’s network to Mail-Gear. She selects the Add shortcut for the Client object from the main administration page. She adds each client by entering the client’s IP address and clicking Add. When she finishes adding clients, she clicks Back to Top. Next, she must create the client casts. To create a cast, she selects the Add shortcut for the Cast object from the main administration page. She adds 140 Configuring Mail-Gear (initial setup) each new cast name, and clicks Add. She creates four new casts: Lab, Library, Room1, and Room2. To populate these casts with the appropriate clients, Amy selects the Modify shortcut for the Cast object. Amy selects a cast, selects the Modify Membership option, and clicks Next. Amy selects those clients that are located in the Lab from the list of Unassigned Clients, and clicks Add to add these clients to the Lab cast. Amy sets up the Library, Room1, and Room2 casts in the same manner. Amy’s next step is to set up lists of email addresses. She wants to create three lists initially: Faculty, Students, and BadList. Two of these lists will be used for bulk mailing, and the other list will be used for filtering. Amy selects the Add shortcut for the List object from the main administration 141 Using Mail-Gear: Some examples page. She enters the name of each new list, and clicks Add. When she has created the new lists, she clicks Back to Top. Amy next wants to populate two of the new lists with users. First she must add users to Mail-Gear. Amy selects the Add shortcut for the User object from the main administration page. Amy wants to make all accounts in Mail-Gear virtual accounts, so she selects Create Multiple Virtual Users, and clicks Next. Because she has only a few users, she enters the user list manually in the field provided (rather than uploading a file). When she has entered all the 142 Configuring Mail-Gear (initial setup) necessary information, she clicks Go!. Mail-Gear confirms that all the users have been created. Amy is ready to populate the appropriate new lists with Mail-Gear users. She selects the Modify shortcut for the List object. She selects the Faculty list, and clicks Next. She wants to add all faculty members who use Mail-Gear to this list. Amy highlights her own account and Bill’s account from the Mail-Gear User field, and clicks List Members. Amy wants to be notified of any problems with the list, so she also adds herself as an Owner by selecting her name again and clicking Owners. 143 Using Mail-Gear: Some examples When she finishes populating the list, she clicks Back to Top to save her changes. Amy next modifies the Students list to add the appropriate Mail-Gear users to this list. She adds herself as an owner for this list also, and clicks Back to Top to save her changes. Amy created the BadList list because she knows of an address that the school has deemed inappropriate for students and faculty. She wants to add this address to the BadList list, so she selects the Modify shortcut for the List object, selects the BadList list, and then clicks Next. The school has determined that neither students nor faculty should be allowed to send or receive email messages from any users at badmail.com, 144 Configuring Mail-Gear (initial setup) so Amy types @badmail.com in the Address field, then clicks List Members. Amy enters the address in the Address field, and clicks List Members 145 Using Mail-Gear: Some examples Amy clicks Back to Top when she is finished with her changes. Amy also wants to create several dictionaries that will be used to filter the content of email messages. She clicks Add in the Dictionary object section. She enters a name for each new dictionary in the New Dictionary Name field, and clicks Add. When she has finished creating the dictionaries she needs, she clicks Back to Top. 146 Configuring Mail-Gear (initial setup) Amy now needs to populate the new dictionaries with words and phrases that will be used to score email messages. She selects the Modify shortcut for the Dictionary object. Amy selects a dictionary to be modified, and clicks Next. From the next screen, Amy adds related words and phrases and a corresponding score for each that will be used to score email messages. She adds as many words as necessary. She can revisit the dictionaries later and add and delete words or adjust word scores after she has an idea of how effectively the dictionaries are filtering. When she finishes modifying the selected dictionary, she clicks Back to Top to return to the main Mail-Gear administration page. She then adds appropriate words and phrases to the other new dictionaries as well. 147 Using Mail-Gear: Some examples Amy next wants to set the default filtering properties for her system. She returns to the main administration page, and selects the Schedule shortcut for the System object. She selects Set Defaults, and clicks Next. Amy wants to protect students who forget to log out, so she sets the inactivity timeout to 5 minutes. School policy requires that students be filtered by default, so Amy selects Filtered as the filtering state. Amy then selects SMTP, POP, and the Mail-Gear Web Client for permitted server access methods at the system level. (Later, if she wants to restrict students to only the Mail-Gear Web Client, she can schedule a separate default event for the Student cast.) Finally, to prevent Mail-Gear users from receiving inappropriate email messages, Amy chooses to have blocked messages bounced back to the sender. She also designates her account to be notified of all blocked messages. She then clicks Next. 148 Configuring Mail-Gear (initial setup) Next Amy must designate those lists of email addresses that will be allowed and those that will be denied by default for sending messages. Amy highlights the BadList list, and clicks Deny. Now, by default, Mail-Gear users are able to send email messages to all email addresses, except those listed in BadList. Amy clicks Next. Amy must next specify which lists of email addresses will be denied and which will be allowed for the receipt of email messages. Amy wants the 149 Using Mail-Gear: Some examples restrictions for receiving email to be the same as for sending email, so she clicks Copy from Sending, then clicks Next. The next screen lets Amy set other filtering options. First Amy selects the newly created dictionaries and activates them by clicking On. She decides not to change the dictionary threshold; she leaves the threshold setting at its default value of 50 for now. Amy does not want to keep students from receiving attachments, so she does not click the check boxes for any MIME types. 150 Configuring Mail-Gear (initial setup) She also enables the AutoLock feature, and sets the number of blocked messages and the appropriate time period for AutoLocking an account. She clicks Finish to save her changes. Finally, Amy wants to grant administrative permissions to her own account using the virtadmin account. She selects the Modify shortcut for the User object from the main administrative page. She selects her own account from the list of users, and clicks Next. By selecting all the check boxes, 151 Using Mail-Gear: Some examples Amy grants all administrative permissions to her account. She clicks Finish to save her changes. Amy grants all administrative permissions to her account by checking each check box Amy decides that for now she is finished configuring Mail-Gear for her school. Monitoring and controlling email use Amy has received notification of several blocked messages sent by Michael in the past week. To obtain a summary of Michael’s email violations, Amy generates a report to show all blocked messages. She first selects the Report shortcut for the User object. She decides to report on all users rather 152 Monitoring and controlling email use than just Michael, so she does not select any users from the list provided. She clicks View Usage. She enters a range of time that includes the entire week. Amy is only interested in content violations, so she clicks the Content Violation check box, and then clicks Generate Report. The report shows four bounced 153 Using Mail-Gear: Some examples email messages that have been sent by Michael in the reported period of time, so Amy decides to monitor Michael’s email activity. To monitor Michael’s email activity, Amy schedules a default event for Michael. Amy clicks on the Schedule shortcut for the User object. She selects Michael’s name, selects the Set Defaults function, and clicks Next. Amy changes the settings so that blocked messages are now dropped from the system (rather than bounced back to the sender). She also changes the settings so that she is notified on all messages that Michael sends rather than only on blocked messages). If an email message sent by Michael is blocked, that message is neither delivered to the recipient nor bounced back to Michael. Instead, Amy is notified of the blocked message. From the notification message, Amy is able to either approve the message and forward it on to the intended recipient, bounce the message back to Michael, or delete the message. After making the necessary changes, Amy clicks Next. She then clicks through the next several pages without changing any settings because she doesn’t need to change the filtering 154 Monitoring and controlling email use settings for Michael. On the last page, she clicks Finish to save her changes and create a new default event for Michael. Amy changes the setting for Michael so that blocked messages are dropped from the system She changes the notification setting so that she is notified on all messages sent by Michael Over the next several days, Amy receives notification on several email messages containing inappropriate language sent by Michael to other students. Amy decides to deny Michael access to any email until she is able to speak with him. To do so, Amy needs to edit the default event that she scheduled for Michael earlier. Amy clicks Schedule in the User object section. She selects Michael from the list of users, selects Edit/View an 155 Using Mail-Gear: Some examples Existing Event, and then clicks Next. From the list of events scheduled for Michael, Amy selects the default event, then clicks Next. Amy selects the default event that has been scheduled for Michael and clicks Next Amy deselects all of the permitted server access methods so that Michael is unable to access email, then clicks Next. Amy deselects all permitted server access methods for Michael. With all access methods disabled, Michael will be unable to access email 156 Mail relaying (initial setup) Amy clicks through the next several pages without changing any other settings. On the last page, she clicks Finish to save her changes. Now, when Michael comes to Amy complaining that he is unable to access his email, Amy is able to explain and show Michael why his email privileges have been revoked. Mail relaying (initial setup) Jonathan is a systems administrator for a large company. The company already has a well-established network using another email product but has recently purchased Mail-Gear to filter the content of email messages and to prevent their mail servers from being used illegally to relay spam mail. Jonathan plans to leave the current email setup in place and use Mail-Gear as a filtering relay for the other internal mail servers. Jonathan is ready to configure Mail-Gear to handle the mail relaying. He selects the Modify shortcut for the System object from the main Mail-Gear administration page. He selects SMTP Server Options (Relay), then clicks Next. 157 Using Mail-Gear: Some examples To prevent the relaying of spam mail, Jonathan must configure Mail-Gear to prevent mail that is both sent from and addressed to any remote host from being relayed through the Mail-Gear server. Under External-to-External Relays, he selects Not Allowed (only local email). Jonathan knows that if any users plan to use Mail-Gear in conjunction with other client email software (for example, system or virtual users who connect to the Mail-Gear server to send mail composed in Netscape Mail or Eudora®) he would need to select Allowed Only From These Hosts and enter the specific clients in the field provided, but because he only plans to add relay users to Mail-Gear now, he selects Not Allowed. Jonathan selects Not Allowed to prevent the Mail-Gear server from being used to relay junk email messages If Jonathan had users using Mail-Gear in conjunction with other client email software, he would need to select Allowed Only From These Hosts, and then enter the specific Client workstations in the field provided Next, Jonathan needs to configure Mail-Gear to handle local routing of incoming mail to the two local mail servers. Under Relay Routing, Jonathan enters the routing information in the Relaying Routing table. Before the purchase of Mail-Gear, the network at Jonathan’s company had two mail servers: server1 and server2. Jonathan has installed Mail-Gear on a third machine that is connected directly to the Internet. All mail will route through the Mail-Gear server before being routed to either server1 or server2. The domain name for Jonathan’s company is brightcorp.com, so email addresses for users at Brightcorp are in the following format: [email protected]. All incoming email addressed to brightcorp.com needs to route to server1. Incoming email also is occasionally addressed directly to one of the mail servers, for example, [email protected]. Mail that is addressed in this manner needs to be routed to the specific server. 158 Mail relaying (initial setup) To enter this routing information into the table, Jonathan needs to make three entries in the routing table. The first entry specifies that incoming mail addressed to brightcorp.com should be routed to server1.brightcorp.com. To make this entry in the Relay Routing table, Jonathan first clicks Add. He types the incoming host address, brightcorp.com, in the Routed Host Address field. He next enters in the Target Host Address field the host address to which the incoming mail addressed to brightcorp.com will be routed, server1.brightcorp.com. If server1 was listening on a port other than the standard SMTP port number, Jonathan would need to enter that port number in the field provided. However, in this case the default port number of 25 is correct, so he leaves this field blank. He clicks Save to add this entry to the routing table. Jonathan enters the “route from” host and the target host address (the “route to” address) If the port number for the target host differed from the default port number (25), Jonathan would enter the new port number here Jonathan clicks Save to add the information to the Routing Table 159 Using Mail-Gear: Some examples The next type of entry specifies that mail addressed directly to a particular server be routed to that server. For example, mail addressed to server1.brightcorp.com should be routed to server1. Jonathan again clicks Add. He enters the incoming host address, server1.brightcorp.com, in the Routed Host Address field. In this case, the Target Host Address is identical to the Routed Host Address and the port number is the default port (25), so Jonathan does not need to enter anything in the Target Host Address field. (If the port number for the Target Host Address was not port 25, Jonathan would have to enter both the address and the new port number in the fields provided.) He clicks Save to add this entry to the Routing table. Jonathan enters the Routed Host Address, server1.brightcorp.com Because the Target Host Address is identical to the Routed Host, he leaves this field blank If the port number for the identical Target Host Address was not port 25, Jonathan would have to enter the Target Host Address and the new port number 160 Mail relaying (initial setup) Jonathan makes one other similar entry to the routing table to specify that mail addressed directly to server2.brightcorp.com be routed to server2. Jonathan next must specify the method of disposition for incoming local mail that is addressed to users who have not been defined in Mail-Gear. Jonathan decides to bounce this mail back to the sender. He could also decide to deliver mail unfiltered, but because he plans to define all of Brightcorp’s users as relay users, he doesn’t need to worry about delivering unfiltered mail to any users. If Brightcorp’s network was configured to route outgoing mail through another server (between the Mail-Gear server and the outside), Jonathan also would need to enter this information in the Default Relay Host field and provide a port number if necessary. However, in this case, the Mail-Gear server makes a direct connection to the outside, so Jonathan 161 Using Mail-Gear: Some examples leaves this field blank. Jonathan is finished specifying local routing information. Jonathan indicates that he wants incoming messages addressed to users who have not been defined in Mail-Gear bounced back to the sender If Brightcorp’s outgoing mail was routed through another server to reach the Internet, Jonathan would enter the appropriate information here Jonathan is finished setting up the mail relaying portion of Mail-Gear and is now ready to begin adding relay users to Mail-Gear. Jonathan knows that to provide effective filtering, he also must configure the other mail servers and Brightcorp’s network to ensure that all incoming and outgoing mail is routed through the Mail-Gear server before delivery. He also must configure DNS so that all incoming mail addressed to brightcorp.com, server1.brightcorp.com, and server2.brightcorp.com is delivered to the Mail-Gear server. Jonathan is also aware that he should take steps in accordance with the other email software products used by Brightcorp to ensure that the From field cannot be forged by users before sending messages (in an attempt to bypass the applicable filtering settings in Mail-Gear). 162 Service and support solutions This software includes Symantec Helpdesk Gold support for one year. Symantec Helpdesk Gold support includes: ■ Corporate technical support on a priority toll-free telephone number for a designated contact. ■ Access to the Symantec Service & Support Web site at http://service.symantec.com. This gives you access to product knowledge bases, interactive troubleshooter, Frequently Asked Questions (FAQs), and more. Please contact your Symantec Sales representative if you have any questions. Other technical support options ■ PlatinumCare Support PlatinumCare Support provides Symantec corporate customers with our highest level of technical support. Your organization’s desginated support contact receives unlimited toll-free calls, extended hours of operation, access to our most senior technical analysts, access to a secure PlatinumCare Web site, plus much more. For complete information, please visit the Symantec PlatinumCare Web site at: http://www.symantec.com/platinum/ or call your Symantec Sales representative. Support for old and discontinued versions When a new version of this software is released, registered users will automatically receive the new version during the first year as part of their site license. After the first year, registered users will receive upgrade information in the mail. Telephone support will be provided for the previous version for up to six months after the release of the new version. Technical information may still be available through the Service & Support Web site (http://service.symantec .com). When Symantec announces that a product will no longer be marketed or sold, telephone support will be discontinued up to one year later. 163 Service and support solutions Customer service Visit Symantec Customer Service online at http://service.symantec.com for assistance with non-technical questions and for information on how to do the following: ■ Obtain product literature or trialware. ■ Locate resellers and consultants in your area. ■ Replace missing or defective CD-ROMS, disks, manuals, and so on. ■ Update your product registration with address or name changes. ■ Get order, return, or rebate status information. ■ Access customer service FAQs. ■ Post a question to a customer service representative. To speak with a customer service representative, call (800) 441-7234. For upgrade orders, visit the online upgrade center at: http://www.symantec.com/upgrades/ or call the Customer Service Order Desk at (800) 568-9501. Worldwide service and support Technical support and customer service solutions vary by country. For information on Symantec and International Partner locations outside of the United States, please contact one of the service and support offices listed below, or connect to http://www.symantec.com, select the country you want information about, and click Go! 164 Worldwide service and support Service and support offices North America Symantec Corporation 175 W. Broadway Eugene, OR 97401 http://www.symantec.com/ (800) 441-7234 (USA & Canada) (541) 334-6054 (all other locations) Fax: (541) 984-8020 Automated Fax Retrieval (800) 554-4403 (541) 984-2490 Argentina, Chile, and Uruguay Symantec Region Sur Cerrito 1054 - Piso 9 1010 Buenos Aires Argentina http://www.symantec.com/region/mx +54 (11) 4315-0889 Fax: +54 (11) 4314-3434 Asia/Pacific Rim Symantec Australia Pty. Ltd. 408 Victoria Road Gladesville, NSW 2111 Australia http://www.symantec.com/region/reg_ap/ +61 (2) 9850 1000 Fax: +61 (2) 9817 4550 Brazil Symantec Brazil Av. Juruce, 302 - cj 11 São Paulo - SP 04080 011 Brazil http://www.symantec.com/region/br/ +55 (11) 531-7577 Fax: +55 (11) 5530 8869 Columbia, Venezuela, the Caribbean, and Latin America Symantec América Latina 2501 Colorado, Suite 300 Santa Monica, CA 90404 http://www.symantec.com/region/mx/ +1 (541) 334-6050 (U.S.A.) Fax: (541) 984-8020 (U.S.A.) 165 Service and support solutions Europe, Middle East, and Africa Symantec Customer Service Center P.O. Box 5689 Dublin 15 Ireland http://www.symantec.com/region/reg_eu/ +353 (1) 811 8032 Fax: +353 (1) 811 8033 Automated Fax Retrieval +31 (71) 408-3782 Every effort has been made to ensure the accuracy of this information. However, the information contained herein is subject to change without notice. Symantec Corporation reserves the right for such change without prior notice. May 2000 166 Mail-Gear CD Replacement Form CD REPLACEMENT: After your 60-Day Limited Warranty, if your CD becomes unusable, fill out and return 1) this form, 2) your damaged CD, and 3) your payment (see pricing below, add sales tax if applicable), to the address below to receive replacement CD. DURING THE 60-DAY LIMITED WARRANTY PERIOD, THIS SERVICE IS FREE. You must be a registered customer in order to receive CD replacements. FOR CD REPLACEMENT Please send me: ___ CD Replacement Name ________________________________________________________________________________________________________________ Company Name _______________________________________________________________________________________________________ Street Address (No P.O. Boxes, Please)_____________________________________________________________________________________ City ______________________________________________________________________ State _______ Zip/Postal Code _________________ Country* _________________________________________________________Daytime Phone _______________________________________ Software Purchase Date _________________________________________________________________________________________________ *This offer limited to U.S., Canada, and Mexico. Outside North America, contact your local Symantec office or distributer. Briefly describe the problem:_____________________________________________________________________________________________ ______________________________________________________________________________________________________________________ CD Replacement Price Sales Tax (See Table) Shipping & Handling $ 10.00 ______ $ 9.95 TOTAL DUE ______ SALES TAX TABLE: AZ (5%), CA (7.25%), CO (3%), CT (6%), DC (5.75%), FL (6%), GA (4%), IA (5%), IL (6.25%), IN (5%), KS (4.9%), LA (4%), MA (5%), MD (5%), ME (6%), MI (6%), MN (6.5%), MO (4.225%), NC (6%), NJ (6%), NY (4%), OH (5%), OK (4.5%), PA (6%), SC (5%), TN (6%), TX (6.25%), VA (4.5%), WA (6.5%), WI (5%). Please add local sales tax (as well as state sales tax) in AZ, CA, FL, GA, MO, NY, OH, OK, SC, TN, TX, WA, WI. FORM OF PAYMENT ** (CHECK ONE): ___ Check (Payable to Symantec) Amount Enclosed $ _________ __ Visa __ Mastercard __ American Express Credit Card Number ___________________________________________________________________________________Expires __________ Name on Card (please print) ________________________________________________ Signature ___________________________________ **U.S. Dollars. Payment must be made in U.S. dollars drawn on a U.S. bank. MAIL YOUR CD REPLACEMENT ORDER TO: Symantec Corporation Attention: Order Processing 175 West Broadway Eugene, OR 97401-3003 (800) 441-7234 Please allow 2-3 weeks for delivery within the U.S. Symantec and Mail-Gear are trademarks of Symantec Corporation. Other brands and products are trademarks of their respective holder/s. 1998 Symantec Corporation. All rights reserved. Printed in the U.S.A. 168 I N D E X A Access methods for server, selecting 73 Activity logging enabling 131-133 Add, method adding casts 104 adding clients 69 adding dictionaries 115-116 adding lists 110 adding users 87-97 Address List. See List, address Administration of Mail-Gear accessing admin functions 63-64 administrative interface 64-66 search capability for user lists 66-68 Attachments, scanning of 41-42 compression formats 41 decomposition limit 133 file types 41 scanning failure 133 AutoLock definition of 78 unlocking a user 78 B Blocking of messages. See Filtering of messages C Cast, object 103-107 adding casts 104 deleting casts 104 establishing default quota for 106-107 modifying cast attributes 106-107 modifying cast membership 105 modifying casts 105-107 password permissions for 106-107 reporting on casts 107 scheduling casts 107 setting up (rules for) 35 Client, object 69-85 adding clients 69 adding to casts 70 deleting clients 70 modifying clients 70 reporting on clients 81-85 scheduling clients 70-81 Connections, setting maximum HTTP requests 130 incoming email 121 incoming POP sessions 130 outgoing email 121 D Debugging, enabling 133 Delete, method deleting casts 104 deleting clients 70 deleting dictionaries 116 deleting lists 110 deleting users 98 Dictionary, object 115-119 adding dictionaries 115-116 adding words to 116-117 deleting dictionaries 116 deleting words from 117 editing words in 118 general discussion of 40 in conjunction with lists 52-57 modifying dictionaries 116-118 reporting on dictionaries 118-119 threshold, establishing 78 DNS configuration server settings 15-17 zone configuration 17 Search the online help index for more information. 169 E Events daily events, scheduling 78-79 defaults, scheduling 71-78 deleting existing 80-81 editing existing 80 hierarchy of 34-35 specific events, scheduling 79-80 List, object 109-114 adding lists 110 deleting lists 110 modifying lists 110-112 reporting on list activity 113-114 reporting on list contents 112-113 Local email domain, specifying 122 M F Filtering of messages attachment decomposition limit 133 attachment file types 41 attachment scanning 41 attachment scanning failure 133 based on recipient’s permissions 43 based on sender’s permissions 42 disposition of blocked messages 46-48 general discussion of 42-52 masking 45-46 notification messages 49-52 H HTTP port number, setting 130-131 I Inactivity timeout, establishing 72 Installing Mail-Gear disabling other SMTP and POP3 servers 15 DNS configuration 15-17 initial Mail-Gear set-up 21-23 installation directories, selecting 18 preparing for 14-17 procedures for 17-21 selecting HTTP port number 19 upgrading from earlier versions 14-15 virtadmin account 19 Mail-Gear Web Client accessing the Web Client 60-61 general description of 59-61 Masking of messages 45-46 Methods 32 MIME types, blocking of 78 Modify, method modifying casts 105-107 modifying clients 70 modifying dictionaries 116-118 modifying lists 110-112 modifying system 121-133 modifying users 99-101 N Notification messages 49-52 O Objects 31 P Password cast permissions for 106-107 changing for virtual user 99-101 system defaults for 131-133 user permissions for 99-101 Permissions hierarchy of (by object) 33-34 POP port number, setting 128-130 L List, address 37-40 adding addresses to 38 in conjunction with dictionaries 52-57 states 39-40 170 Search the online help index for more information. R Receiving mail establishing filtering for 76 steps in filtering process 43 Relay user. See User, relay Relaying 25-29 external hosts 25-27, 123-125 for controlling spam 25-27 settings for 123-128 to local hosts 28-29, 125-128 Report, method reporting on casts 107 reporting on clients 81-85 reporting on dictionaries 118-119 reporting on lists 112-114 reporting on system 134 reporting on users 102 S Schedule, method scheduling casts 107 scheduling clients 70-81 scheduling system 133-134 scheduling users 101-102 Search capability, user lists description of 66-68 enabling 132 Sending mail establishing filtering for 74-75 steps in filtering process 42 SMTP port, specifying 122 Spam control 25-27 Specifications, system client requirements 14 server requirements 13-14 System user. See User, system System, object 121-134 activity logging, enabling 131 debugging, enabling 133 default quota, specifying 131 default relay host, specifying 128 HTTP port, setting 130-131 HTTP server options 130-131 incoming email connections 121-122 local domain, specifying 121-122 modifying system 121-133 System, object (continued) outgoing email connections 121-122 password, defaults for 131 POP port, setting 128-130 POP server options 128-130 reporting on system 134 scheduling system 133-134 SMTP port, specifying 121-122 SMTP relay options 123-128 standard SMTP options 121-122 U Uninstalling Mail-Gear 23-24 Upgrading Mail-Gear 14-15 User, object 87-102 adding to casts 99-101 adding users 87-97 assigning administrative permissions to 99-101 deleting users 98 enabling existing users 96-97 establishing default quota for 99-101 modifying users 99-101 password permissions for 99-101 reporting on users 102 scheduling users 101-102 User, relay adding to Mail-Gear 94-96 definition of 87 User, system adding to Mail-Gear 88-90 definition of 87 User, virtual adding to Mail-Gear 91-93 changing password for 99-101 definition of 87 V Virtual user. See User, virtual Search the online help index for more information. 171