1
Norton Ghost™ Personal Edition
User’s Guide
Norton Ghost™ Personal Edition User’s Guide
The software described in this book is furnished under a license agreement
and may be used only in accordance with the terms of the agreement.
Copyright Notice
Copyright Ó 1998–1999 Symantec Corporation.
All Rights Reserved.
Any technical documentation that is made available by Symantec Corporation
is the copyrighted work of Symantec Corporation and is owned by Symantec
Corporation.
NO WARRANTY. The technical documentation is being delivered to you
AS-IS and Symantec Corporation makes no warranty as to its accuracy or use.
Any use of the technical documentation or the information contained therein
is at the risk of the user. Documentation may include technical or other
inaccuracies or typographical errors. Symantec reserves the right to make
changes without prior notice.
No part of this publication may be copied without the express written
permission of Symantec Corporation, Peter Norton Group, 10201 Torre
Avenue, Cupertino, CA 95014.
Trademarks
Symantec, the Symantec logo, Norton Ghost, Ghost Walker, Ghost Explorer,
and GDisk are trademarks of Symantec Corporation.
Microsoft, MS-DOS, Windows, and Windows NT are registered trademarks of
Microsoft Corporation. IBM, OS/2, and OS/2 Warp are registered trademarks
of International Business Machines Corporation. Novell and NetWare are
registered trademarks of Novell Corporation. 3Com and EtherLink are
registered trademarks of 3Com Corporation. Compaq is a registered
trademark of Compaq Corporation. Zip and Jaz are registered trademarks of
Iomega Corporation. SuperDisk is a trademark of Imation Enterprises
Corporation.
Other product names mentioned in this manual may be trademarks or
registered trademarks of their respective companies and are hereby
acknowledged.
Printed in the United States of America.
10
9
8
7
6
5
4
3
2
1
SYMANTEC LICENSE AND WARRANTY
NOTICE: SYMANTEC LICENSES THE ENCLOSED SOFTWARE TO YOU ONLY UPON THE CONDITION
THAT YOU ACCEPT ALL OF THE TERMS CONTAINED IN THIS LICENSE AGREEMENT. PLEASE READ
THESE TERMS CAREFULLY. IF YOU DO NOT AGREE TO THESE TERMS, THEN SYMANTEC IS
UNWILLING TO LICENSE THE SOFTWARE TO YOU, IN WHICH EVENT YOU SHOULD RETURN THE
FULL PRODUCT WITH PROOF OF PURCHASE TO THE DEALER FROM WHOM IT WAS ACQUIRED
WITHIN SIXTY DAYS OF PURCHASE, AND YOUR MONEY WILL BE REFUNDED.
LICENSE AND WARRANTY:
The software which accompanies this license (the "Software") is the property of Symantec or its licensors
and is protected by copyright law. While Symantec continues to own the Software, you will have certain
rights to use the Software after your acceptance of this license. Except as may be modified by a license
addendum which accompanies this license, your rights and obligations with respect to the use of this
Software are as follows:
• You may:
(i) use the Software on one computer to clone, or apply an image of, a hard drive on that computer, or
a portion thereof, to another hard drive on the same computer;
(ii) use the Software on that same computer to create an image file of a hard drive on that computer and
store the image file on removable media for disaster recovery purposes;
(iii) use the Software to create a boot disk as described in the documentation for reapplying the hard
drive image that was created for disaster recovery purposes to the hard drive on that same computer;
(iv) use the Software to clone a hard drive from that same computer to a replacement computer, in the
manner described in the software documentation, and to use the Software on the replacement computer
provided that the Software has been removed from the original computer;
(v) make one copy of the Software for archival purposes, or copy the Software onto the hard disk
of your computer and retain the original for archival purposes;
(vi) after written notice to Symantec, transfer the Software on a permanent basis to another person or
entity, provided that you retain no copies of the Software and the transferee agrees to the terms of this
agreement.
• You may not:
(i) use the Software commercially or non-commercially for the purpose of creating multiple computers
or hard drives not connected to the original computer, with similar or identical configurations to that of
the original computer or hard drive;
(ii) copy the documentation which accompanies the Software;
(iii) sublicense, rent or lease any portion of the Software;
(iv) reverse engineer, decompile, disassemble, modify, translate, make any attempt to discover the
source code of the Software, or create derivative works from the Software; or
(v) use a previous version or copy of the Software after you have received a disk replacement set or an
upgraded version as a replacement of the prior version, unless you donate a previous version of an
upgraded version to a charity of your choice, and such charity agrees in writing that it will be the sole
end user of the product, and that it will abide by the terms of this agreement. Unless you so donate a
previous version of an upgraded version, upon upgrading the Software, all copies of the prior version
must be destroyed.
• Sixty Day Money Back Guarantee:
If you are the original licensee of this copy of the Software and are dissatisfied with it for any reason,
you may return the complete product, together with your receipt, to Symantec or an authorized
dealer, postage prepaid, for a full refund at any time during the sixty day period following the delivery
to you of the Software.
• Limited Warranty:
Symantec warrants that the media on which the Software is distributed will be free from defects for a
period of sixty (60) days from the date of delivery of the Software to you. Your sole remedy in the
event of a breach of this warranty will be that Symantec will, at its option, replace any defective media
returned to Symantec within the warranty period or refund the money you paid for the Software.
Symantec does not warrant that the Software will meet your requirements or that operation of the
Software will be uninterrupted or that the Software will be error-free.
THE ABOVE WARRANTY IS EXCLUSIVE AND IN LIEU OF ALL OTHER WARRANTIES, WHETHER
EXPRESS OR IMPLIED, INCLUDING THE IMPLIED WARRANTIES OF MERCHANTABILITY, FITNESS
FOR A PARTICULAR PURPOSE AND NONINFRINGEMENT. THIS WARRANTY GIVES YOU SPECIFIC
LEGAL RIGHTS. YOU MAY HAVE OTHER RIGHTS, WHICH VARY FROM STATE TO STATE.
• Disclaimer of Damages:
REGARDLESS OF WHETHER ANY REMEDY SET FORTH HEREIN FAILS OF ITS ESSENTIAL PURPOSE,
IN NO EVENT WILL SYMANTEC BE LIABLE TO YOU FOR ANY SPECIAL, CONSEQUENTIAL,
INDIRECT OR SIMILAR DAMAGES, INCLUDING ANY LOST PROFITS OR LOST DATA ARISING OUT
OF THE USE OR INABILITY TO USE THE SOFTWARE EVEN IF SYMANTEC HAS BEEN ADVISED OF
THE POSSIBILITY OF SUCH DAMAGES.
SOME STATES DO NOT ALLOW THE LIMITATION OR EXCLUSION OF LIABILITY FOR INCIDENTAL
OR CONSEQUENTIAL DAMAGES SO THE ABOVE LIMITATION OR EXCLUSION MAY NOT APPLY TO
YOU.
IN NO CASE SHALL SYMANTEC'S LIABILITY EXCEED THE PURCHASE PRICE FOR THE SOFTWARE.
The disclaimers and limitations set forth above will apply regardless of whether you accept the
Software.
• U.S. Government Restricted Rights:
RESTRICTED RIGHTS LEGEND. All Symantec products and documentation are commercial in nature.
The software and software documentation are "Commercial Items", as that term is defined in 48 C.F.R.
2.101, consisting of "Commercial Computer Software" and "Commercial Computer Software
Documentation", as such terms are defined in 48 C.F.R. 252.227-7014(a)(5) and 48 C.F.R. 252.2277014(a)(1), and used in 48 C.F.R. 12.212 and 48 C.F.R. 227.7202, as applicable. Consistent with 48
C.F.R. 12.212, 48 C.F.R. 252.227-7015, 48 C.F.R. 227.7202 through 227.7202-4, 48 C.F.R. 52.227-14,
and other relevant sections of the Code of Federal Regulations, as applicable, Symantec's computer
software and computer software documentation are licensed to United States Government end users
with only those rights as granted to all other end users, according to the terms and conditions
contained in this license agreement. Manufacturer is Symantec Corporation, 10201 Torre Avenue,
Cupertino, CA 95014.
• General:
This Agreement will be governed by the laws of the State of California. This Agreement may only be
modified by a license addendum which accompanies this license or by a written document which has
been signed by both you and Symantec. Should you have any questions concerning this Agreement,
or if you desire to contact Symantec for any reason, please write: Symantec Customer Sales and
Service, 10201 Torre Avenue, Cupertino, CA 95014.
C
O
Chapter 1
N
T
E
N
T
S
About Norton Ghost Personal Edition
How Norton Ghost works ................................................................ 8
Clone internal hard disk drives and individual partitions ............. 8
Save and load image files to and from removable media ........... 9
Clone hard disk drives and partitions peer-to-peer .................. 10
Chapter 2
Setting up Norton Ghost
Minimum system requirements ...................................................... 13
Hardware requirements for Norton Ghost transfer modes ....... 14
Installing Norton Ghost Personal Edition ........................................ 14
Installing Norton Ghost in Windows ........................................ 14
Installing Norton Ghost in DOS ............................................... 15
Uninstalling Norton Ghost ............................................................. 16
Uninstalling Norton Ghost in Windows .................................... 16
Uninstalling Norton Ghost in DOS .......................................... 16
Setting up a DOS boot disk ........................................................... 16
Setting up transfer methods .......................................................... 17
Internal drives .......................................................................... 17
Local devices .......................................................................... 17
Peer-to-peer connections ........................................................ 18
Peer-to-peer parallel port connections ..................................... 18
Peer-to-peer NetBIOS network connections ........................... 18
Chapter 3
Using Norton Ghost
What you need to do ..................................................................... 21
Starting Norton Ghost ................................................................... 23
Navigating without a mouse ........................................................... 24
Cloning disks ................................................................................. 24
Cloning from disk to disk ......................................................... 25
Cloning a disk to image file ..................................................... 27
Cloning a disk from an image file ............................................. 29
Cloning partitions ........................................................................... 32
Cloning from partition to partition ............................................ 32
Cloning from partition to image file .......................................... 34
Cloning a partition from an image file ....................................... 36
Managing image files ..................................................................... 39
Image files and compression ................................................... 39
Image files and CRC32 ........................................................... 40
5
Contents
Image files and volume spanning ............................................. 40
Image files and tape drives ...................................................... 43
Viewing image file content and selective file restoration .......... 44
Appendix A
Norton Ghost command-line switches
Command-line switches ................................................................. 47
Appendix B
Frequently asked questions
Appendix C
Troubleshooting
Norton Ghost error codes ............................................................. 67
Appendix D
Diagnostics
Hard drive detection and diagnostic information ............................. 69
Norton Ghost abort error file (ghost.err) ................................. 69
Hard disk geometry diagnostics .............................................. 70
Full diagnostic statistics dump summary .................................. 70
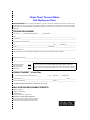
Symantec Service and Support Solutions
Disk Replacement Form
Index
6
C
H
A
P
T
E
About Norton Ghost
Personal Edition
R
1
Norton Ghost is the fast and reliable software solution to satisfy all your PC
disk cloning and copying needs: upgrading hard drives, backing up for
disaster recovery, or migrating from your old PC to a new PC.
Caution: Norton Ghost Personal Edition is a powerful utility program that
performs complex operations on your computer. It is recommended for
experienced and highly skilled PC users only.
Norton Ghost clones either complete disks or specified partitions:
■
An entire disk can be either cloned directly from one disk to
another or saved into a Norton Ghost image file. The image file
can be used as a template to create copies of the original disk.
■
The contents of a partition can be copied to another partition.
Selected partitions can be copied to an image file that is used as a
template to create copies of the original partitions.
When cloning complete hard drives, procedures such as FDISK and
FORMAT are a thing of the past. Norton Ghost dynamically partitions and
formats a target disk on the fly. The source and target disks can be different
sizes. Norton Ghost adjusts the position and size of the target partitions
automatically, FAT12, FAT16, FAT32, and NTFS partitions are expanded or
contracted to fit the target. The source and target disk can be on the same
computer, or the target disk can be on a different computer, providing the
two computers are connected through NetBIOS or the parallel ports.
Norton Ghost copies every required partition, regardless of type, from the
source (disk or image file) to the target. If the source and target disks are
identical in size and structure, Norton Ghost can perform a sector-by-sector
copy. Because this is seldom the case and does not allow the resizing of
7
Chapter 1:
About Norton Ghost Personal Edition
partitions, Norton Ghost positions each partition or logical drive on the
target disk using the same rules as FDISK, copying the partitions on a fileby-file basis.
An image file can be stored on a CD, Superdisk, JAZ or ZIP drive, or other
removable media. This file can be used for backup or for cloning copies of
the original disk.
Norton Ghost runs in DOS with a simple graphical interface. Alternatively,
to simplify repetitive tasks, command-line switches can automate
operation.
The Norton Ghost installation CD contains these additional utilities that
work with Norton Ghost:
■
Ghost Explorer recovers and deletes individual directories and files
from an image file.
■
GDISK is a complete replacement for the FDISK and FORMAT
utilities that allows on-the-fly formatting, better disk space
utilization, batch mode operation, hiding and unhiding of
partitions, and extensive partition reporting.
Unlike FDISK, which uses interactive menus and prompts, GDISK is
command line driven and offers quicker configuration of a disk’s
partitions.
How Norton Ghost works
Because the Norton Ghost executable is small with minimal conventional
memory requirements, it can easily be run from a DOS boot disk or
alternative storage location within DOS. Norton Ghost can make complete
backups of disks or partitions. Norton Ghost even copies in-use system
files that other backup utilities miss, making it a great tool for disaster
recovery operations.
The following sections give examples of common ways to use Norton
Ghost.
Clone internal hard disk drives and individual partitions
With Norton Ghost you can save all of the contents on one internal hard
disk drive or partition to another by cloning local disk-to-disk, or partitionto-partition. The hardware must be installed correctly and have the hard
disk drive jumpers and CMOS/BIOS correctly configured. As with all
8
How Norton Ghost works
Norton Ghost usage, both the source and destination must be free from file
corruption and physical hard disk drive problems prior to cloning.
Note: When cloning an entire hard disk drive, the existing partition
configuration is overwritten and need not be set in advance.
Internal transfer operations are one of the fastest methods of cloning, and
offer a simple quick hard disk drive backup or migration tool. By using a
second hard disk drive as a backup, it can be used to replace the original
in the event of its failure or corruption, reducing the downtime of the
machine.
Norton Ghost’s ability to resize the partitions and file systems it
understands while cloning disk-to-disk simplifies upgrading to a larger
hard disk drive. Install the new hard disk drive hardware as required, then
run Norton Ghost from a boot disk to migrate the contents of the old drive
to the larger drive. This leaves the original disk untouched and available
until the new system configuration is completed.
Caution: Make sure you correctly identify and select the source and
destination disks as the operation cannot be undone.
Save and load image files to and from removable media
It is possible to burn image files onto a CD or to save an image file to a ZIP
drive, JAZ drive, Superdisk, or other removable media.
For ZIP, JAZ, Superdisk, and removable media, Norton Ghost writes and
reads directly to and from the device, providing that the device is working
and has a DOS drive letter.
When creating the image of the model for storage on a CD, we recommend
bringing the image down onto the PC that has the writing software, and
then creating the CD. Norton Ghost can be included on the created CD.
To create a CD image file for later restoration:
1
Save the model hard disk to an image file using Norton Ghost and
the split command-line option.
2
Run the CD writing software and save the image onto the CD.
9
Chapter 1:
About Norton Ghost Personal Edition
For restoration purposes, once the device is working and has a drive letter,
Norton Ghost can use that drive to perform the required task.
Clone hard disk drives and partitions peer-to-peer
Peer-to-peer connections are typically used when there are two computers
that you wish to connect. Norton Ghost gives you the choice of connecting
through the NetBIOS or through the LPT (printer) parallel port. In both
cases, one computer becomes the master, the other the slave. See “Peer-topeer connections” on page 18 for more information.
■
To connect through the printer port you need a parallel data
transfer cable plugged into the LPT port of both computers.
■
To connect through NetBIOS you need a network card in each
computer, a converted Ethernet cable, and the appropriate
networking software. In general, connecting through the network
gives two to five times the performance of an LPT connection.
For NetBIOS and LPT connections, one machine must act as the master and
the other the slave. All operator input will be on the master computer.
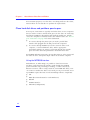
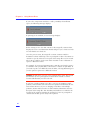
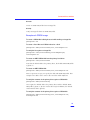
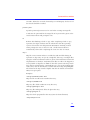
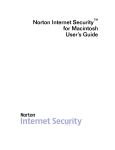
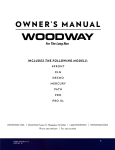
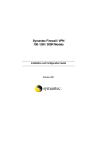
Using the NETBIOS interface
With Ethernet, or Token Ring, it is possible to clone between two
machines, using their network interface cards through the NetBIOS
protocol interface. By purchasing, or making, a custom connectivity
Ethernet crossover cable or using coaxial or a mini-HUB and cables, a PC
can connect to another PC. This is a two-node peer-to-peer network. To set
up NetBIOS requires five basic Novell networking software components:
10
■
LSL
■
MLID (the Network Interface Card ODI driver)
■
IPXODI
■
NetBIOS interface
■
NET.CFG (configuration)
How Norton Ghost works
These components can be loaded from a boot disk to allow Norton Ghost
to use NetBIOS to communicate and clone between master and slave.
Master
Crossover
Ethernet Cable
Slave
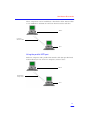
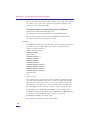
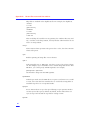
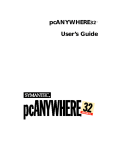
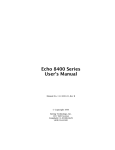
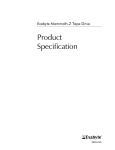
Using the parallel (LPT) port
With two computers and a parallel data transfer cable (not provided with
Norton Ghost) you can clone two computers, master to slave.
Master
Parallel data
transfer cable
Slave
11
Chapter 1:
12
About Norton Ghost Personal Edition
C
H
A
P
T
E
R
Setting up Norton Ghost
2
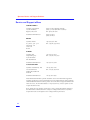
Minimum system requirements
The system requirements to run Norton Ghost are:
■
386SX processor (486 or above recommended)
■
4 MB RAM (8 MB RAM for NTFS), 16 MB recommended
■
DOS 5.0 or above
■
VGA monitor
13
Chapter 2:
Setting up Norton Ghost
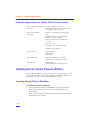
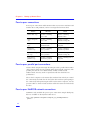
Hardware requirements for Norton Ghost transfer modes
Peer-to-peer LPT/parallel port
connection
Parallel connection cable and a
bidirectional parallel port with EPP or ECP
compatibility on each machine.
Peer-to-peer NetBIOS
connection
Ethernet or Token Ring network interface
card.
Established network connection which
includes one of the following:
■
Crossover Ethernet cable (pins 1236
> 3612)
■
Coaxial cable
■
Standard cables with hub or MAU
NetBIOS network software
SCSI tape driver
DOS ASPI driver
SCSI tape drive
Tape media
Removable media
Removable media drive and media
Media drivers required to use in DOS
CD-ROM usage
CD-ROM writer
CD-ROM writer disk creation software
Installing Norton Ghost Personal Edition
Norton Ghost installation requires you to run the setup program or copy
the Norton Ghost executable to the location from which it will be run,
depending on whether you install in Windows or DOS.
Installing Norton Ghost in Windows
To install Norton Ghost in Windows:
1
Insert the Norton Ghost Personal Edition CD in your CD-ROM
drive. After a moment, the Norton Ghost setup program starts
automatically.
If the setup program does not start automatically, Autorun might be
disabled on your computer.
14
Installing Norton Ghost Personal Edition
To manually start the installation, double-click the My Computer icon
on your desktop. Then locate and double-click SETUP.EXE on the
installation CD.
Note: If you do not have a CD-ROM drive, see the Disk
Replacement form in this guide for information about getting
floppy disks.
2
Follow the instructions that appear on the screen.
The setup program places a Norton Ghost Personal Edition program
group in your Start menu and installs the files necessary to run
Norton Ghost Personal Edition.
Installing Norton Ghost in DOS
To install Norton Ghost in DOS:
1
Create a directory on the destination drive.
For example, C:\GHOSTPE.
2
Locate the DOSINST folder on the installation CD and copy the
directory tree under DOSINST to the folder you created in step 1.
For example, if E:\ is your CD-ROM drive, type the following at the
DOS prompt:
cd E:\DOSINST
copy *.* C:\GHOSTPE
Note: If a Windows drag-and-drop or copy and paste operation is used
instead of a DOS command, the files being copied from the CD retain their
read-only attributes when copied to a floppy disk or hard drive. You must
manually change the attribute on the Norton Ghost executable
(GHOSTPE.EXE) and all other files that will be updated or edited.
To remove read-only property on Norton Ghost files in Windows:
1
Select the GHOSTPE.EXE file.
2
Right-click the file and select Properties.
3
Uncheck the Read-only attribute.
4
Click OK.
15
Chapter 2:
Setting up Norton Ghost
Uninstalling Norton Ghost
Uninstalling Norton Ghost in Windows
To uninstall Norton Ghost in Windows:
1
Click the Start button, then select Settings > Control Panel.
2
Double-click Add/Remove programs.
3
In the list of installed programs, select Norton Ghost Personal
Edition. Click Add/Remove.
4
Follow the instructions on the screen.
Uninstalling Norton Ghost in DOS
To uninstall Norton Ghost under DOS:
■
Delete the single GHOSTPE.EXE executable file and associated
files in the Ghost directory on your hard drive.
Setting up a DOS boot disk
Norton Ghost is a DOS-based application that should be run in DOS mode
outside of Windows. On some systems, such as Windows NT, Windows
2000, and other non-DOS operating systems, a DOS boot disk must be
used to start the system to allow Norton Ghost to operate. Additional DOS
drivers may be required to allow Norton Ghost to access local hardware.
The configuration files on a DOS boot disk can be altered to load these
drivers as detailed in “Setting up transfer methods” on page 17.
To create a DOS boot disk for Norton Ghost:
1
Insert a blank floppy disk into the A: drive of a Windows 9x or
DOS machine.
2
Copy the system files onto the disk. Do one of the following:
■
Within Windows 95/98:
a Double-click the My Computer icon.
b Right-click the floppy drive, and select Format.
c Choose Copy System Files.
■
16
Within a DOS prompt box:
Setting up transfer methods
Use the following DOS command to copy the system files to the
formatted disk:
C:\> sys c: a:
Use the following DOS command to format and copy the system files
to the unformatted disk:
C:\> format a: /s
3
Copy GHOSTPE.EXE onto the boot disk. For example:
4
Set up any drivers required for the transfer method. For more
information see “Setting up transfer methods” on page 17.
C:\> copy c:\GHOSTPE\GHOSTPE.EXE a:\
Setting up transfer methods
The following sections summarize the information you need to prepare
devices and drives for Norton Ghost operation.
Internal drives
To work with internal drives, ensure that each of the drives is properly
configured. This means that if fixed IDE drives are in use, the jumpers on
the drives are set up correctly, and the BIOS of the machine is configured
for the disks and setup arrangement. Both the source and the destination
drives must be free from file corruption and physical hard drive defects.
Local devices
To use Norton Ghost with SCSI tape devices, the tape device needs to have
an Advanced SCSI Programming Interface (ASPI) driver for DOS installed.
The driver is installed in the config.sys file as shown in the example below:
device=C:\scsitape\aspi4dos.sys
Refer to the documentation included with the SCSI tape device for further
details.
17
Chapter 2:
Setting up Norton Ghost
Peer-to-peer connections
Peer-to-peer connections enable Norton Ghost to run on two machines and
transfer drives and partitions, and to use image files between them.
Action
Master
Slave
Disk-to-disk copy
Machine containing
source disk
Machine containing
destination disk
Disk-to-image file
copy
Machine containing
source disk
Machine receiving
destination image file
Image file-to-disk
copy
Machine containing
destination disk
Machine containing source
image file
Partition-topartition copy
Machine containing
source partition
Machine containing
destination partition
Partition-to-image
file copy
Machine containing
source partition
Machine receiving
destination image file
Image file-topartition copy
Machine containing
destination partition
Machine containing source
image file
Peer-to-peer parallel port connections
Connect both computers through the LPT port with a parallel data transfer
cable. Norton Ghost must be running under DOS on both computers. The
parallel port must be set to bidirectional, or EPP, or ECP, but not
unidirectional. You may need to experiment with the mode for best
performance.
Select which computer is the master (the machine from which you control
the connection), and which is the slave (the other machine participating in
the connection). All operator input will be on the master computer. Use the
previous table to choose which machine will be the master and which will
be slave.
Peer-to-peer NetBIOS network connections
NetBIOS is only available for peer-to-peer connections. Sample third-party
files are available on the Symantec FTP site at:
ftp://ftp.symantec.com/public/english_us_canada/products/
ghost/
18
Setting up transfer methods
Sourcing NetBIOS
The following steps explain the NetBIOS setup procedure.
1
Install network interface cards.
2
Once the network interface cards are installed, the two peer
machines need to be connected using cabling. The type and setup
of the connection will depend on your individual network
requirements. These can include converted twisted pair cables,
coaxial, hub, and MAU-based setups.
3
Run the Network Interface Card setup program and configure the
card.
4
Set up NetBIOS.
Here is an example of loading NetBIOS in your startnet.bat or
autoexec.bat:
LSL.COM
REM (Comment: replace NE2000.COM with your NIC driver)
NE2000.COM
IPXODI.COM
NETBIOS.EXE
An example of the net.cfg for an NE2000 NIC:
#set up the NIC
link driver NE2000
_int 10
_port 300
Select which computer is the master (the machine from which you
control the connection), and which is the slave (the other machine
participating in the connection). All operator input will be on the
master computer. See “Peer-to-peer connections” on page 18 to
choose which will be the master and which machine will be slave.
19
Chapter 2:
20
Setting up Norton Ghost
C
H
A
P
T
E
R
Using Norton Ghost
3
This chapter describes how to perform operations. The procedures assume
that all hardware is configured properly and communication methods are
established. See “Setting up transfer methods” on page 17 for more
information.
Information on the following tasks is provided:
■
Starting Norton Ghost
■
Navigating in Norton Ghost without a mouse
■
Cloning disks
■
Cloning partitions
■
Managing image files
What you need to do
The following section gives a quick overview of the ways you can use
Norton Ghost to perform everyday tasks.
1
2
Identify what you want Norton Ghost to do and how many
machines are involved.
■
Disk duplication
■
Disk image file creation
■
Disk creation from image file
■
Partition duplication
■
Partition image file creation
■
Partition creation from image file
Select the hardware setup method you will use to perform the
operation.
Internal disk drives and:
21
Chapter 3:
Using Norton Ghost
3
■
No other devices.
■
Other peripheral devices not needing additional setup (for
example, Jaz or Zip drive).
■
SCSI tape drive requiring DOS ASPI driver setup.
■
Third-party device requiring DOS driver setup.
■
Peer-to-peer connection using LPT printer port.
■
Peer-to-peer connection using NetBIOS and network interface
cards connection.
Set up the hardware and system for the method chosen.
■
Ensure all hard drives are installed correctly and the BIOS of
the system is configured and correctly displays the valid
parameters of the drives.
■
Set up additional drivers required for other devices:
SCSI tape drive requiring DOS driver setup
Install the SCSI ASPI DOS driver in the config.sys file as outlined
in SCSI Tape Drive documentation.
Third-party device requiring DOS driver setup
Install the DOS driver as outlined in device documentation.
Peer-to-peer connection: LPT
Using a parallel data transfer connection cable, connect up the
two machines. Decide which machine is the master and which is
the slave.
Peer-to-peer connection: NetBIOS
■
22
■
Install network interface card (NIC).
■
Connect cabling.
■
Set up NIC using manufacturer’s installation program.
■
Run NIC test program to check NIC and cabling.
■
Install NetBIOS networking software.
■
Select which machine is the master and which is the slave.
Test Hardware and DOS driver setup.
4
Start Norton Ghost. Optionally, add command-line switches. For
information on the Norton Ghost command-line switches, see
“Command-line switches” on page 47.
5
Select the transfer method and Norton Ghost operation from
menu.
Starting Norton Ghost
6
Select source hard disk drive, partitions, or image file.
7
Select destination hard disk drive, partition, or image file.
Warning: Choose carefully. Make sure you select the correct destination to
overwrite. In most cases, you will not be able to recover from an
incorrectly selected destination drive.
8
Follow on-screen prompts and proceed with clone.
9
Reboot the machine.
Starting Norton Ghost
Norton Ghost is a DOS-based application and should run in DOS mode
outside of Windows, if possible. If you run Norton Ghost within Windows
95/98, note the following:
■
Files may be in an open or changing state. If these files are cloned,
the resulting destination files will be left in an inconsistent state.
■
The operating system’s volume must not be overwritten.
■
If you overwrite a drive or partition, the system must be restarted.
■
LPT connection operation is not available.
■
Norton Ghost will not automatically reboot the system.
■
Hard disk drive sizes may be displayed smaller than their actual
size. Norton Ghost will only be able to access the displayed
destination size. The remaining space will not be used.
Norton Ghost should never be run within Windows NT, Windows 2000,
OS/2 or other non-DOS operating systems. To run Norton Ghost on a
machine running a non-DOS operating system, use a DOS boot diskette.
To start Norton Ghost:
■
From the DOS prompt, type:
C:\> ghostpe.exe
Alternatively, boot the machine using a DOS boot disk. A DOS boot disk
can be created on a machine running Windows or DOS. See “Setting up a
DOS boot disk” on page 16 for more information. Running Norton Ghost
in DOS may require additional DOS drivers to be started to allow Norton
23
Chapter 3:
Using Norton Ghost
Ghost to access and use some hardware. See “Setting up transfer methods”
on page 17 for more information.
Navigating without a mouse
Depending upon how Norton Ghost is started, mouse support may not be
available.
To use Norton Ghost without a mouse:
■
Use arrow keys to navigate the menu.
■
Press Tab to move from button to button.
■
Press Enter to activate the selected button.
■
Press Enter to select an item in a list.
Cloning disks
Disk cloning procedures are accessed from the main menu. To specify the
transfer method, select one of the following:
■
24
Local
Cloning disks
■
LPT > Master
■
NetBIOS > Master
Cloning from disk to disk
To clone disk to disk:
1
From the main menu, select Disk > To Disk.
The Source Drive dialog box displays.
2
Select the source drive.
The Source Drive dialog box displays the details of every disk Norton
Ghost can find on the local machine. On selection of the source
drive, the Destination Drive dialog box displays.
3
Select the destination drive.
The Destination Drive dialog box displays the details of every disk
Norton Ghost can find on the destination machine. If a peer-to-peer
connection is established this will be the slave machine’s disks. (If
this is a local disk-to-disk copy, then the source disk will be
unavailable for selection.). On selection of the destination drive, the
Destination Drive Details dialog box displays.
Warning: Choose carefully as this is the disk that is going to get
overwritten.
25
Chapter 3:
Using Norton Ghost
4
Confirm or change the destination drive partition layout.
The Destination Drive Details dialog box displays a suggested
partition layout for the destination drive. By default Norton Ghost
allocates any extra space that the new disk has to the first FAT or
NTFS partition that it discovers.
You can change the size of any destination FAT or NTFS partition at
this stage simply by entering the new size in megabytes.
You cannot enter a value that exceeds the available space, is beyond
the file systems limitations, or that is not large enough to contain the
data held in the source partition. On selecting OK, Norton Ghost
displays the final “Proceed with disk clone?” question. This is the last
chance to back out.
5
26
Check the details displayed and ensure the correct options have
been selected. Do one of the following:
Cloning disks
■
Select Yes to proceed with the disk cloning.
The system performs a quick integrity check of the file structure
on the source disk and then copies the source disk to the
destination. If you need to abort the process use Ctrl-C, but be
aware that this leaves the destination disk in an unknown state.
Warning: Only select Yes if you are really sure you want to
proceed. The destination drive will be completely overwritten with
no chance of recovering any data.
■
6
Select No to return to the menu.
When the disk clone is complete, reboot the machine. Norton Disk
Doctor, ScanDisk, or a similar utility can then be run to verify the
integrity of the destination disk.
Cloning a disk to image file
To clone a disk to an image file:
1
From the main menu, select Disk > To Image.
The Source Drive dialog box displays.
2
Select the source drive.
The Source Drive dialog box displays the details of every disk Norton
Ghost can find on the local machine. On selection of the source
drive, the File Locator dialog box displays.
3
Select the image file. Do one of the following:
■
Type the path and filename for the disk image file.
■
Browse to locate the image file.
27
Chapter 3:
Using Norton Ghost
Specify the drive or device, and specify the full pathname.
The image file may reside on a local drive (but not the one that is
being copied from). When using peer-to-peer connections, the image
file will be created on the slave machine. On pressing Enter, the
compress image question displays.
4
Select the compression type.
■
Select No for no compression (high speed).
■
Select Fast for low compression (medium speed).
■
Select High for high compression (slower speed).
Compression may affect the speed of operations. On selection of a
compression type, Norton Ghost estimates the amount of space
available for the destination image file. If there is insufficient space,
Norton Ghost prompts you to enable spanning of image files.
Note: If spanning is enabled, Norton Ghost prompts for the additional
disks and volumes. See “Image files and volume spanning” on page 40 for
more information.
28
Cloning disks
Norton Ghost displays the final “Proceed with disk dump?” question.
This is the last chance to back out.
5
Check the details displayed and ensure the correct options have
been selected. Do one of the following:
■
Select Yes to proceed with the image file creation.
The system performs a quick integrity check of the file structure
on the source disk and then copies the source disk to the
destination image file. If you need to abort the process use Ctrl-C,
but be aware that this leaves the destination image file in an
unknown state.
■
6
Select No to return to the menu.
After the image file creation is complete, Norton Ghost can verify
the integrity of the image file. From the main menu, select Check >
Image File.
Cloning a disk from an image file
To clone a disk from an image file:
1
From the main menu, select Disk > From Image.
Norton Ghost displays the File Locator dialog box.
2
Do one of the following:
■
Type the path and filename of the image file.
■
Browse to locate the image file.
29
Chapter 3:
Using Norton Ghost
Specify the drive or device and select the full pathname. Note that the
image file may reside on a local drive (but not the one that is being
copied to). When using peer-to-peer connections, the file will be
located on the slave machine. On pressing enter, the Destination
Drive dialog box displays.
3
Select the destination drive.
The Destination Drive dialog box displays the details of every drive
Norton Ghost can find on the local machine. The disk containing the
source image file is not available for selection. On selection of the
destination drive, the Destination Drive Details dialog box displays.
Warning: Choose carefully as this is the disk that is going to get
overwritten.
4
Confirm or change the destination drive partition layout.
The Destination Drive Details dialog box displays a suggested
partition layout for the destination drive. By default Norton Ghost
allocates any extra space that the new disk has to the first FAT or
NTFS partition that it discovers.
You can change the size of any target FAT or NTFS partition at this
stage simply by entering the new size in megabytes.
You cannot enter a value that exceeds the available space, is beyond
the file systems limitations, or is not large enough to contain the data
30
Cloning disks
held in the source partition. On selecting OK, Norton Ghost displays
the final “Proceed with disk load?” question. This is the last chance to
back out.
5
Check the details displayed and ensure the correct options have
been selected. Do one of the following:
■
Select Yes to proceed with the disk cloning.
Norton Ghost creates the destination drive using the source image
file drive details. If you need to abort the process use Ctrl-C, but
be aware that this leaves the destination drive in an unknown
state.
Warning: Only select Yes if you are really sure you want to
proceed. The destination drive will be completely overwritten with
no chance of recovering any data.
■
Select No to return to the menu.
Note: Spanned and split image files are handled as outlined in the
image file management section. See “Managing image files” on
page 39.
6
When the disk image load is complete, reboot the machine.
Norton Disk Doctor, ScanDisk, or a similar utility can then be run
to verify the integrity of the destination drive.
31
Chapter 3:
Using Norton Ghost
Cloning partitions
Partition cloning procedures are accessed from the main menu. To specify
a transfer method, select one of the following:
■
Local
■
LPT > Master
■
NetBIOS > Master
The source and destination partitions must be correctly configured before
cloning partitions.
Cloning from partition to partition
A destination partition must be correctly configured before Norton Ghost
can clone another partition into it.
To clone from partition to partition:
1
From the main menu, select Partition > To Partition.
The Source Drive dialog box displays.
2
Select the source drive.
The Source Drive dialog box displays the details of every drive
Norton Ghost can find on the local machine. On selection of the
source drive, the Source Partition dialog box displays.
32
Cloning partitions
3
Select the source partition.
The Source Partition dialog box displays the details of all the
partitions on the selected source drive. On selection of the source
partition, the Destination Drive dialog box displays.
4
Select the destination drive.
The Destination Drive dialog box displays the details of every disk
Norton Ghost can find on the destination machine. For peer-to-peer
connections, the slave machine is the destination. On selection of the
destination drive, the Destination Partition dialog box displays.
5
Select the destination partition.
The Destination Partition dialog box displays the details of all the
partitions on the selected destination drive. On selection of the
destination partition, Norton Ghost displays the final “Proceed with
partition copy?” question. This is the last chance to back out.
33
Chapter 3:
Using Norton Ghost
Warning: Choose carefully as this is the partition that is going to be
overwritten.
6
Check the details displayed and ensure the correct options have
been selected. Do one of the following:
■
Select Yes to proceed with the partition copy.
If you need to abort the process use Ctrl-C, but be aware that this
leaves the destination drive in an unknown state.
Warning: Only select Yes if you are really sure you want to
proceed. The destination partition will be completely overwritten
with no chance of recovering any data.
■
7
Select No to return to the menu.
When the partition copy is complete, reboot the destination
machine. Norton Disk Doctor, ScanDisk, or a similar utility can
then be run to verify the integrity of the destination partition.
Cloning from partition to image file
To clone a partition to an image file:
1
From the main menu, select Partition > To Image.
The Source Drive dialog box displays.
2
34
Select the source drive.
Cloning partitions
The Source Drive dialog box displays the details of every disk Norton
Ghost can find on the local machine. On selection of the source
drive, the Source Partition dialog box displays.
3
Select the source partitions to be included in the destination image
file.
The Source Partition dialog box displays the details of all the
partitions on the selected source drive. Multiple partitions may be
selected. On selecting OK, the File Locator dialog box displays.
4
Select the image file. Do one of the following:
■
Type the path and filename for the disk image file.
■
Browse to locate the image file.
The image file may reside on a local drive (but not the one that is
being copied from). When using peer-to-peer connections, the image
file will be created on the slave machine. On pressing Enter, the
compress image question displays.
5
Select the compression type.
■
Select No for no compression (high speed).
■
Select Fast for low compression (medium speed).
■
Select High for high compression (slower speed).
Compression may affect the speed of operations. On selection of a
compression level, Norton Ghost estimates the amount of space
available for the destination image file. If there is insufficient space,
Norton Ghost prompts you to enable spanning of image files.
Note: If spanning is enabled, Norton Ghost prompts for the additional
disks and volumes. See “Image files and volume spanning” on page 40 for
more information.
35
Chapter 3:
Using Norton Ghost
Norton Ghost displays the final “Proceed with partition dump?”
question. This is the last chance to back out.
6
Check the details displayed and ensure the correct options have
been selected. Do one of the following:
■
Select Yes to proceed with the image file creation.
The system performs a quick integrity check of the file structure
on the source partitions and then copies the source partitions to
the destination image file. If you need to abort the process use
Ctrl-C, but be aware that this leaves the destination image file in
an unknown state.
■
7
Select No to return to the menu.
After the image file creation is complete, Norton Ghost can verify
the integrity of the image file. From the main menu, select Check >
Image File.
Cloning a partition from an image file
A destination partition must be correctly configured before Norton Ghost
can clone another partition into it.
To clone a partition from an image file:
1
From the main menu, select Partition > From Image.
The File Locator dialog box displays.
2
Do one of the following:
■
Type the path and filename of the image file.
■
Browse to locate the image file.
Specify the drive or device and select the full pathname. Note that the
image file may reside on a local drive (but not the one that is being
copied to). When using peer-to-peer connections, the image file will
be located on the slave machine. On pressing Enter, the Source
Partition dialog box displays.
36
Cloning partitions
3
Select the source partition from the image file.
The Source Partition dialog box displays the details of all the
partitions in the image file. On selection of the source partition, the
Destination Drive dialog box displays.
4
Select the destination drive.
The Destination Drive dialog box displays the details of every disk
Norton Ghost can find on the local machine. On selection of the
destination drive, the Destination Partition dialog box displays.
5
Select the destination partition.
The Destination Partition dialog box displays the details of all the
partitions on the selected destination drive. On selection of the
destination partition, Norton Ghost displays the final “Proceed with
partition load?” question. This is the last chance to back out.
37
Chapter 3:
Using Norton Ghost
Warning: Choose carefully as this is the partition that is going to be
overwritten.
6
Check the details displayed and ensure the correct options have
been selected. Do one of the following:
■
Select Yes to proceed with the partition cloning.
Norton Ghost overwrites the destination partition using the
partition details contained in the image file. If you need to abort
the process use Ctrl-C, but be aware that this leaves the
destination partition in an unknown state.
Warning: Only select Yes if you are really sure you want to
proceed. The destination partition will be completely overwritten
with no chance of recovering any data.
■
Select No to return to the menu.
Note: Spanned and split image files are handled as outlined in the
Image File Management section. See “Managing image files” on
page 39.
7
38
When the partition copy is complete, reboot the destination
machine. Norton Disk Doctor, ScanDisk, or a similar utility can
then be run to verify the integrity of the destination partition.
Managing image files
Managing image files
Norton Ghost can create an image file that contains all the information
required to recreate a complete disk or partition. Image files are a useful
way to store and reliably compress images of model system configurations,
or to create backup copies of complete drives or partitions.
The image files created with Norton Ghost have a .gho extension by
default. They can contain the entire disk or partitions in the disk. Image
files support:
■
Various levels of compression
■
CRC32 data integrity checking
■
Splitting of media files
■
Spanning across volumes
If you also use the Ghost Explorer application, an image file companion
utility, individual files from these image files can be recovered selectively
without having to restore the complete partition or disk.
Image files and compression
Image files created in Norton Ghost support several levels of data
compression. When using Norton Ghost in interactive mode, three
compression options are provided: none, fast, and high. The Norton Ghost
command-line switches provide access to nine levels of compression. The
compression switch -Z is detailed in Appendix A.
As a general rule, the more compression you use, the slower Norton Ghost
will operate. However, compression can improve speed when there is a
data transfer bottleneck. There is a big difference in speed between high
compression and no compression when creating an image file on a local
disk. Over a NetBIOS connection, fast compression is often as fast as, or
faster than, no compression. Over a parallel cable, high compression is
often faster than no compression because fewer bytes need to be sent over
the cable. Decompression of high-compressed images is much faster than
the original compression. The level of compression you should select
depends on your own individual requirements.
39
Chapter 3:
Using Norton Ghost
Image files and CRC32
Cyclic Redundancy Checking (CRC) is a data error checking technique.
CRC ensures that the original data that was written to the image file is the
same as the data that is being used from the image file. The 32 value in
CRC32 indicates the CRC technique uses a 32-bit value to store error
checking information. The use of CRC32 increases detection of errors in
the image file.
When image files are created, CRC32 details are embedded into the file to
ensure image file corruption can be detected when it is being restored to
disk. CRC32 is currently included on a file-by-file basis with FAT partitions
and on a MFT table basis for NTFS partitions.
In addition to image file error detection, the CRC values can be used to
verify that image files and partitions or disks are identical. This can offer an
additional detection method against bad sector writes and other drive
anomalies that may be missed during normal imaging checks.
A text file containing CRC values and associated file attributes can be
generated using the -CRC32 command-line switch. These switches and
functions are detailed in Appendix A.
Image files and volume spanning
Standard image files
Standard image files consist of a single file that contains the contents of the
complete disk or required partitions. This type of image file is used for
storing system configurations on hard disk drives and tape drives where
the volume is large enough and capable of holding the complete image file
in one piece.
Size-limited, multi-segment image files
There are situations where it may not be practical to have a standard image
file. Norton Ghost can split up an image file into segments (known as
spans) that are limited to a user-specified size. This option is most
commonly used to limit span sizes to 550 MB for later transfer onto CD.
40
Managing image files
Spanned image files
Spanned image files are similar to size-limited multi-segment image files.
The difference is that each segment file (or span) of the image file is
limited by the actual volume size of the media the image is being saved to.
This allows you to specify a drive and filename and let Norton Ghost sort
out when to request another volume or location for the remaining data. For
example, this is very useful when using ZIP, JAZ, LS120 Superdisk, and
other disk drive types.
Norton Ghost also allows size limiting of spans when spanning volumes,
ensuring no span exceeds the maximum size.
With all image files, the only constraint on the selection of the destination
volume is that it must not be part of the source selection; for example, it
cannot be on a source disk or partition if that disk or partition is being
included in the image.
Creating an image file
An image file can be created using the disk-to-image file and partitions-toimage file options in Norton Ghost. For more information, see “Cloning a
disk to image file” on page 27 and “Cloning from partition to image file” on
page 34.
How to span an image across multiple volumes and limit
span sizes
When creating an image file from a disk or partition, the destination drive
may not have sufficient space to store the image file. If Norton Ghost
estimates this is the case, you are informed that there is not enough space
on the destination volume and asked whether to enable spanning the
image file. Norton Ghost assumes compression will reduce the size of the
image by one-third when determining whether the image will fit.
Alternatively, the -span and -split command-line switches can be used to
configure Norton Ghost on start up to use image file splitting. See “Norton
Ghost command-line switches” on page 47 for more information.
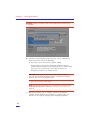
The following message displays:
41
Chapter 3:
Using Norton Ghost
If you select compression and there is still a possibility of insufficient
space, the following message displays:
If spanning is not enabled, an error message displays:
Before starting to save the disk contents to the image file, Norton Ghost
displays the source and destination details and gives you a chance to back
out. The default is to back out.
Once the process starts, the image file creation continues until the
destination volume is filled up. You are prompted to either select Enter to
continue or specify where the next span of the image file is to be located.
Select OK to continue on the same form of media or enter a filename to
span to a different location.
For example, if you started spanning onto a JAZ drive and wish to span a
3.0 GB drive onto just JAZ disks, select Enter to continue on JAZ disks. If
you wish to span across different forms of media, selecting FileName gives
you the option to span onto a different location.
Caution: Record where you save your segments of the span. Also record
the filename of each span segment. Norton Ghost will not record the
location and filename you have selected.
If you have a single partition on a drive, or if you are imaging a single
partition, Norton Ghost will end on the last-spanned volume with no user
intervention. However, if you are imaging a hard drive with multiple
partitions, Norton Ghost needs to record boundary information onto the
first span of the image file. This boundary information is recorded to the
location of the partition amongst the spanned set. You are prompted to
confirm that the first span is ready to be updated.
42
Managing image files
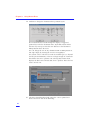
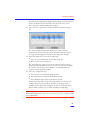
The screen below shows how Norton Ghost will prompt you for span set
disk one and for subsequent volumes.
How to load from a spanned image
When loading a disk or partition from an image file, the process is the
same as loading from an unspanned image file. The loading procedure is
the reverse of the saving procedure. You are prompted to provide details
of each portion of the spanned image, as shown in the screen below.
Do one of the following:
■
Select OK to continue on the same form of media. For example, if
you originally spanned onto a JAZ drive and wish to restore a 3.0
GB drive from just JAZ disks, replace the disk and press Enter to
continue from JAZ disks.
■
If you wish to restore from different forms of media, selecting
FileName gives you the option to restore from a different location.
Caution: You need to know where you saved your segments of the span.
You must also know each filename and path for each span segment.
When the disk image load is complete, reboot the target machine.
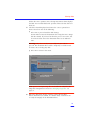
Image files and tape drives
Norton Ghost’s support of SCSI tape drives allows storage of a single image
file onto a tape. When written onto the tape, there is no associated file
system used and this means that you are unable to access the tape from a
drive letter as if it were another storage drive. SCSI tapes only support
standard image files.
43
Chapter 3:
Using Norton Ghost
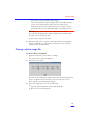
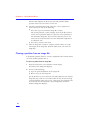
When using tape drives with Norton Ghost, the tape drive can be selected
as the source or destination device in the File Locator window. Each SCSI
tape device is shown as MTx, where x is a number starting at 0 and
increases incrementally for each drive present. For example, the following
screen shows a tape drive MT0 available for use.
For Norton Ghost to access SCSI tape drives, a DOS ASPI driver must be
installed prior to use. See “Setting up transfer methods” on page 17 for
more information.
Norton Ghost in its default mode performs well with most SCSI tape
devices. In some situations with older style SCSI tape devices and possibly
with unreliable tapes, Norton Ghost may need to be configured to slow
down or alter the way it uses the tape device. These options are listed in
Appendix A.
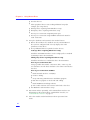
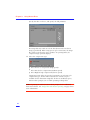
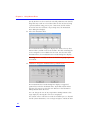
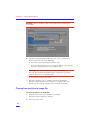
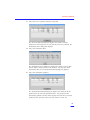
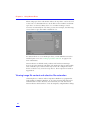
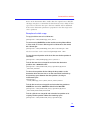
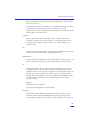
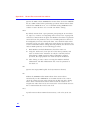
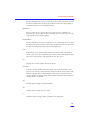
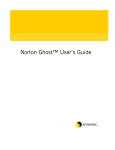
Viewing image file content and selective file restoration
Ghost Explorer is a Norton Ghost companion Windows 95 program that
looks similar to Windows Explorer. It can open an image file and restore
individual files or entire directory structures from it. It can also launch
Norton Ghost in batch mode to create an image file, using Windows dialog
44
Managing image files
boxes to prompt for the disk and partition to save. A sample screen is
shown below:
Norton Ghost creates an index in the image file as it works that allows
Ghost Explorer to create a display of files very quickly.
For more information on Ghost Explorer, see the Ghost Explorer online
help.
45
Chapter 3:
46
Using Norton Ghost
A
P
P
E
N
D
I
X
Norton Ghost
command-line switches
A
Norton Ghost can be run:
■
Interactively with no command-line switches
■
Interactively with selected switches
The Norton Ghost command-line switches are used to alter Norton Ghost’s
behavior and automate procedures. To list Norton Ghost’s command-line
switches, type:
ghostpe.exe -h.
A hyphen (-) or a slash (/) must proceed all switches apart from @.
Switches are not case sensitive. They can be entered in upper, lower, or
mixed case.
Command-line switches
@filename
Specifies a file containing additional command-line switches that should be
read. filename indicates the path and filename of the command-line switch
file. The command-line switch file can include any Norton Ghost
command-line switches, except for -afile and -dfile. The Norton Ghost
command-line switch file must be a text file with each switch on a new
line. This feature allows you to exceed the DOS command-line limit of 150
characters.
Example:
ghostpe.exe @ghswitch.txt
Example command-line switch file contents:
47
Appendix A:
Norton Ghost command-line switches
-clone,mode=pdump,src=1:2,dst=g:\part2.gho
-fcr
-afile=filename
Overrides the default abort error log file (ghost.err) to the directory and file
given in filename.
-autoname
Automatically names spanned image files during creation. Avoids the user
prompt asking for confirmation of the next destination location for the
remainder of the image file.
-bfc=x
Handles bad FAT clusters when writing to disk. If this switch is set, and the
target partition is FAT, Norton Ghost will try to work around bad sectors.
The “x” value indicates the maximum number of bad sectors allowed to be
handled by Norton Ghost. The default value is 500. Norton Ghost will abort
when a bad sector is encountered in a non-FAT partition; after the
maximum number of bad clusters is exceeded; or if the switch is not
selected.
-chkimg,filename
Checks the integrity of the image file indicated by filename.
-clone
The full syntax for this switch is:
-
clone,MODE={copy|load|dump|pcopy|pload|pdump},SRC={dri
ve|file|drive:partition|@MTx},DST={drive|file|drive:partit
ion|@MTx},SZE{E|F|L| n={nnnnM|nnP|F|V}
Clone operation switch. Note that no spaces are allowed in the command
line. This switch allows automation of Norton Ghost operations and has a
series of arguments that define the operation parameters:
48
Command-line switches
MODE={copy | load | dump | pcopy | pload | pdump}
MODE defines the type of clone command:
copy
- disk-to-disk copy
load
- file-to-disk load
dump
- disk-to-file dump
pcopy
- partition-to-partition copy
pload
- file-to-partition load
pdump
- partition-to-file dump
SRC={drive | file | drive:partition | @MTx}
SRC defines the source for the operation selected by the clone mode
option:
Mode
Description of SRC option
copy/dump
Source disk number. For example, disk one is represented
by SRC=1.
load
The image file source location drive, path and filename or
device.
If using a tape drive device set to @MTx (x=0...)
pcopy/pdump
Source partition number. 1:2 indicates the second partition
on drive one.
pload
Partition image filename or device and partition number.
g:\images\disk1.img:2 indicates the second partition in
the image file.
DST={drive | file | drive:partition | @MTx}
DST defines the destination location for the operation:
Mode
Meaning
copy/load
Destination drive. For example, disk two is represented by
DST=2.
49
Appendix A:
Norton Ghost command-line switches
dump
Disk image filename, for example g:\images\system2.img.
If using a tape drive set to @MTx(x=0...).
pcopy/pload
Destination partition, For example, 2:2 indicates the LOAD
second partition on drive two.
pdump
Partition image filename e.g, g:\images\part1.img:2.
SZE{E | F | L | n={nnnnM | nnP| F | V}}
SZE is used to set the size of the destination partitions for either a disk load
or disk copy operation.
Available Options:
E
The size of all partitions except the last partition will remain
fixed. The last partition will be resized to the maximum
allowed size.
F
Resizes the first partition to maximum size allowed based on
file type. If additional space remains, other partition sizes will
be increased.
L
Resizes the last partition to maximum size allowed based on
file type. If additional space remains, other partition sizes will
be increased.
n=xxxxM
Indicates that the nth destination partition is to have a size of
xxxx MB (e.g, SZE2=800M indicates partition two is to have
800 MB).
n=mmP
Indicates that the nth destination partition is to have a size of
mm percent of the target disk. Due to partition size rounding
and alignment issues, 100% physical use of disk space may not
be possible.
n=F
Indicates that the nth destination partition is to remain fixed in
size.
n=V
Indicates that the partition will be resized according to the
following rules:
Rule 1: If the destination disk is larger than the original source disk, then
the partition(s) will be expanded to have the maximum amount of space
subject to the free space available and the partition type (for example,
FAT16 partitions will have a maximum size of 2047 MB).
50
Command-line switches
Rule 2: If the destination disk is smaller than the original source disk (but
still large enough to accommodate the data from the source disk), the free
space left over after the data space has been satisfied will be distributed
between the destination partitions in proportion to the data usage in the
source partitions.
Examples of switch usage
To copy local drive one to local drive two:
ghostpe.exe -clone,mode=copy,src=1,dst=2
To connect using NetBIOS to another machine running Norton Ghost
in slave mode, and save a disk image of local drive two to the remote
file c:\drive2.gho:
ghostpe.exe -clone,mode=dump,src=2,dst=c:\drive2.gho -nbm
The slave machine can be started with ghostpe.exe -nbs
To copy the second partition of the local drive one the first partition of
local drive:
ghostpe.exe -clone,mode=pcopy,src=1:2,dst=2:1
To load drive two from an image file and resize the destination
partitions into a 60:40 allocation
ghostpe.exe -clone,mode=load,src=g:\2prtdisk.gho,dst=2
,sze1=60P,sze2=40P
To clone a three partition disk and keep the first partition on the
destination drive the same size as on the source disk, but divide up
the remaining space between the other partitions, leaving no
unallocated space
ghostpe.exe clone,mode=copy,src=1,dst=2,sze1=F,sze2=V,sze3=V
To load drive one from an image file and resize the first partition to
450 MB, the second to 1599 MB and the third to 2047 MB.
ghostpe.exe -clone,mode=load,src=g:\3prtdisk.gho,dst=1
,sze1=450M,sze2=1599M,sze3=2047M
To load a disk from an image file and resize the last partition to its
capacity. The first partition utilizes the remaining space.
ghostpe.exe -clone,mode=load,src=g:\2prtdisk.gho,
51
Appendix A:
Norton Ghost command-line switches
dst=1,szeL
-CRC32
The -CRC32 switch allows making a list of the files on a disk or partition, or
in an image file with CRC values for each, and to verify that list against the
original or a clone. The purpose is to allow both quick listing of the
contents of an image file and verification that a disk created by Norton
Ghost contains the same files as the original. CRC checking works file by
file with FAT partitions. NTFS partitions are CRC-checked within an image
file by each MFT table. It is not possible at present to obtain a list of files
failing a CRC check with an NTFS file system. When a CRC file is created
for an NTFS partition, only a single CRC value is generated. You can also
create a CRC file from an image file, and verify against a disk.
The full syntax for this switch is:
-CRC32,action={create|verify|pcreate|pverify|
dcreate|dverify},src={{Disk Spec}|{Part Spec}|
{File}},{crcfile={File}|vlist={File}|vexcept=
{File}}
Note that no spaces are allowed in the command line.
crcfile={File}::ASCII CRC32 file - default=ghost.crc
vlist={File}::Verification list file - default=ghost.ls
vexcept={File}::Verification exception file - no default
The possible actions (with descriptions) are:
create
Create an ASCII CRC32 file from a disk.
verify
Verify a disk from a CRC32 file.
pcreate
Create an ASCII CRC32 file from a partition.
pverify
Verify a partition from an ASCII CRC32 file.
52
Command-line switches
dcreate
Create an ASCII CRC32 file from an image file.
dverify
Verify an image file from an ASCII CRC32 file.
Examples of -CRC32 usage
To create a CRC32 file (called ghost.crc) while making an image file:
ghostpe.exe -fcr
To create a list of files and CRC32 values for a disk:
ghostpe.exe -CRC32,action=create,src=1,crcfile=ghost.crc
To verify the list against an image file:
ghostpe.exe -crc32,action=dverify,src=x:dumpfile.gho,
crcfile=ghost.crc
To create an ASCII CRC32 file from the primary hard drive:
ghostpe.exe -crc32,action=create
Note that the default disk is the primary drive, the default ASCII CRC32 file
is ghost.crc.
To create an ASCII CRC32 file:
ghostpe.exe -CRC32,action=create,src=2,crcfile=myfile.txt
Same as previous except you specify the disk and ASCII CRC32 file. This
example uses disk 2 as the source drive and the outfile myfile.txt.
To verify the contents of the primary drive against a CRC32 file:
ghostpe.exe -CRC32,action=verify
Once again, the default disk is the primary drive and the default ASCII
CRC32 file is ghost.crc (in the current directory). In addition, the default
verification list file is ghost.ls.
To verify the contents of the primary drive against a CRC32 file:
ghostpe.exe -CRC32,action=verify,src=1,crcfile=myfile.txt,
vlist=myfile.out
53
Appendix A:
Norton Ghost command-line switches
Same as previous but specify the disk, CRC file, and list file. This example
uses disk 1 as the source drive, myfile.txt as the ASCII CRC32 file, and
myfile.out as the verification list file.
To verify the contents of the primary drive against a CRC32 file:
ghostpe.exe -CRC32,action=verify,src=1,
crcfile=myfile.txt,vlist=myfile.out,vexcept=myfile.exc
Same as above with the inclusion of the EXCEPTION argument that
excludes compared files based upon its entries.
VEXCEPT
The VEXCEPT argument specifies files that are not checked with CRC. This
is normally used to exclude files that are always changed on boot. A
sample exception file follows:
[ghost exclusion list]
\PERSONAL\PHONE
[partition:1]
\WINDOWS\COOKIES\*.*
\WINDOWS\HISTORY\*
\WINDOWS\RECENT\*
\WINDOWS\USER.DAT
\WINDOWS\TEMPOR~1\CACHE1\*
\WINDOWS\TEMPOR~1\CACHE2\*
\WINDOWS\TEMPOR~1\CACHE3\*
\WINDOWS\TEMPOR~1\CACHE4\*
[partition:2]
*\*.1
[end of list]
The exclusion list is case-sensitive; all files should be specified in upper
case. The *wildcard follows Unix rule, it is more powerful than the MSDOS *. In particular it matches the . as well as any other character, but
other characters can follow the *. Thus a wildcard of *br* will match any
files containing the letters “br”, for example, brxyz.txt, abr.txt, abc.dbr.
The specification of \WINDOWS\COOKIES\*.* in the example above
means match all files in the subdirectory \WINDOWS\COOKIES that have
an extension. To match all files with or without an extension,
WINDOWS\COOKIES\* should be used.
Short filenames should be used in exclusion files.
54
Command-line switches
Files specified before the first [Partition:x] heading will be used to match
files in any partition.
A directory of * matches any subdirectory, regardless of nesting. The above
exclusion file will match any file with an extension of .1 in any
subdirectory on the second partition. Apart from this, wildcards should be
used for files, not for directories.
-crcignore
Ignores CRC errors. CRC errors indicate data corruption. This switch
overrides the CRC error detection to allow a corrupted image file to be
used. Note that using this switch will leave the corrupted files in an
unknown state.
-dd
Dumps disk metrics information to the dump log file ghststat.dmp. The file
location can be altered using the -dfile=filename switch.
-dfile=filename
Changes the path and filename of the dump log file created using the -dd
switch. This switch can not be included in the @ ghost switch text file.
-di
Displays diagnostics. This is useful for Technical Support purposes. For
each disk present on the machine, the physical attributes such as drive,
cylinders, heads, sectors per track, and total sectors are displayed. For each
partition present on each disk, the number, type, physical/logical flag,
starting sector and number of sectors are displayed. The diagnostics may
be redirected to a file and given to Technical Support to assist with
problem solving.
Example:
ghostpe.exe -di > diag.ls
will output disk diagnostics to the file diag.ls.
-dl=number
Specifies the highest BIOS fixed disk slot to attempt to detect. Solves
problems where some Phoenix BIOS based systems may hang when
Norton Ghost attempts to detect disks or when all disks do not appear in
55
Appendix A:
Norton Ghost command-line switches
Norton Ghost. This switch may also assist when tape drives are incorrectly
reported as drives. Valid values for number are 128 to 255.
-f32
Allows Norton Ghost to convert all FAT16 volumes to FAT32 volumes when
the destination partition is larger than 2047 MB in size. Caution: ensure that
the installed operating systems requiring access to the volumes that will be
converted support FAT32.
-f64
Allows Norton Ghost to resize FAT16 partitions to be greater than 2047 MB
using 64K clusters. This is only supported by Windows NT. Do not use on
systems including other operating systems.
-fatlimit
Limits the size of NT FAT16 partitions to 2047 MB. Useful when Windows
NT OS FAT16 partitions are present on the disk, and 64K clusters are not
wanted.
-fcr
Creates a CRC32 file (called ghost.crc) while creating an image file.
-ffi
Forces the use of direct IDE access for IDE hard disk operations. By
default, direct IDE access is only used for disks greater than 1024 cylinders
when Extended Int13 is not supported. This switch does not have any
effect when running Norton Ghost in Windows 95/98.
-ffs
Prefer the use of direct ASPI/SCSI disk access for SCSI hard disk operations.
-ffx
Prefer the use of Extended Interrupt 13h disk access for hard disk
operations.
-finger
56
Command-line switches
Displays the fingerprint details written on a hard disk drive created by
Norton Ghost. The fingerprint displays the process used to create the drive
or partition and the time, date, and disk the operation was performed on.
-fnf
Disables the creation of a fingerprint when cloning hard disk drives or
partitions. Similar to the functionality environment switch FPRNT=N.
-fni
Disables direct IDE Access support for IDE hard disk operations.
-fns
Disables direct ASPI/SCSI access support for SCSI hard disk operations.
-fnw
Disables writing to FAT disks or partitions. Similar to the functionality
environment switch WRITE=N. This switch does not work with NTFS
volumes.
-fnx
Disables Extended INT13 support during cloning and disk geometry
detection.
-fro
Forces Norton Ghost to continue cloning even if source contains bad
clusters.
-fx
Flag Exit. Causes Norton Ghost to exit to DOS after operation completion.
By default, Norton Ghost prompts the user to reboot or exit when the
operation has finished.
-h
Displays the Norton Ghost command-line switch help page.
-ia
Image All. The Image All switch forces Norton Ghost to do a sector-bysector copy of all partitions. When copying a partition from a disk to an
57
Appendix A:
Norton Ghost command-line switches
image file or to another disk, Norton Ghost examines the source partition
and decides whether to copy just the files and directory structure, or to do
a sector-by-sector copy. If it understands the internal format of the
partition, it defaults to copying the files and directory structure. Generally
this is the best option, but occasionally, if a disk has been set up with
special hidden security files that are in specific positions on the partition,
the only way to reproduce them accurately on the target partition is
through a sector-by-sector copy.
-ib
Image Boot. Copies the entire boot track, including the boot sector, when
creating a disk image file or copying disk to disk. Use this switch when
installed applications such as boot-time utilities use the boot track to store
information. By default, Norton Ghost copies only the boot sector, and
does not copy the remainder boot track. You cannot perform partition-topartition or partition-to-image functions with the -ib switch.
-id
Image Disk. Similar to -ia (Image All), but also copies the boot track, as in
-ib (ImageBoot); extended partition tables; and unpartitioned space on the
disk. When looking at an image made with -id, you will see the
unpartitioned space and extended partitions in the list of partitions. The -id
switch is primarily for the use of law enforcement agencies who require
forensic images.
When Norton Ghost restores from a -id image, it relocates partitions to
cylinder boundaries and adjusts partition tables accordingly. Head, sector,
and cylinder information in partition tables is adjusted to match the
geometry of the destination disk. Partitions are not resizeable, and you will
need an identical or larger disk than the original to restore to.
Norton Ghost does not wipe the destination disk when restoring from a -id
image. Geometry differences between disks may leave some tracks on the
destination disk with their previous contents.
Use the -ia (Image All) switch instead of the -id switch when copying
partition to partition or partition to image. An individual partition can be
restored from an image created with -id.
-lpm
LPT master mode. This switch causes Norton Ghost to automatically go
into LPT master mode, and is the equivalent of selecting LPT Master in the
58
Command-line switches
main menu. See “Peer-to-peer connections” on page 18, for more
information.
-lps
LPT slave mode. This switch causes Norton Ghost to automatically go into
LPT slave mode, and is the equivalent of selecting LPT Slave in the main
menu. See “Peer-to-peer connections” on page 18, for more information.
-memcheck
Activates internal memory usage checking for technical support.
-nbm
NetBIOS master mode. This switch causes Norton Ghost to automatically
go into NetBIOS master mode, and is the equivalent of selecting the
NetBIOS Master option from the main menu. See “Peer-to-peer NetBIOS
network connections” on page 18, for more information.
-nbs
NetBIOS slave mode. This switch causes Norton Ghost to automatically go
into NetBIOS slave mode, and is the equivalent of selecting NetBIOS slave
in the main menu. See “Peer-to-peer connections” on page 18, for more
information.
-nd
Disables NetBIOS.
-nofile
Disables the Image File Selection dialogue box. Useful when opening
directories with large numbers of files and overly slow links.
-ntc-
Disables NTFS contiguous run allocation.
-ntd
Enables NTFS internal diagnostic checking.
-ntic
59
Appendix A:
Norton Ghost command-line switches
Ignores the NTFS volume CHKDSK bit. Norton Ghost checks the CHKDSK
bit on a NTFS volume before performing operations. When Norton Ghost
indicates the CHDSK bit is set, we recommend running CHKDSK on the
volume to ensure the drive is in a sound state before cloning.
-ntiid
By default, Norton Ghost copies partitions participating in an NT volume
set, stripe set, or mirror set using Image All sector-by-sector copying. This
switch forces Norton Ghost to ignore the Windows NT volume set partition
status and clone the partition as if it were an NTFS partition to allow it to
be intelligently cloned on a file-by-file basis. Care should be taken when
using this switch. Use of the -ntiid switch with volume sets and stripe sets
is not recommended. When cloning mirrored partitions, also known as NT
software RAID partitions, use the following procedure:
1
With Windows NT disk administrator, break the mirror set.
2
Using the -ntiid switch, clone just one of the mirror partitions, and
resize as desired. Note: Partitions can only be resized by Norton
Ghost during a DISK operation. When performing a partition
operation, the target partition size must already be established.
3
After cloning, recreate a mirror set using the Windows NT disk
administrator. The disk administrator will create the partitions in
the mirror set.
-ntil
Ignores non-empty NTFS log file check (inconsistent volume).
-ntn
Inhibits the CHKDSK on first NTFS volume boot. Norton Ghost
automatically sets the CHKDSK bit on an NTFS volume to force NT to
check the volume structure when it boots for the first time after cloning.
This is done to demonstrate Norton Ghost has left the volume in an
integral state and to detect if an error exists in the created volume structure.
We recommend that this switch is not used.
-ntx:y
Specifies Norton Ghost’s NTFS volume memory cache to be yK in size.
-or
60
Command-line switches
Override. Allows the override of internal space and integrity checks. Use of
this switch should be avoided.
-pwd and -pwd=x
Specifies password protection to be used when creating an image file.
x indicates the password for the image file. If no password is given in the
switch Norton Ghost will prompt for one.
-rb
Reboots after finishing a load or copy. After completing a load or copy
operation, the target machine must be rebooted so that the operating
system can load the new disk/partition information. Normally, Norton
Ghost prompts the user to reboot or exit. -rb tells Norton Ghost to
automatically reboot after completing the clone. See also -fx switch.
-skip=x
Skip file. Causes Norton Ghost to exclude the indicated files during an
operation. A skip entry can specify a single file, directory, or multiple files
using the *wildcard. Filenames must be given in short filename format and
all pathnames are absolute. Only FAT system files are able to be skipped. It
is not possible to skip files on NTFS or other file systems. The skip switch
may only be included in the command line once. To specify multiple skip
entries, they must be included in a text file indicated using -skip=@skipfile.
The format of the skip text file ‘skipfile’ matches the format used with the
CRC32 vexcept option.
Examples:
-skip=\windows\user.dll
Skips the file user.dll in the windows directory.
-skip=*\readme.txt
Skips any file called readme.txt in any directory.
-skip=\ghostpe\*.dll
Skips any file ending with .dll in the ghost directory.
-skip=\progra~1\
Skips the whole program files directory (note the short filename).
[email protected]
61
Appendix A:
Norton Ghost command-line switches
Skips files as outlined in the skipfile.txt file. For example, the skipfile.txt
contains:
*\*.tmt
[partition:1]
\windows\
*\*.exe
[Partition:2]
*\*me.txt
This would skip all *.tmt files on any partition, the windows directory and
any *.exe files on the first partition, and any file that ended with the me.txt
on the second partition.
-sleep=x
Slows Norton Ghost operation. The greater the x value, the slower Norton
Ghost will operate.
-span
Enables spanning of image files across volumes.
-split=x
Splits image file into “x” MB spans. Use this to create a forced size volume
set. For example, if you would like to force smaller image files from a 1024
MB drive, you could specify 200 MB segments. For example,
ghostpe.exe -split=200
will divide the image into 200 MB segments.
-tapebuffered
Default tape mode. Sets the ASPI driver to report a read/write as successful
as soon as the data has been transferred to it. Useful when using older or
unreliable tape devices or sequential media.
-tapeeject
Forces Norton Ghost to eject the tape following a tape operation. Earlier
versions ejected the tape by default. By default, Norton Ghost does not
eject the tape and rewinds the tape before exiting to DOS.
-tapesafe
62
Command-line switches
Sets the ASPI driver to report a read/write as successful only when the data
has been transferred to the physical medium. Useful when using older or
unreliable tape devices or sequential media.
-tapespeed=x
Allows control of tape speed. Where x equals 0 to F. 0 is default, 1-F
increases tape speed. Only use this when the tape does not work correctly
at the speed used by Norton Ghost.
-tapeunbuffered
Sets the ASPI driver to report a read/write as successful only when the data
has been transferred to the tape drive. (It is possible that this occurs before
the data is actually physically written to the medium.)
-vdw
If this switch is set, Norton Ghost will use the disk’s verify command to
check every sector on the disk before it is written. The action Norton Ghost
takes if a sector fails the verify depends on the -bfc switch.
-ver
Displays the version number of Norton Ghost.
-ver=value
Tests the version number of Norton Ghost. If the version number value
given is less than the version number of Norton Ghost, Norton Ghost will
operate normally. If the version number value given is greater than the
version number of Norton Ghost, Norton Ghost will abort and exit before
carrying out the command.
-wd-
Disables disk caching on destination disk.
-ws-
Disables disk caching on source disk.
-z
Compress when saving a disk or partition to an image file.
63
Appendix A:
64
Norton Ghost command-line switches
■
-z or -z1 low compression (fast)
■
-z2 high compression (medium)
■
-z3 thru -z9 higher compression (slower)
A
P
P
E
N
D
Frequently asked
questions
I
X
B
When I compare the contents of the original source disk to the disk Norton
Ghost created there is a difference in the number of files. Why?
In addition to files skipped using the -skip switch, some temporary files are not
included when cloning a FAT volume. These include SWAPPER.DAT,
WIN386.SWP, SPART.PAR, PAGEFILE.SYS, HYBERN8, 386SPART.PAR,
GHOST.DTA, and DOS DATA SF.
Can I run Norton Ghost inside Windows 95/98/NT, or OS/2?
It is best to run Norton Ghost in DOS mode only. Norton Ghost should not be
run in Windows NT or OS/2. Norton Ghost will run in a DOS box of Windows
95/98, but caution should be observed. When the operating system is running
there may be files open or in a changing state, which, if cloned, will result in
the destination being in an unknown state. In addition, if you overwrite
partitions, the system must be restarted before using them.
If I shouldn’t run Norton Ghost inside the operating system, how should I
launch Norton Ghost?
It is best to execute Norton Ghost at the true DOS level, not a DOS window
inside the operating system. Hitting F8 while Starting Windows 95/98 works
well, or you can create a floppy boot disk and then launch Norton Ghost.
I know I should launch Norton Ghost outside the operating system, but then I
don’t have access to a JAZ, ZIP or CD-ROM drive for saving and loading disk
images. How do I work around this?
Create a bootable disk with the DOS-based drivers required to access these
devices.
65
Appendix B:
Frequently asked questions
Can Norton Ghost compress an image file?
Yes. Norton Ghost includes several levels of compression that offer a range of
performance and storage gains.
After cloning and restarting Windows 95, Windows 95 keeps finding a new NIC
card. The NIC card is the same as on my model machine. Why?
Plug and play at times will see and find devices twice or more. To avoid this,
remove the device and all the protocols from the model BEFORE saving the
image or cloning. After cloning, restart. Windows 95 will detect the card for the
first time and request the drivers. These drivers can be saved in the image file
for easy access after cloning.
Does Norton Ghost support Macintosh?
No.
If I accidentally specify the wrong destination drive, is there any way to restore
the original contents?
No. Norton Ghost completely overwrites the target hard disk or partition. Be
careful when selecting the destination and ensure the operation you have
selected is correct when Norton Ghost asks if you are sure you want to
proceed.
Does Norton Ghost support spanning multiple JAZ or ZIP drives?
Yes.
66
A
P
P
E
N
D
Troubleshooting
I
X
C
Browse through the “Frequently asked questions” on page 65 for answers
to commonly asked questions. If an error code is reported, find its meaning
and possible resolution in the following table.
Norton Ghost error codes
A Norton Ghost error message consists of an error number, a description,
and possibly a suggestion of what can be done to remedy the problem.
Below is a list of the more common errors that Norton Ghost may report.
Refer to “Diagnostics” on page 69 for information on the ghost.err file
generated when an abort error occurs.
Further information is available on Symantec’s Norton Ghost technical
support website. See “Symantec Service and Support Solutions.”
8005, 8012
Norton Ghost is being run in a non-DOS environment. Either boot the
system to DOS or create a DOS boot disk with required device drivers to
start the system and run Norton Ghost.
10098, 12412
The partition number must be included in the command-line switches. See
“Norton Ghost command-line switches” on page 47 for further information.
11010, 10013, 10014, 10016, 10017, 10019, 10032, 10041, 10042,
11000
Incorrect path/file syntax. Ensure path and filename are correct and
complete. Also make sure you have the proper user rights to read or create
the image file on the network.
67
Appendix C:
Troubleshooting
14030
An unregistered version of Norton Ghost has encountered a file with a date
beyond its expiration date. Scan your system for files beyond this date and
temporarily remove them from the system to allow Norton Ghost to
continue. You can locate the offender by looking at the
drive:\path\filename at the bottom of the Norton Ghost window when this
error occurs. Visit the Symantec website at www.symantec.com for details
on how to purchase Norton Ghost.
15150
Probable corrupt image file. Check the integrity of the image file by
selecting Local > Check > Image File in the main menu.
15170
Due to an unformatted or invalid partition on the source hard drive. Make
certain the source drive is completely allocated as Norton Ghost looks for
100% viable media.
CDR101: Not ready reading drive X, Abort, Retry, Fail
A system error message. This error is not caused by Norton Ghost. It is
caused by malfunctioning hardware or software configurations.The image
file on the CD is not readable. To verify this, try going into DOS and
copying the image file off the CD using copy verification.
68
A
P
P
E
N
D
I
Diagnostics
X
D
This appendix contains information that may be helpful for diagnostic
purposes.
Hard drive detection and diagnostic information
Norton Ghost has the ability to generate several different diagnostic reports
outlining the hard drive devices detected, other system-related information,
and error conditions when they are detected.
Norton Ghost abort error file (ghost.err)
An error message consists of an error number, a description, and possibly a
suggestion of what can be done to remedy the problem.
The Norton Ghost abort error file includes these details along with
additional drive diagnostics and details required to assist technical support
in diagnosing the cause of the problem.
The Norton Ghost abort error file is generated when a erroneous condition
is detected by the software which Norton Ghost is unable to recover from
or work around. The ghost.err file is generated in the directory where the
Norton Ghost executable resides. If this location is read-only, the ghost.err
file output location should be redirected. The location and file name of the
abort file generated by Norton Ghost during an abort can be altered using
the -afile=drive:\path\filename command line switch.
For more information, see “Troubleshooting” on page 67.
69
Appendix D:
Diagnostics
Hard disk geometry diagnostics
A list of all detected hard drives on the system and their associated
geometry values can be reported to screen using the command line switch
-di. To generate a file containing the details, the DOS redirect output can
be used as shown in the following example:
c:\ > ghostpe -di > drives.txt
Full diagnostic statistics dump summary
A full diagnostic statistics dump summary file contains the detected hard
disk geometry details along with other Norton Ghost statistics. The full
Norton Ghost diagnostic statistics dump can be created using the command
line switch -dd. The location and file name of file generated by Norton
Ghost can be altered by adding the -dfile=drive:\path\filename command
line switch.
70
Symantec Service and Support Solutions
Symantec is committed to excellent service worldwide. Our goal is to provide you
with professional assistance in the use of our software and services, wherever you
are located.
Technical Support and Customer Service solutions vary by country. If you have
questions about the services described below, please refer to the section
“Worldwide Service and Support” at the end of this chapter.
Registering your Symantec product
To register your Symantec product, please complete the registration card included
with your package and drop the card in the mail. You can also register via modem
during the installation process (if your software offers this feature) or via fax to
(800) 800-1438 or (541) 984-8020.
Technical support
Symantec offers an array of technical support options designed for your individual
needs to help you get the most out of your software investment.
World Wide Web
The Symantec World Wide Web site (http://service.symantec.com) is the doorway
to a set of online technical support solutions where you will find the following
services:
Interactive problem solver
Symantec’s online interactive problem solver (known as the Support Genie) helps
you solve problems and answer questions about many Symantec products.
Product knowledgebases
Product knowledgebases enable you to search thousands of documents used by
Symantec Support Technicians to answer customer questions.
71
Symantec Service and Support Solutions
FAQs
Frequently Asked Questions documents, also known as FAQs, list commonly asked
questions and clear answers for specific products.
Ask a tech
Ask a tech discussion groups provide a forum where you can ask questions and
receive answers from Symantec online support technicians.
File downloads
Point your web browser to http://service.symantec.com to search for and download
technical notes and software updates. You can also click the LiveUpdate button in
programs enabled with this feature to automatically download and install software
updates and virus definitions.
Other technical support options
Other Symantec support options include the following:
America Online
Type Keyword: SYMANTEC to access the Symantec forum.
CompuServe
Type GO SYMANTEC to access the Symantec forum.
Symantec BBS
Set your modem to 8 data bits, 1 stop bit, no parity and
dial (541) 484-6669.
Automated fax
retrieval system
To receive general product information, fact sheets and
product upgrade order forms directly to your fax machine,
please call our Customer Service fax retrieval system at
(800) 554-4403 or (541) 984-2490.
For technical application notes, please call our Technical
Support fax retrieval system at (541) 984-2490 and select
option 2.
StandardCare
Support
If you can’t access the Internet, take advantage of your 90
days of free telephone technical support (from the date of
your first call) at no charge to all registered users of
Symantec software.
Please see the back of this manual for the support
telephone number for your product.
72
Symantec Service and Support Solutions
PriorityCare and
PlatinumCare
Support
Expanded telephone support services are available to all
registered customers. For complete information, please
call our automated fax retrieval service, located in the
United States, at (800) 554-4403 or (541) 984-2490, and
request document 070, or visit
www.symantec.com/techsupp/phone/index.html
Support for old and discontinued versions
When a new version of this software is released, registered users will receive
upgrade information in the mail. Telephone support will be provided for the
previous version for six months after the release of the new version. Technical
information may still be available through online support.
When Symantec announces that a product will no longer be marketed or sold,
telephone support will be discontinued 60 days later. Support will only be available
for discontinued products through online services. See the section “Technical
support” for online service options.
Customer Service
Symantec’s Customer Service department can assist you with non-technical
questions. Call Customer Service to:
■
Order an upgrade.
■
Subscribe to the Symantec Support Solution of your choice.
■
Fulfill your request for product literature or demonstration disks.
■
Find out about dealers and consultants in your area.
■
Replace missing or defective CDs, disks, manuals, etc.
■
Update your product registration with address or name changes.
You can also visit Customer Service online at www.symantec.com/custserv for the
latest Customer Service FAQs, to find out the status of your order or return, or to
post a query to a Customer Service discussion group.
Worldwide Service and Support
Symantec provides Technical Support and Customer Service worldwide. Services
vary by country and include International Partners who represent Symantec in
regions without a Symantec office. For general information, please contact the
Symantec Service and Support Office for your region.
73
Symantec Service and Support Solutions
Service and Support offices
NORTH AMERICA
Symantec Corporation
175 W. Broadway
Eugene, OR 97401
(800) 441-7234 (USA & Canada)
(541) 334-6054 (all other locations)
Fax: (541) 984-8020
Automated Fax Retrieval
(800) 554-4403
(541) 984-2490
BRAZIL
Symantec Brazil
Av. Juruce, 302 - cj 11
São Paulo - SP
04080 011
Brazil
+55 (11) 5561 0284
Fax: +55 (11) 5530 8869
EUROPE
Symantec Ltd.
Schipholweg 103
2316 XC Leiden
The Netherlands
+31 (71) 408 3111
Fax: +31 (71) 408 3150
Automated Fax Retrieval
+31 (71) 408 3782
ASIA/PACIFIC RIM
Symantec Australia Pty. Ltd.
408 Victoria Road
Gladesville, NSW 2111
Australia
+61 (2) 9850 1000
Fax: +61 (2) 9850 1001
Automated Fax Retrieval
+61 (2) 9817 4550
Most International Partners provide Customer Service and Technical Support for
Symantec products in your local language. For more information on other Symantec
and International Partner locations, please call our Technical Support automated fax
retrieval service, in the United States at +1 (541) 984-2490, choose Option 2, and
request document 1400.
Every effort has been made to ensure the accuracy of this information. However,
the information contained herein is subject to change without notice. Symantec
Corporation reserves the right for such change without prior notice.
8/98
74
✁
Norton Ghost™ Personal Edition
Disk Replacement Form
DISK REPLACEMENT: After your 60-Day Limited Warranty, if your disk or CD becomes unusable, fill out and return 1) this form, 2) your
damaged disk or CD, and 3) your payment (see pricing below, add sales tax if applicable), to the address below to receive replacement disks.
DURING THE 60-DAY LIMITED WARRANTY PERIOD, THIS SERVICE IS FREE. You must be a registered customer in order to receive disk
replacements.
FOR DISK REPLACEMENT
Please send me: ___ 3.5” high-density disks (replacement)
___ CD Replacement
Name_________________________________________________________________________________________________________________
Company Name ________________________________________________________________________________________________________
Street Address (No P.O. Boxes, Please) _______________________________________________________________________________________
City ________________________________________________________________________State _______ Zip/Postal Code _________________
Country* __________________________________________________________Daytime Phone _______________________________________
Software Purchase Date___________________________________________________________________________________________________
*This offer limited to U.S., Canada, and Mexico. Outside North America, contact your local Symantec office or distributer.
Briefly describe the problem:_______________________________________________________________________________________________
_____________________________________________________________________________________________________________________
Disk Replacement Price
Sales Tax (See Table)
Shipping & Handling
TOTAL DUE
$ 10.00
______
$ 9.95
______
SALES TAX TABLE: AZ (5%), CA (7.25%), CO (3%), CT (6%), DC (5.75%), FL (6%), GA (4%), IA (5%),
IL (6.25%), IN (5%), KS (4.9%), LA (4%), MA (5%), MD (5%), ME (6%), MI (6%), MN (6.5%), MO (4.225%),
NC (6%), NJ (6%), NY (4%), OH (5%), OK (4.5%), PA (6%), SC (5%), TN (6%), TX (6.25%), VA (4.5%), WA (6.5%),
WI (5%). Please add local sales tax (as well as state sales tax) in AZ, CA, FL, GA, MO, NY, OH, OK, SC, TN, TX, WA,
WI.
FORM OF PAYMENT ** (Check One):
___ Check (Payable to Symantec) Amount Enclosed $ _________
__ Visa
__ Mastercard
__ American Express
Credit Card Number ____________________________________________________________________________________ Expires __________
Name on Card (please print) ____________________________________________________Signature ___________________________________
**U.S. Dollars. Payment must be made in U.S. dollars drawn on a U.S. bank.
MAIL YOUR DISK REPLACEMENT ORDER TO:
Symantec Corporation
Attention: Order Processing
175 West Broadway
Eugene, OR 97401-3003 (800) 441-7234
Please allow 2-3 weeks for delivery within the U.S.
Symantec and Norton Ghost are trademarks of Symantec Corporation.
Other brands and products are trademarks of their respective holder/s.
Ó 1999 Symantec Corporation. All rights reserved. Printed in the U.S.A.
Disk Replacement Form
76
I
N
D
E
X
A
abort log, 48, 69
ASPI driver, 17, 22
automation
clone switch and examples, 48
close on completion, 57
NetBIOS, 59
reboot on completion, 61
switches, 47–63
version checking, 63
B
backup
See image files
See procedures
boot disk
setup, 16
boot disks, 23
C
CDROM, 14
See also image files spanned
clone, 7
compression. See image files
copy, 7
CRC. See CRC32
CRC32, 40, 52–55, 56
D
diagnostics, 69
disk. See hard disk
F
file system
FAT16
Windows NT, 56
FAT32
conversion from FAT16, 56
NTFS
switches, 59–60
files
skipping, 61
fingerprint. See Ghost
format
logical, 7
G
Ghost
features
memory requirements, 8
fingerprint, 57
image file. See image files
introduction, 7
system requirements, 13
See also uninstalling
See also procedures
hard disk
See also procedures
Ghost Explorer, 44
Ghost operation
operating system, 23
ghost.err. See abort log
H
hard disk
cloning, 7, 8
upgrading, 8
I
image files, 39–45
CDROM, 9
compression, 28, 39, 63
CRC. See CRC32
creating, 41
insufficient space, 41
77
Index
See also image files multi-segment
See also image files spanned
features, 39
loading, 43
multi-segment, 40–43, 48, 62
password, 61
SCSI tape, 43
size limited. See image files
multi-segment
spanned, 41–43, 48, 62
split. See image files multi-segment
standard, 40
viewing contents, 44
installation, 14–15
See also slave
partition
cloning, 7
peer to peer connection
LPT. See parallel port transfer
procedures, 21–23
disk, 24–31
from image file, 29–31
to disk, 25–27
to image file, 27–29
partitions, 32–38
from image file, 36–38
to image file, 34–36
to partition, 32–34
J
R
Jaz drive. See image files spanned
LPT. See parallel port transfer
removable media, 8, 14
See also image files spanned, 39
restore
See image files
See procedures
M
S
L
master, 10–11, 18
N
NetBIOS, 10, 14
setup, 18–19, 22
See also automation
network
See also NetBIOS
O
operations. See procedures
P
parallel port transfer, 11, 14
automation, 58
setup, 18, 22
See also master
78
SCSI tape, 14
setup, 17
switches, 62–63
See also image files
sector
bad, 48, 57, 63
sector by sector copy, 57
setup, 17
quick guide, 21–23
See also parallel port transfer
See also SCSI Tape
See also NetBIOS
See also procedures
slave, 10–11, 18
spanning. See image files spanned
system requirements. See Ghost
Index
T
tape drive
See image files
See SCSI tape
U
uninstalling, 16
W
Windows - running Ghost inside, 23
Z
Zip drive. See image files spanned
79
Index
80