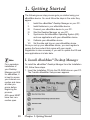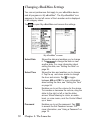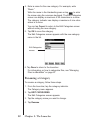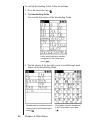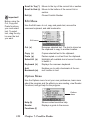
1
EBM-900/901/911 Electronic Publishers www.franklin.com/ebookman User’s Guide www.franklin.com/ebookman Disclaimer This is the eBookMan User’s Guide version 2.1. All displays pictured are simulated, are not intended to specify included applications or content, and are subject, along with all technical information and specifications, to change without notice. ® License Agreement READ THIS LICENSE AGREEMENT BEFORE USING eBookMan®. YOUR USE OF eBookMan® DEEMS THAT YOU ACCEPT THE TERMS OF THIS LICENSE. IF YOU DO NOT AGREE WITH THESE TERMS, YOU MAY RETURN THIS PACKAGE WITH PURCHASE RECEIPT TO THE DEALER FROM WHICH YOU PURCHASED eBookMan® AND YOUR PURCHASE PRICE WILL BE REFUNDED. eBookMan® means the eBookMan® multimedia content reader, the device itself, and the software product and documentation found in this package. FRANKLIN means Franklin Electronic Publishers, Inc. Limited Use License All rights in eBookMan® remain the property of FRANKLIN. Through your purchase, FRANKLIN grants you a personal and nonexclusive license to use this ELECTRONIC PRODUCT. You may not make any copies of eBookMan®’s software or of the data stored therein, whether in electronic or print format. Such copying would be in violation of applicable copyright laws. Further, you may not modify, adapt, disassemble, decompile, translate, create derivative works of, or in any way reverse engineer eBookMan®. You may not export or reexport, directly or indirectly, eBookMan® without compliance with appropriate governmental regulations. eBookMan® contains Franklin’s confidential and proprietary information which you agree to take adequate steps to protect from unauthorized disclosure or use. This license is effective until terminated. This license terminates immediately without notice from FRANKLIN if you fail to comply with any provision of this license. Table of Contents Welcome! 11 Support ................................................................................15 About Screen Illustrations ...................................................15 Getting Started 1. Getting Started 18 I. Install eBookMan Desktop Manager ...............................18 II. Install Batteries ................................................................19 III. Connect eBookMan to a PC ...........................................20 IV. Start the Desktop Manager ............................................21 V. Synchronize the OS and Applications .............................22 VI. Calibrate your eBookMan ..............................................25 VII. Set the Date and Time ..................................................26 Registering Your eBookMan Device ....................................27 ® 2. eBookMan® Desktop Manager 29 Understanding the Views .....................................................30 Using the Menus .................................................................33 eBookMan Monitor® .............................................................36 Mobipocket Web Companion ..............................................37 Uninstalling the Desktop Manager ......................................37 3. Managing & Synchronizing Content 39 Managing Files in the Desktop Manager .............................39 Using IntellisyncTM ................................................................43 Adding New Content and Applications ................................48 eBookMan® User’s Guide v The eBookMan Device 4. Hardware Features 60 Front Panel ..........................................................................60 Back Panel ...........................................................................62 Cover ...................................................................................63 Product Care ........................................................................64 Resetting the Device ............................................................64 5. The Launcher 67 Using the Launcher Menu ...................................................68 Changing eBookMan Settings .............................................70 Opening and Closing Programs ..........................................72 Performing a System Restart ..............................................73 Using a Password ................................................................74 Using Categories .................................................................78 Managing Files in eBookMan ..............................................81 6. Data Entry 85 Handwriting ..........................................................................85 Onscreen Keyboard .............................................................91 Content Applications 7. Franklin Reader 96 Opening and Closing eBooks ..............................................96 Understanding Franklin Reader Features ...........................98 Using the Menus ................................................................101 Setting Preferences ...........................................................103 Moving Around ...................................................................106 Searching within an eBook ................................................108 Using Bookmarks ...............................................................118 Using Help .........................................................................120 Search Abbreviations .........................................................121 Exiting Franklin Reader .....................................................122 vi Table of Contents 8. Mobipocket Reader 123 Opening and Closing Documents ......................................123 Understanding the Library .................................................125 Viewing a Document ..........................................................128 Using the Menus ...............................................................130 Changing the Settings .......................................................131 Moving around within a Document ....................................132 Searching a Document ......................................................133 Using Bookmarks ..............................................................134 Getting Help .......................................................................136 Exiting Mobipocket Reader ...............................................137 9. Audiobook Player 139 Understanding the Buttons ................................................140 Using the Menus ...............................................................140 Selecting a Title and Section .............................................141 Listening to an Audiobook .................................................141 Saving Audiobooks to MultiMediaCards ............................142 Exiting Audiobook Player ...................................................143 10. Music Player 145 Understanding the Buttons ................................................145 Using the Menus ...............................................................146 Selecting a Title .................................................................147 Listening to Music ..............................................................147 Exiting Music Player ..........................................................148 Organizer Applications 11. Address Book 150 Adding Contacts ................................................................151 Understanding the Views ...................................................152 Editing Entries ...................................................................155 Searching for an Entry .......................................................158 Deleting Entries .................................................................159 Field Limits ........................................................................159 eBookMan® User’s Guide vii Using the Menus ................................................................160 Synchronizing with Microsoft® Outlook ..............................161 Exiting Address Book .........................................................161 12. Date Book 163 Adding Appointments .........................................................164 Editing Appointments .........................................................165 Understanding the Views ...................................................172 Field Limits .........................................................................175 Using the Menus ................................................................175 Synchronizing with Microsoft® Outlook ..............................177 Exiting Date Book ..............................................................177 13. ToDo Book 179 Adding Entries ...................................................................179 Editing Entries ....................................................................180 Field Limits .........................................................................183 Using the Menus ................................................................184 Synchronizing with Microsoft® Outlook ..............................185 Exiting ToDo Book .............................................................185 14. Memo Book 187 Adding Memos ...................................................................187 Viewing Memos .................................................................188 Editing Memos ...................................................................189 Using the Menus ................................................................189 Synchronizing with Microsoft® Outlook ..............................191 Exiting Memo Book ............................................................191 Miscellaneous Applications 15. Voice Memo 194 Understanding the Buttons ................................................194 Using the Menus ................................................................195 Recording Voice Memos ....................................................196 Listening to Voice Memos ..................................................197 Exiting Voice Memo ...........................................................197 viii Table of Contents 16. Calculate 199 Understanding the Keys ....................................................199 Using the Menu .................................................................200 Making Calculations ..........................................................200 Using Calculator Memory ..................................................201 Exiting Calculate ................................................................201 Appendix A. Getting Updates 204 Checking for Updates ........................................................204 Updating the eBookMan® Desktop Manager .....................204 Updating the eBookMan Software .....................................206 B. Serial Port Connection 207 Serial cradle users .............................................................207 Serial cable users ..............................................................208 C. MultiMediaCards 209 Inserting MMCs .................................................................209 Backing Up to MMC ..........................................................210 Restoring from MMC ..........................................................211 Erasing an MMC ................................................................211 D. Glossary 212 E. Troubleshooting 218 Downloading and Installing the Desktop Manager, Operating System, or Applications ...................................218 Sending Files from the Desktop Manager to eBookMan ..221 The Desktop Manager .......................................................223 The eBookMan Device ......................................................224 eBookMan® User’s Guide ix F. Legal Information 231 Specifications ....................................................................231 FCC Notice ........................................................................231 Copyrights, Trademarks, Legal ..........................................232 Limited Warranty, Disclaimer of Warranties and Limited Remedy .........................................................233 Limited Warranty (outside U.S.) .........................................234 Index Index x Table of Contents 235 Welcome! Congratulations on your purchase of eBookMan! eBookMan is a versatile, handheld computing device. Your package includes: • the eBookMan device with cover and stylus • a USB cable (ebm-900 only) or USB cradle (ebm-901 and ebm-911) • two AAA batteries (ebm-911 only) • the eBookMan Installation CD: - eBookMan® Desktop Manager with IntellisyncTM, the PC software that transfers applications and content to eBookMan; along with Mobipocket Web Companion, the PC software that publishes and transfers electronic documents to eBookMan - eBookMan Operating System (OS) and core applications - Complete eBookMan® User’s Guide in PDF format - Interactive product demo • Quick Start Guide • Concise eBookMan® User’s Guide You determine the use for your eBookMan by installing the applications and contents you want. eBookMan can be a library of books, a personal organizer, a music player, a multimedia reader, a recorder for memos, a calculator or even an arcade of games. eBookMan enables you to view thousands of book titles, magazines, and newspapers; listen to audio books and music; and store addresses, phone numbers and other personal information. Just like a larger computer, multiple programs can run at the same time. To install the Desktop Manager on your PC, your computer must meet the following minimum system requirements: • IBM-compatible Pentium class PC or higher • 256 color VGA monitor • Mouse or other pointing device • Windows® 98 or higher • 50 MB free disk space • 32 MB RAM (recommended) • Available USB port • Internet access • Microsoft Internet Explorer® 4.0 (or above) OR Netscape Navigator® 4.02 (or above) eBookMan® User’s Guide Note: Out of the box, your eBookMan device contains a tour only. To view the tour, install batteries and turn on the device. Note: A serial port is required for Windows® NT users. Serial cradles and cables are sold separately. 11 Before using eBookMan, follow the instructions in the Quick Start Guide. For more detailed information, see “Chapter 1. Getting Started”. Use the Desktop Manager to transfer content and applications to and from your eBookMan. For more detailed information, see “Chapter 2. eBookMan® Desktop Manager”. Franklin makes these core applications available from the Installation CD and with each OS download: The Franklin Reader application opens and navigates books formatted as Franklin Universal Binary (*.fub) files. Use Franklin Reader to read Bibles, reference material, dictionaries, translators and other books. The Mobipocket Reader opens and navigates eBooks, eNews and eDocuments. The downloaded files must be sent to the eBookMan device, during which time they are converted for viewing on the Mobipocket Reader. Should you prefer to listen to a book, you can do so with Audiobook Player. Audible® software powers the audio book listening features of eBookMan. You must download Audible Manager from www.audible.com to transfer audio books to your eBookMan. The Music Player application enables you to listen to downloaded music. The Desktop Manager converts MP3 files to an eBookMan music format before moving the files to the device. eBookMan stores personal information in several programs. Address Book organizes contact information, Date Book tracks appointments, ToDo Book lists tasks by priority, and Memo Book enables you to enter notes. Through IntellisyncTM for eBookMan, you can synchronize your personal information to Microsoft® Outlook®. Other applications include Voice Memo and Calculate. Voice Memo lets you record memos, and the calculator (Calculate) enables you to solve math problems. After you install the OS and core applications, you can download content and other applications that you want to use in your eBookMan. Many companies on the internet provide applications and content that run on eBookMan. For more detailed information, see “Chapter 3. Synchronizing and Managing Contents”. 12 This User’s Guide explains how to operate eBookMan and describes all the features of the core applications. It is arranged as follows: Getting Started Chapter 1: Getting Started - Describes how to install the Desktop Manager, install batteries, connect your device to a PC, run the Desktop Manager, synchronize the OS and applications, calibrate eBookMan and set the date and time. Chapter 2: eBookMan® Desktop Manager - Explains how to manage files in the Desktop Manager, how to move individual files to your device, and how to use the Mobipocket Web Companion. Chapter 3: Synchronizing and Managing Contents - Explains how to manage files in the Desktop Manager and how to synchronize with your device. The eBookMan Device Chapter 4: Hardware Features - Describes the hardware features of your device and includes instructions on installing batteries, resetting the unit and caring for your product. Chapter 5: The Launcher - Details the Launcher features and explains how to use menus, set preferences, use a password, assign categories and manage files. Chapter 6: Data Entry - Shows how to enter characters in your device using both natural handwriting and the onscreen keyboard. Content Applications Chapter 7: Franklin Reader - This chapter describes the Franklin Reader and shows you how to move around in books and use the Menu and Search options. Chapter 8: Mobipocket Reader - This chapter explains how to use MobiPocket Reader to view eBooks, eNews and eDocs and how to use the Mobi Web Companioin. Chapter 9: Audiobook Player - This chapter illustrates the various features of Audiobook Player and describes how to use the play, stop, fast forward and rewind functions, and how to use the menus. Chapter 10: Music Player - This chapter highlights the features of Music Player and describes how to play, stop, fast forward, and rewind music files. eBookMan® User’s Guide 13 Organizer Applications Chapter 11: Address Book - This chapter explains how to enter and view names, addresses, phone numbers and other contact information in Address Book. Chapter 12: Date Book - This chapter shows you how to list appointments and the different ways to view the entered data in Date Book. It also explains how to set alarms. Chapter 13: ToDo Book - This chapter demonstrates how to keep track of tasks with ToDo Book. Chapter 14: Memo Book - This chapter shows you how to use Memo Book to list your memos. Miscellaneous Applications Chapter 15: Voice Memo - This chapter describes features of the program and details how to record and play memos, how to use the menus, and how to control the volume. Chapter 16: Calculate - This chapter describes Calculate and its functions. Appendix A. Getting Updates - Explains how to install the Desktop Manager and update eBookMan software from Franklin’s Web site. B. Serial Port Connection - Provides steps for connecting your eBookMan device to a PC using a serial port. C. MultiMediaCards - Describes how to install and use MultiMediaCards (MMCs) in your eBookMan device. D. Troubleshooting - Offers solutions to problems you may encounter while using the Desktop Manager or your eBookMan device. E. Glossary - Lists and defines terms. F. Legal Information - Includes specifications, copyright, trademarks, warranties, and FCC notice. Index Provides an alphabetical list of entries to help you locate information in the manual. 14 Support Most programs come with online Help. This manual describes all the features of the various programs in detail. Should you require further technical support in the United States or Canada, visit web site www.franklin.com/ebookman and follow the link to the support screen or call (609) 386-8997 between 9AM and 5PM EST Monday through Friday. If you require further technical support outside of the United States and Canada, please use the following contact information: Australia Belgium [email protected] [email protected] 0900 10.388 France [email protected] 0825 309 319 Germany & Austria [email protected] 49 89 90899 116 Luxemburg & Netherlands [email protected] 32 70 22.32.32 Mexico [email protected] 01 800 710 5938 Switzerland [email protected] 41 1 2403360 United Kingdom [email protected] 0800 328 5618 About Screen Illustrations Some screen illustrations in this user’s guide may vary slightly from what you see on the device. This does not mean your eBookMan is malfunctioning. eBookMan® User’s Guide 15 16 G ETTING S TARTED eBookMan® User’s Guide 17 1. Getting Started The following seven step process gets you started using your eBookMan device. You must follow the steps in the order they appear. I. Install the eBookMan® Desktop Manager on your PC. II. Install batteries in your eBookMan device. III. Connect your eBookMan device to your PC. IV. Start the Desktop Manager on your PC. V. Synchronize the eBookMan Operating System (OS) and core applications with your eBookMan device. VI. Calibrate your eBookMan device. VII. Set the date and time on your eBookMan device. Once you set up your eBookMan device, you must register to receive the free content that comes with your model. Registration is also necessary if you wish to update the OS and core applications at a later date. I. Install eBookMan® Desktop Manager Note: For a seamless installation of your Desktop Manager and OS for eBookMan, it is best to access your Internet connection and close all other programs before beginning the process. AOL users MUST have their connection open. 18 To install the eBookMan® Desktop Manager from the Installation CD, follow these steps. 1. Insert the Installation CD into the CD-ROM drive on your PC. The Franklin eBookMan Setup screen appears. Chapter 1. Getting Started 2. 3. 4. 5. If this screen DOES NOT launch automatically, follow these steps. • From your PC desktop, double-click My Computer, and • Double-click the CD drive (EbmInstall). Click a flag to select the corresponding language. Note: You must have Windows for the language you choose. Click the Install eBookMan Desktop Manager and Device Drivers button. Note: You may need to install the USB drivers from the usbdriver directory on the Installation CD. Note: If you have not used the USB port on your PC, it may be disabled. You must enable the USB port in the BIOS. Consult your computer manufacturer’s documentation for details. Follow the instructions on the screen to install the program. Once installation is finished, click the Exit button to close the Franklin eBookMan Setup screen. You may be prompted to restart your computer. II. Install Batteries Your device requires two AAA batteries. You must insert the batteries before connecting your device to a PC. To install batteries, follow these steps. 1. Push the tab on the battery cover, snap the battery cover open and lift it off. 2. Insert two AAA batteries following the +/- markings in the battery compartment. Battery compartment In the upper half of the compartment, the positive (+) end of the battery (the end with the bump) goes against the spring. In the bottom half of the compartment, the negative (-) end of the battery (the flat end) goes against the spring. 3. Replace the battery cover. eBookMan® User’s Guide 19 See also: For more information on the battery indicator, see “Chapter 5. The Launcher” on page 67. Your eBookMan powers on, and the tour begins. Tap the introductory sentence in the language you want to view the tour. It ends with a picture of the device with an arrow. The tour appears only after the device is left without battery power for more than five minutes or when a hard reset is performed. Replacing Batteries When eBookMan is on, a battery indicator appears in the Status bar of the Launcher. The battery indicator is a graphic that shows the energy left in the batteries. Replace batteries when the battery indicator runs low. It is best not to wait for the indicator to empty. Should the battery power run too low, the unit will start up when you press On/Off but will then shut off automatically. When this happens, please replace the batteries immediately. 1. Turn the device off. Warning: If you change your batteries when the device is on, your device will reset and you will lose your data. 2. Attach the eBookMan protective cover to the device and turn the device over. Note: When changing batteries, make sure the device is not on a hard surface. If the On/Off button is pressed accidentally, your data will be lost. See also: For more information on connecting your device using a serial connector, see “Appendix B. Serial Port Connection” on page 207. 20 3. Follow the steps under “Install Batteries.” Warning: To prevent data loss, synchronize often to back up your data, and take no more than one minute to replace the batteries. It is best to replace the batteries as soon as the low battery warning appears. If your unit does not power on or stay on, please replace the batteries. III. Connect eBookMan to a PC eBookMan has a built in USB port and comes with a cable or cradle to connect it to your desktop or laptop computer. If you do not have a USB port, a USB-to-serial connector can be purchased from www.franklin.com/ebookman/accessories.asp or your local retailer. Chapter 1. Getting Started Important: A serial port is required for Windows® NT users. Cable Users Plug one end of your cable into the USB port on your device and plug the other end into a USB port on your desktop or laptop computer. USB port Device USB connector USB connector Cradle users Plug your device into the cradle. Plug the USB connector into a USB port on your computer. USB port Device USB connector Cradle IV. Start the Desktop Manager 1. On your PC, double click the desktop shortcut or click Start|Programs|Franklin Electronic Publishers|eBookMan Desktop Manager. eBookMan® User’s Guide 21 Note: You can change the connection configuration at any time from the Desktop Manager. Click Setup | Connection..., and the Connection Configuration dialog box appears. The Connection configuration dialog box appears. By default, the Communication Method is set to USB - Universal Serial Bus. 2. Click the arrow to display the list of connections. 3. Select the port you want to highlight it. You can click Cancel to exit the dialog box without saving changes. 4. Click OK to save the changes. The Connection view appears. For more information about the views and menus in the Desktop Manager, see “Understanding the Views” on page 30. V. Synchronize the OS and Applications The Installation CD contains the OS and core applications. When you run eBookMan® Desktop Manager for the first time, it automatically unpacks and synchronizes the OS and core applications. The following dialog box appears. 1. Verify that your eBookMan device is properly connected and turned on. 2. Click OK. The following dialog box appears. 22 Chapter 1. Getting Started 3. Click CD-ROM to retrieve files from the Installation CD. The following dialog box appears. 4. Click OK to unpack the OS and applications. The Desktop Manager connects to www.franklin.com and authenticates your eBookMan software. 5. Click Yes to send the OS and core applications to eBookMan. If your eBookMan device requires a firmware update, a warning dialog box appears. If no update is necessary, a status dialog box appears. 6. Click OK. One or more status dialog boxes appear, indicating that files are being sent to eBookMan. eBookMan® User’s Guide 23 Synchronizing will take approximately 4-6 minutes with a USB connection. When the process is complete, the following dialog box appears. 7. Click OK to end synchronization. 8. Disconnect your eBookMan device from your PC. What eBookMan is doing . . . During the synchronization process, you may encounter the following graphics on the eBookMan touch-sensitive screen: eBookMan is communicating with your PC. eBookMan is busy. eBookMan is connected to a PC, the Desktop Manager is running and detects eBookMan. Synchronization is not complete. eBookMan is connected to a PC but the Desktop Manager is not running. 24 Chapter 1. Getting Started VI. Calibrate your eBookMan Note: After synchronization, follow these steps. 1. Disconnect eBookMan from your PC. The calibration screen appears after a few seconds. Calibration screen The Calibration screen enables you to set reference points by which eBookMan determines the accuracy and precision of the touch-sensitive screen. 2. Using the stylus, tap the intersection of the crosshairs as they appear in each corner of the screen. When the screen is calibrated, the message, “Please set the date and time” appears on the screen. 3. Tap OK. The My eBookMan® screen appears. The calibration screen appears each time you perform a hard reset, system restart or pen calibration. For more information about a hard reset, see “Resetting the Device” on page 64. For more information about a system restart, see “Performing a System Restart” on page 73. For more information about pen calibration, see “Using the Launcher Menu” on page 68. My eBookMan® screen. See also: For more information about My eBookMan®, see “Changing eBookMan Settings” on page 70. eBookMan® User’s Guide 25 VII. Set the Date and Time The OS and organizer applications use the date and time settings to operate properly. Setting the Date To set the date, follow these steps. 1. From My eBookMan®, tap next to Select Date. The Select Date screen appears. Select Date screen Note: The date and time appear on the Status bar in the Launcher. For details about viewing the date, see “Chapter 5. The Launcher” on page 67. 2. Tap or to select the year. 3. Tap the month and day. You can tap Cancel to return to My eBookMan® without saving your changes. 4. Tap Select to save changes and return to My eBookMan®. Setting the Time To set the time, follow these steps. 1. From My eBookMan®, tap and change the hour and minute. 2. Tap to toggle between AM and PM. 3. Tap Done to go to the Launcher. 26 next to Select Time to Chapter 1. Getting Started Registering Your eBookMan Device The Desktop Manager enables you to register your device through the Internet. You must register to download any free content that comes with your eBookMan. You also can get samples of eBooks, music, and audiobooks. To register from the Desktop Manager, follow these steps. 1. Open your Internet connection on your PC. 2. Connect eBookMan to your PC. 3. Turn on your eBookMan device. 4. Start the Desktop Manager. 5. Click Web|Register. 6. Follow the instructions on the screen to create a Franklin account and download content. eBookMan® User’s Guide Important! Always write your password down and keep it in a safe place. You must enter your password each time you visit your Library of titles and content on Franklin’s Web site. 27 28 Chapter 1. Getting Started 2. eBookMan® Desktop Manager eBookMan Desktop Manager is the PC software program that transfers applications and content to your eBookMan device. You must install the Desktop Manager on your PC before using eBookMan. For information about installation, see “Chapter 1. Getting Started” on page 18. This chapter describes the Desktop Manager views and menus, the eBookMan Monitor and the Mobipocket Web Companion. It also provides instructions for uninstalling the Desktop Manager. The Desktop Manager consists of a Menu bar, Toolbar, Status bar, and a view that represents your eBookMan and the PC. Use the Menu bar, Toolbar, and Status Bar as you do in other Windows-based programs. ® The Toolbar consists of the following: Moves files from the Contents pane to the Device pane and synchronizes personal information between your organizer programs on the PC and on the eBookMan. Backs up one folder. Displays files in the Contents folder. Displays files from the Library folder in the Contents pane. See also: For more information on synchronizing and managing files using the Desktop Manager, see “Chapter 3. Managing & Synchronizing Content” on page 39. See also: For more information about the Contents folder and Library folder, see “Directory Structure” on page 40. Switches from the Connection view to the Contents view. Switches from the Contents view to the Connection view. eBookMan® User’s Guide 29 Understanding the Views The Desktop Manager uses two views: Connection and Contents. In the Desktop Manager, click View to the Contents View. Click View to the Connection View. to switch from the Connection to switch from the Contents Connection View If the Desktop Manager detects the eBookMan device, the image shows the connection. Note: By default, the Connection View appears after you set the connection configuration. If the Desktop Manager does not detect eBookMan, the image shows that the device is not connected to your PC. 30 Chapter 2. eBookMan® Desktop Manager Contents View The Contents View uses two list panes to organize and display files stored on your PC (Contents pane) and content stored in your eBookMan device (Device pane). Contents Pane The Contents pane contains the file structure on your PC. Similar to Windows Explorer, this pane shows all files and folders in the selected directory. You can right click on a file or folder to access a corresponding context menu. Folders listed in the Contents pane have the following context menu: Open Opens a folder. You can also double click on the folder icon or name to open it. Files listed in the Contents pane have the following context menu items: Send to Sends content to the device. You can also double click on the file name to send it. eBookMan Move to Moves the highlighted file from the current Library Folder folder to the Library folder. When you move a file to the Library folder, the file no longer appears in the directory from which it was moved. Copy to Copies the highlighted file to the Contents Contents Folder folder. When you copy a file, the original file remains in the current directory. Unpack Expands a zipped secure eBookMan (*.seb) file. eBookMan® User’s Guide See also: For a list of all file types and extensions that your eBookMan device recognizes, see “File Types” on page 39. 31 Delete Properties Deletes a file from the Desktop Manager. Note that this option removes a file from the program and from your PC. Use caution when deleting files. There is no way to restore them once deleted. Displays the Properties for File dialog box. Device Pane Note: All synchronized files appear under the RAM folder in the Device pane. For more information about MMCs, see “Appendix C. MultiMediaCards” on page 209. 32 The Device pane shows two folders: RAM and MultiMediaCard (MMC). The RAM folder contains the content files that appear in memory on the connected eBookMan device. The MMC folder contains the content files that appear on the MMC contained in the connected device. By default, content is moved to the RAM folder. This pane may also contain status messages, for example, "Waiting for eBookMan." You can right click on a file or folder to access a corresponding context menu. Folders listed in the Device pane have the following context menu: Properties Displays the Folder Properties dialog box. Files listed in the Device pane have the following context menu items: Send to PC Sends a file from the device to your PC. Send to PC Sends a voice recording from the device to as .WAV file your PC in *.wav format. Move to MMC Moves a file on the device from RAM to MMC. This option is active only when an MMC is installed in eBookMan. Move to RAM Moves a file on the device from MMC to RAM. This option is active only when an MMC is installed in eBookMan. Delete Deletes the existing file from your device. You must confirm the deletion by clicking OK. Click Cancel to exit without deleting. Properties Displays the properties of the selected file in the Title Properties dialog box. Chapter 2. eBookMan® Desktop Manager Managing the Panes Only one pane is active at a time. The title bar of the active pane is highlighted. To activate the other pane, click anywhere in it. To change the width of the panes, drag the divider. To switch the position of the panes, click the View menu and then select Switch Panes. Using the Menus The eBookMan® Desktop Manager uses five menus: File, View, Web, Setup and Help. File Menu Use the File menu to open, move and delete files on your PC. You can also move and synchronize content to your eBookMan device, and designate the folder or folders to store eBookMan content, view file properties, and close the program. Synchronize Synchronizes all files between the current Contents directory and your eBookMan device. Synchronizes data from an organizer program, such as Microsoft® Outlook®, with the data in the organizer programs on your eBookMan device. Also synchronizes audiobooks, if AudibleManager® is installed. Send to Moves a highlighted file from the Contents pane to the Device pane. eBookMan Send to PC Moves a highlighted file from the Device pane to the Contents pane. Move to Library Moves a highlighted file to the Library folder. When you move a file to the Library folder, Folder the file no longer appears in the directory from which it was moved. Copy to Copies a highlighted file to the Contents foldContents Folder er. The original file remains in the directory from which it was copied. Unpack Expands a zipped *.seb file. Delete Removes a highlighted file or folder. Note that deleting files from this program can remove files from the eBookMan device and the file manager on your PC. Use caution when deleting files. eBookMan® User’s Guide 33 Properties Displays the properties of the highlighted file: name, type, size, publisher, and security. Open Opens a highlighted folder. Change to Changes the directory in the Contents pane Contents Folder to the Contents folder. Change to Changes the directory in the Contents pane to the Library folder. Library Folder Change Folder Changes the folder displayed in the Contents pane. Change Sync Changes the folder to which content is downloaded from the internet and from which conFolder tent is synchronized to eBookMan. Exit Closes the Desktop Manager. View Menu Note: The eBookMan ID is also available from the Launcher menu. For more information, see “Using the Launcher Menu” on page 68. Use the View menu to see information about your device, display the Toolbar, switch the panes, and refresh the information in the current pane. Device Info Displays the eBookMan Information dialog box. Toolbar Displays or hides the Toolbar. By default, the Toolbar is displayed. Switch Panes Switches the Contents and Device panes. The Contents pane is the default left pane and the Device pane is the default right pane. Refresh Reloads the active pane. The active pane has a highlighted title bar. This option refreshes the display to include the most upto-date information for the active pane. Web Menu The Web menu gives you direct access to the eBookMan page on Franklin’s Web site. From this site, you can register your device, browse and purchase titles, and get product support. If your web browser is not set up for automatic Internet connection, you will be prompted to connect to the Internet. 34 Chapter 2. eBookMan® Desktop Manager My Updates Goes to the page on Franklin’s Web site where you can check for and download newer versions of the Desktop Manager and OS and applications. My Download Goes to your eBookMan account at Franklin’s Web site. Library Download OS/ Automatically downloads the OS and appliApplications cations from Franklin’s Web site if the OS is a later version from the one you have. eBookMan Home Goes to the eBookMan home page at Franklin’s Page Web site. Product Support Goes to technical support at Franklin’s Web site. Purchase Titles Goes to Franklin’s eBookStore. Register Enables you to register your eBookMan device online at Franklin’s Web site. Mobipocket Web Opens the Web Companion, which enables you to select eNews to download and conCompanion vert documents to an electronic format that Mobipocket Reader can display. Note: Connect your eBookMan to your PC and turn your device on before selecting Download OS/Applications. Note: Setup Menu Use the Setup menu to specify the port that connects your device to a PC and to configure your settings for the synchronization of your organizer data with a PC organizer application. Connection. . . Displays the Connection configuration dialog box and enables you to designate the port. Intellisync. . . Enables you to change settings for synchronizing data between a PC organizer application and the organizer programs on your eBookMan device. Install. . . Re-installs the operating system and program files from the eBookMan Installation CD. eBookMan® User’s Guide eBookMan® Desktop Manager with IntellisyncTM supports synchronization with Microsoft® Outlook®. To sync with Microsoft® Outlook Express® 4.x, Lotus Notes® 5.0, Lotus Organizer® 5.0, or Act! 2000TM, purchase IntellisyncTM for eBookMan Upgrade at www.franklin.com /ebookman. 35 Help Menu Use the Help menu to access help and get information about Desktop Manager and IntellisyncTM for eBookMan. Help Topics Displays online help for the Desktop Manager. About eBookMan Displays version and copyright Desktop Manager information for the Desktop Manager. About Intellisync Displays version and copyright information for IntellisyncTM for eBookMan. eBookMan Monitor® eBookMan Monitor® is the part of the Desktop Manager that runs in the system tray on your PC. When the monitor is active, shows in the system tray. Right-click the icon to access the eBookMan Monitor® menu: Open eBookMan Opens the Desktop Manager. Desktop About eBookMan Shows version and copyright information for Monitor eBookMan Monitor®. Exit Closes eBookMan Monitor®. When connected through a USB port, eBookMan Monitor® also provides power to eBookMan and changes color. You can use the device while it is connected. 36 Chapter 2. eBookMan® Desktop Manager Mobipocket Web Companion The Mobipocket Web Companion is a PC program that enables you to download, update and synchronize electronic documents to eBookMan. Electronic documents include text files, newspapers, electronic books (eBooks), web pages (*.htm and *.html), and Palm documents (*.pdb and *.prc files). The Web Companion also provides access to Mobipocket’s Web site and includes a publishing feature that formats web and Palm documents for the Mobipocket Reader. The Web Companion is installed on your PC with the Desktop Manager. Access the Web Companion from the Desktop Manager by clicking Web|Mobipocket Web Companion. Uninstalling the Desktop Manager See also: For details about the Web Companion, refer to the online help that comes with the program. For information on how to use the Web Companion, see “Using the Mobipocket Web Companion” on page 51. To uninstall the Desktop Manager, follow these steps. 1. From your PC, click Start|Settings|Control Panel. 2. Double-click Add/Remove Programs. The Add/Remove Programs Properties dialog box appears. 3. From the Install/Uninstall tab, click eBookMan Desktop Manager. 4. Click the Add/Remove. . . button. 5. Follow the instructions in the Install Wizard to remove the application. If the files are stored in the Audible, Contents, or Library folders, these folders will be left in the respective subdirectory. You must remove these manually. eBookMan® User’s Guide 37 38 Chapter 2. eBookMan® Desktop Manager 3. Managing & Synchronizing Content This chapter describes using the Desktop Manager to manage content and applications using the directory structure, synchronize personal information between organizer applications on eBookMan and organizer applications on your PC and synchronize new content and applications between your PC and your device. Managing Files in the Desktop Manager Use the Desktop Manager to store all content and applications for eBookMan. Some applications can be used without content. For example, you can use the calculator (Calculate) without content. Other applications require content. For example, the Franklin Reader requires eBooks formatted as Franklin Universal Binary (*.fub) files. Before you use the Franklin Reader, you must download an eBook and move it to eBookMan. File Types eBookMan recognizes most PC files. However, not all file types can be used in your eBookMan device. For example, video clips such as *.vgm can only be used with a program that runs *.vgm files. Files that are not recognized will not be transferred to eBookMan. File extensions may be in lower- or upper-case characters. Content is any file that must be associated with an application to open it. Content files include, but are not limited to, the following types: .htm or .html HyperText Markup Language file .mp3 Music file .txt Text file .fub Franklin Universal Binary; the file extension for Franklin Reader books .prc A file formatted for handheld devices .pdb A file formatted for handheld devices eBookMan® User’s Guide See also: For definitions of file types, see “Appendix D. Glossary” on page 212. 39 Applications are self-contained programs that may require content to run. Application files include the following types: .seb Secure eBookMan binary; most application and content files downloaded from the Franklin Web site use the *.seb file extension .fxe Franklin executable Other file types are generated while using programs in eBookMan. For example, *.bmark files are created when you add bookmarks in the Franklin Reader. These files are synchronized when you click . Directory Structure Important! Cookies must be enabled in your browser to download content from the Franklin Web site. To find instructions on enabling cookies, go to an Internet search engine and enter “enable cookies.” By default, eBookMan content is stored in the C:\Program Files\Franklin Electronic Publishers\eBookMan Desktop Manager\Data\Contents directory. Note: If you designate a different directory during download, the Data directory and its subdirectories are placed there. All files are downloaded and stored in the Contents folder. By default, the Data folder is also the place from which all files are synchronized (the sync folder). The Desktop Manager creates three folders under the sync folder: Contents, Audible, and Library. You can change the location of this folder by clicking File|Change Sync Folder and specifying a new folder location. Note that when you change the sync folder, the original directories remain. Use this feature to set up multiple eBookMan devices from one PC. The Contents Folder Use the Contents folder to synchronize files between your PC and eBookMan by clicking . When you click , the Desktop Manager compares the files on your eBookMan to files in the Contents folder of the Desktop Manager. If the files on your eBookMan are more recent, the Desktop Manager copies the more recent files from eBookMan to the Contents pane on the PC and then copies the more recent files from the Contents pane on the PC to your eBookMan. 40 Chapter 3. Managing & Synchronizing Content If you save content files in other directories, you must move or copy the file or files to the Contents folder before synchronization. To copy a file to the Contents folder, locate the file in the Contents pane of the Desktop Manager and do one of the following: • Right-click on the file name and select Copy to Contents Folder or • Highlight the file name and click File|Copy to Contents Folder. Keep only files that you sync often in the Contents folder. Once files are synchronized, store them to the Library folder. The Library Folder Use the Library folder to store, organize, backup, and restore files after you sync them to eBookMan. You can store and organize files by moving them to the Library folder. To move a file to the Library folder, locate the file in the Contents pane of the Desktop Manager and do one of the following: • Right-click on the file name and select Move to Library Folder or • Highlight the file name and click File|Move to Library Folder. Note: When you move a file to the Library folder, the file no longer appears in the directory from which it was moved. You can organize files in the Library folder by creating subdirectories. Consult your Windows documentation for more information on creating and using folders. Always backup content files and applications by moving them to the Library folder after you synchronize. You also can keep a copy of all files in the Contents folder. If you lose data or an application becomes corrupt, you can restore the information to eBookMan from the Library folder. eBookMan® User’s Guide 41 To restore files to eBookMan, follow these steps: 1. Move all files from the Library back to the Contents folder. 2. Click . The Audible Folder The Desktop Manager uses the Audible folder to administer tasks from AudibleManager®. Do not alter or delete the contents of this folder or its subdirectories. Note: Audible files are added to and deleted from eBookMan through AudibleManager® only. Deleting Files See also: For more information on removing files from eBookMan, see “Deleting Files” on page 83. To delete a file from eBookMan, you must remove the file from both the eBookMan device and the Desktop Manager. 1. From the Desktop Manager, locate the file in the Device pane. 2. Right-click on the file you want to delete. 3. Click Delete. Click No to cancel the deletion. 4. Click Yes at the confirmation dialog box. When you delete a file, a message "File has been deleted" appears. The file no longer exists on the eBookMan, but the file remains in the Desktop Manager. If you sync by clicking , the file will be copied back to your eBookMan device. To avoid this, you must delete the file from the Contents pane in the same manner. Note: When you delete a file from the Contents pane, it is removed permanently from that location on your PC. If you mistakenly delete a file from the PC and the file remains on your eBookMan, you can restore the file to your PC by synchronizing. 42 Chapter 3. Managing & Synchronizing Content Using IntellisyncTM Intellisync is the program that allows you to import, export or synchronize files between your PC organizer program and your eBookMan organizer programs. IntellisyncTM for eBookMan, included on the Installation CD and in the full download, supports MS Outlook® 98 and 2000. IntellisyncTM for eBookMan Upgrade, which can be purchased separately at Franklin’s accessories Web page, supports Microsoft® Outlook Express® 4.x, Lotus Notes® 5.0, Lotus Organizer® 5.0, and Act! 2000TM. The PC organizer applications can be synchronized with the following programs located in your eBookMan device: • Address Book • Date Book • ToDo Book • Memo Book Data can be transferred in the following ways: • Imported from your PC organizer application to the eBookMan. • Exported from the eBookMan to your PC organizer application. • Synchronized so that the most up-to-date information is placed in both locations. To synchronize your organizer, follow these steps. 1. Configure your organizer programs. 2. Change advanced settings. 3. Synchronize your personal information. Configuring Your Organizer Programs For your organizer data to be included in a synchronization, the eBookMan organizer programs must first be aligned with your PC organizer application. You must select the eBookMan organizer programs and the PC organizer applications that you want to synchronize. To configure the synchronization settings, follow these steps. 1. From the Desktop Manager, click Setup|Intellisync. eBookMan® User’s Guide 43 You see the Intellisync for eBookMan Sync Options dialog box. 2. Click the box next to the eBookMan organizer program you want to synchronize with your PC organizer application. Note: The Choose Translator dialog box appears the first time you select a translator. During subsequent configuration, you must check the box next to the organizer program you want to edit and click the Choose button. 3. Click your PC organizer application from the list of available translators. A PC organizer application file is assigned to the program you are aligning. 4. Click the check box next to the operation you want to perform. Import Imports data from your PC organizer application to the organizer program on eBookMan. 44 Chapter 3. Managing & Synchronizing Content Export Exports data to your PC organizer application from the organizer program on eBookMan. Synchronize Synchronizes data between the organizer program on eBookMan and your PC organizer application. Click Options to change settings used when exchanging data with your PC organizer application or click Browse to map an alternate file or folder to this application. Click Cancel to exit without saving any changes. Click Help for additional information. 5. Click OK to accept your changes and return to the Intellisync for eBookMan Sync Options dialog box. 6. Repeat this process for each organizer program you want to include in the synchronization. The eBookMan organizer programs you want to include in the synchronization are now connected to your PC organizer application. Click the Write to log file check box to create a synchronization log file. Click Cancel to return to the Desktop Manager without saving your configuration settings. 7. Click OK to save your configuration settings. When you are finished configuring the applications, edit the advanced settings. Changing Advanced Settings Each eBookMan organizer program contains advanced settings, such as confirmation, conflict resolution, and field mappings. These include program specific parameters and fields to be mapped for the data exchange. Note: These setting vary by eBookMan organizer program. Once you have selected a translator for an organizer program, you can change the advanced settings. 1. In the Intellisync for eBookMan Sync Options dialog box, click the eBookMan organizer program for which you want to change advanced settings. eBookMan® User’s Guide Important! PC organizer applications may have longer fields than eBookMan can accept. When the data in your PC organizer application fields exceeds the number of characters allowed in the corresponding eBookMan organizer program fields, the portion of the data that exceeds the field limit will not be copied. If you edit the fields in eBookMan, the eBookMan data will be considered the newer data, and your PC organizer application data WILL BE OVERWRITTEN when you next sync. If you do not edit those fields in eBookMan, your PC organizer application data WILL NOT BE OVERWRITTEN. 45 2. Click Advanced. You see the Advanced Settings dialog box. This dialog box differs for each eBookMan organizer program. Note: If you delete an eBookMan organizer database from your eBookMan device, you must synchronize to replace the database. An import will not successfully replace the data on your device. 3. Click the tab containing the settings you want to change. For details about the settings, click Help. 4. To edit field mappings, clickField Mapping. You see a dialog box indicating the file or folder the field names are retrieved from. This is the file or folder assigned to the organizer program when your PC organizer application is selected in the Choose Translator dialog box. 5. Click OK to accept this file or folder. Click Cancel to map fields without refreshing the information from the file or folder. Click Help for additional information. You see the Field Mapping dialog box. 46 Chapter 3. Managing & Synchronizing Content 6. Map the fields for the organizer program. Your PC organizer application fields are bold and listed in the right column. Click and drag a field in the right column up or down to align it with a matching eBookMan application field in the left column. Select a field, then double-click or press the space bar to map or unmap the fields. Mapped fields contain a double arrow between the columns. You can also click in the middle column to map or unmap fields. Click Reset to return the field mapping to the default settings. Click Cancel to exit without saving your changes. Click Help for additional information. 7. Click OK to save your changes. Repeat this process for each eBookMan organizer program for which you want to change advanced settings. Special Considerations All available PC organizer applications contain default field mappings for the synchronization of data with your eBookMan. There are some field mappings, however, that you are required to map manually. For accurate synchronization in the Address Book, the following fields must be mapped in the programs below. • Microsoft® Outlook® users must map the following fields: Title (eBookMan) ↔ Profession (Outlook) Note: By default, Job Title in Outlook and Birthday in eBookMan are not synchronized. • Lotus Notes 5.0 users must map the following fields: Home Telephone 2 (eBookMan) ↔ Home Fax (Lotus Notes 5.0) • Lotus Organizer 5.0 users must map the following fields: WWW Page (eBookMan) ↔ Business URL (Lotus Organizer 5.0) Work Telephone 2 (eBookMan) ↔ Business Assistant (Lotus Organizer 5.0) eBookMan® User’s Guide Note: Personal information from an organizer program on your PC is synchronized to eBookMan only after you configure Intellisync. 47 Synchronizing Personal Information To synchronize personal information from the Desktop Manager, click or click File|Synchronize. Note: For proper synchronization, make sure that the eBookMan organizer applications you want are selected. Adding New Content and Applications After the initial synchronization, you can add individual files to eBookMan at any time. These files can be either content or applications. Getting Content and Applications Many companies on the Internet provide applications and content that run on eBookMan. For applications such as advanced calculators, converters, and games, visit Franklin’s Web site at www.franklin.com/estore. You also can search a list of thousands of eBooks, many of which are free, at Franklin’s Web site. Audiobooks can be found at www.audible.com. Other Franklin partner Web sites include, but are not limited to: www.mobipocket.com www.awe-struck.net www.beiks.com www.fictionwise.com www.pankhurst.com www.thewisdomkeeper.com Any MP3, HTML, text file or PDB (Palm Database) file can be added to eBookMan. To find these file types, use your favorite search engine. Save the file to your PC and then synchronize the file to eBookMan. 48 Chapter 3. Managing & Synchronizing Content Synchronizing Content and Applications The synchronization process moves files between your eBookMan and the PC. It also moves data between your personal information manager (such as Microsoft® Outlook®) and organizer programs on eBookMan (such as Date Book). When you click , the Desktop Manager does the following. 1. Compares the files in the Device pane (on eBookMan) and Contents pane (on your PC). Note: Before synchronizing, always make sure your eBookMan device is connected properly to your PC and turned on. Note: Some files available at www.franklin.com/ebookman are downloaded to the Desktop Manager in a compressed format. During synchronization, zipped files are identified. You will be prompted to unpack each file and synchronize again. To unpack a zipped *.seb file, double-click the file or go to File|Unpack. If a file in the Device pane shares the same name as a file in the sync folder, the older file is overwritten. 2. Uploads unique and changed files from the Device pane (eBookMan). 3. Downloads all files from the sync folder on your PC. 4. Synchronizes personal information (if Intellisync is configured). 5. Synchronizes audio books through AudibleManager® (if audio books are detected and AudibleManager® is set up). To move individual files, except audio books, between eBookMan and the PC, do one of the following things: • Drag individual files between the Contents pane to the Device pane. • Double click a file in the Contents pane. • Right click a file and click Send to eBookMan (in the Contents pane). Music Files The Desktop Manager converts MP3 files to the eBookMan music format and gives you a destination choice (RAM folder or MMC folder, when available) before sending the file to your device. To synchronize individual music files, follow these steps: eBookMan® User’s Guide Note: The amount of time it takes to synchronize a file or files varies by the type of file, the size of the file, the type of port, and the file destination - RAM or MMC. 49 1. From the Desktop Manager, locate the file in the Contents pane. 2. Send the file to eBookMan. 3. Click OK. You see a dialog box that shows the progress of the conversion. You can click Cancel to stop the conversion. When conversion is complete, a *.seb file with the same name appears in the Contents pane. If there is no MMC in your eBookMan, you see a message stating that the file was sent to eBookMan. If the Desktop Manager detects an MMC in your device, the Select Destination dialog box appears. 4. Click the destination you want. 5. Click OK. You see a dialog box that shows the progress of the synchronization. Click Cancel to stop the file from being moved to eBookMan. 50 Chapter 3. Managing & Synchronizing Content Audiobooks Audiobook files are managed through AudibleManager®. You must download this program and purchase titles from Audible.com® before you can synchronize audiobooks. To download audiobooks, follow these steps. 1. Open your browser and go to www.audible.com. 2. Follow the “Audiobooks” links to the AudibleManager® and install it on your PC. Note: The Desktop Manager and eBookMan Monitor must be closed to install or upgrade the AudibleManager® software. The first time you use the AudibleManager® software, you must select eBookMan as your mobile device. 3. Follow the instructions to activate eBookMan with Audible®, open an account, and purchase the titles you want. See also: For more information about the eBookMan Monitor®, see “eBookMan Monitor” on page 36. 4. Connect your eBookMan to your PC and turn on the device. 5. Open eBookMan® Desktop Manager. 6. Synchronize the content between the PC and your eBookMan. Using the Mobipocket Web Companion The Mobipocket Web Companion enables you to automatically update eNews from Mobipocket’s Web site. It also enables you to publish documents such as Web pages so that images and links are maintained in the Mobipocket Reader. Before using the Web Companion for the first time, you must connect your eBookMan device to your PC, start the Desktop Manager and then start Web Companion. To start the Web Companion, do one of the following: • From the desktop, click Start|Programs|Franklin Electronic Publishers|Mobipocket Web Companion. • From the Desktop Manager, click Web|Mobipocket Web Companion. The main window of the Web Companion appears. or eBookMan® User’s Guide See also: For details about the Web Companion features, refer to the online help that comes with the program. 51 Note: The Web Companion will periodically update your eNews when you are connected to a local network. Configure the Web Companion To configure the Web Companion, follow these steps. 1. Click Edit|Configuration. You see the Mobipocket Web Companion configuration dialog box. 2. Click the check box for the synchronization mode you want. The Manual update enables you to control when your eNews is updated. The Web Companion only updates eNews when you click 52 . Chapter 3. Managing & Synchronizing Content The Automatic update gets eNews from the Internet whenever you synchronize with your eBookMan device. 3. Click the check box for the proxy configuration you want. The Internet Explorer proxy is the default configuration. If you are an AOL user, select Use no proxy. If you access the Internet through a firewall where authentication is required, select Use this proxy and enter the necessary data in the Address, Port and User name fields. Click Cancel to exit without saving configuration changes. 4. Click OK to save the configuration. Download Electronic Documents Electronic documents formatted for the Mobipocket Reader are sorted into three categories: • eBooks which include PRC and Palm DOC files. • eNews which includes newspaper downloads that are formatted and synchronized using the Web Companion. A list of default eNewspaper subscriptions are installed with the Web Companion. • eDocs which include text and HTML files. eBooks The Web Companion does not display a list of eBooks. The Web Companion does, however, provide you with easy access to Mobipocket’s Web site so you can download eBooks at your convenience. To download eBooks, follow these steps. 1. Click (eBooks). Your default browser is launched and you go to Mobipocket’s Web page that lists eBooks. 2. Browse the page and site to find the eBook you want. In addition to eBooks from the Mobipocket Web site, any PRC or Palm DOC file can be added to eBookMan as an eBook. eBookMan® User’s Guide 53 3. Save the file or files to your computer. Note: You must save these files to a directory other than the Contents folder (or sync folder) in the eBookMan® Desktop Manager directory structure. If you attempt to sync by clicking without first formatting the file, an error message appears. 4. Find the file on your PC. 5. Right click the file. You see the context menu. 6. Click Send to eBookMan. The file is formatted for your eBookMan device and saved as a *.seb file in the current sync folder. Note: Although the file is formatted for your eBookMan, you must synchronize from the Desktop Manager to move the file to your eBookMan. After you move the files to your eBookMan, these files are displayed in the eBooks category in the Mobipocket Reader. eNews To download eNews, follow these steps. 1. Subscribe to the eNewspaper you want. Additional subscriptions are available through the Mobipocket Web site. Important! Write your user name and password down. You must enter your password each time you subscribe to different eNewspapers at the Mobipocket Web site. 54 a. Click (eNews). Your default browser is launched and you go to www.mobipocket.com/en/eNews/. b. Browse the page and site to find the eNewspaper you want. c. Click Add News. You may be prompted to log on to the Web site. If so, enter a user name and password and then click OK. The file automatically downloads to its proper destination and you see a confirmation dialog box. Chapter 3. Managing & Synchronizing Content d. Click OK. Your Web browser stays active for you to download and install other eNewspapers. e. Repeat these steps for each eNewspaper subscription you want. 2. Select the sections of the eNewspapers. a. Click next to an eNewspaper subscription to see the list of available sections. b. Click the check box next to the sections you want. c. Repeat this process for every eNewspaper you want to download. 3. Click (Update now). The Web Companion connects to the Internet and downloads the Web pages which are formatted for your eBookMan device and saved as *.seb files in the current sync folder. Note: Although the files are formatted for your eBookMan, you must synchronize from the Desktop Manager to move the files to your eBookMan. eBookMan® User’s Guide 55 After you move the files to your eBookMan, they are displayed in the eNews category in the Mobipocket Reader. Important! To retain the images and links in an HTML file, you must first publish it. See “Using Quick Publish” on the next page to learn how. To unsubscribe, click next to an eNewspaper you want and then either click File|Unsubscribe or right-click the eNewspaper and click Unsubscribe from the context menu. eDocs In addition to eBooks and eNews, you can download and read other file types. Mobipocket Reader supports text (*.txt) and HTML (*.html or *.htm) files. To download and format an eDoc, follow these steps. 1. Save the file you want onto your PC. 2. Find the file on your PC. 3. Right click the file. You see the context menu. 4. Click Send to eBookMan. The file is then formatted for delivery to your eBookMan device and saved as a *.seb file in the current sync folder. Note: Although the file is formatted for your eBookMan, you must synchronize from the Desktop Manager to move the file to your eBookMan. After synchronization, these files are displayed in the eDocs category in the Mobipocket Reader. Move the Electronic Documents to eBookMan After you download and format Mobipocket Reader content, synchronize the files to your eBookMan one of the following ways: 1. In the Desktop Manager, click to synchronize all content. 2. Move individual files to your eBookMan in one of the following ways: • Drag individual files between the Contents pane to the Device pane. • Double click a file in the Contents pane. • Right click a file and select Send to eBookMan (in the Contents pane) 56 Chapter 3. Managing & Synchronizing Content Using Quick Publish Some files, such as Web pages, need to be published to maintain their images and links when viewed in Mobipocket Reader. To publish a Web page, do the following: 1. Save the page to a folder on your PC. 2. Open Mobipocket Web Companion. 3. Click (Publish). The Web Companion Quick Publish dialog box appears. 4. Click the first . The Open dialog box appears. 5. Find the file you want to publish and click Open. 6. Click the second . The Save As dialog box appears. 7. Find the directory you want to save the file in. 8. Type a name for your file in the File Name field. 9. Click Save. 10.Click Publish. The file is saved with a .prc extension. You can now find the file in Windows Explorer and right-click it to see the context menu. Click Send to eBookMan. Follow the steps in “Move the Electronic Documents to eBookMan” on the previous page to move your file to your eBookMan device. eBookMan® User’s Guide 57 58 Chapter 3. Managing & Synchronizing Content T HE eB OOK M AN D EVICE eBookMan® User’s Guide 59 4. Hardware Features This chapter introduces you to the controls and hardware features on your eBookMan. It also contains tips on caring for the eBookMan device and instructions for resetting it. Front Panel Microphone Touchsensitive screen Warning! DO NOT Connect eBookMan to a PC through the Headphone jack. Doing so may cause damage to your eBookMan the device. } On/Off button& Backlight control Control Pad ¤ Microphone Speak into this when recording voice memos. Touch-sensitive The display area for programs. Touch it with screen the stylus to make a selection or perform a command. 60 Chapter 4. Hardware Features Control Pad The area on the device that contains the Handwriting area, the Launcher and Menu icons and the scroll arrows. On/Off Button & Press once to turn the device on. Press Backlight again to turn the device off. You can also control control the backlight (in models with backlight screens) with this button. When the device is on, press and hold this button for approximately two seconds to turn on the backlight. Press and hold again to turn the backlight off. Note: Use the backlight to view the eBookMan screen in dark areas. Control Pad The Control Pad is the area below the touch-sensitive screen where you can tap icons, write characters, or use the scroll area to control eBookMan. Handwriting area Launcher icon Scroll area Menu icon Scroll area Handwriting area Menu icon Launcher icon Use the scroll arrows or scroll lines to move up and down on the eBookMan screen. Write letters in the Letter input area ( ), punctuation in the Punctuation input area ( ), and numbers in the Number input area ( ). Tap this icon at any time to see the available menus. Tap this icon to return to the Launcher screen. Please see “Chapter 5. The Launcher” on page 67 for more information. eBookMan® User’s Guide 61 Back Panel USB port Stylus Note: eBookMan Earphones are sold separately at www.franklin.com/ ebookman/ accessories.asp. You can use earphones with a 3.5 mm plug and 835 ohm impedance. Headphone jack Speaker Control Wheel MMC port Reset button Battery compartment Note: Use only the stylus made for eBookMan. Do not use a pen point or other tool to touch the screen. Additional stylus sets can be purchased at www.franklin.com /ebookman/ accessories.asp. 62 Headphone jack Plug your headphones or earphones in here when listening to audio books, music, or voice memos. USB port Use this to make the connection with your cradle or cable. Stylus Slide this tool out of the compartment and use it to touch the screen, tap the Control Pad, and write in the Handwriting area. Speaker Amplifies sound from eBookMan. Please do not cover this when using the audio programs without headphones. Reset button Use this button to reset and restart eBookMan. For more information, see “Resetting the Device” on page 64. Chapter 4. Hardware Features Battery compartment The device requires 2 AAA batteries. For more information, see “Install Batteries” on page 19. MMC port Insert MultiMediaCards (MMCs) here. For more information, see “Appendix B. MultiMediaCards” on page 209. Control Wheel The circular control in the rear of the eBookMan that functions as an “Enter” key, a scrolling mechanism, or volume setting. In a program, push in the wheel to select the highlighted item. Rock the wheel to scroll one page when reading. Hold the wheel up or down to scroll continuously. Rock it to control the volume when listening. Hold the wheel up or down to change volume continuously. Warning! Please note that the Control Wheel rocks up and down and does not spin. Please do not force the wheel or you will damage the device. Cover Your eBookMan comes with a hard plastic cover to protect the screen when the device is not in use. To attach the cover, insert the pegs on the cover into the holes on either side of the device. To detach the cover, gently snap the pegs out of the holes. We recommend that you keep the cover attached when you are not using your eBookMan. Note: Leather carrying cases can be purchased at www.franklin.com /ebookman/ accessories.asp or your local retailer. Pegs eBookMan® User’s Guide 63 Product Care Important! Keep a record of your serial number (on the back of the device) and eBookMan ID number (described in “Using the Launcher Menu” on page 68) in case your device is stolen or requires replacement. eBookMan is designed to be light, compact and durable. However, it is an electronic device and must be treated carefully. Putting unnecessary pressure on it or striking the device against other objects can cause damage. In order to avoid damage to your eBookMan, please: • Keep the device covered when you are not using it. This will protect the screen from being broken, scratched or marred in any way. • Do not drop, crush, bend, or apply excessive force to the device. • Do not expose eBookMan to moisture, extreme temperatures or other adverse conditions. Avoid storing it in damp, humid or wet places. It is not waterproof. • Clean the device by wiping with a soft, dry cloth. Do not use harsh chemicals. • Do not use instruments other than the stylus when touching the screen. Other instruments may scratch or damage the screen. Resetting the Device Occasionally, eBookMan may need to be reset to clear memory or repair software problems. Soft Reset In most cases a soft reset is sufficient. A soft reset does not affect programs or data. If a program is not performing as it should, you can perform a soft reset using one of the methods described below. 1. Reset from the Launcher menu. • Tap to go to the Launcher. • Tap to see the Launcher menu. • Tap Restart system on the Launcher menu. 64 Chapter 4. Hardware Features • In the Ready for restart screen, tap Restart now. • Calibrate your unit and you return to the Launcher. 2. Reset from the back of the unit. Should you be unable to access the Launcher menu, use the blunt end of a paper clip to gently press the reset button located on the back of the device just above the battery compartment. Reset button You hear a beep and eBookMan turns on. Warning! Hard Reset In the rare event that the data on the screen is corrupted, a program is not responding properly, or you forget your password, you will need to perform a hard reset. To do this, hold On/Off and then use a paper clip to press the reset button. Should you do a hard reset, you will need to download the program and content files to your device again. Please read “Synchronize the OS and Applications” on page 22 to learn how to load system files onto your device. eBookMan® User’s Guide After a hard reset, any stored data will be lost. Synchronize your data often so that you always have a copy on your PC. 65 66 Chapter 4. Hardware Features 5. The Launcher This chapter details the features of the Launcher and provides instructions for performing tasks from the Launcher. After completing the steps in “Chapter 1. Getting Started,” the Launcher appears on your eBookMan device. Program Icon Contents Icon Category indicator Status bar Memory indicator { Battery indicator Time indicator Note: You can view 16 icons at a time in the Launcher. When there are more than 16 icons, a scroll bar appears. Tap the scroll bar to see more icons. You also can use the Control Wheel or the scroll area in the Control Pad to see more icons. The Launcher is like the desktop on your PC. All programs and some content files, in RAM and in an installed MultiMediaCard (MMC), are represented by icons on the screen. Program icons, such as Date Book and Franklin Reader, appear on a dark background. Content icons, such as music and audio books, appear on a white background. Program and content icons from an MMC have an M on the bottom right corner. The area located at the bottom of the Launcher is the Status bar. It contains the following items: Battery indicator Displays a graphic of the energy left in the batteries. Tap the Battery indicator to view the percent of remaining battery life. Time indicator Displays the time. Tap the Time indicator to view the date. The date appears for approximately five seconds. Category indicator Displays the current category. Tap the Category indicator to access the Category menu. See “Using Categories” on page 78 for more details. Memory indicator Displays the amount of memory available in RAM. eBookMan® User’s Guide 67 Using the Launcher Menu There are several options available on the Launcher menu. Tap to see the following items. Launcher menu Note: The Handwriting Guide is also available from most screens that support data entry. Note: For more information about MMCs, see “Appendix C. MultiMediaCards” on page 209. 68 Handwriting Guide Provides a quick, onscreen reference for Natural handwriting input. It shows all the supported letter styles. For more information about Natural handwriting, see “Chapter 6. Data Entry” on page 85. Restart System Closes programs and files when your eBookMan device is unresponsive. Pen Calibration Displays the Calibration screen and enables you to re-calibrate your eBookMan device. For details about calibration, see “Calibrate your eBookMan” on page 25. Set Contrast Enables you to set the contrast on the screen. For more information, see “Setting Contrast” on page 69. Disable Password Enables you to turn your password off or on. When no password is set, the menu item is greyed and inactive. When you set a password, Disable Password becomes active. Tap this menu item to disable the password temporarily. The menu item becomes Enable Password. To turn your password on again, tap Enable Password. For more information, see “Using a Password” on page 74. MMC Backup Enables you to copy all files from your eBookMan to an MMC, restore files from an MMC to your eBookMan, or erase content on an MMC. Launcher Help Displays onscreen help for the Launcher. Chapter 5. The Launcher Active Programs Enables you to view and manage programs that are open. Programs can be closed quickly from this location to make memory available for other programs. For details, see “Opening and Closing Programs” on page 72. File Manager Displays the name and size of all program and content files stored in RAM. Also enables you to move files into categories or remove files from your eBookMan device. For more information, see “Managing Files in eBookMan” on page 81. About Displays the eBookMan ID, the version number of the eBookMan Operating System, the unique identifier of the device, and other information. Setting Contrast To set contrast in eBookMan, follow these steps. 1. From the Launcher, tap Note: The eBookMan ID is different from the number on the back of the device (serial number). It is highly recommended that you keep a written record of the numbers. . 2. Tap Set Contrast. The Set Contrast screen appears. Set Contrast dialog box 3. Use the stylus to drag the slider or tap the arrows to increase or decrease the contrast. You also can rock the Control Wheel up and down to adjust the contrast. 4. Tap OK to save your changes and return to the Launcher. eBookMan® User’s Guide 69 Changing eBookMan Settings You can set preferences that apply to your eBookMan device and all programs in My eBookMan®. The My eBookMan® icon appears in the top left corner of the Launcher and is displayed in all category views. Tap to open My eBookMan® and access the settings. My eBookMan® screens Select Date Select Time Volume Password 70 Shows the date and enables you to change it. Tap to change the date or view another date. For more information about setting the date, see “Setting the Date” on page 26. Shows the time and enables you to change it. Tap the up and down arrows to change the hour and minute. Tap to toggle between AM and PM. For more information about setting the time, see “Setting the Time” on page 26. Enables you to set the volume for the device. To increase or decrease the volume, drag the slider to the right or left or tap the slider arrows. When listening to music, an audiobook, or voice memo, rock the Control Wheel up or down. Enables you to set the password. Tap to access the Set Password screen. For more information, see “Using a Password” on page 74. Chapter 5. The Launcher Sounds Pen Language Shutoff Time Time Format Date Format Numbers Enables you to turn the device sounds off. Audiobooks, music files, and the Date Book alarm are not affected by this option. Enables you to activate character recognition for different languages. eBookMan provides Western European character recognition for the following languages: Dutch, French, German, Italian, Portuguese and Spanish. To enable this feature, tap and then tap the language you want to select. Tap Western European to access all the supported characters. Enables you to set the time that elapses before the device automatically turns off. By default, the shutoff time is 2 Minutes. Tap to change the shutoff time to 1 Minute or 5 Minutes. Enables you to set the format for the time. By default, the time format is HH:MM AM/PM, where HH is the hour and MM is the minute. To change the time format, tap and then tap the format you want. HH:MM is a 24-hour clock with a colon delimiter. HH.MM AM/PM is a 12-hour clock with a period delimiter. HH.MM is a 24-hour clock with a period delimiter. Enables you to set the format for the date. By default, the date format is MM/DD/YY, where MM is the month, DD is the date, and YY is the year. To change the date format, tap and then tap the format you want: DD/MM/YY, DD.MM.YY, or YY/MM/DD. Enables you to set the format for numbers. By default, the number format is 1,000.00. To change the number format, tap and then tap theformat you want: 1.000,00, 1 000.00, or 1 000,00. eBookMan® User’s Guide 71 Week Starts Double-click Enables you to select either Sunday or Monday as the start of the week. By default, the start of the week is Sunday. To change it, tap and then tap Monday. Enables you to set the speed at which the screen recognizes taps from your stylus. By default, the setting is Slow. To change the speed, tap and then tap the speed you want: Fast or Medium. To save your changes and close My eBookMan®, tap Done. The Launcher appears and all changes take effect immediately. Opening and Closing Programs Note: When running multiple programs at the same time, you can close programs from the Launcher to make memory available for other programs. To open a program or file, tap its corresponding icon. When a program is running, you can return to the Launcher without closing it by tapping . Shadows on the right and left sides of the program icon indicate that it is running in the background. Each time you close a program, you return to the Launcher. You can close a program in one of the following ways: • In most programs and dialog boxes, right corner. Tap to exit. • In most programs, you can exit by using the File menu. From the program, tap then File|Exit. From the Launcher menu by using Active Programs. • appears in the top Using Active Programs 1. Tap then tap Active Programs. The Active Programs screen appears. It shows the amount of memory available and lists the publisher and title for each open program. 72 Chapter 5. The Launcher Note: When only one program is open, tap Stop Program to close it and return to the Launcher. Active Programs screen 2. Tap a program to select it. 3. Tap Stop Program. The program title becomes italicized to indicate it is closing, and the amount of memory available refreshes. 4. Tap Done to return to the Launcher. Performing a System Restart As with any computer, you may experience a problem with a program and need to restart the device. To do so, follow these steps. 1. Tap then tap Restart system. See also: For other ways to reset eBookMan, see “Resetting the Device” on page 64. Ready for Restart screen See also: The Ready for Restart screen appears. 2. Tap Restart Now to initiate a restart. The eBookMan device restarts, and the Calibration screen appears. Note: You can return to the Launcher without restarting the device by tapping Cancel. eBookMan® User’s Guide For more information about the Calibration screen, see “Calibrate your eBookMan” on page 25. 73 Using a Password Warning! After setting a password, you must enter your password each time you turn on the eBookMan device. When an incorrect password is entered, the message Passwords do not match appears for three seconds. Always write your password down and keep it in a safe place. If you forget your password, follow the instructions in “Forgotten Password” on page 77. You can protect data stored in your eBookMan device by setting a password. When a password is set, your eBookMan device automatically enables it. You must enter the password each time you turn on eBookMan. You also can change a password, delete a password or disable a password without deleting it. Setting a Password To set a password, follow these steps. 1. From the Launcher, tap to open My eBookMan®. 2. Tap . The Enter password dialog box appears. Enter password dialog box 3. Enter a password using a maximum of eight characters. You can write any combination of characters or tap to enter characters using the onscreen keyboard. The password that you enter appears on the screen next to the New prompt. You can tap Cancel to exit the screen without setting a password. 4. Tap OK. The prompt changes to Retype New. Enter password dialog box 5. Re-enter the password exactly as you did the first time. You can tap Cancel to exit the screen without setting a password. 6. Tap OK. 74 Chapter 5. The Launcher The message, “Password has been changed,” appears on the screen. 7. Tap OK. Your password is set and enabled. The device returns to the My eBookMan® screen. 8. Tap Done to return to the Launcher. Disabling a Password To disable a password, follow these steps. 1. From the Launcher, tap . 2. Tap Disable Password. The password you set remains and is disabled. You can reenable the password by tapping and then Enable Password. Changing a Password To change an existing password, follow these steps. 1. From the Launcher, tap to open My eBookMan®. 2. Tap . The Enter password dialog box appears with the Password prompt. Enter password dialog box 3. Enter the old password and tap OK. The Enter password dialog box appears with the New prompt. Enter password dialog box eBookMan® User’s Guide 75 4. Enter a new password and tap OK. The Enter password dialog box appears with the Retype New prompt. Enter password dialog box At any of the Enter password dialog boxes, you can tap Cancel to exit the screen without changing a password. 5. Re-enter the password exactly as you did in Step 4 and tap OK. The message, “Password has been changed,” appears on the screen. 6. Tap OK. Your password is changed, and the device returns to the My eBookMan® screen. 7. Tap Done to return to the Launcher. Deleting a Password To delete a password, follow these steps. 1. From the Launcher, tap to open My eBookMan®. 2. Tap . You are prompted to enter your password. 3. Enter your password and tap OK. You see the Enter password dialog box with the New prompt. At any of the Enter password dialog boxes, you can tap Cancel to return to My eBookMan® without deleting your password. 4. Tap OK without entering any characters. You see the prompt Retype new. 5. Tap OK again without entering any characters. 76 Chapter 5. The Launcher The message, “Password has been changed,” appears on the screen. 6. Tap OK. Your password is deleted, and the device returns to the My eBookMan® screen. 7. Tap Done to return to the Launcher. Forgotten Password Important: If you forget your password and the password is enabled, you will not be able to use your eBookMan. To attempt recovery after forgetting your password, follow these steps. 1. Remove the batteries from eBookMan for about five minutes. All applications and content, including your password, are deleted from the device. 2. If you DID NOT backup the applications and content (including the password) to your PC, transfer the applications and content from your PC to eBookMan by synchronizing from the Desktop Manager. For more information, see “Chapter 3. Managing & Synchronizing Content” on page 39. If you DID back up your password-enabled applications and content to your PC, DO NOT synchronize. The content in the Desktop Manager includes the forgotten password. Go to Step 3. Warning! If you remove the batteries to erase your password, YOU ALSO LOSE THE OPERATING SYSTEM, PROGRAMS AND DATA. 3. Follow the instructions in “Appendix A. Getting Updates” on page 204 to download and synchronize the latest copy of the OS and core applications. You must download and transfer all other applications and content separately. You also must synchronize your personal information from the organizer programs on your PC. eBookMan® User’s Guide 77 Using Categories A category is the name used to group and display icons that appear in the Launcher. As the number of icons that appear in the Launcher increases, use categories to manage the program and content icons that are displayed. The default categories are: -ALL-, CONTENT, PROGRAMS and UNFILED. You can add, rename, and delete new categories using the Category menu. You cannot delete default categories. Tap the category indicator to see the Category menu. See also: You can assign programs and files to a category using the File Manager. See “Categorizing Files” on page 83 for more details. Category menu -ALL- CONTENT PROGRAMS UNFILED EDIT CATEGORIES 78 Displays all program and content icons in the Launcher. By default, -ALL- categories are displayed in the Launcher. For information, see “Changing the Category View” on page 79. Displays only content icons in the Launcher. Displays only program icons in the Launcher. Displays only icons that are not filed under a category. For more information on filing icons, see “Managing Files in eBookMan” on page 81. Displays the Edit Categories screen, which enables you to add, rename, and delete categories. Chapter 5. The Launcher Changing the Category View To change the icons that appear in the Launcher, follow these steps. 1. From the Launcher, tap the category indicator. The Category menu appears. 2. Tap the category you want. The icons in the Launcher immediately change to the category you specified, and the active category is displayed in the Category indicator. The active category is displayed until you change it. Adding a Category You can create new categories to customize the Launcher and organize the icons that appear. To add a category, follow these steps. 1. From the Launcher, tap the category indicator. The Category menu appears. 2. Tap EDIT CATEGORIES. The Edit Categories screen appears. This screen lists the categories in alphabetical order. Edit Categories screen 3. Tap Add. The Add Category dialog box appears. Add Category dialog box eBookMan® User’s Guide 79 4. Enter a name for the new category. For example, write “Music.” Write the name in the Handwriting area or tap to enter the name using the onscreen keyboard. The Edit Categories screen can display a maximum of 20 characters in a name. The category indicator can display a maximum of nine characters in a name. You can tap Cancel to return to the Edit Categories screen without saving the new category. 5. Tap OK to save the category. The Edit Categories screen appears with the new category name in the list. Edit Categories screen 6. Tap Done to return to the Launcher. For information on how to categorize files, see “Managing Files in eBookMan” on page 81. Renaming a Category To rename a category, follow these steps. 1. From the Launcher, tap the category indicator. The Category menu appears. 2. Tap EDIT CATEGORIES. The Edit Categories screen appears. 3. Tap the category name you want to change. 4. Tap Rename. 80 Chapter 5. The Launcher The Rename a Category dialog box appears. The current name of the category is displayed and highlighted. Rename a Category dialog box 5. Enter a new name and tap OK. Write a new name in the Handwriting area or tap enter a new name using the onscreen keyboard. to 6. Tap OK to save your change and return to the Edit Categories screen. The renamed category is listed. Tap Cancel to return to the Edit Categories screen without saving your change. 7. Tap Done to return to the Launcher. Deleting a Category Note: 1. From the Launcher, tap the category indicator. Then Category menu appears. 2. Tap EDIT CATEGORIES. The Edit Categories screen appears. 3. Tap the category you want to delete. Note: You cannot delete default categories. 4. Tap Delete. The category is deleted. 5. Tap Done to return to the Launcher. Managing Files in eBookMan To delete a category that contains a program, you must first move or delete all files associated with that program. To delete files, use the File Manager. For more details, see “Managing Files in eBookMan” on this page. A File Manager is available on the Launcher menu. It is a directory that lists the name and size of all files on your eBookMan. From the File Manager, you can view details about a file, associate a file with a category or delete a file from eBookMan. eBookMan® User’s Guide 81 Viewing Details About a File To find details about a file, follow these steps. 1. From the Launcher, tap . 2. Tap File Manager. The File Manager screen appears. File Manager screen 3. Tap the file you want. Use the scroll bar or scroll area to see more files. 4. Tap Details. The File Details screen appears. File Details screen This screen shows the file name, publisher, size, category (where available), access settings and security settings. Except for the Category field, this information is read only. 5. Tap Done to exit this screen and return to the File Manager. 6. Tap Done again to return to the Launcher. 82 Chapter 5. The Launcher Categorizing Files Note: To associate a file with a category, follow these steps. 1. Follow the steps 1-4 under “Viewing Details About a File” on page 82. 2. Tap next to Category. The list of categories appears. File Details screen Files represented by icons are categorized when downloaded to eBookMan. Programs are categorized under PROGRAMS, and content is filed under CONTENT. Note: 3. Tap the category you want. 4. Tap Done. The File Manager screen appears. 5. Tap Done again to return to the Launcher. You can only categorize files represented by icons. Deleting Files You can delete files from eBookMan to increase free memory or remove files that are no longer used. To delete a file, follow these steps. 1. From the Launcher, tap . 2. Tap File Manager. The File Manager screen appears. 3. Tap the file you want. 4. Tap Delete. You can tap Cancel to exit without deleting. 5. Tap OK to delete the file. The file is removed from eBookMan. Note: Audible® files are added to and deleted from eBookMan through AudibleManager® only. 6. Tap Done to return to the Launcher. eBookMan® User’s Guide 83 84 Chapter 5. The Launcher 6. Data Entry This chapter explains how to enter data using natural handwriting, identifies acceptable characters and provides useful handwriting tips. It also describes the onscreen keyboard and all the options it offers. eBookMan gives you the choice of writing your data or tapping it on an onscreen keyboard. Handwriting Natural handwriting is the recognition system that eBookMan uses to allow data entry through writing. It makes character input simple, accurate and fast by supporting more than one way to write most characters. All writing must be entered in the appropriate section of the Handwriting area, located at the center of the Control Pad. Letter input area Punctuation input area Note: Natural handwriting uses simpliWrite® by ART (Advanced Recognition Technologies, Inc.). Control Pad { Number input area The Handwriting area is divided into the Letter input area, Number input area and Punctuation input area. Write letters in the Letter input area ( ), punctuation in the Punctuation input area ( ), and numbers in the Number input area ( ). Handwriting Guide The Handwriting Guide shows the acceptable stroke or strokes for each character. You can write each character in any of the ways shown. The natural handwriting system recognizes these variations. eBookMan® User’s Guide 85 To use the Handwriting Guide, follow these steps. 1. From the Launcher, tap . 2. Tap Handwriting Guide. You see the first screen of the Handwriting Guide. Letter and punctuation strokes recognized in the Letter input area ( ). 3. Tap the arrows at the top right corner to scroll through each screen of the Handwriting Guide. Number and punctuation strokes recognized in the Number input area ( ). 86 Chapter 6. Data Entry Punctuation strokes recognized in the Punctuation input area ( ). Important! Function strokes recognized in the Letter, Number, or Punctuation input areas. Accented character strokes recognized in the Letter input area ( ). Before you can write an accented character, you must select the appropriate Pen Language in My eBookMan®. For more information, see "Changing eBookMan Settings” on page 70. 4. Tap to exit the Handwriting Guide and return to the Launcher. Entering Data With Natural Handwriting Entering data with natural handwriting takes some practice. Follow these steps to enter a sentence in the Memo Book. 1. Remove your stylus from the back of your eBookMan. 2. From the Launcher, tap an icon for a program that allows data entry. For example, tap . 3. Locate a field where you can enter data. For example, tap New to go to the Edit screen. A blinking cursor appears in all fields where you can enter data. If the blinking cursor does not appear, the field is not active. The field must be active before you can enter data. Note: When you write a character that eBookMan does not recognize, you hear a beep. 4. Place the pointed end of the stylus at the bottom, center of the Letter input area and draw a line straight up to shift the first letter to a capital. A single dot appears in the cursor to indicate shift. eBookMan® User’s Guide 87 5. In the center of the Letter input area, write the letter “a”. • Start the stroke where indicated by the point and draw it as it appears in the Handwriting Guide. For example, to draw an “a” start here and write the character left to right. • Lift the stylus, and the character appears in the data entry field. Always write in lower case, as displayed in the Handwriting Guide. If you want upper case letters to display, write the stroke for shift or caps lock before writing the letters you want to capitalize. For more information about functions, see “Writing Functions” on page 89. Natural handwriting also recognizes simple strokes for backspace, carriage return and space, as well as shift and cap lock. 6. Write the stroke for a space. Place the pointed end of the stylus in the center, left side of the Letter input area and draw a line straight to the right. A space appears in the data entry field. 7. Write the letters for the word you want. For example, write “walk.” When you complete the strokes, the characters you entered appear in the data entry field. The Handwriting area does not change. Always write each character in the center of the appropriate Handwriting area. If the character is composed of more than one stroke, you see interim results on the screen. For example, when you write “k,” an “l” may show on the screen before the “k” appears. 8. Write the stroke for a space. 9. Write the next words you want. For example, write “in the park”. 10. Write the stroke for a period. 88 Chapter 6. Data Entry Practicing Natural Handwriting For more handwriting practice, use Stalagmite. 1. From the Launcher, tap . 2. Tap Help for more information on how to play. Writing Punctuation Follow these guidelines when entering punctuation: Period Write in the lower part of the appropriate input area. Comma Write in the lower part of the appropriate input area. Apostrophe Write in the upper part of the appropriate input area. Note: To ensure that you finished writing, eBookMan pauses approximately two seconds before displaying the character written in the Punctuation input area. Writing Functions Simple strokes make it easy to write functions, such as backspace, space, tab, shift and caps lock. The following table gives details about the functions. Stroke Function Note: Functions work in all input areas. Deletes the previous character (like the backspace key). Inserts a space (like the spacebar). Inserts a line break (like the enter key). Note: Enables you to write the next letter in upper case (like the shift key). Switches to upper case (like the caps lock key). When you want to return to lower case, draw the shift key gesture (as above). eBookMan® User’s Guide When you draw the shift or caps lock stroke in a program, switch to another program and then return to the first program, the function is remembered and restored. 89 Deleting Characters Delete characters in the data entry field by writing the back function. To delete one character, place the cursor to the right of the character you want to delete and write the back function in the Letter input area. To delete consecutive characters,do the following: 1. Drag the stylus over the characters to highlight them. 2. Write the back function in the Letter input area. Writing Accented Characters Natural handwriting supports accented character recognition for Dutch, French, German, Italian, Portuguese and Spanish. To enable accented characters, you must first select the Pen Language you want in My eBookMan®. 1. From the Launcher, tap 2. Tap to open My eBookMan®. next to Pen Language. 3. Tap the language you want. Tap Western European to access all accented characters. Note: The following special characters can only be written in the Punctuation input area: French << >> Spanish ¡ ¿ 4. Tap Done to return to the Launcher. Accented characters written in the Letter input area now appear in the data entry field. The following table lists the accented characters available for each language. Language Dutch French German Italian Portuguese Spanish 90 Characters à à ä à ã á á â ö è á é ä â è ç ë è ü ß é ì ò â ç è í ñ ó é ë ê ì í ï î ò ó ô ö ù ú ü û ñ ç é ê ï î ô œ ü ù û « » ù é ê í ò ó ô õ ü ú ú ü ¡ ¿ Chapter 6. Data Entry Hints For Successful Handwriting • Keep eBookMan vertically oriented to avoid writing slanted characters. • Write characters as they appear in the Handwriting Guide. • Always write in lower case. • Write the characters large and in the appropriate input area. • For an initial capital letter, write the shift function. A single dot appears in the cursor to indicate a shift. Write the letter you want. • For a series of capital letters, write the caps lock function. Double dots appear in the cursor to indicate caps lock. Write the letters you want. Repeat the shift function to return to lower case. Onscreen Keyboard The onscreen keyboard offers an alternative way to enter data in your eBookMan. It supports all letter, number, punctuation and accented characters that natural handwriting supports. The keyboard is available in most programs in every screen where you can enter data. Using the Onscreen Keyboard To use the onscreen keyboard, follow these steps. Note: To access the keyboard in some data entry screens, you can tap and then either tap Edit|Keyboard or write the Menu shortcut k. 1. From any data entry screen, draw a line straight up and out of the Handwriting area. The default keyboard appears. It contains the characters available on a standard English typewriter. Default keyboard eBookMan® User’s Guide 91 If the character you want to enter does not appear on the default keyboard, use the Cap, Shift, Accent, or Shift/Accent option to find it. • Tap cap to access the Caps lock keyboard. Caps lock keyboard • The Caps lock keyboard contains capital letters, punctuation, and special characters. Tap cap again to return to the Default keyboard. Tap shft to access the Shifted keyboard. Shifted keyboard • 92 The Shifted keyboard contains capital letters, punctuation, and special characters. Tap shft again to return to the Default keyboard. Tap acnt to access the Accent keyboard. Chapter 6. Data Entry Lowercase accents keyboard • The Accent keyboard contains lowercase accented letters, punctuation, and special characters. Tap acnt again to return to the Default keyboard. Tap shft + acnt to access the Shifted Accent keyboard. Shifted accent keyboard The Shifted Accent keyboard contains uppercase accented letters, punctuation, and special characters. Tap shft + acnt again to return to the Default keyboard. 2. Tap the characters you want. The data you enter appears in the line above the keys. To delete a single character to the left of the cursor, tap back. To delete a single character in the middle of a word, tap in the line to the right of the character you want to delete, and then tap back. To delete more than one character, drag your stylus across the characters you want to delete to highlight them. When you tap in your new data, the old characters are overwritten. Tap ¶ to enter a line break. 3. Tap enter to save your text and exit the keyboard. Tap esc to exit the keyboard without saving. eBookMan® User’s Guide 93 94 Chapter 6. Data Entry C ONTENT A PPLICATIONS eBookMan® User’s Guide 95 7. Franklin Reader eBookMan includes Franklin Reader, a program that lets you read electronic books (eBooks). It also lets you search for words or phrases, mark text, and add notes to eBooks. This chapter describes how to: • open and close eBooks • set preferences • move through an eBook • find specific information within an eBook • use bookmarks • get help • exit Franklin Reader Before using this program, you must download and install eBooks formatted for the Franklin Reader. General reference material (such as the Merriam-Webster® Dictionary), medical reference books (such as The Medical Letter® Handbook of Adverse Drug Interactions), Bibles (such as the Holy Bible, King James Version), and novels (such as David Copperfield by Charles Dickens) in Franklin Reader format are available at www.franklin.com/estore. Note: When you register your eBookMan, you can select free eBooks and samples. To access these files from the eBookMan® Desktop Manager, click Web|My eBookMan Library. For more information, see “Registering your eBookMan Device” on page 27. Opening and Closing eBooks Open eBooks from Franklin Reader or from the Launcher. To open an eBook from Franklin Reader, follow these steps. 1. Tap to open Franklin Reader. The screen that appears varies based on available content and whether or not eBooks were opened previously. 96 Chapter 7. Franklin Reader • If no eBooks are available, the message “No books loaded” appears. Empty Booklist • You must download and install Franklin eBooks in your eBookMan to use Franklin Reader. Tap to exit. If eBooks are available and no eBooks have been opened, you see the Booklist. The Booklist is an alphabetical list of Franklin eBooks that are installed in your eBookMan. Booklist Note: If an eBook had been opened previously, Franklin Reader displays the last viewed screen of the eBook. To exit the Booklist, tap See also . 2. Tap the eBook you want to open. The default Home screen for the eBook you selected appears. The Home screen is the initial screen for an eBook. In most eBooks, the Home screen is designated as Outline, Index, or Search. eBookMan User’s Guide ® For more information about the screens, see “Understanding Franklin Reader Features.” 97 See also For information on how to change the Home screen for an eBook, see “Setting Preferences” on page 103. To open an eBook from the Launcher, tap the Content icon for the eBook. The default Home screen or the last viewed screen appears. Note: Not all eBooks have Content icons associated with them. 3. Tap to close Franklin Reader. The next time you open Franklin Reader, the book you last viewed appears. Understanding Franklin Reader Features Most Franklin Reader screens consist of a title bar, tool bar and a view that represents eBook content. Title bar Tool bar View area Title Bar The title bar displays the name of the eBook, the title of your current location within an eBook or the Outline Location within an eBook. Names of eBooks can be abbreviated in the Booklist and in the title bar. Names of section titles are often abbreviated as you move through the Outline or in text. To see the full name of an eBook or the full title of the current location within and eBook, follow these steps. 1. Tap the name in the title bar. 98 Chapter 7. Franklin Reader The full name is displayed in a dialog box. 2. Tap OK to exit. When viewing text or searching for a word, you can find the Outline Location within an eBook by tapping the title bar. For example, you may read text in a Bible that displays the verse and number but not the book. To display the Outline Location, tap the title bar. Tool Bar The tool bar displays icons that enable you to move around in an eBook and access other locations in Franklin Reader. The icons that appear on the tool bar vary by location within the program and by available features within an eBook. The following icons are available. (Booklist) Returns to the Booklist from any screen. (Home) Returns to the Home screen for the selected eBook. (Outline) Goes to the top level of the Outline. (Search) Goes to the Search screen. After a search, goes to the Search Results screen. From the Search Results screen, returns to the Search screen with the previous query word or words displayed. At the Search screen, clears the selected item or items or query word or words. (Forward) Moves forward to a previously visited location. (Back) Moves back to a previously visited location. (Next) Goes to the next match when viewing text after a search. (Previous) Goes to the previous match when viewing text See also For an example of the Outline Location, see instructions for using the search screen on page 109. Note: Icons for functions that are not available appear grayed-out on the tool bar. See also For more information about the Search screen, see “Searching an eBook” on page 104. after a search. (List) After a search, goes to the Selection List. (Exit) Closes Franklin Reader and returns to the Launcher. eBookMan User’s Guide ® 99 The Views Note: A section is an item that is listed on the top level of the Outline. Franklin Reader uses five views to represent the content of an eBook: List, Text, Sub-text, Search, and Bookmark. List View The List view displays chapters, sections or headwords of an eBook. The content of a list varies. For example, a list in a novel may contain the titles of the chapters. A list in a dictionary may contain headwords, and a list in a medical reference may contain sections of drug types. The most common lists include the Outline and Index, which are similar to the Table of Contents and Index in a printed book. Other lists include, but are not limited to, the Booklist and Bookmark List. List example: Outline of Tom Sawyer See also For more information, see “Searching within an eBook” on page 108. List example: Outline of Physician’s Desk Reference® (PDR) 2000 Demo Many lists are short and easy to navigate. When a list does not fit on one screen, a scroll bar appears. The diagonal arrow to the left of a list item indicates another list below, similar to a sub-menu. Tap the list item to go to the sublist. Tap the arrow to bypass all sub-lists and go directly to the corresponding text. Search View Enables the user to enter and search for a word or phrase within an eBook. Also displays the results of a search. To access the Search screen, tap . 100 Chapter 7. Franklin Reader Text View The Text view displays the main text of an eBook. Read, scroll, highlight text, and add bookmarks from text. To change the way text is displayed in Franklin Reader, see “Setting Preferences.” Sub-text View The Sub-text view displays additional text such as context-sensitive help, bibliographic entries, footnotes, and tables. Most sub-text is accessed by tapping a special marker or by using a menu item. Bookmark View The Bookmark view provides a way to enter, view, edit and remove bookmarks. Using the Menus Franklin Reader includes four menus: Move, Edit, Options and Go To. To access a menu, follow these steps. 1. Tap Note: The available menus and menu options vary from eBook to eBook and by location in an eBook. on the Control Pad to see the available menus. Some menu items have a character in the right column. These are Menu shortcuts. 2. Tap the name of the menu you want. 3. Tap the menu item you want or write the Menu shortcut in the Handwriting area. Move Menu Use the Move menu to move between different locations in an eBook. Move menu Back (<) Forward (>) Moves back to the previously visited location. Moves forward to the previously visited location. eBookMan User’s Guide ® 101 Important! Before using the Cut, Copy and Paste functions, you must select text. To select text, drag the stylus over the text you want. Scroll to Top (^) Moves to the top of the current list or section. Scroll to End (v) Moves to the bottom of the current list or section. Exit (e) Closes Franklin Reader. Edit Menu Use the Edit menu to cut, copy and paste text, access the onscreen keyboard, and add bookmarks. Edit menu Cut (x) Copy (c) Paste (p) Select All (a) Keyboard (k) Add Bookmark (m) Removes selected text. The text is stored on the clipboard to copy to another location. Copies selected text to the clipboard. Pastes copied or cut text from the clipboard. Highlights all available text at current location to select it. Displays the onscreen keyboard. Enables you to add a bookmark at the current location in text. Options Menu Use the Options menu to set your user preferences, learn more about the program and the eBook you are reading, view Reader Functions, and get help for the program. Options menu Help (h) Reader Functions (f) 102 Shows context-sensitive help. Displays a guide to the menus. Chapter 7. Franklin Reader About This Book Displays copyright information for the current eBook. About Franklin Displays the version number and copyright information for Franklin Reader. Preferences (r) Enables you to set preferences in Franklin Reader Reader and the current eBook. Go To Menu Use the Go To menu to access the top level of the Outline or Index, go to the Search screen, and view search results, the Bookmark List and the Booklist. The Bookmark List is the list of bookmarks that you have inserted in the eBook you are currently viewing. Go To menu Outline (o) Index (i) Search (s) Search Results Bookmark List (l) Booklist (b) [eBook name] Goes to the top level of the Outline. Goes to the top level of the Index, when available. Goes to the Search screen, when available. Goes to the Search Results screen, when available. Displays the list of Bookmarks for the current eBook. Goes to the Franklin Reader Booklist. Displays the name of most recent eBooks that were opened and are still available. Setting Preferences You can set your preferences for Franklin Reader and the eBook you are currently viewing. The options on the Preferences screen may vary by eBook. eBookMan User’s Guide ® 103 To set preferences, do the following. 1. From any screen within an eBook, tap and then either tap Options|Preferences or write Menu shortcut r. Preferences screen 2. Change the settings you want. You can tap Help to get information about the settings. 3. Tap OK to save your changes. Tap Cancel to exit without changing the defaults. Franklin Reader Settings You can set features that change the appearance of all eBooks in the Franklin Reader, such as font size and display. Book font sizes By default, the large font (B) is highlighted. Tap the small B to change to a smaller font. The smaller font lets you view more text on the screen. Small font size 104 Chapter 7. Franklin Reader Large font size with no scroll bars Show scroll bars When checked, this option shows scroll bars. Tap the check box next to the scroll bar option to deselect it. Show quick Tap the check box next to the Quick Commands option to deselect it. commands Note: Most books do not have Quick Commands. Text in portrait This option lets you select the viewing orienmode tation: portrait or landscape. By default, this option is checked. See also For information on how to move through an eBook using Quick Commands, see “Quick Commands”. Text in Landscape mode Note: Landscape orientation applies only to the text views in an eBook. All other screens remain in portrait mode. eBook Settings Depending on the eBook, you can select the default Home screen, display the title bar over text, and select a start topic. Home Tap the button next to Outline, Index or Search to select it as the Home screen of the current eBook. Novel reading mode Tap the check box next to this option to format an eBook with margins and justification. The text appears more like a printed eBook. By default, this option is not checked. Show title bar over text The default is to show the title bar over text. Tap the check box to deselect it. eBookMan User’s Guide ® 105 Start topic Tap the down arrow to see the list of topics that you can set as the starting point for viewing text. This option is not available in every eBook. Moving Around You can read an eBook just as you would a printed book or use an eBook as a reference. Rather than flipping pages, moving around in an eBook involves tapping icons and using the menus associated with Franklin Reader. It also involves tapping through lists, scrolling through text, and tapping Special Markers or hyperlinks associated with the content of the eBook. To move through an eBook, follow these steps. 1. Move to the list you want. For example, move to the Outline. Go to the Outline in one of the following ways: • Tap . • Tap and then either tap Go To|Outline or write Menu shortcut o to go to the top level of the Outline. • If the Home screen is the Outline, tap . 2. Tap the list item (chapter or section) you want. If the list is longer than one screen, use the scroll bar, scroll area on the Control Pad, or Control Wheel to view the rest of the list. Text may appear directly under the list item. If text does not appear, continue to tap through the list until you get to the text you want. 3. In text, move by line or screen. Use the scroll bar on the screen, the scroll area in the Control Pad, or the Control Wheel to move by line or by screen. 4. Tap and to return to the text that you already viewed. If the text you see is the result of a search, tap move to the next or previous match. 106 Chapter 7. Franklin Reader or to Special Markers When reading and moving through text, you may see Special Markers - images of blocked text. Special markers indicate that more information is available. The following are some examples of Special Markers: - , Footnote Graphic or figure Bibliographic entry Unavailable section of text Unavailable graphic illustration Table reference Cross reference Bookmark Pronounces the headword, highlighted word, or entry. To view the information associated with a special marker, follow these steps. 1. Tap the marker to view its information in sub-text. If the information takes up more than on screen, use the scroll bar to view more text. 2. When done, tap reading. or OK to return to the text you were Quick Commands When reading and moving through text, you may see Quick Commands - a row of buttons at the bottom of text. Quick Commands act as hyperlinks that jump to a related section of the text. They most commonly appear in medical references. Quick Commands eBookMan User’s Guide ® 107 To use a Quick Command, tap or write the letter to go directly to that section of text. When using Quick Commands, please note the following: • Quick Commands only work in Text view. • When Quick Commands are not displayed, you can write these letters to go to the indicated section. Searching within an eBook Franklin Reader enables you to search for words or phrases within an eBook. The search method varies by location in the program and in the eBook. The basic search methods include Lookup, Quick Search and the Search screen. Lookup The Lookup feature provides a quick way to find items in a list. It is used best when you know the list item (for example, headword, chapter or section) you want. To use the Lookup feature, follow these steps. 1. Go to a list in an eBook. For example, tap to go to the Outline. 2. Write the characters of the list item one at a time in the Handwriting area or tap them on the onscreen keyboard. The characters you enter appear in the Lookup field at the bottom of the screen. The highlight automatically moves to the first list item starting with those characters. Note: Capitalization and punctuation are not necessary for Lookup. Lookup for the letters “ps” 108 Chapter 7. Franklin Reader If you enter a series of letters, the program searches for them in sequence. When it encounters a letter for which there is no match, it highlights the first list item with the last matched letters. When you delete characters, the Lookup backs up to the previous match. 2. Tap the item you want to select it. Note: The Lookup feature is available in List view only. Quick Search You can search for a word in more than one eBook by using Quick Search. 1. In text, highlight the word or words you want by dragging the stylus over them. 2. Tap the highlighted word or words. The Select Book to Search screen appears. Select Book to Search screen 3. Tap the eBook where you want to find the word or words. The eBook opens and the word or words are searched. The search results are the same as if you had performed a word search in that eBook. The Search Screen The Search screen lets you find words or phrases in text. Note: The Search screen is not available in all eBooks. In some eBooks, the Search screen uses a Selection List and enables you to find words in the list. eBookMan User’s Guide ® See also For more information about searching the Selection List, see “Searching from a List” on page 113. 109 The Search screen also can be used to correct spelling. To use the Search screen to find words or phrases in text, follow these steps. Note: In some eBooks, you can restrict searches to specific parts of the eBook by writing section, book or language abbreviations. These abbreviations and the eBooks they apply to are listed in "Search Abbreviations" on page 121. 1. Go to the Search screen. Access the Search screen from any location within Franklin Reader in one of the following ways: • Tap . • Tap and then either tap Go To|Search or write Menu shortcut s. For example, tap in Sherlock Holmes. The Search screens appears. Search screen for words 2. Enter up to six words by using the Handwriting area or the onscreen keyboard. For example, enter “Moriarty.” Searching for “Moriarty” in Sherlock Holmes You also can paste text that was previously copied to the clipboard. 110 Chapter 7. Franklin Reader 3. Tap Search to initiate the search. The search results appear. Search results for “Moriarty” in Sherlock Holmes If you enter words that cannot be found, you see a dialog box indicating “No candidates found.” Enter a new search request and try again. 4. Tap the list item in which you want to find the word or phrase. For example, tap “THE EMPTY HOUSE.” Text where the match was found appears, and a dotted box appears around the match. See also: For details about the categories of results, see “Search Results” on page 114. Search results in text 5. Tap or to move to the next or previous match. Tap the title bar to see the Outline Location of the current match within the eBook. eBookMan User’s Guide ® 111 Outline Location screen 6. Tap OK to exit the Outline Location. Spell Correction If any word you enter in the Search screen is misspelled, a list of corrections appears. Spell Correction screen If the list of corrected spellings includes the word you intended, tap it and then tap OK to continue the search using the correction. To go back to the Search screen and enter a different word, tap Cancel. Word Match If you are not sure how to spell a word, enter ? to stand for a single letter or ✻ to stand for zero, one or more letters. For example, if you are not sure whether the word is spelled "receipt" or "reciept", write rec??pt and tap Search. All words matching this pattern are displayed. To see all the words that begin with "hypo", write hypo✻ and tap Search. 112 Chapter 7. Franklin Reader Match results for hypo✻ A list of possible matches is displayed. Tap the word you want and then tap OK to search using that word. To go back to the Search screen and change the request, tap Cancel. Searching from a List In some eBooks, the Search screen shows a list of items from which you can search. Use this feature to find information about two or more items. To perform a search from this screen, follow these steps. 1. Go to the Search screen. Access the Search screen from any location within Franklin Reader in one of the following ways: • Tap . • Tap and then either tap Go To|Search or write Menu shortcut s. Search screen with List 2. Tap an item to select it. A check mark appears to the left of the item. To deselect an item, tap it again. eBookMan User’s Guide ® 113 You can select up to 30 items from the provided list. Search screen with selected items 3. Tap to see the Selection List, a complete list of selected items. Selection List To delete an item, tap it and then tap Delete. Use the scroll bar, when available, to view all selected items. Note: Not all of the categories described are available in every eBook. Every search request will not return matches in every category available to that eBook. In some instances, you may need to tap More to see a particular category. 114 4. Tap OK to return to the Search screen. 5. Tap Search to initiate the search. Search Results Because search results are based on the content and structure of an eBook, they vary widely. Search results are assigned categories to help you easily determine the part of an eBook in which your words were matched - a chapter title, definition, text or index. Results may be found in more than one category. If the More button appears on the Search Results screen, it indicates that more search matches are available in a different category. Tap More to see them. Chapter 7. Franklin Reader Search results can occur in the following categories: A. Entries using other forms These matches occur when other forms of the word or words you entered match a compound word or phrase. Other forms include inflections and root words. B. Headwords These matches occur when the word or words you entered exactly match a headword. Inflections and root words may be considered exact matches. Headwords in translator Phrases or Compound Words in translator C. Phrases or Compound Words These matches occur when the word or words you entered match part of a compound word or phrase. D. Text These matches occur when the word or words you entered match within a single verse or paragraph of text or match inflections or run-ons within a definition. You must tap through the Outline until you enter text to see the matching words. Your search word or words will be boxed. eBookMan User’s Guide ® 115 Text in PDR® 2001 Demo Text using Synonyms in PDR® 2001 Topical E. Text using Synonyms Synonyms are words of similar meaning and usage. This category returns matches just like "Text" except that it uses synonyms for the word or words you entered. F. Titles These matches occur when the word or words you entered all match part of an Outline title (for example, a monograph name, chapter title, section title, index title, headword or phrase). Inflections and root words are considered matches. Titles in PDR 2001 Demo Titles using Synonyms in PDR 2001 Topical G. Titles using Synonyms Synonyms are words of similar meaning and usage. This category returns matches just like "Titles" except that it uses synonyms for the word or words you entered. 116 Chapter 7. Franklin Reader H. Titles & Text These matches occur when some of the words you entered match in an Outline and some match in text. You must enter the text to see these matches. This category also returns matches if the words you entered occur in different titles along a single Outline path. You must tap through the Outline until you enter text to see the matching words. I. Titles & Text using Synonyms Synonyms are words of similar meaning and usage. This category returns matches just like "Text & Titles" except that it uses synonyms for the word or words you entered. J. Words, Phrases, or Compound Words These matches occur during a restricted search when the word or words you entered match all of a headword and part of a compound word or phrase. K. Pairs of Words These matches occur when a pair of items you selected at the Search screen match part of an Outline title. In some medical books, if you search for brand names, the generic name or drug group may be substituted. L. Single Words These matches occur when a single item you selected at the Search screen matches part of an Outline title. In some medical books, if you search for brand names, the generic name or drug group may be substituted. Matches may be returned in the following categories depending on the type of eBook you are reading. • Dictionary - B, D, F • Holy Bible - D, E, F, G, H, I • Medical Reference - D, E, F, G, H, I, K, L • Translator - A, B, C, J eBookMan® User’s Guide 117 Using Bookmarks You can enter a bookmark in any location in text. In the Bookmark Edit screen, you can either paste text that was previously cut or copied, or you can enter a note. You can enter up to 50 bookmarks in each eBook. Adding Bookmarks To add a bookmark, follow these steps. 1. From any text view, bring up the Bookmark Edit screen by tapping and then either tapping Edit|Add Bookmark or writing Menu shortcut m. Note: During synchronization, bookmarks are saved to your PC. Bookmark Edit screen Note: appears at the location in text where you placed a bookmark. It is considered a special marker. The title of the current section of text appears highlighted in a new bookmark. 2. Use the Handwriting area or the onscreen keyboard to enter text. You can write over the existing title or add text following the title by first tapping after the title to remove the highlight and then writing your text. You also can paste any text from the clipboard into the bookmark. You can enter up to 100 characters. 3. Tap OK to add the bookmark. You can exit without adding a bookmark by tapping Cancel. You must confirm the cancellation. To confirm, tap Yes. To exit without cancelling, tap No. When you enter a bookmark, 118 Chapter 7. Franklin Reader appears in text. Viewing an Entered Bookmark You can view the text of an existing bookmark or a list of all bookmarks. To view or edit a bookmark, follow these steps. Note: If you are already at the location in text where you entered the bookmark, begin at Step 3. 1. Tap and then either tap Go To|Bookmark List or write Menu shortcut l to see a list of all bookmarks. The list is organized from newest to oldest, with the most recent addition at the top. 2. Tap the title of a bookmark to go to its location in text. Bookmark icon in text Note: You see the Bookmark Edit screen. 3. From text view, tap . 4. Enter or revise the text you want. 5. Tap OK to save your changes. Tap Cancel to exit without saving the changes. You can also remove an entered bookmark by tapping Delete. You must confirm the delete. To confirm, tap Yes. To exit without deleting, tap No. eBookMan® User’s Guide When the bookmark fills more than one screen, a scroll bar appears. Tap on the up and down arrows or the scroll bar to move and view the entire text. 119 Using Help Your Franklin Reader comes with context-sensitive help and a guide to Reader Functions. You can view Reader Functions from any location. Tap and then either tap Options|Reader Functions or write Menu shortcut f to read the guide. You can read the help in any location. Tap and then either tap Options|Help or write Menu shortcut h to read the help. Helptext view To move up and down by screen in the Reader Functions and help screens, use the up and down arrows or the scroll bar. Tap OK to return to your previous location. Reader Functions view Tap OK to exit the help screen and return to your previous location. 120 Chapter 7. Franklin Reader Search Abbreviations The following abbreviations are available in Bible references and translators. Bible ebook Abbreviations Add these testament or book abbreviations at the beginning of your search request to narrow your search parameters to only that testament or book. The Old Testament (ot): Genesis ....................Gen Exodus ........................Ex Leviticus ....................Lev Numbers..................Num Deuteronomy...........Deut Joshua ....................Josh Judges ....................Judg Ruth.........................Ruth 1 Samuel ...............1Sam 2 Samuel ...............2Sam 1 Kings.......................1Ki 2 Kings.......................2Ki 1 Chronicles ............1Chr 2 Chronicles ............2Chr Ezra .........................Ezra Nehemiah .................Neh Esther ........................Est Job ............................Job Psalms ........................Ps Proverbs ..................Prov Ecclesiastes ..............Ecc Song of Solomon .......Sol Isaiah..........................Isa Jeremiah ....................Jer Lamentations ...........Lam Ezekiel.....................Ezek Daniel .......................Dan Hosea .......................Hos Joel...........................Joel Amos .....................Amos Obadiah..................Obad Jonah ........................Jon Micah.........................Mic Nahum ......................Nah Habakkuk..................Hab Zephaniah...............Zeph Haggai ......................Hag Zechariah ................Zech Malachi ......................Mal The New Testament (nt): Matthew:......................Mt Mark ...........................Mk Luke ............................Lk John ............................Jn Acts..........................Acts Romans ...................Rom 1 Corinthians...........1Cor 2 Corinthians...........2Cor Galatians ...................Gal Ephesians.................Eph Philippians ................Php Colossians .................Col 1 Thessalonians....1Thes 2 Thessalonians....2Thes 1 Timothy ................1Tim 2 Timothy ................2Tim Titus ........................Titus eBookMan® User’s Guide 121