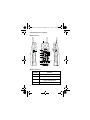
1
900 MHz UG.book Page 1 Wednesday, June 13, 2001 12:42 PM
User Guide
900 MHz
VB-44240A
Cordless Telephone
Issued July 2001
900 MHz UG.book Page 2 Wednesday, June 13, 2001 12:42 PM
The contents of this manual are subject to change
without notice and do not constitute a commitment on
the part of Panasonic Telecommunication Systems
Company (PTSC). Every effort has been made to
ensure the accuracy of this document. However, due
to ongoing product improvements and revisions,
Panasonic cannot guarantee the accuracy of printed
material after the date of publication nor can it accept
responsibility for errors or omissions. Panasonic will
update and revise this document as needed.
The software and hardware described in this
document may be used or copied only in accordance
with the terms of the license pertaining to said
software or hardware.
Reproduction, publication, or duplication of this
manual, or any part thereof, in any manner,
mechanically, electronically, or photographically, is
prohibited without permission of the Panasonic
Telecommunication Systems Company (PTSC).
© Copyright 2001 by Panasonic Telecommunication
Systems Company (PTSC).
All rights reserved.
900 MHz UG.book Page iii Wednesday, June 13, 2001 12:42 PM
CONTENTS
Precautions. . . . . . . . . . . . . . . . . . . . . . . . . . . . . . v
Checking Your Package . . . . . . . . . . . . . . . . . . vii
Understanding Your Telephone . . . . . . . . . . . . . 1
Handset Overview . . . . . . . . . . . . . . . . . . . . . . .
Base Station Features . . . . . . . . . . . . . . . . . . . .
Optional Headset (VB-44249HS) . . . . . . . . . . . .
Charging Unit (EXP9785) . . . . . . . . . . . . . . . . . .
4
6
7
8
Installing the 900 MHz Cordless Telephone . . . 9
1. Selecting the Installation Location . . . . . . . . . 9
2. Connecting the Telephone Cords . . . . . . . . . 10
3. Applying Power . . . . . . . . . . . . . . . . . . . . . . . 11
4. Installing the Handset Battery . . . . . . . . . . . . 12
5. Charging the Handset Battery (First Time) . . 13
6. Attaching Belt Clip to Handset . . . . . . . . . . . 14
Wall-Mounting the Base Station
(Optional Procedure) . . . . . . . . . . . . . . . . . . . . 15
Wall-Mounting the Charging Unit
(Optional Procedure) . . . . . . . . . . . . . . . . . . . . 18
Using Your 900 MHz Cordless Telephone . . . . 21
Before You Begin . . . . . . . . . . . . . . . . . . . . . . .
Placing a Call . . . . . . . . . . . . . . . . . . . . . . . . . .
Answering a Call . . . . . . . . . . . . . . . . . . . . . . . .
Adjusting the Headset/Microphone Volume . . .
Muting the Handset Microphone . . . . . . . . . . . .
Adjusting the Ringer Volume . . . . . . . . . . . . . .
Switching Calls Between Telephones . . . . . . . .
900 MHz Cordless Telephone User Guide
21
21
22
22
23
23
25
iii
900 MHz UG.book Page iv Wednesday, June 13, 2001 12:42 PM
Selecting Channels . . . . . . . . . . . . . . . . . . . . . .
Low Battery Indicator . . . . . . . . . . . . . . . . . . . .
Recharging the Handset Battery . . . . . . . . . . . .
Cleaning Handset & Charging Unit Contacts . .
Charging a Spare Battery . . . . . . . . . . . . . . . . .
26
27
28
28
29
Programming Your Handset . . . . . . . . . . . . . . . 31
Troubleshooting . . . . . . . . . . . . . . . . . . . . . . . . . 35
Service Parts and Accessories . . . . . . . . . . . . . 37
Service Parts . . . . . . . . . . . . . . . . . . . . . . . . . . 37
Optional Accessories . . . . . . . . . . . . . . . . . . . . 38
iv
900 MHz UG.book Page v Wednesday, June 13, 2001 12:42 PM
Precautions
Warning: Products powered by electricity
should be serviced only by experienced
professional technicians. Any attempt by others
to service the products dealt with in this manual
could result in serious injury or death.
Warning: The 900 MHz cordless telephone and
associated equipment described in this manual
are not waterproof. To reduce the risk of fire,
electrical shock, or damage to equipment, DO
NOT expose the equipment to rain or moisture.
Caution: This equipment contains a Rechargeable
Nickel-Cadmium Battery.
• Do not short-circuit the battery.
• Do not charge the battery in any charger other
than the one specified in this Guide. Using
another charger may damage the battery, or
cause the battery to explode.
• Do not remove or damage the battery casing.
• Never throw the battery into a fire, disassemble
it, or heat it.
The nickel cadmium battery you have
purchased is recyclable. At the end of its
useful life, under various state and local
laws, it is illegal to dispose of this battery
into your municipal waste stream.
v
900 MHz UG.book Page vi Wednesday, June 13, 2001 12:42 PM
Precautions
FCC Warning
This equipment generates, uses, and can radiate
radio frequency energy, and, if not installed and used
properly, that is, in strict accordance with the
instruction manual, may cause interference to radio
and television reception. This equipment has been
tested and found to comply with the limits for a
Class A computing device in Subject J of Part 15 of
FCC Rules, which are designed to provide
reasonable protection against such interference in a
residential installation. However, there is no
guarantee that interference will not occur in a
particular installation. If this equipment does cause
interference, take one or more of the following
actions:
1. Place each base station at least five feet apart.
2. Raise the base station antenna to the vertical
position.
3. Place the base station on top of a desk or on
higher shelves.
4. Avoid locations surrounded by metal surfaces.
vi
900 MHz UG.book Page vii Wednesday, June 13, 2001 12:42 PM
Checking Your Package
Before reading the User Guide and using the
Panasonic 900 MHz Cordless Telephone, take a few
minutes to check the contents of your package.
You should have the following:
Handset
Base Station with
AC Adapter
Charging Unit with
AC Adapter
vii
900 MHz UG.book Page viii Wednesday, June 13, 2001 12:42 PM
Checking Your Package
800 mAH DC 3.6V
Rechargeable
Battery
Belt Clip
Wall Mount Adapter
Function Label
viii
900 MHz UG.book Page ix Wednesday, June 13, 2001 12:42 PM
Checking Your Package
Telephone Cable
ix
900 MHz UG.book Page x Wednesday, June 13, 2001 12:42 PM
Checking Your Package
x
900 MHz UG.book Page 1 Wednesday, June 13, 2001 12:42 PM
Understanding Your Telephone
The Panasonic 900 MHz VB-44240A Business
Phone is a digital cordless telephone that allows you
to stay connected to your Panasonic PBX - even
when you are away from the desk. This phone
includes:
• Digital Spread Spectrum
• Range of one mile (approximate)
• 2-line LCD display with 16 digits per line
• Any-key answer
• Vibrator alert
• 10 channels, selectable with the handset
• 6 Function keys (F1 - F4 backlighted)
• 6 Hours of talk time/4 days standby time on one
battery charge
• Headset Jack (2.5 mm)
900 MHz Cordless Telephone User Guide
1
900 MHz UG.book Page 2 Wednesday, June 13, 2001 12:42 PM
Understanding Your Telephone
Handset features
9
1
16
17
2
3
4
10
11
12
13
5
6
7
14
15
8
Handset Features
2
Number
Feature
1
Ringer ON/OFF switch
2
Message Display
3
FF-6 (programmable)
Default: PROGRAM key
4
TALK key
900 MHz UG.book Page 3 Wednesday, June 13, 2001 12:42 PM
Understanding Your Telephone
Number
Feature
5
Numeric Keypad
6
FF-2 (programmable)
7
FF-1 (programmable)
8
Microphone
9
Headset Jack
10
FF-5 (programmable)
Default: AUTO key
11
HOLD key
12
REDIAL key
13
CHANNEL key
14
FF-3 (programmable)
15
FF-4 (programmable)
16
Volume (R/VOL) key
17
Mute (MUTE) key
900 MHz Cordless Telephone User Guide
3
900 MHz UG.book Page 4 Wednesday, June 13, 2001 12:42 PM
Understanding Your Telephone
HANDSET OVERVIEW
The 900 MHz handset has a two-line LCD display.
Each line displays up to 16 alphanumeric characters.
The display can also show up to four icons:
(Talk, Ringer Off,
Battery Low, and
Message)
Handset Modes
Your handset operates primarily in these modes:
Standby, Talk, or Programming.
When you place a call, receive a call, or when you
are in a converstation, the handset is in Talk mode
and the Talk icon
is displayed. The Talk
icon blinks when Muting is turned on or during
channel changes.
When you place a call, the handset LCD display
shows the number you are dialing. When receiving
an incoming call, the display shows information
about the calling party such as phone number and
name (if incoming line is equipped with Caller ID).
When you are not receiving a call or dialing, the
handset goes into Standby mode. The display is
blank, unless the 900 Mhz handset or the key
telephone has a call holding.
If either of these conditions occurs, the second line of
the handset display shows the identity of the party on
4
900 MHz UG.book Page 5 Wednesday, June 13, 2001 12:42 PM
Understanding Your Telephone
hold. If the holding call is diconnected, the LCD goes
blank.
For information about programming mode, see
"Programming Your Handset" on page 31.
Ringer Off Indication
The Ringer Off icon
appears if the ringer is
turned off with the R/VOL switch.
Low Battery Warnings
•
Standby mode: Battery Low
icon
appears. A battery low alert tone
sounds once every 15 seconds for three
minutes.
•
Talk mode: The Battery Low icon
appears, and the battery low alert tone sounds
once every three seconds until the conversation
ends. At that time the handset goes to standby
mode.
Message Waiting Indication
The Message icon
message is waiting.
: displayed when a
The handset can show up to 32 characters in the
LCD display. If the message is longer than 32
characters, the message is displayed on two
"pages". The display switches between pages at 1.5
second intervals.
900 MHz Cordless Telephone User Guide
5
900 MHz UG.book Page 6 Wednesday, June 13, 2001 12:42 PM
Understanding Your Telephone
BASE STATION FEATURES
1
5
2
6
4
3
Number
Feature
1
CORDLESS Button
2
CORDLESS LED
3
STATUS LED
4
DESK LED
5
DESK Button
900 MHz UG.book Page 7 Wednesday, June 13, 2001 12:42 PM
Understanding Your Telephone
OPTIONAL HEADSET (VB-44249HS)
The optional Headset provides a “Hands-Free”
Option for the 900 MHz phone. With the Headset
installed, you can use the Belt Clip to carry the
handset, and conduct a conversation using the Head
Set.
To install the optional Headset, open the cover over
the Headset Jack and plug the Headset in.
No other settings are needed.
Operation of the 900 MHz phone using the Headset
is exactly the same as using the handset. However,
you will hear through the Headset earphone, and talk
through the Headset microphone. The handset
earphone and microphone (mouthpiece) are
disconnected when the headset is plugged in.
900 MHz Cordless Telephone User Guide
7
900 MHz UG.book Page 8 Wednesday, June 13, 2001 12:42 PM
Understanding Your Telephone
CHARGING UNIT (EXP9785)
The unique design of your 900 MHz phone allows
you to place the handset in the charging unit with or
without the Belt Clip attached.
The Battery Packs can be recharged either in or out
of the handset.
8
900 MHz UG.book Page 9 Wednesday, June 13, 2001 12:42 PM
Installing the 900 MHz Cordless
Telephone
The Panasonic 900 MHz Cordless phone is installed
with your existing key telephone and DBS series
PBX as shown in the following illustration:
PBX
Base
Station
Handset
Key
Telephone
1. SELECTING THE INSTALLATION LOCATION
The base station can be placed on a desk or tabletop
near a standard 120V AC outlet and telephone line
jack. The base station can also be mounted on a
standard AT&T or GTE wall plate, or directly on a
wall, using the Wall Mount Adapter.
Avoid locations surrounded by metal surfaces. Keep
the base station and handset away from excessive
heat and humidity, and from sources of electrical
noise (motors, transformers, fluorescent lighting, or
computers).
Mount the base station and your key telephone at
least three to four feet apart to avoid noise from the
key telephone speaker. If you are installing multiple
base units, place them at least five feet apart.
900 MHz Cordless Telephone User Guide
9
900 MHz UG.book Page 10 Wednesday, June 13, 2001 12:42 PM
Installing the 900 MHz Cordless Telephone
2. CONNECTING THE TELEPHONE CORDS
The base station for your 900 MHz phone must be
connected to the Panasonic PBX. You can also
connect a Panasonic key phone to the base station.
Caution:
Never install telephone wiring during a lightning
storm.
Never touch uninsulated telephone wires or
terminals unless the telephone line has been
disconnected at the network interface.
Connecting the Base Station to the PBX and
Key Telephone
Key
Telephone
PBX
LINE
OUT
10
LINE
IN
900 MHz UG.book Page 11 Wednesday, June 13, 2001 12:42 PM
Installing the 900 MHz Cordless Telephone
3. APPLYING POWER
IMPORTANT! Route the power cord where it will not
create a trip hazard, or where it could become chafed
and create a fire or other electrical hazards.
3.1 Applying Power to the Base Station
Use only the supplied AC Adapter (EXP9704).
3.2 Applying Power to the Charging Unit
Use only the supplied
AC Adapter (AD970).
900 MHz Cordless Telephone User Guide
11
900 MHz UG.book Page 12 Wednesday, June 13, 2001 12:42 PM
Installing the 900 MHz Cordless Telephone
4. INSTALLING THE HANDSET BATTERY
1. Remove the
battery cover
by pressing
the latch and
sliding the
cover down
and off of the
handset.
2. Slide the
battery down
into the
handset.
3. Place the
cover and
slide the
cover up until
it latches into
the handset.
12
900 MHz UG.book Page 13 Wednesday, June 13, 2001 12:42 PM
Installing the 900 MHz Cordless Telephone
5. CHARGING THE HANDSET BATTERY
(FIRST TIME)
The Rechargeable Nickel-Cadmium Battery must be
fully charged before using your 900 MHz phone for
the first time.
1. Place the handset in the front
slot of the charging unit.
2. Make sure the CHARGE
indicator lights. If the CHARGE
light doesn’t light, check to see
that the AC Adapter is plugged
in, and that the handset is
making good contact with the
charging unit charging contacts.
3. Charge the battery without
interruption for 15-20 hours.
900 MHz Cordless Telephone User Guide
13
900 MHz UG.book Page 14 Wednesday, June 13, 2001 12:42 PM
Installing the 900 MHz Cordless Telephone
6. ATTACHING BELT CLIP TO HANDSET
You can use the belt clip to attach the handset to
your belt or pocket for convenient portability.
1. Locate the belt clip notches on the sides of the
handset, near the top.
2. Slide the belt clip tabs
into the notches.
3. Press firmly until the
belt clip snaps into
place.
4. To remove, simply lift
one side of the belt
clip to pull the tabs
out of the handset
notches.
14
900 MHz UG.book Page 15 Wednesday, June 13, 2001 12:42 PM
Installing the 900 MHz Cordless Telephone
WALL-MOUNTING THE BASE STATION
(OPTIONAL PROCEDURE)
Standard Wall Plate Mounting
You can use this mounting option if you have a
standard AT&T or GTE wall plate connection to the
Panasonic PBX.
1. Slide the Wall Mount
Adapter into the
notches at the top of
the base station.
Rotate the Wall
Mount Adapter down
and snap it into place.
2. Plug the AC Adapter
(EXP9704) into the
base station.
3. Place the AC Adapter
cord inside the molded channel of the Wall
Mount Adapter.
4. Plug a short telephone cord into the LINE IN jack
on the base station. Connect a telephone cord
from a Panasonic key telephone to the LINE
OUT jack. Then place the telephone cord(s)
inside the molded channel(s) on the bottom of
the Wall Mount Adapter.
900 MHz Cordless Telephone User Guide
15
900 MHz UG.book Page 16 Wednesday, June 13, 2001 12:42 PM
Installing the 900 MHz Cordless Telephone
5. Plug the other end
of the short
telephone cord
(from the LINE IN
jack) into the
modular wall jack.
6. Place the base
station on the posts
of the wall plate and
push down until it is
firmly seated.
7. Plug the AC
Adapter into a
standard 120V AC
wall outlet.
Note: You can plug the base station into an AC outlet
controlled by a wall switch. This is especially
convenient for base stations that are not easily
accessible.
To avoid accidentally turning off the base station, do
not use a wall switch that controls lights or other
equipment.
16
900 MHz UG.book Page 17 Wednesday, June 13, 2001 12:42 PM
Installing the 900 MHz Cordless Telephone
Direct Wall Mounting
If you do not have a standard wall plate, you can
mount the 900 MHz Cordless Telephone base
station directly on a wall. Before doing so, consider
the following:
• Select a location away from electrical cables,
pipes, or other items behind the mounting
location that could cause a hazard when screws
are inserted into the wall.
• Ensure that the wall material is capable of
supporting the weight of the base station.
• Use #10 screws with anchoring devices suitable
for the wall material at the mounting point.
1. Insert two mounting screws in the
wall, 3-15/16 inches apart. Allow
about 3/16 of an inch between the
wall and screw heads for mounting
the base station.
2. Perform steps 1 to 3 of "Standard
Wall Plate Mounting" on page
15.
3. Plug a telephone cord into the
LINE IN jack on the base station.
Connect the other end to the wall
jack leading to the Panasonic PBX.
4. Plug a telephone cord from a Panasonic key
telephone into the LINE OUT jack on the base
station.
900 MHz Cordless Telephone User Guide
17
900 MHz UG.book Page 18 Wednesday, June 13, 2001 12:42 PM
Installing the 900 MHz Cordless Telephone
5. Place the telephone cord(s) inside the molded
channel(s) on the bottom of the Wall Mount
Adapter.
6. Place the base station on the posts of the wall
screws and push down until firmly seated.
7. Plug the AC Adapter into a standard 120V AC
wall outlet.
WALL-MOUNTING THE CHARGING UNIT
(OPTIONAL PROCEDURE)
The charging unit is also designed to be wallmounted. Before mounting your charging unit,
consider the following:
• Select a location away from electrical cables,
pipes, or other items behind the mounting
location that could cause a hazard when
inserting screws into the wall.
• Make sure the wall material is capable of
supporting the weight of the charging unit.
• Use #10 screws with anchoring devices suitable
for the wall material at the mounting point.
18
900 MHz UG.book Page 19 Wednesday, June 13, 2001 12:42 PM
Installing the 900 MHz Cordless Telephone
1. Insert two mounting
screws 1-9/10 inches
apart. Allow about
3/16 of an inch
between the wall and
screw heads for
mounting the phone.
2. Plug the AC Adapter into the charging unit. Wrap
the AC Adapter cord around the strain relief.
3. Place the charging unit on the posts of the wall
screws and push down until firmly seated.
Strain
Relief
4. Plug the AC Adapter into a standard 120V AC
wall outlet.
900 MHz Cordless Telephone User Guide
19
900 MHz UG.book Page 20 Wednesday, June 13, 2001 12:42 PM
Installing the 900 MHz Cordless Telephone
20
900 MHz UG.book Page 21 Wednesday, June 13, 2001 12:42 PM
Using Your 900 MHz Cordless Telephone
BEFORE YOU BEGIN
•
•
•
•
Ensure that your 900 MHz phone has been
installed as described in "Installing the 900 MHz
Cordless Telephone" on page 9.
Remove the handset from the charging unit
before using the handset.
Raise the base
station antenna to
the vertical position.
Ensure that the
Cordless
LED
"CORDLESS" LED
on the base station
is lit.
Note: When you pick up the
ACQUIRING
LINK
handset and press TALK, you
may see this message
momentarily:
This message disappears when the base station
obtains an open line from the PBX.
PLACING A CALL
1. Press TALK. You will hear a dial tone.
2. Enter the number you are calling.
3. To end the call, press TALK.
900 MHz Cordless Telephone User Guide
21
900 MHz UG.book Page 22 Wednesday, June 13, 2001 12:42 PM
Using Your 900 MHz Cordless Telephone
ANSWERING A CALL
If the handset is out of the charging unit:
• Press TALK or any key on the numeric keypad.
If the handset is in the charging unit:
1. Remove the handset from the charging unit.
(The AutoTalk feature allows you to answer the
call immediately.)
2. When you finish the call, place the handset back
in the charging unit. (The AutoStandby feature
automatically ends the call.)
ADJUSTING THE HEADSET/MICROPHONE
VOLUME
When in Talk mode (during a
coversation):
Press the R/VOL key on right
side of handset to select
maximum, high, medium, or
low earpiece volume level.
22
900 MHz UG.book Page 23 Wednesday, June 13, 2001 12:42 PM
Using Your 900 MHz Cordless Telephone
MUTING THE HANDSET MICROPHONE
When in Talk mode (during a
coversation):
Press the Mute key on right
side of the handset. The called
party can no longer hear you
voice or any other sounds
near the handset. The Talk
icon
blinks.
To turn off mute, press the Mute key again. Mute is
also cancelled when you press the Talk button to end
the conversation.
ADJUSTING THE RINGER VOLUME
When in Standby mode:
Rapidly press the R/VOL key on right side of
handset to select one of the following ringer volume
settings:
Ringer Volume
Screen Display
Ring type A (High)
Ring Type A
High
Ring type A (Low)
Ring Type A
Low
900 MHz Cordless Telephone User Guide
23
900 MHz UG.book Page 24 Wednesday, June 13, 2001 12:42 PM
Using Your 900 MHz Cordless Telephone
24
Ring type B (High)
Ring Type B
High
Ring type B (Low)
Ring Type B
Low
Ring type C (High)
Ring Type C
High
Ring type C (Low)
Ring Type C
Low
Ring Off (Vibrate)
Ring Off
900 MHz UG.book Page 25 Wednesday, June 13, 2001 12:42 PM
Using Your 900 MHz Cordless Telephone
SWITCHING CALLS BETWEEN TELEPHONES
The 900 MHz cordless telephone base station allows
you to switch calls between the 900 MHz handset
and the key telephone.
Caution: Do not press the buttons labeled "Desk"
or "Cordless" on the base station when
receiving a call. Doing so may
disconnect the call.
Switching a call from 900 MHz handset to key
telephone
To switch during an active call:
1. Press HOLD on the 900 MHz handset.
2. Press TALK on the 900 MHz handset.
3. Press the DESK button on the base station.
4. Pick up the receiver on the key telephone.
Note:
•
When the base station is operating with the key
telephone, and you press the 900 MHz handset
TALK button, there is no handset tone. The handset displays LINE IN USE for 5 seconds.
•
If the PBX is powered off and on while the base
station is in use, it may be necessary to reset the
base station. You can do so by powering the base
station off and on.
900 MHz Cordless Telephone User Guide
25
900 MHz UG.book Page 26 Wednesday, June 13, 2001 12:42 PM
Using Your 900 MHz Cordless Telephone
Switching a call from key telephone to 900 MHz
handset
To switch a call from the key telephone to the 900
MHz handset during an active call:
1. Press HOLD on the key telephone.
2. Press the CORDLESS button on the base
station.
3. Press TALK on the 900 MHz handset.
Note:
•
If you are on an active call on the key telephone
and you press the CORDLESS button on the
base station without first pressing the HOLD button on the key telephone, your call will be disconnected.
•
If you are on an active call on the 900 MHz handset and you press the desk button on the base station without first pressing the HOLD button on the
key telephone, the transfer between phones is
delayed until the call is completed. (Avoid this
practice.)
•
If the TALK button on the handset is pressed while
the base station is switching from Desk mode to
Cordless mode, the base station switches back to
Desk mode.
SELECTING CHANNELS
To change the active channel, press the CHANNEL
button on the handset.
26
900 MHz UG.book Page 27 Wednesday, June 13, 2001 12:42 PM
Using Your 900 MHz Cordless Telephone
LOW BATTERY INDICATOR
When the battery in the
handset is low and needs to be
charged, you will see a
message on the display.
On a Call
In Standby Mode
All keys and functions are None of the buttons
available.
operate.
Handset beeps once
every 3 seconds until
conversation ends.
Handset beeps once
every 15 seconds for
3 minutes, then stops.
Complete your call as
quickly as possible.
Cannot make call and
receive a call.
Replace battery within 20 Replace battery
seconds to continue call. before making a call.
Return the handset to the charging unit for charging
or replace the handset battery with another charged
battery.
900 MHz Cordless Telephone User Guide
27
900 MHz UG.book Page 28 Wednesday, June 13, 2001 12:42 PM
Using Your 900 MHz Cordless Telephone
RECHARGING THE HANDSET BATTERY
1. Place the handset in the front
slot of the charging unit.
2. Make sure the CHARGE
indicator lights. If the CHARGE
light doesn’t light, check to see
that the AC Adapter is plugged
in, and that the handset is
making good contact with the
charging unit charging contacts.
3. Charge the battery without
interruption for 5 hours.
CLEANING HANDSET & CHARGING UNIT
CONTACTS
To maintain a good charge, it
is important to clean all
charging contacts on the
handset and charging unit
about once a month. Use a
pencil eraser or other contact
cleaner. Do not use any
liquids or solvents.
28
900 MHz UG.book Page 29 Wednesday, June 13, 2001 12:42 PM
Using Your 900 MHz Cordless Telephone
CHARGING A SPARE BATTERY
The Charger Unit of your 900 MHz phone is
equipped to charge a spare battery with or without
the handset in the front slot.
1. Slide the (optional) spare
battery into the second slot in the
charging unit until the retaining
clip snaps over the top of the
battery.
2. Make sure the BATT CHARGE
indicator lights. If the BATT
CHARGE indicator doesn’t light,
check to see that the AC Adapter
is plugged in, and that the battery
is making good contact with the charging unit
charging contacts.
Note: When charging a battery for the first time,
charge it without interruption for 15-20 hours.
When recharging a battery, charge it without
interruption for 5 hours.
3. When charging is complete, press back on the
latch and remove the battery for use. Or, if you don’t
need the battery immediately, leave it in the charging
compartment; it will not overcharge.
900 MHz Cordless Telephone User Guide
29
900 MHz UG.book Page 30 Wednesday, June 13, 2001 12:42 PM
Using Your 900 MHz Cordless Telephone
30
900 MHz UG.book Page 31 Wednesday, June 13, 2001 12:42 PM
Programming Your Handset
The 900 MHz handset has 6 programmable function
keys (F1 to F6).
The F1 to F4 keys are back lighted, so these keys
can be programmed as Feature Function (FF) keys.
F2
F1
F5 F6
F3
F4
Note: When used with the DBS 96/72/90 and
the DBS 824, LED indications of calls are only
available if the handset and desk telephone FF
Keys are programmed as CO keys.
Note: For detailed programming instructions,
see your key telephone user manual. A largedisplay key telephone is recommended for
programming.
1. To enter the 900 MHz handset programming
mode from standby mode, press and hold the
and # buttons. While holding those buttons,
press the TALK button. You will hear a beep
*
900 MHz Cordless Telephone User Guide
31
900 MHz UG.book Page 32 Wednesday, June 13, 2001 12:42 PM
Programming Your Handset
confirming that you are in programming mode.
By default, the F1 key will be selected.
2. Choose the key you want to program. Scroll
forward through the key selections by pressing
the R/VOL key, or move backwards by pressing
the MUTE key.
3. Press the "0" key to confirm your F-key
selection.
4. Select the program function to assign to the
F-key by pressing the R/VOL or MUTE key to
move through the selections.
Program
Function
One Touch
(OTCH) keys
1-10
Location
Display/Complete
message
Anywhere
(F1-F6)
OTCH xx(xx=01-10)
FLASH key
FLASH key
CONF key
CONF key
PROG key
AUTO key
REDIAL key
32
PROG key
Default:
F5
AUTO key
REDIAL key
(System Redial)
Soft-key (mode)
MODE key
Soft-key (<EXEC)
EXEC>key
Soft-key (End)
END key
Soft-key (<EXEC)
<EXEC key
No operation
NO OPERATION
900 MHz UG.book Page 33 Wednesday, June 13, 2001 12:42 PM
Programming Your Handset
5. Press the "0" key to confirm your function
selection. The handset will display COMPLETE
next to the assigned key number and the
function assigned to that key.
You can now program the next F-key.
Note: To exit the programming mode at any
time, press the TALK key. This returns the
phone to Standby mode.
Note: You must press the TALK button on the
handset to scroll through System Speed Dial
(SSD) and Personal Speed Dial ( PSD)
addresses using the * and # keys.
The TALK button must also be pressed for the
programmed FF keys to function (except as
described in the following Note.)
Note: When Function Keys are programmed as
the MCO key, CO key, DN key, or BLF key, they
can be used without first pressing the TALK
button.
900 MHz Cordless Telephone User Guide
33
900 MHz UG.book Page 34 Wednesday, June 13, 2001 12:42 PM
Programming Your Handset
34
900 MHz UG.book Page 35 Wednesday, June 13, 2001 12:42 PM
Troubleshooting
If your 900 MHz cordless telephone is not performing
to your expectations, try these steps. If you are still
unable to resolve the problems, contact your PBX
Administrator.
Note: Do not attempt to service this unit
yourself. All service must be performed by
qualified service personnel.
Problem
Cause/Corrective Action
•
Warning tone and
NO SERVICE
message
•
•
•
Warning tone and
blank display
After Talk button is
pressed, handset
displays blank
screen
Make sure the base station
antenna is fully vertical.
Move closer to the base
station.
Check for LOW BATT
warning.
Select a different channel
on your handset
•
Select a different channel
on your handset.
•
Make sure the base station
power is on.
Make sure the base station
is connected to the PBX.
Battery may be weak.
Charge the battery without
interruption for 5 hours.
•
•
900 MHz Cordless Telephone User Guide
35
900 MHz UG.book Page 36 Wednesday, June 13, 2001 12:42 PM
Troubleshooting
Problem
Cause/Corrective Action
•
•
Charge light won’t
come on when
headset is placed in
charging unit.
•
•
Conversation
interrupted by other
conversations or
excessive static
Conversation is
interrupted
frequently.
•
Select a different channel
on your handset.
•
Make sure the base
antenna is fully vertical.
Move closer to the base.
Check for LOW BATT
warning.
•
•
•
Handset does not
ring
•
•
•
36
Make sure the AC adapter
is plugged into the base
station and wall outlet.
Make sure handset is
properly seated in charging
unit.
Make sure the battery is
properly placed in the
handset.
Make sure the charging
contacts on the handset
and charging unit are clean.
Battery may be weak.
Charge the battery without
interruption for 5 hours.
Make sure the base station
antenna is fully vertical.
The handset may be too far
away from the base station.
Ensure the ringer ON/OFF
switch is in the ON position.
900 MHz UG.book Page 37 Wednesday, June 13, 2001 12:42 PM
Service Parts and Accessories
SERVICE PARTS
AC Adapter for
Charging Unit
AD970
AC Adapter for
Base Station
EXP9704
Belt Clip
(Assembled)
EXP9702
Charging Unit
without AC Adapter
EXP9785
800 mAH DC 3.6V
Rechargeable Battery
BT2499
Wall Mount Adapter
EXP9660
900 MHz Cordless Telephone User Guide
37
900 MHz UG.book Page 38 Wednesday, June 13, 2001 12:42 PM
Service Parts and Accessories
OPTIONAL ACCESSORIES
Leather Case
VB-44249ALC
38
Headset
VB-44249HS
900 MHz UG.book Page 39 Wednesday, June 13, 2001 12:42 PM
Service Parts and Accessories
900 MHz Cordless Telephone User Guide
39
900 MHz UG.book Page 40 Wednesday, June 13, 2001 12:42 PM
PanasonicTelecommunication Systems Company
Division of Matsushita Electric Corporation of America
Business Telephone Systems Division
Headquarters
Two Panasonic Way
Secaucus, NJ 07094
(201) 392-4220
www.panasonic.com/dbs
06/2001
Printed in USA
P/N 545X05201