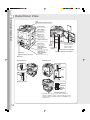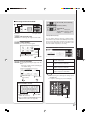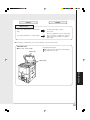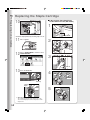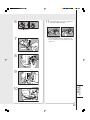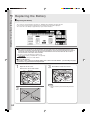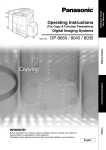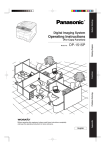
1
Product
Overview
(For Basic Operations)
Digital Imaging Systems
DP-8060 / 8045 / 8035
Before operating this machine, please carefully read this manual, and keep this
documentation in a safe place for future reference.
(Illustration shows optional accessories that may not be installed on your machine.)
English
Appendix
Replacing
Consumables
Problem Solving
Facsimile /
Internet Fax/Email
Network
Scanning
Printing
Model No.
Copying
Operating Instructions
Operating Instructions
Product Overview
The following Operating Instruction manuals are included with this machine. Please refer to the appropriate manual
and keep all manuals in a safe place for future reference. If you lose a manual, contact an authorized Panasonic
dealer.
Operating Instructions (For Setting Up)
This manual contains essential information for
setting up the machine.
Operating Instructions
(For Basic Operations)
Accessories
This manual contains essential information for
proper operation of the machine.
It describes basic Copy, Print, Network Scan,
Facsimile/Internet Fax/Email, and other functions.
Operating Instructions
Adobe Reader 5.0 or newer is required and
must be installed to read the Operating
Instructions.
Unauthorized copying and distribution is a
violation of law.
Panasonic Communications Co., Ltd.
Digital Imaging Company
Microsoft, Windows, Windows NT and Windows Server are either registered trademarks or trademarks
of Microsoft Corporation in the United States and/or other countries.
Adobe, the Adobe logo, and Reader are either registered trademarks or trademarks of
Adobe Systems Incorporated in the United States and/or other countries.
2005 Panasonic Communications Co., Ltd. All Right Reserved.
Made in Japan
PJJXC0110ZB
Operating Instructions CD
Contains manuals with detailed information for Copy
& Function Parameters, Facsimile/Internet Fax/Email
Functions, and User Authentication.
Document Management System CD
Adobe Reader 5.0 or newer is required and
must be installed to read the Operating
Instructions.
Unauthorized copying and distribution is a
violation of law.
Panasonic Communications Co., Ltd.
Digital Imaging Company
PJJXC0097ZB
Operating Instructions CD
Document Management System CD
Copy Function
Print Function
Describes how to make a copy with
creative features.
Describes how to print, change default
printer settings, or describes the
course of action to take when a
problem message appears, etc.
Function Parameters
Describes how to change the default
settings of each function using the
Control Panel of the machine.
Facsimile and Internet Fax/Email
Function
(The Facsimile function is available when
optional Fax Communication Board (DAFG600) is installed.)
Describes how to send/receive a Facsimile/
Internet Fax/Email, or describes the course
of action to take when a trouble message
appears, etc.
User Authentication
Describes how to enable, and use the
user authentication function.
2
Contains the Application Software, and manuals
with detailed information for the Print function, and
Application software.
Application Software
Describes how to use the application
software.
Ex: Quick Image Navigator, Network
Scanner, Utilities (Network Status
Monitor, Address Book Editor,
Device Configuration Editor)
Memo
3
Product
Overview
Table of Contents
Product Overview
Product Overview
■
■
■
■
■
■
■
Operating Instructions ..................................
Safety Information .......................................
Precautions ..................................................
Security Suggestions for Key Operators ......
Outer/Inner View ..........................................
Control Panel ...............................................
Touch Panel Display .....................................
● Copy Function ..........................................
Network Scanning
2
6
9
12
14
15
16
17
● Fax (Option)/Internet Fax/Email Functions .... 18
● Scan/File Functions ................................. 19
● Print Function ........................................... 20
■ Network Scanner .......................................... 25
● Start up the Communications Utility ......... 25
● Scanning the Document to Your PC .......... 26
● Selecting the Scanner Mode ..................... 27
Facsimile /
Internet Fax/Email
■ Address Book (Facsimile) ............................ 28
● Creating an Address Book ........................ 28
Copying
■ Placing Originals (Copy) ............................... 21
● How to Place Originals ............................. 21
■ Basic Copy Operation .................................. 22
● Making a Copy ......................................... 22
■ Address Book (Internet Fax/Email) .............. 30
● Creating an Address Book ........................ 30
■ Placing Originals
(Facsimile/Internet Fax/Email) ...................... 32
● How to Place Originals ............................. 32
■ Sending Originals (Facsimile) ....................... 33
● Sending Scanned data via Facsimile ........ 33
■ Sending Originals (Internet Fax/Email) ......... 35
● Sending Scanned data via Internet
Fax/Email ................................................. 35
Printing
■ Printing from PC .......................................... 24
● Printing from Windows Applications .......... 24
4
■ Receiving an Email from POP Server .......... 37
● Receiving Email Automatically ................. 37
● Receiving Email Manually ........................ 37
Product
Overview
Problem Solving
Appendix
■ Troubleshooting ............................................ 38
● Machine Care ........................................... 39
■ Specifications .............................................. 65
■ User (U) / Error Codes .................................. 40
● User Error Codes (U Codes) ..................... 40
● i-ADF (Standard) ....................................... 66
■ Removing Misfed Paper ............................... 41
● Locations/User Error Codes (J Codes) ...... 41
● System Console 1 (DA-DS603) ................. 66
● System Console (Option) (A) .................... 42
● For G3 Facsimile (Option) [DA-FG600] ..... 67
● DP-8060/8045/8035 (Copier) ..................... 65
● Printer Unit ............................................... 66
● System Console 2 (DA-DS604) ................. 66
● Paper Entry Area (B) ................................ 43
● For Internet Fax (Email) [Standard] ........... 67
● Paper Transport Area (C) .......................... 44
● 3000-Sheet Tray (LCT) (DA-MA301) .......... 68
● Paper Exit/Fuser Area (D) ......................... 45
● Automatic Duplex Unit (ADU) (E) .............. 46
● Letter-R/Legal Size Adaptor for
3000-Sheet Tray (LCT) (DA-TK31) ............. 68
● Reverse Area (F) ...................................... 47
● 2-Bin Finisher (DA-FS600) ........................ 68
● 3000-Sheet Tray (LCT) (Option) (G) ........... 47
● 2-Bin Saddle-Stitch Finisher (DA-FS605) ... 69
● 2-Bin Finisher (Option) (H)
(DA-FS600/605) ........................................ 48
● Punch Unit (DA-SP31)
[for DA-FS600/605] ................................... 69
● 2-Bin Finisher (Option) (H) (DA-FS330) ..... 49
● 2-Bin Finisher (DA-FS330) ........................ 69
● 1-Bin Saddle-Stitch Finisher (Option) (H) ... 50
● 1-Bin Saddle-Stitch Finisher
(DA-FS355A) ............................................ 70
● 2-Bin Saddle-Stitch Finisher only
(Option) (I) .................................................. 51
● 1-Bin Saddle-Stitch Finisher
(Option) (I/F) ............................................. 52
● i-ADF (J) ................................................... 53
● Punch Unit (DA-SP41) [for DA-FS355A] ... 70
■
■
■
■
■
Option and Supplies .....................................
Multi-Tasking Job Table ................................
FCC Notice ..................................................
Index ...........................................................
Glossary ......................................................
71
72
73
76
78
Replacing Consumables
■
■
■
■
■
Adding Paper ...............................................
Replacing Toner Bottle ..................................
Replacing the Staple Cartridge .....................
Dispose of the Punch Hole Residue .............
Replacing the Battery ...................................
54
56
57
62
64
5
Safety Information
Product Overview
For Your Safety
To prevent severe injury and loss of life, read this section carefully before using the Panasonic DP-8060/8045/8035
to ensure proper, and safe operation of your machine.
■ This section explains the Warnings and Cautions used in this Operating Instructions manual.
WARNING Denotes a potential hazard that could result in serious injury, or death.
CAUTION
Denotes hazards that could result in minor injury, or damage to the machine.
■ This section also explains the graphic symbols used in this Operating Instructions manual.
These symbols are used to alert operators to a specific operating procedure that must not be
performed.
These symbols are used to alert operators to a specific operating procedure that must be
emphasized in order to operate the machine safely.
This symbol is used to alert operators to a heated surface that may cause burns and requires
close attention.
WARNING
Power and Ground Connection
Cautions
Ensure that the plug connection is free of dust.
In a damp environment, a contaminated
connector can draw a significant amount of
current that can generate heat, and eventually
cause fire over an extended period of time.
Always use the power cord provided with your
machine. When an extension power cord is
required, always use a properly rated cord.
● 120 V/15 A
If you use a cord with an unspecified current
rating, the machine, or plug may emit smoke,
or become hot to the touch externally.
Do not attempt to rework, pull, bend, chafe, or
otherwise damage the power cord. Do not
place a heavy object on the cord. A damaged
cord can cause fire, or electric shocks.
Never touch a power cord with wet hands.
Danger of electric shock exists.
If the power cord is broken, or insulated wires
are exposed, contact your Service Provider for
a replacement. Using a damaged cord can
cause fire, or electric shocks.
Stop operation immediately if your machine
produces smoke, excessive heat, unusual
noise or smell, or if water is spilt onto the
machine. These conditions can cause fire.
Immediately switch Off and unplug the machine,
and contact your Service Provider.
6
Do not disconnect, or reconnect the machine
while it is on. Disconnecting a live connector
can deform the plug and cause fire.
When disconnecting the machine, grasp the plug
instead of the cord. Forcibly pulling on a cord
can damage it, and cause fire, or electric shock.
When the machine is not used over an extended
period of time, switch it Off and unplug it. If an
unused machine is left connected to a power
source for a long period, degraded insulation can
cause electric shocks, current leakage or fire.
Be sure to switch Off and unplug the machine before
accessing the interior of the machine for cleaning,
maintenance or fault clearance. Access to a live
machine’s interior can cause electric shock.
Be sure to switch Off and unplug the machine
before accessing the interior of the machine
for accessing interface cables, maintenance
or fault clearance. Access to a live machine’s
interior can cause electric shock.
Once a month, unplug the machine and check the
power cord for the following. If you notice any unusual
condition, contact your Service Provider.
● The power cord is plugged firmly into the
receptacle.
● The plug is not excessively heated, rusted, or bent.
● The plug and receptacle are free of dust.
● The cord is not cracked or frayed.
If accessing the inner components of the machine to
clear misfed paper, etc., exercise care not to touch
heated areas, or you may get burned.
Product
Overview
Operating Safeguards
Do not touch areas where these caution labels
are attached to, the surface may be very hot
and may cause severe burns.
Do not place any liquid container such as a
vase or coffee cup on the machine. Spilt water
can cause fire or shock hazard.
Do not place any metal parts such as staples
or clips on the machine. If metal and flammable
parts get into the machine, they can short-circuit
internal components, and cause fire or electric
shocks.
If debris (metal or liquid) gets into the machine,
switch Off and unplug the machine. Contact
your Service Provider. Operating a debriscontaminated machine can cause fire or electric
shock.
Never open or remove machine covers that
are secured with screws unless specifically
instructed in the “Operating Instructions”. A highvoltage component can cause electric shocks.
Do not try to alter the machine configuration or
modify any parts. An unauthorized modification
can cause smoke or fire.
Consumable Safeguards
Never throw a toner cartridge into an open
flame. Toner remaining in the cartridge can
cause an explosion and you can get burnt.
Never throw toner or a waste toner container
or a toner cartridge into an open flame. It can
cause an explosion and you can get burnt.
Keep button batteries/stamp out of the reach of
children. If a button battery/stamp is swallowed
accidentally, get medical treatment immediately.
CAUTION
Installation and Relocation
Cautions
Do not place the machine near heaters or
volatile, flammable, or combustible materials
such as curtains that may catch fire.
Do not place the machine in a hot, humid, dusty
or poorly ventilated environment. Prolonged
exposure to these adverse conditions can
cause fire or electric shocks.
Place the machine on a level and sturdy surface
that can withstand a weight of 302 lb (DP-8060/
8045) / 295 lb (DP-8035). If tilted, the machine
may tip-over and cause injuries.
When relocating the machine, contact your
Service Provider.
When moving the machine, be sure to unplug
the power cord from the outlet. If the machine is
moved with the power cord attached, it can
cause damage to the cord which could result
in fire or electric shock.
Operating Safeguards
Do not place a magnet near the safety switch
of the machine. A magnet can activate the
machine accidentally, resulting in injuries.
Do not use a highly flammable spray or solvent
near the machine. It can cause fire.
When copying a thick document, do not use
excessive force to press it against the platen
glass. The glass may break and cause injuries.
Never touch a labelled area found on or near
the heat roller. You can get burnt. If a sheet of
paper is wrapped around the heat roller, do
not try to remove it yourself to avoid injuries or
burns. Switch Off the machine immediately, and
contact your Service Provider.
Do not use conductive paper, e.g. folding paper,
carbonic paper and coated paper.When a paper jam
occurs, they can cause a short circuit and fire.
Do not place any heavy objects on the machine.
An off-balance machine can tip-over or the heavy
object can fall, causing damage and/or injuries.
Keep the room ventilated when using the
machine for an extended period of time to
minimize the ozone density in the air.
When copying with the document cover open,
do not look directly at the exposure lamp. Direct
eye exposure can cause eye fatigue or damage.
Pull out paper trays slowly to prevent injuries.
When removing jammed paper, make sure that
no pieces of torn paper are left in the machine.
A piece of paper remaining in the machine can
cause fire. If a sheet of paper is wrapped around
the heat roller, or when clearing a jammed
paper that is difficult or impossible to see, do
not try to remove it by yourself. Doing so can
cause injuries or burns. Switch Off the machine
immediately, and contact your Service Provider.
Others
■ When clearing a paper jam or other fault, follow the
appropriate procedure given in the Operating Instructions.
7
Safety Information
Product Overview
For Your Safety
CAUTION
Consumable Safeguards
Others
Never heat the drum cartridge, or scratch its
surface. A heated or scratched drum can be
hazardous to your health.
Be sure to use the specified type of batteries only.
Ensure that batteries are installed with correct
polarity. Incorrectly installed batteries can burst
or leak, resulting in spillage or injuries.
■ The machine has a built-in circuit for protection against
lightning-induced surge current. If lightning strikes in
your neighborhood, maintain ample distance from the
machine, and do not touch the machine until the
lightning has stopped.
■ If you notice flickering or distorted images or noises on
your audio-visual units, your machine may be causing
radio interference. Switch it Off and if the interference
disappears, the machine is the cause of the radio
interference. Perform the following procedure until the
interference is corrected.
● Move the machine and the TV and/or radio away
from each other.
● Reposition or reorient the machine and the TV and/
or radio.
● Unplug the machine, TV and/or radio, and replug
them into outlets that operate on different circuits.
● Reorient the TV and/or radio antennas and cables
until the interference stops. For an outdoor antenna,
ask your local electrician for support.
● Use a coaxial cable antenna.
CAUTION
Denotes hazards that could result in minor injury or damage to the machine.
● TO REDUCE THE RISK OF SHOCK OR FIRE, USE ONLY NO. 26 AWG OR LARGER TELEPHONE LINE CABLE.
● DISCONNECT ALL POWER TO THE MACHINE BEFORE COVER(S) ARE REMOVED. REPLACE THE COVER(S)
BEFORE THE MACHINE IS RE-ENERGIZED.
IMPORTANT SAFETY INSTRUCTIONS
When using your telephone equipment, basic safety precautions should always be followed to reduce the risk of
fire, electric shock and injury to persons, including the following:
● DO NOT USE THIS PRODUCT NEAR WATER, FOR EXAMPLE, NEAR A BATH TUB, WASH BOWL, KITCHEN SINK
OR LAUNDRY TUB, IN A WET BASEMENT OR NEAR A SWIMMING POOL.
● AVOID USING A TELEPHONE (OTHER THAN A CORDLESS TYPE) DURING AN ELECTRICAL STORM. THERE
MAY BE A REMOTE RISK OF ELECTRIC SHOCK FROM LIGHTNING.
● DO NOT USE THE TELEPHONE TO REPORT A GAS LEAK IN THE VICINITY OF THE LEAK.
● USE ONLY THE POWER CORD AND BATTERIES INDICATED IN THIS MANUAL. DO NOT DISPOSE OF
BATTERIES IN A FIRE. THEY MAY EXPLODE. CHECK WITH LOCAL CODES FOR POSSIBLE SPECIAL
DISPOSAL INSTRUCTIONS. SAVE THESE INSTRUCTIONS.
SAVE THESE INSTRUCTIONS.
8
Product
Overview
Precautions
Precautions
■ Laser Safety
LASER SAFETY
This unit employs a laser. Only qualified service personnel should attempt
to service this device due to possible eye injury.
CAUTION:
USE OF CONTROLS, ADJUSTMENTS OR PERFORMANCE
PROCEDURES OTHER THAN THOSE SPECIFIED HEREIN MAY RESULT
IN HAZARDOUS RADIATION EXPOSURE.
■ Caution Label
Complies with FDA radiation
performance standards, 21 CFR
Subchapter J
Manufacturer's Name and Address
Factory ID
(For DP-8060/8045)
(For DP-8035)
9
Precautions
Product Overview
For Your Safety
Illegal Copies
■ The maximum power consumption is 1.45 kW.
A properly wired (grounded), dedicated, 15 A, 120 V
AC outlet is required. Do not use an extension cord.
The power cord on this machine must be used to
disconnect the main power.
Please ensure that the machine is installed near a wall
outlet and is easily accessible.
It is unlawful to make copies of certain documents.
Caution Note: Unplug the power cord from the wall outlet
before removing covers.
Supplies
■ Store the Toner Cartridge and paper in cool areas with
low humidity.
● Use high quality 16 - 24 lb (Sheet Bypass: 15 - 35 lb)
paper.
● For optimum performance, it is recommended that
only Panasonic Brand supplies are used in the
machine.
● Certain types of transparency film may not be
compatible and may damage your machine.
Consult with an authorized Panasonic dealer for
advice regarding non-standard paper types.
(Panasonic has tested “3M PP2500” transparency
film and found it to be compatible.)
● Panasonic recommends using high quality 16 - 24
lb paper, using an inferior paper may cause
excessive paper curl, requiring you to empty out the
Output Tray more often to avoid paper jams.
■ Use of other than genuine Panasonic supplies can
damage the machine. This may void the warranty of the
machine and supplies. Be sure to use only genuine
Panasonic Toner designed for the machine.
Installation
■ The machine should not be installed in areas with the
following conditions:
● Extremely high or low temperature and humidity.
Ambient conditions Temperature: 50-86 °F
Relative humidity: 30-80 %
● Where temperature and humidity can change rapidly,
causing condensation.
● Direct exposure to sunlight.
● Directly in the air conditioning flow.
● In areas of high dust concentration.
● In areas of poor ventilation.
● In areas with chemical fume concentration.
● In areas with extreme vibration.
● With unstable or uneven conditions (floors, etc.).
10
Copying certain documents may be illegal in your country.
Penalties of fines and/or imprisonment may be imposed
on those found guilty. The following are examples of items
that may be illegal to copy in your country.
● Bank notes and checks
● Bank and government bonds and securities
● Passports and identification cards
● Copyright material or trademarks without the consent
of the owner
● Postage stamps and other negotiable instruments
This list is not inclusive and no liability is assumed for
either its completeness or accuracy.
In case of doubt, contact your legal counsel.
Notice:
Install your machine near a supervised area to prevent
illegal copies from being made.
Product
Overview
Ventilation
■ The machine should be installed in a well-ventilated
area to minimize the ozone density in the air.
Handling
■ Do not turn the Power Switch Off, or open the Front
Cover during copying/printing.
■ Sleep/Shutdown Mode Notice
● The following functions will not work if the Sleep/Off
Mode setting is set to the Shutdown mode.
When using any of the following functions, we
recommend that you leave the Sleep/Off
Mode in the initial factory default setting (Sleep
mode).
- Printer Function (Local Parallel Port and Network
Connections)
- Internet Fax/Email Function
- Facsimile Function (Option)
■ Key Operator Password
● The Initial Machine Modes can be checked or
changed with the Function Modes, however, these
modes require the Key Operator Password.
■ Maximum Copies Limitation
After setting the maximum allowed number of copies
for each department, consult with your Key Operator
when the total copy count reaches the designated limit
and the “DEPT.MAXIMUM COPIES HAS BEEN
REACHED” message appears on the LCD.
■ Power Switch
If you are not going to
use the copier for long
periods of time, turn OFF
the Power Switch on the
Left Side of the machine
and wait 10 seconds
then, turn OFF the Main
Power Switch on the
Rear Side of the machine.
■ Auto Reset Time
As the initial setting for Auto Reset Time is 1 minute, the
selected operation mode goes back to default operation
mode after 1 minute. If you wish to change the Auto
Reset Time, consult with your Key Operator.
■ User Authentication
The User Authentication works for this machine under
the management of the Windows Server. As a result,
users must be authenticated before they can use the
functions of the machine (copying, faxing, scanning,
and printing). The supported authentication protocol is
NTLM v2.
Users
- Users login to this machine using their Windows
account (user name and password).
System Administrator
- The system administrator can manage user account
by using Windows Server.
- User authentication can be set independently for
each function (copying, faxing, scanning, and
printing).
■ Dept. (Departmental) Code
When the Department Counter function is set up, the
Dept. (Department) Code input screen is displayed on
the LCD Display. A registered Department Code (1 to
8-digit) is required to gain access to each secured
function, or the secured Copy/Fax/Scanner function(s)
cannot be used. Please consult with the Key Operator
regarding the Department Code(s) for the desired
function.
Procedures :
1 Input a registered department code (1 to 8-digit).
2 Press the SET or START key.
11
Security Suggestions for Key Operators
Product Overview
To maintain your machine’s highly-sensitive document
data secure from unauthorized users, machine access
must be restricted, managed, and controlled from the
initial machine installation, network connection, network
configuration, and setup of security functions.
The designated Key Operators are instructed to perform
the recommended security measures described below.
1. Key Operators are required to verify the identity of the
manufacturer's service technician, or of an affiliated
company's staff, or marketing company, by requesting
their ID Card.
2. Always connect through a Firewall when installing your
device on a network that is connected to the Internet.
When connecting this device to a client PC, or a server,
we recommend configuring your network environment
with a switching hub to prevent your device from being
wiretapped.
3. A Key Operator password is essential to maintaining
the security of the machine.
Key Operators are required to keep the password
confidential, and in a safe place.
To change the initial Key Operator password, refer to
the Operating Instructions (For Copy & Function
Parameters), and setup:
[General Settings] → [09 Key Operator Mode] → [50
Key Operator Password]
4. Change the Hard Disk Drive Lock password from the
initial setting.
By setting a password, even is the hard disk drive is
taken away, the password locked device prevents illicit
retrieval of the data by unauthorized personnel.
The Hard Disk Drive Lock password is required when
the equipment is being repaired. Furthermore, it is
essential that the Key Operator personally enter the
password to maintain security of the password and
prevent unauthorized users.
To change the initial Hard Disk Drive Lock password,
refer to the Operating Instructions (For Copy & Function
Parameters), and setup:
[General Settings] → [09 Key Operator Mode] → [51
HD Drive Lock Settings]
5. The documents stored in the Mail Box should be printed
immediately. Upon printing, the document data is
deleted, thus preventing unauthorized re-printing by a
third party.
For additional information, please refer to the Operating
Instructions (For PCL Printer Driver), [Mail Box].
6. When disposing of this equipment, initialize the Hard
Disk Drive, by overwriting and deleting the data area
stored in the Hard Disk Drive.
To initialize the Hard Disk Drive, refer to the Operating
Instructions (For Copy & Function Parameters), and
setup:
[General Settings] → [09 Key Operator Mode] → [27
Hard Disk Initialize].
12
∗ The security settings on this equipment are restricted,
and requires the input of an 8-digit Key Operator
password to set, or change them. The initial password
setting is 00000000 (8-digit). The password can be set
arbitrarily.
The Key Operator plays a critical part in maintaining
and controlling the security of the machine, and in
prevention of its unauthorized access, therefore, it is of
utmost importance that you understand the content
described in the Operating Instructions, and that you
follow the suggestions herein.
Memo
13
Product
Overview
Outer/Inner View
Product Overview
ADF
(Automatic Document Feeder)
Control Panel
Sheet Bypass
Front Cover
Right Cover
Paper Tray 1
Right Lower Cover
Manual Pocket
Store the Operating
Instructions in the
Manual Pocket for
future reference.
Paper Tray 2
Paper Tray 3
(Optional System
Console)
Left Cover
(Optional System Console)
Toner
Bottle
Fuser Knob
(Green)
Paper Tray 4
(Optional System
Console)
Paper Transport Knob (Green)
Transport Release Lever (Green)
Exit Cover
● Power Switches
● Interface Ports
ON
OFF
Parallel
Cable
Power Switch
ON
OFF
LAN
Cable
Main Power Switch
Telephone
Line Cable
External
Telephone
Cable
● Parallel Cable is used for Local Printer connection.
Telephone Cable is used for connecting the optional Fax
Communication Board (Order Number: DA-FG600) to the
telephone line.
14
Product
Overview
Control Panel
1
2
3
4
13
12
Original Copy Size
Size Keys Keys
No.
1
2
3
4
5
Icon
Contents
11
10
Touch Panel
Display
No.
Icon
5
6
7
8
9
Keypad
Start
Key
Contents
Copy Key
To use the unit as a photocopier.
6
Reset Key
Resets all features to the initial poweron state.
Fax/Email Key
To use the Facsimile/Internet Fax/Email
function.
7
Clear Key
Clears the copy quantities, etc.
Scan/File Key
To use the Scan/File function.
8
Stop Key
Stops the Copy/Facsimile/Scan job run.
Print Key
Sets the Print function.
9
Fax (Option) Function Keys
Refer to the Getting to Know Your
Machine in the Operating Instructions
(For Facsimile and Internet Fax/Email
Functions).
Energy Saver Key
Saves power while the copier is not in
use.
10
Fax/Email "On Line" LED
For Fax (Option)/Internet Fax/Email
functions.
Active Icon/LED
The LED lights in GREEN when
machine is active.
11
Interrupt Key
Interrupts other copy or print jobs while
making copies.
Status Icon/LED
The LED flashes in RED when trouble
occurs. (See NOTE)
12
Print Data Icon/LED
The LED lights in GREEN when
printing print data.
13
Print "On Line" LED
For Print function.
Function Key
Use when changing the initial function
values (default values) and Key
Operator settings.
NOTE
● When the machine detects a problem or an alarm status is activated, the 11 Status LED lights or begins to flash.
LED Lights: Machine detected a trouble status
• No paper in the selected tray, or toner has run out.
• Machine detected trouble, such as paper misfed or jammed.
LED Flashes: Machine detected an alarm status
• No paper in the Tray. (Tray not selected)
• Toner is getting low, etc.
15
Touch Panel Display
Product Overview
Touch Panel Display
● The above image shows everything is lit at the same time. This is for
illustration purposes only, the machine will never have all icons, lit, or flashing
at the same time. Refer to pages 17 to 20 for details of each function's image.
When the Department Counter function is set up, the
departmental Identification Code input screen is displayed on
the Touch Panel Display. A registered departmental
Identification Code (Max 8-digits) is required to gain access to
each secured function, or the secured Copy/Fax/Scanner
function(s) cannot be used. Please consult with the Key
Operator regarding the departmental Identification Code(s) for
the desired function.
Input an Identification Code
with the Keypad.
NOTE
● Use only gentle finger pressure to activate the Touch Panel Display. DO NOT USE SHARP OBJECTS such as
pens, fingernails etc., as this may damage the panel.
● Touch Panel Display Brightness Adjustment:
To adjust the brightness of the Touch Panel display, press and while holding down the "C" (Clear) key, keep
pressing the "Original Size/Ledger" or the "Copy Size/Ledger" keys until the desired brightness is achieved.
Original Size/Ledger : Dimmer
Copy Size/Ledger
: Brighter
16
Product
Overview
Copy Function
Job Status Indicator
Ex.: Copying 3 sets.
The Indicator displays the progress of a job task as follows: 0/3 → 1/3 → 2/3 → 3/3
6
2
1
3
4
7
5
14
8
9
10 11
12
13
22
15
23
16
24
17
25
26
21
20
19
18
● The above image shows everything is lit at the same time. This is for illustration purposes only, the machine will
never have all icons, lit, or flashing at the same time. Refer to pages 17 to 20 for details of each function's image.
■ Touch Panel Display Indications
Contents
No.
Contents
No.
14
Paper Tray Selection Button
2
Warning Indications
: Call Service (Call your Service Provider)
: Add Paper
: Add Toner
: Waste Toner
Original Image Icon
15
Tandem/Remote Button Indication
3
Original Size Indication
16
TANDEM/REMOTE Button
4
Multi-Size Feeding / Job Build and SADF Mode
Indication
17
Contrast Buttons
Contrast Indicator (7 levels)
Copy contrast can be adjusted.
5
Rotate Mode Indication
This is displayed when the orientation of the original
and copy paper are not the same.
18
Original Mode Select Buttons
The Original Mode setting is useful when copying
photographs or illustrations with gray tones.
6
Number of Copies / Original(s)
19
Copy Direction and Paper Direction Indication
7
Machine / User Error Code Indication (E1-01, U13, etc.)
20
Copy Ratio Indication
8
Copy Image Icon
21
Original Direction Indication
9
Copy Size Indication
22
Function Categories
10
RESERVE A JOB Button
23
PROOF SET Button
11
Finisher Function's Indication
24
JOB SETTINGS Button
Selected copy jobs will be indicated on the right
side of the touch panel display.
12
Machine Outline with Tray Selection (Paper Tray
and Output Tray)
25
JOB QUEUE Button
13
Paper Level and Size Indication
26
COMPLETION NOTICE Button
1
17
Touch Panel Display
Product Overview
Fax (Option)/Internet Fax/Email Functions
1 2
3
4
5
11
6
7
12
8
9
10
■ Touch Panel Display Indications
No.
18
Contents
No.
Contents
1
File type and Transmit type
7
SEARCH Button
Searches the Local/Global Directory.
2
Resolution
Your machine is preset to Fine resolution, which is
suitable for most documents.
Use Fine or Super Fine for detailed documents.
8
EMAIL HEADER Button
Set the address of CC/BCC/FROM.
3
Original
Shows the type of original.
9
DESTINATIONS Button
Confirm selected address.
4
Contrast Indication
The scanning contrast densities which are set in
the Mode Setting screen are displayed in 7 levels.
10
Scroll Buttons
Displays the other destination screen of same
alphabetical tab group.
5
MODE SETTING Button
More setting can be configured by pressing the
MODE SETTING Button.
11
Address Tabs
Selects an alphabetical tab group from the Address
Book.
6
KEYBOARD Button
Allows manual input of the email address.
12
Destination Buttons
Telephone numbers or Email addresses should
be registered in advance.
Product
Overview
Scan/File Functions
1
2
3
4
5
9
8
6
7
■ Touch Panel Display Indications
No.
Contents
No.
Contents
1
File Type
Displays the scanning file type (TIFF or PDF).
5
MODE SETTING Button
More setting can be configured by pressing the
MODE SETTING Button.
2
Resolution
Your machine is preset to 300dpi resolution, which
is suitable for most documents.
6
DD SAVE/DD RETRIEVE Buttons
Optional DD Server Software (DA-WS20) is required.
For more details, refer to the Operating Instructions
(For DD Server).
3
Original
Shows the type of original.
7
Scroll Buttons
Displays the other destination screen of same
alphabetical tab group.
4
Contrast Indication
The scanning contrast densities which are set in
the Mode Setting screen are displayed in 7 levels.
8
Destination Buttons
Displays the registered destinations (PC/Email
Address).
9
Address Tabs
Selects an alphabetical tab group from the Address
Book.
19
Touch Panel Display
Product Overview
Print Function
1
2
3
5
4
6
■ Touch Panel Display Indications
20
No.
Contents
No.
Contents
1
MAIL BOX Tab
Allows you to use the Security Print function to start
the printing job.
4
ON LINE Button
Allows you to return your printer ON LINE after
taking it OFF LINE with the OFF LINE Button.
2
JOB CONTROL Tab
Allows you to select OFF LINE, ON LINE,
CANCEL PRINT, JOB QUEUE functions.
5
CANCEL PRINT Button
Allows you to cancel a print job before the printing
has started.
3
OFF LINE Button
Allows you to temporarily take your printer OFF
LINE when you want to cancel a print job, etc.
6
JOB QUEUE Button
Allows you to see the print jobs which are in
progress or in the printing queue.
Product
Overview
Placing Originals (Copy)
■ How to Place Originals
Set the originals up to the
upper limit indicator.
Upper Limit
Indicator
Upper Guide
When copying a thick Booklet, open the
ADF and verify that the ADF Hinge was
returned to original position if the rear of
the ADF was raised.
1
3
2
4
Copying
● On the ADF
ADF Tray
Original Guides
Adjust to the original’s width
Notice for ADF
● Once the originals are set, press Start key, and do not touch the originals as it may cause them to jam.
● Before setting the originals on the ADF, make sure they are free of clips or staples.
Originals that cannot be used
● Drawing papers, Transparencies, Labeling paper, Heavy weight papers, Thin Art papers, Film, Thermal
papers
Inappropriate Originals
● Papers which are curled, ripped, creased, folded, punched, glued, stapled or self adhesive.
● Originals of assorted (mixed) width size (except for the combination of Ledger and Letter)
● Paste-ups
● Pressure sensitive or carbon backed papers
● Paper with excessive curl
● Stapled originals
● Freshly printed copies from a laser printer which is still wet with color ink or whiteout.
● Originals with fresh White-Out (Liquid paper correction fluid)
● On the Platen
Original Guides
INV
INV
LTR
LGL
LTR
LDR
Ex: Book Original
LDR
LEDGER
LGL
LEGAL
LTR
LETTER-R
LTR
INV
INVOICE-R
INV
INVOICE
Align the original to top left corner mark ( ).
● If the original is not positioned properly, a portion of the
original may not be copied.
● For originals smaller than 5.5" x 8.5" (Invoice) size,
position the original within the 5.5" x 8.5" area and
select 5.5" x 8.5".
LETTER
Notice for Platen
Ex: Sheet Original
21
Basic Copy Operation
Copying
Making a Copy
Original and Copy size are automatically selected.
NOTE
● If the power is turned OFF, turn ON the Main Power Switch, and then turn ON the Power Switch.
● During the copy operation and after making copies, the fan motor may start spinning. This is a normal operation
and is used to cool down the copier.
● When the desired size of paper is not set in the Paper Tray, use the sheet Bypass. (See page 55)
1
Place Original(s) on the ADF or Platen
Glass.
2
Press the Copy key if the machine is
set to other function mode.
3
Select the Original size if original size is
not detected correctly.
Face Up
Up to 85 sheets* (20 lb/Letter)
*70 Sheets : Invoice/Legal/Ledger
● When copying from the ADF, read the Notice
for ADF. (See page 21)
Ex: Sheet Original
Face Down
Align with top left corner
Ex: Book Original
Original Size Keys
● When copying from the Platen Glass, read the
Notice for Platen. (See page 21)
22
Select the required settings.
NOTE
● To stop the copy job, press the Stop key.
The cancellation message will appear on the
LCD. Follow the instructions on the Touch Panel
Display.
Copying
4
Ex: Copy Contrast and Original Mode
Adjust the Manual
Contrast (7 levels)
or
Select type of Original(s)
Mainly Text
Text and Photo
combined
Mainly Photo
● For other mode settings, refer to the Operating
Instructions (For Copy & Function Parameters)
● When clearing the copy mode settings, press
the Reset key. (See NOTE)
5
Reset Key
Stop Key
● Memory Full
If memory overflows during original scanning, the
message “Cannot Complete Job / Exceeds
Memory Capacity / Output Current Pages? 1:YES
2:NO” will be displayed on the LCD. If this occurs,
follow the instructions on the LCD. If this occurs
frequently, adding optional memory is
recommended, consult with an authorized service
provider.
Enter the desired number of copies,
and then press the Start key.
Start Key
Number of copies
(Up to 999)
● Clear Key
When changing the number of copies, press
the Clear key and reenter the corrected
number of copies.
● Number of Copies
The maximum number of copies is up to 999
(3 digits with keypad).
When the optional Fax Communication Board
(DA-FG600) is installed:
During the copy mode, if you input 4-8 digit
numbers, they will be interpreted as being a
phone number and displayed on the LCD,
then the machine will switch to the Fax mode.
23
Printing from PC
Printing
Printing from Windows Applications
■ Operation Chart
■ Selecting the required settings
1. Installing the Printer Driver software and
setting up the Printer Driver.
● Refer to the Operating Instructions (For Setting
Up) provided with another booklet.
2. If more than one printer is installed on
your PC, select the Printer as installed in
step 1.
● If it is not set to the default printer, refer to the
following steps. (ex.Windows XP/Server 2003)
(1) Click the “Start”, select “Printers and Faxes”,
and then click the Printer icon.
(2) Right-click on the desired printer icon, and then
select “Set as Default Printer” in popup menu.
The check mark next to the printer icon denotes
a Default Printer.
3. Select the required settings.
1
No.
Contents
2
3
4
5
Contents
1
Page Range All
: Prints all pages.
Selection : Prints displayed area
on the PC screen.
Current Page : Prints displayed page.
Pages
: Prints selected pages.
2
Print
Starts to printing document(s).
3
Cancel
Closes the print dialog box.
4
Number of
copies
Number of copies : 1-999
Collate : Printed multiple documents
are sorted automatically.
5
Preferences Selecting other settings.
●Refer to the Operating
Instructions (For Software (Printer
Driver)) on the provided CDROM.
Ex. Page range, number of copies, etc.
(See right column)
NOTE
4. Click Print to start printing the
document(s) from the PC.
24
● The screen image that appears on your PC
display may vary, depending on the application
software you are using.
Network Scanner
1. Installing the Panasonic Document
Magagement System.
● The Quick Image Navigator and Communications
Utility are required for Network Scanner function,
refer to the Operating Instructions (For Setting Up)
provided with another booklet.
Start up the Communications Utility
1
Click Start button, select All Programs
-> Panasonic -> Panasonic Document
Management System, and then select
Communications Utility.
2
Check the Communications Utility icon
is indicated on the task bar.
Printing
■ Operation Chart
2. Set up the Communications Utility software.
Communications Utility Icon
● Do not turn OFF the Communications Utility
icon while the Network Scanner is operating.
3. Check the Communications Utility icon is
indicated onto the task bar of your PC.
● If the Communications Utility icon is not indicated,
start the Communications Utility software.
(See right column)
4. Scan the document to your PC.
(See pages 26-27)
25
Network
Scanning
● Refer to the Operating Instructions (For Setting
Up) provided with another booklet.
Network Scanner
Network Scanning
Scanning the Document to Your PC
Scanned data will be directly transferred to your
PC. By using the optional installed software
(Panasonic Document Management System), you
can view or edit the scanned data on your PC.
1
Place Original(s) on the ADF or Platen
Glass.
Face Up
Up to 85 sheets* (20 lb/Letter)
3
Select the destination (PC) for the
scanned data.
● If the Panasonic Communications Utility software
is not started on your PC, a destination is not shown
on the Touch Panel Display.
*70 Sheets : Invoice/Legal/Ledger
● When scanning from the ADF, read the Notice
for ADF. (See page 21)
Face Down
Align with top left corner
4
Select the Scanner mode setting.
5
Press the Start key.
● When scanning from the Platen Glass, read the
Notice for Platen. (See page 21)
2
Start Key
Press the Scan/File key.
The scanned data will be transferred to the PC,
then the scanner reception notice appears on
the PC's monitor.
● For more details, refer to the operating
instructions (for Quick Image Navigator) on the
provided CD-ROM.
26
■ Selecting the Scanner Mode
Resolution∗ (150/300/600dpi)
Contrast (7 levels)
Original Mode
TEXT
: Mainly text
TEXT/PHOTO : Text/Photo mixed
PHOTO
: Mainly photo
See below
See right column
JOB BUILD AND SADF
For scanning a thin original from the ADF.
2-SIDED ORIGINAL
For scanning 2-sided original.
*150dpi: Text mode only.
To scan smaller characters (8-point or smaller) clearly,
select TEXT mode, and then select 600 dpi. Since the file
size increases with higher resolutions, the transfer time
becomes longer depending on the specifications of the
network, and the computer you are using.
Network
Scanning
When COMPRESSION is selected.
1 Select Binding Position
2 Select "OK"
FILE TYPE AND NAME
For changing Scanning File Type and/or File
Name.
● File name is date and time (mm/dd/yy) in
the default setting.
MH
Modified Huffman format:
Lowest compression
MR
Modified Read format:
Higher compression than MH
MMR
Modified MR format:
Higher compression than MR
JBIG
Joint Bi-level Image format:
Higher compression than MMR
NOTE
1 Select a file type
(TIFF or PDF)
4 Select "OK".
● When clearing the scanning mode settings, press
the Reset key.
● To stop the scanning job, press the Stop key.
When CUSTOM is selected.
2 Input a file name
3 Select "OK".
(Max. 20 characters)
● Refer to How to use the Keyboard, in the
Address Book section. (See page 30)
Reset Key
Stop Key
27
Address Book (Facsimile)
Facsimile / Internet Fax/Email
■ Creating an Address Book
NOTE
● For details on how to edit a registered address, refer to Address Book in the Operating Instructions (For Facsimile and
Internet Fax/Email Functions) on the provided CD-ROM.
● Up to 1,000 addresses can be registered.
1
2
3
4
28
Press the Function Key.
Function Key
5
Enter a telephone number (up to 36
digits), and then select "OK".
For Facsimile
Enter a telephone number with the Keypad.
● When changing a number, move a cursor (_)
to the right side of the incorrect number, and
then press Clear key.
Select "FAX/EMAIL SETTINGS".
6
Enter the name of the destination (up to
15 characters), and then select "OK".
7
Enter the Key Name of the Address
Book (up to 15 characters), and then
select "OK".
Select "00 Address Book".
Select "01 Add Telephone Number".
8
Select whether you wish to add this
Telephone Number to Favorites.
9
To enter other Fax numbers:
Repeat steps 5 to 8
or
To exit this setting mode:
Press Reset Key.
memo:
Facsimile /
Internet Fax/Email
Reset Key
29
Address Book (Internet Fax/Email)
Facsimile / Internet Fax/Email
■ Creating an Address Book
NOTE
● For details on how to edit a registered address, refer to Address Book in the Operating Instructions (For Facsimile and
Internet Fax/Email Functions) on the provided CD-ROM.
● Up to 200 addresses can be registered.
1
Press the Function Key.
Function Key
5
Enter an Email address (up to 60
characters), and then select "OK".
For Internet Fax/Email
Enter an Email address with the Keyboard.
2
How to use the Keyboard
CAPS: Selecting a lower or upper case letter.
NUMERIC/SYMBOLS:
Entering number/symbol characters.
: Moving a cursor (_).
BACK SPACE:
Deleting character.
Select "FAX/EMAIL SETTINGS".
● When changing number, move cursor (_) to
the right side of the incorrect character, and
then select "BACK SPACE".
3
4
30
Select "00 Address Book".
Select "02 Add EMAIL Address".
6
Enter the name of the destination (up to
15 characters), and then select "OK".
7
Enter the Key Name of the Address
Book (up to 15 characters), and then
select "OK".
8
Select whether you wish to add this email
address to Favorites.
9
To enter other Email addresses:
Repeat steps 5 to 8
or
To exit this setting mode:
Press Reset Key.
memo:
Facsimile /
Internet Fax/Email
Reset Key
31
Placing Originals (Facsimile/Internet Fax/Email)
● On the ADF/Platen (See page 21)
Rotation XMT
P
The portion labeled “P”
that exceeds the standard
original size is not sent.
Scanning Direction
● When an oversized original is sent
to another machine, sometimes, it is
reduced in accordance with the other
party’s recording paper size.
Ex:
11" x 17" size
● Scanning Area
Ex:
Original Width:
216 mm (8.5")
8 mm (0.3")
with Header Area
8.5" x 11" size
5 mm (0.2")
5 mm
(0.2")
Scanning
Width:
206 mm
(8.1")
5 mm
(0.2")
A
A
When transmitting non-standard size original(s),
the machine may perform Rotate Transmission
automatically and not transmit the portion of the
original that exceeds the standard size (“P” portion).
A
● Sending Non-Standard Size Originals
A
Facsimile / Internet Fax/Email
■ How to Place Originals
The original’s border (gray area)
will be lost during scanning.
Scanning Direction
● Original Size
From the ADF
Maximum Size
Minimum Size
2000 mm (78.7")
140 mm (5.5")
From the Platen Glass
Maximum Size
432 mm (17")
279 mm (11")
32
Scanning
Direction
140 mm (5.5")
279 mm (11")
Scanning
Direction
Sending Originals (Facsimile)
Sending Scanned data via Facsimile
Scan
Facsimile Function
Telephone Line
1
Place Original(s) on the ADF or Platen
Glass.
2
Facsimile /
Internet Fax/Email
Facsimile Machine
Press Fax/Email key.
Face Up
Up to 85 sheets* (20 lb/Letter)
*70 Sheets : Invoice/Legal/Ledger
● When scanning from the ADF, read the Notice
for ADF. (See page 21)
Face Down
Align with top left corner
● When scanning from the Platen Glass, read the
Notice for Platen. (See page 21)
<Continue on the next page...>
33
Sending Originals (Facsimile)
Facsimile / Internet Fax/Email
3
Select either ADDRESS BOOK DIALING,
or MANUAL NUMBER DIALING.
For ADDRESS BOOK DIALING
Telephone numbers should be registered in
advance. (See pages 28-29)
Memory Transmit STN(s):001
TO:PANASONIC
5551234
PANASONIC
QUALITY DEPT
Select the destination
5
Press the Start key.
The document(s) will be stored into memory with
a file number.
Then starts dialing the telephone number
immediately after storing the first page.
The remaining page(s) continue to store into
memory.
NOTE
● When clearing the sending mode settings, press
the Reset key.
● To stop the transferring job, press the Stop key.
The cancellation message will appear on the
LCD. Follow the instructions on the Touch Panel
Display.
For MANUAL NUMBER DIALING
Facsimile: Enter the telephone number with the
Keypad, and then select "OK".
EX: 5 5 5 1 2 3 4
5551234
Reset Key
Start Key
Stop Key
4
Select "MODE SETTING" to configure
the desired Facsimile mode settings.
● For more details, refer to the Operating
Instructions (For Facsimile and Internet Fax/
Email Functions).
Memory Transmit STN(s):001
Add More STN(s)
Press START To Send
34
Sending Originals (Internet Fax/Email)
Sending Scanned data via Internet Fax/Email
Scan
Email Function
Computer
LAN/Internet
Internet Fax Function
LAN/Internet
1
Place Original(s) on the ADF or Platen
Glass.
2
Facsimile /
Internet Fax/Email
Internet Fax Machine
Press Fax/Email key.
Face Up
Up to 85 sheets* (20 lb/Letter)
*70 Sheets : Invoice/Legal/Ledger
● When scanning from the ADF, read the Notice
for ADF. (See page 21)
Face Down
Align with top left corner
● When scanning from the Platen Glass, read the
Notice for Platen. (See page 21)
<Continue on the next page...>
35
Sending Originals (Internet Fax/Email)
Facsimile / Internet Fax/Email
3
Select either ADDRESS BOOK EMAIL
ADDRESSING, or MANUAL EMAIL
ADDRESSING.
4
For ADDRESS BOOK EMAIL ADDRESSING
Email addresses should be registered in
advance. (See pages 30-31)
Select "MODE SETTING" to configure
the desired Internet Fax/Email mode
settings.
● For more details, refer to the Operating
Instructions (For Facsimile and Internet Fax/
Email Functions).
Memory Transmit STN(s):001
TO:PANASONIC
[email protected]
QUALITY DEPT
PANASONIC
Select the destination
For MANUAL EMAIL ADDRESSING
Internet Fax/Email:
Enter the Email address using the KEYBOARD.
MMM-dd-yyyy 15:00
Ready To Fax
Original Set
5
Press the Start key.
0%
AFRICA
AMERICA
ANTARTICA
APOLLO
ASIA
BERLIN
BRAZIL
1
Enter the Email address, and then select "OK".
EX: [email protected]
Enter Addr(TO) STN(s):000
Enter Station(s)
[email protected]
The document(s) will be stored into memory with
a file number.
Then starts connecting to the LAN immediately
after storing the first page.
The remaining page(s) continue to store into
memory.
@panasonic.com
@mgcs.co.jp
NOTE
@abc-net.wxy.com
@host.pana.com
2
● Refer to How to use the Keyboard, in the
Address Book section. (See page 30)
● When clearing the sending mode settings, press
the Reset key.
● To stop the transferring job, press the Stop key.
The cancellation message will appear on the
LCD. Follow the instructions on the Touch Panel
Display.
Reset Key
Start Key
Stop Key
36
Receiving an Email from POP Server
Receiving Email Automatically
With “147 Auto POP Receive” set to “Valid” and POP acquisition interval set between 1 and 60 minutes in Fax
Parameters (refer to the Operating Instructions (For Facsimile and Internet Fax/Email Functions)), queries are transmitted
to the POP Server periodically to check for new mail.
If there is Email on the POP Server when a query is transmitted, it is retrieved and printed automatically.
LAN
Computer
Internet FAX Machine
NOTE
● For instructions on how to configure the Internet Fax/Email, refer to the Operating Instructions (For Facsimile and
Internet Fax/Email Functions) on the provided CD-ROM.
Facsimile /
Internet Fax/Email
Receiving Email Manually
With POP acquisition interval set between 1 and 60 minutes, queries are transmitted to the POP Server periodically to
check for new mail, and the number of the incoming Email messages on the server appears on the display.
1
Press the Fax/Email key.
3
Check for incoming mail(s).
4
Select “GET EMAIL”.
If set to other
function mode
2
Select “MODE SETTING”.
The retrieved Email is printed.
37
Troubleshooting
Problem Solving
Check
Action
Unit Does Not Operate
Does the display light?
Check if the Power Switches (Main Power Switch
on the back and Power Switch on the Left Side
of the machine) are turned ON and if the power
cord is plugged into the AC outlet.
Does the Energy Saver key flash (or light) and
displays are turned OFF?
Press Energy Saver key on the control panel.
(See page 15)
Does any of the U## codes and messages
appear on the display?
(U1, U4, U6, U7, U11....etc.)
Perform actions in accordance with each
message.
Does the Add Staples indicator and message
appear on the display?
Add Staples (See pages 57-61)
Remove all jammed staples. (See pages 58-61)
Does the Add Paper indicator and message
appear on the display? ( )
Add paper. (See pages 54-55)
Does the paper misfeed indicator and message
appear on the display? ( )
Remove the misfed paper. (See pages 41-53)
Does E#-## indicator and message appear on
the display?
Turn the Power Switch on the Left Side and the
Main Power Switch on the Back of the machine
to the OFF and ON. If the error code does not
clear, call your Service provider.
The machine would not accept the next job
during operation, instructed job would not be
accepted for a long time period or job would
not be completed.
Turn the Power Switch on the Left Side and the
Main Power Switch on the Back of the machine
to the OFF and ON.
Light Copies
38
Does the contrast indicator say “LIGHTER”?
Touch the “DARKER” button.
Does the Add Toner indicator and message
appear on the display? ( )
Replace the Toner Bottle.
(See page 56)
Check
Action
Marked Copies
Is the copier Platen Glass or Platen Sheet
dirty?
Clean the Platen Glass or Sheet.
(See below)
Is the original an OHP film, or a dark original?
Cover the original with a sheet of white paper
before copying for an OHP film original, or
lighten the contrast setting before copying a
dark original.
■ If the measures outlined above do not solve the problem, call your Service provider.
Machine Care
■ As a rule, clean weekly.
Platen Glass/Platen Sheet
Wipe marks off with a cloth and a neutral detergent.
Wipe again with a dry cloth.
Platen Sheet
Problem Solving
Platen (Glass)
39
User (U) / Error Codes
Problem Solving
■ User Error Codes (U Codes)
U20, U21
U32
U4, U12
U30
U9
U6
U35
U13
U1
U7
U31, U33, U34
Code
40
Check Points
Code
Check Points
U1
Front Cover is open.
U20
ADF is open.
U4
Finisher is separated from the machine.
U21
ADF is opened while scanning from ADF.
U6
Right Cover is open.
U30
Punch Dust Cover is open.
U7
Right Lower Cover is open.
U31
U9
Left Cover is open.
Paper is remained in the Saddle-Stitcher
Unit.
U32
Finsher Infeed/Inner Cover is open.
(DA-FS605/FS355A)
U33
Stapler of Saddle Stitcher Unit is incorrectly
set. (DA-FS605/FS355A)
U12
Finisher Staple Cover/Upper Cover is open.
Trash Box is not installed. (DA-FS330)
U13
Low Toner.
U16
Call your Service provider.
U34
U18
Total Copy Count is limit, consult with your
Key Operator.
Finisher Lower Front Cover is open.
(DA-FS605)
U35
Saddle Exit Cover is open. (DA-FS605)
U90
Need to replace the battery. (See page 64)
Removing Misfed Paper
■ Locations/User Error Codes (J Codes)
DA-FS355
DA-FS355A
DA-FS600
H
DA-FS605
H
H
J
D
C
B
H
I
I
Jam Location
Misfed Indicator
● Indicates to open each cover, check
and remove any misfed paper.
Code
J00
E
F
G
A
Copier
ADU
Paper Feed Unit
LCT
A: System Console (See page 42)
B: Paper Entry Area (See page 43)
C: Paper Transport Area (See page 44)
D: Paper Exit/Fuser Area (See page 45)
E: ADU Area (See page 46)
F: Reverse Area (See page 47)
G: 3000-Sheet Tray (LCT) Area (See page 47)
Finisher
H: Finisher (See pages 48-50)
I: Saddle-Stitch Finisher (See pages 51-52)
i-ADF
J: i-ADF (See page 53)
Check Points
Sheet Bypass (Remove the misfed paper,
and then open and close the cover)
J01, J17, Paper Tray 1 and Paper Feed Section
J21
(Paper Tray 1-4 and Sheet Bypass)
J02, J22 Paper Tray 2 and Paper Feed Section
(Paper Tray 2)
J03, J23 Paper Tray 3 and Paper Feed Section
(Paper Tray 2-4)
J04, J24 Paper Tray 4 and Paper Feed Section
(Paper Tray 3, 4)
J07, J08, Paper Feed Section
J09, J27, (Paper Tray 2 and Optional Paper Tray 3
J28
and 4)
Code
Check Points
J19
Paper Feed Section and ADU Section
J29
System Console Section
J82, J83, ADU Section and Fuser/Exit Section
J84, J85,
J88
Problem Solving
DA-FS330
● The display indicates the section of the
misfed paper. Remove the misfed paper
and check to see if the misfed location
indicator has been cleared. If other
locations indicate presence of paper,
remove them and check the display again.
● If an unknown error code appears, or
cannot clear the error codes, switch off
the machine and contact the authorized
Panasonic dealer.
J30, J31, Paper Feed Section and Fuser/Exit Section
J40,
J42-J45
J41, J50, Fuser/Exit Section and Paper
J51, J52, Transport Section
J53, J86
J80, J81, Fuser/Exit Section
J87
J06, J16, LCT Section
J26
Paper Feed Section
J54-J55 Paper Transport Section
J18, J33 Paper Feed Section
(Paper Tray 1-4 and Sheet Bypass)
Verify that the media type selection in the
control panel matches the media loaded on
the trays.
Ex: Select "Transparency" when Transparencies
are loaded in the Sheet Bypass
J70-J79 ADF Section
J92-J94
J60-J64 Optional Finisher Section
41
Removing Misfed Paper
Problem Solving
■ System Console (Option) (A)
4
Close
1
Right Lower Cover
5
Right Lower Cover
Open
Open
Close
2
Misfed Paper
Remove
3
Remove
Pull
42
■ Paper Entry Area (B)
4
Close
1
5
Right Cover
Open
2
Right Cover
Close
Misfed Paper
Remove
2
Problem Solving
3
Remove
1
Pull
43
Removing Misfed Paper
Problem Solving
■ Paper Transport Area (C)
4
Turn until it stops
1
5
Open
Close
2
Turn
Transport Release Lever (Green)
3
Remove
44
Paper
Transport
Knob
(Green)
■ Paper Exit/Fuser Area (D)
5
Remove
Caution
heated
surface
1
6
Magnet
Open
Heat Roller Cover
2
7
Open
Close
Exit Cover
Exit Cover
3
Fuser Knob
(Green)
4
Problem Solving
8
Close
Magnet
Heat Roller Cover
45
Removing Misfed Paper
Problem Solving
■ Automatic Duplex Unit (ADU) (E)
5
Green Knob 5 (Right)
1
6
Open
Green Knob 5 (Left)
2
7
Turn
Push
Transport Release Lever (Green)
3
Automatic Duplex Unit
8
Turn until it stops
Pull
Automatic Duplex Unit
4
9
Close
Green Knob 5 (Center)
46
■ Reverse Area (F)
■ 3000-Sheet Tray (LCT) (Option) (G)
When the optional 3000Sheet Tray (LCT) (DAMA301) is installed.
1
1
Misfed Paper
Latch
Open
Left Cover
Hold the latch and slide the large capacity
paper tray to the right.
2
2
Door
Misfed Paper
Remove
3
Door
Problem Solving
3
Close
Left Cover
Close
4
Return
47
Removing Misfed Paper
Problem Solving
■ 2-Bin Finisher (Option) (H)
When the optional 2Bin Finisher (DAFS600/605) is installed.
5
Misfed Paper
Punch Cover
1
6
Open
Misfed Paper
Remove
2
Finisher Upper Cover
Finisher
7
Transport
Cover
Push
Release button
Misfed Paper
3
Punch Cover
8
Finisher Upper Cover
Open
4
9
Turn to Mark
48
Return
■ 2-Bin Finisher (Option) (H)
When the optional 2Bin Finisher
(DA-FS330) is
installed.
5
Finisher Guide
Remove
● When paper cannot be removed:
1
6
Upper Cover
Remove
Knob B
Misfed Paper
2
7
Release Button
Raise
Slide out
Stapler Cover
8
Finisher Entry guide
Pull out
4
Problem Solving
3
Trash Box
9
Return
Knob A
Misfed Paper
49
Removing Misfed Paper
Problem Solving
■ 1-Bin Saddle-Stitch Finisher
(Option) (H)
When the optional
1-Bin Saddle-Stitch
Finisher (DA-FS355A)
is installed.
Return
Finisher
1
Remove
Misfed Paper
2
Release Button
Slide out
3
Finisher
Remove
Upper Cover
4
Return
Upper Cover
50
5
■ 2-Bin Saddle-Stitch Finisher only
(Option) (I)
When the optional 2-Bin
Saddle-Stitch Finisher (DAFS605) is installed.
5
SaddleExit
Cover
Open
1
Finisher
6
Misfed Paper
Push
Release button
2
7
Misfed Paper
Open
Infeed
Cover
Lower Front
Cover
3
Problem Solving
8
Turn
Infeed
Cover
4
9
Return
Return
Push and Turn
51
Removing Misfed Paper
Problem Solving
■ 1-Bin Saddle-Stitch Finisher (Option) (I/F)
When the optional 1-Bin Saddle-Stitch Finisher (DAFS355A) is installed. (See page 50)
5
or
Release Button
Slide
out
Finisher
1
6
Inner Cover
Open
Open
Finisher Front Cover
2
7
Misfed Paper
Remove
Turn
Lower
Knob
(Green)
3
8
Return
Remove
Stitch Tray
4
Close
Finisher Front Cover
52
Finisher
■ i-ADF (J)
5
Misfed Paper
Remove
1
ADF Cover
6
Exit Guide
2
7
2
Green Mark
1
3
Misfed Paper
8
ADF Tray
4
Paper Transport Knob
Green
Labelled Tab
9
Problem Solving
Inner Cover
ADF Cover
Close
Exit Guide
53
Adding Paper
Replacing Consumables
■ Paper Tray (1550-Sheet Paper Tray 1)
■ System Console (550-Sheet Paper
Tray 2-4)
1
1
Open
Open
2
2
● Paper Weight: 16-24 lb
3
● Paper Weight: 16-24 lb
3
Max Level Indicator
Max Level Indicator
● Paper Capacity: 1550 Sheets (20 lb)
4
4
Close
54
● Paper Capacity: 550 Sheets (20 lb)
Close
■ Paper Tray (3000-Sheet Tray (LCT)
(Option))
■ Sheet Bypass
1
1
2
Sheet Bypass
Paper Feed Tray
1
● Do not touch the tray while it is moving.
2
2
Face-Up
● Slide out the tray until it stops.
3
● After tray stops, place paper neatly on the tray.
Letter size only (Portrait).
● Letter-R/Legal size is available when optional
Letter-R/Legal Size LCT Adapter (DA-TK31)
is installed.
3
● Approximately up to 50
● Letter size sheets/20 lb
● Paper Weight: 15-35 lb
● To add paper to the Sheet Bypass, remove
the leftover paper from the tray, and align it
with the added paper and load them together
onto the tray.
● Load the paper with the unprinted side facing
upward.
● Do not exceed limit mark when loading paper.
Side Guides
● Paper Capacity: 3000 Sheets (20 lb)
4
Replacing
Consumables
4
Overfill Indicator
Close
Adjust
● Incorrect adjustment may cause the paper to
wrinkle, misfeed or skew.
● If the paper size is not detected, remove
paper and press Reset Key. Then, load the
paper again.
55
Replacing Toner Bottle
Replacing Consumables
ATTENTION
● For optimum copy quality, it is recommended that only Panasonic Brand toner is used in the copier. Store toner in
a cool dark area with low humidity. Do not unseal the toner bottle unless you are ready to use it.
1
6
2
Open
1
2
Toner Hopper
7
Toner Bottle
Slide the Corona Cleaner in and out 3
or 4 times slowly, then return the
Corona Cleaner Handle to original
position.
Pull
3
1
8
2
9
Remove
Cap
56
Close
New Toner Bottle
Shake
10 to 15 times
5
Toner Hopper
Empty Toner Bottle
4
Hopper
Close
Replacing the Staple Cartridge
When optional Finisher is installed, an Add
Staple message will be shown on the display.
5
2
New
Add Staples
1
Empty
or
■ 2-Bin Finisher (DA-FS330)
6
Remove
Tape
1
Release Button
Slide out
7
2
Return
Open
Stapler Cover
3
8
Stapler Unit
1
4
Lock Lever
Replacing
Consumables
2
9
Pull out
Close
Staple Cartridge
Stapler Cover
<Continue on the next page...>
57
Replacing the Staple Cartridge
Replacing Consumables
■ 2-Bin Finisher (DA-FS600)/2-Bin
Saddle-Stitch Finisher (DA-FS605)
10
1
Return
Open
Staple Cover
Check the staple operation by following steps 11 to 13.
11
Place originals.
2
Push down
12
Select "SORT/FINISH", and then select
"STAPLE-SORT".
3
Staple Cartridge
Pull out
13
Press the Start key.
4
New
2
1 Empty
Start Key
Jammed
Staple
2
1
3
● When the Staple jams
The following message will be displayed on the
Touch Panel Display: “Can Not Complete Confirm
Staple Unit”
58
5
Remove
Tape
■ When supplying the 2-bin Saddle-Stitch
Finisher Unit with staples (DA-FS605 only)
6
1
Return
Open
7
2
Close
Staple Cover
8
Follow the steps 11 to 13 on page 58 to
check the staple operation.
Pull out
3
3
2
1
4
● When the Staple jams
The following message will be displayed on the
Touch Panel Display: “Can Not Complete Confirm
Staple Unit”
1 Until it stops
2
Empty
New
Staple Cartridge
Replacing
Consumables
Jammed
Staple
5
<Continue on the next page...>
59
Replacing the Staple Cartridge
Replacing Consumables
■ 1-Bin Saddle-Stitch Finisher (DA-FS355A)
6
Until it
stops
1
Open
Return
Finisher Front Cover
7
2
Turn
Close
Blue Mark
8
1
Follow the steps 11 to 13 on page 58 to
check the staple operation.
3
Stapler Unit
2
2
1
3
4
4
Staple Cartridge
Pull out
● When the Staple jams
The following message will be displayed on the
Touch Panel Display: “Can Not Complete Confirm
Staple Unit”
5
Empty Staple Case
60
11
6
Follow the steps 11 to 13 on page 58 to
check the staple operation.
New Staple Case
7
● When the Staple jams
The following message will be displayed on the
Touch Panel Display: “Can Not Complete Confirm
Staple Unit”
Tape
Remove
8
Staple Cartridge
Return
9
Stapler Unit
Replacing
Consumables
Return
10
Close
Finisher Front Cover
61
Dispose of the Punch Hole Residue
Replacing Consumables
When the punch hole container is full, the
punch hole crust indicator will be shown on
the display.
5
■ DA-FS600/FS605 with optional Punch
Unit (DA-SP31)
■ DA-FS355A with optional Punch Unit
(DA-SP41)
1
1
Open
Close
Release Button
Slide out
Finisher
2
Pull out
2
Pull out
3
3
4
4
Return
62
5
5
Return
Return
Finisher
■ DA-FS330
1
Release Button
Slide out
2
Pull out
4
Replacing
Consumables
3
Finisher Entry guide
Trash Box
63
Replacing the Battery
Replacing Consumables
■ Replacing the Battery
The copier has an internal battery (Product No.: CR2032) which maintains the date and time.
In the event, the battery requires replacement, the following message will be displayed.
The service life of the battery is approximately 1 year under normal use.
!
CAUTION
● THIS PRODUCT CONTAINS A LITHIUM BATTERY. REPLACE ONLY WITH THE SAME OR EQUIVALENT TYPE.
IMPROPER USE OR REPLACEMENT MAY CAUSE OVERHEATING, RUPTURE OR EXPLOSION RESULTING IN
INJURY OR FIRE. DISPOSE OF USED BATTERIES ACCORDING TO THE INSTRUCTIONS OF YOUR LOCAL
WASTE OFFICIALS AND LOCAL REGULATIONS.
● Be sure to use the specified type of battery only.
● Ensure that the battery is installed with correct polarity.
!
WARNING
● Keep the battery away from small children.
■ Notice: California only:
This product contains a CR Coin Cell Lithium Battery which contains Perchlorate Material - special handling may apply.
See www.dtsc.ca.gov/hazardouswaste/perchlorate
1
Open the Front Cover.
Remove the Screw and Holder.
3
Reinstall the Holder and Screw.
NOTE
● Battery Holder is placed behind the print data
LED.
2
1
2
64
Specifications
DP-8060/8045/8035 (Copier)
Semi Console
Platen Type
Fixed
Acceptable Original
Sheets, Books (max. Ledger)
Copying Method
Laser Electrophotography
Fixing Method
Heat Roller Fixing
Imaging Method
Dry-Type Two components imaging
Resolution
Maximum: 600 dpi
Operation Panel
Touch Panel Display
Maximum Copy Size
Ledger - Invoice via Paper Tray
Void Area
Max. 0.2" (5 mm)
Warm Up Time
DP-8060/8045 : Approx. 180 seconds (68 °F/20 °C)
DP-8035
: Approx. 30 seconds (68 °F/20 °C)
First Copy Time
(Letter , from 1st Tray, platen)
DP-8060 : Approx. 3.5 seconds
DP-8045 : Approx. 4.5 seconds
DP-8035 : Approx. 5.8 seconds
Multi-Copy Speed
DP-8060 : 60 cpm (Letter size)
DP-8045 : 45 cpm (Letter size)
DP-8035 : 35 cpm (Letter size)
Enlargement Ratios
Preset: 121 %, 129 %, 155 %, 200 %
Variable: from 101 - 400 % in 1 % increments
Reduction Ratios
Preset: 79 %, 77 %, 65 %, 61 %, 50 %
Variable: from 99 - 25 % in 1 % increments
Paper Feed
Paper Tray (1550 sheets + 550 sheets) + Sheet Bypass (50 sheets)
+ System Console (1100 sheets)
Paper Weight
Paper Tray: 16 - 24 lb (Bypass: 15 - 35 lb)
Quantity Selector
Maximum: 999 sheets (Optional Exit Tray capacity is 250 sheets)
Electrical Consumption
120 V AC, 60 Hz, 12 A
Energy Consumption
Less than 1.45 kW
Dimensions (W x D x H)
23.6" (W) x 29.8" (D) x 35.4" (H) (600 x 757 x 900 mm)
Weight
DP-8060/8045 : 302 lb (137 kg)
DP-8035
: 295 lb (134 kg)
Operating Environment
Temperature: 50 - 86 °F (10 - 30 °C); Relative Humidity: 30 - 80 %
(However, the humidity should be 70 % or less at a temperature of 86 °F (30 °C),
and the temperature should be 80 °F (27 °C) or less at a humidity level of 80 %.)
Modes
Sleep Mode
Power Consumption
(Measured 68 °F/20 °C)
DP-8060 : Approximately 200 W
DP-8045 : Approximately 190 W
DP-8035 : Approximately 60 W
Approximately 35 W
Shutdown Mode
Below 4 W
Power Saver Mode
Replacing
Consumables
● Specifications are subject to change without notice.
Warm Up Time
DP-8060/8045/8035 : Min. 30 sec. recovery
DP-8060/8045 : 180 sec. recovery
DP-8035
: 30 sec. recovery
DP-8060/8045 : 180 sec. recovery
DP-8035
: 30 sec. recovery
65
Appendix
Type
Specifications
Appendix
i-ADF*1 (Standard)
Tray Capacity
Letter: Maximum 85 sheets (20 lb: 75 g/m2)
Invoice/Legal/Ledger: Maximum 70 sheets (20 lb: 75 g/m2)
Paper Size
Invoice/Letter/Legal/Ledger
Paper Weight
14 - 28 lb (50 - 105 g/m2)/1-sided
17 - 28 lb (64 - 105 g/m2)/2-sided
Electrical Requirements
Supplied from copier
Dimensions (W x D x H)
23.6 x 23.0 x 5.9 in (600 x 583 x 151 mm)
1
* inverted-ADF
Printer Unit
Printing Speed:
DP-8060: Up to 60 sheets/minute
DP-8045: Up to 45 sheets/minute
DP-8035: Up to 35 sheets/minute
Resolution (dots per inch):
Max. 1200 x 600 dpi
Interface:
Ethernet (10Base-T/100Base-TX)
Parallel Port
Applicable OS:
Windows 98*1, Me*2, NT 4.0*3 (with service pack 3 or later is required),
2000*4, XP*5, Server 2003*6
*1 Microsoft® Windows® 98 operating system
*2 Microsoft® Windows® Millennium Edition operating system
*3 Microsoft® Windows NT® operating system Version 4.0 *4 Microsoft® Windows® 2000 operating system
*5 Microsoft® Windows® XP operating system
*6 Microsoft® Windows Server® 2003 operating system
System Console 1 (DA-DS603)
Combination
Paper Tray x 1
Storage Tray x 1
Paper Size
Invoice/Letter/Letter-R/Legal/Ledger
Paper Weight
16 - 24 lb (60 - 90 g/m2)
Paper Capacity
Maximum 550 sheets x 1: 20 lb (75 g/m2)
Electrical Requirements
Supplied from copier
Dimensions (W x D x H)
23.6 x 28.7 x 11.4 in (600 x 730 x 290 mm)
Weight
64 lb (29 kg)
Applicable Models
DP-8060/8045/8035
System Console 2 (DA-DS604)
66
Combination
Paper Tray x 2
Paper Size
Invoice/Letter/Letter-R/Legal/Ledger
Paper Weight
16 - 24 lb (60 - 90 g/m2)
Paper Capacity
Maximum 550 sheets x 2: 20 lb (75 g/m2)
Electrical Requirements
Supplied from copier
Dimensions (W x D x H)
23.6 x 28.7 x 11.4 in (600 x 730 x 290 mm)
Weight
66 lb (30 kg)
Applicable Models
DP-8060/8045/8035
For G3 Facsimile (Option) [DA-FG600]
Compatibility
ITU-T Group 3
Coding Scheme
JBIG, MH, MR, MMR (Conforms to ITU-T Recommendations)
Modem Type
ITU-T V.34, V.17, V.29, V.27 ter and V.21
Modem Speed
2,400 - 33,600 bps
Document Size
Ledger/Legal/Letter/Letter-R/Invoice/Invoice-R
Max : Platen Glass : 11" x 17" (Ledger)
ADF
: 11" (Original's Width)
Min : Platen Glass : No Minimum
ADF
: 5.5" x 8.5" (Invoice)
Scanning Method
Sheet Feeding with CCD type image sensor
Effective Scanning Width
10.8" (274 mm)
Scanner Resolution
Horizontal
Standard and Fine Resolution : 203 pels/inch (8 pels/mm)
Super Fine Resolution
: 406 pels/inch (16 pels/mm)
Vertical
Standard Resolution
: 98 lines/inch (3.85 lines/mm)
Fine Resolution
: 196 lines/inch (7.7 lines/mm)
Super Fine Resolution
: 391 lines/inch (15.4 lines/mm)
Address Book Memory
Capacity
1000 stations
Each station can register up to 36 digits for each telephone number
(including pauses and spaces) and up to 15 characters for each station name
Image Memory Capacity
Base Memory 3 MB
: 180 pages
with 4 MB Flash Memory Card : 500 pages
with 8 MB Flash Memory Card : 820 pages
(Based on ITU-T Image No.1 using Standard Resolution)
FCC Registration Number
US: BTLFA15BMGCS02-01
Ringer Equivalence
1.5 B
Standard Compliance
10Base-T Ethernet (IEEE 802.3), 100Base-TX Fast Ethernet (IEEE802.3u)
Connector Interfaces
10/100 Base-TX port: RJ-45
Compatibility
IETF RFC 3965, ITU-T T.37
Communication Protocol
TCP/IP, SMTP, POP3, MIME
File Format
TIFF [IETF RFC 3949 Profile S, F, J]
PDF
Email Receiving Width
Maximum LEDGER size
67
Appendix
For Internet Fax (Email) [Standard]
Specifications
Appendix
3000-Sheet Tray (LCT) (DA-MA301)
Paper Size
Letter (Letter-R/Legal with optional DA-TK31)
Paper Weight
16 - 24 lb (60 - 90 g/m2)
Paper Capacity
Maximum 3000 sheets x 20 lb (75 g/m2)
Electrical Requirements
Supplied from copier
Dimensions (W x D x H)
11.7 x 17.5 x 19.9 in (295 x 445 x 505 mm)
Weight
33 lb (15 kg)
Applicable Models
DP-8060/8045/8035
Letter-R/Legal Size Adaptor for 3000-Sheet Tray (LCT) (DA-TK31)
Paper Size
Letter-R/Legal
Paper Weight
20 lb (75 g/m2)
Paper Capacity
Letter-R
Legal
Applicable Model
DP-8060/8045/8035
: Maximum 2500 sheets
: Maximum 1500 sheets
2-Bin Finisher (DA-FS600)
68
Mode
Non-sort/Sort/Staple
Paper Size
Invoice/Letter/Letter-R/Legal/Ledger
Paper Weight
16 - 35 lb (60 - 135 g/m2): Non-sort mode
Paper Capacity
Maximum: 1000 sheets / 30 set (Stapling mode)
Staple
Paper Size
Letter/Letter-R/Legal/Ledger
Paper Weight
17 - 21 lb (64 - 80 g/m2)
Capacity
2-50 sheets: Letter (20 lb: 75 g/m2)
2-30 sheets: Letter-R/Legal/Ledger (20 lb: 75 g/m2)
Point
Rear 1/Front 1/Middle 2-Point Staple
Electrical Requirements
Supplied from copier
Dimensions (W x D x H)
26.4 x 24.2 x 59.1 in (670 x 613 x 1500 mm)
Weight
70 lb (32 kg)
Applicable Models
DP-8060/8045
2-Bin Saddle-Stitch Finisher (DA-FS605)
Mode
Paper Size
1 Bin and 2 Bin
Non-sort/Sort/Staple
Stitch Tray
Saddle-Stitch
1 Bin and 2 Bin
Invoice/Letter/Letter-R/Legal/Ledger
Stitch Tray
Letter-R/Ledger
16 - 35 lb (60 - 135 g/m2): Non-sort mode
Paper Weight
Paper
Capacity
1 Bin and 2 Bin
Maximum: 1000 sheets / 30 set (Stapling mode)
Stitch Tray
Maximum: 30 set
Staple
Paper Size
Letter/Letter-R/Legal/Ledger
Paper Weight
17 - 21 lb (64 - 80 g/m2)
Capacity
2 - 50 sheets: Letter (20 lb: 75 g/m2)
2 - 30 sheets: Letter-R/Legal/Ledger (20 lb: 75 g/m2)
Point
Rear 1/Front 1/Middle 2-Point Staple
Saddle-Stitch Paper Size
Letter-R/Ledger
Paper Weight
17 - 21 lb (64 - 80 g/m2)
Stack
11 - 15 sheets: 10 sets/6 - 10 sheets: 15 sets/2 - 5 sheets: 25 sets
Electrical Requirements
Supplied from copier
Dimensions (W x D x H)
26.4 x 24.2 x 59.1 in (670 x 613 x 1500 mm)
Weight
114 lb (52 kg)
Applicable Models
DP-8060/8045
Punch Unit (DA-SP31) [for DA-FS600/605]
Paper Size
Letter/Ledger : 3-hole / Letter-R/Legal : 2-hole
Paper Weight
17 - 35 lb (64 - 133 g/m2)
Applicable Models
DP-8060/8045
2-Bin Finisher (DA-FS330) (1/2)
Paper Size
1 Bin
Non-sort/Sort
2 Bin
Non-sort/Shift-Sort (Letter Portrait only)/Staple (Letter Portrait only)
1 Bin
Invoice/Letter/Letter-R/Legal/Ledger
2 Bin
Letter
16 - 35 lb (60 - 135 g/m2): Non-sort mode
Paper Weight
Paper
Capacity
1 Bin
100 sheets
2 Bin
Maximum: 1000 sheets / 30 set (Stapling mode)
Staple
Paper Size
Letter
Paper Weight
17 - 21 lb (64 - 80 g/m2)
Capacity
2 - 30 sheets: 20 lb (75 g/m2)
Point
1-Point Staple
<Continue on the next page...>
69
Appendix
Mode
Specifications
Appendix
2-Bin Finisher (DA-FS330) (2/2)
Punch
Paper Size
Letter/Ledger: 3-hole
Paper Weight
16 - 28 lb (60 - 105 g/m2)
Electrical Requirements
Supplied from copier
Dimensions (W x D x H)
16.6 x 20.5 x 17.0 in (420 x 520 x 430 mm)
Weight
33 lb (15 kg)
Applicable Model
DP-8035
1-Bin Saddle-Stitch Finisher (DA-FS355A)
Mode
Paper Size
Bin
Non-sort/Sort/Staple
Stitch Tray
Saddle-Stitch
Bin
Invoice/Letter/Letter-R/Legal/Ledger
Stitch Tray
Letter-R/Ledger
16 - 35 lb (60 - 135 g/m2): Non-sort mode
Paper Weight
Paper
CapacityBin
Bin
Maximum: 1000 sheets / 30 set (Stapling mode)
Stitch Tray
Maximum: 20 set
Staple
Paper Size
Letter/Letter-R/Legal/Ledger
Paper Weight
17 - 21 lb (64 - 80 g/m2)
Capacity
2 - 50 sheets: Letter/Letter-R (20 lb 75 g/m2)
2 - 25 sheets: Legal/Ledger (20 lb 75 g/m2)
Point
Saddle-Stitch Paper Size
Rear 1/Front 1/Middle 2-Point Staple
Letter-R/Ledger
Paper Weight
17 - 21 lb (64 - 80 g/m2)
Stack
6 - 10 sheets: 10 sets/1 - 5 sheets: 20 sets
Electrical Requirements
Supplied from copier
Dimensions (W x D x H)
21.7 x 23.7 x 18.3 in (550 x 600 x 464 mm)
Weight
62 lb (28 kg)
Applicable Models
DP-8045/8035
Punch Unit (DA-SP41) [for DA-FS355A]
70
Paper Size
Letter/Ledger : 3-hole
Letter-R/Legal : 2-hole
Paper Weight
17 - 35 lb (64 - 133 g/m2)
Applicable Model
DP-8045/8035
Option and Supplies
Part Name
Part No.
Remarks
Deluxe Stand
DA-D351R
For USA/Canada only
Deluxe Stand (Short)
DA-D352R
For USA/Canada only
System Console 1
DA-DS603
550 Sheet Paper Tray x 1
System Console 2
DA-DS604
550 Sheet Paper Tray x 2
3000-Sheet Tray (LCT)
DA-MA301
3000 Sheet Paper Tray
2-Bin Finisher
DA-FS600
For DP-8060/8045
2-Bin Finisher
DA-FS330
For DP-8035
2-Bin Saddle-Stitch Finisher
DA-FS605
For DP-8060/8045
1-Bin Saddle-Stitch Finisher
DA-FS355A
For DP-8045/8035
Punch Unit
DA-SP31
DA-FS600/FS605 for DP-8060/8045
Punch Unit
DA-SP41
DA-FS355A for DP-8045/8035
Exit Tray
DA-XT600
For DP-8060/8045/8035
Letter-R/Legal Size Adaptor for
DA-TK31
For DA-MA301
Image Memory (16 MB)
DA-SM16B
For Electronic Sorting
Image Memory (64 MB)
DA-SM64B
For Electronic Sorting
Image Memory (128 MB)
DA-SM28B
For Electronic Sorting
Expansion Flash Memory Card, 4 MB
UE-410047
Additional Page Memory for Fax Communication Board (DA-FG600)
Expansion Flash Memory Card, 8 MB
UE-410048
Additional Page Memory for Fax Communication Board (DA-FG600)
Printer Controller Module
DA-PC800
Printer Controller for PCL6* Emulation
Multi Page Description
Language Controller Module
DA-MC800
Printer Controller for PCL6/PS3*
Fax Communication Board
DA-FG600
G3 Fax/Tel communication
Data Security Kit
DA-SC01
DD Server Software
DA-WS20
For DD Server function
Accounting Software
DA-WA10
For Accounting function
Document Distribution System
DA-WR10
For Document Distribution function
Document Distribution System Unlock Key
DA-UK10
For DDS (DA-WR10)
Staple Cartridge
FQ-SS66
Staple Cartridge Refills (3) for DA-FS605/600
Staple Cartridge
FQ-SS50
Staple Cartridge Refills (3) for DA-FS605 (Saddle-Stitch)
Staple Cartridge
DQ-SS35
Staple Cartridge Refills (3) for DA-FS355A
Staple Cartridge
FQ-SS32
Staple Cartridge Refills (3) for DA-FS330
Toner
DQ-TU33R
Toner for DP-8045/8035
Toner
DQ-TU38R
Toner for DP-8060
3000-Sheet Tray
● PCL6 is a Page Description Language of the Hewlett-Packard Company.
PS3 is a Page Description Language of the Adobe System Company.
● F-ROM 8MB Expansion Board (DA-EM600) is included with the PCL6 and PCL6/PS3 options.
71
Appendix
NOTE
Multi-Tasking Job Table
Appendix
Concurrent Copy*
Current Job
Copy
2nd Job
Copy
Copy
Concurrent Copy*
Storing Document
Printing
Network Scanning
Storing Document
GDI/PCL/PS Printing
Receiving Data
Printing Receive Document
Facsimile (Sending)
Storing Document
Memory Transmission
Facsimile (Receiving)
Memory Receiving
Printing Received
Memory Data
Storing
Document
Printing
Network Scanning GDI/PCL/PS Printing Facsimile (Sending) Facsimile (Receiving)
Storing Transmission Receiving
Printing
Storing
Memory
Memory Printing Received
Document
to PC
Data
Received Data Document Transmission Receiving Memory Data
*
: Accepts and executes 2nd Job.
: Accepts and executes 2nd Job (Copy) only if Current Job has been interrupted.
: Accepts 2nd Job and executes the 2nd Job after Current Job has completed.
: Accepts 2nd Job (Concurrent copy printing) and executes the 2nd Job after Current Job (Printing from PC data) has stopped, or at the end of a printing Copy (Electronic/Rotate/Shift/
Staple Sort) or the end of a printing Group (Rotate/Shift Stack). After 2nd Job has completed, the remains of Current Job will restart.
For example:
Current Job (PC print): 2 pages x 2 copies with staple sort; 2nd Job (Concurrent Copy): 1 page
> After one operator sets Current Job, another operator sets 2nd Job.
2 pages print stapled (PC print);
1 page prints (Concurrent Copy);
2 pages print with staple (PC print)
: Not accepts the 2nd Job.
: None
NOTE
∗: Additional 16MB (minimum) Image memory are required.
72
FCC Notice
■ For Users in USA
!
WARNING
This equipment has been tested and found to comply with the limits for a Class A digital device, pursuant to part 15
of the FCC Rules. These limits are designed to provide reasonable protection against harmful interference when the
equipment is operated in a commercial environment. This equipment generates, uses, and can radiate radio
frequency energy and, if not installed and used in accordance with the Operating Guide, may cause harmful
interference to radio communications.
Operation of this equipment in a residential area is likely to cause harmful interference in which case the user will be
required to correct the interference at his/her own expense.
Any unauthorized changes or modifications to this equipment would void the users authority to operate this device.
Warning: To assure continued compliance, use only shielded interface cable when connecting the facsimile
machine parallel interface port to host computer. Also, any changes or modifications not expressly
approved by the party responsible for compliance could void the user's authority to operate this
equipment.
This device complies with Part 15 of the FCC Rules. Operation is subject to the following two conditions:
(1)This device may not cause harmful interference, and
(2)This device must accept any interference received, including interference that may cause undesired operation.
Responsible Party : Panasonic Corporation of North America
One Panasonic Way, Secaucus, NJ 07094
FCC Inquiries Only : Panasonic Digital Document Company/Technical Support Department
Three Panasonic Way, Secaucus, NJ 07094
1-800-225-5329 (see Note below)
Email: [email protected]
Note: For Technical Support, please contact your Authorized Panasonic selling dealer.
This equipment complies with Part 68 of the FCC rules and the requirements adopted by the ACTA. On the
rear panel of this equipment is a label that contains, among other information, a product identifier in the format
US:AAAEQ##TXXXX. If requested, this number must be provided to the telephone company.
Ask your telephone company or installer to install the jack suitable for your device if such is not available.
A plug and jack used to connect this equipment to the premises wiring and telephone network must comply with the
applicable FCC Part 68 rules and requirements adopted by the ACTA. A compliant telephone cord and modular plug
is provided with this product. It is designed to be connected to a compatible modular jack that is also compliant. See
installation instructions for details.
The REN is used to determine the number of devices that may be connected to a telephone line. Excessive RENs
on a telephone line may result in the devices not ringing in response to an incoming call. In most but not all areas,
the sum of RENs should not exceed five (5.0). To be certain of the number of devices that may be connected to a
line, as determined by the total RENs, contact the local telephone company. The REN for this product is part of the
product identifier that has the format US:AAAEQ##TXXXX. The digits represented by ## are the REN without a
decimal point (e.g., 03 is a REN of 0.3).
If your telephone equipment causes harm to the telephone network, the Telephone Company may discontinue your
service temporarily. If possible, they will notify you in advance. But if advance notice isn't practical, you will be
notified as soon as possible. You will be informed of your right to file a complaint with FCC.
<Continue on the next page...>
73
Appendix
Your telephone company may make changes in it's facilities, equipment, operations or procedures that could affect
the proper functioning of your equipment. If they do, you will be notified in advance to give you an opportunity to
maintain uninterrupted telephone service.
FCC Notice
Appendix
If you experience trouble with this telephone equipment, please contact the manufacturer's authorized service
agency for information on obtaining service or repairs. The telephone company may ask that you disconnect this
equipment from the network until the problem has been corrected or until you are sure that the equipment is not
malfunctioning.
For protection against the risk of electric shock, always disconnect all cables from the wall outlet before servicing,
modifying or installing the equipment.
This equipment may not be used on coin service provided by the telephone company nor connected to party lines.
Connection to party line service is subject to state tariffs. (Contact the state public utility commission, public service
commission or corporation commission for information.)
If your home has specially wired alarm equipment connected to the telephone line, ensure the installation of this
equipment does not disable your alarm equipment. If you have questions about what will disable alarm equipment,
consult your company or a qualified installer.
The Telephone Consumer Protection Act of 1991 makes it unlawful for any person to use a computer or other
electronic device to send any message via telephone facsimile machine unless such message clearly contains in a
margin at the top or bottom of each transmitted page or on the first page of transmission the following information:
1. Date and Time of transmission; and,
2. Identification of either business, business entity or individual sending the message: and,
3. Telephone number of either the sending machine, business, business entity or individual.
In order to program this information into your facsimile machine, you should refer to the Operating Instructions For
Facsimile and Internet Fax/Email Functions to complete the steps.
Example of Header Format (LOGO, ID Number setting)
74
■ For Users in Canada
!
CAUTION
Users should not attempt to make such connections themselves, but should contact the appropriate electric
inspection authority, or electrician, as appropriate.
!
Avertissement
L’utilisateur ne doit pas tenter de faire ces raccordements lui-même; il doit avoir recours à un service d’inspection des
installations électriques, ou à un électricien, selon le cas.
NOTICE
Before installing this equipment, users should ensure that it is permissible to be connected to the facilities of the
local telecommunications company. The equipment must also be installed using an acceptable method of
connection. The customer should be aware that compliance with the above conditions may not prevent degradation
of service in some situations.
Repairs to this equipment should be made by an authorized Canadian maintenance facility designated by supplier.
Any repairs or alterations made by the user to this equipment, or equipment malfunctions, may give the
telecommunications company cause to request the user to disconnect the equipment.
Users should ensure for their own protection that the electrical ground connections of the power utility, telephone
lines and internal metallic water pipe system, if present, are connected together. This precaution may be particularly
important in rural areas.
Avis
Avant d’installer ce matériel, l’utilisateur doit s’assurer qu’il est permis de le raccorder aux installations de l’entreprise
locale de télécommunication. Le matériel doit également être installé en suivant une méthode acceptée de raccordement.
L’abonné ne doit pas oublier qu’il est possible que la conformité aux conditions énoncées ci-dessus n’empêche pas la
dégradation du service dans certaines situations.
Les réparations de matériel homologué doivent être effectuées par un centre d’entretien canadien autorisé désigné
par le fournisseur. La compagnie de télécommunications peut demander à l’utilisateur de débrancher un appareil à la
suite de réparations ou de modifications effectuées par l’utilisateur ou à cause de mauvais fonctionnement.
Pour sa propre protection, l’utilisateur doit s’assurer que tous les fils de mise à la terre de la source d’énergie électrique,
des lignes téléphoniques et des canalisations d’eau métalliques, s’il y en a, sont raccordé ensemble. Cette précaution
est particulièrement importante dans les régions rurales.
NOTICE
This equipment meets the applicable Industry Canada Terminal Equipment Technical Specifications. This is
confirmed by the registration number. The abbreviation, IC, before the registration number signifies that registration
was performed based on a Declaration of Conformity indicating that Industry Canada technical specifications were
met. It does not imply that Industry Canada approved the equipment.
On the rear panel of this equipment is a label that contains, among other information, the Registration Number and
Ringer Equivalence Number (REN) for this equipment.
The REN assigned to each terminal equipment provides an indication of the maximum number of terminals allowed
to be connected to a telephone interface. The termination on an interface may consist of any combination of devices
subject only to the requirement that the sum of the Ringer Equivalence Numbers of all devices does not exceed five.
Avis
Le présent matériel est conforme aux spécifications techniques d’Industrie Canada applicables au matériel terminal.
Cette conformité est confirmée par le numéro d’enregistrement. Le sigle IC, placé devant le numéro d’enregistrement,
signifie que l’enregistrement s’est effectué conformément à une déclaration de conformité et indique que les
spécifications techniques d’Industrie Canada ont été respectées. Il n’implique pas qu’Industrie Canada a approuvé le
materiel.
L’IES assigné à chaque dispositif terminal indique le nombre maximal de terminaux qui peuvent être raccordés à une
interface téléphonique. La terminaison d’une interface peut consister en une combinaison quelconque de dispositifs,
à la seule condition que la somme d’indices d’équivalence de la sonnerie de tous les dispositifs n’excède pas 5.
75
Appendix
Sur le panneau arrière de cet appareil se trouve une étiquette, sur laquelle est indiqué, entre autres, le numéro
d’enregistrement et le Numéro d’Equivalence de Sonnerie (REN) pour cet appareil.
Index
Appendix
A
J
Accessories ................................................................... 2
Active Icon/LED ........................................................... 15
Adding Paper ......................................................... 54–55
Paper Tray (1550-Sheet Paper Tray 1) ................... 54
Paper Tray (3000-Sheet Tray (LCT)) ....................... 55
Sheet Bypass .......................................................... 55
System Console (550-Sheet Paper Tray 2-4) ......... 54
Address Book (Facsimile) ...................................... 28–29
Address Book (Internet Fax/Email) ........................ 30–31
Job Build and SADF Mode (Copy) .............................. 17
JOB QUEUE Button (Copy) ......................................... 17
JOB QUEUE Button (Print) .......................................... 20
JOB SETTINGS Button ................................................ 17
B
M
Basic Copy Operation ................................................. 22
Machine Care .............................................................. 39
MODE SETTING Button (Fax/Internet Fax/Email) ........ 18
MODE SETTING Button (Scan/File) ............................ 19
Multi-Size Feeding (Copy) .......................................... 17
C
CANCEL PRINT Button ............................................... 20
Clear Key ..................................................................... 15
Communications Utility ................................................ 25
COMPLETION NOTICE Button .................................... 17
Control Panel ............................................................... 15
Copy Contrast .............................................................. 23
Copy Direction and Paper Direction Indication .......... 17
Copy Key ..................................................................... 15
Copy Size Keys ........................................................... 15
D
DD RETRIEVE Button ................................................. 19
DD SAVE Button .......................................................... 19
DESTINATIONS Button ................................................ 18
Dispose of the Punch Hole Residue ..................... 62–63
DA-FS330 ............................................................... 63
DA-FS600/FS605 with optional Punch Unit (DA-SP31) ... 62
DA-FS355A with optional Punch Unit (DA-SP41) ... 62
E
EMAIL HEADER Button ............................................... 18
Energy Saver Key ........................................................ 15
Energy Star .................................................................. 83
F
Fax (Option) Function Keys ......................................... 15
Fax/Email Key .............................................................. 15
Fax/Email On Line LED ............................................... 15
FCC Notice ............................................................ 73–75
Function Key ................................................................ 15
G
Glossary ................................................................. 78–80
I
Interrupt Key ................................................................ 15
76
K
KEYBOARD Button ...................................................... 18
Keypad ........................................................................ 15
N
Network Scanner ......................................................... 25
O
OFF LINE Button .......................................................... 20
ON LINE Button ........................................................... 20
Operating Instructions ................................................... 2
Option and Supplies .................................................... 71
Original Mode Select Buttons ...................................... 17
Original Size (Copy) .................................................... 21
Original Size (Facsimile/Internet Fax/Email) ............... 32
Outer/Inner View .......................................................... 14
P
Panasonic Document Magagement System ................. 25
Paper Tray Selection Button ........................................ 17
Placing Originals (Copy) ............................................. 21
Placing Originals (Facsimile/Internet Fax/Email) ......... 32
Power Switch ........................................................ 11, 14
Precautions .............................................................. 9–11
Print Data Icon/LED ..................................................... 15
Print Key ...................................................................... 15
Print On Line LED ........................................................ 15
Printing from PC .......................................................... 24
PROOF SET Button ..................................................... 17
Punch ........................................................................... 62
R
Receiving an Email from POP Server ......................... 37
Removing Misfed Paper ........................................ 41–53
1-Bin Saddle-Stitch Finisher ............................ 50, 52
2-Bin Finisher .................................................... 48–49
2-Bin Saddle-Stitch Finisher ................................... 51
3000-Sheet Tray (LCT) ............................................ 47
Automatic Duplex Unit ............................................ 46
i-ADF ....................................................................... 53
Paper Entry Area ..................................................... 43
Paper Exit/Fuser Area ............................................. 45
Paper Transport Area .............................................. 44
Reverse Area .......................................................... 47
System Console ...................................................... 42
Replacing the Battery .................................................. 64
Replacing the Staple Cartridge ............................. 57–61
1-Bin Saddle-Stitch Finisher (DA-FS355A) ............ 60
2-Bin Finisher (DA-FS330) ..................................... 57
2-Bin Finisher (DA-FS600) ..................................... 58
2-Bin Saddle-Stitch Finisher (DA-FS605) ............... 58
When supplying the Saddle Stitcher Unit with staples
(DA-FS605 only) ..................................................... 59
Replacing Toner Bottle ................................................ 56
RESERVE A JOB Button ............................................. 17
Reset Key .................................................................... 15
S
Safety Information ...................................................... 6–8
Scan/File Key ............................................................... 15
Scanner ....................................................................... 25
SEARCH Button .......................................................... 18
Security Suggestions for Key Operators ..................... 12
Sending Originals (Facsimile) ............................... 33–34
Sending Originals (Internet Fax/Email) ................. 35–36
Sheet Bypass ........................................................ 14, 55
SORT/FINISH ............................................................... 58
Specifications ........................................................ 65–70
STAPLE-SORT ............................................................ 58
Start Key ...................................................................... 15
Status Icon/LED ........................................................... 15
Stop Key ...................................................................... 15
T
Table of Contents ....................................................... 4–5
TANDEM/REMOTE Button .......................................... 17
Touch Panel Display ............................................. 16–20
Transparency ............................................................... 41
Troubleshooting ..................................................... 38–39
U
77
Appendix
User Error Codes (U Codes) ....................................... 40
User Error Codes (J Codes) ........................................ 41
Glossary
Appendix
78
Address Book
The Address Book is a convenient directory that stores contact Phone Numbers
and Email Addresses for easy retrieval at a future time.
Address Book Dialing
A dialer that enables you to dial an entire Telephone Number/Email Address by
pressing one key.
ADF
(Automatic Document Feeder)
The mechanism that delivers a stack of document pages to the scanner one
page at a time.
CD-ROM
CD-ROM media is read-only media that holds about 650 MB of data. It's
generally accepted as the easiest way to distribute software. CD-ROM drives can
also read audio CDs even though they are in a different format than standard
CD-ROM media.
Contrast
Signifies the scanning sensitivity in terms of lightness and darkness of your
original pages. The degree of color or darkness of an image or photograph.
DDS
(Document Distribution
System)
The Document Distribution System automatically distributes received data
(scanner data, data received via FAX, and data received via Internet Fax) to
specified recipients via a predefined delivery mechanism. The system
administrator uses the system to specify the delivery mechanisms and the
recipients.
Dept. Code
(Department Code)
This operation requires the user to input a preset number of digits (Department
Code) before being given access to a function of the machine such as
transmission for example. The Department Name of selected Department Code is
printed on the Header of each page sent, Cover Sheet, Comm. Journal and
Individual Transmission Journal.
DHCP
Dynamic Host Configuration Protocol - a standard method for assigning IP
addresses automatically to the devices on a TCP/IP network. As a new device
connects, the DHCP server assigns an IP address from a list of available
addresses. The device retains this IP address for the duration of the session once the device disconnects the IP address becomes available for use again.
Disk Drive
A peripheral storage device that holds, spins, reads and writes magnetic or
optical disks. It may be a receptacle for disk cartridges, disk packs or floppy disks,
or it may contain non-removable disk platters like most hard disks.
dpi
Abbreviation of dots per inch, which indicates the resolution of images. The more
dots per inch, the higher the resolution. A common resolution for laser printers is
600 dots per inch. This means 600 dots across and 600 dots down, so there are
360,000 dots per square inch.
Drum
Along with the laser, this is one of the basic components of a laser printer. A lightsensitive drum on which the image is generated by the laser beam as the pattern
of an electric charge. The toner particles adhere to this pattern after the drum has
brushed against the developing roller. (a.k.a. OPC Drum)
Fax Board
In a multi-functional device, this is a Fax capability built onto a printed circuit
board which can send and receive facsimiles. The multi-functional device is
normally able to scan a document and transmit it over a phone line to another fax
machine. Also, it can receive faxes from other machines and print them out.
FTP
Short for File Transfer Protocol, the protocol for exchanging files over the Internet.
FTP works in the same way as HTTP for transferring Web pages from a server to
a user's browser and SMTP for transferring electronic mail across the Internet in
that, like these technologies, FTP uses the Internet's TCP/IP protocols to enable
data transfer.
FTP is most commonly used to download a file from a server using the Internet or
to upload a file to a server (Ex: uploading a Web page file to a server).
G3
(Group 3)
Refers to the standards and transmission capabilities of the current generation of
facsimile machines.
The physical component of a PC which performs the basic operations on the
hard disk-including rotating the disk and reading/writing data to the disk.
Install
To add hardware or load a software application onto your multi-functional
machine/computer.
Internet
The Internet is a vast collection of inter-connected networks that all use the TCP/
IP protocols, on which you can send an electronic email, chat to people
electronically or search for information on almost any subject you care to think of.
Quite simply it is a “network of computer networks”.
Internet FAX
The Internet fax uses the Internet to send faxes. The transmission and reception
take place via store-and-forward mode on the Internet using Internet email. In
store-and-forward mode the facsimile protocol stops at the gateway to the
Internet and is reestablished at the gateway leaving the Internet.
JPEG
Short for Joint Photographic Experts Group, and pronounced jay-peg. JPEG is a
lossy compression technique for color images. Although it can reduce file size to
about 5 % of their normal size, some detail is lost in the compression. JPEG is a
graphical format that is widely used in WWW pages.
Key Name
An alternate to the station name that can be programmed for each Address Book
dialing key. (By default it displays the first 15 characters of the station name.)
Keypad
A group of numeric keys located on your Control Panel.
LAN
(Local Area Network)
A Local Area Network is a computer network system and printer limited to an
immediate area, such as an Office, Factory, and University used to integrate and
exchange data.
LCD
Liquid Crystal Display. The display area of your machine.
Memory
The term memory identifies data storage that comes in the form of chips, which
holds information that your machine needs to use. The word storage is used for
memory that exists on disks.
Modem
A device that converts signals from your fax machine into signals that can be
transmitted over telephone lines.
Module
A self-contained hardware or software component that interacts with a larger
system.
Hardware modules are often made to plug into a main system. Program modules
are designed to handle a specific task within a larger program.
Network
Any time you connect 2 or more computers together so that they can share
resources, you have a computer network. Connect 2 or more networks together
and you have an internet.
PC
The Personal Computer - Quite Simply a computer designed to be used by one
person at a time.
PCMCIA/PC Card
A credit card sized removable module for portable computers. PCMCIA/PC Cards
are used to attach modems, network adapters, sound cards, radio transceivers,
solid state disks and hard disks to a portable computer.
PCL
(Printer Control Language)
The page description language, which has become a de facto standard used in
many printers and typesetters. PCL Level 6 streamlines the graphics and font
commands, reducing the amount of information that has to be sent to the printer.
PDF
Adobe® Portable Document Format is a universal file format that preserves all the
fonts, formatting, graphics, and color of any source document, regardless of the
application and platform used to create it.
<Continue on the next page...>
79
Appendix
HDD
(Hard Disk Drive)
Glossary
Appendix
80
Protocol
A standard process, a set of rules and conditions that perform a particular
function. A word which is very common in PC and Internet Terminology.
Ex: FTP (File Transmission Protocol), IP Address (Internet Protocol Address),
TCP/IP (Transmission Control Protocol/Internet Protocol), POP (Post Office
Protocol)
Resolution
This relates to the quality of a viewed image either on the PC Screen or printed
output. For printed images the resolutions is measured in dots per inch or DPI.
The higher the DPI the better the resolution and better image quality.
SD Card
(Secure Digital Memory Card)
A flash memory card that provides secure storage for your machine, which is also
popular with handheld devices such as digital cameras, cell-phones, and PDAs.
Sleep Mode
The lowest power state that the machine enters after the specified time without
actually turning off.
SMTP
(Simple Mail Transfer
Protocol)
An accepted standard used extensively on the Internet for transferring E-mail
messages between computers. The standard defines exactly how the message
will be sent, any controls, format of the message etc.
Software
Software is basically a series of instructions that causes the PC to do something.
The Operating System such as DOS is known as Systems Software. Application
Programs such as a Word Processor or Spreadsheet perform the main tasks for
which we use the PC.
Station Name
An Alphanumeric ID which can be programmed for each phone number or email
address location in the Address Book.
TCP/IP
TCP/IP stands for Transmission Control Protocol/Internet Protocol and is quite
simply a standard set of protocols that govern the basic workings of the Internet
that was implemented in 1982.
The TCP part is all about ensuring that data is transmitted correctly between 2
computers. If any errors occur these are detected and the data is retransmitted.
The data transmitted is split up into small portions called Data packets. The IP
part of TCP/IP is how these data packets are moved from one point to another.
Each computer on the internet has a unique IP address and the data packets are
moved from the source to the destination through many different computers and
this is controlled via TCP/IP. This protocol is used on the Internet and also by
computers which are part of a LAN.
Thumbnails
A miniature display of a page or an image. Thumbnails enable you to see the
layout of many pages/images on the screen at once. Generally, thumbnails are
too small to show the actual text/image.
TIFF
Tagged Image File Format. One of the many different types of File Format used
on PC's. An image file format for attachments of graphic data for smooth
transmission between different units.
The coding method of this format supports the same coding as Modified Huffman
(MH) and multiple-page image data.
Toner
A special type of ink used by copy machines and laser printers. Toner consists of
a dry, powdery substance that is electrically charged so that it adheres to an
invisible image that has been charged onto a drum, plate, or piece of paper with
the opposite polarity.
Verification Stamp
A user selectable transmission verification stamp which can be placed on
scanned documents that are successfully transmitted or stored in memory.
81
Appendix
Memo
Appendix
82
Memo
The following trademarks and registered trademarks are used throughout this manual:
Microsoft, Windows, Windows NT, Windows Server, Outlook & Windows logo are either registered
trademarks or trademarks of Microsoft Corporation in the USA and other countries.
Microsoft product screen shot(s) reprinted with permission from Microsoft Corporation.
Adobe, Acrobat Reader & Adobe logo are either registered trademarks or trademarks of Adobe Systems
Incorporated.
All other trademarks identified herein are the property of their respective owners.
PEERLESSPageTM is a trademark of the PEERLESS Systems Corporation; and,
PEERLESSPrint® and Memory Reduction Technology® are registered trademarks of PEERLESS
Systems Corporation; and, COPYRIGHT © 2002 PEERLESS Systems Corporation.
Universal Font Scaling Technology (UFST) and all typefaces have been licensed from Monotype Imaging.
Agfa® and the Agfa rhombus are registered trademarks of Agfa-Gevaert N.V. registered in the U.S. Patent and
Trademark Office and may be registered in other jurisdictions. Monotype® is a registered trademark of AMT
registered in the U.S. Patent and Trademark Office and may be registered in other jurisdictions. ColorTune® is a
registered trademark of Agfa-Gevaert N.V. registered in the U.S. Patent and Trademark Office and may be
registered in other jurisdictions. Profile Tool KitTM, Profile StudioTM and Profile OptimizerTM are trademarks of
AMT and may be registered in certain jurisdictions.
Copyright © 2005 Monotype Imaging Inc. All rights reserved.
Novell and NetWare are registered trademarks of Novell, Inc. in the United States and other countries.
PCL is either trademark or registered trademark of Hewlett-Packard Company and/or its subsidiaries.
Adobe, PostScript and PostScript 3 are either registered trademarks or trademark of Adobe Systems
Incorporated in the United States and/or other countries.
This equipment contains a number of programs licensed under the terms of the GNU General Public
License/GNU Lesser General Public License and other open software. For more details and applicable
license terms thereof, please refer to the relevant information in the CD attached herewith.
As an ENERGY STAR® Partner, Panasonic has determined that this product meets
the ENERGY STAR® guidelines for energy efficiency.
This voluntary program specifies certain energy consumption and usage standards.
This product will automatically “power down” after a specified period of non-use. The
use of this ENERGY STAR® compliant product will reduce energy consumption
and ultimately benefit the environment.
The default functions can be adjusted depending on your office requirements.
Please ask your authorized Panasonic dealer for more details.
© 2006 Panasonic Communications Co., Ltd. All Rights Reserved.
Unauthorized copying and distribution is a violation of law.
The contents of these Operating Instructions are subject to change without notice.
83
USA Only
WARRANTY
PANASONIC DIGITAL DOCUMENT COMPANY MAKES NO WARRANTIES, GUARANTEES OR
REPRESENTATIONS, EXPRESSED OR IMPLIED, TO CUSTOMER WITH RESPECT TO THIS
PANASONIC MACHINE, INCLUDING BUT NOT LIMITED TO, ANY IMPLIED WARRANTY OF
MERCHANTABILITY OR FITNESS FOR A PARTICULAR PURPOSE.
PANASONIC DIGITAL DOCUMENT COMPANY ASSUMES NO RISK AND SHALL NOT BE SUBJECT
TO LIABILITY FOR ANY DAMAGE, INCLUDING, BUT NOT LIMITED TO DIRECT, INDIRECT, SPECIAL,
INCIDENTAL OR CONSEQUENTIAL DAMAGES OR LOSS OF PROFITS SUSTAINED BY THE
CUSTOMER IN CONNECTION WITH THE USE OR APPLICATION OF THIS PANASONIC MACHINE.
SEE YOUR DEALER FOR DETAILS OF DEALER’S WARRANTY.
■ Notice: California only:
This product contains a CR Coin Cell Lithium Battery which contains Perchlorate Material - special
handling may apply.
See www.dtsc.ca.gov/hazardouswaste/perchlorate
For Service, Call:
Panasonic Digital Document Company,
Unit of Panasonic Corporation of North
America
One Panasonic Way
Secaucus, New Jersey 07094
http://panasonic.co.jp/pcc/en/
Panasonic Canada Inc.
5770 Ambler Drive
Mississauga, Ontario L4W 2T3
http://www.panasonic.ca
C0806-1116(04)
PJQQC0055ZB
November 2006
Published in Japan