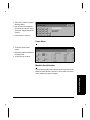
1
About This Guide
Xerox Document Centre
220/230/332/340
Setup Guide
July 1999
602p35412
Xerox Corporation
800 Phillips Road
Webster
New York 14580
Prepared by:
Xerox Europe Technical Centre
Multinational Professional Services
Bessemer Road
Welwyn Garden City
Hertfordshire
AL7 1HE
ENGLAND
©1999 by Xerox Limited. All rights reserved.
Copyright protection claimed includes all forms and matters of
copyrighted material and information now allowed by statutory or
judicial law or hereinafter granted, including without limitation material
generated from the software programmesprograms that are displayed
on the screen such as icons, screen display looks, etc.
Xerox® and all Xerox products mentioned in this publication are
trademarks of Xerox Corporation. Product names and trademarks of
other companies are hereby acknowledged.
Changes are periodically made to this document. Changes, technical
inaccuracies,and typographical errors will be corrected in subsequent
editions.
This document was created on a PC using Adobe Framemaker
software.
Table of Contents
Table of Contents
ABOUT THIS GUIDE .............................................................................1-1
Related Documentation ............................................................1-1
Introduction ........................................................................................1-2
Xerox Welcome Center Telephone Number .............................1-3
Conventions ......................................................................................1-4
Orientation ................................................................................1-4
Italic typeface ............................................................................1-5
Quick Pathway ..........................................................................1-5
Notes ........................................................................................1-5
Hints ..........................................................................................1-6
Cautions ....................................................................................1-6
Warnings ...................................................................................1-6
ABOUT SETUPS ...................................................................................2-1
Setup Procedures ..............................................................................2-2
Key Operator Tools ..............................................................2-2
System Administrator Tools .................................................2-3
Auditron Administrator Tools ................................................2-3
Owner Tools .........................................................................2-4
Changing the Settings .......................................................................2-5
Switch On .................................................................................2-5
Access the Setup Tools ............................................................2-5
MACHINE SETUPS ...............................................................................3-1
Access the Machine Setups .....................................................3-1
Paper Tray Setups ....................................................................3-3
Date/Time Setup .......................................................................3-4
Date ......................................................................................3-4
Time .....................................................................................3-5
Xerox Document Centre 220/230/332/340 Setup Guide
Page-i
Walkup Screen ......................................................................... 3-5
Timers ...................................................................................... 3-6
Auto Clear ............................................................................ 3-6
Low Power ........................................................................... 3-7
Power Save (or Auto Off) ..................................................... 3-8
Contention ................................................................................ 3-8
Interrupt Button .................................................................... 3-9
Priority or Print Queue Priority ............................................. 3-9
Localization ........................................................................ 3-10
Additional Setups ................................................................... 3-11
Report Languages .............................................................. 3-11
Touch Screen Contrast ...................................................... 3-12
Customer Support Number ................................................ 3-12
Paper Sizes ........................................................................ 3-13
Machine Serial Number ...................................................... 3-13
Xerox Supplies Number / Supplies Tel. Number ................ 3-14
Fault Override ................................................................................. 3-15
Accessing Fault Override ....................................................... 3-16
Unavailable Features ............................................................. 3-17
COPY SETUPS .................................................................................... 4-1
Access the Copy Setups .......................................................... 4-2
Reduce/Enlarge ........................................................................ 4-3
Defaults ................................................................................ 4-3
Normal .................................................................................. 4-4
Custom ................................................................................. 4-4
Image Quality ........................................................................... 4-5
Output ....................................................................................... 4-6
Sides Imaged ........................................................................... 4-7
Expert Image Quality ................................................................ 4-8
Margin Shift (DC332/340) ......................................................... 4-9
Erase (DC332/340) .................................................................. 4-9
Border Erase (DC332/340) ................................................ 4-10
Edge Erase (DC332/340) ................................................... 4-11
Page-ii
Table of Contents
Xerox Document Centre 220/230/332/340 Setup Guide
Table of Contents
FAX SETUPS .......................................................................................5-1
Access the Fax Setups .............................................................5-2
Fax Terminal Setups .........................................................................5-3
Access Fax Terminal Setups ....................................................5-3
Fax Terminal Options ...............................................................5-4
Local ID ................................................................................5-4
Local Name ..........................................................................5-5
Company Logo .....................................................................5-6
Delayed Start Time ...............................................................5-7
Long Document (DC332/340) ..............................................5-8
Dialing Digits Reporting (DC332/340) ..................................5-8
Fax Printing Options .................................................................5-9
Receive Reduction ...............................................................5-9
Page Margin .......................................................................5-10
Duplex Printing ...................................................................5-11
Paper Attributes ..................................................................5-11
Output Selection .................................................................5-12
A3 ‡ 11" x 17" .....................................................................5-13
Fax Report Options .................................................................5-14
Activity Report ....................................................................5-14
Broadcast and Multi-Poll Reports .......................................5-14
Transmission Report ..........................................................5-15
Mailbox Report ...................................................................5-16
Fax Panel Defaults .................................................................5-16
Resolution ..........................................................................5-16
Lighter/Darker .....................................................................5-17
Original Type ......................................................................5-17
Forced 4800 (Document Centre 220/230) ..........................5-18
Communication Mode (DC332/340) ...................................5-18
Fax Mailboxes .........................................................................5-19
To Delete a Mailbox ...........................................................5-20
To Add or Edit a Mailbox ....................................................5-20
Fax File Management .............................................................5-21
Mailbox Files / Failed Fax Files ..........................................5-22
Page-iii
Files for Polling / Files Stored for Polling ........................... 5-22
Fax Communication Setups ............................................................ 5-24
Access Fax Communication Setups ....................................... 5-24
Outgoing Fax Options ............................................................ 5-25
Dialing Type ....................................................................... 5-25
Pause Time ........................................................................ 5-26
Redial Management ........................................................... 5-26
Line Monitor ....................................................................... 5-27
Batch Send ......................................................................... 5-28
Resend Count .................................................................... 5-28
Incoming Fax Options ............................................................ 5-29
Auto Answer Delay ............................................................. 5-29
Ring Volume ....................................................................... 5-30
Junk Fax Prevention .......................................................... 5-30
Receive Header Print (DC332/340) ................................... 5-31
Secure Fax Receive (DC332/340) ..................................... 5-31
Line Use Restriction (DC332/340) .......................................... 5-31
AUDITRON SETUPS ............................................................................. 6-1
Access Auditron Setups .................................................................... 6-2
Internal Auditron - DC332/340 .......................................................... 6-3
Auditron Enable Setups - DC332/340 ...................................... 6-3
Account Setups - DC332/340 ................................................... 6-4
Add/Modify Accounts ........................................................... 6-5
Delete Account ..................................................................... 6-6
Reset All Counters ............................................................... 6-7
Reset All Limits .................................................................... 6-7
Delete All Accounts .............................................................. 6-7
Job Limit Policy - DC332/340 ................................................... 6-8
Account Summary - DC332/340 ............................................... 6-8
Internal Auditron - DC220/230 ........................................................ 6-10
Service Access Setup - DC220/230 ....................................... 6-10
Account Setup - DC220/230 ................................................... 6-11
Add Accounts ..................................................................... 6-12
Job Completion Setup - DC220/230 ....................................... 6-13
Page-iv
Table of Contents
Table of Contents
Foreign Interface Device .................................................................6-15
ACCESS RIGHTS .................................................................................7-1
Assign Privileges ......................................................................7-4
Add Pin .....................................................................................7-5
Set User Privileges ...................................................................7-5
Delete PIN ................................................................................7-6
INDEX .................................................................................................8-1
Xerox Document Centre 220/230/332/340 Setup Guide
Page-v
Page-vi
Table of Contents
1 About This Guide
NOTE: The graphic representations of the user interface
screens are based on a fully configured Document Centre
332/340 and the appearance of these interface screens
may differ slightly on other models or configurations.
However, feature descriptions and functionality remain the
same as described.
Related Documentation
In addition to this Setup Guide, the following documentation
is available for the Document Centre 220/230/332/340.
- Document Centre 220/230/332/340 User Guide provides an in-depth understanding of each feature.
- Document Centre 220/230/332/340 On-Line Help provides context-sensitive help about the settings
being modified or the features being used.
- Document Centre 220/230/332/340 System
Administration Guide - provides information and
instructions for network installation.
Xerox Document Centre 220/230/332/340 Setup Guide
Page 1-1
About This Guide About This Guide
This chapter contains an introduction to the machine and an
orientation to the conventions used in this Guide.
About This Guide
This document is a Setup Guide for the Owner, Key
Operator and System Administrator of the machine. It
contains step by step instructions for customizing the
various product defaults.
Introduction
Welcome to the Xerox family of Document Centre products.
As the Owner or Key Operator, the first step is to locate and
record the product serial number. The serial number is
located inside the Left Front Cover, under the Copy/Print
Cartridge. Record the serial number in the space below and
in the front of the User Guide.
Serial number:
If difficulty is experienced when operating the Document
Centre 220/230/332/340, check the suggestions in Chapter
11, Problem Solving, in the Document Centre
220/230/332/340 User Guide to see if the problem can be
resolved quickly. If the difficulty persists, contact the Xerox
Welcome Center.
Page 1-2
About This Guide
Xerox Welcome Center Telephone Number
The telephone number of the Xerox Welcome Center is
provided at the time of product installation. For future
reference, record the telephone number in the space below:
Welcome Center Telephone Number:
Canada..............................................800-939-3769
About This Guide About This Guide
When telephoning the Xerox Welcome Center, please have
the serial number of the Document Centre 220/230/332/340
readily available and a note of any error messages. This
information can help to resolve the problem quickly.
About This Guide
United States.....................................800-821-2797
Xerox Document Centre 220/230/332/340 Setup Guide
Page 1-3
Conventions
Throughout this Setup Guide, some terms are used
interchangeably:
- Paper is synonymous with media.
- Document is synonymous with original.
- Page is synonymous with sheet.
- Document Centre 220/230/332/340 is synonymous
with the machine.
- DC is synonymous with Document Centre.
Orientation
Orientation is used to mean the direction of images on the
page. When the image is upright, the paper (or other media)
can be one of two ways:
Long Edge Feed (LEF) / When paper is loaded LEF into the Document Feeder or a
Portrait paper tray, place the paper with one of the long edges on the
left side and one of the short edges toward the front of the
tray.
Short Edge Feed (SEF) / When paper is loaded SEF into the Document Feeder or a
Landscape paper tray, place the paper with one of the short edges on
the left side and one of the long edges toward the front of the
tray.
A
A
A
A
LEF Orientation / Portrait SEF Orientation / Landscape
Paper feed direction
Page 1-4
Paper feed direction
About This Guide
Italic typeface
The Italic typeface is used to emphasize a word or phrase.
In addition, references to other chapters and publications
are displayed in Italic typeface. For example:
- Always follow safety procedures when operating
equipment.
Quick Pathway
À
À
À
À
Press the Access
button on the Control
Panel
Enter Owner PIN
Touch Enter in the
pop-up window
Touch Auditron Setups
This book contains step by step instructions for
programming setups. In addition, a summary of the steps is
contained in the Quick Pathway at the beginning of a
chapter or section. After becoming familiar with the setup
procedures for a particular feature, the Quick Pathway is a
useful reminder of the steps required to access the setup
required.
Notes
Notes are statements that provide additional information. An
example of a note is shown below:
NOTE: Use caution when deleting a remote job. It may not
be possible to re-create or resubmit the job.
Xerox Document Centre 220/230/332/340 Setup Guide
Page 1-5
About This Guide About This Guide
Quick Pathway
About This Guide
- Refer to Chapter 10, Maintenance, for information
about cleaning the Document Glass.
Hints
Hints help to perform a task. An example of a hint is shown
below:
HINT: The Machine serial number is located inside the Left
Front Cover of the machine under the Copy/Print Cartridge.
Cautions
Cautions are statements that suggest mechanical damage
as a result of an action. An example of a caution is shown
below:
CAUTION When cleaning the Document Centre 220/230/332/340,
do not use organic solvents or aerosol cleaners. Do not
pour fluids directly onto any area. Avoid supplies that
are not specifically listed as approved in this
documentation.
Warnings
Warnings are statements that provide an alert to the
possibility of personal damage. An example of a warning is
shown below:
WARNING When the machine is in use, the cover should be
properly closed. In cases where the cover cannot be
closed, avoid eye contact with the light from the
machine. The brightness might cause discomfort.
Page 1-6
About This Guide
2 About Setups
The Document Centre 220/230/332/340 is designed to
enable machine and feature default settings to be
customized to meet local requirements. This chapter
contains an explanation of Setups and general information
regarding the Setup procedures.
About Setups
About Setups
NOTE: The graphic representations of the user interface
screens in this chapter may differ slightly dependent on
model or configuration. However, feature descriptions and
functionality remain the same as described.
Xerox Document Centre 220/230/332/340 Setup Guide
Page 2-1
Setup Procedures
During manufacture, certain settings for features and
functions of the Document Centre 220/230/332/340 are
programmed into the machine. Once the machine is
installed, the Setup Tools can be used to change these
settings to the most suitable settings for the users’
environment.
To change the settings, a user enters a PIN (Personal
Identification Number). Depending on the access rights
assigned to the PIN any or all of the following tools can be
accessed to allow the various settings to be changed.
For further information about assigning PINs, refer to
“Access Rights” on Page 7-1.
Key Operator Tools
If a PIN is entered that has been assigned ‘Key Operator’
access rights, the user can set up or change the machine
and feature settings. These include some or all of the
following, dependent on machine configuration.
Machine Setups enable machine specific default settings to be changed or
set up, including paper tray defaults, machine date and time
settings, the touch screen display, machine timers and
reports.
For further information refer to “Machine Setups” on Page
3-1.
Fault Override used to disable a faulty component so that other
components and features may still be used.
For further information refer to “Fault Override” on Page
3-15.
Page 2-2
About Setups
Copy Setups enables the Copy specific default settings to be changed or
set up, including Reduce/Enlarge, Image Quality, Output,
Sides Imaged, Expert Image Quality, Margin Shift and
Erase.
Refer to “Copy Setups” on Page 4-1 for further information.
Fax Setups enable the Fax specific default settings to be changed or set
up, including Fax Terminal Options, Fax Printing Options,
Fax Report Options, Fax Panel Defaults, Fax Mailboxes and
Fax File Management.
Refer to “Fax Setups” on Page 5-1 for further information.
System Administrator Tools
If a PIN is entered that has been assigned ‘System
Administrator’ access rights, the user can set up or change
the settings for the Scan to File and Print features.
Auditron Administrator Tools
If a PIN is entered that has been assigned ‘Auditron
Administrator’ access rights on the DC332/340, or ‘Owner’
access rights on the DC220/230, the user can set up or
change the Auditron settings.
About Setups
Refer to the System Administration Guide for further
information.
Refer to “Internal Auditron - DC332/340” on Page 6-3 or
“Internal Auditron - DC220/230” on Page 6-10 for further
information.
Foreign Interface Device external control devices such as a coin-operated device, a
bill acceptor, a card reader, or a network controlled tracking
system installed on the system are also covered in this
chapter.
Refer to “Foreign Interface Device” on Page 6-15 for further information.
Xerox Document Centre 220/230/332/340 Setup Guide
Page 2-3
About Setups
The Internal Auditron is a feature which records machine usage by account and
restricts usage and/or access.
Owner Tools
If a PIN is entered that has been assigned ‘Owner’ access
rights, the user can set up or change:
Access Rights the allocation of Key Operator, System Administrator,
Auditron Administrator (DC332/340) and Owner Access
Rights.
Refer to “Access Rights” on Page 7-1 for further information.
Page 2-4
About Setups
Changing the Settings
Switch On
To switch ON the power to the Document Centre
220/230/332/340 press the Power ON/OFF button which is
located on the upper-right side, near the front of the
machine. It takes approximately 3 minutes for the machine
to warm up and perform a self-test.
CAUTION To avoid damage to the machine after switching OFF,
allow at least 10 seconds before switching the power
ON again.
Access the Setup Tools
When the Document Centre 220/230/332/340 is delivered, it
contains a default password (#22222) which can be used to
provide access to the Setup Tools prior to PINs and Access
Rights being assigned.
About Setups
The first time the machine is switched ON, a message is
displayed. Follow the instructions in the pop-up window to
enable the machine to synchronize its components. This
message will not be displayed again.
About Setups
To change the default password refer to “Access Rights” on
Page 7-1.
Xerox Document Centre 220/230/332/340 Setup Guide
Page 2-5
À
Press the Access button on
the Control Panel.
À
A pop-up window will be
displayed on the Touch
Screen.
À
Press the # button on the
Control Panel and use the
number keypad to enter the
default password - 22222.
À
Touch Enter in the pop-up
window.
The following Screen is displayed and contains buttons for
the types of setups available.
NOTE: The graphic representations of the user interface
screens in this chapter may differ slightly dependent on
model or configuration. However, feature descriptions and
functionality remain the same as described.
À
Select the button for the
setups to be changed.
Refer to the appropriate chapter
for further instructions.
For Scan to File and Print Setup instructions and
information, please refer to the Document Centre
220/230/332/340 System Administrator Guide.
Page 2-6
About Setups
3 Machine Setups
Quick Pathway
À
À
À
Press the Access
button on the Control
Panel
Enter Key Operator PIN
- see NOTE
Touch Machine Setups
This chapter contains the procedures for changing the
default settings for the Paper Trays, Date/Time, Walkup
Screen, Timers, Contention, Localisation, Report
Languages, Touch Screen Contrast, Customer Support
Number, Document Feeder, Machine Serial Number, and
Xerox Supplies Number.
Fault Override instructions are also included.
NOTE: These changes can only be made when a PIN
(Personal Identification Number) which has been assigned
Key Operator access rights is entered. The default
password is #22222 which may be used if PINs have not
yet been assigned.
Press the Access button on
the Control Panel.
A pop-up window will be
displayed on the Touch Screen.
À
À
Press the # button on the
Control Panel and use the
number keypad to enter a
Key Operator PIN - see
NOTE.
Touch Enter in the pop-up
window.
NOTE: The default password - #22222 - may be used if PINs
have not been assigned.
Xerox Document Centre 220/230/332/340 Setup Guide
Page 3-1
Machine Setups
À
Machine Setups
Access the Machine Setups
À
Touch the Machine Setups
button.
À
The Machine Setups screen
is displayed.
HINT: The Additional Setups
button accesses more Machine
Setup features. Touch this
button if the feature you require
is not displayed on the initial
Machine Setups screen.
NOTE: The graphic representations of the user interface
screens in this chapter are based on a fully configured
Document Centre 332/340. The appearance of these
interface screens may differ slightly on other models or
configurations. However, feature descriptions and
functionality remain the same as described.
Page 3-2
Machine Setup
Paper Tray Setups
À
À
À
Touch any button to change
the setting - a description of
each follows.
À
À
Make changes as required.
Access Machine Setups as described on Page 3-1.
Touch the Paper Trays button.
Touch Save to continue.
Tray Priority Select the order in which the machine searches the trays for
available media.
To change the settings, assign a priority to each tray.
Number 1 is the highest priority and, depending on how
many trays are available, 4, 5, or 6 will represent the lowest
priority, Each number can only be assigned once.
Auto Tray Switching Use the scroll buttons to select or de-select this feature. On
sets the machine to automatically switch to another paper
tray when the selected tray is out of paper. Another tray
must contain paper of the same size, type and orientation for
automatic switching to occur. To de-select this feature,
select Off.
Xerox Document Centre 220/230/332/340 Setup Guide
Page 3-3
Machine Setups
If Auto is selected as the default setting, the paper tray is
selected automatically to match the size and orientation of
the originals.
Machine Setups
Default Tray Touch the scroll buttons to select the paper supply default
setting - the list contains only the paper trays available with
the machine configuration. The chosen setting will be
displayed prior to other selections made by the user.
Date/Time Setup
À
À
Access Machine Setups as described on Page 3-1.
Touch the Date/Time button.
Date
À
Touch the Date Setup button.
À
Touch the scroll buttons to
select the preferred display
format, for example, the
mm-dd-yy format would
display 06-10-01 for a current
date of 10th June 2001.
À
Use the scroll buttons to
select the current month
(mm), day (dd) and year (yy).
À
Touch Save to continue.
Page 3-4
NOTE: The current date is displayed on fax documents,
confirmation pages, and activity reports. It is also displayed
when users select Annotation and Date for their copies.
Machine Setup
Touch the Time Setup button.
À
Select the preferred display
format, 12 or 24 Hour - for
example eleven o’clock at
night would either be
displayed as 11 or 23 hours.
À
Use the scroll buttons to
select the current time in
hours and minutes.
À
Touch Save and Close to
continue.
NOTE: The current time is displayed on fax documents,
confirmation pages, and activity reports. It is also displayed
when users select Annotation and Time for their copies.
Walkup Screen
À
À
Access Machine Setups as described on Page 3-1.
Touch the Walkup Screen button.
Xerox Document Centre 220/230/332/340 Setup Guide
Page 3-5
Machine Setups
À
Machine Setups
Time
To change the default display
for the Touch Screen:
À
Select the preferred default
screen
À
Touch Save to continue
The screen selected will be
displayed when the machine is
switched ON, when
programming or job time-out
occurs, or when AC is pressed. NOTE: The buttons available will depend on the machine
configuration.
Timers
À
À
À
Access Machine Setups as described on Page 3-1.
À
À
Make changes as required.
Touch the Timers button.
Touch any button to change the setting - a description of
each follows.
Touch Save to continue.
Auto Clear
With the Auto Clear feature enabled, the machine returns to
the default settings after the specified time.
Page 3-6
Machine Setup
À
À
À
Touch the Auto Clear button.
Select On or Off.
If On is selected, use the
scroll buttons to set the
timeout period.
Low Power
Low Power Mode becomes active after the specified time of
machine non-use. When activated, the Touch Screen is
blank and the Power Saver light is on. When the Control
Panel or Touch Screen is touched, or the Platen cover lifted,
the machine responds within 1 second. All features are
available within 30 seconds.
Machine Setups
Touch the Low Power button.
Low Power programs the
machine to default to Low
Power Mode after a specified
time.
À
Use the scroll buttons to set
the timeout period.
NOTE: If the Low Power timeout is set higher than the
timeout for Power Save or Auto Off (depending on system
configuration), the machine displays a message that Low
Power cannot exceed Power Save (or Auto Off).
Xerox Document Centre 220/230/332/340 Setup Guide
Page 3-7
Machine Setups
À
Power Save (or Auto Off)
The Power Save or Auto Off feature function is dependent
on machine configuration.
Auto Off Mode/Sleep Mode 60 minutes after the last copy/print out the machine will
(Power Save) automatically switch into Auto Off/Sleep (Power Save)
Mode.
The copier version of the Document Centre 220/230
switches the Power ON/OFF switch to the off position. Any
stored jobs remain in the memory and the Document Centre
220/230 returns to an operational condition when powered
on.
À
Touch the Auto Off or Power
Save button.
À
Touch the scroll buttons to
select the desired timeout
period.
À
Touch Save to continue.
NOTE: If Low Power is set higher than Power Save/Auto
Off, the machine displays a message that Low Power
cannot exceed Power Save/Auto Off.
Contention
Page 3-8
À
À
À
Access Machine Setups as described on Page 3-1.
À
À
Make changes as required.
Touch the Contention button.
Touch any button to change the setting - a description of
each follows.
Touch Save to continue.
Machine Setup
Interrupt Button
The Interrupt feature enables the current job to be stopped
and held in memory while another job is executed. When the
Interrupt job is complete, programming for the first job is
retrieved by pressing the Interrupt button again.
À
À
Touch Interrupt Button.
Select Enabled or Disabled.
À
Touch the Priority or Print
Queue Priority button.
À
Select a priority for either the
Print or Fax Queue.
À
Touch Save to continue.
Xerox Document Centre 220/230/332/340 Setup Guide
Machine Setups
Program the machine to complete Print or Fax jobs in a
specified order. Number 3 is the highest priority, and number
5 is the lowest priority. Copy jobs are always priority 3 - they
have job priority over all other jobs. When print or fax is set
as priority 4, the machine automatically sets the other
feature as priority 5. Priority can only be changed for print
and fax jobs.
Machine Setups
Priority or Print Queue Priority
Page 3-9
Localization
À
À
Touch the Localization button
À
Touch Save to continue.
Select the preferred
measurement display format
- Inches or Millimeters.
Page 3-10
Machine Setup
Additional Setups
À
Access Machine Setups as
described on Page 3-1.
À
If necessary, touch the
Additional Setups button.
Touch any button to change
the setting - a description of
each follows.
À
À
Make changes as required.
Touch Save to continue.
HINT: This screen may have a different appearance
depending on machine configuration.
Report Languages
Various language options can be made available for printed
reports. Please contact your Xerox representative for further
information.
Xerox Document Centre 220/230/332/340 Setup Guide
Page 3-11
Machine Setups
À
Machine Setups
NOTE: The graphic representations of the user interface
screens in this chapter may differ slightly dependent on
model or configuration. However, feature descriptions and
functionality remain the same as described.
À
Touch the Report Languages
button.
À
Select the language to use
for printed reports.
À
Touch Close to continue.
Touch Screen Contrast
À
Touch the Touch Screen
Contrast button.
À
Use the up/down arrows to
select a contrast level
between 1 and 254.
Alternatively, touch the
display window to change the
setting using the pop-up
keypad. The factory default is
127.
À
Touch Save to continue.
Customer Support Number
The machine displays the Xerox customer support
telephone number when the Machine Status button is
pressed. Typically, the correct number is entered by a Xerox
representative when the machine is first installed. If it is not
on the screen, or if it is incorrect, follow the instructions
below to enter the correct number.
Page 3-12
Machine Setup
À
Touch the Customer Support
Number button.
À
Use the numeric keypad on
the screen to enter the Xerox
Customer Support telephone
number.
À
Touch Save to continue.
À
Touch the Paper Sizes
button.
À
Select the preferred selection
of paper sizes.
À
Touch Save to continue.
Machine Serial Number
Machine Setups
The machine displays this machine serial number when the
Machine Status button is pressed. This number is required
when calling for customer support.
Machine Setups
Paper Sizes
Xerox Document Centre 220/230/332/340 Setup Guide
Page 3-13
À
Touch the Machine Serial
Number button.
À
Use the keypad on the screen
to enter the Machine Serial
number - if necessary touch
the More Characters button
on the screen to display an
alternative keypad.
À
Touch Save to continue.
HINT: The Machine serial number is located inside the Left
Front Cover of the machine under the Copy/Print Cartridge.
Xerox Supplies Number / Supplies Tel.
Number
The machine displays the Xerox supplies telephone number
when the Machine Status button is pressed.
À
Touch the Xerox Supplies
Number or Supplies Tel.
Number button.
À
Use the numeric keypad on
the screen to enter the Xerox
Supplies telephone number.
À
À
Touch Save and Close.
Select another Setup or
touch Exit to exit the setup
screens.
Page 3-14
Machine Setup
Fault Override
When a fault occurs on the Document Center
220/230/332/340, the Touch Screen displays step-by-step
instructions for the walkup user to clear the fault. The
instructions include contacting the Key Operator if the fault
cannot be cleared.
The Key Operator can then enter their PIN to access the
Fault Override screen to disable the faulty component. After
the component is disabled, all features will be available
except those that require the disabled component. This then
enables other machine features to be used until the disabled
component is enabled.
Use Fault Override only if all other attempts to clear the fault
have failed. Entering Fault Override Mode might require
action to disable the faulted component, delete the faulted
job, or both, depending on the type of job and fault.
Machine Setups
NOTE: Use caution when deleting a remote job - it may not
be possible to re-create or resubmit the job.
Machine Setups
The Key Operator can call the Xerox Welcome Centre if the
fault cannot be cleared.
Xerox Document Centre 220/230/332/340 Setup Guide
Page 3-15
Accessing Fault Override
To access Fault Override Mode, a fault screen must
currently be displayed on the Touch Screen.
À
À
Press the Access button on the Control Panel.
À
Select confirm to delete the current job and or disable
the faulty component.
Touch the # and enter a PIN (Personal identification
Number) with Key Operator access rights - see NOTE
below.
NOTE: The default password - #22222 - may be used if
PINs have not been assigned. Refer to “Access Rights” on
Page 7-1 for more information.
Page 3-16
Machine Setup
Unavailable Features
Some types of jobs will not print if the disabled component
is required for a default setup. In this case, the machine
displays a prompt to check the setups.
The following table contains details about specific features
that are unavailable when a component is disabled.
Service/
Feature
Disabled
Feature/Result
Copy
2 Up, Booklet
Creation, Sides
Imaged 2 È1 or
2 È 2, or Mixed
Size Originals in
the DADF.
Document Feeder
Fax
Sides Scanned
Document Feeder
Scan to File
Sides Imaged
Duplex Module
Copy
Booklet
Creation, Sides
Imaged 1È2 or
2 È2
Machine Setups
Document Feeder
Machine Setups
Disabled
Component
Xerox Document Centre 220/230/332/340 Setup Guide
Page 3-17
Disabled
Component
Page 3-18
Service/
Feature
Disabled
Feature/Result
Duplex Module
Copy Setups,
Sides
Imaged, 1È2
Sided or
2 È2 Sided
The machine will
not print copy
jobs if Duplex is
disabled and
Sides Imaged
1È2 or 2È2 are
the default
settings. The
Sides Imaged
button will not be
displayed on the
Touch Screen.
Duplex Module
In Fax
Setups, Fax
Terminal
Setups, Fax
Printing
Options,
Duplex
Printing: All 2
Sided and
1,2,2...
The machine will
not print fax jobs
if the Duplex
Module is
disabled and if
the default
settings are
Duplex Printing:
All 2 Sided or
1,2,2...
Duplex Module
In Print
Setups,
Printer
Setups, Job
Settings,
Sides
Printed,
Duplex
The machine will
not print jobs if
the Duplex
Module is
disabled and the
default is Sides
Printed, Duplex.
Duplex Module
Network
Double-sided
printing.
Machine Setup
Disabled
Feature/Result
Editing Kit
Copy
Editing.
Finisher
In Fax
Setups, Fax
Terminal
Setups, Fax
Printing
Options,
Output
Selection,
Left, Stapled
The machine will
not print Fax
jobs if the
Finisher is
disabled and the
default is
Stapled.
Finisher
In Fax
Setups, Fax
Terminal
Setups, Fax
Printing
Options,
Output
Selection,
Left Tray
The machine will
not print Fax
jobs if the
Finisher is
disabled and the
default is the Left
Tray.
Finisher
In Fax
Setups,
Printer
Setups, Tray
Settings,
Destination
Tray, Left
Tray
The machine will
not print Print
jobs if the
Finisher is
disabled and the
default is the Left
Tray.
Xerox Document Centre 220/230/332/340 Setup Guide
Page 3-19
Machine Setups
Service/
Feature
Machine Setups
Disabled
Component
Disabled
Component
Page 3-20
Service/
Feature
Disabled
Feature/Result
Finisher
In Copy
Setups,
Output,
Stapled
The machine will
not print Copy
jobs if the
Stapler is
disabled and
also is the
default. The
Output button
will not be
displayed on the
Copy screen.
Finisher
In Fax
Setups, Fax
Terminal
Setups, Fax
Printing
Options,
Output
Selection,
Left Tray
The machine will
not print Fax
jobs if the
Finisher is
disabled and the
default output is
the Left Tray.
Finisher
In Print
Setups,
Printer
Setups, Tray
Settings,
Destination
Tray, Left
Tray
The machine will
not print Print
jobs if the
Finisher is
disabled and the
default is the Left
Tray.
Machine Setup
Disabled
Feature/Result
Finisher
In Copy
Setups,
Output,
Collated Left
Tray and
Copy Setups,
Output,
Uncollated
Left Tray
The machine will
not print Copy
jobs if the
Finisher is
disabled and the
default output is
the Left Tray.
The Output
button will not be
displayed on the
Copy screen.
Finisher and
Stapler
In Copy
Setups,
Output,
Stapled
The machine will
not print Copy
jobs if Stapled is
disabled and
also is the
default output.
The Output
button will not be
displayed on the
Copy screen.
Foreign Interface
Device
In the Copy
feature with
Foreign
Interface
Device
The Copy
feature is
disabled.
Xerox Document Centre 220/230/332/340 Setup Guide
Machine Setups
Service/
Feature
Machine Setups
Disabled
Component
Page 3-21
Disabled
Component
Service/
Feature
Disabled
Feature/Result
Foreign Interface
Device
In the Copy
feature with
Foreign
Interface
Device and
Internal
Auditron
Control
The Copy
feature is
enabled only for
Internal Auditron
Control.
Foreign Interface
Device
In Setups,
Auditron
Setups,
External
Control
Device,
Per-Page
Control, or
Monitor with
or without
limits
For Copy with a
Foreign
Interface Device,
the machine will
not copy if
Foreign
Interface Device
is disabled and
External Control
Device is
selected.
For Copy with
Foreign
Interface Device
and Internal
Auditron Control,
Copy is enabled
only for Internal
Auditron Control.
Foreign Interface
Device
Page 3-22
In the Copy
feature with
Foreign
Interface
Device
The Copy
feature is
disabled.
Machine Setup
Disabled
Feature/Result
High Capacity
Feeder
Copy
High Capacity
Tray
High Capacity
Feeder
The High
Capacity
Feeder
The machine will
not print Copy or
Fax jobs if the
disabled tray is
the default tray.
The Paper
Supply button
will not be
displayed on the
Copy screen.
Print Engine
In Scan
Setups, Filing
Setups, Proof
Before Send
Proof Before
Sending might
be enabled in
some Scan to
File templates.
The Proof
Before Send job
will be pending
in the Print
Queue until the
print engine fault
is cleared and
printing is
resumed.
Xerox Document Centre 220/230/332/340 Setup Guide
Page 3-23
Machine Setups
Service/
Feature
Machine Setups
Disabled
Component
Disabled
Component
Page 3-24
Service/
Feature
Disabled
Feature/Result
Print Queue
Print
Network/Print
Controller jobs
are temporarily
removed from
the Print Queue.
When the fault is
cleared, the
machine
attempts to
recover the jobs.
Tower Mailbox
In Print
Setups,
Printer
Setups, Tray
Settings,
Destination
Tray, Tower
Mailbox, Bins
1–10
The machine will
not print Print
jobs if the Tower
Mailbox is
disabled and the
default is any Bin
1–10.
Paper Tray 1
In Machine
setups,
Paper Trays,
Default Tray
The machine will
not print Copy or
Fax jobs if the
disabled tray is
the default tray.
The Paper
Supply button
will not be
displayed on the
Copy screen.
Machine Setup
Disabled
Feature/Result
Paper Tray 2
In Machine
Setups,
Paper Trays,
Default Tray
The machine will
not print Copy or
Fax jobs if the
disabled tray is
the default tray.
The Paper
Supply button
will not be
displayed on the
Copy screen.
Paper Tray 3
In Machine
Setups,
Paper Trays,
Default Tray
The machine will
not print Copy or
Fax jobs if the
disabled tray is
the default tray.
The Paper
Supply button
will not be
displayed on the
Copy screen.
Paper Tray 4
In Machine
Setups,
Paper Trays,
Default Tray
The machine will
not print Copy or
Fax jobs if the
disabled tray is
the default tray.
The Paper
Supply button
will not be
displayed on the
Copy screen.
Xerox Document Centre 220/230/332/340 Setup Guide
Page 3-25
Machine Setups
Service/
Feature
Machine Setups
Disabled
Component
Page 3-26
Machine Setup
Quick Pathway
À
À
À
Press the Access
button on the Control
Panel
Enter Key Operator PIN
- see NOTE
Touch Copy Setups
This section contains the procedures for Copy Setups, which
includes programming the default settings for the following
features:
Copy Setups
4 Copy Setups
- Reduce/Enlarge
- Image Quality
- Output
- Sides Imaged
- Expert Image Quality
- Margin Shift (DC332/340)
Copy Setups
NOTE: These changes can only be made when a PIN
(Personal Identification Number) which has been assigned
Key Operator access rights is entered. The default
password is #22222 which may be used if PINs have not
yet been assigned.
Copy Setups
- Erase (DC332/340)
Xerox Document Centre 220/230/332/340 Setup Guide
Page 4-1
Access the Copy Setups
À
Press the Access button on
the Control Panel.
A pop-up window will be
displayed on the Touch Screen.
À
Press the # button on the
Control Panel and use the
number keypad to enter a
Key Operator PIN - see
NOTE.
À
Touch Enter in the pop-up
window.
À
Touch the Copy Setups
button.
NOTE: The default password - #22222 - may be used if PINs
have not yet been assigned.
NOTE: The graphic representations of the user interface
screens in this chapter may differ slightly dependent on
model or configuration. However, feature descriptions and
functionality remain the same as described.
Page 4-2
Copy Setups
À
Copy Setups
Reduce/Enlarge
Touch the Reduce/Enlarge
button.
Defaults
Touch the Defaults button.
Use the arrow buttons to
select the default
magnification setting.
Copy Setups
À
À
Copy Setups
The default magnification will be
selected when the machine is
switched ON, when
programming or job timeout
occurs, or when AC is pressed.
Xerox Document Centre 220/230/332/340 Setup Guide
Page 4-3
Normal
When users touch Normal in the Reduce/Enlarge column on
the Touch Screen, a selection of preset sizes is displayed.
The default value of these presets can be customized to
meet local requirements. The factory default presets are:
1. 100%
2. 8 1/2” x 5 1/2” through 8 1/2” x 14”
3. 8 1/2” x 11” through 11” x 17”
4. 8 1/2” x 14” through 8 1/2” x 11”
5. 11” x 17” through 8 1/2” x 11” inches
À
À
Touch the Normal button.
Use the arrow buttons to
select a value for each
magnification preset.
Custom
The Custom settings are used to reduce or enlarge
non-standard document sizes onto standard paper. X and Y
values are selected from a range of 25% through 400%.
À
À
Touch the Custom button.
À
Touch Save to continue.
Use the scroll buttons to
select a value for X and Y.
Page 4-4
Copy Setups
À
Use the scroll buttons to
select the Original Type
according to the document
type used most frequently.
See below for an explanation
of each.
À
Set the default level of
darkness or lightness
required for each original
type.
À
Touch Save to continue.
Access Copy Setups as described on Page 4-2.
Touch the Image Quality button.
Text for documents that contain line art and low-quality halftones.
Colored backgrounds are automatically suppressed. This is
the factory default.
Auto for documents that contain text, photo, and graphic
combinations. Colored backgrounds are automatically
suppressed and line edges and text sharpened.
Copy Setups
Photo for documents that contain photographs. This setting
identifies the use of black, white, and halftones to focus on
the photo image and make a clear copy.
Copy Setups
À
À
Copy Setups
Image Quality
Xerox Document Centre 220/230/332/340 Setup Guide
Page 4-5
Output
À
À
À
Access Copy Setups as described on Page 4-2.
Touch the Output button.
Use the scroll buttons to
select the default output
option required - Stapled,
Uncollated Left Tray, Collated
Left Tray, Uncollated Center
Tray or Collated Center Tray.
The factory default is Collated
Center Tray.
À
Touch Save to continue.
NOTE: Only those selections relevant to the machine
configuration will be available.
HINT: Typically, the Center Tray is used for copy output, and
the Left Tray is used for fax output.
Page 4-6
Copy Setups
À
À
À
Copy Setups
Sides Imaged
Access Copy Setups as described on Page 4-2.
Touch the Sides Imaged button.
Select the preferred default
options - see below for an
explanation.
Touch Save to continue.
1 Sided single-sided copies from single-sided originals.
2
1 Sided single-sided copies from double-sided originals.
1
2 Sided double-sided copies from single-sided originals.
2
2 Sided double-sided copies from double-sided originals.
For double-sided options, also select the orientation:
Head to Head the top of the document on each side is at the top of the
page. This is the factory default setting.
Head to Toe the image on the second side of each page is rotated 180°;
therefore, the top of the document on the second side is at
the bottom of the page.
Portrait or Landscape If available, select either Portrait or Landscape.
The following illustration depicts the results for Head to Head
or Head to Toe selections for Portrait and Landscape
images.
Xerox Document Centre 220/230/332/340 Setup Guide
Page 4-7
Copy Setups
1
Copy Setups
NOTE: The screen display may
differ slightly dependent on
machine configuration.
Portrait Images
Landscape Images.
Head to Head
Head to Head
for binding on the short edge for binding on the short edge
A
B
Head to Toe
for binding on the short edge
A
B
Head to Toe
for binding on the long edge
A
A
B
B
Expert Image Quality
À
Select the default required - a
description of each follows.
À
Touch Save to continue.
À
Access Copy Setups as described at the beginning of this
chapter.
À
Touch the Expert Image Quality button.
Sharpness adjusts the sharpness of the image - select the preferred
setting.
Grayscale Copying provides improved reproduction of gray levels - select On or
(DC220/230) Off.
Page 4-8
Copy Setups
À
select a default setting of On to enhance documents with
colored backgrounds or Off to disable this feature.
Margin Shift (DC332/340)
Programs the default amount of Margin Shift to move the
image up/down or side to side on one or both sides of a
page. Margin Shift can be applied to side one and side two
of a page.
Select the Side 1 or Side 2
button to change the setting
or Off to disable this feature.
À
If Side 2 shift is selected,
select Independent and the
settings or Mirror to mirror
side 1 settings.
À
Touch Save to continue.
Access Copy Setups as described at the beginning of this
chapter.
À
Touch the Margin Shift button.
Copy Setups
À
À
Copy Setups
Auto Exposure
Erase (DC332/340)
À
Access Copy Setups as described at the beginning of this
chapter.
À
If necessary, touch the Additional Setups button
Xerox Document Centre 220/230/332/340 Setup Guide
Page 4-9
Copy Setups
Programs the default settings for the Edge Erase and Border
Erase features. The factory default is set for all the erase
features switched off and the erase values set to 0 inches.
À
À
Touch the Erase button.
À
À
Make changes as required.
Touch Border or Edge Erase
to change the settings - a
description of each follows, or
touch Off to turn this feature
off.
Touch Save to continue.
Border Erase (DC332/340)
À
Touch the Border Erase
button.
À
Use the scroll buttons to set
the default measurement for
Border Erase between 0 and
2 inches.
À
À
Touch Save to continue.
Select another Setup or
touch Exit to exit the setup
screens.
Page 4-10
Copy Setups
À
Use the scroll buttons to set
the default Edge Erase
settings.
À
À
Touch Save.
Copy Setups
Edge Erase (DC332/340)
Copy Setups
Copy Setups
Touch Close to exit Copy
Setups.
Xerox Document Centre 220/230/332/340 Setup Guide
Page 4-11
Page 4-12
Copy Setups
5 Fax Setups
Fax Setups are divided into two areas:
À
À
À
Press the Access
button on the Control
Panel
Enter Key Operator PIN
- see NOTE
Touch Fax Setups
- Fax Terminal Setups: to set and change the defaults
for the available fax options such as paper size and
type, resolution, and mailbox options.
- Fax Communication Setups: to set options that affect
incoming and outgoing fax documents such as redialing
and preventing the receipt of junk fax documents.
Fax Setups
Fax Setups
NOTE: These changes can only be made when a PIN
(Personal Identification Number) which has been assigned
Key Operator access rights is entered. The default
password is #22222 which may be used if PINs have not
yet been assigned.
Fax Setups
Quick Pathway
Xerox Document Centre 220/230/332/340 Setup Guide
Page 5-1
Access the Fax Setups
À
Press the Access button on
the Control Panel.
A pop-up window will be
displayed on the Touch Screen.
À
Press the # button on the
Control Panel and use the
number keypad to enter a
Key Operator PIN - see
NOTE.
À
Touch Enter in the pop-up
window.
À
Touch the Fax Setups button.
NOTE: The default password - #22222 - may be used if PINs
have not been assigned.
NOTE: The graphic representations of the user interface
screens in this chapter are based on a fully configured
Document Centre 332/340. The appearance of these
interface screens may differ slightly on other models or
configurations. However, feature descriptions and
functionality remain the same as described.
Page 5-2
Fax Setups
Fax Terminal Setups
À
À
À
À
Press the Access
button on the Control
Panel
Enter Key Operator PIN
- see NOTE
Touch Fax Setups
Touch Fax Terminal
Setups.
This section contains the procedures for the following Fax
Terminal Setups:
- Fax Terminal Options
- Fax Printing Options
- Fax Report Options
- Fax Panel Defaults
- Fax Mailboxes
- Fax File Management
NOTE: The default password is #22222 which may be used
if PINs have not yet been assigned.
Fax Setups
Quick Pathway
Access Fax Setups as
described on Page 5-2.
À
Touch the Fax Terminal
Setups button.
NOTE: Only those selections relevant to the machine
configuration will be available.
Xerox Document Centre 220/230/332/340 Setup Guide
Page 5-3
Fax Setups
À
Fax Setups
Access Fax Terminal Setups
Fax Terminal Options
À
À
À
Touch any button to change
the setting - a description of
each follows.
À
À
Make changes as required.
Access Fax Terminal Setups as described on Page 5-3.
Touch the Fax Terminal Options button.
Touch Save to continue.
Local ID
According to the Federal Law, the Document Centre
220/230/332/340 must be programmed with an identification
number. The identification number, or Local ID, is the
telephone number for the Document Centre
220/230/332/340.
If the identification number has not been programmed, the
Document Centre 220/230/332/340 displays a pop-up
message instructing users to enter the ID number before
completing their jobs. To ensure that this law is adhered to,
the Document Centre 220/230/332/340 will not continue
until the number is entered. Entering the Local ID number is
required only the first time the machine is used.
Page 5-4
Fax Setups
À
If more than 1 line is
connected, touch the line
number button.
À
Enter the telephone number
of the Document Centre
220/230/332/340 using the
keypad on the screen (up to
20 characters including
spaces).
À
Touch Save to continue.
Fax Setups
Touch the Local ID button on
the right of the screen.
Local Name
The Local Name is the name allocated to this particular
machine. For example, it could indicate the location of the
machine - for example, ‘Copier West’, or be the Company
name.
Touch the Local Name
button.
Fax Setups
À
Fax Setups
À
Xerox Document Centre 220/230/332/340 Setup Guide
Page 5-5
À
Touch the second Local
Name button on the right of
the screen.
À
Use the keypad on the
screen to enter the Local
Name of the Document
Centre 220/230/332/340 (up
to 20 characters including
spaces).
À
Touch Save to continue.
Company Logo
Company Logo is used in the header of the transmission
report and in the cover letter for fax documents to identify the
organization sending the fax.
À
Touch the Company Logo
button.
Page 5-6
Fax Setups
Touch the second Company
Logo button on the right of
the screen.
À
Use the keypad on the
screen to enter the Company
Logo (up to 30 characters
including spaces).
À
Touch Save to continue.
Fax Setups
HINT: Touch Change Keyboard to display
additional characters.
Delayed Start Time
Users can scan a document and delay its transmission start
time. If they do not specify the delayed start time, the
machine uses the default delayed start time that is entered
here.
Touch the Delayed Start Time
button.
Fax Setups
À
Fax Setups
À
Xerox Document Centre 220/230/332/340 Setup Guide
Page 5-7
À
Touch the second Delayed
Start Time button on the right
of the screen.
À
Use the scroll buttons on the
screen to select the default
transmission start time.
À
Touch Save to continue.
Long Document (DC332/340)
À
Touch the Long Document
button.
À
Select 600 mm or 3600 mm
to enable scanning of long
documents up to these
lengths.
À
Touch Save.
Dialing Digits Reporting (DC332/340)
This default selects whether the first or last 20 digits of a
telephone number are displayed on reports and headers.
Page 5-8
Fax Setups
Select the preferred option.
Fax Setups
À
À
Touch Save.
Fax Printing Options
À
À
Access Fax Terminal Setups as described on Page 5-3.
Touch the Fax Printing Options button.
Receive Reduction
With this feature enabled, the Document Centre
220/230/332/340 automatically determines the required
reduce/enlarge ratio for printing on the selected paper.
Xerox Document Centre 220/230/332/340 Setup Guide
Page 5-9
Fax Setups
Touch the Dialing Digits
Reporting button.
Fax Setups
À
À
Touch the Receive Reduction
button.
À
Select Auto or Off as
required.
Page Margin
This feature defines the maximum amount of space between
the length of an incoming fax and the length of the paper on
which the fax is to be printed. The Page Margin setting
affects the bottom of the page. It avoids image loss if users
are printing onto a smaller size paper.
À
Touch the Page Margin
button.
À
Use the scroll buttons to
select the required margin.
Page 5-10
Fax Setups
Duplex Printing
This feature sets the default duplex printing setting for
incoming fax documents and reports.
À
Touch the Duplex Printing
button.
À
Make selections as required see below. All 1 Sided is the
factory default.
Fax Setups
For DC220/230 duplex options,
also select either Portrait or
Landscape output and whether
printing should be Head to Head
or Head to Toe.
All 1 Sided: prints fax documents and reports single-sided.
1, 2, 2... prints fax documents with the first page single-sided and the
rest of the pages double-sided. Reports are printed all
double-sided.
Paper Attributes
Fax Setups
All 2 Sided: prints fax documents and reports double-sided.
Fax Setups
Programs the default types, colors and sizes of paper on
which fax documents and reports can be printed.
Xerox Document Centre 220/230/332/340 Setup Guide
Page 5-11
À
Touch the Paper Attributes
button.
À
Touch the buttons on the right
of the screen to select the
types, colors and sizes of
paper on which incoming fax
documents and reports will
be printed - more than one
type can be selected.
À
Touch Save to continue.
Output Selection
Programs the output tray for incoming fax documents.
À
Touch the Output Selection
button.
À
Select the default output
option required - the available
options are dependent on
machine configuration.
HINT: Typically, the Left Tray is the default fax tray; the
Center Tray is the default copy tray. If a Finisher is installed,
the options will include Finisher/Stapled.
Page 5-12
Fax Setups
A3 È 11" x 17"
Touch the A3 È 11" x 17"
button.
À
Select the default option
required. Trim A3 is the
factory default.
À
Touch Save to continue.
Fax Setups
Fax Setups
À
Fax Setups
Programs incoming fax documents to be printed on a
different size paper. For example, an incoming A3 size
(European standard) fax can be trimmed to print on 11" x 17"
paper. Alternatively, choose to have the machine reduce the
image to fit.
Xerox Document Centre 220/230/332/340 Setup Guide
Page 5-13
Fax Report Options
À
À
Access Fax Terminal Setups as described on Page 5-3.
Touch the Fax Report Options button.
Activity Report
Programs the machine to automatically print a report of
phone line activity.
À
Touch the Activity Report
button.
À
Select the default option
required - see description
below. Auto Print is the
factory default.
Auto Print prints an Activity Report when the number of outgoing and
incoming calls reaches 50 and includes only calls that were
not printed on the last report.
On Demand prints an Activity Report only when it is manually selected
and includes only calls that were not printed on the last
report.
Broadcast and Multi-Poll Reports
Programs the machine to print a report of each broadcast
send and multi-polling operation to multiple remote
machines. When a fax is sent to one fax number, the
machine prints a Transmission Report. When a fax is sent to
or polled from a group of numbers, the machine prints one
Broadcast and Multi-Poll Report, which lists all of the
numbers in the group.
Page 5-14
Fax Setups
Touch the Broadcast and
Multi-Poll Reports button.
À
Select Auto Print to have this
report print automatically or
Off to turn the feature off.
Auto Print is the factory
default.
Transmission Report
À
Touch the Transmission
Report button.
À
Select the option required -
Fax Setups
Programs the machine to print the status of each
transmission and displays a reduced image of the first page
of the original document after each transmission is
completed.
Fax Setups
À
- Always Print automatically
prints a report for each
outgoing fax.
Fax Setups
- Print on Error Only prints a
report only when a
transmission error occurs.
- Off turns this feature off.
Xerox Document Centre 220/230/332/340 Setup Guide
Page 5-15
Mailbox Report
Programs the machine to automatically print a report
informing the mailbox owner each time a fax is received to
his or her mailbox.
À
Touch the Mailbox Report
button.
À
Select the default option
required.
À
Touch Save to continue.
Fax Panel Defaults
À
À
Access Fax Terminal Setups as described on Page 5-3.
Touch the Fax Panel Defaults button.
Resolution
Sets one of three resolutions as the default setting for
outgoing fax documents. The default selected depends on
the types of documents users send most often.
À
À
Touch the Resolution button.
Select the default option
required - see description
below.
Page 5-16
Fax Setups
Standard (200 x 100) reduces communication time - use for text documents.
Fine (200 x 200) combines features of standard and super fine resolution use for most fax documents and for black and white
graphics.
Super Fine (400 x 400) improves image quality and rendition - use for photos,
halftones and images with grey tones.
Touch the Lighter/Darker
button.
À
Use the scroll buttons to
select the default option
required.
À
Touch the Original Type
button.
À
Select the default option
required - see below for a
description.
Fax Setups
Original Type
Auto separates images into text and photo areas automatically,
and implements image processing for each area.
Text optimizes image processing for text, lines, and solid areas.
Photo optimizes image processing for photographs.
Xerox Document Centre 220/230/332/340 Setup Guide
Page 5-17
Fax Setups
À
Fax Setups
Lighter/Darker
Forced 4800 (Document Centre 220/230)
Used when fax communications are susceptible to
errors.This mode is slower, but it is less susceptible to
errors.
À
Touch the Forced 4800
button.
À
Select On or Off as the
default.
À
Touch Save.
Communication Mode (DC332/340)
This feature sets the default communication mode used for
transmission to a remote fax machine.
À
Touch the Communications
Mode button.
À
Select the default option
required - see below for a
description.
À
Touch Save to continue.
Super G3 automatically determines the communication mode to be
used based on the maximum capabilities of the remote fax
machine. This mode minimizes the data transmission errors
by using Error Correction Mode (ECM). Initial
communication speed is 33,600 Bits Per Second (bps).
Page 5-18
Fax Setups
The speed can also be selected manually. The lower the
speed, the less chance errors will occur during transmission.
The Kilo Bits Per Second (Kbps) speeds available are 33.6,
31.2, 28.8, 24.0, 21.6, 19.2 and 16.8.
The speed can also be selected manually. The lower the
speed, the less chance errors will occur during
transmission.The speeds available are 14.4Kbps, 12.0Kbps,
9600 bps and 7200 bps.
Forced 4800 bps used when fax communications are susceptible to errors.
This mode is slower, but it is less susceptible to errors.
Fax Setups
G3 like Super G3, this setting automatically determines the
communication mode to be used based on the maximum
capabilities of the remote fax machine but initial
communication speed is 14,400 bps. ECM is also used with
this option.
Fax Mailboxes
Fax Mailboxes are used to electronically store confidential
incoming fax documents for users to retrieve and print at a
convenient time. Use this option to create, assign, modify,
and delete electronic fax mailboxes. A maximum of 200
mailboxes are available on the DC332/340 and 30 on the
DC220/230.
Access Fax Terminal Setups as described on Page 5-3.
Fax Setups
À
À
Fax Setups
NOTE: In some regional areas, the use of the
Communication Mode feature is restricted.
Touch the Fax Mailboxes button.
Xerox Document Centre 220/230/332/340 Setup Guide
Page 5-19
À
Touch a mailbox in the list to
select it. Touch the scroll
buttons to move up and down
the list.
À
Follow the instructions below
to delete, edit or add a
mailbox.
To Delete a Mailbox
À
Touch the Delete Mailbox
button.
À
Touch Confirm to delete the
selected mailbox and its
contents.
To Add or Edit a Mailbox
À
In the Mailbox List, touch a
mailbox to select it. To add a
new mailbox, touch an empty
mailbox.
À
Touch the Edit Mailbox
button.
Page 5-20
Fax Setups
À
Use the keypad on the
Control Panel to enter a
four-digit password
(0000-9999).
À
Touch Save to continue.
À
Touch the Mailbox Name
button.
À
Use the keypad on the Touch
Screen to enter a name of up
to 10 characters.
À
À
Touch Save.
À
Fax Setups
Touch the Mailbox Password
button.
Touch Next Mailbox to
program another mailbox.
Touch Previous Mailbox to
return to a previous mailbox.
HINT: Touch Change Keyboard for access to
additional characters.
Touch Save and then Close.
Fax Setups
À
Fax File Management
Access Fax Terminal Setups as described on Page 5-3.
Fax Setups
À
À
Touch the Fax File Management button.
Xerox Document Centre 220/230/332/340 Setup Guide
Page 5-21
À
Touch any button to change
the setting - a description of
each follows.
À
À
Make changes as required.
Touch Save to continue.
Mailbox Files / Failed Fax Files
Displays a list of fax jobs that were unsuccessful after
attempting to send the job a specified number of times
depending on the current settings.
À
Touch the Mailbox Files or
Failed Fax Files button.
À
Select the required default
setting - a description of each
follows.
Auto Delete automatically deletes all failed fax documents.
Delete in 24 hours (DC220/230) automatically deletes all failed fax documents after 24 hours.
Keep keeps all failed fax documents until they are manually
deleted.
Files for Polling / Files Stored for Polling
Contains data for documents scanned and stored in memory
in order to send them to a remote terminal when polled.
Page 5-22
Fax Setups
Touch the Files Stored for
Polling button.
À
Select the required default
setting - a description of each
follows.
À
Touch Save. Touch Close.
Auto Delete automatically deletes stored fax files after they have been
transmitted.
Fax Setups
Fax Setups
Keep keeps stored fax files after they have been transmitted until
they are manually deleted.
Fax Setups
À
Xerox Document Centre 220/230/332/340 Setup Guide
Page 5-23
Fax Communication Setups
Quick Pathway
À
À
À
À
Press the Access
button on the Control
Panel
Enter Key Operator PIN
- see NOTE
Touch Fax Setups
Touch Fax
Communication
Setups.
This section contains the procedures to set the following:
- Outgoing Fax Options
- Incoming Fax Options
- Line Use Restriction
NOTE: The default password is #22222 which may be used
if PINs have not yet been assigned.
Access Fax Communication Setups
À
À
Access Fax Setups as described on Page 5-2.
Touch the Fax
Communication Setups
button.
NOTE: Only those selections relevant to the machine
configuration will be available.
Page 5-24
Fax Setups
Outgoing Fax Options
Touch any button to change
the setting - a description of
each follows.
À
À
Make changes as required.
Access Fax Communication Setups as described on
Page 5-24.
À
Touch the Outgoing Fax Options button.
Fax Setups
À
À
Touch Save to continue.
Dialing Type
NOTE: This feature might be restricted in some areas.
- Tone
- 10 PPS (pulse per second): for a rotary dial.
À
Touch the Dialing Type
button.
À
If necessary, touch the Line 1
or Line 2 button.
À
À
Select the desired option.
Fax Setups
- 20 PPS (pulse per second): for a rotary dial.
Touch Save to continue.
Xerox Document Centre 220/230/332/340 Setup Guide
Fax Setups
This setting programs a tone or pulse dialing.
Page 5-25
Pause Time
This feature sets the amount of time for dial pauses.
À
Touch the Pause Time
button.
À
Touch the scroll buttons to
select a pause time in
seconds.
Redial Management
Redial Count sets the number of times the machine will automatically
attempt a redial if a connection cannot be made.
Redial Interval sets the time intervals in minutes between redials.
NOTE: This feature might be restricted in some areas.
À
Touch the Redial
Management button.
Page 5-26
Fax Setups
Touch the scroll buttons to
select the number of redial
attempts.
À
Touch Save to continue.
À
Touch the Redial Interval
button.
À
Touch the scroll buttons to
select the elapsed time in
minutes.
À
Touch Save to continue.
Fax Setups
À
Line Monitor
Line Monitor audibly monitors a transmission through the internal speaker
until a connection is made. After connection, the line monitor
is removed.
À
Touch the Line Monitor
button.
À
Select On to enable this
feature or Off to switch this
feature off.
À
Touch Save to continue.
Line Monitor Volume sets a default volume for line monitoring as High, Normal, or
Low.
Xerox Document Centre 220/230/332/340 Setup Guide
Page 5-27
Fax Setups
Touch the Redial Count
button.
Fax Setups
À
À
If the Line Monitor feature is
set to On, touch the Line
Monitor Volume button.
À
Select the volume setting
required.
À
Touch Save to continue.
Batch Send
Transmits several pending documents to one destination
during a single phone call.
À
À
Touch the Batch Send button.
Select On to enable this
feature or Off to switch this
feature off.
Resend Count
Automatically re-transmits a failed page if a page error
occurs.
À
Touch the Resend Count
button.
À
Select the number of
attempts the machine should
make to send a failed page.
À
Touch Save to continue.
Page 5-28
Fax Setups
Incoming Fax Options
Touch any button to change
the setting - a description of
each follows.
À
À
Make changes as required.
Access Fax Communication Setups as described on
Page 5-24.
À
Touch the Incoming Fax Options button.
Fax Setups
À
À
Touch Save to continue.
Auto Answer Delay
NOTE: This feature might be restricted in some areas.
Touch the Auto Answer Delay
button.
À
Touch the scroll buttons to
set the time delay before
calls are answered.
Fax Setups
À
Fax Setups
Sets the delay in seconds before incoming calls are
automatically answered.
Xerox Document Centre 220/230/332/340 Setup Guide
Page 5-29
Ring Volume
À
Touch the Ring Volume
button.
À
Select High, Normal or Low
as the default ring volume.
Junk Fax Prevention
This feature programs the machine to only accept incoming
fax documents from remote machines whose Local ID
numbers are programmed into the Dial Directory. All other
fax documents are rejected thereby ensuring junk fax
documents such as advertisements and circulars are not
received.
À
Touch the Junk Fax
Prevention button.
À
Select On to enable this
feature and Off to switch this
feature off.
À
Touch Save to continue.
Page 5-30
Fax Setups
À
Touch the Receive Header
Print button.
À
Select On or Off.
Fax Setups
Receive Header Print (DC332/340)
Secure Fax Receive (DC332/340)
Touch the Secure Fax
Receive button.
À
Select On or Off.
Fax Setups
À
Where more than one line is connected to the Document
Centre 332/340, this feature enables one line to be reserved
for incoming fax documents.
Xerox Document Centre 220/230/332/340 Setup Guide
Page 5-31
Fax Setups
Line Use Restriction (DC332/340)
À
Touch the Line Use
Restriction button.
À
Touch the Line 1 or Line 2
button.
À
Select Receive only to
reserve this line for incoming
fax documents.
À
Alternatively, select Transmit
and Receive to enable the
chosen line to accept
incoming and outgoing fax
documents.
À
Touch Save. Touch Close.
Page 5-32
Fax Setups
6 Auditron Setups
À
À
À
À
Touch the Access
button on the Control
Panel
Press the # button on
the control panel.
Enter Auditron
Administrator PIN - see
NOTE
Touch Enter in the
pop-up window
Touch Auditron Setups
The Internal Auditron is a built-in electronic
accounting system that enables system usage to be
tracked in machine memory by account number. When
enabled, the user enters an account number prior to
using the machine. The numbers of prints made using
the Account are tracked by internal counters which can
be viewed on the User Interface screen by a user with
Auditron Administrator privileges.
The Foreign Interface feature enables an external
control device such as a coin-operated device, a bill
acceptor, a card reader, or a network controlled tracking
system.
The Auditron Setups are used initially to set up the Auditron
accounts, feature, and job limits, job completion procedures
and periodically to gain access to account usage
information.
Access to the Auditron Setups is controlled by a Personal
Identification Number (PIN), and it is limited on the
DC332/340 to users who have Auditron Administrator
privileges and on the DC220/230 to users who have Owner
privileges.
For further information about privileges, please refer to
“Access Rights” on Page 7-1.
Xerox Document Centre 220/230/332/340 Setup Guide
Page 6-1
Auditron Setups
À
The Auditron feature enables machine usage to be tracked
and / or controlled, preventing unauthorized access to the
machine and enabling recharges for prints to be applied.The
options available are described below - the chosen option
must initially be enabled by your Xerox Service
representative.
Auditron Setups
Quick Pathway
Access Auditron Setups
À
Press the Access button on
the Control Panel.
A pop-up window will be
displayed on the Touch Screen.
À
À
Press the # button on the
Control Panel and use the
number keypad to enter an
Auditron Administrator PIN NOTE: The default password is #22222 which may be used if
see NOTE.
PINs have not yet been assigned.
Touch Enter in the pop-up
window.
À
Touch the Auditron Setups
button.
À
Proceed according to
machine model:
- For DC332/340 refer to
“Internal Auditron DC332/340” on Page 6-3.
- For DC220/230 refer to
“Internal Auditron DC220/230” on Page 6-10.
Page 6-2
Auditron Setups
Internal Auditron - DC332/340
Quick Pathway
À
À
À
À
À
Press the Access
button on the Control
Panel
Press the # button on
the Control Panel
Enter Auditron
Administrator PIN - see
NOTE
Touch Auditron Setups
Touch Internal Auditron.
Internal Auditron setups on the DC332/340 models covers
the following topics:
1. Auditron Enable Setups—to set up the Auditron for
one or more services.
2. Account Setups—to set up the Auditron accounts,
delete accounts and to set counter limits for each
account.
3. Job Limit Policy—to set up how the machine should
behave when an account reaches its account limit.
4. Account Summary—reviews all the auditron
accounts.
Auditron Enable Setups - DC332/340
This setup enables the Auditron services to be enabled or
disabled as required. One or more services can be selected.
À
Access Auditron Setups as
described on Page 6-2.
À
Auditron Setups
NOTE: The screen may show
more options dependent on
configuration.
Touch the Internal Auditron
button.
Xerox Document Centre 220/230/332/340 Setup Guide
Auditron Setups
NOTE: The default password is #22222 which may be used
if PINs have not yet been assigned.
Page 6-3
À
Touch the Auditron Enable
Setups button.
À
Select the services to be
enabled or disabled for the
Auditron - see below.
À
Touch Save to continue.
Copy enables/disables Auditron for Copy jobs.
Fax enables/disables Auditron for Fax jobs.
Scan enables/disables Auditron for Scan jobs.
Print enables/disables Auditron for Network print jobs
Reports enables/disables Auditron for printing reports.
NOTE: The choice available will depend on what the
machine configuration is - for example if the machine does
not have Fax capability, then the Fax option will not be
displayed.
Account Setups - DC332/340
This setup is used to create, delete or modify the accounts.
Depending on local requirements for tracking usage, one
account number can be assigned to each department or one
account number assigned to each individual. A maximum of
2000 accounts can be programmed into the machine.
Account numbers can contain between 4 and 16 digits.
À
À
Page 6-4
Access Auditron Setups as described on Page 6-2.
Touch the Internal Auditron button.
Auditron Setups
À
Touch the Account Setups
button.
À
Make selections as required see below for a description of
each.
À
Touch Save to continue.
Add/Modify Accounts
À
Touch the Add Account
button
À
Enter the account number
(between 4 and 16 digits
long) using the screen
keypad.
Auditron Setups
To add an account:
À
Select the account number
and touch the Modify
Account button.
À
Select the services and copy
limits for the selected account
- see below.
À
Touch Save to continue.
Xerox Document Centre 220/230/332/340 Setup Guide
Auditron Setups
To modify an account:
Page 6-5
All Limits the same use the popup keypad to enter a limit in units of 100 to
restrict the number of prints which can be assigned to this
account for all the services selected.
Change Limit use the popup keypad to enter a limit in units of 100 to
restrict the number of prints which can be assigned to this
account for each service selected.
No Limit select this button to assign no restriction on the number of
prints for this account for each service selected.
Not Allowed a value of 0 will be displayed. No prints can be allocated to
this account for the service selected.
HINT: Users can check the status of their accounts by
pressing the Machine Status button on the Control Panel.
Auditron is on the Reports & Counters tab.
Delete Account
À
Select the account number to
be deleted.
À
Touch the Delete Account
button.
À
À
Touch Confirm.
Touch Close to continue.
Page 6-6
Auditron Setups
Reset All Counters
À
To reset the counters for ALL
ACCOUNTS to zero, touch
the Reset All Counters button
at the top of the screen.
À
À
Touch Confirm.
Touch Close to continue.
À
To reset the limits for ALL
ACCOUNTS to zero, touch
the Reset All Limits button at
the top of the screen.
À
À
Touch Confirm.
Auditron Setups
Reset All Limits
Touch Close to continue.
À
To delete ALL ACCOUNTS
touch the Delete All Accounts
button at the top of the
screen.
À
À
Touch Confirm.
Auditron Setups
Delete All Accounts
Touch Close to continue.
Xerox Document Centre 220/230/332/340 Setup Guide
Page 6-7
Job Limit Policy - DC332/340
This feature sets machine behavior when the user’s account
limit has been reached. When the limit is reached, the
machine will either stop the current job immediately or let the
job finish and go over the limit.
À
À
À
Touch the Job Limit Policy
button.
À
Select the preferred option see below for a description of
each.
À
Touch Save to continue.
Access Auditron Setups as described on Page 6-2.
Touch the Internal Auditron button.
Terminate Immediately the machine will stop the job as soon as the account limit has
been reached. For the Copy feature, any pages committed
to print will be allowed to print. Therefore the account limit
may be exceeded. The maximum number of pages allowed
after the limit has been reached is three pages. For Scan
and Fax jobs, no extra pages are allowed beyond the
account limit.
Terminate on Job Boundary the machine allows the current job to be completed. No
further jobs are allowed until the limit is increased or the
counter reset.
Account Summary - DC332/340
This feature provides access to all of the Auditron accounts
and their associated counters. It also enables an individual
counter or all account counters to be cleared.
Page 6-8
Auditron Setups
À
À
À
Touch the Account Summary
button.
À
Select a feature button and
make changes as required a description of each follows.
Access Auditron Setups as described on Page 6-2.
Touch the Internal Auditron button.
Scroll List use the scroll buttons to access each account to review the
counters associated with that account. The scroll list
displays all accounts in numerical order with the lowest
account number appearing at the top of the list.
Clear Counters Button touch this tool bar button to reset the counters for the
selected account to zero. Touch Confirm in the pop-up
window and Close to continue.
Clear All Counters Button touch this button to reset all the counters for ALL OF THE
ACCOUNTS to zero. Select Confirm in the pop-up window
and Close to continue.
Xerox Document Centre 220/230/332/340 Setup Guide
Page 6-9
Auditron Setups
Counters and Limits Display this display provides the current value and limit of the
counters for each service associated with the selected
account.
Auditron Setups
Search to access a particular account, touch the Search button,
enter the account number and touch Save.
Internal Auditron - DC220/230
Quick Pathway
À
À
À
À
À
À
Press the Access
button on the Control
Panel
Enter Owner PIN - see
NOTE
Touch Auditron Setups
Touch Internal Auditron.
Touch a button
Make changes as
required
Internal Auditron setups on the DC220/230 models cover the
following topics:
1. Service Access Setup—to set up the Auditron for
one or more services.
2. Account Setup—to set up the Auditron accounts,
delete accounts and to set counter limits for each
account.
3. Job Completion Setup—to set up how the machine
should behave when an account reaches its
account limit.
NOTE: The default password is #22222 which may be used
if PINs have not yet been assigned.
Service Access Setup - DC220/230
This setup enables the Auditron services to be enabled or
disabled as required. One or more services can be selected.
À
Access Auditron Setups as
described on Page 6-2.
À
Touch the Internal Auditron
button.
Page 6-10
Auditron Setups
À
Touch the Service Access
Setup button
À
Make selections as required
for each Service - see below
for a description of each.
À
Touch Save to continue.
Off (No Auditron) enables/disables Auditron.
Auditron Without Account enables Auditron and allows unlimited usage for each
Limits account.
Account Setup - DC220/230
This setup is used to create, delete or modify the accounts.
Depending on local requirements for tracking usage, one
account number can be assigned to each department or one
account number assigned to each individual. A maximum of
2000 accounts can be programmed into the machine.
Account numbers can contain between 4 and 16 digits.
Xerox Document Centre 220/230/332/340 Setup Guide
Page 6-11
Auditron Setups
NOTE: The choice available will depend on what the
machine configuration is - for example if the machine does
not have Fax capability, then the Fax option will not be
displayed.
Auditron Setups
Auditron With Account Limits enables Auditron and allows usage limits to be set for each
account.
À
Access Auditron Setups as
described on Page 6-2.
À
Touch the Internal Auditron
button.
À
Touch the Account Setup
button.
À
Make selections as required see below for a description of
each.
À
Touch Save to continue.
Add Accounts
À
Touch the Add Account
button.
À
Enter the new account
number (between 4 and 16
digits long) using the pop-up
keypad.
À
Touch Save to continue.
Page 6-12
Auditron Setups
À
Select the services required
for this account.
À
Make other selections as
required - see below.
À
Touch Save and Close to
continue.
Scroll buttons a new limit can be entered to restrict the number of prints
which can be assigned to this account.
Unlimited there is no limit on the number of prints that can be assigned
to this account.
HINT: Users can check the status of their accounts by
pressing the Machine Status button on the Control Panel.
Auditron is on the Reports & Counters tab.
Delete Account the selected account will be deleted
Modify Account displays the services and copy limits for the selected
account.
Clear Counters resets counters for the selected account to zero.
Auditron Setups
Reset Count the counters for this account will be reset to zero.
Job Completion Setup - DC220/230
This feature sets machine behaviour when the user’s
account limit has been reached. When the limit is reached,
the machine will either stop the current job immediately or let
the job finish and go over the limit.
Xerox Document Centre 220/230/332/340 Setup Guide
Page 6-13
Auditron Setups
Reset All Accounts resets counters for ALL ACCOUNTS to zero.
À
Access Auditron Setups as
described on Page 6-2.
À
Touch the Internal Auditron
button.
À
Touch the Job Completion
Setup button.
À
Make selections as required see below for a description of
each.
Terminate Job if set to On, the machine will stop the job as soon as the
account limit has been reached - any pages committed to
print will be allowed to print.
Delete Pending Jobs if set to On, when an account limit is reached all pending jobs
assigned to this account will be deleted.
Page 6-14
Auditron Setups
Foreign Interface Device
Quick Pathway
À
À
À
À
À
Press the Access
button on the Control
Panel
Touch the # button on
the Control Panel
Enter Auditron
Administrator PIN - see
NOTE
Touch Auditron Setups
Touch Foreign
Interface.
A Foreign Interface Device might be a coin-operated device,
a bill acceptor, a card reader, or a network controlled
tracking system installed on the system. The device must
initially be enabled by the Xerox representative.
NOTE: This device controls only Copier print services and
has no bearing on the Fax services.
À
À
Access Auditron Setups as described on Page 6-2.
Touch the Foreign Interface button. Make selections as
required - a description of each follows.
Per-Page Control to set the device for tracking each page in each job
separately. For example, for a coin-operated device, set
External Auditron to Per-Page Control. Otherwise, more
than the current page will be printed, even though only one
coin was inserted.
Auditron Setups
Monitor to set the device to track the usage of the machine, but not
to limit users to a number of copies or prints.
Auditron Setups
Off to specify that a Foreign Interface Device is not connected.
Xerox Document Centre 220/230/332/340 Setup Guide
Page 6-15
Page 6-16
Auditron Setups
7 Access Rights
À
À
À
À
- Key Operator
- System Administrator
- Auditron Administrator (DC332/340)
- Owner
NOTE: The factory default password is #22222. This
password is used initially, prior to new PINs being
assigned.To prevent unauthorized , a user with Owner
privileges can change this PIN or change the Access Rights
to it.
Access Rights
À
Press the Access
button on the Control
Panel
Press the # button on
the Control Panel.
Enter Owner PIN - see
NOTE below.
Touch Additional
Setups (if necessary)
Touch Access Rights
Setups
Personal Identification Numbers (PINs) and privileges are
assigned to users who need to access the Setup Tools. Up
to 100 PINs, each between 4 and 16 digits long, may be
assigned.There are different levels of privileges, depending
on machine configuration:
Access Rights
Quick Pathway
Xerox Document Centre 220/230/332/340 Setup Guide
Page 7-1
Each privilege determines the right to set up the default
settings for a specified set of functions, as shown in the table
below.
Key
System
Auditron
Owner
Operator Administrator Administrator
Machine
Setups
Yes
No
No
No
Copy
Setups
Yes
No
No
No
Fax
Setups
Yes
No
No
No
Print
Setups
No
Yes
No
No
Scan to
File
Setups
No
Yes
No
No
Auditron
Setups
(DC220/
230)
No
No
N/A
Yes
Auditron
Setups
(DC332/
340)
No
No
Yes
No
Access
Rights
No
No
No
Yes
More than one privilege can be assigned to an individual
user. Customer preference determines whether individual
privileges are assigned to various users or all privileges
assigned to only ONE user.
Page 7-2
Access Rights
The following table illustrates a situation where various
privileges are assigned to five users.
PIN
Key
System
Auditron
Owner
Operator Administrator Administrator
1234
2345
3456
5678
4567
- PIN 3456 enables its assigned user to enter the Setup
Tools and access the Print Setups and the Scan to File
Setups. This user cannot access any other Setup
buttons.
- PIN 5678 enables its assigned user to access Machine
Setups, Copy Setups, Fax Setups, Access Rights
setups and Auditron Setups on the DC220/230.
- PIN 4567 enables its assigned user to enter the Setup
Tools and access ALL of the Setups.
Xerox Document Centre 220/230/332/340 Setup Guide
Page 7-3
Access Rights
- PIN 2345 enables its assigned user to enter the Setup
Tools and access the Machine Setups, Copy Setups,
and Fax Setups. This user cannot access any other
Setups.
Access Rights
- PIN 1234 enables its assigned user to enter the Setup
Tools and access only the Auditron and Access Setup
features. This user cannot access any other Setups.
Assign Privileges
À
Touch the Access button on
the Control Panel.
A pop-up window will be
displayed on the Touch Screen.
À
Press the # button on the
Control Panel, and enter a
PIN with Owner Privileges see NOTE below.
À
Touch Enter in the pop-up
window.
À
NOTE: The factory default password is #22222. This
password is used initially, prior to new PINs being
assigned. To prevent unauthorized access, a user with
Owner privileges can change this PIN or change the
Access Rights to it.
If necessary, touch the
Additional Setups button on
the Touch Screen.
Page 7-4
Access Rights
À
Touch the Access Rights
button.
Add Pin
À
À
Touch Add Pin
À
Touch Save.
Access Rights
Using the pop-up keypad,
enter a number between 4
and 16 digits.
À
Use the search facility or
scroll buttons to select the
user pin number for the user
whose privileges are to be
set or modified.
À
Touch the desired button(s)
to add or remove privileges see Page 7-2 for a
description of each.
À
Touch Confirm.
Xerox Document Centre 220/230/332/340 Setup Guide
Access Rights
Set User Privileges
Page 7-5
Delete PIN
À
Use the search facility or
scroll buttons to select the
User PIN number to be
deleted
À
À
Touch Delete PIN.
Touch Confirm.
Page 7-6
Access Rights
8 Index
4-7
A
A3 to 11" x 17" 5-13
about this guide 1-1
access button 2-6, 3-1, 5-2
access rights 7-1
access setups 2-5
account setup (DC220/230) 6-11
account setup (DC332/340) 6-4
account, delete (DC220/230) 6-13
account, delete (DC332/340) 6-6
accounts, delete all (DC332/340) 6-7
activity report 5-14
add accounts (DC220/230) 6-12
add accounts (DC332/340) 6-5
adding a user 7-5
Additional Setups
Report Languages 3-11
additional setups 3-10
localization 3-10
auditron administrator privileges (DC332/340)
7-5
auditron administrator tools 2-3
auditron enable 6-10
auditron enable (DC332/340) 6-3
auditron setups 6-1
auto answer delay 5-29
auto clear 3-6
auto off mode 3-8
auto tray switching 3-3
Auto, paper tray 3-3
Xerox Document Centre 220/230/332/340 Setup Guide
batch send 5-28
Border Erase (DC332/340) 4-10
broadcast and multi-poll reports 5-14
buttons
access 2-6, 3-1, 5-2
interrupt 3-9
C
calling for service 1-2
change keypad 5-7
communication mode
forced 4800 5-19
G3 5-19
super G3 5-18
Communication Mode (DC332/340)
company logo 5-6
contention 3-8
conventions 1-4
copy setups 4-1
customer support number 3-12
5-18
Index
2-sided printing 5-11
2-sided, sides imaged
B
D
date setup 3-4
date/time setup 3-4
default paper tray 3-3
default password 7-1, 7-4
default screen 3-5
delay, auto answer 5-29
delayed start time 5-7
delete account (DC220/230) 6-13
delete account (DC332/340) 6-6
delete all accounts (DC332/340) 6-7
Dialing Digits Reporting 5-8
dialing type 5-25
Index
Numerics
Page 8-1
double-sided printing 5-11
duplex printing 5-11
duplex, sides imaged 4-7
job limit policy (DC332/340)
junk fax prevention 5-30
K
E
Edge Erase (DC332/340)
Erase (DC332/340) 4-9
expert image quality 4-8
4-11
Failed Fax Files 5-22
fault override 3-15
fax communication setups 5-24
fax file management 5-21
fax mailboxes 5-19
fax options, incoming fax 5-29
fax panel defaults 5-16
fax printing options 5-9
fax report options 5-14
fax setups 5-1
fax stapling 5-12
fax terminal options 5-4
files stored for polling 5-22
forced 4800 5-19
foreign interface device 6-10
G
5-19
H
head to head 4-7
head to toe 4-7
I
image quality defaults 4-5
inches, setting 3-10
incoming fax options 5-29
Internal Auditron 6-1
internal auditron (DC220/230)
internal auditron (DC332/340)
interrupt button 3-9
6-10
6-3
J
job limit policy (DC220/230)
Page 8-2
key operator privileges
key operator tools 2-2
7-5
L
F
G3
6-8
6-13
Languages, reports 3-11
lighter/darker 5-17
lighter/darker settings 4-6
line monitor 5-27
line monitor volume 5-27
line use restriction 5-31
local ID 5-4
local name 5-5
localization 3-10
Long Document (DC332/340)
long edge feed (LEF) 1-4
low power mode 3-7
5-8
M
machine serial number 1-2, 3-13
machine setups 3-1
Mailbox
delete 5-20
mailbox
add 5-20
edit 5-20
list 5-20
name 5-21
password 5-21
report 5-16
mailbox files 5-22
mailboxes, fax 5-19
margin shift (DC332/340) 4-9
millimetres, setting 3-10
N
name, mailbox
5-21
O
OFF
2-5
Index
page margin 5-10
panel defaults, fax 5-16
paper attributes 5-11
paper sizes 3-13
paper tray priority 3-3
paper trays
auto tray switching 3-3
default paper tray 3-3
setting defaults, 3-3
paper trays, setting up 3-3
password 7-1, 7-4
password, mailbox 5-21
pause time 5-26
phone number 1-3
polling, stored files 5-22
power save mode 3-8
printing options, fax 5-9
printing, duplex 5-11
Privileges, setting 7-5
pulse 5-25
Q
quick pathway
access rights 7-1
auditron setups (DC332/340) 6-1
copy setups 4-1
fax communications setups 5-24
fax setups 5-1
fax terminal setups 5-3
foreign interface (DC332/340) 6-15
internal auditron (DC220/230) 6-10
internal auditron (DC332/340) 6-3
Xerox Document Centre 220/230/332/340 Setup Guide
R
Receive Header Print (DC332/340)
receive reduction 5-9
redial count 5-26
redial intervals 5-26
redial management 5-26
reduce/enlarge defaults 4-3
reduction, incoming fax 5-9
related documentation 1-1
Report Languages 3-11
reports
activity report 5-14
broadcast 5-14
fax options 5-14
languages 3-11
mailbox report 5-16
multi-poll 5-14
paper sizes 3-13
transmission report 5-15
resend count 5-28
resolution 5-16
ring volume 5-30
5-31
S
screen display setup 3-5
Secure Fax Receive (DC332/340)
serial number 1-2, 3-13
service 1-2
service telephone number 1-3
Set User Privileges 7-5
setting defaults 2-5
setup procedures 2-1
sharpness 4-8
short edge feed (SEF) 1-4
sides imaged 4-7
stapling 5-12
super G3 5-18
switch on/off 2-5
5-31
Index
P
Machine Setups 3-1
quick pathway, using 1-5
Index
ON 2-5
orientation 1-4
original type 5-17
output defaults 4-6
output selection 5-12
owner privileges 7-5
owner tools 2-3
Page 8-3
system administrator privileges 7-5
system administrator tools 2-3
system serial number 1-2, 3-13
T
telephone numbers 1-3
terminate immediately 6-8, 6-14
Terminate on Job Boundary 6-8
time setup 3-4
timers 3-6
tone 5-25
tools
auditron administrator 2-3
key operator 2-2
owner 2-3
system administrator 2-3
touch screen contrast 3-12
Page 8-4
transmission report
5-15
U
User Privileges
7-5
V
volume, line monitoring
volume, ring 5-30
5-27
W
walkup screen display setup 3-5
Welcome Centre 1-3
Welcome Centre telephone number
1-3
X
Xerox telephone number 1-3
Xerox Welcome Centre 1-2
telephoning 1-3
Index