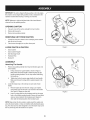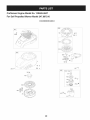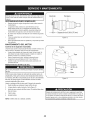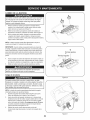
1
Operator's
PRO
Manual
E
S
S
I
0
21" SELF PROPELLED
N
A
MOWER
Model No. 247.887210
o SAFETY
ASSEMBLY
OPERATION
MAINTENANCE
PARTS LIST
o ESPANOL
CAUTION:
Before using
this product, read this
manual and follow all
safety rules and operating
instructions.
Sears,
Roebuck
and Co., Hoffman
Visit our website:
Estates,
www.craftsman.com
IL 60179, U.S.A.
FORM1/0. 769-03781
4/14/2009
WarrantyStatement
..................................
Page2
SafeOperationPractices
..........................
Pages3-4
SlopeGuide..............................................
Page5
SafetyLabels............................................
Page7
Assembly
..................................................
Pages8-11
Operation
..................................................
Pages12-13
ServiceandMaintenance
.........................
Pages14-19
Off-SeasonStorage
..................................
Page20
TroubleShooting
.......................................
Page21
PartsList...................................................
Page22-32
Espa_ol
.....................................................
Page37
ServiceNumbers......................................
BackCover
Craftsman Two Year Limited
Warranty
If this Craftsmanproductfails due to a defectin materialor workmanshipwithintwo yearsfrom thedateof purchase,returnitto any Searsstore,
SearsServiceCenter,or other Craftsmanoutletin the UnitedStatesfor free repair.
This warrantydoesnot include:
•
Expendableitemswhichcan wearout from normaluse withinthe warrantyperiod,suchas rotarymowerblades,bladeadapters,belts,air
cleaners,and sparkplug.
•
Repairsnecessarybecauseof operatorabuseor negligence,including
bentcrankshaftsand thefailureto operateor maintainthe equipmentaccordingto all suppliedinstructions.
This warrantyappliesforonly 90 days ifthis productiseverusedfor commercialor rentalpurposes.
This warrantyappliesonly whilethis productis usedinthe UnitedStates.
This warrantygivesyou specificlegal rights,and you mayalso haveotherrightswhich vary from stateto state.
Sears, Roebuck and Co., Hoffman Estates, IL 60179
EngineOil Type:
SAE30
EngineOil Capacity:
Fuel:
18ounces
UnleadedGasoline
SparkPlug:
Engine:
Champion®RC12YC
Briggs& Stratton
© Sears Brands,LLC
ModelNumber.................................................................
Serial Number .................................................................
Dateof Purchase.............................................................
Recordthe modelnumber,serialnumber
and dateof purchaseabove
2
__IL
This machinewas builtto be operatedaccordingto the rulesfor
safe operationin this manual.As with anytype of powerequipment,
carelessnessor error on the partof the operatorcan resultin serious
injury.This machineis capableof amputatinghandsand feet and
throwingobjects.Failureto observethefollowingsafetyinstructions
could resultin seriousinjury or death.
which,if not followed,couldendangerthe personal
his symbolpointsout
importantsafetyinstructions
safetyand/or
propertyof
yourselfand others.Read
and followall instructionsin this manualbefore
attemptingto operatethis machine.Failureto complywith these
instructionsmay resultin personalinjury.Whenyou seethis symbol,
HEEDITS WARNING!
Batteryposts,terminals,and relatedaccessoriescontainlead and
leadcompounds,chemicalsknownto the State of Californiato cause
cancer and reproductiveharm.Washhandsafter handling.
__ate
of Californiato I
causecancer and birthdefectsor otherreproductiveharm.
CHILDREN
Tragicaccidentscan occur if operatoris not alert to presenceof children.Children areoften attractedto mowerandmowingactivity.Theydo not understand
the dangers.Neverassumethat childrenwill remainwhereyou lastsawthem.
,,
Keepchildren out of the mowingarea and underwatchfulcare of a
responsibleadult otherthanthe operator.
,,
Be alert andturn moweroff if a child entersthe area.
,,
Beforeandwhile movingbackwards,look behindanddown for small
children.
,,
Useextremecare when approachingblind corners,doorways,shrubs,
trees, or otherobjectsthat may obscureyourvisionof a childwho may
run into the mower.
,,
Keepchildren awayfrom hot or runningengines.They can suffer burns
from a hot muffler.
,,
Neverallow childrenunder 14yearsold to operatea power mower.
Children14years old and overshouldread and understandoperation
instructionsand safetyrulesin this manualand shouldbe trainedand
supervisedbya adult.
GENERAL
•
,,
,,
,,
,,
Thoroughlyinspectthe area wherethe equipmentis to be used.Remove
all stones,sticks,wire, bones, toysand otherforeignobjectswhichcould
be trippedoveror picked up and thrown bythe blade.Thrownobjects
can causeseriouspersonalinjury.
Plan yourmowingpatternto avoid dischargeof materialtowardroads,
Alwayswearsafetyglassesor safetygoggles duringoperationand while
performingan adjustmentor repairto protectyour eyes. Thrownobjects
which ricochetcan causeserious injury to the eyes.
,,
,,
Wear sturdy,rough-soledwork shoesandclose-fittingslacksandshirts.
Shirts and pantsthat coverthe armsand legs andsteel-toedshoes
are recommended.Neveroperatethis machinein barefeet, sandals,
slipperyor light weight (e.g.canvas) shoes.
Donot put handsor feetnear rotating partsor undercutting deck.
Contactwith bladecan amputatehandsandfeet.
A missingor damageddischargecover can causebladecontact or
thrown objectinjuries.
Manyinjuriesoccur as a resultof the mower beingpulledoverthe foot
duringa fall causedby slippingor tripping.Do not hold on to the mowerif
you are falling; releasethe handleimmediately.
Neverpull the mowerbacktoward you whileyou are walking.If you must
backthe mowerawayfrom a wall or obstructionfirst look down and
behindto avoid trippingandthenfollow thesesteps:
a. Step backfrom mowerto fully extendyourarms.
b.Be sureyou are wellbalancedwithsure footing.
c. Pull backslowly,no morethan half waytowardsyou.
d. Repeatthese steps as needed.
Donot operatethe mowerwhile underthe influenceof alcoholor drugs.
Donot engagethe self-propelledmechanismon units so equippedwhile
startingengine.
The blade control handleis a safety device.Neverattemptto bypassits
operation.Doingso makesthe safetydevice inoperativeand may result
inpersonalinjury through contactwiththe rotatingblade.The blade
control handle mustoperateeasilyin both directionsand automatically
returnto the disengagedpositionwhen released.
Neveroperatethe mowerin wet grass.Alwaysbe sureof yourfooting. A
slip andfall can causeseriouspersonalinjury.If you feel you are losing
yourfooting, releasethe bladecontrol handleimmediatelyandthe blade
will stop rotatingwithinthreeseconds.
Mowonly in daylightor good artificial light. Walk, neverrun.
,,
Stopthe bladewhen crossing graveldrives,walks or roads.
,,
,,
Readthis operator'smanualcarefullyin its entirety beforeattempting
to assemblethis machine.Read,understand,andfollow all instructions
on the machineand inthe manual(s)beforeoperation.Be completely
familiarwiththe controlsand the properuse of this machinebefore
operatingit. Keepthis manualin a safe place forfuture andregular
referenceand for orderingreplacementparts.
Be familiarwithall controls andtheir properoperation.Know howto stop
the machineanddisengagethem quickly.
This machineis a precision pieceof powerequipment,not a plaything.
Therefore,exerciseextremecautionat all times.Your unit has been
designedto performonejob: to mowgrass. Do not use it for anyother
purpose.
Neverallow childrenunder 14yearsold to operatethis machine.Children 14 yearsold and overshouldread and understandthe instructions
inthis manualand shouldbe trainedandsupervisedby a parent.
Onlyresponsibleindividualswho arefamiliar withthese rulesof safe
operationshouldbe allowedto usethis machine.
,,
,,
OPERATION
,,
,,
,,
,,
,,
,,
,,
,,
3
sidewalks,bystandersand the like.Also,avoid dischargingmaterial
againsta wall or obstructionwhich may causedischarged materialto
ricochetbacktoward the operator.
To helpavoid bladecontactor a thrownobject injury,stay in operator
zone behindhandlesand keepchildren,bystanders,helpers,and pets at
least75 feet from mowerwhile it is inoperation.Stopmachineif anyone
entersarea.
•
•
•
•
•
•
•
If the equipmentshould startto vibrateabnormally,stop the engine and
check immediatelyfor the cause.Vibrationis generallya warningof
trouble.
lock-opendevice.
Shutthe engineoff andwait untilthe bladecomesto a completestop
beforeremovingthe grass catcheror uncloggingthe chute.
The cuttingblade continuesto rotatefor a fewseconds afterthe engine
is shut off. Neverplace any part of the bodyinthe bladearea untilyou
aresure the bladehas stoppedrotating.
Do not mow slopesgreaterthan 15degrees asshown on the
slope gauge.
•
Do not mow on wetgrass. Unstablefooting could causeslipping.
Neverremovegas cap or addfuel while engineis hot or running.
Allow engineto cool at least two minutesbeforerefueling.
Neveroverfill fuel tank.Fill tank to no morethan 1 inchbelow bottom
of filler neckto provideforfuel expansion.
•
•
•
•
Keepall nuts, bolts, andscrewstight to be surethe equipmentis in
safe workingcondition.
•
Nevertamperwith safetydevices.Checktheir properoperation
regularly.
•
After strikinga foreignobject, stop the engine,disconnectthe spark
plugwire and groundagainstthe engine.Thoroughlyinspectthe
mowerfor any damage. Repairthe damagebeforestartingand
operatingthe mower.
Neverattemptto makea wheelor cutting heightadjustmentwhilethe
engine is running.
Grasscatchercomponents,dischargecover,andtrailshieldare
subjectto wear anddamagewhichcould exposemovingparts or
allowobjectsto be thrown.For safetyprotection,frequentlycheck
componentsand replaceimmediatelywithoriginalequipment
manufacturer's(O.E.M.)parts only, listedin this manual."Use of parts
which do not meet the original equipmentspecificationsmay leadto
improperperformanceand compromisesafety!"
Donot changethe engine governorsetting or overspeedthe engine.
The governorcontrolsthe maximumsafe operatingspeed of the
engine.Do not crankengine withspark plug removed.
Checkfuel line,tank, cap, andfittings frequentlyfor cracks or leaks.
Replaceif necessary.
Maintainor replacesafetyand instructionlabels,as necessary.
Observeproper disposallawsand regulations.Improperdisposalof
fluids and materialscan harmthe environment.
•
Useonly an approvedgasolinecontainer.
Neverfill containersinsidea vehicle or on a truckor trailer bedwith a
•
plastic liner.Alwaysplace containerson the ground awayfrom your
vehiclebeforefilling.
Removegas-poweredequipmentfrom the truck or trailer and refuel it on
the ground. If this is not possible,then refuel such equipmenton a trailer
witha portablecontainer,ratherthan from a gasolinedispensernozzle.
•
Keepthe nozzlein contact withthe rim of the fuel tank or container
openingat all times until fueling is complete.Donot usea nozzle
Neverrun an engine indoorsor in a poorlyventilatedarea.Engine
exhaustcontainscarbon monoxide,an odorlessand deadlygas.
Beforecleaning, repairing,or inspecting,makecertainthe bladeand
all movingparts havestopped.Disconnectthe sparkplug wire and
ground againstthe engine to preventunintendedstarting.
Checkthe bladeand engine mountingboltsat frequentintervals
for propertightness.Also,visually inspectbladefor damage (e.g.,
bent,cracked,worn) Replacebladewiththe original equipment
manufacture's(O.E.M.)bladeonly,listed inthis manual."Use of parts
which do not meet the original equipmentspecificationsmay leadto
improperperformanceand compromisesafety!"
Mowerbladesare sharpand can cut. Wrap the bladeor weargloves,
and use extra cautionwhen servicingthem.
•
•
Safe Handling Of Gasoline:
•
Toavoid personalinjury or propertydamage useextreme care in
handlinggasoline. Gasolineis extremelyflammableandthe vapors are
explosive.Serious personalinjury can occurwhen gasolineis spilledon
yourselfor yourclotheswhichcan ignite.Washyour skinand change
clothesimmediately.
•
Replacegasolinecap andtighten securely.
If gasolineis spilled,wipe it off the engineand equipment.Moveunit
to another area.Wait 5 minutesbeforestarting engine.
Neverstorethe machineor fuel container nearan openflame, spark
or pilot light ason a waterheater,spaceheater,furnace,clothesdryer,
or othergas appliances.
To reducefire hazard,keepmowerfree of grass, leaves,or other
debris build-up.Clean up oil or fuel spillage andremoveany fuel
soakeddebris.
•
Allow a mowerto cool at least 5 minutesbeforestoring.
General Service:
SERVICE
•
•
•
•
Slopesare a major factorrelatedto slip andfall accidentswhichcan resultin
severeinjury.Operationon slopesrequiresextracaution.Ifyou feel uneasyon
a slope,do not mow it.For yoursafety,usethe slope gaugeincludedas part
of this manualto measureslopesbeforeoperatingthis unit on a slopedor hilly
area.If the slope is greaterthan 15 degrees,do not mowit.
Do:
•
Mow acrossthe face of slopes; never up anddown. Exerciseextreme
cautionwhen changingdirectionon slopes.
•
Watchfor holes,ruts,rocks, hiddenobjects,or bumpswhich can cause
youto slip or trip.Tall grasscan hide obstacles.
•
Alwaysbe sureof your footing.A slip andfall can causeseriouspersonal
injury.If you feel you are losingyour balance,releasethe bladecontrol
handle immediately,andthe bladewill stop rotatingwithin3 seconds.
Do Not:
•
Neverfuel machineindoorsbecauseflammablevapors will accumulatein the area.
•
OPERATION
Do not mow neardrop-offs, ditchesor embankments,whereyou could
lose yourfooting or balance.
•
•
•
Whenstartingengine,pull cordslowly until resistanceis felt, then pull
rapidly.Rapid retractionof starter cord(kickback) will pull handand
armtoward enginefaster than you can let go. Brokenbones,fractures,
bruisesor sprainscould result.
If situationsoccurwhich are not coveredinthis manual,use careand
goodjudgment. ContactyourSears ServiceCenterfor assistance.
•
Extinguishall cigarettes,cigars,pipes andother sources
of ignition.
•
Neveroperatemowerwithoutproper trailshield,dischargecover,grass
catcher,bladecontrol handle,or othersafety protectivedevices in place
andworking.Neveroperate mowerwithdamagedsafetydevices.Failure
to do so can resultin personalinjury.
Mufflerandengine becomehot and can causea burn.Do not touch.
Only use partsand accessoriesmadefor this machineby manufacturer.
Failureto do so can result in personalinjury.
SLOPE
•
•
•
•
Your Responsibility:Restrictthe use of this powermachineto personswho read,understand,andfollowthe warningsand instructionsin this manualandon the
machine.
4
I
Do notmow on inclineswith a slopein excessof 15degrees(a riseof approximately2-1/2feet every 10feet).
g3
OperateWALK-BEHINDmowersacrossthe face of slopes,neverup and downslopes.
0
._c
Sight and hold this level with a vertical tree...
or a fence post
15°
|
15°
q3
05
(D
05
This page left intentionally blank.
6
READOPERATOR'S
MANUAL. KEEPSAFETYDEVICES
(BLADECONTROL,
TRAILINGSHIELD,
DISCHARGE
COVER,ETC.)IN PLACEANDWORKING.IF DAMAGED,REPLACE
IMMEDIATELY.
7
IMPORTANT:This unit is shippedwithoutgasolineor oil in the engine.
Be certain to serviceenginewithgasolineand oil as instructedin the
Operationsectionbeforestartingor runningyourmachine.
NOTE:Referenceto rightand left hand sideof the LawnMoweris
observedfrom the operatingposition.
OPENING
CARTON
1.
Cut eachcornerof the cartonverticallyfromtop to bottom.
2.
3.
Removeall looseparts.
Removeloosepackingmaterial.
REMOVING
UNIT FROM CARTON
1.
Lift unit from the rearto detach it from underlyingcarton material
and roll unit out of carton.
2.
Checkcarton thoroughlyfor anyotherlooseparts.
J
LOOSE
Figure1
PARTS IN CARTON
•
GrassCatcher
•
•
•
GrassCatcherAdapter
Side DischargeChute
HardwarePack
•
EngineOil
f
ASSEMBLY
Attaching
1.
2.
The Handle
Removeany packingmaterialwhich may be betweenupperand
lowerhandles.
a.
Pull up and back on upperhandleas shownin Figure1.
Makecertainthe lowerhandle is seatedsecurelyintothe
handlemountingbrackets.Do notcrimp cableswhile lifting
the handleup.
b.
Tightenstar knobsto secureupper handleto lowerhandle.
Makesurethat each carriagebolt is seatedproperlyin the
handle.
/.
Locatethe hairpinclip on the weldpin on eachsideof lower
handle.
a.
b.
Removehairpinclipfrom this hole. Usinga pairof pliers,
insert hairpinclip intothe hole on pin closestto thebracket.
See Figure2. Repeaton otherside.
Inserta carriagebolt fromthe hardwarepack intothe upper
hole on the handlemountingbracket.Securewith one plastic
wingnut, also includedin thehardwarepack.Repeaton
othersidewith remainingitemsfrom hardwarepack.
Figure2
NOTE:Makecertainthe drivecable is routedaroundthe outsideand
abovethe lowerhandleso it does not interferewith attachingthe grass
bag.The chutedoor has beendesignedto movethe starterrope out of
theway of the bag whenthe chutedoor is opened.
8
f
3.
The ropeguide,which is connectedto the support rod,is located
on the rightsideof the lowerhandle.See Figure3.
a. Holdblade controlagainstupperhandle.
b.
c.
4.
Pull starterropeout of the engine.Releasebladecontrol.
Slip starterrope intorope guide.
Attachcablesto the lowerhandlewith thecable ties alreadyon
the lowerhandle.Insertpegson cableties intothe holeson the
lowerhandle.See Figure4. Pullcable ties tight and cut off the
extra.
Attaching
the Grass
Catcher
Themowerwas shippedwith the mulchingbaffleinstalledon the unit.
For baggingpurposes,youwill haveto attachthe grassbag and its
adapterin placeof the mulchingbaffle.
1. Removethreewingnuts holdingthe mulchingbaffle in placeand
removefrom unit. See Figure5.
2.
3.
Replacewithgrass bag adapter,whilemakingsurethe front lip of
adaptergoes undertheedge of the deck.Securewith wingnuts
previouslyremoved.
Lift chute door on the grass bagadapterand slidegrass bagonto
the adapter.See Figure6.
Figure 3
(
Figure4
/
Figure6
,J
Figure5
9
f
ADJUSTMENTS
Cutting
Height
Thecuttingheightadjustmentleverislocatedabovethe rearleft
wheel.See Figure7Ainsert.
1. Pull leveroutand awayfrom mower.
2.
3.
Moveleverforwardor backfor desiredcuttingheight.
Releaselevertowardsmowerdeck.
Thefront wheelcuttingheightisdeterminedby selectingone of six
positionson eachcasterassembly.To adjustfront cuttingheight,refer
to Figure7B and proceedas follows:
1. Removewing nut fromaxle bolt.
Slideaxle bolt and wavewasher
fromthe assemblyand selecta
cuttingheight.
2. Withwave washeron axle bolt,
reinserthardwarein the square
hole desiredthroughwheel
assemblyand securewith wing
nut previouslyremoved.
IMPORTANT:All wheels mustbe placedin the samerelativeposition.
For roughor unevenlawns,movethe heightadjustmentleverto a
higherposition.This will stop scalpingof grass.
Thecasterscan be locked in a straightaheadpositionor positionto
swivelfreely.See Figure70 insert.
1.
2.
Lift lock pins.
Placein larger holesto lock wheels.Placepins in smallerholesto
allowcastersto rotatefreelyfor turning.
Drive Control
Theadjustmentwheelis locatedin the drivecontrol handlehousing
and is usedto tightenor loosenthe drivebelt.You will haveto adjust
thedrive controlif any of the followinghappens:
1.
2.
The mowerdoes notpropelitself with thedrive controlengaged.
The mower'sdrivewheelshesitatewith the drivecontrolengaged.
If either of theseconditionsoccur,rotatetheadjustmentwheel
clockwiseto tightenand counter-clockwiseto loosencableto adjust
thedrive control.See Figure8.
Figure8
NOTE:Forsome peoplethe drivecontrolmay not be in a comfortable
position.Youcan adjustthe handleby tighteningthe adjustmentwheel.
10
Control
DriveControl
ElectricStartIgnitionKey
ShiftLever
Cutting Height
Adjustment Lever
RecoilStarter.....................
0il Cap/Dipstick
Y
Spark Plug
Gas Cap
Side Discharge Chute
Primer Bulb
Air Cleaner
J
Figure9
BLADE
CONTROL
ELECTRIC
Theblade controlis attachedto the upper handleof the mower.See
Figure9. Depressand squeezeit againstthe upperhandleto operate
the unit. Releaseit to stopengineand blade.
HEIGHT
SIDE DISCHARGE
CHUTE
Your moweris shippedas a mulcher.Todischargethegrass clippings
to the side instead,followthe instructionsin the Assemblysectionto
attachthe sidedischargechute.
ADJUSTMENT
Keep handsand feet awayfrom the chutearea on cuttingdeck. Refer
to warninglabel on the unit.
Thecuttingheightadjustmentleveris locatedabovethe
left rearwheel.Toadjust thecutting height,referto the
Assemblysection.
RECOIL
STARTER
The recoilstarteris connectedto the supportrod and is locatedon the
rightsideof the lowerhandle.Standbehindthe unit and pull the recoil
starterrope to start the unit.
DRIVE CONTROL
GAS CAP
Thedrivecontrol is locatedon the upper handle.Squeezethe drive
controlto engagethe drivesystem.Releaseit to disengagethedrive
system.
SHIFT
KEY
The electricstartignitionkey is locatedon the left sideof the handle
panel.It is usedonly forthe electricstarter.
This bladecontrolis a safetydevice.Neverattemptto bypassits
operations.
CUTTING
LEVER
START IGNITION
Removethe gascap to add fuel to the fueltank. Useclean, fresh,
regularunleadedgasolinewith a minimumof 87 octane.
SPARK
LEVER
PLUG
Theshift leveris locatedon the drivecontrol housingon the upper
handle.This leveris usedto selectthe forwardspeedof the mower.
Whenchangingspeedselection,releasethe drivecontrol.
Referto the Maintenancesectionfor instructionson spark plug
replacement.
IMPORTANT:Movethe shift leveronlywhenthe engineis running.
Changingthe shift leversettingwith theengineoff can damagethe
mower.
Referto the Maintenancesectionfor instructionson checkingthe oil.
OIL CAP/DIPSTICK
11
GAS AND OIL FILL-UP
Oil (one bottle shipped with unit)
FirstTime Use
1.
2.
Removeoil fill dipstick.
Withthe lawnmoweron levelground,use a funnelto emptyentire
contentsof oil bottle providedintothe engine.
3.
Replaceoil fill dipstickand tighten.
o
0
Subsequent Uses
0
Onlyuse high qualitydetergentoil ratedwith APIserviceclassification
SF,SG,SH, or SJ. Selectthe oil's SAEviscositygradeaccordingto
theexpectedoperatingtemperature.Followthe chart below.
'Colder -'_
,.._
32°F
0
Q
_Warmer
Oi! Viscosity Chart
Figure9
J
Althoughmulti-viscosityoils (5W30,10W30,etc.)improvestarting
in cold weather,they will result in increasedoil consumptionwhen
usedabove32°E Checkyourengine oil level morefrequentlyto avoid
possibleenginedamagefrom runninglowon oil. See Figure9.
1. Checkthe oil levelbeforeeachoperationmakingcertain not
to rub the dipstickalong theinsidewalls of the oil fill tube and
withoutscrewingit in.This would resultin a false dipstick
reading.Refillto FULLmarkon dipstick,if necessary.Capacity
is approximately18oz. Overfillingwillcause theengine to smoke
profuselyand will resultin poorengine performance.
2.
3.
Toavoidengineproblems,thefuel systemshouldbe emptiedbefore
storagefor 30 days or longer.Drainthe gas tank,startthe engine
and let it run untilthe fuel linesand carburetorare empty.Use
freshfuel next season.See STORAGEInstructionsfor additional
information.
Neveruseengine or carburetorcleanerproductsin the fuel tank or
permanentdamagemayoccur.
Replaceoil fill dipstickand tighten.
Keepoil levelat FULL.Runningtheenginewith too little oil can
result in permanentenginedamage.
Be sureno one otherthan theoperatoris standingnearthe lawn
mowerwhilestartingengineor operatingmower.Neverrun engine
indoorsor in enclosed,poorlyventilatedareas. Engineexhaust
containscarbonmonoxide,an odorlessand deadlygas. Keep hands,
feet, hairand looseclothingawayfrom any movingpartson engine
and lawn mower.
Gasoline
extreme
when
Gasolineis
flammableand the vaporsare explosive.Neverfuelmachineindoors
whilethe engineis
hotor
running.Extinguishcigarettes,cigars,
l or
Use
care
handlinggasoline,
extremely
pipes,and othersourcesof ignition.
1.
Removefuel cap from thefuel tank.
2.
Makesurethe containerfrom which youwill pour thegasolineis
cleanand freefrom rust or foreignparticles.Neveruse gasoline
that may be stale from long periodsof storagein its container.
Gasolinethat hasbeen sittingfor anyperiod longerthanfour
weeksshouldbe consideredstale.
3.
TO START
Fillfuel tank with clean,fresh,unleadedregulargasolineonly. Do
not usegasolinecontainingMETHANOL.Replacefuelcap.
1.
Attach sparkplug wireand rubberbootto spark plug.
2.
3.
Gastank shouldbe at least 3/4 full beforestarting.
Pushprimerbutton3 times. Do not primeon hotdays or to restart
a warm engineafter a short shutdown.See Figure10.
4.
Standingbehindthe mower,depressthe bladecontroland holdit
againstthe upper handle.See Figure10.
This mowerhastwo separatestartingsystems,electricand recoil.
Electric Start: Turnignitionkeyto the rightto startthe engine.
Releasethe key after theengine starts.
Recoil Start: Graspstarterhandleand pull rope out slowly
untilengine reachesstartof compressioncycle(rope will pull
slightlyharderat this point). Letthe rope rewindslowly.Pull rope
with a rapid,continuous,full arm stroke.Keepinga firm grip on
the starterhandle,letthe roperewindslowly.
5.
Useof alcoholblendedfuels (calledgasoholor usingethanolor
methanol)canattract moisturewhich leadsto separationand formationof acids during storage.Acidic gascan damagethe fuel system
[of an eng ne wh e n storage.
2
ENGINE
TO STOP ENGINE
1.
2.
f
Releasebladecontrolto stop the engineand blade.
Disconnectsparkplug wireand groundit to the retainingpost to
preventaccidentalstartingwhilethe equipmentis unattended.
,--__5./
Waitfor the bladeto stopcompletelybeforeperforminganywork on
the moweror to removethe side dischargechute.
USING YOUR
LAWN MOWER
Be sure lawnis clearof stones,sticks,wire, or otherobjectswhich
coulddamagelawnmoweror engine.Suchobjectscouldbe accidently
thrownby the mowerin anydirectionand cause seriouspersonal
injuryto the operatorand others.
1.
2.
Oncethe engineis running,squeezethe drivecontrol againstthe
upperhandleto propelmower.Releaseit to disengagethe drive.
Use the shiftleverto selectthe forwardspeedof the mower- 1
is the slowestspeed,6 is thefastest.Whenchangingspeed
selection,releasethedrivecontrol.
IMPORTANT:Movethe shift leveronlywhenthe engineis running.
Changingthe shift leversettingwith theengineoff can damagethe
mower.
If youstrikea foreignobject,stop the engine.Removewirefrom the
sparkplug,thoroughlyinspectmowerfor anydamage,and repair
damagebeforerestartingand operating.Extensivevibrationof mower
duringoperationis an indicationof damage.The unitshouldbe
promptlyinspectedand repaired.
USING
GRASS CATCHER
Youcan usethe grass catcherbag to collectclippingswhileyouare
operatingthe mower.
1. Attachgrasscatcherfollowinginstructionsin the Assembly
section.Grassclippingswillautomaticallycollectin thebag as
you runthe mower.
2.
3.
4.
5.
Operatethe mowertill the grass bag is full.
Stopenginecompletelyby releasingthe bladecontrol.Makesure
that the unithas cometo a completestop.
Whileholdingthegrass bag by boththe rear handleand the lower
handle,lift the grassbag straightup off the adapter.The chute
door will movethe ropeout of the way of the bag.
Continuingto hold the lowerhandle,raisethe rearof thegrass
bag and releasethe lowerhandleovera properreceptacle.The
grassbag will open and the grassclippingswilldisperse.When
replacingthe grassbag, be surethe topof the bag restson the
wiresupport betweenthe handles.
USING
Figure11
The operationof any lawnmowercan resultin foreignobjectsbeing
thrownintothe eyes,whichcan damageyoureyes severely.Always
wearsafetyglasseswhileoperatingthe mower,or whileperforming
any adjustmentsor repairson it.
SIDE DISCHARGE
Followstepsbelowto installthe sidedischargechute:
USING AS IVlULCHER
1.
Formulchinggrass,removethe grass catcheror the sidedischarge
chute fromthe mower,and reattachthe mulchingbaffle.Referto page
9 of Assemblysection.Foreffectivemulching,do not cut wet grass.If
the grass hasbeen allowedto growin excessof fourinches,mulching
is not recommended.Use thegrass catcher to bag clippingsinstead.
2.
Removemulchingbaffle or grass bag adapterfrom unitby
disconnectingwingnuts.
Attachsidedischargechute to unit and securewith thethree wing
nuts.See Figure11.
13
f
Electrode
Always
stopengine,
disconnect
spark
plugwire,andground
against
Porcelain
enginebeforeperformingany type of maintenanceon yourmachine.
GENERAL
RECOMMENDATIONS
•
•
Alwaysobservesafetyruleswhenperformingany maintenance.
Thewarrantyon this lawnmowerdoesnot coveritemsthat have
been subjectedto operatorabuseor negligence.To receivefull
valuefromwarranty,operatormustmaintaintheequipmentas
instructedhere.
•
•
Changingof engine-governedspeedwill voidenginewarranty.
All adjustmentsshouldbe checkedat least onceeach season.
•
Periodicallycheckall fastenersand makesuretheseare tight.
ENGINE
--*
.030 (.76 mm) gap
Figure12
MAINTENANCE
f
Checking the Spark Plug
Cleansparkplug and reset theelectrodegap to 0.030"at least oncea
season;replaceevery 100hoursof operation.
Screws
Cleanareaaroundthe spark plug base.Do not sandblastspark
plug.Sparkplug shouldbe cleanedby scrapingor wire brushing
and washingwith a commercialsolvent.
Removeand inspectthe spark plug.Checkgap to makesureit is
set at .030".See Figure12.
Cover
Replacethe spark plug if electrodesare pitted,burned,or the
porcelainis cracked.
Servicing
the Air Cleaner
Air Cleaner
Cartridge
Do notuse pressurizedair or solventsto cleanthe air cleaner
cartridge.
Base
Theair cleanerpreventsdamagingdirt, dust,etc.,from enteringthe
carburetorand beingforced intothe engineand is importantto engine
lifeand performance.Neverrun the enginewithoutan air cleaner
completelyassembled.
Cleanor replacetheair cleanerevery 25 hoursof operation.
1. Loosenscrewsthat hold the air filter cover.
2.
Opencover and removecartridge.See Figure13.
3.
Installnewair cleanercartridge.Cartridgemustfit securelyin
base.
4.
Placecoveroverair cleaner.
Figure13
After servicingtheair cleaner,be sureall the removedparts are
reinstalledproperlyin place.Failureto securelyfastentogetherair
cleanercase and air cleanerbodymay causedirt or otherforeign
materialsto enterthe enginewhile it is running,resultingin engine
troublesor failures.
5. Tightenscrews.
NOTE:If thefilter is torn or damagedin anyway,replaceit.
14
Check Engine Oil
Checkoil levelbeforeeachoperation.Be sureoil levelismaintained.
1.
2.
Removeoil fill dipstickand wipeclean with cloth.
Replacedipstickwithoutscrewingitin. Removeand checkoil
level.Levelshouldbe at FULLmark.
3.
4.
If needed,add oil slowJy-recheck.Do notoverfill.
Installand tightendipstick.
Oil Fill/Dipstick
Donotoverfill.Overfillingwith oil maycausethe engine to not start,
hard starting,or engine smoking.If overthe FULLmark on the
dipstick,drain oil to reduceoil levelto FULL markon dipstick.
Change Engine Oil
•
Onlyuse high qualitydetergentoil ratedwith APIservice
classificationSF,SG, SH, or SJ. Selectthe oil'sSAE viscosity
gradeaccordingtothe expectedoperatingtemperature.Referto
Operationsectionfor viscositychart.
•
Changeengineoil afterthe first eighthoursof operation,and
everyfifty hoursthereafter.
Air
Figure14
Service
•
To Drain Oil
1.
2.
3.
4.
5.
6.
Drainthe fuelfrom the tank by runningthe engineuntil thefuel
tank is empty.Be surethe moweris level.
With engineOFF butstill warm,disconnectspark plugwire and
keepit awayfrom spark plug.
Tip themower,keepingthe air cleanerabovethe oil fill. See
Figure14.
Clean Engine
•
Dailyor beforeevery use,cleangrass,chaff or accumulated
debrisfromengine.Keeplinkage,spring,and controlsclean.
Keeparea aroundand behindmufflerfree of anycombustible
debris.
Refillwith approximately18oz. of fresh oil. Fillto FULLline on
dipstick.Donot overfill.Referto GasAnd Oil Fill-Upin Operation
section.
Replaceoil fill dipstickand tighten.
8.
Replacesparkplug wirebeforestarting.
Inspectmufflerperiodically,and replaceif necessary.Replacementparts for the mufflermust be the sameand installedin the
samepositionas the originalparts.
Temperatureof mufflerand nearbyengineareasmay exceed150° F
(65°0).Avoidcontactwith theseareas.
Removethedipstickfrom the engineand pour entireoil contents
from thecrank case intoan appropriatecontainer.
Putthe mowerback to its operatingposition(on all fourwheels).
7.
Muffler
•
•
Keepingenginecleanallowsair movementaroundengine.
Engineparts shouldbe keptcleanto reducethe risk of overheatingand ignitionof accumulateddebris.
Do notuse waterto cleanengineparts.Watercouldcontaminatefuel
system.Use a brushor dry cloth.
Usedoil is a hazardouswasteproduct.Disposeof usedoil properly.
Donotdiscardwith householdwaste.Checkwith yourlocalauthorities or SearsServiceCenterfor safedisposal/recyclingfacilities.
Carburetor
Adjustment
Thecarburetoron this engine isnot adjustable.
Engine
Speed
Do not tamperwith thegovernorsettingor the carburetorsettingto
increasethe enginespeed.Eachcarburetoris adjustedat the factory
with eithera cap or stop plateinstalledon the mixturescrew.Any
adjustmentsmustbe performedby a Searsor otherqualifiedservice
dealer.
15
LUBRiCATiON
disconnect
and
lAIways
stopengine,
spark
plug,
groundagainst
enginebeforeperformingany
type
of maintenance
on yourmachine.
Blade Control
Lubricatepivot pointson the bladecontrolat least oncea seasonwith
lightoil. The bladecontrolmustoperatefreely in bothdirections.See
Figure15.
\
Wheels
and Casters
Lubricatethe wheelsand castersat least oncea seasonwith lightoil
(or motor oil). If wheelsare removedforany reason,lubricatethe axle
boltand innersurfaceof the wheelwith lightoil. See Figure15.
Grass
Catcher
Adapter
Lubricatethe torsionspringand pivot pointon eachend of thegrass
catcheradapterdoor at least oncea seasonwith light oil to prevent
rust.See Figure15.
Transmission
J
Figure15
Thetransmissionis pre-lubricatedand sealedat the factoryand does
not requirelubrication.
CLEANING
f
DECK
Cleanundersideof themowerdeck after eachuseto preventbuild-up
of grassclippingsor otherdebris.Followstepsbelowforthis job.
1. Disconnectspark plug wire. Draingasolinefrom lawnmoweror
placea pieceof plasticunderthe gas cap.
2.
Tip mowersothat it restson the housing,keepingthe mufflerside
down.Hold mowerfirmly.
Nevertip the mowermorethan 90o in anydirectionand do not leave
I the mowertippedfor any lengthof time. Oil can draininto the upper
partof theenginecausinga startingproblem.
3.
Scrapeand cleanthe undersideof the deck with a suitabletool.
Do not spraywith water.
IMPORTANT:Donot usea pressurewasheror garden hoseto clean
yourunit. Thesemay causedamageto bearings,or the engine.The
useof water will resultin shortenedlife and reduceserviceability.
4.
Figure16
Putthe mowerback on its wheelson the ground.If you had put
plasticunderthe gascap earlier,make sureto removeit now.
REPLACING
REAR FLAP
To replacerear flap, proceedas follows:
1. Cut off the flat end of the wire rod whichsecuresit to the deck.
See Figure16.
2.
16
Attachthe newflap and new rodto thedeck, bendingthe endsof
the new rod overto secureto deck.
ADJUSTING
SHIFT
f
LEVER CABLE
Periodicadjustmentof the six speedshiftcable maybe necessarydue
to normalwearon the cable.Adjustmentis neededif all six speedsdo
not work.The adjustablecablebracketis locatedon the left side of the
mowerbesidethe engine.See Figure17.
1. Start engineand placeshift leverin the sixth speedposition.
2.
3.
4.
5.
Stopengineand disconnectsparkplug wireand groundit against
engine.
Loosenhex nutwhich securesthe adjustablecablebracket.See
Figure17.
Pushbackon the adjustablecablebracket.
Tightenhexnut.
BLADE
CARE
When removingthe cutting bladefor sharpeningor replacement,
protectyour handswith a pair of heavyglovesor use a heavyrag to
holdthe blade.
J
Figure17
Periodicallyinspectthe bladeadapterforcracks,especiallyif you
strikea foreignobject.Replacewhennecessary.Followthe steps
belowfor bladeservice.
1.
2.
Disconnectsparkplug bootfrom sparkplug.Turnmoweron its
side makingsurethat theair filterand thecarburetorare facing
up.
Removethebolt and the blade bell supportwhichhold the blade
and the bladeadapterto the enginecrankshaft.See Figure18.
NOTE: Whenremovingthe blade,bladeadapter,etc., be carefulnot
to removeor lose partsaboveit associatedwith the enginepulley.
3. Removebladeand adapterfrom the crankshaft.See Figure18.
4.
Removebladefrom theadapterfortestingbalance.Balancethe
bladeon a roundshaft screwdriverto check. Removemetalfrom
the heavyside untilit balancesevenly.Whensharpeningthe
blade,follow the originalangleof grind.Grind eachcuttingedge
equallyto keepthe blade balanced.
5.
6.
7.
Bolt
Support
An unbalancedblade willcause excessivevibrationwhenrotating
at high speeds.It may causedamageto mowerand couldbreak
causing personalinjury.
Figure18
Lubricatethe enginecrankshaftand theinner surfaceof the blade
adapterwith lightoil. Slide the bladeadapterontotheengine
crankshaft.Placethe bladeon the adaptersuchthat the sideof
the blademarked"Bottom"(or with part number)facesthe ground
whenthe moweris in the operatingposition.Makesurethatthe
bladeis alignedand seatedon the bladeadapterflanges.
Placebladebell supporton the blade.Alignnotcheson the blade
bell supportwith small holesin blade.
Replacehexboltand tightenhexbolt to torque:450 in. Ibs. rain.,
600 in. Ibs.max.
Toensuresafeoperationof yourmower,periodicallycheckthe blade
boltfor correcttorque.
17
BELT CARE
NOTE:Severalcomponentsmustbe removedin order to changethe
mower'sdrivebelt. See an authorizedSearsServiceCenterto have
your belt replaced.
REPLACING
BATTERY
Batteriescontainsulfuricacid whichmay causeburns. Donot short
I circuitor mutilatebatteriesin anyway.Do not putbatteriesin fireas
_thesemay burst or releasetoxic materials.
1.
2.
3.
Loosenstar knobs securingupper and lowerhandlesand
carefullyfoldthe upper handledowntowardthelowerhandleas
shownin Figure19.
Removethe two screwssecuringbatterycoverto batteryhousing
and placethem to the side.See Figure19.
Open batterycover,removepositiveand negativeleadsfrom
battery,removeand replacewith newbattery.Connectthe
positivelead to the positiveside of the batterypack,then connect
the negativeside.
NOTE:Thebatteryyou havemaydiffer slightlyfrom the one shownin
Figure20. Referto the Parts List.
Figure19
iMPORTANT:Whenreplacingbatterypack inhandlepanel,battery
pack mustbe positionedwith the positiveterminalto the left side
and the negativeterminalto the rightsideof panel(Positiveterminal
isclosestto the key switch).See Figure20. Replacingbatterypack
incorrectly
will causeseriousdamage.
4.
Reattachbatterycoverto batteryhousingbysecuringwith the
two screwsremovedearlier,makingsureto snapthe wire conduit
on the leftintoplaceon the housing.
5.
Foldhandlesback up and tighten star knobs.
+
Positive
- Terminal
Negative
rminal
Do notremovethe batterypackfrom theelectricstarterhousingfor
anyreasonotherthanreplacement.
Charging
Battery
,J
Figure20
Thebatterycontainscorrosivefluidand toxic material;handlewith
careand keepawayfrom children.Donot puncture,disassemble,
mutilateor incinerate
the battery.Explosivegases couldbe vented
duringchargingor discharging.Use ina wellventilatedarea,away
from sourcesof ignition.
f
NOTE:Thespecialdesignedplug on thechargerwill onlyfit intothe
plug on the batterybox.
1. Plugthe batterychargerintothe porton the undersideof the
batteryhousing.See Figure21.
2.
Insertthe batterychargerplug intoa standard120volt household
outlet.Chargebatteryfor 8 to 10 hoursbeforeinitialuse. Failure
to do somay result indiminishedbatterylife. Do not charge
longer than 12 hours. The batteryshouldonly needto be
chargedupon initialsetupand after any otherextendedperiodsof
non-use.
3.
Aftercharging,disconnectchargerplugfrom outletfirst, then
disconnectchargerlead from battery.
J
Figure21
18
f
IMPORTANT:Alwaysplug chargerlead into batterypacklead first,
and theninsert batterychargerplug into 120volt standardhousehold
outlet.Followthis orderof action everytime you chargethe battery.
Use onlythe batterychargersuppliedwith this mower.
Replacing
Fuse
Theelectricstartercircuitand batteryare protectedbya 40 ampere
fuse.If thefuse burnsout, the electricstarterwill notoperate.If the
unitfails to startwith the electricstarter,performthe followingstepsto
checkthe fuse insidethe batteryhousing:
1.
2.
3.
Openthe batterycoveras describedin ReplacingBattery.See
Figure19.
Removefusefrom socketand inspectas shownin Figure22. If it
is burnedout, replacewith standardautomotive40 amperefuse.
Blown Fuse
Carefullyplacewiringbackinto housing,close batterycover,and
foldupper handleback intoplace.
J
Figure22
NOTE:Theenginecan be startedmanuallyif the fuse burnsout.
MAINTENANCE
SCHEDULE
X
Followthe maintenanceschedulegivenbelow.This chart describes
serviceguidelinesonly.Use the ServiceLog columnto keeptrackof
completedmaintenancetasks.To locatethe nearest Sears Service
Centeror to scheduleservice,simplycontactSearsat
1-800-4-MY-HOME®.
Beforeperforminganytypeof maintenance/service,
disengageall
controlsandstoptheengine.Waituntilall movingpartshavecometo
a completestop.Disconnectsparkplugwireandgroundit againstthe
engineto preventunintendedstarting.
Each Use
1.
Check
Unit and engine.
2.
3.
Tightenor replace
Clean
1.
Engineoil
1.
Change
25 hours
1.
2.
Air cleaner1
1.
Controllinkages/pivotsand wheels 2.
Cleanor replace
Lubewith lightoil
50 hours
1.
Engineoil ff
1.
Change
Annuallyor 100hours
1.
Sparkplug
1.
Clean,replace,re-gap
BeforeStorage
1.
Fuelsystem
1.
Runengineuntil it stopsfrom lack of
fuelor add a stabilizerto thegas in the
tank.
1.
2.
Engineoil level
Looseor missinghardware
3.
1st5-8 hours
1 Cleanmoreoften under dustyconditionsor whenairbornedebrisis present.Replaceair cleanerif very dirty.
ff Changeoil every25 hourswhereoperatingtheengine underheavy loador in high temperatures.
19
Neverstorelawnmowerwith fuel in tank indoorsor in poorly
ventilatedareaswherefuel fumesmay reachan openflame,spark,
or pilot lightas on a furnace,water heater,clothesdryer,or gas
appliance.
PREPARING
THE ENGINE
PREPARING
Equipmentstoredwith fuel canbecomestale whenstoredover30
days.Stalefuel causesacid and gumdepositsto form in fuel system
or on essentialcarburetorparts. Mixfuel stabilizerwith fuelin tank or
storagecontainer.Runengine fora shorttime to circulatestabilizer
throughcarburetorand engine.Engineand fuelwith stabilizercan be
stored up to 24 months.
3.
Whileengineis still warm,changeoil.
Removespark plugand pourapproximately1/2 oz. (15 ml)of
new engineoil intosparkplug cavity whichputs oil intocylinder.
Replacespark plugsecurely.
4.
Pullstarterrope slowly.This turns the engine'scrankshaftand
distributesoil throughthe engine.
Add fuel stabilizeror drain fuelfrom engine.
5.
6.
Cleandirt and debrisfrom topand all areasaroundengine.
Storein a clean,dry area.
Cleanand lubricatemowerthoroughlyas describedinthe lubrication instructions.
•
Donot usea pressurewasheror gardenhoseto cleanyour unit.
•
Coat mower'scuttingbladewith chassisgreaseto prevent
rusting.
Store mowerin a dry,cleanarea. Do notstore nextto corrosive
materials,such as fertilizer.
Whenstoringany type of powerequipmentina poorlyventilatedor
metal storageshed,care shouldbe taken to rust-prooftheequipment.
Usinga lightoil or silicone,coat the equipment,especiallycablesand
all movingpartsof yourlawnmowerbeforestorage.
Performthe followingbeforelong-termstorageof equipment:
1.
2.
•
•
IMPORTANT:If fuel stabilizerisnot used,you needto drain gasoline
from equipmentprior to storage.
THE LAWN MOWER
Battery
The batterymustbe storedwith a full charge.Extendedstorageof a
dischargedbatterywill reducelifeand capacityof the battery.
20
Enginefails to start
1.
2.
Bladecontroldisengaged.
Sparkplug bootdisconnected.
1.
2.
Engageblade control.
Connectwireto spark boot.
3.
4.
Fueltank emptyor stale fuel.
Enginenot primed.
3.
4.
Filltank with clean, freshgasoline.
Primeengineas instructedin the Operation
section.
5.
6.
Faultyspark plug.
Blockedfuel line.
5.
6.
Clean,adjustgap,or replace.
Cleanfuel line.
7.
Engineflooded.
7.
Wait a few minutesto restart,butdo not
prime.
8.
Burntfuse.(ElectricStart only)
8.
Replacefuse (see ServiceSection).
1.
2.
Sparkplug bootloose.
Blockedfuel line or stalefuel.
1.
2.
3.
Ventin gas cap plugged.
4.
5.
Wateror dirt in fuel system.
Dirtyair cleaner.
3.
4.
Connectand tightenspark plug boot.
Cleanfuel line; fill tank with clean,fresh
gasoline.
Clearvent.
Drainfueltank. Refillwith fresh fuel.
5.
Referto Maintenancesectionin manual.
1.
2.
Engineoil levellow
Air flow restricted
1.
2.
Fillengine with properamountand type of oil.
Cleandebrisfrom aroundthe engine'scoolingfins
and blowerhousing.
Enginehesitatesat high RPMs 1.
Sparkpluggap set tooclose
1.
Adjust gap to .030".
Engineidles poorly
1.
Sparkplugfouled,faulty,or gap too wide.
2.
Dirtyair cleaner
1.
2.
Clean,replace,or reset gap to .030".
Referto Maintenancesectionin manual.
1.
Cuttingbladelooseor unbalanced.
1.
Tighten bladeand adapter.Balanceblade.
2.
Bentcuttingblade.
2.
Contactyour SearsServiceCenter.
1.
Wetgrass.
1.
Do notmow whengrassis wet;wait until
laterto cut.
2.
Excessivelyhigh grass.
2.
3.
Dullblade.
3.
Mowonce at a highcuttingheight,then mowagain
at desiredheightor makea narrowercuttingpath.
Sharpenor replaceblade.
1.
Wheelsnotpositionedcorrectly.
Dullblade.
1.
Placeall fourwheels in same heightposition.
2.
Sharpenor replaceblade.
1.
Beltnot installedproperly.
1.
Checkbeltfor properpulleyinstallationand
movement.
2.
Debriscloggingdriveoperation.
2.
Stopengine,disconnectspark plug boot,
and cleanout debris.
3.
Damagedor worn belt.
3.
Contactyour SearsServiceCenter.
Enginerunserratically
Engineoverheats
Excessivevibration
Mowerwill not mulchgrass
Unevencut
.
Mowerwill not self propel
NEED MORE HELP?
YouII
find
I,he a_swer
Find this and all your
Get answers
from
Get a personalized
Find information
and more
other
our team
product
of home
maintenance
and tools
b_ou_ht
o'1 mar_age___yhome
manuals
online.
experts.
plan for your
to help with
home
home.
projects.
to you by Sea_s
21
co___ - Io_ Iree!
Self Propelled
Mower B Model
No. 247.887210
12"
15
21
20
44
"43
22
Self Propelled
Mower B Model
No. 247.887210
I
=
O
m
O
D =
O
1
647-0004
BladeControl
38
2
753-0717
UpperControlHousing
39
964-04093
3
731-0620A
DriveControl
4O
747-0940A-0637 SupportRodw/Rope Guide
4
753-0717
LowerControlHousing
41
747-0939
Pivot Rod
5
710-1667A
C SunkTapScrew,#10 x.75 Lg
42
747-0937-0637
GrassCatcherFrame
6
753-0717
CableMountingCap
43
631-0071
GrassCatcherCover
7
746-0711B
DriveCable
44
926-0106
CapNut
8
728-0199
Rivet
45
712-04063
FlangeLockNut,5/16-18
9
925-04347
Key Switch
46
731-1874A
ChuteDoor
10
925-0201
Key
47
732-0819
TorsionSpring
11
746-04530
ControlCable
48
726-0111
PushCap
12
749-04354A-0637 UpperHandle
49
747-0965
Pivot Rod
13
720-04072
Star Knob
5O
925-04323
12VBattery
14
710-1652
Screw,1/4-20x .625
51
710-0654A
SeresScrew,3/8-16x 1.00
15
710-1174
CarriageBolt,5/16-18x 2.0
52
925-04072
HarnessAssembly
CableTie
53
936-0526
WaveWasher,1.38ID x.88 OD
950-1070
SIveSpacer,.88ID x 1.00OD
16
926-0240
710-0895
Screw,1/4-15x .750
GrassCatcher
17
749-0907B
LowerHandle
54
18
931-0066
AdapterAssembly
55
782-7596A
ControlArm
19
731-1832
Side DischargeChute
56
932-0807
TorsionSpring
2O
931-1833A
Mulch Cover
57
711-1114
PivotShaft
21
782-0078B-4028 Deck21"
58
782-7597
PivotBracket
22
912-0397
Wing Nut
59
738-0924A
ShlderScrew,.375ID x 1/4-14
23
710-0703
CarriageBolt, 1/4-20x .75"
60
756-0625
CableRoller
24
914-0104
CotterPin
61
710-0134
CarriageScrew,1/4-20x .62
25
726-0233
PushNut, .25x ID x .50 OD
62
936-0329
LockWasher,1/4
26
950-1071
SleeveSpacer,.881Dx 1.130D
63
782-7575B-0637 CableMountingBracket
27
756-0612A
Half Pulley:2.62OD
64
746-0939A
28
756-0613
Half Pulley:2.62OD x 1.61
65
782-7574A-0637 CableAdjustmentBracket
29
741-0545
Ball Bearing
66
712-04064
Hex Nut 1/4-20
30
682-7527
Cup
67
912-0138
Hex Nut 1/4-28
31
748-0377C
Blade Adapter
68
732-0627
Shift LeverSpring
Blade Bell Support
69
731-0924
6 SpeedShift Lever
913-0397
Gear Insert
32
736-0524B
6 SpeedCable
33
710-1257
Hex Bolt, 3/8-24x 2.5
70
34
742-04276S
21"MulchingBlade
71
16864
6 Spd.RackCableBracket
35
710-0653
Screw,1/4-20x 3.75
72
956-0613A
PulleyAssembly
36
731-1828
Baffle
73
725-04329
12VBatteryCharger
37
954-0460
Belt, 3/8 x 39.24
23
Self Propelled
Mower B Model
No. 247.887210
49
12
57
58
24
Self Propelled
Mower B Model
m
No. 247.887210
D =
"
O
O
1
914-0474
CotterPin
29
682-7528-0637
ChainCoverAssembly
2
710-1652
Screw1/4-14x .825
3O
741-0324A
FlgeBearing.506 ID x .590Lg
3
936-0264
FlatWasher.330ID x.630 OD
31
682-7526-0637
TransmissionAxleAssembly
4
914-0104
CotterPin
32
918-0263A
TransmissionAss'yComplete
5
932-0306A
CompressionSpring
33
734-1857
Wheel7 x 2
913-0453
Chain
6
734-2010
Wheel,9 x 2.125
34
7
912-0414
Top LockTabWeldNut 1/4-20
35
638-0012
RearAxle Assembly
941-0522
FIgeBearing.506 ID x .715Lg
8
16855
RatchetPawlPlate
36
9
10622B
PlasticSpring Ratchet
37
782-0568-0637
HeightAdjustmentSpring Brkt.
10
748-0381
PawlRH
38
950-0151
Spacer.550ID x .750OD
948-0188B
PawlLH
39
710-1315
Screw3/8-16x .25
11
938-0137A
ShlderScrew.340ID x.285 OD
4O
911-0835
ClevisPin .50 Diax 4.82 Lg.
12
948-0318
Wheel Ratchet
41
750-0807
Spacer.385ID x .624OD
13
736-0270
BellWasher.265ID x.75 OD
42
732-0832
TorsionSpring
14
710-0751
HexCap Screw 1/4-20x.620
43
710-0779A
Screw,AB, #10-16x .500
15
937-3000
GreaseFitting
44
731-06874
TrailShield
16
736-0931
FlatWasher.203ID x.403 OD
45
687-02495
HandleBracketAssembly- LH
17
747-0924
Wheel Pin Lock
46
687-02494
HandleBracketAssembly- RH
18
682-9020A-0691
CasterAssemblyRH
47
725-0157
CableTie
682-9021A-0691
CasterAssemblyLH
48
710-1348
Screw 1/4-14x.500
682-9024-0691
CasterBracketAssemblyRH
49
710-0260A
CarriageBolt5/16-18x.62
682-9026-0691
CasterBracketAssemblyLH
50
911-1146
CasterAxle
720-0223
Grip
51
912-0397
Wing Nut
712-04063
FlangeLock Nut5/16-18
19
20
21
732-0803A
SpringLever
52
22
938-0529
ShoulderNut.825x .165Lg.
53
726-0214
PushCap
23
936-0369
FlatWasher.508 ID x 1.00D
54
936-0232
WaveWasher.531ID x.781OD
24
782-0566B-0637
PivotArmAssembly
55
736-0366
FlatWasher.640ID x 1.12OD
25
750-0515
Spacer.510ID x .70OD
56
741-0685
FlangeBearing
26
741-0978
SIv Bearing.504 ID x .830OD
57
731-07001
Hubcap- RadialSpoke
27
950-1056
ShlderSpacer,.3851Dx .715Lg
58
731-1887
Hubcap- Spokew/Hole
28
710-0653
TapScrew 1/4-20x .375
59
710-0604A
Screw,5/16-18x .625
25
Craftsman
Engine Model No. 12S605-0607
For Self Propelled
Mower iVlodel 247.887210
110SSOPERATORS
MANUAq
I
48S,ORTBLOOK
I
1330 REPAIR MANUAL
11A
287
i
iii
iiii
W
306
\
lO
[]
27g_i
307
i
46
sos _i
615 _
404 <'_
?
ii
i26
4_
616 _''
i
12
358 ENGINE GASKET SET
3_.
842_
!/ 51
883
163_ !I_.
122
524 _;
26
1022
I
Craftsman
Engine Model
For Self Propelled
[]
No. 12S605-0607
Mower Model 247.887210
_,
51
_
i_b-_
f+" % _'
883
122 :_
...."
k...........
718 e_Z
51
7
155
1022
36
238 _\_
_'
_
_._%x
¢,,,_&_*',"_
.)
lO29t_:_
914A _
383
j-
968
,
967
/
/
914A _
445_:_
\
914 _
1095 VALVE GASKET SET
883
51
4_5i
i976i
122
i
868
27
163
Craftsman
Engine Model No. 12S605-0607
For Self Propelled
Mower Model 247.887210
121 CARBURETOR
ii
OVERHAUL
KIT
511
633A @
:
137
i
163
51
18276
/2s_
276 _'122
633 _ J
977 CARBURETOR
276 _#
_
GASKET SET
137
51B
276
1631
122
.....
276 C<b_
Cop
633 C_.
601
24O
334
635 o-339
333 i
i851
i
789
935i
745
202
_J_;'_
51
621
209
d_s
28
;_
Craftsman
Engine Model No. 12S605-0607
For Self Propelled
Mower Model 247.887210
I 1036 EMISSIONS
LABEL ]
65
55
592
il 211
210i:_
459 _::_'_¢_
_::=_ 58
689d_
_7_
iii
..........
.......
/;i,'
65
305_i
_
697
592 ®
_
332@#
937
455
783
/
651
783A _
363
853
29
.
i
Craftsman
Engine Model No. 12S605-0607
For Self Propelled
Mower Model 247.887210
692194
Retainer-Valve
43
691997
Slinger-Governor/Oil
SeaI-Oil(MagnetoSide)
45
690977
Tappet-Valve
493429
Head-Cylinder
46
694039
Camshaft
7
697230t*
Gasket-CylinderHead
48
692745
ShortBlock
8
495786
BreatherAssembly
51
692668_1t* Gasket-intake
9
699833
Gasket-Breather
51A 697735_1t* Gasket-intake
10
691125
Screw (BreatherAssembly)
51B 692555
Gasket-intake
11
691781
Tube-Breather
55
691421
Housing-RewindStarter
12
692232t
Gasket-Crankcase
58
697316
Rope-Starter(Cut to RequiredLength)
13
691137
Screw (CylinderHead)
60
281434S
Grip-StarterRope
15
691680
Plug-OilDrain
65
690837
Screw(RewindStarter)
16
691457
Crankshaft
95
691636
Screw(ThrottleValve)
790121
Shaft-Throttle
692670
CylinderAssembly
2
399269
Kit-Bushing/Seal(MagnetoSide)
3
299819St
5
20
3399781St Seal-Oil(PTOSide)
97
22
691092
Screw (CrankcaseCover/Sump)
104 691242_1
Pin-FloatHinge
23
697610
Flywheel
117 498981
Jet-Main(Standard)(includesO-RingSeal)
24
222698S
Key-Flywheel
118 497466
Jet-Main(HighAltitude)(Incl.O-RingSeal)
25
795429
PistonAssembly(Standard)
121 792383
Kit-CarburetorOverhaul
795430
PistonAssembly(.O20"Oversize)
122 792382
795431
RingSet(Standard)
125 790120
Spacer-Carburetor
795432
RingSet(.020"Oversize)
127 694468_1
Carburetor
27
691866
Lock-PistonPin
130 695564
Plug-Welch
28
499423
Pin-Piston
133 398187
Valve-Throttle
29
499424
Rod-Connecting
134 398188
Float-Carburetor
32
691664
Screw(ConnectingRod)
137 693981_1
Tube-FuelTransfer
32A 695759
Screw(ConnectingRod)
155 698214
Gasket-FloatBowl
26
33
499622
Valve-Exhaust
163 691894_:t
Plate-CylinderHead
34
499641
Valve-Intake
187 791766
Gasket-AirCleaner
35
691304
Spring-Valve(intake)
188 691147
Line-Fuel(Cut To RequiredLength)
36
691304
Spring-Valve(Exhaust)
190 690940
Screw(ControlBracket)
3O
Craftsman
Engine Model No. 12S605-0607
For Self Propelled
Mower Model 247.887210
281505S
PawI-Ratchet
505
691251
Nut (GovernorControl Lever)
Link-MechanicalGovernor
510
795093
Drive-Starter
Spring-Governor(Yellow)
513
795100
Clutch-Drive
227 694864
Bracket-Control
523
499621
Dipstick
240 298090S
Lever-GovernorControl
524
692296
Seal-DipstickTube
276 271716
Washer-Sealing
525
495265
Tube-Dipstick
287 690940
Screw(DipstickTube)
562
691119
Bolt(GovernorControlLever)
300
697590
Muffler
584
697734
Cover-BreatherPassage
304
499677
Housing-Blower
585 _ 691879
305
691108
Screw(BlowerHousing)
592
690800
Nut (RewindStarter)
306
691232
Shield-Cylinder
597
691696
Screw(PawlFrictionPlate)
307
690345
Screw(CylinderShield)
601
791850
Hose-Clamp
309
795092
Motor-Starter
608
497680
Starter-Rewind
332
690662
Nut (Flywheel)
613
691108
Screw(Muffler)
333
802574
Armature-Magneto
613A 691140
Screw(Muffler)
690340
Retainer-Governor
Shaft
694543
Screw (FuelTank)
202
691303
Adjuster-RockerArm
209
691851
222
792404
_ Gasket-BreatherPassage
334
691061
Screw(MagnetoArmature)
615
337
692051
Plug-Spark
616
698801
Crank-Governor
339
795146
Tube/ConnectorAssembly
619
691108
Screw(CylinderHeadPlate)
356
692390
Wire-Stop
621
692310
Switch-Stop
358
792384
GasketSet-Engine
633
691321_
363
19069
Puller-Flywheel
635
66538S
Seal-Choke/ThrottleShaft
365
691129
Screw(Carburetor)
651
691660
Boot-SparkPlug
383
19374S
Wrench-SparkPlug
684
690345
Screw(StarterGear Cover)
404
690272
Washer(GovernorCrank)
689
691855
Screw(BreatherPassage)
425
690244
Screw(Air CleanerCover)
697
691127
Spring-Friction
443
690255
Screw(Air CleanerPrimerBase)
718
690959
Screw(Drive Cap)
445
697029
Filter-AirCleanerCartridge
741 794388
Pin-Locating(Cylinder)
455
791960
Cup-Flywheel
742
795094
Gear-Timing
456
692299
Plate-PawlFriction
745
691648
Retainer-ERing
1 Includedin EngineGasketSet, KeyNumber358
Includedin CarburetorOverhaulKit, Key Number121
* Includedin ValveGasketSet, KeyNumber1095
ff Availablefrom a Briggs& StrattonAuthorizedDealer
31
Craftsman
Engine Model No. 12S605-0607
For Self Propelled
Mower Model 247.887210
795099
Screw (Brake)
691138
Screw(BlowerHousingCover)
784
795095
Gear-Pinion
972
794792
Tank-Fuel
830
694544
Cover-StarterGear
975
493640
Bowl-Float
842
691031
Stud-RockerArm
976
694395
Primer-Carburetor
847 692047
Seal-O Ring(DipstickTube)
977
792385
GasketSet-Carburetor
851 493880S
Dipstick/TubeAssembly
993
694088
Gasket-CylinderHeadPlate
853
696842
Adaptor-Wire
1022 691890t*
Gasket-RockerCover
868
795440t*
Seal-Valve
1023 499624
Cover-Rocker
883
691893t
Gasket-Exhaust
1026 692045
Rod-Push
Screw (RockerCover)
1029 691230
Arm-Rocker
914A 691127
Screw (RockerCover)(Usedin Pos. 1 & 2)
1034 691313
Guide-PushRod
921
795145
Cover-BlowerHousing
1036 tt
Label-Emissions
922
691831
Spring-Brake
1058 277102TRI Operator'sManual
923
691994
Brake
1059 692311
Kit-Screw/Washer
935
499421
Switch-Interlock
1095 795441
GasketSet-Valve
937
795098
Spline-Starter
1160 690345
Screw(InterlockSwitch)
957
794793
Cap-FuelTank
1210 498144
Pulley/SpringAssembly(Pulley)
966
795151
Base-AirCleanerPrimer
1211 498144
Pulley/SpringAssembly(Spring)
967
273356S
Filter-PreCleaner
1330 272147
RepairManual
968
795147
Cover-AirCleaner
914 691108
t Includedin EngineGasketSet, KeyNumber358
Includedin CarburetorOverhaulKit, KeyNumber121
* Includedin ValveGasketSet, KeyNumber1095
tt Availablefrom a Briggs& StrattonAuthorizedDealer
32
33
(Thispage applicablein the U.S.A.and Canadaonly.)
Sears, Roebuck and Co., U.S.A. (Sears), the California Air Resources Board (CARD)
and the United States Environmental
Protection Agency (U.S. EPA)
Emission Control System Warranty Statement (Owner's Defect Warranty Rights and Obligations)
EMISSIONCONTROLWARRANTYCOVERAGEISAPPLICABLETO CERTIFIEDENGINESPURCHASEDIN CALIFORNIAIN 1995ANDTHEREAFTER,WHICHARE USEDINCALIFORNIA,ANDTO CERTIFIEDMODEL
California
and United
States
YEAR 1997AND LATERENGINESWHICHARE PURCHASEDAND USED
ELSEWHEREIN THE UNITEDSTATES(ANDAFTERJANUARY1,2001 IN
CANADA).
Emission
Control
The CaliforniaAir ResourcesBoard(CARD),U.S.EPAand Searsare pleased
to explainthe EmissionControlSystemWarrantyon your modelyear2000and
latersmalloff-roadengine(SORE).In California,newsmall off-roadengines
mustbe designed,builtand equippedto meetthe State'sstringentanti-smog
standards.Elsewherein the UnitedStates, newnon-road,spark-ignition
enginescertifiedfor modelyear 1997and latermustmeetsimilar standardsset
forth bythe U.S.EPA.Sears mustwarrantthe emissioncontrol systemon your
Sears Emission
Control
Statement
parton yourengineis defective,the part will be repairedor replacedbySears.
Warranty
Responsibilities
Asthe smalloff-roadengine owner,you are responsiblefor the performanceof
the requiredmaintenancelistedin yourOperatingand MaintenanceInstructions.Searsrecommendsthatyou retain all yourreceiptscoveringmaintenance
on yoursmalloff-roadengine,but Sears cannotdenywarrantysolelyfor the
lackof receiptsor for yourfailureto ensurethe performanceof all scheduled
maintenance.As the smalloff-roadengineowner,you shouldhoweverbe
awarethat Searsmay denyyou warrantycoverageif your smalloff-roadengine
or a part hasfailed dueto abuse,neglect,impropermaintenanceor unap-
Sears Emission
Warranty
Defects Warranty Coverage
Smalloff-roadenginesarewarrantedrelativeto emissioncontrol partsdefects
fora periodof one year,subjectto provisionsset forth below.Ifany covered
Owner's
Defects
enginefor the periodsoftime listedbelow,providedtherehas been noabuse,
neglector impropermaintenanceof your smalloff-roadengine.Youremission controlsystemincludespartssuch as the carburetor,air cleaner,ignition
system,mufflerand catalyticconverter.Also includedmay be connectorsand
otheremissionrelatedassemblies.Wherea warrantableconditionexists,Sears
will repairyour smalloff-roadengineat no costto you includingdiagnosis,parts
and labor.
provedmodifications.You
are responsiblefor presentingyour smalloff-road
engineto an AuthorizedSearsServiceDealeras soonas a problemexists.The
undisputedwarrantyrepairsshouldbe completedina reasonableamountof
time,not to exceed30 days. Ifyou haveany questionsregardingyourwarranty
rightsand responsibilities,you shouldcontacta SearsService Representative
at 1--800--469--4663.
The emissionwarrantyis a defectswarranty.Defectsare
judged on normalengineperformance.Thewarrantyis not relatedto an in-use
emissiontest.
Control Defects Warranty Provisions
Thefollowingarespecificprovisions
relativetoyourEmission
ControlDefectsWarranty
Coverage.
It isin addition
totheSearsenginewarranty
fornon-regulated
enginesfound in the Operatingand MaintenanceInstructions.
1. WarrantedParts
3. NoCharge
Repairor replacementof anyWarrantedPartwill be performedat no
chargeto the owner,includingdiagnosticlabor whichleads to the
determinationthata WarrantedPartis defective,if the diagnosticwork is
performedat an AuthorizedSears ServiceDealer.For emissionswarranty
servicecontact yournearestAuthorizedSears ServiceDealeras listed in
the "YellowPages"under"Engines,Gasoline,""GasolineEngines,""Lawn
Mowers,"or similar category.
4. Claimsand CoverageExclusions
Warrantyclaimsshall be filed in accordancewiththe provisionsof the
Sears EngineWarrantyPolicy.Warrantycoverageshall be excludedfor
failuresof WarrantedPartswhichare not original Sears partsor because
of abuse, neglector impropermaintenanceas setforth inthe Sears
EngineWarrantyPolicy.Sears is not liableto coverfailuresof Warranted
Partscausedby the use of add-on, non-original,or modifiedparts.
5. Maintenance
Coverageunderthis warrantyextendsonly to the parts listedbelow (the
emissioncontrolsystemsparts)to the extentthese partswere presenton
the engine purchased.
a. FuelMeteringSystem
• Cold start enrichmentsystem
• Carburetorand internalparts
• FuelPump
b. Air lnduction System
• Air cleaner
• Intakemanifold
c. IgnitionSystem
• Spark plug(s)
• Magnetoignitionsystem
d. CatalystSystem
• Catalyticconverter
• Exhaustmanifold
Any WarrantedPart whichis not scheduledfor replacementas required
maintenanceor whichis scheduledonly for regularinspectionto the effect
of "repairor replaceas necessary"shallbe warrantedas to defectsfor the
warrantyperiod.Any WarrantedPartwhich is scheduledfor replacement
as requiredmaintenanceshallbe warrantedas to defectsonly forthe
periodof time up to the first scheduledreplacementfor that part. Any
replacementpart that is equivalentin performanceand durabilitymay
be usedin the performanceof any maintenanceor repairs.The owneris
responsibleforthe performanceof all requiredmaintenance,as definedin
the SearsOperatingand MaintenanceInstructions.
6. ConsequentialCoverage
Coveragehereundershallextend to the failure of any engine components
caused bythe failureof any WarrantedPartstill underwarranty.
• Air injectionsystemor pulsevalve
e. MiscellaneousItemsUsedin AboveSystems
• Vacuum,temperature,position,time sensitivevalves
andswitches
• Connectorsandassemblies
2. Lengthof Coverage
Searswarrantsto the initialownerand eachsubsequentpurchaserthat
the WarrantedPartsshallbe free from defects in materialsandworkmanshipwhich causedthe failure of the WarrantedPartsfor a periodof one
yearfrom the datethe engineis deliveredto a retailpurchaser.
Inthe USAandCanada,a 24 hour hot line, 1-800-469-4663,has a menu of pre-recordedmessagesofferingyou enginemaintenanceinformation.
34
Look For Relevant Emissions Durability Period and
Air index information On Your Engine Emissions Label
Engines that are certified to meet the California Air Resources Board (CARB) Tier 2 Emission Standards must
display information regarding the Emissions Durability Period and the Air Index. Sears, Roebuck and Co., U.S.A.
makes this information available to the consumer on our emission labels.
The Emissions Durability Period describes the number of hours of actual running time for which the engine is
certified to be emissions compliant, assuming proper maintenance in accordance with the Operating & Maintenance Instructions. The following categories are used:
Moderate:
Engine is certified
to be emission compliant
for 125 hours of actual engine running time.
Intermediate:
Engine is certified
to be emission compliant
for 250 hours of actual engine running time.
Extended:
Engine is certified
to be emission compliant
for 500 hours of actual engine running time.
For example, a typical walk-behind lawn mower is used 20 to 25 hours per year. Therefore, the Emissions
Durability Period of an engine with an intermediate rating would equate to 10 to 12 years.
The Air Index is a calculated number describing the relative level of emissions for a specific engine family. The
lower the Air Index, the cleaner the engine. This information is displayed in graphical form on the emissions label.
After
After July 1, 2000 certain
Environmental Protection
sions Compliance Period
for which the engine has
July 1,2000, Look For Emissions
Compliance
On Engine Emissions
Compliance
Label
Period
Sears, Roebuck and Co., U.S.A. engines will be certified to meet the United States
Agency (USEPA) Phase 2 emission standards. For Phase 2 certified engines, the Emisreferred to on the Emissions Compliance label indicates the number of operating hours
been shown to meet Federal emission requirements.
For engines less than 225 cc displacement,
For engines of 225 cc or more, Category
Category
C = 125 hours, B = 250 hours and A = 500 hours.
C = 250 hours, B = 500 hours and A = 1000 hours.
This is a generic representation of the emission label typically found on a certified engine.
FAMILY YSSXS.3192VA
274812
35
Congratulationson makinga smartpurchase.YournewCraftsman®
Professionalproductis designedand manufacturedfor years of
dependableoperation.Butlike all products,it may requirerepairfrom
time to time.That'swhen havinga RepairProtectionAgreementcan
saveyou moneyand aggravation.
Here'swhat the RepairProtectionAgreement*includes:
• Expert serviceby our 10,000professionalrepairspecialists
Unlimitedserviceand no chargefor parts and labor on all covered
repairs
Productreplacementup to $1500if yourcoveredproductcan't be
fixed
• Discountof 10%from regularpriceof serviceand service-related
parts notcoveredby theagreement;also, 10%off regularpriceof
preventivemaintenancecheck
Onceyou purchasethe Agreement,a simplephonecall is all that it
takesfor youto scheduleservice.Youcan call anytimedayor night,or
schedulea serviceappointmentonline.
The RepairProtectionAgreementis a risk-freepurchase.If youcancel
for any reasonduringthe productwarrantyperiod,wewill providea full
refund.Or,a proratedrefundanytimeafter the productwarrantyperiod
expires.Purchaseyour RepairProtectionAgreementtoday!
Somelimitations and exclusionsapply. Forpricesand additional
informationin the U.S.A.call 1-800-827-6655.
*Coverage in Canadavarieson someitems. Forfull details call
Sears Canadaat 1-800-361-6665.
Sears Installation Service
ForSearsprofessionalinstallationof homeappliances,garagedoor
openers,waterheaters,and othermajorhomeitems,in the U.S.A.or
Canadacall 1-800-4-MY-HOME®.
• Fasthelp by phone- we callit RapidResolution- phonesupport
from a Searsrepresentative.Thinkof usas a "talkingowner's
manual."
36
Declaraci6n de garantia ..................................................
37
Instrucciones de seguridad ....................................... 38-39
Guia de cuesta ................................................................
40
Etiquetas de seguridad ...................................................
41
Montaje .....................................................................
42-45
Garantia
Operaci6n ..................................................................
46-47
Servicio y Mantenimiento ......................................... 48-53
Almacenamiento fuera de temporada ............................ 54
Soluci6n de problemas ...................................................
55
NOmero de servicio ............................... Cubierta posterior
de dos aSos de Craftsman
Si este productoCraftsmanfalla debidoa un defectoen los materialeso la manode obra dentrode los dos aSosde la fechade compra,sirvase
devolverloa cualquiertiendaSears,Centrode servicioSears,u otro puntode venta Craftsmanen los EstadosUnidosparasu reparaci6nsin
cargo.
Estagaranfiano cubre:
•
•
Articulosde duraci6nlimitadaque puedendesgastarsebajo condicionesnormalesde uso duranteel periodode garantia,tales como
cuchillasde cortadora rotativas,adaptadorespara cuchillas,correas,filtrosde aire,y bujiasde encendido.
Las reparacionesrequeridasdebidoa abusoo negligenciadel operador,incluiyendoabolladurasdel cig(JeSaly no operaro mantenerel
equipode acuerdoconlas instruccionessuministradas.
Estagarantias61otendr&validezdurante90 dias si este productoseutiliza en cualquiermomentoparafines comercialeso de alquiler.
Estagaranfias61otendr&validezmientrasel productose utiliceen los EstadosUnidos.
Estagarantiale otorgaderechoslegalesespedficos,pero ustedpodria gozarde otros derechosen raz6nde su lugarde residencia.
Sears, Roebuck and Co., Hoffman Estates, IL 60179
Aceitedel motor:
SAE 30
N_rnerode modelo.
Capacidadde aceite del motor:
Combustible:
18onzas
Gasolinasin plomo
Bujia:
Motor:
Champion®RC12YC
Briggs& Stratton
N_rnerodeserie _
Fecha de cornpra
Registreel nOmerode modelo,nOmerode seriey fechade compra
m_sarr ha.
© SearsBrands,LLC
37
Lapresencia
deestesimbolo
indica
quesetrata
deinstrucciones
importantes
deseguridad
quesedeben
respetar
para
evitar
poner
enpeligro
suseguridad
personal
y/omaterial
yiadeotras
personas.
Leaysigatodas
iasinstrucciones
deestemanual
antes
deponer
en
funcionamiento
estama.quina.
Sinorespeta
estas
instrucciones
puede
provocar
iesiones
personales.
Cuando
veaestesimbolo,
iTENGA
EN
CUENTA
LAADVERTENCIA!
Esta ma.quinarue construida para set operada de acuerdo con ias
regias de seguridad contenidas en este manual. AI igual que con
cuaiquier tipo de equipo motorizado, un descuido o error per parte
del operador puede producir lesiones graves. Esta ma.quinaes capaz
de amputar manos y pies y de arrojar objetos con gran fuerza. De no
respetar las instrucciones de seguridad siguientes se pueden producir
lesiones graves o la muerte.
Loshomes
delabateria
ylosaccesorios
dines
El escape dei motor de este producto,algunos de sus componentes
y aigunos componentes del vehiculo contienen o iiberan sustancias
quimicas que el estado de California considera que pueden producir
ca.ncer,defectos de nacimiento u otros problemas reproductivos.
contienen plomo y
compuestos de plomo, sustancias quimicas que seg@ io establecido
pot el Estado de California causan ca.ncery daSos en ei sistema
reproductive. La.veselas manes despues de estar en contacto con estos
componentes.
N QOS
Pueden ocurrir accidentes tr_.gicossi el operador no est,. atento a la presencia de
niRos.Per Io general a los niRos les atraen las cortadoras y la actividad de cortar
el cesped. No entienden los riesgos ni los peligros. Nunca suponga que los niRos
permanecer_.nen el mismo lugar donde los vie per Oltimavez.
•
Mantenga a los niRos fuera del _.reade corte de cesped y bajo estricta
vigilancia de un adulto responsable adem_.sdel operador.
•
Este alerta y apague la cortadora si un niRoingresa al _.rea.
•
Antes y mientras se est,. moviendo hacia atr_.s,mire hacia atr_.sy hacia
abajo y verifique que no haya niRos.
•
Tenga extrema precaucidn cuando se aproxime a esquinas ciegas, entradas
de puertas, arbustos, _.rbolesu otros objetos que puedan obstaculizarle la
vista de un niRoque pudiese correr hacia la cortadora de cesped.
•
Mantenga a los niRos alejados de los motores en marcha o calientes.
Pueden sufrir quemaduras con un silenciador caliente.
•
Nunca permita que niRos menores de 14 ares operen una cortadora
de cesped. Los niRos mayores de 14 ares deben leery entender las
instrucciones de operaci6n y las reglas de seguridad contenidas en este
manual y deben ser entrenados y supervisados per un adulto.
FUNCIONAMIENTO
•
•
•
•
•
•
•
•
•
•
•
•
•
•
GENERAL
Lea cuidadosamente todas las instrucciones contenidas en este manual
antes de intentar realizar el montaje de la m_.quina.Lea, comprenda y
respete todas las instrucciones que figuran en la m_.quinayen el(los)
manual(es) antes de hacerla funcionar. Antes de operar este equipo,
familiarfcese totalmente con los controles y el use correcto del mismo.
Guarde este manual en un lugar seguro para consultas futuras y periddicas,
asf come para solicitar repuestos.
Familiarfcese con todos los controles y su operaci6n correcta. Sepa cdmo
detener la m_.quinay desactivar los controles r_.pidamente.
Esta m_.quinaes un equipo de precisidn, no un juguete. Per Io tanto, tenga
mucho cuidado en todo memento. Esta unidad rue diseRada para realizar
una tarea: cortar el @sped. No la utilice para ningOnotro fin.
No permita nunca que los niRos menores de 14 ares utilicen esta m_.quina.
Los niRos mayores de 14 ares deben leery entender las instrucciones
de operaci6n contenidas en este manual, y deben ser entrenados y
supervisados per sus padres.
S61ose debe permitir usar esta m_.quinaa individuos responsables que
est@ familiarizados con sus reglas de seguridad.
Revise minuciosamente el _.readonde se utilizar_,el equipo. Retire todas las
piedras, palos, Ilantas, huesos,juguetes y otros objetos extraRos que podrfan
hacer tropezar o ser recogidosy arrojados per laaccidn de las cuchillas. Los
objetos arrojados per la m_.quinapueden producir lesiones graves.
Planifique el patrdn de corte para evitar que la descarga de material se
realice hacia los caminos, las veredas, los observadores, etc. Evite adem_.s
descargar material contra las paredes u obstrucciones que podfian hacer
que el material descargado rebote contra el operador.
Para ayudar a evitar el contacto con la cuchilla o una lesidn per un objeto
arrojado, mant@gase en la zona del operador detr_.sde las manijas y
mantenga a los niRos,observadores, ayudantes y mascotas apartados
al menos 75 pies de la cortadora mientras est,. en operacidn. Detenga la
m_.quinasi alguien entra en la zona.
Para protegerse los ojos, utilice siempre gafas o anteojos de seguridad
mientras opera la m_.quinao mientras la ajusta o repara. Los objetos
arrojados que rebotan pueden producir lesiones oculares graves.
Utilice zapatos de trabajo resistentes, de suela fuerte, y pantalones y camisas
ajustados. Se recomiendavestir camisa y pantaldn para cubrir brazos y
piernas y usar zapatoscon puntera de acero. Nunca opere esta m_.quina
descalzo, con sandalias, zapatos resbalosos o livianos (per ej. de Iona).
No ponga las manes o los pies cerca de las piezas rotatorias ni debajo
de la plataforma de corte. El contacto con las cuchillas puede producir la
amputaci6n de manes y pies.
Una cubierta de descarga que falte o este daRada puede provocar lesiones
per contacto con la cuchilla o per objetos arrojados.
Muchas lesiones ocurren come resultado de pasar la cortadora sobre los
pies durante una caida provocada al patinarse o tropezarse. No se sostenga
de la cortadora si se est,. cayendo, suelte la manija inmediatamente.
Nunca jale hacia usted la cortadora mientras camina. Si debe retroceder
con la cortadora para evitar una pared u obst@ulo, mire primero abajo y
atr_.spara evitar tropezarse y luego siga estos pasos:
a. Retroceda de la cortadora hasta estirar completamente sus brazes.
b. AsegOrese de que est,. en equilibrio y bien parado.
c. Tire lentamente hacia atr_.s,no m_.s all_.de la mitad de la distancia entre
usted y la cortadora.
•
•
d. Repita estos pasos segOn sea necesario.
No opere esta m_.quinaestando bajo los efectos del alcohol o de drogas.
En las unidades que disponen de mecanismo de autopropulsidn no
•
embrague dicho mecanismo mientras arranca el motor.
La manija de control de la cuchilla es un dispositivo de seguridad. Nunca
intente evitar su funcionamiento. De hacerlo no funcionarian los dispositivos
•
de seguridad y podrian producirse lesiones personales per el contacto con
las cuchillas rotatorias. La manija de control de la cuchilla debe funcionar
bien en ambas direcciones y regresar autom_.ticamentea la posicidn
desengranada cuando se la suelta.
Nunca opere la cortadora sobre cesped hOmedo. Siempre este seguro de
estar bien parade. Si tropieza y cae puede lesionarse gravemente. Si siente
que pierde el equilibrio, suelte inmediatamente la manija de control de la
cuchilla y la misma dejar_,de rotar en tres segundos.
Corte el cesped solamente con luz de dia o con buena luz artificial. Camine,
•
nunca
•
•
•
38
corra.
Detenga la cuchilla cuando cruce caminos de gravilla, sendas o senderos.
Si la m_.quinacomenzara a vibrar de manera anormal, detenga el motor
y busque inmediatamente la causa. La vibracidn per Io general es una
advertencia de algOn problema.
Apague el motor y espere hasta que la cuchilla se detenga completamente
antes de retirar el colector de cesped o de desbloquear el canal. La cuchilla
conti@a rotando per unos cuantos segundos desp@s que el motor se ha
apagado. Nunca coloque ninguna parte del cuerpo en el _.reade la cuchilla
•
•
•
•
•
hasta
que
este
seguro
dequelamisma
hadetenido
sumovimiento
rotatorio.
•
Nunca Ilene en exceso el dep6sito de combustible. Llene el tanque a no
Nunca
opere
lacortadora
sinotiene
colocados
yfuncionando
elescudo
m_.sde 1 pulgada per debajo de la base del cuello del tap6n de carga, para
posterior
apropiado,
lacubierta
dedescarga,
elcolector
decesped,
permitir la expansi6n del combustible.
lamanija
decontrol
delacuchilla
yotros
dispositivos
deseguridad
y
•
Vuelva a colocar la tapa de la gasolina y ajOstelabien.
protecci6n.
Nunca
opere
lacortadora
silosdispositivos
deseguridad
est_.n • Limpie la gasolina que se pueda haber derramado sobre el motor y el
daRados.
SinoIohace,
pueden
producirse
lesiones
personales.
equipo. Traslade la m_.quinaa otra zona. Espere 5 minutes antes de
encender el motor.
Elsilenciador
yelmotor
secalientan
ypueden
causar
quemaduras.
Nolos
toque.
•
Nunca almacene la m_.quinao el recipiente de combustible en un espacio
Utilice
solamente
piezas
yaccesorios
originales
defgbrica.
SinoIohace,
cerrado donde haya fuego, chispas o aparatos con piloto come per ejemplo,
pueden
producirse
lesiones
personales.
calentadores de agua, calefactores, homes, secadores de ropa u otros
Para
encender
elmotor,
jaledelacuerda
lentamente
hasta
que
sienta
aparatos a gas.
resistencia,
luego
jalergpidamente.
Elrepliegue
rgpido
delacuerda
de
•
Para reducir el riesgo de incendio mantenga la m_.quinalimpia de paste,
arranque
(tensi6n
deretroceso)
lejalarg
lamane
yelbraze
hacia
elmotor
hojas y de acumulaci6n de otros escombros. Limpie los derrames de aceite
m_.s
rgpido
deIoque
usted
puede
soltar.
Elresultado
pueden
serhuesos
o combustible y saque todos los residues embebidos en combustible.
rotes,
fracturas,
hematomas
oesguinces.
•
Dejeque la m_.quinase enfffe per Io menos 5 minutes antes de almacenarla.
Sisepresentan
situaciones
que
noest_.n
previstas
eneste
manual,
sea
Servicio general:
cuidadoso
yuse
elsentido
comOn.
Comunfquese
con
sucentre
deservicio • Nunca encienda el motor en espacios cerrados o en una zona con poca
Sears
para
obtener
ayuda.
ventilaci6n. El escape del motor contiene mon6xido de carbono, un gas
FUNCIONAiVlIENTO
EN PENDIENTES
•
Las pendientes son un factor importante en los accidentesocasionados por derrapes
y cafdas y pueden producir lesiones graves.La operaci6n en pendientes requiere
mucha precauci6n. Si no se siente seguroen una pendiente, no realice el corte de
cesped.Para su seguridad, use el indicadorde pendientes que se incluyecome
parte de este manual para medir la pendiente antes de operar la unidad en una zona
inclinada.Si la pendientesupera los 15 grades,no realiceel corte de cesped.
Haga Io siguiente:
•
Corte el cesped de la pendiente en sentido transversal, nunca hacia arriba y
abajo. Tenga mucho cuidado al cambiar de direcci6n en pendiente.
•
Este atento a los agujeros, surcos, rocas, objetos ocultos o bultos que
puedan provocar que se resbale o se tropiece. El cesped alto puede ocultar
obst_.culos.
•
•
Siempre este seguro de que est,. bien parade. Si tropieza y cae
puede lesionarse gravemente. Si siente que pierde el equilibrio, suelte
inmediatamente la manija de control de la cuchilla y la misma dejar_,de rotar
en 3 segundos.
No haga Io siguiente:
•
No corte el cesped cerca de hundimientos, zanjas o terraplenes, podrfa
perder el equilibrio.
•
No corte el cesped en pendientes que superen los 15 grades come Io indica
el medidor de pendientes.
•
No corte el cesped hOmedo.Si no est,. firmemente parade, puede resbalarse.
•
•
•
•
SERVlCIO
•
Manejo seguro de la gasolina:
•
Para evitar lesiones personales o dares materiales sea sumamente
•
cuidadoso al manipular la gasolina. La gasolina es sumamente inflamable
y sus vapores pueden causar explosiones. Si se derrama gasolina encima
o sobre la ropa se puede lesionar gravemente ya que se puede incendiar.
•
•
Lgvese la piel y c_.mbiese de ropa de inmediato.
Utilice s61orecipientes para gasolina aprobados.
Nunca Ilene los recipientes en el interior de un vehfculo o cami6n o caja de
•
remolque con recubrimientos pl_.sticos. Coloque siempre los recipientes en
el piso y lejos del vehfculo antes de realizar la carga.
Retire el equipo a gasolina del cami6n o remolque y Ilenelo en el suelo. Si
•
esto no es posible, Ilene el equipo en un remolque con un recipiente port_.til,
en vez de hacerlo con una boquilla dispensadora de gasolina.
Mantenga la boquilla en contacto con el borde del dep6sito de combustible
•
•
•
inodoro y letal.
Antes de limpiar, reparar o inspeccionar la m_.quina,compruebe que la
cuchilla y todas las partes que se mueven se hayan detenido. Desconecte el
cable de la bujfa y p6ngalo haciendo masa contra el motor para evitar que
se encienda accidentalmente.
Revise los pernos de montaje de la cuchilla y del motor a intervalos
frecuentes para verificar que esten bien apretados. Inspeccione adem_.s
visualmente la cuchilla en busca de dares (per ejemplo, abolladuras,
desgaste, roturas). Reemplace la cuchilla Onicamente con equipo original
del fabricante (OEM) listado en este manual. "La utilizaci6n de piezas que
no cumplen con las especificaciones de equipos originales puede tener
come resultado un rendimiento inadecuado y puede poner en riesgo la
seguridad".
Las cuchillas de las cortadoras son muy afiladas y podrfan cortarlo.
Envuelva la cuchilla o use guantes y extreme las precauciones cuando
efectOe mantenimiento.
Mantenga todas las tuercas, pernos y tornillos bien ajustados para
asegurarse de que la m_.quinase encuentra en condiciones seguras de
operaci6n.
Nunca intente alterar los dispositivos de seguridad. Controle peri6dicamente
que funcionen correctamente.
Despues de golpear algOnobjeto extraRo, detenga el motor, desconecte el
cable de la bujfa y col6quelo haciendo masa contra el motor. Inspeccione
minuciosamente la m_.quinapara determinar si est,. daRada. Repare el dare
antes de encenderla y operarla.
Nunca trate de ajustar una rueda o la altura de corte mientras el motor est,.
en marcha.
Los componentes del colector de cesped, la cubierta de descarga y el escudo
posterior, estgn sujetos a desgaste y dares que podrian dejar expuestas
las piezas m6viles o permitir que se arrojen objetos. Para proteger su
seguridad, verifique frecuentemente redes los componentes y reempl_.celos
inmediatamentes61ocon piezas de los fabricantes de equipos originales
(O.E.M.)listadas en este manual. "La utilizaci6n de piezas que no cumplen
con las especificaciones de equipos originales puede tener como resultado un
rendimientoinadecuado y puede poner en riesgo la seguridad".
•
No cambie la configuraci6n del regulador del motor ni acelere demasiado
el mismo. El regulador del motor controla la velocidad m_.ximade
funcionamiento seguro del motor. No de arranque al motor si no est,. la bujia
de encendido.
o con la abertura del recipiente en todo memento, hasta terminar de cargar.
No utilice un dispositivo de boquilla de apertura/cierre.
Apague redes los cigarrillos, cigarros, pipas y otras fuentes de combusti6n.
•
Verifique frecuentemente la linea de combustible, el tanque, el tap6n y
los accesorios para ver si hay rajaduras o perdidas. Reemplace de ser
necesario.
Nunca cargue combustible en la m_.quinaen interiores porque los vapores
inflamables podrfan acumularse en el grea.
Nunca saque la tapa de la gasolina ni agregue combustible mientras el
•
Mantenga o reemplace las etiquetas de seguridad e instrucciones segOn
sea necesario.
•
Respete las leyes y normas aplicables para disponer adecuadamente de los
desechos. La eliminaci6n inapropiada de liquidos o materiales puede daRar
el medio ambiente.
motor est,. caliente o en marcha. Deje que el motor se enfrfe per Io menos
dos minutes antes de volver a cargar combustible.
Su responsabilidad: S61opermita que usen esta m_tquinaelectrica las personas que lean, comprendan y respeten las advertencias y las instrucciones que aparecen en
este manual yen la m_.quina.
39
o5
(D
movimientopodriavoltearsey causarlesionesseveras.Si en una pendienteopera una podadoraubicadodetrasde la misma,es
No podeen inclinacionesmayoresa 15grados(elevaci6naproximadade 2 1/2pies por cada 10pies). Una podadoraen
extremadamentedificil mantenerel equilibrioy podriaresbalarsey sufrir lesionesgraves.
0
0
Z
"O
O
ii _
I:D
_
Alineey sostengaeste nivelcon un Arbolvertical...
I
O
UOb/e a/_,
i_-_
"_ _argo d_.,
__
_" _ _/a/[r;e!
_ _P_t_r;toadal,
O
-O
O
o la esquinade una construcci6n...
_
_:
_
o el postede
una cerca.
I:D
I:D
._ do15
I:D
O
I:D
|
I:D
O
E
15
I:D
I:D
,___.___
2x
..c
¥o
-o
o
DEADOPERATOR'S
MANUAL. KEEPSAFETYDEVICES
(BLADECONTROL,
TRAILINGSHIELD,
DISCHARGE
COVER,ETC.)IN PLACEANDWORKING.IF DAMAGED,REPLACE
IMMEDIATELY.
41
f
IMPORTANTE: Esta unidad se envfa sin gasolina ni aceite en el motor.
Antes de comenzar o correr ia ma.quinacargue el motor con gasolina y
aceite como se indica en la secci6n de operaci6n de este manual.
NOTA: Las referencias a los lados derecho e izquierdo de ia cortadora de
cesped se hacen observando la ma.quinadesde la posici6n de operaci6n.
APERTURA
DE LA CAJA DE CARTON
1.
Corte cada una de ias esquinas de la caja verticaimente, de la parte
superior a la base.
2.
3.
Saquetodas las piezas sueltas.
Quite el material de empaque suelto.
C61VIO SACAR
1.
2.
LA UNIDAD
DE LA CAJA
Eleve la unidad desde la parte posterior para separarla del material
de ia caja que quede debajo y haga rodar ia unidad fuera de ia caja.
Verifique cuidadosamente si en la caja queda aiguna parte suelta.
J
PIEZAS
SUELTAS
DENTRO
Figura1
DE LA CAJA
Colector de cesped
Adaptador del colector de pasto
Toivade descarga lateral
Paquete de elementos de ferreterfa
Aceite del motor
f
iVIONTAJE
IViontaje de la manija
1.
2.
Retire el material de empaque que pudiera estar entre las manijas
superior e inferior.
a.
Tire hacia arriba y hacia atras ia manija superior como se
muestra en la Figura 1.Asegurese de que ia manija inferior este
asentada firmemente en los soportes de montaje de ia manija.
Asimismo, no prense los cables mientras levanta la manija.
b.
Apriete las periiias estreiia que sujetan la manija superior a ia
manija inferior. Asegurese de que cada perno del carro este
apropiadamente asentado en la manija.
(
Localice el pasador de horquilla que se encuentra en el pasador
soldado a cada lado de la manija inferior.
a. Saque el pasador de horquilia de este orificio. Con un par
de pinzas, inserte el pasador de horquilla en ei agujero del
pasador ma.scercano ai soporte. Vea la Figura 2. Repita del
otro lado.
b.
Inserte un bul6n de carro dei paquete de elementos de
ferreterfaen el orificio superior del soporte de montaje de
la manija. Sujete con una tuerca pla.sticade mariposa, que
tambien se incluye en el paquete de elementos de ferreterfa.
Repita del otto iado con los elementos restantes del paquete de
elementos de ferreterfa.
NOTA: Aseguresede que el cable de transmisi6n quede alrededor de
la parte exterior y pot encima de la manija inferior de manera que no
interfiera cuando se acople la boisa colectora. La puerta del canal ha
sido dise_ada para mover la cuerda del arrancador fuera del camino de la
bolsa cuando la puerta del canal esta.abierta.
42
J
Figura2
3.
4.
La guia de la cuerda, que esta.conectada a lavariiia de sosten, se
encuentrasobre el lade derecho de la manija inferior.Vea la Figura3.
a. Sostenga la manija de control de la cuchilla contra la manija
superior.
b. Jale la cuerda de arranque para sacarla del motor. Suelte el
control de la cuchilla.
c. Deslice la cuerda de arranque en la guia.
Una los cables a la manija inferior con las uniones de cable que ya
se encuentran en la manija inferior. Inserte los pasadores de las
uniones de cables dentro de los orificios de la manija inferior. Vea
la Figura 4. Jaie las uniones de cables apreta.ndolasy recortando el
exceso.
Conexi6n
de la colectora
de c_sped
La cortadora fue enviada con iatolva de abono instalada en la unidad.
Para fines de embolsado, debera,acoplar ia boisa colectora y su
adaptador en lugar de la tolva de abono.
1. Extraiga ias tres tuercas de mariposa que sostienen ia toiva de
abono en su iugar y retireia de la unidad. Vea ia Figura 5.
2. Reemplace con el adaptador de ia boisa colectora, asegurandose
de que el labio frontal del adaptador encaje debajo del horde de la
plataforma. Asegure con las tuercas de mariposa que extrajo antes.
3.
J
Figura3
Eleve ia puerta dei canal en el adaptador de la bolsa colectora y
deslice la bolsa sobre el adaptador. Veala Figura 6.
(
i
Figura 4
/
_.,.,
,J
Figura 6
,J
Figura5
43
AJUSTES
_
_'_
AItura de torte
La palanca de ajuste de altura de corte se ubica por encima de la rueda
izquierda trasera. Veael recuadro de la figura 7A.
1. Tire de la palanca hacia afuera de ia cortadora.
2.
Mueva la palanca hacia adelante o hacia atrfis para la altura de corte
deseada.
3. Libere la palanca hacia la plataforma de ia cortadora.
La altura de corte de ia rueda frontal se determina seleccionando una de
las seis posiciones en el montaje de cada ruedita. Para ajustar la altura
de corte frontal, consulte la Figura 7B y reaiice Io siguiente:
1. Extraiga iatuerca de mariposa del
perno del eje. Deslice el perno del
eje y la arandela ondulada fuera
del montaje y seleccione la altura
de corte.
2. Con ia arandeia ondulada sobre
el pemo del eje, reinserte los
elementos de ferreteria en ei orificio
cuadrado deseado a traves dei
Figura7
montaje de la rueda y asegure con
la tuera mariposa previamente extrdda.
IMPORTANTE: Todas las ruedas deben set colocadas en la misma
posici6n relativa. Cuando ei terreno es agreste o irregular cambie ia
palanca de ajuste de la aitura a una posici6n mils alta. De esta manera se
cuida mils el cesped.
Las rueditas pueden asegurarse en posici6n directamente hacia adelante
o para que giren iibremente. Vea el recuadro de la figura 7C.
1.
2.
Levantelos pasadoresdefijaci6n.
Col6quelos en los agujeros mils grandes para trabar las ruedas.
Coloque los pasadores en los orificios mils peque_os para permitir
que las ruedas giren iibremente.
Control
de la transmisi6n
La rueda de ajuste estfi ubicada en el alojamiento de la manija de control
de transmisi6n y se utiliza para ajustar o aflojar la correa de transmisi6n.
Deberfi ajustar el control de transmisi6n en case de que:
1. La cortadora no se autopropulsara con el control de transmisi6n
engranado.
2. Las ruedas de transmisi6n de la cortadora temblaran con el control
de transmisi6n engranado.
J
Figura 8
Si ocurriera alguna de estas condiciones, gire la rueda de ajuste en el
sentido de las agujas del reloj para ajustar yen sentido contrario alas
agujas del reloj para aflojar el cable para ajustar el control de transmisi6n.
Vea la Figura 8.
NOTA: Para algunas personas, el control de transmisi6n puede no
encontrarse en una posici6n c6moda. Puede ajustar la manija apretando
la rueda de ajuste.
44
f
Control de la cuchilla
Control de la transmisi6n___
de encendido electrico
Palanca de ajuste de
la altura de corte
Arrancador de retroceso
Tap6n de aceite/varilla de
medici6n del nivel de aceite
Y
J
Tap6n de
J
Bujfa de encendido
Tolva de descarga lateral
Filtro de aire
Bulbo de CartiNa
J
Figura 9
CONTROL
LLAVE
DE LA CUCHILLA
El control de la cuchilla esta.unido a la manija superior de la cortadora.
Vea ia Figura 9. Presione el control de la cuchilia y aprietelo contra ia
manija superior para operar la unidad. Sueltelo para detener el motor y la
cuchilla.
TOLVA
DE DESCARGA
LATERAL
Su cortadora se envfa como abonadora. Para descargar los recortes de
cesped pot el costado, siga las instrucciones de la secci6n Montaje para
acoplar el canal de descarga lateral.
DE LA
Mantenga sus manos y pies alejados del area del canal de la plataforma
de corte. Consulte la etiqueta de advertencias en la unidad.
La palanca de ajuste de altura de corte se ubica por encima
de la rueda izquierdatrasera. Para ajustar la altura de corte,
consulte la Secci6n Montaje.
CONTROL
ELEOTRICO
La Navede encendido electrico esta.ubicada en el lado izquierdo dei
panel de la manija. Se la utiliza Onicamentepara el encendido electrico.
El control de ia cuchiiia es un dispositivo de seguridad. Nunca intente
anular su funcionamiento.
PALANCA DE AJUSTE
ALTURA DE CORTE
DE ENOENDIDO
ARRANCADOR
DE RETROCESO
El arrancadorde retrocesoesta.conectadoa iavariilade soportey se
ubicasobre el lado derechode lamanijainferior.Paraencenderla unidad
col6quesedetra.sde ia mismay tire de ia cuerdadel arrancadorde retroceso.
DE LA TRANSiVlISI6N
TAPON
DE GASOLINA
El control de transmisi6n esta.ubicado en la manija superior.
Apriete el control de la transmisi6n para engranar ei sistema
de transmisi6n. Libere el control de transmisi6n para desengranar el
sistema de transmisi6n.
Retireei tap6n de gasolina para agregar combustible ai tanque de
combustible. Use gasolina limpia, nueva, regular, sin plomo con un
octanaje mfnimode 87.
PALANCA
BUJiA
DE CAIVIBIOS
DE ENCENDIDO
La palanca de cambios esta.ubicada en el alojamiento de control de
transmisi6n sobre la manija superior. Esta palanca se utiliza para
seleccionar ia velocidad de avance hacia adeiante de ia cortadora.
Cuando cambie la selecci6n de velocidad, iibere el control de transmisi6n.
Consuite la secci6n Mantenimiento para obtener instrucciones sobre el
cambio de bujfas.
IMPORTANTE: Mueva ia palanca de cambios s61ocuando el motor este
en marcha. Si cambia el ajuste de la palanca de cambios con el motor
apagado, su cortadora puede resultar da_ada.
Consulte la secci6n Mantenimiento para obtener instrucciones sobre
c6mo verificar el aceite.
45
TAPON DE ACEITE/VARILLA
DEL NIVEL DE ACEITE
DE iVlEDICI6N
LLENADO
DE GASOLINA
f
Y ACEITE
Aceite (se envia una botella junto con la unidad)
Primer uso
1. Saque la varilla del nivel de aceite.
2. Con ia cortadora de cesped ubicada en suelo nivelado, utilice
un embudo para vaciar todo el contenido de la botella de aceite
suministrada en el motor.
3.
Vuelva a colocar la varilla de Ilenadode aceite y ajQstela.
Usos posteriores
Use solamente un aceite detergente de alta calidad cuya clasificaci6n de
servicio API sea SE SG, SH o SJ. Seleccione el grado de viscosidad SAE
del aceite segt_nia temperatura de operaci6n esperada. Cumpla ia tabla
que aparece a continuaci6n.
f
32F
Mils frio
_Mfis
caliente
5W30
J
Tabla de viscosidad del aceite
Figura 9
Aunque los aceites de viscosidad mQltiple(5W30, 10W30,etc.) mejoran el
encendido cuando ei clima estfi frio, los mismos incrementan el consumo
de aceite cuando se usan a mis de 32°R Compruebe el nivel de aceite
con mayorfrecuencia para evitar da_os debido a que el motor trabaje con
un nivel de aceite bajo. Vea la Figura 9.
1. Controle el nivel de aceite antes de cada operaci6n, asegurindose
de que ia varilia de nivel de aceite no roce con las paredes interiores
del tubo de Ilenado de aceite y sin enroscar ia misma. Esto daria
lugar a una faisa iectura de la varilla de medici6n. Llene hasta la
marca FULL (lleno) de la varilla del nivel de aceite, si es necesario.
La capacidad es de aproximadamente 18 onzas. Ei ilenado en
exceso hace que el motor emane mucho humo y que el rendimiento
del mismo no sea bueno.
2.
3.
Vuelva a colocar la varilla de Ilenadode aceite y ajQstela.
Mantenga el nivei de aceite en ia marca FULL. Si pone el motor en
marcha con muy poco aceite le puede causar dahos permanentes.
Gasolina
Tenga mucho cuidado ai trabajar con gasolina. La gasolina es
sumamente inflamable y sus vapores pueden causar explosiones. NuncaI
cargue combustible en ia miquina en un espacio cerrado o cuando el I
motoresti caliente o en marcha. Apague cigarrillos, cigarros, pipas y
I
otras fuentes de combusti6n.
1.
2.
Saque la tapa del dep6sito de combustible.
Verifique que el recipiente dei que va a verter ia gasolina este limpio
y libre de 6xido o de objetos extrahos. No use nunca gasolina que
pueda estar vieja pot haber estado almacenada en su recipiente
pot largos periodos. La gasolina que ha estado estacionada por un
periodo superior a cuatro semanas debe considerarse vieja.
Para evitar problemas con el motor, se debe vaciar el sistema de
combustible antes de almacenar ia miquina durante 30 dias o mils.
Vacie ei tanque de nafta, encienda ei motor y dejelo funcionar hasta
que las lineas de combustible y el carburador esten vacios. La siguiente
temporada use combustible nuevo. Consulte las Instrucciones de
ALMACENAMIENTOsi desea informaci6n adicional.
Nunca use productos de limpieza para el motor o el carburador en ei
tanque de combustible ya que esto provocari un da_o permanente.
AsegQresede que ninguna persona aparte dei operador permanezca
cerca de ia cortadora mientras arranca el motor u opera la misma.
Nunca encienda el motor en espacios cerrados o en una zona con poca
ventilaci6n. El escape del motor contiene mon6xido de carbono, un gas
inodoro y ietai. Mantenga ias manos, los pies, el cabello y la ropa suelta
alejados de las partes m6viles del motor y de la cortadora.
3.
Llene el tanque de combustible s61ocon gasolina normal sin plomo,
limpia y fresca. No use gasolina que contenga METANOL. Vuelva a
colocar la tapa de combustible en su lugar.
PARA ENCENDER
1.
Conecte el cable de la bujia y el capuch6n de goma de la bujia.
2.
El tanque de combustible deberia ser al menos 3/4 o Ileno antes del
arranque.
Presione el bot6n del cebador 3 veces. En dias calurosos, si el
motor esti caliente no Io cebe para volver a arrancar luego de una
detenci6n breve. Vea la Figura 10.
Parado detris de ia cortadora de cesped, presione ei control de
la cuchilla y sostengalo contra la barra de control superior. Vea la
Figura 10.
Este cortacesped tiene dos sistemas iniciales separados, electricos
y retroceso.
3.
El uso de combustibles con mezcla de alcohol (que se Ilaman gasohol, o
que utilizan etanol o metanol) pueden atraer humedad, Io que conduce a
la separaci6n y formaci6n de icidos durante ei aimacenamiento. El gas
acidico puede da_ar el sistema de combustible de un motor durante el
almacenamiento del mismo.
4.
5.
46
EL MOTOR
Arrancador
el_ctrico:
Gire la Ilave de encendido a la derecha
para arrancar el motor. Sueite la ilave apenas arranque el motor.
Arrancador de retroceso: Tome la manijadel arrancadory
saque la cuerda lentamentehastaque el motoralcance ei comienzo
del ciclo de compresi6n(la cuerda tirara,un poco ma.sfuerte en este
punto). Dejeque la cuerdase enrolle lentamente.Tire de lacuerda
con un golpe r@ido y continuode todo ei brazo. Mantengafirme
la manija del arrancador,deje que la cuerda se vuelva a enrollar
lentamente.
PARA DETENER
EL MOTOR
1.
Suelte la manija de control de la cuchilla para detener el motor y la
cuchilla.
2.
Desconecte el cable de la bujia y col6quelo a masa contra el poste
de retenci6n para evitar que se encienda accidentalmente mientras
no se esta.prestando atenci6n ai equipo.
Espere a que ia cuchilla se haya detenido pot completo antes de hacer
cualquier trabajo en la cortadora o de retirar el canal de descarga lateral.
USO DE LA CORTADORA
DE CESPED
Aseguresede que el cesped esta.libre de piedras,palos, cables u otros
objetos que pudiesenda_ar la cortadorao el motor.Dichos objetos pueden
set arrojadosaccidentalmentepot la cortadora en cualquier direcci6ny
provocar iesionespersonales graves ai operadory a otras personas.
1.
Figura10
Una vez que el motor est6 funcionando, apriete el control de
transrnisi6n contra la rnanija superior para propulsar la podadora.
Libere el control de transrnisi6n para desengranar el sisterna de
transrnisi6n. Refierasea la pagina 11de la secci6n de Operacibn.
/
Si golpea un objeto extra,o, detenga ei motor. Retireel cable de ia
bujia, inspeccione detenidamente la cortadora para vet que no tenga
da_os, y repare el dai_oantes de volver a encender y operar. El exceso
de vibraci6n de la cortadora durante la operaci6n es una indicaci6n de
da_o. Se debe inspeccionar y reparar la unidad Io antes posible.
USO DEL COLECTOR
DE CESPED
Puede utilizar la bolsa colectora para juntar losrecortes de cesped
mientras opera la cortadora.
1. Acople el colector de cesped siguiendo las instrucciones de la
secci6n de Montaje. Los recortes de cesped son recolectados en la
bolsa de forma automa.ticaa medida que pasa ia cortadora.
2. Opere ia cortadora hasta que ia bolsa colectora este iiena.
3. Detenga ei motor pot completo soltando ia manija de control de la
cuchiiia. Compruebe que ia unidad se haya detenido por completo.
4. Mientras sostenga la boisa colectora de pasto pot medio de la
manija trasera y la manija inferior, levante la bolsa colectora para
sacarla dei adaptador. La puerta del canal movera,la cuerda fuera
del camino de la bolsa.
5.
Continue sosteniendo ia manija inferior, eleve ia parte posterior de
la bolsa colectora, y liberan el manija inferior sobre un recepta.culo
apropiado. La bolsa colectora se abrira,y los recortes de cesped se
dispersara.n.AI volvera colocar la bolsa de cesped, asegurese de
que ia parte superior de la bolsa se apoye sobre el sosten del cable
entre las manijas.
USO DE LA DESCARGA
LATERAL
Siga los pasos que se indican a continuaci6n para instaiar el canal de
descarga lateral:
J
Figura 11
1.
2.
Extraiga la tolva de abono o el adaptador de ia bolsa colectora de la
unidad soltando las tuercas de mariposa.
Acople el canal de descarga lateral y asegure con las tres tuercas
man
Vea ia
ura 11
AI operar unacortadora de cesped es posibleque objetos extra_os sean
arrojados a los ojos, Io cual puede da_arlos gravemente. Utilice siempre
Igalas de seguridad durante la operaci6n de la cortadora de cesped o
mientras la ajusta o repara.
USO COIVIO ABONADORA
Para abonar el cesped, quite el colector de cesped o el canal de
descarga lateral de ia maquina, y acople la toiva de abono. Refierase a
la pa.gina9 de la secci6n de Montaje. Para un abono eficiente, no corte
cesped hQmedo.Si el cesped ha crecido ma.sde cuatro pulgadas, no se
recomienda el uso de la cortadora como abonadora. En ese caso, use el
4.7colector de cesped para embolsar los recortes.
f
Detenga
siempre
elmotor,
desconecte
elcable
delabujia
y haga
masa
contra
elmotor
antes
dereaiizar
cuaiquier
tarea
demantenimiento
asu
mfiquina.
RECOMENDACIONES
Respete siempre las reglas de seguridad cuando realice tareas de
mantenimiento.
•
La garanfia de esta cortadora no cubre elementos que han
estado sujetos al mal uso o la negligencia del operador. Para
recibir el reembolso total de la garantia, ei operador deberfi dar
mantenimiento ai equipo tal y como se indica en este manual.
El cambio de la velocidad controlada del motor invalidarfi la garantia
del motor.
---_
•
Todos los ajustesdeben set verificados por Io menos una vez en
cada estaci6n.
•
Revise peri6dicamente todos los sujetadores y compruebe que esten
bien ajustados.
MANTENIIVIIENTO
Control
Porcelana
GENERALES
•
•
Electrodo
_
Separaci6n de 0.030 (0.76 mm)
Figura 12
DEL MOTOR
f
de la bujia de encendido
Tornillos
Limpie la bujia y ajuste la separaci6n del electrodo a 0.030" al menos una
vez pot estaci6n, reemplace cada 100 horas de funcionamiento.
•
Limpie el firea alrededor de la base de la bujia. No lije la bujia. Se
debe limpiar las bujias mediante raspado o tallado con cepillo de
alambre y iavado con un solvente comerciai.
•
Saque e inspeccione la bujia. Verifique la separaci6n para
asegurarse de que estfi fijada en 0.030". Vea la Figura 12.
•
Cambie la bujia si los electrodos estfin picados, quemados o la
porcelana estfi rota.
IVlantenirniento
del filtro
_a
de aire.
Cartucho
de filtro de
aire
No useaire presurizadoo solventespara limpiarel cartuchode filtro
de aire.
ase
El filtro de aireevita el ingresoal carburadorde suciedad,polvo,etc.
perjudicialesy evitaque los mismosscan introducidosdentrodel motor.Adem_.s,dichofiltro es importantepara la vida _til y el rendimiento
del motor.Noponga nuncaen funcionamientoel motorsin haber
montadototalmenteel filtro de aire.
Figura13
Limpioo sustituyenel filtro de aire cada25 horasde la operaci6n.
1. Sueltetornillosque sostienenla tapade filtrode aire.
2. La tapa abiertay quitael cartucho.Vea la Figura13.
3. Instaleel nuevocartuchode filtro de aire.El cartuchodebecaber
bien en la base.
4.
5.
Despues dei mantenimientodel filtro de aire, asegQresede que todas
las piezas extraidas se vuelvan a instaiar correctamente en su lugar. Si
no se ajustan con firmeza lacaja del filtro de aire y el cuerpo del mismo
pueden ingresar polvo u otros materiaies extraSosen ei motor durante
su funcionamiento, generar problemas o failos del motor.
Cierrela tapa.
Aprietetornillos.
NOTA:Si el filtro estfi rotoo daSado,cfimbielo.
48
Inspeccione
el aceite
del motor
Controle el nivel de aceite antes del funcionamiento. Aseg_rese de que se
mantenga el nivel de aceite.
1. Extraiga la variila de medici6n de aceite y sequela con un trapo.
2. Vuelvaa colocar iavariiia de medici6nsin enroscarla.Retirelay controle
el nivelde aceite.El niveldeberiaestar en lamarcaFULL (lleno)
3. Si es necesario, agregue aceite lentamente y vuelva a controlar. No
Io Ilene en exceso.
4.
Tap6n de aceite/varilla de
medici6n del nivel de aceite
Vuelva a colocar la varilla y ajQstela.
NO io iiene en exceso. El ilenado excesivo de aceite puede hacer que el
motor no arranque, io haga con dificultad, o fumar de motor. Si se supera
la marca FULL (lleno) de la varilla de medici6n, drene aceite para reducir
el nivel hasta que quede en la marca FULL.
Cambie
•
•
el aceite
del motor
Filtrode aire
Use solamente un aceite detergente de alta caiidad cuya
clasificaci6n de servicio API sea SE SG, SH o SJ. Seleccione
el grado de viscosidad SAE del aceite segQnia temperatura de
operaci6n esperada. Consulte la secci6n Funcionamiento para vet la
tabla de viscosidad.
J
Figura 14
Servicio
•
Cambieei aceite del motor despuesde las primeras ocho horas de
operaci6n,y a partir de entonces cadacincuenta horas de operaci6n.
C6mo vaciar el aceite
1.
2.
3.
4.
5.
6.
7.
8.
Vacie el combustible del tanque haciendo funcionar el motor hasta
que el tanque de combustible este vacio. AsegQresede que la
cortadora de cesped se encuentre nivelada.
Con el motor apagado pero todavia caliente, desconecte el cable de
bujia y mantengalo alejado de la bujia.
incline ia cortadora de cesped, manteniendoel filtro de aire encima
del petr61eose Ilena. Vea la Figura 14.
Extraiga la varilia de medici6n dei motor y vierta todo el aceite
contenido del cfirter del motor en un contenedor adecuado.
al silenciador
Inspeccioneperi6dicamente el silenciador y reemplficelo de set
necesario. Los repuestos del silenciador deben set los mismos y se
deben instaiar en la misma posici6n que las piezas originales.
La temperatura del silenciador y de ias zonas de motor cercanas puede
superar los 150o F (65oC). Evite p6ngase en contactocon esas zonas.
Limpie el motor
Vueiva a colocar ia cortadora de cesped en posici6n operativa
(sobre las cuatro ruedas).
Vueiva a lienar con aproximadamente 18 onzas de aceite nuevo.
Llene hasta la linea FULL (lleno) de la varilla de medici6n. No Io
Ilene en exceso. Consulte Llenado de gasolina y aceite en la secci6n
Funcionamiento.
Vuelva a colocar la varilla de Ilenadode aceite y ajQstela.
Vuelva a colocar el cable de la bujia antes de arrancar la unidad.
•
Diariamente o antes de cada uso, limpie el cesped, la grasa o los
residuosacumulados del motor. Mantenga limpios el varillaje, los
resortes y los controles. Mantenga ei firea que rodea ai silenciador y
detrfis dei mismo iibre de cualquier residuo combustible.
•
El mantenimiento del motor en condiciones limpias permite el
movimiento de aire alrededor del mismo.
•
Las partes dei motor se deben mantener limpias para reducir
el riesgo de sobrecalentamiento y combusti6n de los residuos
acumulados.
No use agua para limpiar ias piezas dei motor. El agua puede contaminar
el sistema de combustible. Use un cepillo o un trapo seco.
El aceiteusado es un residuo peligroso.Elimineel aceite usado
adecuadamente.No Ioarroje juntocon los residuosdomiciliarios.Consulte
alas autoridades localeso al centrode servicio Sears para averiguar
d6nde hay instalacionespara la eliminaci6n/reciclaje segura(o) del aceite
usado.
Ajuste
del carburador
El carburador de este motor no es ajustable.
Velocidad
del
motor
No altere los valores del regulador del motor ni del carburador para
aumentar la velocidad del motor. Cada carburador se ajusta en ffibrica
con capuch6n o placa limitadora instalado(a) sobre el tornillo de mezcla.
Cualquier ajuste debe set realizado por un centro de servicio Sears o
otto centrode servicio autorizado.
49
LUBRICACION
f
Detenga siempre el motor, desconecte la bujia y haga masa contra el
_"
l
I
motor antes de reaiizar cuaiquier tarea de mantenimiento en su ma.quina.j'
Control
de la cuchilla
Lubrique con aceite ligero los puntos de pivote del control de la cuchilla
ai menos una vez pot temporada. El control de ia cuchilla debe funcionar
libremente en ambas direcciones. Vea la Figura 15.
Ruedas
\
y rueditas
Lubrique ias ruedas y rueditas pot io menos una vez pot temporada con
aceite ligero (o aceite para motor). Sin embargo, si las ruedas se quitan
por cualquier raz6n, debe lubricar la superficie del perno del eje y la
superficie interna de ia rueda con aceite ligero. Vea la Figura 15.
Adaptador
de colector
de pasto
Lubrique el resorte de torsi6n y el punto de pivote en cada extremo de
la puerta del adaptador de colector de pasto pot io menos una vez por
temporada con aceite ligero para evitar que se oxide. Vea la Figura 15.
J
Transmisi6n
Figura 15
La transmisi6n es prelubricada y sellada en la f&brica y no requiere
lubricaci6n.
f
LIMPIEZA
DE LA PLATAFORiVIA
Debe limpiar ia parte inferior de ia plataforma de la cortadora de cesped
despues de cada uso para prevenir la acumulaci6n de recortes de cesped
u otros desechos. Siga los pasos que aparecen debajo para realizar esta
tarea.
1.
Desconecte el cable de la bujia. Drene lagasolina de la cortadora
o coloque un trozo de pla.sticodebajo del tap6n de Ilenado del
combustible.
2.
incline la cortadora de cesped de modo que quede apoyada sobre
al alojamiento, mantenga el silenciador de costado hacia abajo.
Sostenga firmemente la cortadora.
Nunca incline iacortadora de cesped ma.sde 900en ninguna direcci6n
y no deje la unidad inclinada. Se puedefiltrar aceite dentro de la parte
_superor de motor y causar prob emas de arranque.
3.
Raspe y iimpie ia parte inferior de la plataforma mediante el uso de
una herramienta adecuada. No la rode con agua.
J
Figura16
IMPORTANTE: No utilice una lavadora a presi6n o manguera de jardin
para limpiar su unidad. Pueden producir daSosa los rodamientos o al
motor. El uso de agua acortara,la vida Otilde la ma.quinay reducira,su
capacidad de servicio.
4.
CAIVIBIO DE LA ALETA TRASERA
Para cambiar la aleta trasera, proceda de lasiguiente manera:
1. Corte el extremo piano de la varilla de alambre que la sujeta a la
plataforma. Vea la Figura 16.
Vueiva a colocar ia cortadora de cesped sobre sus ruedas en
el suelo. Si puso un pla.sticodebajo del tap6n de Ilenadode
combustible asegQresede sacarlo en este momento.
2.
50
Instale ia nueva aieta y ia nueva variiia en ia plataforma, doblando
los extremos de la nueva varilla para sujetarla a la plataforma.
AJUSTE DEL CABLE
CAiVIBIOS
DE LA PALANCA
f
DE
Puede set necesario realizar un ajuste peri6dico del cable de cambios
de seis velocidades debido al desgaste normaldel cable. El ajuste es
necesario si las seis velocidades no funcionan bien. La mensula ajustable
del cable se iocaliza sobre el lado izquierdo de la cortadora de cesped
junto al motor. Vea la Figura 17.
1.
2.
3.
Ponga en marcha el motor y coloque la palanca de cambios en la
posici6n de sexta velocidad.
Detenga el motor y desconecte el cable de la bujia y conectelo a
tierra contra el motor.
4.
Afloje la tuerca hexagonal que sujeta la mensula ajustable del cable.
Vea ia Figura 17.
Empuje hacia atra.sla mensulaajustable del cable.
5.
Ajustelatuerca hexagonal.
CUIDADO
DE LA CUCHILLA
J
Figura 17
las manos usando un par de guantes para trabajo rudo o un trapo
para sostener la cuchilla.
Inspeccione peri6dicamenteel adaptador de la cuchiiia en busca de
rajaduras, especialmente cuando golpee un objeto extra_o. Realice los
reemplazos que resulten necesarios. Siga los pasos que aparecen debajo
para reaiizarel mantenimientode la cuchilla.
1. Desconecte el capuch6n del cable de la bujia. Gire la cortadora
de cesped sobre el costado y compruebe que el filtro de aire y el
carburador queden mirando hacia arriba.
2.
Saque el perno y el soporte de campana de ia cuchiiia que sostienen
la cuchilla y el adaptador de la misma ai cig0e_ai del motor. Vea la
Figura 18.
NOTA: AI quitar ia cuchiila, el adaptador de ia cuchilla, etc., tenga
cuidado de no extraer o aflojar piezas sobre el mismo que esten
asociadas con la polea dei motor.
3. Saque la cuchilla y el adaptador dei cig0e_al. Vea la Figura 18.
4. Saque ia cuchilia del adaptador para comprobar el equilibrio.
Balancee la cuchilla sobre un destornillador de eje redondo para
inspeccionarla. Saque metal dei iado pesado hasta que quede bien
equilibrada. Cuando afile la cuchilla, siga el a.ngulooriginal de la
mueia como guia. Afiie cada horde de corte por iguai para mantener
el balance de la cuchilla.
.............................
//
Soporte de campana
de la cuchilla
Figura18
Si ia cuchilia esta.desequiiibrada generara,vibraciones excesivas cuandoI
rote a aitas velocidades. Puede producir da_os a ia cortadora de cesped I
y se puede romper,causando asi lesiones personales.
|
5.
6.
Perno
7.
Vuelva a colocar el pemo hexagonal y aj0stelo seg0n los siguientes
valores de torsi6n: 450 Ib-pulg como minimo, 600 Ib-pulgcomo
ma.ximo.
Para garantizar ia operaci6n segura de la cortadora de cesped, revise
peri6dicamenteel perno de la cuchilla para determinar siesta, bien
ajustado.
Lubrique ei cig0e_al dei motory ia superficie interna del adaptador
de ia cuchilla con aceite iigero. Desliceel adaptador de lacuchilla
sobre el cig0e_al del motor. Instale ia cuchiiia en ei adaptador
con el lado marcado "Bottom" (inferior) (o con el numero de parte)
hacia ei piso cuando ia cortadora de cesped esta.en posici6n
de funcionamiento. Aseg0reseque la cuchilla quede alineada y
asentada en ias bridas del adaptador.
CUIDADO
DE LA CORREA
NOTA:Para cambiar la correa de paseo de la cortadora de cesped es
necesario extraer varios componentes. Solicite a un centro autorizado de
servicio Sears que realice el reemplazode lacorrea.
Coloque el soporte de campana de la cuchilla en ia misma. Aiinee
las muescas del soporte de campana de la cuchilla con los orificios
peque_os de la cuchilla.
51
CAIVIBIO DE LA BATERiA
Las baterias contienen _cido sulfOricoque puede causar quernaduras. No ponga en corto cirouito ni rnutile las baterias de ninguna
rnanera. No coloque las baterias sobre fuego dado que pueden
_exp otar o ern t r mater a es t6x cos.
1.
2.
3.
Afloje las perillas en estrella que sujetan las manijas inferior y
superior y con cuidado doble la manija superior hacia la manija
inferior tai come se muestra en ia Figura 19.
Retire los dos tornillos que sujetan ia cubierta de ia bateria ai
alojamiento de la bateria y col6quelos al costado. Vea la Figura 19.
Abra ia cubierta de ia bateria, extraiga los conductores positive
y negative de ia bateria, saque la bateria y coloque una nueva.
Conecte el conductor positive ai lade positive del paquete de bateria,
luego conecte el lade negative.
J
NOTA: La bateria que tiene puede diferir ligeramente de la que se
muestra en la Figura 20. Consulte la lista de piezas.
Figura19
IMPORTANTE: Cuando cambie el paquete de bateria en el panel de
la manija, el paquete de bateria debe colocarse con el terminal positivo
hacia el lade izquierdo y el terminal negative hacia el lade derecho del
panel (el terminal positive estfi mils cerca de la Ilave de contacto). Vea
la Figura 20. El cambio incorrecto del paquete de bateria causa daSos
graves.
4.
Vuelva a instalar la cubierta del alojamiento de la bateria y fijela con
los dos tornillos que sac6 antes, asegurfindose de colocar a presi6n
el conducto de alambre a la izquierda en su lugar en el alojamiento.
5.
Doble las manijas hacia arriba y apriete la perillas en estrella.
+
Terminal positivo
m
Terminal negativo
Noquiteel paquetede bateriasdel alojarnientodel arrancador
el_ctricopor ningunaraz6nque no sea el reernplazo.
Carga de la bateria
,J
Figura20
La bateriacontienefluidocorrosivoy materialt6xico; se debe
rnanipularcon cuidadoy rnantenera losniSosalejados.No perfore,
desensarnble,rnutileo prendafuegoa la bateria. Durantela carga
o descargase podrianernitirgases explosivos.Utilicelaen un &tea
bien ventilada,lejosde fuentesde ignici6n.
f
NOTA: La clavija de conexi6n especialmente diseSada del cargador
Onicamenteencaja en la caja de las baterias.
1. Enchufe el cargador de ia bateria dentro del orificio en la parte
inferior del alojamiento de la bateria. Vea la Figura 21.
2.
3.
Inserte el enchufe del cargador de baterias en un tomacorriente
residenciai comOnde 120voltios. Cargue la bateria de 8 a 10 horas
antes de usar ia unidad per primera vez. Si no io hace se puede
reducir ia duraci6n de ia bateria. No cargue pot mils de 12 horas,
La bateria Onicamentenecesitarfi cargarse en el ajuste iniciai y
luego de periodos prolongados sin use.
Despues de cargar, primero desconecte el enchufe del
tomacorriente, luego desconecte el conductor del cargador de la
bateria.
J
Figura21
52
IMPORTANTE: Siempre conecte el conductor dei cargador en del
paquete de baterias en primer iugar, y iuego inserte el enchufe del
cargador de baterias en un tomacorriente residenciai estfindar de 120
voltios. Siga esta secuencia siempre que cargue la bateria.
Utilice Qnicamente el cargador de baterias suministrado con esta
cortadora de cesped.
Cambio
del fusible
El circuito dei arrancador electrico y ia bateria estfin protegidos pot un
fusible de 40 amperes. Si ei fusible se quema, el arrancador electrico no
funcionarfi. Si ia unidad no se enciende con ei arrancador electrico, siga
los siguientes pasos para verificar el fusible que estfi en el alojamiento de
la bateria:
1.
2.
3.
Abra ia cubierta de ia bateria segQnse muestra en Cambio de
bateria. Vea ia Figura 19.
Retire el fusible del enchufe e inspeccione tal como se muestra
en ia Figura 22. Si estfi quemado, reemplace por un fusible de
autom6viles estfindar de 40 amperes.
Fusible quemado
Coloque con cuidado los cables dentro del alojamiento, cierre la tapa
de la bateria y doble la manija superior nuevamente en su lugar.
Figura22
NOTA: El motor puede ponerse en marcha manuaimente si el fusible se
quema.
PROGRAIVlA
•
DE iVlANTENIlVIIENTO
Siga el cronograma de mantenimientoque se presenta a continuaci6n.
Esta tabla s61odescribe pautas de servicio. Utiiice ia columna Registro
de Servicio para hacer el seguimiento de ias tareas de mantenimiento
completadas. Para ubicar el Centro de Servicio Sears mils cercano o
para programar un servicio, simplemente comuniquese con Sears al
tel_fono 1-800-4-MY-HOME®.
A
Antesde realizarcuaiquiertipo de mantenimientoo servicio,desenganche
todos loscontrolesy detengael motor.Esperea que se detengancompletamentetodas laspiezas m6viles.Desconecteelcable de la bujiay p6ngalo
haciendomasacontrael motorparaevitar quese enciendaaccidentaimente.
Cada uso
1.
2.
Niveldeaceite dei motor
Piezas sueltasofaitantes
1.
Verificar
3.
Unidad ymotor.
2.
3.
Ajustaroreemplazar
Limpie
lras 5-8 horas
1.
Aceitedel motor
1.
Cambiar
25 horas
1.
Elemento de espuma del filtro de
aire l-
1.
Limpiaroreemplazar
2.
Varillajes/pivotes de control y ruedas
2.
Lubricarcon aceiteligero
50 horas
1.
Aceite del motor I-i
1.
Oambiar
Anuaimente o cada 100
horas
1.
Bujia de encendido
1.
Limpiar, reemplazar,regular
Antes de aimacenar
1.
Sistema de combustible
1.
Hacer funcionar ei motor hasta que
se detenga pot falta de combustible o
agregar aditivo para gasolina a ia que se
encuentra en ei tanque.
1 Limpiom_.sa menudoen condicionespolvorientaso cuandolos escombrosaerotransportadosest_.npresentes.Sustituyael filtro de aire de
ser rnuysucio.
ff Cambieel petr61eocada25 horaswherefuncionamientodel motorbajo la cargapesadao en temperaturasaltas.
53
Nunca almacene la cortadora de cesped con combustible en el tanque
en un espacio cerrado o en fireas con poca ventilaci6n, donde los
gases dei combustible puedan alcanzar el fuego, chispas o una luz
piloto como ia que tienen algunos homos, calentadores de agua,
secadores de ropa o aigOnotto dispositivo a gas.
PREPARACION
DEL MOTOR
PREPARACION
CO'SPED
El equipo almacenado con el combustible puede enranciarse cuando
almacenado mils de 30 dias. El combustible a_ejo hace que ficido y
dep6sitos de goma se forme en el sistema de combustible o en partes
de carburador esenciaies. Estabilizador de combustible de mezcla con
combustible en tanque o contenedor de almacenaje. Motor dirigido
durante un tiempo corto para poner en circulaci6n estabilizador por
carburador y motor. El motor y ei combustible con el estabilizador pueden
set aimacenados hasta 24 meses.
Limpie y iubrique la cortadora como se describe en las instrucciones
de lubricaci6n.
•
No utilice una lavadora a presi6n ni una manguera de jardin para
limpiar su unidad.
Cubra la cuchilla de la cortadora con grasa para chasis para impedir
la oxidaci6n.
•
3.
4.
Quite la bujia y vierta aproximadamente 1/2 la onz. (15 ml) del nuevo
petr61eode motor en la cavidad de bujia que pone el petr61eoen el
cilindro. Sustituya la bujia bien.
Cuerda de juez de salida de tir6n despacio. Este gira el cigQe_aldel
motor y distribuye el petr61eopor el motor.
ASada el estabilizador de combustible o drene el combustible del
motor.
5.
Suciedad limpia y escombros de cumbre y todas las fireas airededor
de motor.
6.
Tienda en un firea limpia, seca.
Almacene la unidad en una zona limpia y seca. No la almacene
cerca de materiales corrosivos como pot ejemplo fertilizantes.
Cuando almacene cuaiquier tipo de equipo motorizadoen un gaip6n
de dep6sito met_.iicoo con poca ventilaci6n, tenga especial cuidado
de realizarle un tratamiento antioxidante al equipo. Use aceite ligero o
silicona para recubrir ei equipo, especialmente los cables y partes m6viles
de su cortadora antes de aimacenarla.
Realice el siguiente antes del almacenaje a largo plazo del equipo:
1. Mientras ei motor es todavia caliente, petr61eode cambio.
2.
DE
•
•
IMPORTANTE:Si el estabilizadorde combustibleno es usado,usted
tieneque drenar la gasolinadel equipoantesdel almacenaje.
DE LA CORTADORA
Bateria
La bateria debe guardarse con carga completa. El aimacenamiento
prolongado de una bateria descargada reducirfi la vida Otily la capacidad
de la bateria.
54
El motor no arranca
1,
Control de ia cuchilla desenganchado.
1.
Engrane el control de la cuchiila.
2.
Se ha desconectado el capuch6n de la bujia.
El dep6sito de combustible esta.vacio o el
combustible se ha echado a perder.
El motor no esta.cebado.
2.
3.
Conecte el cable al capuch6n de la bujia.
Llene el tanque con gasolina limpia y nueva.
4.
Cebe ei motor tal como se explic6 en la secci6n
Funcionamiento.
5.
6.
7.
La bujia no funciona correctamente.
La linea dei combustible esta.bloqueada.
5.
6.
Limpie, ajuste la separaci6n, o cambie la bujia.
Limpie ia iinea del combustible.
Motor ahogado.
7.
Espere unos minutos para reencender, no realice el
cebado.
8.
Fusible quemado. (Arranque electrico _nicamente)
8.
Reemplace el fusible (vea la secci6n Servicio).
1.
El capuch6n de la bujia esta.flojo.
La linea dei combustible esta.tapada o el
combustible se ha echado a perder.
1.
2.
Conecte y ajuste el capuch6n de la bujia.
Limpie ia linea de combustible; Ileneel tanque con
gasolina limpia y nueva.
3.
La ventilaci6n de la tapa del combustible esta.
obstruida.
3.
Destape laventilaci6n.
4.
Agua o suciedad en el sistema del combustible.
4.
5.
Ei fiitro de aire esta.sucio.
5.
Vacie ei tanque de combustible. Cargue combustible
nuevo en el dep6sito.
Consulte ia secci6n Mantenimientodei manual.
El motor recaiienta
1.
2.
El nivel de aceite del motor esta.bajo
Flujo de aire restringido
1.
2.
Llene el motor con ia cantidad y tipo de aceite adecuado.
Limpie los residuosde airededor de las aletas de
refrigeraci6n del motor y del alojamiento del soplador.
El motor vacila a altas
revoluciones
1.
Poca separaci6n de los electrodos de la bujia
1.
Ajuste la separaci6n a .030".
El motor funciona real
en marcha ienta
1.
2.
Bujia atorada,averiada o exceso de separaci6n.
Ei fiitro de aire esta.sucio
1.
2.
Limpie, reemplaceo reajuste la separaci6n a .030".
Consulte ia secci6n Mantenimientodei manual.
Demasiadavibraci6n
1.
2.
Cuchilla de corte floja o descentrada.
Cuchilla abollada.
1.
2.
Apriete ia cuchiiia y el adaptador Baiancee ia cuchiiia.
Comuniquese con ei centro de servicio Sears.
La cortadora de
1.
Cesped h_medo.
1.
cesped no regresa
el recorte de cesped
como abono
2.
Cesped demasiadoalto.
2.
3.
La cuchiiia de ia cortadora no esta.afiiada.
3.
No corte el cesped cuando este mojado, espere hasta
que sea ma.starde para hacerlo.
Corte una vez a aitura de corte elevada, iuego vueiva a
cortar a ia altura deseada o haga un sendero de corte
mas angosto.
Afile o cambie la cuchilla.
Corte desiguai
1.
2.
La posici6n de las ruedas no es correcta.
La cuchiiia de ia cortadora no esta.afiiada.
1.
2.
Coloque ias cuatro ruedas en la misma posici6n de aitura.
Afile o cambie la cuchilla.
La cortadora no
1.
Correa maiinstaiada.
1.
2.
Hay desechos bloqueando el funcionamientode la
transmisi6n.
2.
Compruebe ia correa para vet si ia polea esta.bien
instalada y se mueve correctamente.
Detenga el motor, desconecte el capuch6n de la bujia y
limpie los desechos.
3.
Correa dafiadaodesgastada.
3.
3.
4.
El motor funciona de
manera erra.tica
2.
avanza por si misma
iNECESITA MAS AYUDA?
[r_(: >r_V:l'_l'_I_ I_!_;_:_u_;V:_y m_; _!r_managemy.com
En linea podr_ encontrar
Sus preguntas
Obtenga
Encuentre
este manual
ser_n respondidas
un plan de mantenimiento
informaci6n
b_ree.ght
y los manuales
pot nuestro
55
que posea.
de especialistas.
para su hogar.
que Io ayudar4n
to ye_J by Sea_rs
- isin cargo!
de todos los otros productos
equipo
personalizado
y herramientas
Comuniquese con el centro de servicio Sears.
con los proyectos
de su hogar.
(Esta p_.ginase aplica s61oen EE.UU. y Canada.).
and Co., U.S.A. (Sears), el Consejo de Recursos Arnbientales de California (CARB)
y la Agencia de Protecci6n Ambiental de los Estados Unidos (EPA)
Declaraci6n de garantia del sistema de control de emisiones (derechos y obligaciones
de la garantia de defectos del propi=
etario)
LA COBERTURADE LA GARANTJADE CONTROLDE EMISIONESES
Y PARALOSMODELOSCERTIFICADOSDELANO 1997Y POSTERIORES,
APLICABLEA LOS MOTORESCERTIFICADOSCOMPRADOSEN CALIFOR- QUESE COMPRENY UTILICENEN CUALQUIERPARTEDE LOS ESTADOS
NIA EN 1995Y POSTERIORMENTE,
QUESE UTILIZANENCALIFORNIA,
UNIDOS(Y A PARTIRDEL 1 DE ENERODE 2001 ENCANADA).
Declaraci6n de garantJa sobre defectos en el control de ernisiones para California y los Estados Unidos
El Consejode RecursosAmbientalesde California(CARB),la EPA(Agencia
ionesde su motorpara losperiodosde tiempo enumeradosa continuaci6n,
de Protecci6nAmbientalde los EE.UU.)y Searstienen elgustode explicarla
siemprequeno hayaabuso,negligenciao mantenimientoindebidode su
garantiadel sistemade control de emisionespara motoresdel a_o2000y para motortodoterrenopeque_o.Su sistemade controlde emisionespuedeincluir
elfuturocon relaci6na motorespeque_ostodo terreno(SORE).En California,
piezastales comoel carburador,el filtro de aire,el sistemade encendido,el
losnuevosmotorespeque6ostodo terrenodebenestar dise_ados,construidos silenciadory el conversorcatalitico.Tambienpuedeincluirconectoresy otras
unidadesrelacionadascon las emisiones.Dondeexistaunacondici6ncubierta
y equipadosparacumplircon las rigurosasnormasanti-smogdel estado.En
el restode losEstadosUnidos,losmotoresnuevostodoterrenode encendido
porla garantia,Sears reparar_su peque6omotortodo terrenosin costoalguno
porchispa certificadosparael a_o 1997debencumplirest_ndaressimilares
incluyendodiagn6stico,piezasy manode obra
establecidospot la EPA.Searsdebegarantizarel sistemade controlde emisCobertura de la garantJa Sears para defectos en el control de ernJsiones
Los motorestodo terrenopeque6osest_ngarantizadosen Iorelativoal control alas disposicionesque se indiquena continuaci6n.Si una partede su motor
de emisionespara defectosen piezasdurante un periodode dos a_os,sujeto
cubiertapot la garanfiaesdefectuosa,Sears reparar_o sustituir_dicha parte.
ResponsabJlidades del propietario en relacibn con la garantia
Comopropietariodel motortodo terrenopeque_o,Ud.es responsablede la
a modificacionesno aprobadas.Ud.es responsablede presentarsu motor
realizaci6ndel mantenimientorequeridoquese incluyeen las instrucciones
todoterrenopeque6oa un distribuidorde serviciosSearsautorizadotan pronto
de operaci6ny mantenimiento.Searsrecomiendaquese conserventodoslos
comoaparezcaun problema.Lasreparacionesde la garantiasinconfiicto
recibosrelativosal mantenimientode su motortodoterrenopeque_o,pero
debencompletarseen un plazode tiempo razonable,no superiora 30 dias.Si
no pudedenegarlagarantiasimplementeporla falta de losmismos,o por su
tienealguna preguntarespectoa sus derechosy responsabilidadesreferenincumplimientodel mantenimientoprogramatic.Comopropietariodel motor
tes a lagarantia,debe contactarcon un representantede serviciosSearsal
peque_otodoterrenodebe saberque, sinembargo,Searsle puedenegar
1--800--469--4663.
La garantiade emisioneses unagarantiapordefectos.Los
la coberturade la garantiasi su motortodoterrenopeque6oo una piezadel
defectossejuzgan de acuerdoconel funcionamientonormalde un motor.La
mismohanfalladodebido a abuso,negligencia,mantenimientoindebidoo
garantia no est_ relacionadacon unapruebade emisionesen uso.
Disposiciones de la garantJa Sears para defectos en el control de emisiones
Las siguientesson disposicionesespecificasrelacionadascon la coberturade lagarantia paradefectosen el controlde emisiones.Es un a_adidoa lagarantiade
motorSearspara motoresno reguladosque seencuentraen lasinstruccionesde funcionamientoy mantenimiento.
1. Piezascon garantia
sin cargo alguno parael poseedor,incluyendotareasde diagn6sticoque
permitandeterminarsi una partecon garantiaes defectuosa,siempreque
La coberturade esta garantiase extiendeL]nicamentea las piezas
dicho diagn6sticose realiceen un distribuidorde serviciosSears autorizaqueaparecena continuaci6n(las partesde lossistemasde control de
do. Parael servicio de lagarantia de emisiones,contacteal distribuidorde
emisiones),siempreque dichas piezasestuvieranya en el motoren el
servicios Sears autorizadom_s cercanoincluidoen las"P_ginasamarillas"
momentode su compra.
a. Sistemade medici6nde combustible
en lascategorias"Motores,gasolina","Motoresde gasolina","Podadoras
de cesped",o similares.
• Sistemade enriquecimientopara arranqueen frio
4.
Reclamacionesy exclusionesa la cobertura
• Carburadory partesinternas
Las reclamacionesde lagarantia debenenviarsede acuerdo con las
• Bombade combustible
disposicionesde la politica de garantia para motoresSears. La cobertura
b. Sistemade inducci6nde aire
de la garantiaexcluir_defectosen piezas con garantiaque no scan partes
• Filtrode aire
originalesSears,o abuso, negligenciao mantenimientoincorrecto,tal y
• Colectorde admisi6n
como se estableceen la politica de garantia para motoresSears.Sears no
c. Sistemadeencendido
es responsablede lasfallas en piezas con garantia provocadaspor el uso
• Bujia(s) de encendido
de partesaSadidas,que no scan originaleso quese hayan modificado.
• Sistemade encendidomagneto
5. Mantenimiento
d. Sistemadelcatalizador
Cualquierpartecon garantiaque no este programadapara ser reem• Convertidorcatalitico
plazadacomomantenimientorequerido,o que s61odeba inspeccionarse
• Colectorde escape
regularmenteal efecto de "inspeccioneo reemplacesegL]nsea necesario",
• Sistemade inyecci6nde aire o v_lvula de impulsos
estar_garantizadacontradefectosduranteel periodode la garantia.Todas
e. Elementosvariadosusadosen los sistemasanteriores
laspiezas garantizadasque esten programadaspara su reemplazopara
• Wlvulas de vacio, sensiblesa temperatura,posici6ny tiempo
cumplircon los requisitosde mantenimientoestar_ngarantizadass61o
e interruptores
porel periodoanterior al primerreemplazoprogramaticparadicha pieza.
• Conectoresy montajes
Cualquierpiezade recambioquesea equivalenteen funcionamientoy
2. AIcancede la cobertura
durabilidadpuedeusarse para realizarmantenimientoo reparaciones.El
propietarioes responsablede realizartodo elmantenimientorequerido,tal
Searsgarantizaal poseedorinicial y a loscompradoressubsiguientes
y comose define en las instruccionesde funcionamientoy mantenimiento
que laspiezas con garantiano tendr_n defectosen materialesni mano
Sears
de obra que provoquenla falla de las mismasduranteun periodo de
6. Coberturaindirecta
dos a6osa partirde la fechaen queel motorse entregaa un comprador
Sears, Roebuck
particular.
3. Sin cargo
La reparaci6no reemplazode cualquierpartecon garantia se realizar_
Porla presente,la coberturase extiendea lafalla de cualquiercomponente
de motorprovocadapor lafalla de unapieza con garantia queeste todavia
en periodode garantia.
En los EstadosUnidosy Canad_hay unalinea de atenci6nde 24 horas,1-800-469--4GG3,
quecuenta con un menL]con mensajespre-grabadosque contienen
informaci6npara el mantenimientode motores.
Busque
el periodo
de duraci6n
de emisiones importantes
yla informaci6n
la etiqueta de emisiones de su motor
de clasificaci6n
de aire en
Los motores cuyo cumpiimiento con los estAndares de emisi6n Tier 2 de la Comisi6n de Recursos Ambientales de California (CARB)
est6 certificado deben exhibir la informaci6n relacionada con el perJodo de duraci6n de las emisiones y la clasificaci6n de aire. Sears,
Roebuck and Co., de los Estados Unidos ponen esta informaci6n a disposici6n deJ consumidor en nuestras etiquetas de emisiones.
El Periodo de Duraci6n de las Emisiones describe el nQmero de horas de tiempo real de funcionamiento para el cual se certifica que
el motor cumple con las reglas de emisi6n, descontando el mantenimiento adecuado deJ mismo segQn las instrucciones de operaci6n y mantenimiento. Se utilizan las siguientes categorias:
Moderado:Se certifica que el motor cumpie con las reglas de emisi6n durante 125 horas de tiempo real de funcionamiento
deJ motor.
Inmediato:Se
certifica que el motor cumple con las reglas de emisi6n durante 250 horas de tiempo real de funcionamiento
deJ motor.
Extendido:Se certifica que el motor cumple con las reglas de emisi6n durante 500 horas de tiempo real de funcionamiento
deJ motor.
Por ejemplo, una cortadora de c6sped tJpica que se empuja desde atrAs se usa entre 20 y 25 horas por afio. Por Io tanto, el Periodo
de Duraci6n de Emisiones de un motor con una clasificaci6n
intermedia seria equivalente a entre 10 y 12 afios.
Laclasificaci6n de aJre es un nQmero calculado para describir eJnivel reiativo de emisiones para un grupo de motores en particular.
Cuanto menor sea Jaclasificaci6n de aire, mayor es JaJimpieza deJ motor. La informaci6n se presenta de forma gr&fica en Jaetiqueta
de emisiones.
Despu_s del 1 de julio de 2000, busque el periodo de cumplimiento
de las reglas de
emisiones
en la etiqueta de cumplimiento
de las reglas de emisiones
del motor
Despu_s deJ 1 de julio de 2000 se certificar_, que determinados
motores Sears, Roebuck and Co., de los Estados Unidos
cumpien con los estAndares de emisiones de la fase 2 de la Agencia de Protecci6n Ambiental de los Estados Unidos (USEPA). Para los motores certificados
para la etapa 2, el periodo de cumpiimiento
con las reglas de emisiones al cual se hace
referencia en la etiqueta de cumpiimiento con las reglas de emisiones indica el nQmero de horas de funcionamiento
para el
cuaJ se ha demostrado que el motor cumpie con los requerimientos
federales de emisi6n.
Para los motores
con desplazamiento
inferior a 225 cc, Categoria
Para los motores
con desplazamiento
de 225 cc o mAs, Categoria
El despiazamiento
de los motores
C = 125 horas, B = 250 horas y A = 500 horas.
C = 250 horas, B = 500 horas y A = 1000 horas.
de la serie modelo 150112 es 249 cc.
La presente es una representaci6n gen_rica de la etiqueta de emisi6n que se encuentra generaimente en un
motor certificado.
57
Felicitacionespor haberrealizadouna adquisici6ninteligente.El
Unavezadquiridoel Acuerdo,puedeprograrnarel serviciocon
productoCraftsman@Profesionalque ha adquiridoest,. dise_adoy
tan s61orealizaruna Ilarnadatelef6nica.PuedeIlarnaren cualquier
fabricadopara brindarrnuchosa_os de funcionarnientoconfiable.Pero mornentodel dia o de la nocheo prograrnarun servicioen linea.
cornotodos los productosa vecespuede requerirde reparaciones.
El Acuerdode Protecci6nde Reparaci6nes una cornprasin riesgo.
Es en ese rnornentocuandoel disponerde un Acuerdode protecci6n
Si ustedanula por alguna raz6nduranteel periodode garanfiade
para reparacionesle puedeahorrardineroy problernas.
producto,proporcionarernosun reernbolsoIleno.O,un reernbolso
A continuaci6nsedetallanlos puntosincluidosen el Acuerdo:
prorrateadoen cualquiermornentodespu6sdel periodode garantia
• Servicio experto prestadopor nuestros10,000especialistasen
de productoexpira, iAdquierahoysu acuerdode protecci6npara
reparacionesprofesionales
reparaciones!
Se aplican deterrninadaslirnitacionesy exclusiones.Paraobtener
• Servicio iJirnitado
sin cargopara laspiezasy la rnanode obra en
inforrnaci6nadicional y preciosen los Estados UnidosIlarne al
todaslas reparacionescubiertas
1-800-827-6655.
• Reemplazodel productohasta 1500d61aressi no es posible
El *Coverage en Canad;_variaen algunos articulos. Paradetalles
repararel productocubierto
Ilenosla IlarnadaCharnuscaCanad_en 1-800-361-6665.
• Descuentode 10%del precionormaldel servicioy de las piezas
Serviciode instalaci6nde Sears
relacionadascon el rnisrnoque no est6ncubiertaspor el acuerdo;
Si deseasolicitarla instalaci6nprofesionalde Searsde aparatos
adern_.s,10%del precionormalde la verificaci6nde rnantendorn6sticos,dispositivospara abrir portones,calentadoresde agua
irnientopreventivo
y otrosarticulosdorn6sticosirnportantes,en los EstadosUnidoso
Canada.Ilarneal 1-800-4-MY-HOME®.
• Ayudar_pida pot tel_fono- IoIlarnarnos
Resoluci6nR@ida- el
apoyotelef6nicode un Charnuscaal representante.Pienseen
nosotroscornoel manual"de un due_ohablador."
58
59
Your Home
For expert troubleshooting
and home solutions advice:
www.managemyhome.com
For repair - in your home - of all major brand appliances,
lawn and garden equipment, or heating and cooling systems,
no matter who made it, no matter who sold it!
For the replacement parts, accessories and
owner's manuals that you need to do-it-yourself.
For Sears professional installation of home appliances
and items like garage door openers and water heaters.
1-800-4-MY-HOME ®
(1-800-469-4663)
Call anytime, day or night (U.S.A. and Canada)
www.sears.com
www.sears.ca
Our Home
For repair of carry-in items like vacuums, lawn equipment,
and electronics, call anytime for the location of your nearest
Sears Parts & Repair Service Center
1-800-488-1222
(U.S.A.)
1-800-469-4663
www.sears.com
To purchase a protection
1-800-827-6655
www.sears.ca
agreement
(U.S.A.)
Para pedir servicio de reparaci6n
a domicilio, y para ordenar piezas:
1-888-SU-HOGAR
(Canada)
on a product serviced
by Sears:
1-800-361-6665
(Canada)
Au Canada pour service
en fran£ais:
1-800-LE-FOYER
®
(1-800-533-6937)
www.sears.ca
(1-888-784-6427)
Trademark / TMTrademark
/ SM Service Mark of Sears Brands, LLC
® Marca Registrada
/ TMMarca de F&brica / SMMarca de Servicio de Sears Brands,
MC Marque de commerce / MD Marque depos6e de Sears Brands, LLC
M°
® Registered
LLC
© Sears
Brands,
LLC