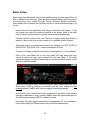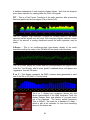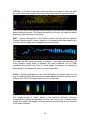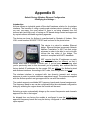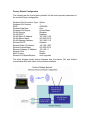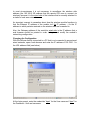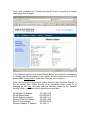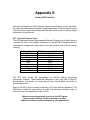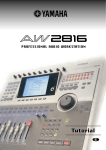
1
Digital Spectral Processor
Quick Start Guide
and
Short Form Manual
First Printing – May 2010
600 Industrial Drive, New Bern, North Carolina, USA 28562
This Page Intentionally Left Blank
3
Subject
Page Number
Welcome to AirAura
4
The Vorsis Company Vision
5
General Information - Introduction
6
Processing Structure Overview
7
Installation
8
Rack Mounting Considerations
9
Installation Tips
Grounding
Surge Protection
UPS/Power Conditioning
Analog Audio Connections
Digital Audio Connections
10
10
10
10
10
10
Where to install AirAura
Analog Left/Right STL
Composite Analog STL
Analog ‘phone’ lines
Digital STL
EAS – US Emergency Alert System
PPM – Arbitron People Meter
11
11
11
12
12
13
13
Energizing AirAura
14
Rear Panel Connections
Audio Inputs
Audio Outputs
FM Audio Outputs
HD Audio Outputs
14
15
Headphones
16
Network Connections
Wired Ethernet
802.11G Wireless
16
16
16
General Purpose I/O
16
User Presets
17
15
15
Basic Setup
Rack Mounting
AC Power
Selecting the Active Audio Input
Adjusting Input Levels
Making Output Connections
Setting Output Levels
Selecting Presets
19
19
19
19
19
20
20
21
Using the Front Panel GUI to Adjust FM Sound
AGC Depth
Compression
Density
Low/Warm Equalization
Mid/High Equalization
FM Loudness
22
22
22
22
23
23
23
Using the Front Panel GUI to Adjust HD Sound
AGC Depth
Compression
Density
Low/Warm Equalization
Mid/High Equalization
HD Loudness
23
22
22
24
24
24
25
Saving a Preset
25
Preset Scheduler / Events
26
Setting up AirAura and GUI Lite to ‘talk’
Network/LAN Connection
GUI IP Address
Hardware IP Address
Subnet Mask
Gateway
27
27
27
28
28
28
AirAura’s Front Panel Network Settings
28
Configuring the Remote GUI
28
Connecting without a LAN (Direct Connection)
29
Wireless Connection
30
AirAura/Internet Security Concerns
30
About DHCP and AirAura
31
AirAura Ports and Network Protocols
If UDP Doesn’t Work
31
31
Using GUI Lite
Input Menu
Input Source
Audio Input Signal Presence Indicators
Automatic Input Failover
Analog Gain
AES3 Digital Gain
L/R Balance
Pre-Emphasis
31
32
32
32
32
33
33
33
Output Menu
Analog Output Type
FM Digital Output
De-Emphasis
Pre-Delay
33
33
33
33
33
HD Digital Output
Phase Reverse
Left/Right Reverse
Diversity Delay
33
33
33
33
Special Analog Output Mode Note
34
Stereo Encoder Menu
MPX Process
MPX Processor Style
Lookahead Limiter
Soft Clipper
Hard Clipper
Stereo Pilot Injection
SCA 1 and SCA 2 Inputs
TX 1 and TX 2 Outputs
34
34
34
34
35
35
35
35
35
Presets Menu
Selecting a Preset
Saving a Preset
36
36
36
Preset Library Functions
37
System Menu
System Settings Change with Preset Takes
37
37
Metering Data over TCP/IP
37
Headphone Source
Input
Analog Input
AES Input
HD Output
FM Pre-Delay
FM Output
38
38
38
38
38
38
38
Headphone Volume Control
38
Status Indicators
Temp
Analog
AES
39
39
39
39
Remote Login
39
Setting System Time
40
Accessing Menu Options
View
Input
Output
St Encoder
Presets
System
Sound
About
40
40
40
40
40
40
40
40
40
Hardware
Devices
On-Line Mode
Event Scheduler
Login Password
Version
Update
40
40
40
40
40
40
40
Presets
Take
Save
Library
41
41
41
41
Analysis Menu
FFT Introduction
O-scope Introduction
E vs. F Introduction
3-D Plot Introduction
SDR Introduction
A-Clip Introduction
Using and interpreting the FFT
Using the O-Scope
Using and interpreting the E vs. F Display
Using and interpreting the 3-D Plot
Using and interpreting the SDR Display
Using interpreting the A-Clip Display
41
41
41
41
41
41
41
42
42
42
43
43
43
Appendix A
Default Wired Ethernet Configuration / Changing the Configuration
Appendix B
Default Wireless Ethernet Configuration / Changing the Configuration
Appendix C
General Specifications
Appendix D
Wireless Module Configuration, Approvals, and Miscellaneous Data
Appendix E
General Purpose Input/Output - GPIO
- Welcome to AirAura The Audio Processing ‘Game Changer’
In the fall of 2007 we set an aggressive goal to design a new FM peak clipper.
Our goal was to find ways to better handle the challenges posed by competitive
loudness and the FM pre-emphasis curve without the audible aliasing, unnatural
high frequency loss, and intermodulation distortion side effects encountered with
conventional clippers. Little did we know that we would be working on our new
FM peak clipper for almost three years before our lofty goals were met to our
satisfaction.
Our new clipper (project code name “AirAura”) is a completely new approach to
FM audio peak control. AirAura clipper’s algorithm has the resolution required to
be able to tell the difference between distortion and audio, and mitigate only the
audible distortion. Music or speech, our new clipper makes it effortless to be
competitively loud and clean at the same time.
The new clipper turned out to be powerful, but it also required enhanced DSP
hardware in order to run it. Therefore we decided to make an entirely new
hardware product around it, and the AirAura on-air processor was born. While we
were under the hood we also tweaked up our Vorsis Bass Management System
algorithm (creating VBMS-II), and also improved our well regarded Sweet Spot
Technology (SST).
VBMS-II effortlessly reveals and controls very deep and natural bass in program
material that contains such bass. However, VBMS is not a bass creator. Rather,
it’s an algorithm that artistically manages bass in a way that keeps it and the rest
of the audio spectrum clean and natural. To enhance the bass experience even
further, we outfitted VBMS-II with a new Bass Texture algorithm which allows
customization of the bass experience when listening on receivers with smaller,
bass-shy speakers.
Our SST algorithm has been well received by Vorsis customers in the broadcast
industry … even Public Radio stations. SST invisibly manages the behavior of
the five-band AGC as the incoming program density changes. Transitions
between today’s heavily mastered hits and material mastered in a more gentle
time are no longer ‘on-air speed bumps’. SST manages program density as
content changes to provide the listener with a smooth, consistent, easy to listen
to sound.
SST is so effective at invisibly managing the audio that Vorsis products
incorporating this feature have been installed in facilities playing everything from
the most blaring modern rock to the quiet solitude of public radio stations with
much more conservative material.
4
The Vorsis Vision
The Vorsis Audio Processing division of Wheatstone was created in 2005, and
for a single purpose — to “competently design new audio processing tools for the
broadcast industry that truly improve the sound of broadcasting.”
Wheatstone founder and owner Gary Snow had noticed how harsh and distorted
radio stations had become over the years as they chased each other in the
loudness game with existing audio processing products. Frustrated with that
sound and how it was destroying the listening enjoyment originally intended for
radio, he set a goal for Wheatstone as a company:
“Design new technology audio processors
that truly improve the sound of radio,
not further destroy it.”
Today the Vorsis development team is comprised of experts in digital signal
processing, professional audio, and product design. The team is led by broadcast
engineering veteran and audio processing expert Jeff Keith (who’s been
interested in audio processing for the better part of 40 years). As well as
designing new DSP algorithms and clever and easy to use user interfaces, he
guides the Vorsis team as they design new and revolutionary audio processing
products.
All of the design, manufacturing and testing of Vorsis audio processing products
is accomplished at Wheatstone’s Corporate Headquarters in New Bern, North
Carolina, USA. In its large, state of the art design and manufacturing facility
Wheatstone maintains 100% control over the quality of their product design and
its manufacturing. True to their goal of making only the highest quality products
Wheatstone utilizes no ‘contract’ or ‘offshore’ manufacturing.
Wheatstone’s obsessive control over the design and manufacturing of their
products ensures that every customer receives the highest quality gear of the
same admired product quality that Wheatstone has delivered to its customers for
over thirty years.
Wheatstone’s line of competently designed and feature-rich Vorsis audio
processing products offers the broadcast industry high-quality products with the
superior audio performance and product reliability that Wheatstone is famous for.
Built to Wheatstone’s exacting product and audio quality standards Vorsis audio
processors are a perfect match for those who truly care about how their station
sounds.
5
General Information
Introduction
The Vorsis AirAura is designed to exceed the expectations of customers who
want more loudness on the radio dial without incurring the usual artifacts that
usually accompany competitive loudness. This third generation full-featured and
top-of-the-line Vorsis audio processor expands on technologies previously
invented by the Vorsis design team as well as incorporating new ones.
The Vorsis design team approaches audio processing with an attitude of ‘quality
first’ and the processing algorithms in the AirAura processor are designed to
push the limits of what can be accomplished in an on-air processor into
completely new territory. Every algorithm is carefully analyzed though hundreds
of hours of critical listening with a wide range of program material to ensure that it
does exactly what it was designed to do - no more and no less.
Equipped with the tools necessary to create the on-air sound you’ve been
yearning for, AirAura’s audio clarity, on-the-dial power and presence, and the
accuracy of its sound are not found in any other audio processing product.
Period. Music sounds like it was meant to sound. Voices are rich and full with no
hint of unnatural coloration or distortion. Transitions between various program
elements are deftly handled with no trace of “processing” while corrections are
being made.
Further, instead of a customer being saddled with the inescapable sound
signature engrained in other brands of audio processors by their designers,
Vorsis products, including the new AirAura, have no fixed sound coloration of
their own. The customer is completely free to use the pallet of tools in the AirAura
to create whatever on air sound he can dream of, from no hint of processing at
all, to wall of sound.
With an internal base sampling rate of 192 kHz (some sections operate as high
as 1½ megahertz!) and its 144dB internal dynamic range AirAura processes a
station’s audio with extreme precision. Twin front panel LCD screens and touchpad allow control of all system and processing setup parameters. Equipped with
the Vorsis GUI Lite right on the front panel, the sound of the AirAura’s Factory
Presets can be quickly customized as desired.
For even more control over processing parameters an optional full-control GUI
designed for processing experts and sporting every possible control can be
obtained by registering for it at http://www.VorsisProGUI.com. Once registered,
users can download a full-control GUI having all processing adjustment controls
available.
6
Processing Structure Overview
The AirAura digital audio processor is designed to separately process the audio
for both conventional analog FM and digital HD radio signals. Sharing the fourband fully parametric equalizer and highly intelligent five-band AGC, the FM and
HD paths each have their own 31-band limiter sections followed by separate final
limiters of different styles optimized for their intended mediums.
Each 31-band limiter section operates much like the high-resolution filter banks
used in perceptual codecs that rely on critical band masking to hide their
operation from the human ear. Because of this technology, and unlike other
limiters with fewer bands, human psychoacoustics makes the operation of each
31-band limiter section essentially invisible to the ear.
The FM signal path is equipped with the new AirAura clipper as well as a lookahead limiter — useful for less aggressive program formats. A digitally perfect
stereo generator provides two multiplex composite stereo outputs and two SCA
inputs. The input connector for SCA-2 can be internally switched to convert it into
a 19 kHz stereo pilot Sync output for RDS applications requiring a separate 19
kHz synchronization signal.
The HD signal path is equipped with a smart look-ahead final limiter with
adjustable operating parameters that allow program density and peak control to
be adjusted as desired. The HD path’s digital and analog outputs may be
swapped left for right as well as phase reversed to accommodate a known bug in
HD radio hardware.
A collection of Factory presets makes a wide range of on air sounds available to
the user. These presets, in combination with the front panel’s GUI Lite controls,
allow the end user to create literally millions of different on-air sounds that are
completely different from what the factory presets provide.
A fully routable headphone monitoring path allows the audio in various parts of
the processing chain to be auditioned.
The System Menu of all GUI’s provides access to a flexible preset scheduling
utility that, along with having daily events, also has a long-form schedule. This
feature allows preset changes to occur on a particular date and time in the future.
This feature is useful for changing presets weeks or months after a preset was
prepared for a special event without having to edit the regular daily schedule to
accommodate the special preset.
GPI (General Purpose Inputs) provide easy access to preset changes via
external events such as contact closures and automation control. In addition the
AirAura is equipped with our ACI protocol which allows complete control of the
processor by a program automation system beyond just preset changes.
7
Installation
We know that you’re probably in a hurry to get on the air with your new AirAura. If
you have little technical expertise with audio processor fundamentals, the
following pages will get you up and running as quickly as possible without having
to know a lot of techie stuff.
If during installation or setup you find that you need assistance or advice, please
feel free to contact our technical support folks at (252) 638-7000 or write to
[email protected].
The image below (colors reversed to save on laser printer toner!) shows the rear
panel of the AirAura and the location of the various connectors associated with
an installation:
AirAura Rear Panel Connections
AirAura’s rear panel connectors from left to right are:
Bottom Row
Analog Left channel In
Analog Right Channel In
Analog Left Channel Out
Analog Right Channel Out
HD Analog Left Channel Out
HD Analog Right Channel Out
AES Digital Input
FM AES Digital Out
HD AES Digital Out
GPI Input
Ethernet 1
Ethernet 2
AC Power Input
Top Row
SCA-1 Input
SCA-2 Input
TX-1 Out
TX-2 Out
WiFi Antenna 1
WiFi Antenna 2
GPO Output
8
Rack Mounting
AirAura is designed to be mounted into an industry standard 19” equipment rack
and requires three rack units (5.25 inches / 13.335cm) of vertical space. If using
only two rack screws always use the bottom two to prevent twisting and other
undue forces from harming the processor.
AirAura does not have top or bottom cover vent holes. Rather, cooler air is drawn
into the unit through vertical slots positioned lower in the side panels, forcing
latent heat, which rises by natural convection, out through slots in the top of the
rear panel.
There is one small fan internal to the unit whose purpose is to stir air inside the
enclosure to even out the temperatures and prevent hot spots. The fan does not
‘remove’ heat and therefore failure of the 80,000 hour-rated fan, in the unlikely
event it should occur, will not compromise the operation of the AirAura as long as
AirAura is being operated in a reasonable environment (below 104F or 40C).
AirAura may be mounted between other devices in the equipment rack; however,
in accordance with good engineering practice it should not be mounted directly
above devices that generate significant amounts of heat such as power
amplifiers or power supplies. If such a location is unavoidable, then it is advisable
to utilize an extra 1RU blank rack panel between the AirAura and devices
immediately above and/or below it.
WARNING!
The AirAura enclosure normally does not need to be opened in the field.
Please be advised that the unit contains high voltage power supply circuits
that are hazardous and potentially deadly if accidentally contacted.
Because there are no user-serviceable parts inside the unit, it should be
returned to Wheatstone Corporation if repair becomes necessary.
9
AirAura Installation Tips:
• Grounding: Establish a low impedance common ground in your facility and try
to route all grounds to that point. AirAura’s ground reference (its chassis) should
be connected to the station ground. This is especially important in a high RF
environment.
• Surge protection: Place surge protection circuits as close as possible to the
AirAura being protected. Surge currents should be steered to power ground
instead of station ground if possible.
• UPS/Power Conditioning: Choose the best power conditioning/UPS units that
you can afford, focusing on the most important features and options that you
need. The better UPS products can prevent equipment damage and some even
come with an external equipment damage warranty.
• Analog Audio Connections: Balanced audio sources should be connected to
AirAura using shielded audio cable. Unbalanced audio connections, if they are
necessary, should be made with shielded two conductor cable such as Belden
8451 or 9451 as if connecting a balanced source. At the unbalanced source’s
output connect its “+ Output” to AirAura’s “Hi” (XLR pin2) input and connect the
unbalanced source’s shield wire to AirAura’s “Lo” (XLR pin-3) input wire. If the
cable shield is used (recommended) connect it to the AirAura end only (XLR pin
1) to prevent ground loops.
• Digital Audio Connections: For digital audio connections always use a good
quality digital audio cable with a characteristic impedance of 110 ohms. The
AES/EBU specification with its broad impedance tolerance allows for cables with
impedances from 88 ohms to 132 ohms - 110 ohms is ideal. Twisted pair cable
should be shielded, and in the case of multi-pair cable, each pair should be
individually shielded. Foil shielding is recommended for permanent installations.
Cable with a foil shield plus an overall braid should be used in applications where
frequent flexing of the cables may occur. Each cable pair is capable of carrying
two channels of AES3 digital audio.
Generic “audio” cable such as Belden 8451 and 9451 can be used for
interconnecting AES3 digital audio devices, but the wire length should be
minimized. The actual cable length that will work is primarily determined by the
error correction and jitter tolerance of the AES3 receiver device and the specific
cable used and its length.
The impedance of most ‘analog’ audio cables ranges from 40 ohms to 70 ohms
and represents a fairly large impedance mismatch from the nominal 110 ohms
required by the AES3 standard. Such impedance mismatch will result in signal
reflections which can cause bit errors and audio dropouts at the AES3 receiver.
10
The higher capacitance of generic analog cables slows down the rise time of the
digital data signals which can impair the ability of the AES3 receiver to accurately
detect digital signal transitions. This results in increased jitter, or at the extreme,
no audio at all.
Where to Install AirAura
The best location for installing AirAura, or any other “on-air” processor, is at the
transmitter site. However this requires that a discrete Left/Right STL, either
analog or digital, be involved in the signal path. The benefit of a transmitter site
installation is that it enables the use of AirAura’s built-in lab-grade stereo encoder
allowing more precise control of modulation peaks.
The transmitter site location also allows the operation of AirAura’s highly
oversampled composite clipper to be used to create an additional loudness
advantage. The Vorsis composite clipper algorithm is more forgiving than those
found in other products, and in combination with our pilot and SCA protection
filters can create additional loudness without the usual audio and spectral grunge
that composite clippers typically create.
We recommend that the processor (any processor) be interfaced to the
transmitter using the exciter’s composite stereo multiplex input. The exciter’s
AES3 digital input may be ‘clean’, but it also precludes the ability to gain
additional loudness through the use of AirAura’s intelligent oversampled
composite clipping. Depending on the sample rates being used the exciter’s AES
digital input can also exhibit somewhat inferior peak control than the composite
input.
If AirAura is located at the studio and an STL is used to send the program
material to the transmitter there are several issues that need to be considered.
Analog Left/Right STL:
Older analog discrete left/right STL’s can suffer from an inability to control audio
peaks because of inadequate bandwidth in their IF circuits or poor low frequency
performance. Individual STL’s rarely have identical audio group delay in both
channels which affects stereo separation when the signal is converted to the
multiplex composite domain. Such STL’s also usually suffer from AFC bounce
when handling processed low frequency material and that can rob modulation
capability.
Composite Analog STL;
An analog composite STL has several advantages over the analog left/right STL
just described. These STL’s typically have better audio performance than an
analog discrete STL, and most have the capability to piggyback subcarriers on
the composite audio. This means that most SCA and RDS generators can be
located at the studio end of the STL along with the audio processor. If nothing
11
else, this is at least a convenient setup. When a modern composite STL is used it
can be nearly as transparent audio-wise as a digital STL.
Analog Phone Lines:
We don’t recommend discrete left/right analog ‘phone line’ STL’s because of the
inability of many service providers to guarantee flat frequency response and
proper phase matching between the two circuits. Furthermore, in many countries
wideband analog circuits are unavailable or their cost is prohibitive.
On the other hand if the STL is a dedicated (and equalized if necessary) pair of
circuits under the station’s control then they may be acceptable.
Digital STL:
When using a Digital STL that employs audio compression, it is highly
recommended that the AirAura be placed at the transmitter site which puts it after
the codec. The reason for this placement is that the codec will usually sound
better when presented with unprocessed studio audio than when handling the
highly processed and pre-emphasized audio present at the processor’s output.
Further, the encoding schemes used in such STL’s will not accurately pass the
well-defined peak levels created by AirAura which will create a modulation
(loudness) disadvantage.
AirAura can also be installed at the studio end of a compressed STL with at least
two caveats:
- The stereo generator and composite clipper in AirAura are not available. Most
digital exciters offer a composite clipper function, but they are usually quite crude
in their implementation compared to AirAura’s exceptional clipper. “Exciter
hosted” composite clippers are never the optimum choice when the station’s
ultimate sound quality is important.
- Compressed (data reduced) STL’s do not perform well when presented with
competitively processed audio. This is because codecs work by examining the
audio for opportunities to remove something that shouldn’t be audible to the
human ear.
When dense audio is presented to a codec there are fewer ‘opportunities’ to
remove redundant audio information and mask it from our hearing. Under these
conditions codec operation can be much more obvious — even objectionable —
than when the processing is located after the codec where the masked artifacts
are only occasionally unmasked.
TIP: If using AirAura at the studio be certain that any clippers in the stereo
generator at the transmitter site are properly set up to complement the settings in
AirAura. This will prevent gross distortion and potentially large modulation
overshoots.
12
Also, pre-emphasis should always be applied by the audio processing, not the
exciter. Modern FM audio processors have special and quite complicated but
efficient circuits to deal with the challenges presented by the FM pre-emphasis
curve and can provide very tight modulation control with low perceived distortion.
FM exciters do not have this technology!
EAS – United States Emergency Alert System
If the EAS generator is placed before the AirAura, the levels of the signaling
tones and FSK data can be disturbed if the processing (any processing, not just
AirAura) is very aggressive. Therefore in this situation it is recommended that the
EAS encoder be placed after the processing.
If the EAS unit needs to be installed prior to AirAura and AirAura is operated
aggressively, AirAura may need to be configured so that when the EAS tones are
being sent AirAura is switched to a bypass mode or a less aggressive preset.
This can easily be accomplished by using AirAura’s GPI interface and by
assigning a special preset to the EAS function that has internal processing
defeated and audio levels calibrated to provide proper modulation levels during
EAS transmissions.
Arbitron People Meter (PPM)
Reports from the field indicate that AirAura favorably passes the data
watermarking scheme used in the Arbitron People Meter rating service
technology, regardless of the aggressiveness of the audio processing performed.
13
Energizing
Assuming AirAura is correctly rack mounted you may now energize it, noting that,
for long-term reliability reasons there is no power switch.
The AC line input voltage may be between 90 and 260 VAC, 50 or 60Hz. Power
consumption is under 100VA.
Aggressive AC input filtering is utilized at AirAura’s AC power input; however it is
always advisable to use some form of competent external surge protection
and/or an uninterruptible power supply (UPS), especially where AC power quality
is questionable, such as at a remote transmitter site.
Power conditioning, surge suppression, and even power backup devices are
wise investments when using sensitive modern electronic devices that, like
AirAura, use some type of internal computer.
The use of a UPS (uninterruptible power supply) is usually recommended and
will protect AirAura from short duration power interruptions which may otherwise
signal it to reboot when it sees the power glitch. When this happens there will be
a loss of audio for approximately 20 seconds.
Rear Panel Connections
All audio input and output, control, Ethernet, and power supply connections are
made via various connectors mounted on AirAura’s rear panel.
•
Nine XLR connectors are provided for analog and digital audio
input and output connections.
•
Four BNC connectors are provided for SCA in and TX (transmitter)
out connections.
•
Two RJ-45 connectors are provided for Ethernet connections.
Either of these connectors can be used to connect a Windows® PC
running the Vorsis AirAura GUI.
•
Two DB-9 connectors provide 8 GPI inputs (for selecting the first 8
presets) and four GPO outputs. The pin-out drawings in Appendix E
summarize wiring connections for these features.
14
Audio Inputs
Input audio can be applied to either the analog left/right inputs or to the AES3
digital input as appropriate. The AES3 input accepts sample rates between 32
kHz and 96 kHz.
Automatic audio failover from one input to the other is a user selectable option.
Automatic failover from AES3 to analog is instantaneous and based on invalid or
missing bits in the AES3 stream, or after 30 seconds of “silence” (level below 48dBFS).
Automatic failover from analog to AES3 is based on the same silence sense
algorithm responding to audio below -48dBFS for more than 30 seconds.
Audio Outputs
FM Audio Outputs
Output audio for the FM path is available as:
•
•
•
•
•
Analog balanced left/right stereo.
Analog balanced left/right stereo and de-emphasized according to
any pre-emphasis used.
AES3 digital, either pre or post diversity delay, and/or deemphasized according to any pre-emphasis used.
Balanced line level composite stereo.
Unbalanced composite stereo on two rear panel BNC female
connectors.
HD Audio Outputs
Output audio for the HD path is available as:
•
•
Balanced left/right analog.
AES3 digital.
15
Headphones
A high-power, overload protected headphone output is available on the front
panel for local monitoring. The headphone audio source can be selected in
software to be from several signal points within the processing algorithm,
including both analog and AES inputs even if those inputs have not been
selected to feed the audio processing chain.
Network Connections
AirAura contains two methods of remote connectivity:
•
Wired Ethernet via twin 100Base-T Ethernet ports on the rear
panel. These ports are Auto MDIX and therefore each port will
accept either a straight through or crossover cable in any
combination.
•
802.11b/g compatible wireless interface. This interface is
configured to make AirAura appear as an ad-hoc wireless device,
providing the simplest method for connecting for most end users
and operating systems. Security options are available in the
wireless interface configuration to allow password protection if
desired. Because AirAura doesn’t contain anything that would be a
desirable hacking target we configure the interface with no security
as the factory configuration. Please see the appendix for detailed
programming information for the wireless interface.
General Purpose Interface (GPI/GPO)
AirAura is equipped with eight General Purpose Input (GPI) control input ports on
one female DB-9 connector, and four General Purpose Output (GPO) tally
outputs on a second female DB-9 connector. All GPI and GPO connections are
optically-isolated from AirAura’s internal circuitry to prevent external ground loops
and to prevent dangerous voltages from being introduced into AirAura.
The eight GPI inputs are hard-coded in software to activate the first eight preset
slots.
Note that as of this writing (Version 0.2.0 software) the GPO ports on AirAura are
disabled pending new features. Please see Appendix E for connection diagrams
and other data concerning the use of the GPI/GPO ports.
16
User Presets
AirAura comes equipped with several dozen factory presets and can hold a total
of 80 presets in its onboard memory. You can design and save additional presets
within AirAura’s onboard memory and can store an unlimited number of presets
on the PC that is hosting the remote control GUI software.
The factory pre-sets can be readjusted and then saved to new names in order to
create a unique and individual sound. Note: The factory presets are writeprotected and changes made to them cannot be written back to the same
memory location. Factory presets whose control settings have been modified are
considered “user” presets and therefore must be saved as a new name and to a
new preset number. Please start with a factory preset that has the on air sound
closest to what you need, and then make any necessary changes to that preset
to get to your final sound.
When changing presets, especially to ones tuned very differently from the current
preset, it may take several seconds for the new settings to become effective. For
instance if a gentle preset is selected after an aggressive preset has been in use
the audio output will be lower at first until the new parameters settle in. Also, to
avoid clicks and pops when presets are changed the preset parameters are
ramped between the current parameter values and the new ones.
When a preset has been recalled and no changes have been made to it, the
preset’s name will show as green text in the GUI. If changes have been made to
the preset, it will be displayed in red text. Once the modified settings have been
saved the preset name will once again appear in green.
NOTE: User presets stored in locations 1 through 8 are logically assigned to the
remote GPI function. Two examples of presets that might be stored here are:
- A preset that has all processing turned off and/or has special input/output level
calibrations (such as for Bypass or EAS purposes).
- A preset that has all processing enabled but has the Stereo Pilot turned off
(Mono Preset).
Preset storage is typically as follows:
- Presets 1 - 8 are user preset storage locations that can be quickly selected by
activating them via the GPI interface and its rear panel connector.
- Factory presets are installed starting at Preset 9, with Preset 9 being a “Bypass”
preset. The factory presets cannot be written over or deleted.
17
- The number of installed factory presets is subject to change and varies with
software version but is typically several dozen.
- User presets, other than the GPI selectable presets 1 - 8, are stored above the
highest-numbered factory preset. The number of available slots for user presets
depends on how many factory presets were installed. The total number of
presets on AirAura hardware cannot exceed eighty (80). The storage space for
presets on the GUI’s host PC, because of a preset’s tiny file size, is virtually
unlimited.
- User presets may be locked by the user. Factory presets, on the other hand,
are locked at the factory. Whereas any user can unlock user-locked presets, the
same user cannot unlock factory presets.
- The exception to the above is when the factory level preset lock utility is being
used. Then the user has full control over all factory presets and may remove or
modify them.
18
Basic Setup
Basic setup and adjustment can be accomplished using the front panel GUI Lite
and its tabbed menu structure. There are seven tabbed options across the top of
the control area: Input, Output, Encoder, Presets, Analysis, System, and Sound.
Each tabbed menu contains the controls required to install AirAura and get it on
the air.
Install AirAura in the equipment rack using at least two rack screws. If only
two screws are used they must be installed in the bottom holes of the rack
ears to prevent undue stress on the front panel and possible bending.
Connect local AC power to the unit. There is no power switch and power is
applied to the unit as soon as you connect it to a suitable source of power.
The power supply is universal and accepts line voltages from 90V AC/DC to
260V AC/DC, 50 or 60Hz if AC. Power consumption is 64VA.
Connect the Analog or Digital audio inputs as appropriate for your installation.
Click on the Input Menu tab on the front panel GUI and select the input
source to match the Input type connected to the rear panel. If the audio
source is already providing an audio feed you should see meter activity on the
AirAura’s metering display.
While still in the Input menu and observing the Input meters adjust the Input
Gain control (AES or Analog as required) until the input meters are just
peaking around -12dBFS with normal program levels being applied.
Note that for best overall audio chain performance, the Input of the AirAura
should be calibrated so that it reaches 0dBFS when the signal chain prior to
the AirAura also reaches 0dBFS, or digital full scale.
Now make the audio output connections as appropriate for your installation,
noting that Analog and Digital outputs may be used simultaneously.
19
If using the Analog L/R outputs pre-emphasized, navigate to the Output
screen and select the checkbox for Analog L/R, either flat or de-emphasized
noting that if pre-emphasis is enabled in the Input menu the FM outputs will
be pre-emphasized unless De-Emphasis is also selected.
Next adjust the FM Analog Output control to set the correct Left and Right
output level.
If using the Analog outputs ‘de-emphasized’ select the L/R De-Emphasized
option. Then adjust the Analog Output control to set the correct Left and Right
output level
If using the AES Digital Outputs, connect it (them) to the equipment following
the AirAura and adjust the AES Output level control in the Output Menu as
appropriate.
If using the Composite outputs associated with the rear panel BNC
connectors, navigate to the Output menu and select the checkbox for MPX.
Then adjust the TX 1 and TX 2 controls as necessary to set the correct
modulation levels for your system.
If the HD output is being used its output level can be adjusted from within the
Output screen. When using the HD output we assume that you’re also going
to need the FM diversity delay. Please adjust it as necessary for your system.
20
Next click on the Presets tab to reveal the list of Factory supplied presets.
The “A Quick Start” preset is the Factory default and will be active when the unit
is first powered up. This preset provides balanced competitiveness and provides
a very good starting point for a variety of program formats. We’ve adjusted it to
have a rich and balanced sound and with reasonable loudness. In short, it won’t
embarrass anyone when it’s put on the air.
Please feel free to explore the different presets to see which one is the closest to
your on-air sound goal, remembering that our preset names don’t necessarily
mean that the preset can ONLY be utilized for a format with a similar name.
Please feel free to experiment and try each preset we provide to see how it
sounds on your station and in your market!
Remember also that the AirAura slews from the old preset to the new one in
order to avoid unnecessary clicks and pops on the air. Therefore it may take
several seconds for a newly selected preset to ‘settle in’ to its intended sound.
From time to time we add new presets to our Vorsis website for customers to
download and experiment with. Presets can easily be installed into AirAura using
the Preset Library management features built into the remote GUI.
You’re on the air!
NOTE: Detailed information on the particulars of the GUI application on the
front panel can be found in the following sections which cover the
operation of the GUI Lite application.
21
Modifying the Sound of Factory Presets using the Front Panel GUI
Selecting the “Sound” tab will reveal the screen containing controls by which the
sound of the Factory presets can be altered.
There are two sections to the Sound screen. The left side contains the controls
that modify the sound of the FM signal path while the right side hosts the controls
for adjusting the sound of the HD signal path. Note that the FM and HD signal
paths share a common five-band AGC structure in order to maintain a consistent
spectral texture as an HD receiver blends from analog over to HD.
Each control is intelligently connected to many controls that normally belong to
the full-control Expert GUI. As a front panel Sound control is adjusted, several
adjustments occur behind the scenes to tailor the sound according to the naming
convention of the controls. The following is an explanation of what each of the
FM Sound controls do, keeping in mind that AGC Depth and Compression are
shared for the FM and HD processing chains.
- FM AGC Depth
The AGC Depth control adjusts how deeply into the AGC the input audio is
allowed to go. Higher AGC Depth settings cause more long-term gain control and
will hold up fading passages longer. Conversely a lower setting of the AGC
Depth control causes less gain reduction and allows less gain to hold up
passages as they fade.
Compression
The Compression control adjusts how deeply into compression the input audio is
allowed to go. Higher Compression settings cause more short-term gain control
(which is more audible) causing the audio to ‘fill up’ and become more ‘full’.
Density
The Density control adjusts how much into short-term limiting the audio is
allowed to go. Higher settings will make the audio more dense, lower settings
less so. Stations looking for a ‘compressed’ sound will find the Compression and
Density controls useful.
22
Note that increasing Density will not cause the final clipper to be overdriven
because those controls are also ganged to the Density control to ensure that
distortion will not increase as Density is increased.
Low/Warm EQ (we’re leaving Loudness for last!)
The Low/Warm Equalization control adjusts how low frequencies sound on the
air. When the control is at “0” and has not been touched since a preset was taken
the factory determined equalization is applied. However, once the control has
been adjusted away from its “0” setting a new equalization scheme opens up.
As the control is turned counterclockwise (towards negative numbers) the bass
takes on a deep, robust character while the ‘mud’ that would normally occur with
such equalization, especially on automobile radios, is reduced through a gentle
parametric equalization cut at around 180-200Hz.
As the control is turned clockwise (toward positive numbers) the bass takes on a
fuller, warmer, ‘bigger’ sound and the gentle cut at 180-200Hz is removed.
Mid/High EQ
The Mid/High Equalization control acts in some ways similar to how the
Low/Warm EQ acts when adjusted. When the control is set at “0” and has not
been touched since a preset was taken, the factory equalization is applied.
As the control is turned counterclockwise (toward negative numbers), a broad
midrange boost is added along with some broad boost at very high frequencies.
The effect is to apply an overall ‘brightening’ to the sound. Note that in some
presets a slight high frequency roll off may be applied when the control is in
negative numbers.
As the control is turned clockwise (toward positive numbers) midrange boost is
minimized and a very high frequency boost is progressively applied. The effect is
to add sparkle and sheen to the audio without adding undesired stridency.
Loudness
Loudness does just what it says it does. Once the previous controls have been
adjusted for the desired texture, “Loudness” can be used to set the amount of
desired on-air loudness.
The Loudness control is ganged to certain controls within the 31 band limiter, FM
Limiter/Clipper and MPX processing.
Next we’ll address the HD controls, again keeping in mind that the HD
processing section shares the five-band AGC with the FM side to provide a
smooth crossfade between analog and HD signals on an HD-capable receiver.
23
- HD –
Density
The Density control adjusts how much short-term limiting the audio is allowed to
undergo. Higher settings will make the audio more dense, lower settings less so.
Stations looking for a ‘compressed’ sound will find the Compression and Density
controls useful.
Note that increasing Density will not cause the final limiter to be overdriven
because its controls are also ganged to the Density control to ensure that
distortion and/or audible pumping will not increase as Density is increased.
Low/Warm EQ (again we’re leaving Loudness for last!)
The Low/Warm Equalization control adjusts how low frequencies sound on the
air. When the control is at “0” and has not been touched since a preset was
taken, the factory determined equalization is applied. However, once the control
has been adjusted away from its “0” setting a whole new equalization opens up.
As the control is turned counterclockwise (toward smaller numbers) the bass
takes on a deep, robust character while the ‘mud’ that would normally occur with
such equalization, especially on automobile radios, is reduced through a gentle
parametric equalization cut at around 180-200Hz.
As the control is turned clockwise (toward larger numbers) the bass takes on a
fuller, warmer, ‘bigger’ sound and the gentle cut at 180-200Hz is removed.
Mid/High EQ
The Mid/High Equalization control acts in some ways similar to how the
Low/Warm EQ acts when adjusted. When the control is set at “0” and has not
been touched since a preset was taken, factory equalization is applied.
As the control is turned counterclockwise (negative numbers) midrange boost is
minimized along with some broad boost at very high frequencies. The effect is to
apply an overall ‘brightening’ to the sound.
As the control is turned clockwise (positive numbers) the midrange boost is left
alone at its factory setting and a very high frequency boost is progressively
24
applied to the audio. The effect of this is to add sparkle and sheen to the audio
without adding undesired stridency.
Loudness
Once the previous controls have been adjusted for the desired texture the
Loudness control can be used to set the desired HD on-air loudness.
“Loudness” is ganged to certain controls within the 31 band limiter and HD
Limiter section. As the control is adjusted upwards from “5” the sound will get
both more dense and louder. The opposite occurs when the control is adjusted
counterclockwise away from “5”.
Saving a Preset
The Preset screen is equipped with a QWERTY keyboard for entering preset
names when they are to be saved. For capital letters there is a Shift key either
side of the spacebar which toggles – press once to lock the keyboard in Caps,
once again to lock it in lower case.
When the Save button is pressed a dialog opens allowing a preset name to be
entered on the line above the keyboard (see below).
Once the preset name is satisfactory, press the Save button to commit it to
memory, noting that it will be stored in the next available preset slot.
25
Preset Scheduler / Events
Both long and short-term preset changing schedules are available in AirAura.
Short term schedules are used for the normal daily preset changes as shifts
change, etc. They may be set for any day of the week and for any hour. Note that
when a preset is set to change it will change and remain at that preset unless a
scheduler entry is programmed to change it back.
Long term schedules are useful for one time events or for special occasions
when a preset is not part of the usual daily rotation. For instance it can be
programmed to switch to a holiday preset at a certain time on December 24. Like
the short term scheduler the long term scheduler needs an additional entry to
allow it to return to the daily preset rotation schedule.
The graphic below shows how these schedules might be configured.
Virtually any combination of schedules and presets can be accommodated,
noting that AirAura’s GPI ports also allow preset switching via hardware
connections to remote devices such as transmitter site remote controls, etc., and
these are completely separate from, and therefore override, the scheduler.
AirAura is also equipped with our ACI (Automation Control Interface) which
allows automation-system based control of not just presets, but ANY processing
or system parameter within the AirAura signal processing chain.
26
Setting up AirAura and GUI Lite to ‘talk’
Using a Wired Network/LAN Connection
AirAura and the PC running the AirAura GUI program (Lite or Pro) can be
straightforwardly connected together using a standard Ethernet Local Area
Network (LAN) or connected to each other using either a straight through or
crossover CAT5 cable. AirAura’s Ethernet interface is Auto MDIX and both cable
types are supported.
A CAT5 Ethernet cable connected to the 100baseT LAN should be inserted into
one of the RJ-45 connectors on the back of AirAura. Likewise, the GUI should be
installed on the desired PC and the PC verified to be working correctly with the
LAN.
AirAura’s pre-configured factory default Ethernet Configuration is as follows:
Front Panel IP Address:
Hardware IP Address:
Subnet Mask:
Gateway:
Wireless Address:
192.168.1.201**
192.168.1.200**
255.255.255.0
192.168.1.1**
192.168.2.100**
** in accordance with NAT routing rules these addresses must be on a different
subnet!
AirAura’s present network configuration can be viewed or changed by using the
front panel’s “Right Click\File\Settings” navigation to get to the IP address setup
page shown below:
On this page there are four
entries (default settings shown):
Front Panel IP Address - This
is the reserved address that the
front panel (not the remote GUI
on
the
PC!)
uses
to
communicate with AirAura’s
DSP farm.
This address is typically set one
IP Address higher than the IP
address assigned to AirAura’s
“Hardware” address, but in no
case should it end in “0” or
“255”.
27
Hardware IP Address – This is the address of AirAura’s DSP farm and is the
address that the remote GUI on a host computer will use to connect to AirAura
and control it over the network.
Subnet Mask – The subnet mask entry must be appropriate for the network
being used. Please see your local IT person if this item is a bit confusing or
consult one of the free online resources such as http://www.subnetmask.info/ or
http://www.subnet-calculator.com/.
Gateway – This is the gateway address that AirAura will use to reach
connections outside of its own internal network. If you are on a local LAN
segment or connected to AirAura by a direct connection, the Gateway address is
not usually necessary and can be set to 0.0.0.0 or 255.255.255.255.
After determining the IP address that you wish AirAura to use, enter that address
in AirAura’s Hardware IP address field using the navigation buttons. It is a good
idea to clear the entire IP address field before entering new data to ensure there
will be no hard to see leading or training blanks in the address.
AirAura’s Front Panel Network Settings
Next, using the same sequence as above enter a new GUI IP address by adding
“1” to the IP address that you entered for the hardware in the above step.
Example:
If you entered 192.168.0.200 as the hardware address, then the logically correct
GUI address will be 192.168.0.201. Note that the front panel GUI address is not
utilized externally by AirAura, however no other device on the connected network
should be using this address – in other words this address must be reserved
even though it is not externally used.
Enter the correct Subnet Mask and Gateway in the same manner as the IP
addresses were entered. Then click the “OK” box. When prompted to reboot
AirAura for the changes to take effect, click “OK” and then interrupt power to the
unit for a few seconds. Reapply power, and once the AirAura has rebooted and
comes back to life, the new IP address will be valid.
Configuring Remote GUI
Now that AirAura has a valid network address the remote GUI must be
configured so that it can find AirAura on the network.
Install and then start the remote GUI. Then click Devices>Add... to bring up the
Edit Device dialog. Entering a name is optional however it makes it easier to
know which AirAura you are connected to.
28
In the IP address field below the name enter the “HARDWARE” IP address that
you just gave the unit in prior steps and then click OK. This name will appear in
the Devices window of the GUI when it has been selected for communication.
Highlight the new AirAura device just created in the Devices list and click on
“Select”. Then click OK.
Now place the GUI online by clicking on the button to the left of the Status
message at the top of the GUI – the indicator should turn green when AirAura
connects, indicating that the GUI is now communicating with AirAura.
Once the GUI has been made aware of AirAura’s existence it will always appear
in the list of “AirAura Devices”, and be instantly accessible – from anywhere.
When connected to AirAura the status bar will indicate “Online” and the “Devices”
text will show the name of the AirAura that it is currently communicating with. The
status bar will also display the name of the preset that the AirAura you’re
connected to is currently running.
A reminder - When the Preset name is shown in green it represents a preset
(factory or user) that has been recalled and no changes have been made to it. If
the Preset name is scrolling in red, it means that the preset has had changes
made to it and has not yet been saved.
Connecting Directly Without a LAN
You can work without a LAN by connecting AirAura and the PC Ethernet ports
together with a standard Ethernet cable - either a straight through or crossover
cable may be used because the Ethernet interface inside AirAura is Auto MDIX.
Note: The controlling PC and AirAura’s network settings must be configured to
place them both on the same subnet! This is also why the front panel GUI and
remote hardware GUI must be on the same network numbering scheme –
although the internal subnet can be any one that is valid, both local and remote
devices must be on the same subnet in order to communicate.
Example: If AirAura is using the 192.168.1.x address range and a laptop is using
the 172.68.122.x address range the laptop won’t be able to communicate with
AirAura. The laptop will need an IP address configuration that puts it on the same
192.168.1.x network subnet as AirAura.
29
Wireless Connection
Many users will want to make adjustments to AirAura while listening to it in a
remote location such as out in a car in the station’s parking lot. This is easily
accomplished by using AirAura’s built-in 802.11b/g wireless capability.
Once powered up AirAura should show up in the PC’s list of available wireless
networks as an “On Demand” device and also an “Unsecured computer-tocomputer network”. The security of AirAura’s wireless interface is disabled by
default to ease first time connections in the field. The wireless interface’s security
can be reconfigured as desired by referring to the procedures documented in the
Appendix B.
Connecting wirelessly to the AirAura is simple.
Open the PC’s wireless connections dialog. AirAura should be listed.
Highlight AirAura and click on the Connect button at the bottom of the dialog.
A “Connect to unsecured network” prompt may appear. Click Yes.
The “Acquiring Network Address” message should appear next to the AirAura
in the list.
Once the status shows “Connected”, open GUI Lite and click on the Devices
button.
Click the Add button and the Add Device dialog will open.
Enter a name for AirAura (like AirAura Wireless)
Enter the IP address 192.168.2.100 (Factory default) and click OK.
Highlight the new device and click the Select button to the right.
Click on the GUI’s Online button
The AirAura GUI should connect to the AirAura and control and graphical
display activity should commence.
AirAura/Internet Security Concerns
AirAura’s wireless interface acts as a “web server” for configuration. While
AirAura’s wireless configuration could be hacked, there is nothing in AirAura’s
signal processing available to hack. Nor is there a way to use a hacked wireless
interface to reach the wired side of the connected network (because the NAT
router in the wireless module can only route to ONE address – AirAura).
The first few AirAura’s are being shipped with Microsoft Windows XP running on
the front panel GUI while work on the Linux interface is completed. AirAura has
been factory configured to allow AirAura’s front panel to appear as “AirAura on
AirAura (192.168.1.201)” in My Network Places (Windows OS). In the event a
software upgrade becomes available before the Linux version is released we will
provide detailed instructions on how to perform the upgrade.
30
About DHCP and AirAura
AirAura does not utilize or support DHCP — Dynamic Host Configuration
Protocol (or automatically assigned network addressing) — and needs to be
assigned a “STATIC” network-unique IP address.
AirAura Ports and Network Protocols
AirAura utilizes TCP and UDP protocols to communicate with the remote GUI.
The TCP protocol is used from GUI to AirAura because its high reliability ensures
that control changes sent to AirAura will be received without errors.
The UDP protocol is used to send metering and other real time data since
handshaking is not required.
The TCP protocol utilizes port 55899, while UDP uses port 60001, and, if 60001is
busy, it tries the next highest port until an idle one is found, stopping a search
when it reaches 60010. Both TCP and UDP ports must be open for any throughthe-firewall connectivity.
If UDP Doesn’t Work
Occasionally a network or internet service provider will block unsolicited UDP
Ethernet packets. When that happens, the GUI will connect and the processor
can be controlled but no metering or analysis graphics will be displayed. If this
happens, navigate to the GUI’s System screen and check the box labeled
“Metering Data over TCP/IP” and the issue should be solved.
Using GUI Lite
The GUI may be positioned on the host computer’s screen by left-clicking and
holding the upper left corner of the GUI and dragging it to the desired position. In
true “Windows” fashion, the GUI may be minimized on the desktop (taken off the
screen) and/or closed by way of the familiar controls at the extreme top right. GUI
Lite may also be resized on the desktop as desired.
Descriptions of the features and functions of the GUI will follow different discrete
regions of the screen;
it will begin with the Control Area at the top;
followed by the Input/Output Levels;
followed by the Dynamic Analysis display;
ending with the Gain Reduction Displays.
The GUI Lite application that runs on the host Windows PC and the GUI that runs
on the front panel of AirAura are virtually identical except for the sizing and
positioning of the graphical analysis and metering displays. Therefore the
following explanations given for the GUI Lite application also pertain to the GUI
on AirAura’s front panel.
31
INPUT MENU
This is the first tab on the top far left of the GUI. (Note: the screen that is
currently being displayed is indicated by a red background on the selection tab).
The Input screen contains controls for the Input Audio Source, Automatic
Failover Enable, Analog and AES/EBU input gain controls, input L/R gain
balance, Phase Rotator In/Out, and Pre-Emphasis selections.
All controls can be adjusted with the AirAura front panel track pad.
Input Source
The Input Source can be selected as either Analog, which is the analog
Left/Right input, or AES, which is the AES3 digital audio input. The currently
selected input is shown by a red checkmark.
Audio Input Signal Presence Indicators
Below the source selection checkboxes are a pair of signal presence indicators
for each input. The Analog indicator lights if there is a signal present at the
analog input that exceeds -48dBFS. The AES indicator lights if there is a valid
AES signal present at the digital input above -48dBFS.
Automatic Input Failover
In the event the currently selected input source fails and the “Input Failsafe”
check box is checked, an alternate source of audio connected to the other input
can automatically be put on the air.
If the primary source was AES/EBU (digital), the analog input will be selected
immediately if the AES3 receiver chip detects invalid bits in the AES data stream
or missing audio data. Also, the analog input will be selected after 30 seconds of
a valid AES data stream having a signal level below -48dBFS.
If the primary source was analog, then a timeout of 30 seconds must elapse
before the unit switches to the AES/EBU input in an attempt to restore audio. The
audio failure sense threshold is fixed at -48dBFS, and this combination with the
30 seconds timeout, is suitable for virtually all program types.
32
Analog Gain
The Analog audio input gain can be adjusted by clicking on the knob and
dragging the mouse or touchpad to the right or left. The Analog Gain can be
adjusted over a +/- 24dB range.
AES3 Digital Gain
The AES/EBU Digital audio input gain can be adjusted by clicking on the knob
and dragging the mouse or touchpad to the right or left. The AES Gain can be
adjusted over a +/- 24dB range.
L/R Balance
Static level errors in Left/Right channel balance can be corrected by using the
“Balance” knob. The Left/Right balance can be adjusted over a +/- 12dB range.
The control is common to both the analog and AES/EBU digital inputs.
Pre-Emphasis
FM Pre-emphasis may be set to Off, 50uS, or 75uS as required by the country
where AirAura will be operated.
OUTPUT MENU
This is the second tab on the top of the GUI. (Note: the screen that is currently
being displayed is indicated by a red background on the selection tab).
The Output screen contains controls for the Analog Output Type, FM Diversity
Delay, FM Digital Output level and the HD Output levels.
The FM Digital Output also has options for applying De-Emphasis that is
complimentary to any Pre-emphasis in use as well as allowing the digital output
to be taken prior to the FM Diversity Delay.
The HD Output has options for reversing the phase of the left and right signals as
well as for swapping the left and right channels.
33
The Analog Output Type box needs special attention!
Unlike other audio processors AirAura’s balanced analog outputs can also carry
balanced composite stereo. When the MPX checkbox is selected, the rear panel
TX-1 and TX-2 BNC connectors are carrying the standard unbalanced composite
stereo signal – at the same time the XLR outputs are carrying balanced, line level
composite stereo. This feature has distinct advantages when the ultimate signal
to noise ratio is desired and the exciter being fed has a differential input stage
(most modern exciters do).
When the L/R Discrete or L/R De-Emphasis checkboxes are checked an FM
Analog Output level control will appear in this screen and the TX level controls in
the Encoder screen will vanish.
All controls can be adjusted with AirAura’s front panel track pad.
STEREO ENCODER MENU
AirAura contains a mathematically perfect stereo encoder whose performance is
limited only by the high speed output Digital to Analog converter (DAC) and its
reconstruction filter. Stereo separation is typically 60dB between 20Hz and
15kHz. Clicking on the Encoder tab opens the screen hosting controls for this
section.
MPX Process
This control allows adjustment of AirAura’s highly oversampled composite clipper
to trade off loudness against distortion.
MPX Processor Style
There are three styles of multiplex processing available, Lookahead Limiter, Soft
Clipper, and Hard Clipper.
Lookahead Limiter – the lookahead limiter is useful for formats requiring
somewhat competitive loudness without the stigma of “…using composite
clipping…” to achieve it.
34
Soft Clipper – the soft clipper can add fullness and warmth to the sound
without adding harsh distortion. When the soft clipper is in use it will be
normal for the MPX Process control to be operated somewhat below 0dB
due to the soft clipper’s gentle transfer function.
Hard Clipper – AirAura’s hard clipper can be driven quite hard without
generating the usual artifacts associated with other composite clippers
when operated above threshold.
Pilot Injection
The pilot injection control adjusts the 19kHz stereo pilot amplitude and is
adjustable from 0 (Off, to make the station transmit in Mono) to 20% of the main
composite signal amplitude in 0.1% steps.
SCA-1 and SCA-2 Inputs
Inputs such as SCA or RDS are applied to the SCA connectors and then digitized
at 192kHz. Prior to being digitized the signals are high pass filtered at 1kHz to
reduce hum and then brick wall low-pass filtered at 94kHz. This control can be
set to OFF or to levels from -79.95dB to +10.0dB in 0.05dB steps.
TX-1 and TX-2 Outputs
These controls adjust the output amplitude of the signals appearing at the rear
panel BNC and XLR connectors when the Output Mode is MPX. These controls
can be set to OFF or to levels from -79.95dB to +6.00dB in 0.05dB steps.
35
PRESETS MENU
The presets tab opens a screen where presets may be selected for on air, saved
to the processor, or managed through AirAura’s comprehensive Preset Library
Management utility.
Selecting a Preset
Selecting a preset for on-air use is as simple as double-clicking on a preset in the
list. The currently running preset will morph into the new preset over a period of
several seconds in order to prevent abrupt clicks and pops when the new
preset’s parameters are being loaded.
Saving a Preset
The Preset screen is equipped with a QWERTY keyboard for entering preset
names when they are to be saved. For capital letters there is a Shift key next to
the spacebar – this key toggles – press once to lock the keyboard in Caps, once
again to lock it in lower case.
When the Save button is pressed a dialog opens allowing a preset name to be
entered on the line above the keyboard (see below).
Once the preset name is satisfactory, press the Save button to commit it to
memory, noting that it will be stored in AirAura’s next available preset slot.
36
Preset Library Functions
Clicking on the Library button opens up the classic Vorsis preset library
management feature. When this window is open both the presets on the AirAura
hardware itself and presets on the host PC are visible.
To move presets from the hardware to the PC or vice versa, simply drag the
preset in the direction you wish it to go. Whenever presets are being moved from
AirAura to the PC, a copy of the preset being dragged over will appear in the
library window.
The same goes for the behavior when dragging a preset from the PC to the
hardware – a copy of the preset is sent to the hardware – the original remains on
the PC for safekeeping.
SYSTEM MENU
The system screen allows system-wide settings to be configured. The following
features and options are available within the System menu.
System Settings Change With Preset Takes
Vorsis processors segregate ‘sound’ settings like AGC Drive from ‘system’
settings like Analog Output Level. However, unlike other processors you may be
familiar with, when a Vorsis preset is saved all currently active parameters are
stored with that preset. This is a huge advantage when the need arises to
change one or more system settings without affecting others.
What this means is that processing presets can be used to adjust system
parameters when desired. An example of how this could be used is the case
where a station might want to change presets for a sports broadcast and also
turn off the stereo pilot because the broadcast is in mono.
When the checkbox labeled System Settings Change with Preset Takes is
checked, all of the system settings stored within a preset will be applied when
that preset is taken. Two presets identical except for the stereo pilot setting could
be used to turn the stereo pilot on and off without changing anything else.
Metering Data over TCP/IP
Sometimes UDP packets are blocked by an Internet provider or in house router,
rendering the GUI without metering (because it uses the UDP protocol for
metering). In this situation metering can be restored simply by selecting the
Metering Data over TCP/IP checkbox.
The downside of operating the GUI in this mode is that unlike UDP which
requires (and expects) no handshaking to guarantee data integrity, TCP/IP
requires handshaking to ensure that every packet received is identical to the one
transmitted. On a noisy or poor link, the need to handshake on every metering
packet can slow the network down.
37
Headphone Source
The headphones may selectively listen to a number of points inside the signal
processing chain:
•
•
•
•
•
•
Input: Listens to the output of the audio input selector, whether
analog or AES input is selected.
Analog Input: Listens to the audio appearing on the analog input
even if it is not selected to be on air.
AES Input: Listens to the audio appearing on the AES3 digital input
even if it is not selected to be on air.
HD Output: Listens to the output of the entire HD processing chain.
FM PreDelay: Listens to the output of the FM processing chain
prior to the FM diversity delay.
FM Output: Listens to the output of the entire FM processing chain,
including the FM diversity delay.
NOTE: AirAura’s headphone routing selector allows you to monitor an audio
input without having to put it on the air. This can be very handy for confirming
that a backup audio source is present and of acceptable quality without actually
switching to it!
Headphone Volume Control
On the top right corner of GUI Lite is the headphone volume control slider.
38
Status Indicators
There are three status indicators: Temp, Analog, and AES.
Temp
This indicator is green when the GUI is online to AirAura and the internal
temperature of its hardware is below 50°C/122°F. The numbers following Temp
represent the current temperature of the hardware.
Analog
This indicator is green whenever there is analog audio present on both left and
right channels and it is above -48dBFS.
AES
This indicator is green whenever there is a valid AES3 digital audio signal
present and it is above -48dBFS.
Remote Login
When Remote Login is clicked, a password prompt box will open as shown
below:
Remote login is for password restricting
GUI access to an AirAura processor over
the Ethernet connection. When a GUI
TCP connection session is initiated,
AirAura accepts the connection and then
asks the remote GUI for a password.
If the remote GUI cannot provide the
correct password, then a dialog box will
pop up asking the user to enter the
correct password. Until the login password can be verified AirAura will not send
any of its current settings to the remote GUI nor accept any changes from the
connecting GUI.
The dialog box allows you to change the login password. You need to know the
current password beforehand, and also enter the new one twice for verification.
The password can be any combination of characters, numbers, or symbols. If the
“Remember this password” check box is checked, the GUI stores the password
on the local PC. If you do not check the check box you will be asked for the
password the next time you connect (since the first round of verification will fail).
When asked for a password while logging in you can also check the “remember”
box to save what you enter. That way you don’t need to enter the password
every time you login. Occasionally you may see the word “pending” temporarily
appear in the connection status box of the remote GUI. That means the AirAura
and Remote GUI are handshaking on the password string that is being sent.
39
Setting System Time
Allows the system time of AirAura’s onboard computer to be set or changed.
AirAura’s system time can be synchronized to external time servers (SNTP, or
Simple Network Time Protocol) if desired. Alternately, time can be synchronized
to the PC that is running the Windows-based GUI. In this instance time updates
will occur upon successful connection to the GUI on the remote PC.
Accessing Menu Options
Right clicking anywhere on the Vorsis AirAura Control Panel will open a pop up
menu tree with access to various items. The first item in the list is View and it
presents the user with several choices for what he wishes to view.
Input: Makes the Input menu screen visible.
Output: Makes the Output menu screen visible.
St Encoder: Makes the Stereo Encoder screen
visible.
Presets: Makes the Preset management screen
visible.
System: Makes the System screen visible.
Sound: Makes the Sound adjustment screen
visible.
About: Displays the GUI software version.
Next in the list is Hardware. When selected, the
Hardware item opens up a list of six items.
Devices: Displays the Devices dialog where the
GUI is configured to communication with AirAura
hardware.
On-Line Mode: Shows or changes the On-Line
status of the GUI.
Event Scheduler: Opens the Event Scheduler for
viewing or editing.
Login Password: Sets the Login password for
the GUI when connecting remotely.
Version: Displays the software and firmware
versions currently loaded in the hardware.
Update…: Opens the hardware update dialog
where a .VBN update file is selected for download
to AirAura.
40
Next in the drop down list is Presets. When
selected, the Presets item opens up a list of three
items:
Take: Opens the Take Preset dialog to allow the
current preset to be changed.
Save: Opens the Preset Save dialog with prompt
for the name and preset slot for the current
settings to be saved to.
Library: Opens the preset Library Manager which
allows presets to be packaged and moved to/from
the hardware and host PC, etc.
Analysis Menu
AirAura is equipped with extensive processing
analysis features that show what the
processing is doing and by how much and
when. The front panel and GUI Lite both have
drop down menus where the analysis to be
viewed may be selected. There are six options
in this drop down menu:
FFT – displays the spectral output of the FM or
HD processing paths after processing. The FM
display includes any pre-emphasis being used
in order to present an accurate view of the
signal actually being sent to the transmitter by
AirAura.
O-Scope – displays the audio waveforms at the output of the FM or HD
processing chains.
E vs F – displays the current FM or HD RMS Loudness within each of the 31
limiter bands.
3-D Plot – a three-dimensional plot of the audio, after processing, showing
amplitude versus frequency versus time. The display has a ten second historical
window depth allowing some historical perspective about the FM or HD audio
after processing.
SDR – Spectral Dynamic Range (a Vorsis exclusive). This display shows the
amount of dynamic range remaining in each of the 31 FM or HD limiter bands,
after processing.
A-Clip – This is AirAura’s final FM clipper activity display (another Vorsis
exclusive) that shows where in the audio spectrum distortion products are being
detected and reduced and by how much.
41
A detailed explanation of each analysis display follows. Note that the Analysis
menu has a selection for viewing either the FM or HD signals.
FFT – This is a Fast Fourier Transform of the audio spectrum after processing
has been applied by the final clipper (FM) or limiter (HD).
The FFT display’s high resolution is useful for locating where in the audio
spectrum certain signals may be found. With complex program material a visual
idea of the amount of energy distributed across the audio spectrum may be
made.
O-Scope – This is an oscilloscope-type time-domain display of the audio
waveforms exiting the output of the FM and HD final peak control sections.
The FM o-scope display will reveal what the pre-emphasized and clipped audio
looks like. The HD path, with its more ‘gentle’ lookahead limiter, will appear less
‘aggressive’ than the FM audio.
E vs. F – This display represents the RMS Loudness being generated in each
one of the FM or HD path’s 31 limiter bands.
The E vs. F display has a submenu (shown left) that
allows customization of the RMS Integration Time, the
display Release Rate, and whether or not peak levels
are to be displayed. The factory default Integration
Time is 300mS – the same as a standard VU meter –
which is also a fair estimator for how loud something
seems to the human ear.
42
3-D Plot – A 3-D plot of the audio shows the last ten seconds of audio and what
the audio levels were at each frequency in the audio spectrum during that time.
The 3-D plot can be very helpful when looking at how the audio spectrum has
been behaving over time. The higher the signal is in the plot, the larger the signal
amplitude at the frequency of the peak.
SDR – During development of the AirAura product we invented the Spectral
Dynamic Range meter in order to assist us in evaluating what was happening in
our new AirAura clipper as it managed the audio spectrum.
We made the SDR meter very easy to interpret – the longer the blue bars, the
more dynamic range there is between the peak amplitude and its RMS
(loudness) level inside each of the 31 limiter bands. Conversely, the shorter the
bar’s length is, the denser the audio is in that limiter band.
A-Clip – During development of our new FM clipper we realized that the only
way to visually monitor what the AirAura clipper was doing was to invent a way to
watch it work. The A-Clip display was born out of that idea.
This display shows in detail, where in the spectrum AirAura’s distortion
management is being accomplished, and by how much. Like a weather radar
image, the ‘redder’ the display, the more active the work being done in that part
of the audio spectrum.
43
Appendix A
Default Factory Wired Ethernet Configuration
- Modifying the Settings AirAura requires two IP addresses – one serves the main DSP board and the
other serves the microcontroller that operates the front panel. Ethernet was used
for the DSP to front panel communications interface because of its speed over,
for instance, a serial connection, a tremendous benefit when calculating and
displaying the high resolution graphics required by the AirAura’s front panel.
The AirAura is configured at the factory to the following:
Main DSP board IP address
Front panel controller IP address
Gateway
Subnet Mask
192.168.1.200
192.168.1.201
192.168.1.1
255.255.255.0
Changing the AirAura’s wired Ethernet interface is a simple process; however
two considerations must be kept in mind when doing so.
1. The Main DSP board and the front panel must be on the same network
subnet. In other words, if the Main DSP board has been assigned an IP
address of 109.16.77.200, then the front panel must also have an IP
address assigned to it that is in the range between 109.16.77.1 and
109.16.77.254 in order to enable communications between them.
2. The two rear panel RJ-45 connectors share the wired side of the wireless
interface which is connected to the same internal Ethernet switch as the
Main DSP board and the front panel. Therefore, if the Main DSP board
and front panel IP addresses are changed, the wired side of the wireless
interface must also be reconfigured in order for wireless to work. Please
see Appendix D for the procedure for reconfiguring the wireless interface.
Changing AirAura’s Network Configuration
To change the IP address and network configuration of the AirAura’s Main DSP
board and front panel interface the features built into the front panel may be
used. Using the front panel trackpad place the cursor in the lower left quadrant of
the left display. Then using the rightmost illuminated “V” button, click the button
to bring up the View/Hardware dialog.
Within that dialog, select the Hardware/Network Settings option and the following
dialog will appear.
Next, using the backspace
button of the numeric keypad,
backspace over any unneeded
entries in the front panel IP
address field.
Next, using the numeric keys,
enter the new IP address for the
front panel, noting that we
usually assign it the next highest
IP address above the hardware
address though this isn’t really
necessary as long as the two
addresses used are in the same
network addressing range.
Next, use the backspace key to erase any undesired characters in the Hardware
IP Address field. Then, using the numeric keys, enter the new Hardware IP
Address.
Use the same procedure to reset the Subnet Mask and Gateway settings to
those appropriate for your network.
Once this has been done, click on the OK button and the new settings will be
stored by the AirAura. When the “You must reboot for the changes to take effect”
message appears, reboot the AirAura by removing its AC power for a few
seconds and then reconnecting it. Once AirAura finishes booting up it will be
operating on the new network settings.
If, after the AirAura boots up the front panel is not showing activity, recheck the
network settings to ensure that they are what you expect them to be. If the Main
DSP board and front panel are on different network address ranges they will not
be able to communicate.
Appendix B
Default Factory Wireless Ethernet Configuration
- Modifying the Settings –
Introduction
AirAura utilizes an industrial grade off-the-shelf hardware solution for its wireless
interface. The benefits of using a ready-made wireless device instead of ‘rolling
our own’ are many, the most salient of them is us being released from the
tedious task (and high cost) of having an RF-based design tested and approved
by myriad various worldwide regulatory agencies.
The device we chose for AirAura is manufactured by Quatech of Hudson, Ohio
USA, model number WLNG-ET-DP501 and is shown in the photo below.
This device is a wired to wireless Ethernet
bridge. Ethernet bridges incorporate Network
Address Translation, or NAT, into their router
schemes in order to be able to sort out traffic
to/from the two sides of the bridge. The
module is compliant with NAT3 standards.
NAT requires that the IP addresses on each
side of the interface be different so that it
knows what data to forward to which port. If you’ve been remembering what
you’ve previously read in this document you’ve probably also noticed that the
factory default IP addresses for the remote GUI are different for AirAura’s wired
and wireless interfaces. According to NAT rules, this configuration is a must!
The wireless interface is equipped with two diversity transmit and receive
antennas in order to provide maximum operational range. The antennas supplied
with the AirAura product are type approved for use with the module.
The module supports worldwide WiFi frequency bands and channel assignments.
The frequency band to use can be configured within the web-based configuration
dialog by selecting the region where the module will be used.
Selecting a region automatically brings up the correct frequencies and channels
approved for use in that region.
As shipped from our factory the module is configured to use the United States
approved frequency bands but may be factory configured to utilize other bands
upon request.
Factory Default Configuration
The following are the Vorsis factory defaults for the most important parameters of
the module’s basic configuration.
Wireless LAN Connection Type:
Wireless LAN Channel:
SSID:
Wireless Data Rate:
Wireless LAN Region:
WLAN Security:
WLAN DHCP:
WLAN Static IP Address:
WLAN Subnet Mask:
WLAN Gateway Address:
Ethernet DHCP:
Ethernet Static IP Address:
Ethernet Subnet Mask:
Ethernet Gateway IP Address:
Ethernet Role:
MAC Cloning:
Ethernet Port Speed/Duplex:
AdHoc
1
AIRAURA
Auto
United States
Disabled
Disabled
192.168.2.100
255.255.255.0
192.168.2.110
Disabled
192.168.1.200
255.255.255.0
192.168.1.1
Router
Disable
Auto-negotiate
The block diagram shown below illustrates how the remote GUI and AirAura
communicate with each other via the wireless interface.
In most circumstances it is not necessary to reconfigure the wireless side
address (the 192.168.2.100 address that the remote GUI uses to connect via
wireless) because it is the wired side of the interface that is normally attached to
a station’s local area network.
An important concept to remember about how the wireless module functions is
that the Ethernet IP address of the module isn’t its IP address – it’s the IP
address to which packets received on the wireless side are forwarded to.
Also, the Gateway address of the module’s wired side is the IP address that a
web browser should be pointed in order to log in and modify the module’s
networking configuration.
Changing the Configuration
With the AirAura directly connected to a PC that is not connected to any external
wired networks, open a web browser and enter the IP address of 192.168.1.1 in
the URL address field (see below).
At the login prompt, enter the credentials “dpac” for the User name and “dpac” for
the Password – both are lowercase.
Once valid credentials are entered and the OK button is pressed, a module
status page should appear.
In the selection bar above the words “Module Status” are options for investigating
or changing the characteristics of the module. We are concerned only with the
option called “Configuration” at this time. Click this item to select it.
When the configuration page loads, select the item called “Network Settings” in
the left column. Also, unless security or the operational region needs to be
changed we are only concerned with the following entries on the “Network
Settings” page – the Vorsis factory defaults are shown here.
WLAN Static IP Address:
WLAN Subnet Mask:
WLAN Gateway Address:
Ethernet Static IP Address:
Ethernet Subnet Mask:
Ethernet Gateway IP Address:
192.168.2.100
255.255.255.0
192.168.2.110
192.168.1.200
255.255.255.0
192.168.1.1
If the IP addresses of the AirAura are modified to be compatible with the local
network and that IP address scheme is different from our factory defaults, the IP
address of the Wired side of the wireless module must also be changed.
For instance, if the AirAura’s new hardware IP address and Gateway IP address
are 66.23.77.40 and 66.23.77.1, respectively, then the entry for the Ethernet
Static IP Address should be changed to 66.23.77.40 and the Gateway IP address
changed to 66.23.77.1. Remember, the module’s Ethernet Static IP Address isn’t
really the module’s static IP address; it is the IP address where packets received
on the wireless side of the module will be forwarded.
Please keep in mind that whatever the new Gateway address is, that is the
address a web browser must now be pointed to in order to reach the module’s
configuration interface once it is restarted and the new configuration is in place.
Once changes have been made, scroll down to the bottom of the Network
Settings page and click on the “Commit” button. Then, in order for the new data
to be active the module requires a reboot. You can either reboot the AirAura
itself, or if that is inconvenient, click on the Maintenance tab of the configuration
screen (at the top center of the page) and when that page loads, click on the
“Restart Module” option in the left column of choices.
Note that once the module has been instructed to restart, the browser will lose
contact with the module until it is up and running again. Also, if the Gateway
address has been changed the browser will need to be pointed to that new
address in order to reach the configuration page.
This is important! If changing the module’s configuration moves it off of the
network address range that the host PC has been using to configure the module,
the host PC’s IP address must also be modified in order to put them both on the
same network address range again and re-enable communications.
If difficulties arise with the module configuration, please contact Vorsis Customer
Support at (252) 638-7000 or email them at [email protected].
Appendix C
General Specifications
System Headroom:
Nominal Operating Level:
>20dB
-20dBFS
Analog Line Input
Type:
Electronic Differential
Input Impedance:
> 10k ohms (bridging)
Optimum Source Impedance:
< 1k ohms
A/D Converter:
AKM5394, 192kHz, 24-bits
Digital Line Input
Data Standard:
AES3 (AES/EBU)
Data Amplitude:
Per AES3-2003 assuming maximum
allowable output signal amplitude of 2V
and minimum allowable input signal
amplitude of 200mV.
AES Receiver:
CS8416, 192kHz, 24-bits
Phase Rotator Filter Type:
4th Order Allpass.
Switchable In/Out.
High-Pass Filter
HPF Filter Class:
24dB/octave Butterworth
Frequency range:
20Hz – 300Hz
HPF Insert Modes:
Off / Stereo L/R / Sum/Difference
AGC Crossover:
Phase Linear, fully adjustable
Multiband AGC:
5-Band, w/embedded compressor
Operates in Sum/Difference – coupled
at AGC time constant.
Stereo Enhancement:
Post Multiband AGC – 0 to +6db.
Spectral EQ available on difference
channel.
Multiband FM Limiter:
31-bands, proprietary ‘no-swish’ design.
May be operated as 31-band, 10-band,
or Timbral-coupled.
Pre-emphasis:
50 or 75 microseconds, plus OFF.
May be placed pre-or post 31-band
limiter.
Final Peak Control:
“AirAura” distortion cancelled spectral
clipper, hard or soft mode available.
Lookahead limiter – may be operated in
combination with distortion cancelled
clipper.
FM Digital Output:
AES 3-pin XLR (digital)
De-emphasis:
Complementary as applied in preemphasis.
Pre or post diversity delay
AES Transmitter:
CS8406, 192kHz, 24-bits
Diversity Delay Range:
0 to 10.0 seconds.
FM Analog Output:
Stereo Analog – Balanced Line Level
(pair 3-pin XLR connectors).
Maximum Output Level:
+24dBu into 600 ohms
Load Impedance:
600 ohms or greater
D/A Converter:
AKM4396 ‘Miracle DAC’ 192kHz, 24-bits
Multiband HD Limiter:
31-bands, proprietary ‘no-swish’ design.
May be operated as 31-band, 10-band,
or Timbral-coupled.
Low-IM final lookahead limiter
HD Digital Output:
AES 3-pin XLR (digital)
Phase:
Left and Right channels may be phasereversed.
Channel Swap:
Left and Right Channels may be
swapped.
AES Transmitter:
CS8406, 192kHz, 24-bits
HD Analog Output:
Stereo Analog – Balanced Line Level
(pair 3-pin XLR connectors)
Maximum Output Level:
+24dBu into 600 ohms
Load Impedance:
600 ohms or greater
D/A Converter:
AKM “Miracle DAC’ 192kHz, 24-bits
Stereo Encoder Type:
DSP-based Ultra-linear DSBSC
Multiplier.
Stereo Width Limiter:
10% to 100% in 10% steps, plus off.
Stereo Pilot Injection:
0 – 20%, 0.1% steps
Stereo Pilot Stability:
Better than +/- 1.0Hz.
Stereo Pilot Phase:
+/- 22.5 degrees referenced to 38kHz.
Composite Processor:
Oversampled clipper – hard and soft
modes or Lookahead Limiter.
Baseband Filters:
19kHz Pilot protection + >53kHz SCA
protection.
SCA 1/2 Input Type:
Analog
Input Impedance:
10k ohms
Maximum Input Level:
+24dBu maximum
SCA Input 1/2 Gain:
-79.95dB to +10.00dB, or OFF
A/D Converter:
AKM5394, 192kHz, 24-bits
TX -1/TX-2 Output Level:
-79.95dB to +6.0dB, 0.05dB steps, or
OFF
Composite Multiplex Outputs:
Unbalanced, floating over ground.
D/A Converter:
AKM ‘Miracle DAC’ 192kHz, 24-bits
Connector:
BNC (2) floating over ground.
Balanced Line Level (pair 3-pin XLR
connectors).
Output Levels - BNC:
1V - 4V RMS
Output Levels – Balanced XLR:
+24dBu maximum
Connectors:
3-pin XLR (2)
Ethernet Interface:
100BaseT, Auto MDIX
Connectors:
Two - rear panel RJ-45 female.
Wireless Interface:
Quatech WLNG-ET-DP501
Antennas:
Two - Diversity receive.
Operating Modes:
802.11b/802.11g
Routing Method:
NAT3
Special Marking:
Using FFC grant:
Using IC grant:
FCC/CE Certification:
Class A Device. Contact the factory for
specific details.
AC Power Requirements:
90-250V AC/DC, AC 50-400Hz
~65VA at 120V AC input
Shipping Weight:
29lbs / 13.16kg
F4AWLNG1
3913A-WLNG1
Appendix D
Wireless Module Approvals
and
Miscellaneous Data
AirAura’s 802.11/a/g wireless interface is a high quality, off-the-shelf product
manufactured by Quatech of Hudson, Ohio USA.
Complete documentation for the module including very detailed configuration
options can be found in the Airborne Wireless Ethernet Bridge Modules section
of the Quatech website:
http://www.quatech.com/catalog/airborne_ethernet_modules.php
The wireless module is type approved in the US, Canada, and Europe, with
certification pending in Japan (as of this writing). To comply with the regulations
dealing with embedded wireless devices, the rear panel of the AirAura is so
marked as required by law:
Using FFC grant: F4AWLNG1
Using IC grant: 3913A-WLNG1
Quatech’s contact information is below:
QUATECH ® Inc..
5675 Hudson Industrial Parkway
Hudson, OH 44236
USA
Telephone: 330-655-9000
Toll Free (USA): 800-553-1170
Fax: 330-655-9010
Technical Support: 714-899-7543
Email: [email protected]
Web Site: www.quatech.com
Typical Usable Wireless Range
The following table illustrates the typical data rates, performance and range of
the wireless module that can be expected when using the omni directional
diversity antennas supplied with AirAura.
Data Rate
Typical Outdoor Range
Typical Outdoor Range
Unity Gain Antennas
2dBi Antennas Each End
1.0 Mb/s
240m / 787 ft
380m / 1247 ft
11.0 Mb/s
135m / 443 ft
215m / 705 ft
6 Mb/s 802.11/g
135m / 443 ft
215m / 705 ft
6 Mb/s 802.11/a
49m / 160 ft
155m / 508 ft
54 Mb/s 802.11/g
12m / 39 ft
19m / 62 ft
54 Mb/s 802.11/a
4.5m / 15 ft
14m / 46 ft
Ranges are based on a combination of receiver sensitivity, transmitter power,
free-space path loss, antenna gain factors, and link margin. Actual range will
almost always vary from those stated and be less. Non-line-of-site applications
will result in values even less than shown in the above table.
The listed “Data Rate” is the supported connection rate for the wireless link
including
handshaking.
Because
handshaking
(to
ensure
reliable
communications) utilizes a small portion of the stated data rate, the actual data
throughput for the link to/from the AirAura and its GUI will be somewhat less than
that stated in the first column.
IMPORTANT NOTE
AirAura utilizes an efficient scheme to send data to and from the remote GUI.
This data rate is far less than the 1Mb/s rate that we’ve configured in the module
as the factory default.
There is NO advantage to forcing the module to communicate using higher data
rates. In fact, the above table should make it quite clear that exactly the opposite
is true – “forced” high speeds can result in an unreliable connection, even at very
modest distances.
Many months of field experience with AirAura and its wireless interface operating
in all kinds of situations has confirmed that the 1Mb/s data rate chosen as our
factory default data rate provides very good coverage and excellent usability.
Transmitter Power
Transmit power is automatically managed by the device for best range and
minimum power consumption. The maximum transmit power available at the
module’s RF connectors is typically +15dBm ± 2 dB for B-Mode (all rates) and
+12dBm+/-2dB for G-Mode (all rates). The RF power at AirAura’s rear panel WiFi
connectors will be somewhat less than this due to losses in the interconnecting
coaxial cables.
Antennas
Any customer supplied antenna used with AirAura must be designed for
operation within the 2.4GHz ISM band and more specifically, must support the
2.412GHz to 2.482GHz bands for 802.11b/g operation. Antennas are required to
have a VSWR of 2:1 maximum, referenced to a 50Ω system impedance. The
antennas supplied with AirAura have been certified for use with the wireless
module.
Performance
Wireless “performance” in an actual application is a very difficult parameter to
define, mainly because the appropriate metric changes with each operational
situation. Performance is always a combination of parameters, some (such as
natural obstructions) are not usually under the control of the AirAura customer.
The underlying characteristic that needs to be observed for best performance is
the link quality, not link speed. Link quality can be defined as “the bandwidth
available over which communication between the AirAura and the host GUI can
efficiently occur”. The lower the link quality the less likely the two can
communicate.
Appendix E
AirAura GPIO Interface
AirAura is equipped two GPIO (General Purpose Input/Output) control interfaces;
an eight input optoisolated interface for selecting presets in the first eight memory
slots and a four output optoisolated interface that can be used to remotely signal
status about the processor.
GPI – General Purpose Input
The GPI interface provides eight separate General Purpose Inputs which share a
common DC return. The interface connector is a female DB-9 connector with the
following pin assignments. Note that all pins are isolated from AirAura internal
circuitry!
GPI Input Number
One
Two
Three
Four
Five
Six
Seven
Eight
Common Return
DB-9 Connector Pin Number
Pin 6
Pin 2
Pin 7
Pin 3
Pin 8
Pin 4
Pin 9
Pin 5
Pin 1
The GPI input circuits are optoisolated by devices having exceptional
input/output isolation. These inputs are designed to work very well in high RF
environments and should not cause ground loop issues when connected to
external equipment.
Each of the GPI inputs is current limited by a 475 ohm internal resistance. The
LED device inside the optoisolators is rated at a maximum forward current of
50mA and a normal operating current of 5mA.
Before connecting external circuitry to the GPI inputs,
first ascertain whether it will be necessary to utilize
additional outboard series resistance in your application!
Use the following table to determine if an external resistance is required and if
so, what value it should be. Note that a one-half watt resistor is sufficient. The
resistance values in the table below have been calculated to result in
approximately 5.0 milliamps forward current through the optoisolator’s internal
LED.
Applied Voltage to GPI
3.3 Volts
5.0 Volts
6.0 Volts
7.5 Volts
10 Volts
12 Volts
15 Volts
24 Volts
30 Volts
*48 Volts*
External Resistance
None
330 Ohms
470 Ohms
820 Ohms
1.3 k Ohms
1.8 k Ohms
2.4 k Ohms
3.9 k Ohms
5.1 k Ohms
9.1 k Ohms
* For personnel safety reasons voltages in excess of 48VDC is NOT
recommended to be applied to the GPI interface.
Example Schematic of General Purpose Inputs
GPO – General Purpose Output
Note: In Version 0.2.0 software (current as of May 2010) the GPO functions are
disabled. An upcoming software release will re-enable this function and add
additional functionality to the GPO interface.
AirAura provides four General Purpose Output (GPO) circuits that may be used
in a variety of ways. Like the GPI circuits, the GPO interface utilizes optoisolators
in order to provide high electrical isolation from the outside world.
Unlike the GPI circuits each of the GPO’s has completely isolated return circuits
— that is, unlike the GPI port they do not share a common return. Because of
this each GPO may be used in any way the end user chooses without regard to
cross coupling between unrelated external circuits.
The optoisolators on the GPO interface are rated at a maximum isolation of 350
Volts AC or DC. Because of their “AC” input rating, the polarity of external circuit
polarity is unimportant and therefore the GPO pins are simply defined as
“Source” and “Return”.
The MAXIMUM permissible load current is 100 milliamps (0.10Amperes).
The pin assignments for the rear panel DB-9 GPO connector is as follows:
GPO Number
One
Two
Three
Four
Source Pin
2
3
4
5
Note that Pin 1 has no connection.
Return Pin
6
7
8
9