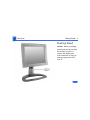
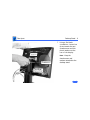
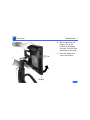
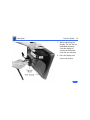
1
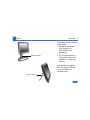
K Service Source Apple Studio Display K Service Source Basics Apple Studio Display Basics Overview - 1 Overview The Apple Studio Display (15.1-inch diagonal image size) is a high-quality, flat panel, XGA desktop monitor for the Macintosh and PC platforms. The display size and weight benefits from an LCD display with a unique Apple ID and system architecture. The design is both ergonomic and flexible. Click the icon at left for a QuickTime VR movie of the Apple Studio Display. Basics Overview - 2 Desktop Stand The display can be used with either stand: • Desktop Stand allows a wide range of tilt, swivel, and height adjustment • Flip-Out Stand allows a fixed, table-top position optimal for single-user viewing Both stands are supplied with the display, and they are also available as separate parts. Flip-Out Stand Basics Features - 3 Features The Apple Studio Display includes the following key features: • Small footprint, lightweight, and adjustable mechanical mounting • 1024 x 768 fixed resolution display format • 24-bit color • High brightness • Standard RGB, analog interface • DDC1/2B for cross platform compatibility • Full screen, direct NTSC/PAL/SECAM playback • Mini-stereo connector for audio Basics U.S. Repair Strategy - 4 U.S. Repair Strategy The Apple Studio Display is serviced through the service facilitation process. Customers may choose carry-in repair service through an Apple Authorized Service Provider (AASP) who will then facilitate a mail-in repair or customers can receive mail-in service from Apple directly. Ordering Apple Service Providers planning to support the Apple Studio Display may facilitate service by calling 800-9192775 and selecting option #6. For more details on this facilitation process, please refer to the Facilitation Process in the archived service notices section of the Service Source CD.(Open the Notices Archive folder at the top level of the Main CD. The complete path is Basics U.S. Repair Strategy - 5 Notices Archive: Service Notices Archive: Service Source Startup: Service Information: Notices: Service Notices: Archived List: Facilitation Process.) Parts To order replacement parts, use the AppleOrder system and refer to Apple Studio Display in the “Service Price Pages.” Large businesses, universities, and K-12 accounts must provide a purchase order on all transactions, including orders placed through the AppleOrder system. Service providers not enrolled in AppleOrder may fax their orders to Service Provider Support (512-908-8125) or mail them to the following address: Basics U.S. Repair Strategy - 6 Apple Computer, Inc. Service Provider Support MS 212-SPS Austin, TX 78714-9125 If you have further questions, please call Service Provider Support at 800-919-2775 and select option #1. Warranty and AppleCare The Apple Studio Display is covered under the Apple OneYear Limited Warranty. The AppleCare Service Plan is also available for this product. Service Providers are reimbursed for warranty and AppleCare repairs facilitated for this display. For pricing information, refer to “Service Price Pages.” Basics Canada Repair Strategy - 7 Canada Repair Strategy The service strategy for the Apple Studio Display is wholeunit replacement in Canada. To prevent “no fault found” returns on the unit, Apple Canada implements the following procedure when an Apple Authorized Service Provider requires service support: 1 2 The service provider calls Escalation Support Austin (ESA) for technical support at 1-800-217-9517, option #1, #3. Important: Service providers, have your 10-digit service account number (beginning with 61) ready. The ESA phone agent works with the service provider to troubleshoot the unit over the phone. • If the ESA phone agent determines the issue to be related to setup or software, he/she will advise. Basics Canada Repair Strategy - 8 • If the ESA phone agent determines the issue to be hardware related, he/she will transfer the service provider to Service Provider Support Administration (SPS) along with a case ID number. 3 Note: ESA and SPS have different operating hours, so it might be necessary to call SPS the next working day. Call SPS at 905-513-5782, option #3. Be sure to have the case ID number ready. Using the Apple part number, the SPS phone agent places an order for the service provider over the phone. The SPS phone agent then provides the sales order number to the service provider, updates the Vantive issue, and then closes the issue. Basics Front View - 9 Front View The front underside of the display includes the following controls: • Reset button • OSD (On-Screen Display) on/off • OSD navigation • OSD adjustment • Video source • Brightness control • Power button For information on adjusting the display, refer to the Adjustments chapter. Basics Back View - 10 Back View AV Door Cable Door ADB Ports Desktop Stand From the back of the display, you can see • AV door • Cable door • Desktop stand • ADB ports Basics Back View - 11 AV Door Behind the AV door are the following ports: • Audio output • Audio input left • Audio input right • C-video (composite) input • S-video input Basics Back View - 12 Cable Door Behind the cable door are the • Display cable • Power adapter cable • ADB cable port Basics Back View - 13 Desktop Stand The neck of the desktop stand can be raised or lowered for optimum viewing height. The back of the desktop stand includes a cable guide for easily routing cables. Basics Back View - 14 ADB Ports Two ADB ports are provided on the base of the desktop stand. The ADB ports support input devices such as a keyboard, mouse, or trackball. K Service Source Specifications Apple Studio Display Specifications Introduction - 1 Introduction Specifications information for the Apple Studio Display can be found in this chapter and also in the Spec Database, which you can access in one of three ways: • Launch it directly by double-clicking the Apple Spec Database runtime alias at the top level of the Main Service Source CD. • Select “Apple Spec Database” from the Service Source dropdown main menu. • Click the Acrobat toolbar icon for the database, which is near the right end of the toolbar with the letters “SP.” Specifications Characteristics - 2 Characteristics Flat Panel Display Desktop Stand Flip-Out Stand 15.1-inch viewable diagonal screen, active matrix thin film transistor (TFT) liquid crystal display (LCD) 1024 x768 active pixels Colors: 16 million (maximum) Tilt adjustment: –10° downward and +45° upward Swivel adjustment: ±45° Height adjustment: 4.4 inches (110 millimeters) Tilt +15° Specifications Screen Resolution Cable Connector Characteristics - 3 640x480 at 59.9 Hz in VESA VGA mode 640x480 at 66.7 Hz in Mac VGA mode 640x480 at 72.8 Hz in VESA VGA mode 640x480 at 75.0 Hz in VESA VGA mode 720x400 at 70.1 Hz in VGA Text mode 800x600 at 56.3 Hz in VESA SVGA mode 800x600 at 60.3 Hz in VESA SVGA mode 800x600 at 72.2 Hz in VESA SVGA mode 800x600 at 75.0 Hz in VESA SVGA mode 832x624 at 74.6 Hz in Mac 16” mode 1024x768 at 60.0 Hz in VESA XGA mode 1024x768 at 70.1 Hz in VESA XGA mode 1024x768 at 74.9 Hz in Mac XGA mode 1024x768 at 75.0 Hz in VESA XGA mode 15-pin miniature D-type Standard 15-pin VGA Specifications System Requirements Characteristics - 4 Power Macintosh or other Mac OS-based systems with PowerPC processors running Mac OS 7.5 or later Windows 95- and Windows NT-based systems Note: The Apple Studio Display is NOT compatible with the following products: •Mac OS-compatible computers NOT using a PowerPC processor (680x0-based computers) •PowerBook 1400-series computers •PowerBook Duo 2300-series computers •PowerBook 3400-series computers •PowerBook 5300-series computers •Apple 8*24 graphics card •Apple 8*24AC graphics card •Apple 24AC graphics card •Apple PowerBook products that have been modified with a Power PC upgrade card Specifications Characteristics - 5 •Apple desktop, minitower or tower products that have been modified with a Power PC upgrade card •Radius ThunderColor 30/1600 graphics card The Apple Studio Display may not be fully compatible with some NuBus graphics cards and some third-party PCI graphics cards. Specifications Characteristics - 6 Monitor Timings 640x480 Resolution @ 59.9 Hz 640x480 Resolution @ 66.7 Hz Horizontal Timing H Freq: 31.469 kHz Back Porch: 48 clocks H SYNC: 96 clocks Front Porch: 16 clocks H Line: 800 clocks Pixel Clock: 25.175 MHz Horizontal Timing H Freq: 35 kHz Back Porch: 96 clocks H SYNC: 64 clocks Front Porch: 64 clocks H Line: 864 clocks Pixel Clock: 30.24 MHz Vertical Timing V Frame: 525 lines Back Porch: 33 lines V SYNC: 2 lines Front Porch: 10 lines Vertical Timing V Frame: 525 lines Back Porch: 39 lines V SYNC: 3 lines Front Porch: 3 lines Specifications Characteristics - 7 Monitor Timings 640x480 Resolution @ 72.8 Hz 640x480 Resolution @ 75.0 Hz Horizontal Timing H Freq: 37.861 kHz Back Porch: 128 clocks H SYNC: 40 clocks Front Porch: 24 clocks H Line: 832 clocks Pixel Clock: 31.500 MHz Horizontal Timing H Freq: 37.500 kHz Back Porch: 120 clocks H SYNC: 64 clocks Front Porch: 16 clocks H Line: 840 clocks Pixel Clock: 31.500 MHz Vertical Timing V Frame: 520 lines Back Porch: 28 lines V SYNC: 3 lines Front Porch: 9 lines Vertical Timing V Frame: 500 lines Back Porch: 16 lines V SYNC: 3 lines Front Porch: 1 line Specifications Characteristics - 8 Monitor Timings 720x400 Resolution @ 70.1 Hz 800x600 Resolution @ 56.3 Hz Horizontal Timing H Freq: 31.4689 kHz Back Porch: 55 clocks H SYNC: 108 clocks Front Porch: 17 clocks H Line: 900 clocks Pixel Clock: 28.322 MHz Horizontal Timing H Freq: 35.156 kHz Back Porch: 128 clocks H SYNC: 72 clocks Front Porch: 24 clocks H Line: 1024 clocks Pixel Clock: 36.0 MHz Vertical Timing V Frame: 449 lines Back Porch: 34 lines V SYNC: 2 lines Front Porch: 13 lines Vertical Timing V Frame: 625 lines Back Porch: 22 lines V SYNC: 2 lines Front Porch: 1 line Specifications Monitor Timings Characteristics - 9 800x600 Resolution @ 60.3 Hz 800x600 Resolution @ 72.2 Hz Horizontal Timing H Freq: 37.879 kHz Back Porch: 88 clocks H SYNC: 128 clocks Front Porch: 40 clocks H Line: 1056 clocks Pixel Clock: 40.0 MHz Horizontal Timing H Freq: 48.077 kHz Back Porch: 64 clocks H SYNC: 120 clocks Front Porch: 56 clocks H Line: 1040 clocks Pixel Clock: 50.0 MHz Vertical Timing V Frame: 628 lines Back Porch: 23 lines V SYNC: 4 lines Front Porch: 1 line Vertical Timing V Frame: 666 lines Back Porch: 23 lines V SYNC: 6 lines Front Porch: 37 lines Specifications Monitor Timings Characteristics - 10 800x600 Resolution @ 75.0 Hz 832x624 Resolution @ 74.6 Hz Horizontal Timing H Freq: 48.875 kHz Back Porch: 160 clocks H SYNC: 80 clocks Front Porch: 16 clocks H Line: 1056 clocks Pixel Clock: 49.5 MHz Horizontal Timing H Freq: 49.725 kHz Back Porch: 224 clocks H SYNC: 64 clocks Front Porch: 32 clocks H Line: 1152 clocks Pixel Clock: 57.2832 MHz Vertical Timing V Frame: 625 lines Back Porch: 21 lines V SYNC: 3 lines Front Porch: 1 line Vertical Timing V Frame: 667 lines Back Porch: 39 lines V SYNC: 3 lines Front Porch: 1 line Specifications Monitor Timings Characteristics - 11 1024x768 Resolution @ 60.0 Hz 1024x768 Resolution @ 70.1 Hz Horizontal Timing H Freq: 48.363 kHz Back Porch: 160 clocks H SYNC: 136 clocks Front Porch: 24 clocks H Line: 1344 clocks Pixel Clock: 65 MHz Horizontal Timing H Freq: 56.476 kHz Back Porch: 144 clocks H SYNC: 136 clocks Front Porch: 24 clocks H Line: 1328 clocks Pixel Clock: 75.0 MHz Vertical Timing V Frame: 806 lines Back Porch: 29 lines V SYNC: 6 lines Front Porch: 3 lines Vertical Timing V Frame: 806 lines Back Porch: 29 lines V SYNC: 6 lines Front Porch: 3 lines Specifications Monitor Timings Characteristics - 12 1024x768 Resolution @ 74.9 Hz 1024x768 Resolution @ 75.0 Hz Horizontal Timing H Freq: 60.241 kHz Back Porch: 176 clocks H SYNC: 96 clocks Front Porch: 32 clocks H Line: 1328 clocks Pixel Clock: 80.0 MHz Horizontal Timing H Freq: 60.023 kHz Back Porch: 176 clocks H SYNC: 96 clocks Front Porch: 16 clocks H Line: 1312 clocks Pixel Clock: 78.750 MHz Vertical Timing V Frame: 804 lines Back Porch: 30 lines V SYNC: 3 lines Front Porch: 3 lines Vertical Timing V Frame: 800 lines Back Porch: 28 lines V SYNC: 3 lines Front Porch: 1 line Specifications Controls and Ports - 13 Controls and Ports User Controls I/O Ports Power on/off button, Brightness control switch, Video source select switch, Reset button (for format reset and system reset), five On-Screen Display (OSD) navigation switches One Apple Desktop Bus (ADB) port on the back of the display supporting an ADB input device (such as a keyboard, mouse, or trackball) or the ADB cable connected to the desktop stand Two ADB ports on the desktop stand supporting ADB input devices (such as a keyboard, mouse, or trackball) Audio output port RCA audio input ports, left and right Super VHS video (S-video) input port Composite video (C-video) input port Specifications Physical and Electrical - 14 Physical and Electrical Power Supply Power Adapter Size and Weight Voltage: 100–120 VAC; 220–240 VAC Frequency: 50–60 Hz Power: 35 W maximum 100–240 VAC line voltage 45 W, 50–60 Hz Dimensions of Display (with Desktop Stand) Height/minimum: 15.0 in. ± 0.2 in. (375 mm ± 5 mm) Height/maximum: 19.3 in. ± 0.2 in. (483 mm ± 5 mm) Width: 15.7 in. ± 0.2 in. (393.6 mm ± 5 mm) Depth: 9.8 in. ± 0.2 in. (249 mm ± 5 mm) Weight of Display (with Desktop Stand): 12.1 lb (5.5 kg) Specifications Physical and Electrical - 15 Dimensions of Display (with Flip-Out Stand) Height: 11.6 in. ± 0.2 in. (297 mm ± 5mm) Width: 15.7 in. ± 0.2 in. (393.6 mm ± 5 mm) Depth: 6.9 in. ± 0.2 in. (184.5 mm ± 5 mm) Weight of Display (with Flip-Out Stand): 7.7 lb (3.5 kg) Specifications Environmental - 16 Environmental Temperature Humidity Altitude Operating: 50°F to 95°F (10°C to 35°C) Shipping (up to 72 hours): –40°F to +149°F (–40°C to +65°C) Storage (up to 6 months): -4°F to 140°F (-20°C to 60°C) Operating: 10% to 80%, noncondensing Shipping (up to 72 hours): 5% to 95%, noncondensing Storage (up to 6 months): 5% to 95%, noncondensing Operating: 0 to 10,000 ft. (0 to 3,030 m) Transit: 0 to 35,000 ft. (0 to 10,606 m) Specifications Power Saving Feature Environmental - 17 Conforms to the Energy Star Program of the United States Environmental Protection Agency TCO 95 compliant: Certified by TCO (the Swedish Confederation of Professional Employees) to have met global safety standards and energy-saving features such as automatic power-saving mode and reduced electromagnetic fields Apple Studio Display The Apple Studio Display combines state-of-the-art digital imaging technology with advanced software-based features unique to Apple. The result is a highperformance flat-panel display that’s ideal for anyone who spends a lot of time manipulating text, graphics, and other media on-screen. Whether you’re a multimedia content creator, a designer, a writer, an educator, or an accountant, the Apple Studio Display can make your job look a lot better to you— and vice versa. The thin film transistor (TFT) active-matrix LCD technology used by the Apple Studio Display enables it to offer outstanding brightness, contrast ratio, and sharpness—for optimal viewing. It also provides an impressively wide viewing angle, as well as completely eliminating screen flicker. And the Apple Studio Display offers all of this performance in a product that’s a fraction the size of a traditional computer monitor. Probably the most distinguishing feature of this display, though, is the advantage it takes of Apple’s outstanding hardware/software integration. In the case of the Apple Studio Display, this enables an unmatched combination of “smart features” and superior software controls—adding up to an extraordinarily flexible, responsive device with which to view your work. In fact, the Apple Studio Display can make that eight-plus hours per day you spend in front of your computer significantly more productive—and surprisingly more pleasant. If you deal primarily with graphics, you’ll be glad to know that the Apple Studio Display requires no special graphics adapter to work seamlessly with your computer. If you deal more with multimedia, you’ll appreciate its built-in connectors for composite and S-video as well as audio input. And if what you deal with most frequently is a combination, you’ll find the display’s ability to shift instantly between graphics and video modes invaluable. The Apple Studio Display—when you look at all of its high-performance capabilities, you’ll really like what you see. Features Spectacular display performance • Offers outstandingly crisp, clear images using thin film transistor (TFT) active-matrix liquid crystal display (LCD) technology • Produces a distortion-free image without any time-consuming geometric correction • Enables flexible viewing through its wide (120° horizontal) viewing angle • Includes composite and S-video connectors, so you can easily display full-screen video • Eliminates screen flicker Stunning style • Takes up a fraction of the space required by a traditional display • Includes tilt-and-swivel and height adjustments for optimal viewing comfort • Offers an alternate picture-frame stand that can further minimize its desktop footprint • Provides easy access to audio/video connectors and screen-control buttons • Reduces cable clutter through an integrated cable guide • Complies with the strict global TCO 95 standards for low power consumption, low emissions, and recyclability Outstanding hardware/software integration • Offers an unmatched combination of “smart” features and superior software user controls • Features smart scaling, which provides fullscreen, high-quality viewing of graphics and video at varying resolutions • Ensures the best possible performance regardless of display/graphics card or analog input from the computer, through accurate, easy phase adjustment • Makes it easy to “optimize” your viewing experience using a unique software-based tool that gives you precise, integrated control over white level, black level, and brightness Apple Studio Display Technical Specifications Screen size • 15.1 inches (diagonal viewable image size) Screen treatment • Antistatic, antireflective coating Screen type • Thin film transistor (TFT) active-matrix liquid crystal display Connectors and cables • Input — 15-pin D-sub for RGB video — 4-pin DIN for S-video — Three 4-pin DIN connectors for Apple Desktop Bus — RCA-type connector for composite video — Two RCA-type connectors for audio (left, right) — 65mm DC connector for DC input • Output — Mini-stereo connector for audio Display colors • 16 million (maximum) Viewing angle (typical) • 120° horizontal; 90° vertical Brightness (typical) • 200 cd/m2 Contrast ratio (typical) • 200:1 Resolution and screen refresh rates • 640 by 480 pixels at 60 Hz, 67 Hz, 72 Hz, or 75 Hz • 720 by 400 pixels at 70 Hz • 800 by 600 pixels at 56 Hz, 72 Hz, or 75 Hz • 832 by 624 pixels at 75 Hz • 1,024 by 768 pixels at 60 Hz, 70 Hz, 74.9 Hz, or 75 Hz User controls (hardware and software) • Power on/off • Graphics/video toggle • Brightness • Reset • On-screen display navigation — Menu position (vertical, horizontal) — Information (display status) — Language — Function adjustment — Menu off • On-screen display functions — Tracking (coarse, fine) — Position (vertical, horizontal) — Black level — Sharpness — White point Power supply electrical requirements • Line voltage: 100 to 240 V AC • Frequency: 50 to 60 Hz, single phase • Power: less than 35W (operating) Agency approvals • FCC Part 15 Class B • CISPR 22 Class A (EN500821f)—complies with European EMC directive • DOC Class B • MPR-II • VCCI Class 2 • CE Mark • EPA Energy Star compliant • IEC 950 • EN60950 • NUTEK • TCO 95 System requirements • Works with Power Macintosh or other Mac OS– based systems with PowerPC processors running Mac OS 7.5 or later* • Works with Windows 95– and Windows NT– based systems Size and weight • With desktop stand: 15.0 inches (minimum) to 19.3 inches (maximum) by 15.7 inches by 9.8 inches (38.1 cm to 49.0 cm by 39.9 cm by 24.9 cm) • With picture-frame stand: 11.6 inches by 15.7 inches by 6.9 inches (24.9 cm by 39.9 cm by 17.5 cm) • With desktop stand: 12 lb. (5.5 kg) • With picture-frame stand: 7.7 lb. (3.5 kg) *Does not work with Macintosh PowerBook 1400 or 5300 systems or with PowerBook Duo 2300 systems. Environmental requirements • Operating temperature: 50° to 95° F (10° to 35° C) • Storage temperature: -4° to 140° F (–20° to 60° C) • Operating humidity: 10% to 80%, noncondensing • Storage humidity: 5% to 95%, noncondensing • Operating altitude: 0 to 10,000 feet (0 to 3,048 m) • Shipping: 0 to 35,000 feet (0 to 10,606 m) Ordering Information Apple Studio Display Order No. M6356LL/A • Apple Displays software (with ColorSync profile) • VGA adapter • Power cord and adapter • Picture-frame stand • User’s manual • Limited warranty Apple Computer, Inc. 1 Infinite Loop Cupertino, CA 95014 (408) 996-1010 www.apple.com For more information For more information about this product, or to find out where to buy Apple products—through a reseller or from the Apple Store—visit www.apple.com or call 1-800-538-9696. © 1998 Apple Computer, Inc. All rights reserved. Apple, the Apple logo, Mac, Macintosh, PowerBook, PowerBook Duo, and Power Macintosh are trademarks of Apple Computer, Inc., registered in the U.S.A. and other countries. The Apple Store is a trademark of Apple Computer, Inc. PowerPC is a trademark of International Business Machines Corporation, used under license therefrom. Other product and company names mentioned herein may be trademarks of their respective companies. Mention of non-Apple products is for informational purposes only and constitutes neither an endorsement nor a recommendation. Apple assumes no responsibility with regard to the selection, performance, or use of these products. All understandings, agreements, or warranties, if any, take place directly between the vendors and the prospective users. Product specifications are subject to change without notice. April 1998 L02844C K Service Source Troubleshooting Apple Studio Display Troubleshooting General - 1 General The Symptom Charts included in this chapter will help you diagnose specific symptoms related to your product. Because cures are listed on the charts in the order of most likely solution, try the first cure first. Verify whether or not the product continues to exhibit the symptom. If the symptom persists, try the next cure. For additional assistance, contact Apple Technical Support. For general troubleshooting tips, go to the Adjustments chapter and click the icon for the linked user’s manual. In the linked user’s manual, refer to Chapter 6, “Tips and Troubleshooting.” Troubleshooting Symptom Charts/No Raster - 2 Symptom Charts No Raster No raster (screen is black); green power indicator light on 1 2 3 4 Verify computer signal by connecting a known-good monitor. Then disconnect the known-good monitor and reconnect the Apple Studio Display. Ensure the monitor’s video cable and ADB cable are connected to the computer. Adjust front panel brightness (it may be set too low). If screen brightness has decreased over time, the most likely condition is the backlights failing. The backlights have an average life of 10,000 hours (about 40 hours per week for five years. If the display is over a year old and you suspect backlight failure, contact an Authorized Apple Dealer for replacing the backlights. US only: Call Apple Technical Support at 1-800-919-2775. Troubleshooting White screen at power on; random/ predominant screen color; controls on bottom of display do not respond Symptom Charts/No Raster - 3 1 2 3 4 With system power off, disconnect ADB cable from computer. Disconnect power to the display. Reconnect power to the display, and reconnect ADB cable to the computer. Verify keyboard's ADB cable is connected to ADB port on the Apple Studio Display's stand. Restart system to check if the symptom remains. US only: Call Apple Technical Support at 1-800-919-2775. Troubleshooting Symptom Charts/Screen Resolutions - 4 Screen Resolutions Blurry or wavy screen image at different resolutions 1 Dark screen or random images or message “Signal Outof-Range” when changing screen resolution 1 2 2 Set resolution to1024x768, and adjust Sharpness setting to the full right position. Adjust tracking in the Monitors & Sound control panel. Select another resolution. Some graphics cards may show a resolution that is not used by this display. If “Signal Out-of-Range” message doesn't go away after about 10 seconds, restart computer by holding down Shift key to turn extensions off. Open Preferences folder in System Folder and drag Display Preferences file to the Trash. Restart computer again. Troubleshooting Symptom Charts/Screen Resolutions - 5 Only one resolution available; display name or settings missing from Monitors & Sound 1 Missing resolutions; display name or settings missing from Monitors & Sound; error message reads “AppleVision failed to load completely. Error 0x00088F8” Install Apple Displays Software 1.6 (or later) that came on the CD with the Apple Studio Display. 2 Ensure ADB cable is connected to computer for software to recognize which display model you have. Ensure Apple Displays Software 1.6 (or later) is installed. Troubleshooting Symptom Charts/Miscellaneous - 6 Miscellaneous Apple Studio Display not listed in Color section of Monitors & Sound The Apple Studio Display profile does not appear in the 2.5 release of ColorSync. Select Generic LCD Display profile instead. (The Apple Studio Display profile will appear in the next release of ColorSync.) Vertical gray bar on edge of raster at 1024x768 resolution Adjust the screen position, via the Monitors & Sounds control panel, so that raster is centered on display. K Service Source Take Apart Apple Studio Display Take Apart Safety Guidelines - 1 Safety Guidelines Caution: Before handling the Apple Studio Display, ensure that you have a clean, flat work surface. Protect the display face from scratches or nicks by placing a protective film over it. Remove all jewelry that could scratch or damage the display or plastic housing. Take Apart Desktop Stand - 2 Desktop Stand Caution: Before you begin, ensure that you have a clean, flat surface to work on. Protect the display face from scratches or nicks by placing a protective film over it. Take Apart Desktop Stand - 3 1 2 Adjust the neck of the desktop stand to its highest extended position. Remove the cables from the cable guide on the desktop stand. Take Apart Desktop Stand - 4 3 4 Tilt the display so the bottom of the rear housing touches the desktop stand. Open the cable door. Take Apart Desktop Stand - 5 5 6 Remove the ADB cable from its port in the rear housing. Remove the ADB cable from the cable clamp. Take Apart Desktop Stand - 6 7 Using a flat-blade screwdriver, loosen but do not remove the two thumbscrews and thin plastic washers at the rear of the display. Note: Keep the thumbscrews and washers attached to the desktop stand. Take Apart Desktop Stand - 7 8 9 While supporting the display, tilt up the bottom of the display, and raise it off the three metal tabs on the stand. Place the display on a clean, flat surface. Take Apart Flip-Out Stand - 8 Flip-Out Stand Caution: Before you begin, ensure that you have a clean, flat surface to work on. Protect the display face from scratches or nicks by placing a protective film over it. Take Apart Flip-Out Stand - 9 1 2 Support the display at the carrying handle. Using a flat-blade screwdriver, loosen but do not remove the two thumbscrews and thin plastic washers at the rear of the display. Note: Keep the thumbscrews and washers attached to the flip-out stand. Take Apart Flip-Out Stand - 10 3 4 While supporting the display, tilt the flip-out stand down and away from the display to release the three tabs from the rear housing. Place the display on a clean, flat surface. Take Apart Audio/Video Door - 11 Audio/Video Door Before you begin, position the display with the A/V door facing you. 1 Open the A/V door. Take Apart Audio/Video Door - 12 2 Pull the A/V door away from the rear housing. Take Apart Audio/Video Door - 13 Replacement Note: Align the two hinges on the A/V door to the two small openings on the rear housing. Press the A/V door into place. K Service Source Adjustments Apple Studio Display Adjustments Linked User’s Manual - 1 Linked User’s Manual You can adjust the screen image using the controls on the front underside of the Apple Studio Display or you can use the On-Screen Display (OSD). Refer to Chapter 3 “Using Manual Controls and the On-Screen Display” in the linked Apple Studio Display user’s manual. Click the icon at left to open the user’s manual. See the next section for a quick reference for setting up and adjusting the display. Adjustments Quick Reference for Setting Up and Adjusting the Apple Studio Quick Reference for Setting Up and Adjusting the Apple Studio Display These instructions are for quickly setting up the Apple Studio Display and adjusting settings for the best screen image. Important: For detailed instructions, refer to the Apple Studio Display User’s Manual. 1 2 Plug in the display. Connect the display cable to your computer. Important: The ADB connector on the display cable is not optional. If the ADB connector is not connected, the maximum number of resolutions and software controls will not be available. Adjustments Quick Reference for Setting Up and Adjusting the Apple Studio 3 4 5 6 For a Mac OS-based computer, connect the keyboard and mouse to the desktop stand. Start up the computer. (You might see an image on the screen; this is a normal characteristic of a flat panel display.) Insert the Apple Displays Software CD into the CD-ROM drive on the computer, and install the Apple Displays Software. Restart the computer. Open the Apple () menu, choose Control Panels, then choose Monitors & Sound. Note: If you’re using a Windows-based computer, use the On Screen Display to make adjustments. For more information, refer to chapter 3 in the Apple Studio Display User’s Manual. Adjustments Quick Reference for Setting Up and Adjusting the Apple Studio 7 Make adjustments so the screen image is crisp and clear. a Set the resolution to 1024x768, which provides the sharpest image for optimal performance. Click the Monitor button at the top of the Monitors & Sound control panel. Then select a 1024x768 resolution setting in the Resolution area. b Make sure the sharpness is set to the maximum level. Click the Flat Panel button at the top of the Monitors & Sound control panel. Then move the Sharpness slider all the way to the right. c Adjust tracking to synchronize the video signal, so the screen image is not blurry or fuzzy. Click the Tracking button. In the window that appears, click + and - to change the Coarse and Fine adjustments. Adjust the controls to eliminate or minimize any horizontal and vertical lines or “noise” you see on the screen. The screen image may get slightly worse Adjustments Quick Reference for Setting Up and Adjusting the Apple Studio d e f before it sharpens. When finished, click OK. Click the buttons in the Position area to center the screen image. Make sure the black level and white level are set correctly. Click the Optimize button in the White Level & Black Level area to automatically adjust these levels to the optimal setting. (You can adjust the black level and white level separately; however, click Optimize to make sure these are always at the optimal settings.) Adjust the brightness. Click the Monitor button at the top of the Monitors & Sound control panel. Then move the Brightness slider to the desired setting. K Service Source Exploded View Apple Studio Display Exploded View Exploded View of Apple Studio Display 1