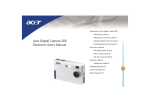
1
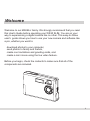
ERA
CAM DE
L
A
T
I
DIGI R'S GU
USE
Welcome
Welcome to our MAXELL family. We strongly recommend that you read
this User's Guide before operating your WS30 SLIM. You are on your
way to experiencing a digital camera like no other. This easy-to-follow
user's guide shows you how to use your new camera and software like
a pro, whether you want to:
l download photos to your computer,
l send photos to family and friends,
l create cool invitations and greeting cards, and
l create a mini movie using the live video feature.
Before you begin, check the contents to make sure that all of the
components are included.
1
Contents
Welcome.......................................................................................... 1
WS30 SLIM Kit................................................................................. 3
Meet the WS30 SLIM........................................................................3
Features & Functions ...................................................................... 4
Let's Get Started ............................................................................. 6
Taking Pictures.................................................................................7
LCD Control Panel............................................................................8
Accessing the CD............................................................................ 12
Installing the Software...................................................................... 12
Install Mr. Photo............................................................................... 13
Install ImageFolio............................................................................. 15
Install Video Works ..........................................................................17
Installing WS30 SLIM Driver.............................................................19
Getting Connected .......................................................................... 20
Fun Things You Can Do- (Digital).................................................... 21
€
Downloading Photos
To download an individual photo
Erasing Photos from WS30 SLIM
Cropping the photo
€
€
€
Fun Things You Can Do- (Video)..................................................... 24
€
Using the Video Recording Feature (Create AVI File)
Using the Video Capture Feature
Using the Video Conferencing Feature
€
€
Where to get Help............................................................................ 28
Frequently Asked Questions ........................................................... 29
Additional Information ..................................................................... 31
2
WS30 SLIM Kit
Your MAXELL WS30 SLIM Kit
includes:
1. WS30 SLIM Camera
2. AAA alkaline batteries (2)
3. Camera Strap
4. Driving utility software CD
5. USB Cable
6. Quick Start Guide
7. Leatherette camera case
8. User's guide
9. Tripod
8
9
7
Meet the WS30 SLIM
This is not your traditional camera. This is a "digital"camera. A digital
camera allows you to take pictures without the use of film.
With the WS30 SLIM, going digital is just the beginning. The WS30 SLIM is a
3-in-1, digital, PC and video camera all wrapped up in a compact camera .
Before going into creating fun projects with the WS30 SLIM, familiarize
yourself with the cameras features and functions.
3
Features & Functions Front of WS30 SLIM
l Standard Mode
The standard mode is used when taking pictures from 0.6 m (2ft) ~infinity.
l Macro Switch
This switch is used to change from Standard to Macro mode.
l Macro Mode
The macro mode is used to take close up pictures of 0.2 m (8 inch).
l USB Connector
The USB Connector is the port where you plug the USB cable into when
you want to download your photos to your computer.
l Shutter
Press the Shutter button to take a picture.
€ Optical Finder
The optical finder or viewfinder is where you look into to compose the
picture.
Shutter
Optical Finder
Standard Mode
Flash Light
Macro Switch
Macro Mode
Self-Timer Signal
USB Connector
4
Features & Functions Back of WS30 SLIM
l
Battery Cover
The battery cover secures the batteries in place.
l
Macro Mode Signal
The Macro Mode signal becomes lit when you switch from standard
mode to macro mode.
l
Busy Signal
The Busy Signal will blink if the camera is not ready to take a picture.
l
Menu Panel
The menu or control panel displays the various menu options.
l
Mode Button
Press the mode button to switch between the camera's six modes.
€
L DSC On/OFF Button
Press the DSC On/OFF button to turn the WS30 SLIM on and off.
Select Button
Press the Select button to select a menu function.
Menu Panel
Busy Signal
Macro Mode Signal
For Strap
DSC On/Off
Battery Cover
Select
Mode
5
Let's Get Started
Attaching the camera strap
Attach the camera strap as shown in the illustration below.
Figure1
Figure 2
Inserting the Batteries
l Step 1 Open the battery cover.
l Step 2 Insert the batteries properly.
L Step 3 Close and lock the battery cover.
Polarity direction
Precaution: Check the batteries for polarity. Remove the batteries if you
are not going to use the camera. Do not short, disassemble or charge the
batteries. Do not throw the batteries into a fire.
6
Taking Pictures
Now that the camera has batteries, let's take a few pictures to get started.
Step 1 Make sure the batteries
are properly inserted into the camera.
l
Step 2 Press the DSC On button.
The camera will beep.
l
l
l
Step 3 Select macro mode or
standard mode.
Battery
press
Standard mode /
0.6 m (2ft) ~ infinity
Macro mode /
0.2 m (8 inch)
Step 4 Use the optical finder to
compose the picture.
press
L Step 5 Press Shutter button to take
the picture. Wait for the beep to complete
the picture.
7
LCD Control Panel
Now that you are familiar with the basic steps to taking a picture, let's take
a closer look at the menu or control panel.
/
Single snap shots
Continuous snap shots
Photo number
Flash status
Video Recording
Self-timer
PCC Mode
Battery Volume(disappeared if USB is plugged)
Delete last
/
Delete all
The WS30 SLIM has six functional modes.
€
Mode 1: Flash - The Flash mode is used to add extra light to your
image. Press the Mode button until "A" is blinking. This is the default
Auto flash mode. The LCD displays "A" to turn the flash on. If
is displayed, the flash is turned off.
Select (Beep)
8
Shutter
to root
€
Mode 2: Self-Timer - The Self-Timer is used to take a picture with a 10
second delay. Press the Mode button until the self-timer symbol
is
blinking. Take the picture by pressing the Shutter button. You have 10
seconds which is indicated by the camera beeping and the self-timer
indicator blinking on the front of the camera.
€
Shutter (beep blinking)
After 10 sec.
Mode 3: Continuous Snap Shots - The Continuous Snap Shots is
used to continuously take four pictures at one time. Press the Mode
button until the
is blinking. Press the Shutter button to take
the pictures.
Shutter to capture 4 pictures
9
€
Mode 4: Video Recording - The Video Recording mode is used to
create a video AVI file that you can mail. Press the Mode button until
the
is blinking. Press and hold the Shutter button and using optical
finder to compose images. When you complete the video file, release the
shutter button.
Shutter (hold) to make a video file
(until release shutter key)
€
Mode 5: Delete Last - The Delete Last mode is used to erase the last
picture that you have taken with the camera. Press the Mode button until
the
is blinking. Press the Shutter button to delete the last picture.
Shutter (Beep)
10
€
Mode 6: Delete All - The Delete All mode is used to erase all of the
pictures from the WS30 SLIM . Press the Mode button until the
is
blinking. Press the Shutter for 2 seconds to delete all of the pictures.
Shutter (beep) hold 2sec.
11
Accessing the CD
l
Step 1 Place the MAXELL Digital CD-ROM into the appropriate drive.
The MAXELL Digital Main Menu screen should automatically appear.
Note: If the main menu screen
doesn't appear follow the directions
below.
l Step 1 Double-click on the My
Computer icon on your desktop.
l
Step 2 Double-click on the
CD-ROM icon.
l Step 3 Double-click on the
Autorun icon.
l Step 4 The MAXELL Digital Main
Menu screen will appear.
Installing the Software
Let's follow the order in which the software appears on the main menu to
begin the install process. Please note that you must install all of the
software options in order to download photos and take advantage of the
WS30 SLIM features.
12
l
Install Mr. Photo
Step 1 Click on Install Presto!
l
Mr. Photo from the main menu.
Step 2 Click Next on the
Welcome screen.
l Step 3 After reading the software
license agreement screen, click
Yes.
Note: If you click No, Mr. Photo
will not be installed onto your
computer.
l Step 4 Click Next on the Choose
Destination Location screen.
Note: The Mr. Photo files are being
installed in the C:\ProgramFiles \
NewSoft \ MrPhoto16 directory.
6
13
l
Step 5 Click Next on the Setup
Type screen. The default setup is
Typical.
l Step 6 Click Next on the Select
Program Folder screen.
The files will begin
to copy to your
computer.
l Step 7 Click OK on the
Information screen.
L Step 8 Click Yes or Register
Later on the Registration screen.
You will now see the Main Menu
again to make your next selection.
14
l
Install ImageFolio
Step 1 Click on Install Presto!
l
ImageFolio from the main menu.
Step 2 Click Next on the
Welcome screen.
l Step 3 After reading the software
license agreement screen, click
Yes.
Note: If you click No, ImageFolio
will not be installed onto your
computer.
l Step 4 Click Next on the Choose
Destination Location screen.
Note: The ImageFolio files are being
installed in the C:\ProgramFiles \
NewSoft \ Presto! ImageFolio 4.2
directory.
15
l
Step 5 Click Next on the Setup
Type screen. The default setup is
Typical.
l Step 6 Click Next on the Select
Program Folder screen. The files
will begin to copy to your computer.
L Step 7 Click Finish on the Setup
Complete screen.
You will now see the Main Menu
again to make your next selection.
16
Install VideoWorks
l
Step 1 Click on Install Presto!
VideoWorks from the main menu.
l
l
Step 2 Click Next on the
Welcome screen.
Step 3 After reading the software
license agreement screen, click
Yes.
l
Note: If you click No, VideoWorks
will not be installed onto your
computer.
Step 4 Click Next on the Choose
Destination Location screen.
Note: The VideoWorks files are
being installed in the C:\ProgramFiles
\NewSoft\Presto VideoWorks directory.
17
l
l
Step 5 Click Next on the Setup
Type screen. The default setup is
Typical.
Step 6 Click Next on the Select
Program Folder screen.
The files will begin
to copy to your
computer.
L Step 7 Click Finish on the Setup
Complete screen.
You will now see the Main Menu
again to make your next selection.
18
Install WS30 SLIM Driver
In order for you to download pictures from the camera to your computer,
you will need to install WS30 SLIM Driver .
l
l
Step 1 Click on Install MAXELL
WS30 SLIM Driver from the main
menu.
l
Step 2 Click Next on the Welcome
screen.
Step 3 Click Finish on the
Installation Completed screen.
l
Note: In order for all of the software
to take effect, your computer will
automatically restart. Once you have
rebooted your computer, you are now
ready to exit the main menu.
Step 1 Click Exit on the Main
Menu screen.
Note: Each software program group
(Mr. Photo , ImageFolio, VideoWorks)
contains a User's Manual provided by
the software manufacturer. These
manuals provide in-depth information
on each program than described in
this User's Guide.
19
Getting Connected
To connect the camera to the computer.
l
Step 1 Connect the USB
cable to the USB port on
your computer.
Computer's
USB port
USB cable
l
Step 2 Connect the other end
of the USB cable to your
camera USB connector.
USB cable
USB connector
The MAXELL WS30 SLIM Digital Camera has three operating modes:
Digital, Video, and PC.
Digital = Take digital pictures with the WS30 SLIM. No need for film.
Download them to your computer.
Video = Create a mini video with the WS30 SLIM's live video feature.
When connected via the USB cable, you now have a video camera.
PC = The WS30 SLIM camera can be used for video conferences.
20
Fun Things You Can Do-(Digital)
Downloading Photos
Important Note: Please make sure that the display indicates numbers
for example "10". If not, press the DSC ON button.
l Step 1 Connect the WS30 SLIM to your computer using the USB cable.
Note: Refer to the "Getting Connected" section on page 20 if you
need assistance.
l Step 2 Click on Start from the Windows Task Bar.
l Step 3 Click on Programs.
l Step 4 Click on Presto! Mr. Photo program group.
l Step 5 Click on the Mr. Photo icon.
l Step 6 Right-click on the camera icon
located on the upper-left hand
corner of the screen.
l Step 7 Click on the Source drop-down arrow and select MAXELL WS30
SLIM Digital Camera.
Note: You can specify the download folder for the photos by changing the
path name.
l Step 8 Click OK.
L Step 9 Click on the Camera
icon. Your photos will now appear in
the Thumbnail viewer.
The thumbnail viewer allows you to view photos that
are stored in the WS30 SLIM's memory. You are
now ready to download your photos to your computer.
21
To download an individual photo
l Step 10 Click on the desired photo.
The photo number will turn red when
selected.
l Step 11 Click on the Transfer button
located at the bottom of the thumbnail viewer.
l Step 12 Click OK on the Transfer Done
screen.
Note: To download all of the photos, click on the Select All button. Next, click
on the Transfer button. To download files in a non-consecutive order, just click
on the desired photos, then click on the Transfer button.
l Step 13 Click on the Exit button when you have finished downloading your
photos. You will now see all of your photos displayed in the Mr. Photo thumbnail
viewer.
Erasing Photos from WS30 SLIM
Let's take a minute to erase the photos from the WS30 SLIM. To erase all of the
photos:
l Step 1 Disconnect the camera from the USB cable.
l Step 2 Press the Mode button until you see the icon
appear in the menu
panel.
l Step 3 Press and hold the Shutter button down for 2 seconds. Notice how the
menu panel displays zero (0) photos.
L Step 4 Press the DSC On button to turn the camera off.
Note: When the camera is connected to the computer by the USB cable, you
can click on the
button located at the thumbnail viewer.
22
Cropping the photo
Back to our exercise. Let's prepare our photo that we downloaded to send to mom
and dad in an email. Since Mr. Photo is still open, let's make a quick change to our
photo.
Note: All of the software programs that were included with your WS30 SLIM
CD contain individual user's manuals provided by the software manufacturer.
Refer to each for in-depth information on each program.
l
Step 1 Double-click on the photo that
we are sending to mom and dad.
Let's crop the picture to remove the extra
background contents.
l
Step 2 Click on the Advanced
button. Notice how the cropping tool
appears over the photo.
l
Step 3 Click and drag the cropping handles to the desired location.
Step 4 Click on the Crop
button.
Step 5 Click on the Exit
button.
Step 6 Click Yes to save the new picture.
l
l
l
23
Fun Things You Can Do-(Video)
Using the Video Recording Feature (Create AVI File)
To use the video recording feature follow the steps below.
l Step 1 Make sure the batteries are properly inserted into the camera.
l Step 2 Press the DSC On button. The camera will beep.
l Step 3 Press the Mode button until you see the icon
appear.
l Step 4 Press and hold the Shutter button, using optical finder to compose images.
l Step 5 Release the Shutter button when you complete a video file.
Note: If the video is under 8 MB, you can record several Video files.
l Step 6 Connect the WS30 SLIM to your computer via the USB cable.
Note: Refer to the "Getting Connected" section on Page 20 for assistance.
l Step 7 Click on Start from the Windows Task Bar.
l Step 8 Click on Programs.
l Step 9 Click on the MAXELL WS30 SLIM Digital Camera program group.
l Step 10 Click on the WS30 SLIM Digital Camera icon. Your photos will now
appear .
l
Step 11 Click on the Video Clip
icon.
The Video screen appears .
l
24
Step 12 Select the AVI
l
Step 13 Click on the Run icon
Note: You can change the Frame rate.
l
.
Step 14 Type in the file name and click
on Save.
l
Step 15 The video file is being created.
l
Step 16 Click on the
button.
L Step 17 The AVI File is now complete, and
you can email it to your friends and family.
Note: You can find this AVI file by
pressing on the button
.
25
Using the Video Capture Feature
To use the video capture feature follow the steps below.
l
Step 1 Connect the WS30 SLIM to your computer via the USB cable.
Note: Refer to the "Getting Connected" section on Page 20 for assistance.
l Step 2 Click on Start from the Windows Task Bar.
l Step 3 Click on Programs.
l Step 4 Click on the Presto! Video Works program group.
l Step 5 Click on the Presto! Video Works icon.
l Step 6 Click on Capture from the menubar.
l
Step 7 Click on Select Image Source from the drop down menu.
The select source screen appears.
l
l
26
Step 8 Click on MAXELL WS30 SLIM Digital Camera.
Step 9 Click on the Select
button.
l
Step 10 Click on the Capture Video
to begin capturing video.
icon which is located on the tool bar
The video viewer screen appears.
l
l
l
l
Step 11 Click on the Sequence Capture
icon on the video viewer.
Step 12 Click OK on the Capture Video Sequence screen.
Step 13 Click OK to start capturing video.
The capture screen appears.
Step 14 Click on the Save icon located on the toolbar to save your video file.
Using the Video Conferencing Feature
When using the WS30 SLIM along with a video conferencing software such as MicroSoft
NetMeeting, you can communicate with others over the Internet or local Intranet.
27
Where to get Help
Help with your WS30 SLIM Camera is available from several resources:
Software Help
Help with any software packaged with this camera can be found under the
help menu located on the menubar for each program, FAQs or by contacting
the manufacturer of the software.
Customer Support
If you have any questions about the camera, software or connections to your
computer, you should:
l Website: www. Maxellcanada.com
Office
Maxell Canada
50 Locke Street, Unit 2
Concord. Ontario. Canada
L4K 5R4
1 800 661 9500 - customer service #
www. Maxellcanada.com
28
Frequently Asked Questions
Q: I've correctly installed the software, connected my camera
to my PC, but get a flashing busy light or nothing at all. What
does this mean?
A:
l Step 1 Double-click on My Computer which is located on your desktop.
l Step 2 Double-click on the Control Panel folder.
l Step 3 Double-click on the System icon. This is usually located near the
bottom of the window. You will now be at the System Properties window.
l Step 4 Click on the second tab, Device Manager. Here we are looking
for two things. About 5 icons down, you should see an icon labeled
"Imaging".
l Step 5 Click on the plus (+) sign located to the left of Imaging to open it.
l Step 6 Further down the list, look for an icon that says"Universal Host
Controller" . If you do not find an icon, contact your PC manufacturer, as
the USB port will need to be enabled in the BI OS section of your computer.
l Step 7 With the camera installed, there will be a listing matching the
description of the mode of the camera, i.e., WS30 SLIM Digital Camera
and WS30 SLIM Video Camera . If the icons are marked in red or any
other color, the driver is not installed properly.
l Step 8 Reinstall the driver.
l Step 9 Restart your computer.
If this is not successful, call our tech support line at, 1 800 661 9500, or
email www. Maxellcanada.com. Be sure to include a telephone number in
your message so we can contact you.
29
Q: How do I delete the photos from my camera once they have
been downloaded?
A:
l Step 1 Press the Mode button until you see the icon appears in the menu
panel.
l Step 2 Press and hold the Shutter button down for 2 seconds. Notice
how the menu panel displays zero (0) photos.
Q: How do I save my photos to my computer from the camera?
A:
After following the " Downloading Photos" section on page 21 , you will
receive the thumbnail image which is a visual representation of all photos in
the camera. These are not actual photos.
l Step 1 Click on the SelectAll button. This will highlight all of the photos
in the thumbnail viewer.
Note: To select individual photos . Once you have selected the photos, you
are ready to transfer them.
l Step 2 Click on the Transfer (download) button. You will now see your
photos being transferred to your computer.
l Step 3 Click on the Finish button when you have completed the
download.
Note: When you download photos from your camera, they will be saved in
the C:\MyPhotos directory.
From here, you can now manipulate (edit, crop, print, touchup, etc.)your
photos.
30
Additional Information
System Requirements
l Windows 98/ME/2000
l Pentium or higher
l CD-ROM drive
l 65 MB hard drive space
l 32 MB RAM (64 MB recommended)
l USB port
Technical Specifications
l Image resolution: Max: 640 x 480
Min: 160 x 120
l 24- bit true color
l Storage Media: On board 8 MB
l Flash modes: auto-flash/off
l Self-timer: 10 second delay
l Focus 8 inch (0.2 m) macro mode / 2ft (0.6m) to infinity from camera
l Electronic shutter: ½ ~1/10000 sec - DSC (Camera mode)
1~1/10000 sec- PCC (Video mode)
l Can delete all or last picture
l Use 2 AAA alkaline batteries as power source
l Interface: USB
l WS30 SLIM will automatically turn off the power if inactive for more
than 2 minutes.
31
Maintenance and Storage
l Usage environment /temperature: 0 to 40 degrees Celsius
l
Usage environment/relative humidity:45% ~85%
l
Do not use or store this camera in environments direct sunlight, high
humidity and dusty places, next to air conditioner, electric heater or other
heat sources, in a closed car that is in direct sunlight, and avoid shaky
places.
l
If this camera becomes wet, wipe it with a dry cloth as soon as possible.
l
Salt or seawater may cause severe camera damage.
l
Do not use organic solvents, such as alcohol, to clean the camera.
l
If the lens or viewfinder are dirty, use a lens brush or soft cloth. Never use
your fingers.
l
To prevent electrical shock, do not attempt to disassemble or repair the
camera. Water may cause fire or electric shock, please store in a dry
place.
l
If a foreign substance or water gets in the camera, turn the power off and
remove the batteries. If possible remove the foreign substance and send
it to the maintenance center.
l
Transfer the data to your computer as soon as possible to avoid losing
your images.
32
MAXELL CANADA
Maxell Canada
50 Locke Street, Unit 2
Concord. Ontario. Canada
L4K 5R4
1 800 661 9500 - customer service #
www. Maxellcanada.com
1-626-13-0011-01