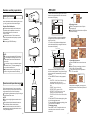
1
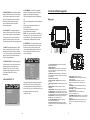
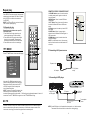
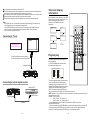
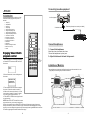
Instruction Manual
PORTABLE DVD PLAYER
WITH 7" LCD MONITOR
MODEL NO.: MTW-727 TWIN
VI D E O
BEFORE USING THIS PRODUCT, READ, UNDERSTAND,
AND FOLLOW THESE INSTRUCTIONS.
Save this booklet for future reference.
Instructions on environment protection
Www.denver-electronics.com
Do not dispose of this product in the usual hou sehold garbage at the end
of its lifecycle; hand it over at a co llectio n point for th e recycling o f electrical
and elec tronic appliances. The sy mbol on the produc t, the instruc tions for
us e or th e packing will inform about the m ethods for d ispos al.
The materials a re recyclabl e as mentioned in this marking. By recycling,
ma terial recycl ing or other forms o f re-utilization of o ld app liances, you are
ma king an important contribution to protect our environmen t.
Please in quire at the community adminis tration for the authorized disposal
lo cation .
Safety i nformation
If the surface is soiled
Wip e gentl y with a soft, damp (wate r only) cloth.
Whe n wipi ng disc s, always m ove th e cloth from the centre ho le toward the outsi de, wh ich
will n ot cause dis tortion . (If yo u wip e the d iscs u sing a circula r moti on, circular s cratch es are
likel y to oc cur, which w ill cau se dist ortion.)
If the disc is brought from a cold to a warm environment
moisture may form on the disc
Wipe this moisture off with a sof t, dry, lint-fre e cloth before using the d isc.
Improper disc storage
You can da mage discs if you s tore t hem in the fo llowin g plac es:
Areas e xposed to dir ect su nlight
Humid o r dusty area s
Areas d irectly expos ed to a heat outlet or hea ting ap plianc e
V ENTILATION WARNING :
T HE NORMAL VENTILAT ION O F THE
P RODUCT SHALL NOT BE IMPEDED
F OR IN TENDED US E.
CAU TION:
DVD/ VIDEO CD/CD PLAYER IS A CLASS 1
LASER PRODUCT. HOW EVE R THIS DVD /
VIDEO CD/ CD PL AYER USES A VIS IBLE
LAS ER BE AM W HICH COUL D CAUSE
HAZA RDO US RA DIATI ON EX PO SURE IF
DIRE CTED. BE SURE TO OPE RATE THE
DVD/ VIDEO CD/CD PLAYER CORR ECTLY
AS IN STRU CTED .
WHEN THIS DVD /VIDEO CD/C D PL AYER
IS PL UGGE D TO THE WALL O UTLE T, DO
NOT PLAC E YOUR EYE S CLO SE TO THE
OPEN ING O F THE DISC TRAY AND
OTHE R OPENING S TO LOOK INTO THE
INSIDE OF THIS P LAYE R.
C AU T I O N
RISK OF ELECTRIC SH OC K
D O NOT OPEN
The lightning flash
and arrow head
within the triangle
is a warning sign
al erti ng you of
“dangerous voltage” inside the
product.
USE OF CO NTRO LS OR ADJUSTM ENTS
OR PER FO RMAN CE O F PRO CEDU RES
OTHE R TH AN TH OSE SPECI FIED HEREI N
MAY RESU LT IN H AZAR DOU S RAD IATIO N
EXPO SURE .
WARN ING: To avoid the r isk of electri cal
shock, make sure t he pro duct is unplu gged
from th e elec trical o utlet b efore reloca ting,
servicing, or cleani ng it.
DO NOT OP EN COVER S AND REPA IR
YOUR SELF. REF ER SE RVICI NG TO
QUALIFIED PERS ONN EL.
Read all instructions befo re u sing.
Do not us e this p roduc t near water.
Do not ce iling- o r wall- moun t the product .
Do not blo ck any venti lation openin gs.
Ins tall the produ ct in a ccorda nce w ith the
ope rating instru ctions .
Do not se t the p roduct near h eat so urces ,
suc h as ra diator s, hea t regis ters, s toves,
or o ther a pparatus (including ampl ifiers)
tha t produ ce he at.
Pro tect th e power cord from being walked
on or pinc hed, p articu larly at plugs ,
con venience receptac les, an d the point
whe re the y exit the pro duct.
Do not us e attac hmen ts not recom mende d
or s old by the pr oduct manuf acture r as a
risk of fire , elect rical s hock, or seri ous
per sonal injury may re sult.
Unp lug th e prod uct du ring lig htning storm s
or w hen u nused for lon g peri ods of time.
Do not ex pose t he pro duct to dripp ing or
splashing water. Do no t plac e obje cts fille d
with liquid (e.g., vases ) on th e prod uct.
Do not pla ce in o r expo se the produ ct to
dire ct sun light, extrem e hea t, hum id or
ust y locat ions.
Nev er ope rate t his pro duct if it has a
dam aged Powe r Cord or plug, is no t
wor king p roperl y, has been d roppe d,
dam aged , or ex posed to moi sture, water,
or o ther li quids. Do no t attem pt to e xamin e
or r epair t his pro duct y ourse lf; take the
THIS DEVIC E IS I NTENDED F OR
CONTINUO US OP ERAT ION!
Region code setting
R egion coding : All D VD dis cs are coded by th e sales territ ory. Pl ease n ote th e playe r
is set to regio n 2 co ding b y the facto ry wh ich ca nnot be changed . This is in c ompli ance
wi th the DVD p atent require ment s.
2
T he Re gion n umber for thi s DVD playe r is
TO RE DUCE THE RISK OF FIR E OR
ELECTRIC SHOC K, AN D ANN OYING
INTERFERE NCE, USE T HE
RECO MMENDED ACCE SSOR IES O NLY.
WARNIN G:
-TO PRE VENT FIRE OR SH OCK HAZARD.
DO NOT USE T HIS PLUG W ITH AN
EX TENS ION CORD. RECEPTACLE OR
OTHER OUTLET UNLESS THE B LADE S
CAN BE FULLY INSE RTED TO PREVENT
BL ADE EXPOSURE.
-TO PRE VENT FIRE OR SH OCK HAZARD.
DO NOT EXPO SE TH IS AP PLIANCE
TO RAIN OR M OISTURE.
CAUTION - LASER RADIATION WHEN
OPEN , DO NOT STARE I NTO BEAM.
28
The exclamation
point within the
triangle is a warning sign alerting
you of important
instructions acco mpanyi ng the
product.
Alway s follo w bas ic saf ety pr ecautions w hen u sing electr ical product s,
espec ially w hen c hildre n are presen t.
Maintenance
Be sure t o pres s POWER to set th e play er to th e stan dby m ode an d disc onnec t the AC
ad apter before maintaining the player.
Wi pe the playe r with a dry, s oft clo th.
If t he sur faces are extremel y dirty ,wipe clean with a cloth which h as been dipped in a
we ak soap-and -wate r solution and wrun g out t horoughly, a nd the n wipe again with a
dry cloth .
Ne ver us e alco hol, be nzine , thinn er, cleaning fluid or other chemicals. And do not us e
co mpres sed air to remove d ust
CAUTION: TO REDUCE THE
RISK OF ELECTRIC SHOCK.
DO NOT REMOVE COVER
(ORBACK). NOUSER
SERVICEABLE PARTS
INSIDE. REFER SERVICING
TO QUALIFIED SERVICE
PERSONNEL.
1
prod uct to a serv ice ce nter fo r inspe ction and re pair.
LA SER S AFET Y:
Troubleshooting (Continued)
Sympt om(Commo n)
This set e mploy s an o ptical laser b eam s ystem in the CD m echani sm de signed
wit h built -in saf eguard s. Do not attempt to disa ssemb le. Ex posure to thi s invis ible
las er ligh t beam may b e harm ful to the hu man e ye. Th is is a Class -1 lase r prod uct
Us e of co ntrols, adjus tments or pro cedures oth er tha n those spec ified h erein m ay
res ult in h azard ous la ser lig ht bea m exp osure. This c ompac t disc player shoul d
not be ad justed or rep aired by any one ex cept q ualifie d serv ice pe rsonne l. The
las er mec hanis m in th e set c orres ponds to the stylus (needl e) of a record play er.
Alt hough this pr oduct uses a laser pick-u p lens , it is c omple tely sa fe whe n
ope rated accor ding to directions.
NOT E: The manu factur er is n ot resp onsib le for a ny rad io or T V inte rferen ce cau sed by
unau thoriz ed mo dificat ions. S uch m odifications could void th e use r's auth ority t o oper ate the
equi pment .
1) O perate turning con trols a nd swi tches as ins tructed in the manu al.
2) Before turning on the power for the first time,make s ure th at the power cord i s prop erly
in stalled .
3) Store your CD s in a cool area to a void d amag e from heat.
No operations can be performed
with the remote control unit.
No key oper ation (by the main
unit and/or t he remote control
unit) is effective.
1) Follow the battery manuf acture r's saf ety an d usag e instr uction s.
2) Keep b atteri es awa y from children an d pets.
3) Never throw batteries into a fire . Do n ot expose ba tteries to fire or oth er hea t sour ces.
4) Battery Disp osal: Spent o r disc harged batte ries m ust be prope rly dis posed of and recyc led
in compliance w ith all applic able laws.
Fo r detailed inf ormation, co ntact y our lo cal solid was te aut hority.
Press STANDBY to set the player t o the standby mode and t hen
back to ON. Alternatively, press STANDBY to set the player to the
standby mode, disconnect the power adaptor and then
reconnect it. (The player may not be operating properly due to
lightning, static electricity or some other external factor.)
Sympt om [D VD]
Play does not start even
when title is selected.
Audio soun dtrack and/o r subtitle
language is not the initial settings.
No subtitles.
Alternative audio soundtrack
(or subtitle) languages f ail to be
selected.
Battery Handling and Usage
Remedy
Check the batt eries are installed with the correct polarities(+and -)
The batteries are exhausted: replace them with new ones.
Point remote control at the remote control sensor and operate.
Operate the remote contr ol unit at a distance of not
more than 6 m from the remote control sensor.
Remove the obstacles between the remote control and
remote control sensor.
Reme dy
Confirm the right region code settin g.
If the audio soundtrack and/or subt itle language does not exist
on the disc, the language selected at the initial settings will
not be seen/heard.
Subtitles appear only with dis cs which con tain them.
Subtitles are cleared from the TV monitor, Perform the steps
disp lay the subtit les.
An alternat ive language is not selected with discs which do
not contain more tha n one language.
In the case of some discs, the alternative language cannot
be selected by operating the AUDIO or SUBTITLE button.
Tr y selecting it from the DVD menu if one is avai lable.
Angle cann ot be change d.
This funct ion is dependent on softw are availability. Even if a
disc has a number of angles recorded, these angles may be
recorded for specific scenes only.
The passw ord for rating level
has been fo rgotten.
Please contact your local sales dealer.
Sympt om [V ideo C D]
No menu play.
Remedy
This funct ion works only for Video C Ds with playback control.
DISC handling and maintenance
Handling precautions
Ho ld the disc by the e dges s o the surfac e will n ot be s oiled with fin gerpr ints. F ingerp rints,
dir t and s cratch es ca n caus e skipping an d dist ortion.
Do not write on the la bel sid e with a ball- point p en or other writing utens ils.
Do not us e reco rd cle aning sprays , benz ine, th inner, static electricity preventi on liqu ids.
Be careful not t o drop or ben d the disc.
Do not in stall m ore th an 1 d isc on the dis c com partment.
Do not try to clo se the disc c over w hen th e disc is not instal led pro perly.
Be sure t o store the d isc in i ts exc lusive case when n ot in use.
2
27
Specifications
Table of contents
Power requirements:
(2) Compac t disc (VIDE O CD)
1 2 cm d isc
8 cm dis c
Video output level: 1 V p - p
Audio output level: 1.2V
Earphone output level: 1KHz , 0dB,
55mW
Pickup: Wave l ength: 655nm
L aser p ower: CLASS -1
Measurement: 270(L) X 1 67(W)X 36(D)mm
Weight: Approx .921g
Measurement of MTF: 2 70(L) X 167 (W)
X 36(D)mm
Weight of MTF: App rox.50 6g
AC 100 - 240V~ 50/6 0Hz
power consumption: 18W
Signal system: NTSC/PAL
Resolution: 144 0(H) X 234(V )
Dots Distance: 0.107 (H) X 0.372(V)mm
Visible Range: 154.0 8(H)X 87.5(V )mm
Discs played:
(1) DV D-VID EO disc
12 cm sin gle-si ded,si ngle-la yer
12 cm sin gle-si ded,du al-layer
12 cm double-sided,single-l ayer
8 cm sing le-sided,single-lay er
8 cm sing le-sided,dua l-layer
8 cm double-sid ed,sin gle-layer
S pecif icatio ns are subje ct to c hang e with out no tice.
Troubleshooting
Sym ptom (Com mon)
Rem edy
N o power.
Insert the AC adaptor securely into the power outlet.
The player is automatically
set to the standby mode.
The player i s automatica lly set to the standby mod e
after approx . 30 minutes in the mode.stop mode
(auto power -off function) . Turn the po wer on again.
N o picture.
No sound .
Dis torted sound.
Picture is dist orted during rapid
advance or rapid reverse.
N o rapid advance or rapid
reverse play
Basic Operation:
Basic play ........ ......... ......... ......... ......... ......... ......... ......... ......... ......... ...13
Stopp ing p lay ... ......... ......... ......... ......... ......... ......... ......... ......... ......... ...14
Skipp ing ahead o r bac k ..... ......... ......... ......... ......... ......... ......... ......... ...14
Fast forwa rd b ackwa rd..... ........ ......... ........ ......... ........ ......... ......... ..14
Pause or p lay ... ......... ......... ......... ......... ......... ......... ......... ......... ......... ...14
Slow- motio n play [DVD/VCD]................. ......... ......... ......... ......... ......... ..15
MP4 p layba ck .... ......... ......... ......... ......... ......... ......... ......... ......... .......1 5-16
JPEG CD.. ......... ......... ......... ......... ......... ......... ......... ......... ......... .......1 7-18
Enjoy ing Video C D with playb ack c ontro l. . . . . . . . . . . .. . . . . . . .. . . . . . .. . . . . . . .. . . . 1 8
On sc reen d ispla y informatio n...... ........ . ........ ........ ......... ........ ......... ..19
Advanced Operation:
Be fore re quest ing service for this player, chec k the c hart below fo r a po ssible cause of the
pro blem you are expe rienci ng. So me sim ple ch ecks or an a djustm ent on your part m ay
eli minate the problem and r estore prope r oper ation.
Play fails to st a rt even w hen
PLAY is pressed.
Play starts but then stop s
imm ediately.
Getting Started:
Safet y informatio n...... ......... ......... ......... ......... ......... ......... ......... ..........1-2
Featu res ................................................................................................4
Accessorie s ..........................................................................................4
Preca ution s....... ......... ......... ......... ......... ......... ......... ......... ......... .............4
Contr ol reference guid e ................................................................... 5-7
Basic conn ection ...... ......... ......... ......... ......... ......... ......... ......... ......... 7-11
Remo te con trol p repar ation.. ........ ......... ......... ......... ......... ................. ...12
Condens ation has f ormed: wa it about 1 to 2 hours
to allow t he player t o dry out.
This play er cannot play a disc other than DVD, VCD and CD.
The disc may be dir ty and may require cleaning.
Ensure t hat the disc is installe d with the l abel side u p.
Ensure that the equipment is connect ed properly.
Ensure tha t the equipm ent is conne cted properly.
Ensure tha t the input setting for the TV and stere o
system are correct.
Adjust the master volume to a suitable volume by rotating
the volume knob at the side of the p layer.
Program pl ay.............. ......... ......... ......... ......... ......... ......... ................. ...19
Repe at play ...... ......... ......... ......... ......... ......... ......... ......... ......... ......... ...20
A-B repeat play.................... ......... ......... ......... ......... ......... ................. ...20
TFT M ODE ........ ......... .......................................................................... 20
GO T O.................................................... ......... ......... ......... ......... .......... 20
Chan ging s ubtitl e lang uage( DVD o nly) . ......... ......... ......... ......... ......... ...21
ZOOM play........ ......... ......... ......... ......... ......... ......... ......... ......... ......... ...21
Chan ging a udio s ound track langua ge[DV D/VCD disc ]....... ......... ...........21
Viewi ng fro m dif ferent angle (DVD only) ......... ......... ......... ......... ......... ...22
Initial Settings:
Co mm on proc edu re f or in itia l se tting s ....................................................22
Gene ral set up ... ......... .................................................................. ..... ...23
Au dio se tup... ......... ......... ......... ......... ......... ......... ......... ......... ......... .......2 3
Video setup .... ......... ......... ......... ......... ......... ......... ......... ......... ......... .. 23
Passw ord s etup ........ ......... ......... ........ ......... ......... ......... ......... ......... ..24
For Reference:
Defin ition o f term s...... ......... ......... ......... ......... ......... ......... ................. ...25
Specifications.... ......... ......... ......... ......... ......... ......... ......... ......... ......... . 26
Troub lesho oting......... ......... ......... ......... ......... ......... ......... ................. ...26
DISC handl ing an d mai ntena nce.... ......... ......... ......... ......... ................. ...27
Regio n Cod e Set ting . ......... ......... ......... ......... ......... ......... ......... ......... ... 28
The picture will be somew hat distorte d at times: th is is normal.
Some discs may have se ctions which prohibit rapid
advance (or rapid revers e.)
To be co ntinu ed
26
3
Features
Precautions
7" TFT DISPLAY
This player has a built in 7" TFT display
window, to pr ovide clear vision, and low
radiation.
MULTI TV SYSTEM SUPPORT
The player ca n play discs with s ignal system
of PAL and NTSC.
GRAPHICAL USER INTERFACE SCREEN
Simply by pre ssing the DI SPLAY button on the
remote control unit, information on the player
and dis c can be dis played on the TV s creen
for easy identificati on, The player's operations
and settings can be performed by operating
the remote control while monitoring screen.
MULTI-AUDIO FUNCTIO N
The audio soundtrack can be heard in up to 8
languages. (The number of audio soun d
languages de pends on the software.)
MULTI-SUBT ITLES FUNCTION
Subtitl es may be di splayed in on e of a
maximum of 32 languages depending on
the software.
MULTI-ANGLE FUNCTIO N
This function allows you to choose the
viewing angle of sc enes which were sh ot
from a number of different angles. (Lim ited
to DVD recorded with multiple c amera
angles.)
PARENTAL L OCK FUNCTION
This prevents play unsuitable for children.
DISC FORMATS SUPPORTED BY PLAYER
The player ca n play back discs bearing any
of the following marks:
VI D EO
Accessories
Remote c ontrol... .. .. .. .. ........... 2
Instructi on manua l .. .. ......... ..1
Batteries (for remote control) .2
AC adaptors(one for mai n unit;
the other one for monitor) ..... ..2
Audio/Video cable ... .. .........
.. ..1
Cigarette li ghte r ...... .. ......... ..1
H eadre s t ca rr yin g bag w i t h
two strips....... .... .. ....... .. ......... ..1
Earphone.. .. .. .. ..... .. .......... .. .. .. 2
4
Pleas e read the p recaut ions before o perati ng .
Powe r Ada ptor P rotection
To av oid an y malfunctions and to pro tect
again st elec tric sh ock, f ire or p erson al injury,
pleas e obse rve th e follo wing:
1) Ho ld the plug f irmly when conne ctingo r
disco nnec ting th e AC a dapto r.
2) Do not c onnec t or di sconn ect th e AC
adap tor wh en yo ur han ds are wet.
3) Ke ep the AC ad aptor away from heatin g
appli ances .
4) Ne ver pu t heav y obj ect on the AC
adap tor.
5) Do not a ttemp t to rep air or recon struc t
the A C ada ptor in any w ay.
6) Re move dust, dirt, e tc. on the pl ug at
regular intervals .
7) If the pla yer ha s bee n drop ped o r
other wise damag ed,se t the p layer to the
stand by modean d disc onnec t the AC
adap tor.
8) If the pla yer ha s fum es, od ours o rnois e,
set th e play er to the standby mode and
disco nnec t the A C pow er adaptor.
Place ment
Avoid placin g the player in are as of:
1) dir ect sunlight o r heating radiators or
close d auto mobile s
2) hig h temperatu re or h igh hu midity
3) Ex cessiv e dust
4) vib ration , impa ct or where th e surf ace is
tilted as the intern al parts may be ser iously
dama ged.
Non-use pe riods
When the p layer is not u sed, set it in standb y
mode .When left u nused for a lo ng pe riod of
time, the pla yer sh ould b e unp lugged from
the household AC outlet .
No fingers or oth er obj ects inside
Touching in ternal parts o f this player is
dang erous, and m ay cau se serious d amage
to the playe r.
Dono t attem pt to d isassemble the pla yer.
Do no t put a ny for eign o bject o n the d isc tra y.
Keep away from magne tic ob jects
Keep magn etic ob jects s uch as spea kers,
at a d istanc e from the pl ayer.
Stack ing
Place the player in a horizonta l posit ion.
Do no t plac e the p layer o n amp lifiers orothe r
equip ment which may be come hot.
Cond ensat ion
If the re is m oisture insid e the p layer, it may
not operate prope rly.Ple ase tu rn off t he pow er
and w ait ab out on e hour for the moisture to
evaporate.
Definition of terms
DVD
Thi s refer s to a high-density optica l disc on whi ch high -qual ity pict ures and sou nd have bee n
obt ained by mea ns of digital signals. Inco rporation a n ew video compres sion te chnol ogy
(MP EG II) and h igh-de nsity r ecord ing tec hnology, DVD enab les ae stheti cally p leasin g
full -motion vide o to be recor ded ov er long perio ds of t ime (fo r insta nce, a whole movi e can
be recorded). DVD ha s a stru cture consis ting o f two 0.6 mm thin discs wh ich are adhe red
to e ach ot her. Since th e thinner the disc, the hig her th e dens ity at w hich the informati on can
be recorded, a D VD di sc has a grea ter ca pacity than a single 1.2 m m thic k disc . Since the
two thin discs ar e adhered to each other, there is the p otenti al to achieve double-side d play
som etime in the future for ev en longer du ration play.
Video CD
Thi s contains re cordin gs of p icture s and sound whose quali ty is on a par with th at of v ideo
tape. This playe r also supports Vid eo CDs with playba ck con trol (v ersion 2.0).
Angle
Rec orded onto s ome D VD di scs ar e scen es which hav e bee n simu ltaneo usly s hot from
a number of different a ngles (the same sc ene is shot f rom th e front, from the left side, from
the right s ide, etc.). With suc h discs, the ANGLE butto n can be use d to vi ew the scene from
diff erent a ngles .
Subtitles
Thi s is the appearance of the dialo gue at the bo ttom o f the s creen which are pr erecor ded on
som e DVD discs .
Title number
The se nu mbers are recorded on DVD discs. Wh en a d isc contains two or more movies, thes e
mo vies ar e numbered as title 1, titl e 2, etc.
Chapter number
The se nu mbers are recorded on DVD discs. A title is s ub- divided i nto ma ny sections, each
of which i s numb ered, and sp ecific parts of vide o pres entati ons can be searche d quic kly
using these numbers.
Time number
Thi s indic ates th e play time w hich has ela psed from th e start of a d isc or a title. It can be
use d to fin d a sp ecific scene quickly.(It may not work w ith so me dis cs.)
Playback control (PBC)
Thi s is rec orded on a V ideo CD (ve rsion 2 .0). The scenes or information to be v iewed
(or listene d to) c an be select ed inte ractiv ely wit h the T V mon itor by looki ng at t he menu
sho wn on the TV moni tor.
Track number
The se nu mbers are as signed to the track s whic h are r e- corded on Video CDs a nd CD s. The y
ena ble sp ecific tracks to be l ocated quick ly.
25
4.1PASSW ORD : It is used to chang e the
pass word, and th e proc edure of cha nging
pass word is desc ribed a s follo wings :
1). En ter old pass word in the O ld Pas sword
row
2). En ter ne w pass word in the New P asswo rd
row
3). En ter th e new p assword ag ain in the
Conf irm PW D row
The Pass word Setup Page, then t he
Pas sword has b een change d.
NOTE: The orig inal passwo rd is 1 36900 , you
can change it, b ut yo u shou ld write it d own
and keep it safe . If yo u forget the p assword,
old passw ord 136900 there can be used .
3.2 BRIG HTNE SS: Press R ight na vigatio n
bu tton or Enter button to ent er, the n pres s
Le ft or Right na vigatio n butt on to a djust
the level of Brig htnes s from -20 to 20 uni t
as desire , pres s Enter butto n again to
ret urn to the Vid eo Se tup Pa ge aft er
fin ishing adjust ment.
3.3 CON TRAST: Pres s Righ t navig ation
bu tton or Enter button to ent er, the n pres s
Le ft or Right na vigatio n to a djust the leve l
of Contra st from -20 to 20 un it as d esire,
pre ss En ter but ton ag ain to return to the
Vid eo Se tup Pa ge after finis hing a djustm ent.
4.2.PARE NTAL : This settin g allows cer tain
peo ple to view c ertain discs , whic h may be
Esp eciall y useful to fo rbid c hildren from
viewing s ome u nbefitting di scs. W hen y ou
hav e ente red th e Parental Contro l, the
scre en wi ll disp lay:
3.4 HUE : Pres s Righ t Navi gation or Ent er
button t o enter, then press Left or Right
Navigat ion to adjust the lev el of H ue fro m
- 9 to + 9 unit a s desi re, pre ss Ent er but ton
again to return to the Video Setup Page
after fin ishing adjust ment.
3.5 SAT URAT ION: Press R ight N avigat ion
or Enter button to en ter, the n pres s Left or
Right Navigation to a djust the lev el of
Saturat ion from -9 to +9 un it as desire,
press Enter bu tton a gain to return to the
Video Setup P age af ter finishing
adjustment.
Control reference guide
Main unit
15
16
17
18
19
1
20
21
22
2
3 4 5 6 7 8 9 10
13
11 12 14
--PASSWO RD SET UP PAG E-PASSWO RD
PARENTAL >>1 KID SAFE
2G
3PG
4 PG 13
5 PG R
6R
7 NC 17
8 A DULT
SET PARE NTAL CO NTR OL
4.PASSW ORD SET UP
The n scro ll down the a lternat ives and pre ss
ENT ER bu tton to confir m, aft er doin g that ,
ente r the p asswo rd and pres s OK b utton on
the s creen , then you ca n set P arent al Con trol
acro ss eig ht diff erent s etting s from
Kid Saf to Adult .
--PASSWORD SET UP PAGE--
PASSWORD
PARENTAL
GO TO PASSWO RD SET UP PAGE
24
1 TFT Display window- D isplays all information
about DVD wo rk scene.
2 Built-in Sp eaker.
3 PREV button- Press this button to m ove left or
to skip to the p revious chapter or title (for DVD) or
track (for VCD / CD).
4 NEXT butto n - Press this button to move right or
to skip to the n ext chapter or title (for DVD) or track
(f or VCD/ CD).
5 Remote co ntrol sensor
6 LEFT navig ation butto n-p ress this button to
m ove left.
7 UP navigati on button -Press this bu tton to move
up.
8 ENTER butt on - Press th is button to confirm
a selection.
9 DOWN butt on- Press th is button to move down.
10 RIGHT but ton - Press t his button to move right
11 MENU but ton - Press t his button to return to the
ro ot menu(for DVD)or to turn on/off the PBC(for VCD)
12 STOP button- Press this button to halt playing.
13 JAG- Push it up to open the cover.
14 PLAY/PAU SE button - Press this button to
st art or pause playing the d isc.
15 Battery In dicator -When the battery is being
charged ,it is r ed, and it gets green whe n charging
completed.
23
,
16 DC In Jack - Powe r input jack.
17 POWER Switch - S witch this knob to turnAnd
on/off t he player.
18 AV In/Out Jack -C onnect to TV or other
external AV equipment to use the pla yer as a
monito r.
19 PH ONE 2 - Conne ct headphone t o this jack
for private listening.
20 PH ONE 1 - Conne ct headphone t o this jack
or private listening.
21 Vol ume - Rotate this knob to adjust the
volume to a suitable le vel.
22 STA NDBY Indicator -When the un it is in standby
Mode, it is red. And w hen the unit is in work mode,
it is gre en.
23 Bac k Bracke t-Pus h the back bracket out, you
can support and place the player levelly on the
stage.
5
Remote control
1.GENERAL SET UP
2. A UDIO SET U P
1 M UTE b utton - Pres s this b utton to mu te the
sou nd.
2 NUMER IC bu ttons - Press these butto ns to
inp ut num eric in forma tion, s uch as track numb er,
STA ND BY
MUTE
15
1
cha pter n umber and s o on.
3 F R button- P ress th is button to p lay th e
1
2
3
TV DISPLAY
WIDE
16
A NGLE MAR K
ON
17
OSD LAN G
CAPTION S
E NG
O FF
SCREEN SAVER
ON
DEFAULT
ON
D ISP
2
dis c back ward a t spee ds:x2, x4,x8, x16,x3 2.
4 F F butt on - Press th is butt on to p lay th e
4
5
6
N/P
7
dis c forwa rd at s peeds : x2,x 4,x8,x 16,x32 .
5 Z OOM button -Pres s this button to enl arge
8
18
9
GOTO
0
pic ture size, ma x.to X 4 or to shrink picture size ,
min . to X1 /4.
6 S LOW button -Pres s this button to pla y the
dis c at sp eeds:1 /2,1/4 ,1/8,1 /16.
7 P ROGR AM b utton -Press this b utton to
set up the memo ry ord er of chapter or title (for
DV D) or t racks (for VC D/CD ).
8 A NGLE butto n -Pre ss this butto n to di splay
the angle number and chang e to di fferent angle s.
9 T FT MO DE button- Press this bu tton t o ente r
the TFT M ODE m enu, move UP or DOWN
nav igatio n butto n to se lect C ontras t, Brig htness,
3
4
5
6
7
8
9
10
11
12
13
14
10+
STOP
PLAY/PAUSE
FR
FF
PREV
NE XT
ZOOM
SL OW
A-B
RE PEAT
P ROGRAM ANGLE
EN TER
T FTM ODE
S UBTITL E
SET UP
TIT LE
AV IN /OUT AUDIO
ME NU
VOL
VOL
19
20
21
22
23
24
25
26
27
28
29
30
31
32
Hue , Satu ration ,Sharp ness or Sca ling, th en
mo ve LEF T or R IGHT naviga tion to set th e
selected i tem as you want to .
10 LEFT navig ation button - Pres s this button
to m ove l eft.
11 SUBT ITLE b utton -Press this b utton to disp lay
and change sub title la nguag e(For DVD o nly).
12 TITLE butto n -Pre ss this butto n to re turn to title m enu (f or DVD ).
13 AV IN/OUT b utton - Pres s this b utton to swit ch the playe r between AV and DVD m ode.
14 AUDIO butt on- Pr ess thi s butto n to s elect t he sou nd tra ck.
15 STAND BY button- Press this b utton t o turn on the unit o r set it in stan dby m ode.
16 DISP button -Pres s DISP butto n cont inuous ly dur ing pla yback , the s creen will dis play t he
pla ying in forma tion, s uch as elaps ed time, remaining time a nd so on.
17 N/P bu tton - Press this b utton to sele ct NTS C, PA L or M ULTI s ystem (For DVD on ly).
18 GO TO butto n- Press thi s butto n to set the player to play disc s tarting at a c ertain point.
19 PLAY /PAUS E button - P ress th is but ton to start o r paus e playing the disc.
20 STOP butto n -Pre ss this button to ha lt play ing.
6
-- GEN ERAL SETUP PAGE--
-- AUDIO SETUP PAGE-EQUALIZER
SETUP
GO TO AUDIO SETUP PAGE
G O TO GENE RAL SETUP PAGE
EQUALIZ ER SE TUP- It is us ed to
com pens ate for freque ncy d istortio n to
imp rove its freq uency response in audio
sys tems(not applicabl e).
O ption s: EQ TYPE- It is fo r selec ting th e
Equ alizer Type, i n this unit, yo u
can choos e Mono, Roc k, Pop ,
Live , Danc e, Tec hno, Classic or
Soft .
BAS S BOO ST- It is use d to tu rn
the B ass B oost O N or O FF.
SUP ER BA SS- It is use d to tu rn
the S uper Bass O N or O FF.
TRE BLE B OOST- It is u sed to
turn the Tr eble B oost O N or O FF.
1 .1 T V DISPLAY - it is for sele cting t he ratio
of th e screen disp lay.
O ption s:Norm al/PS :Pan& scan m ode
Norm al/LB :Lette r box m ode
Wide:16:9 wide s creen mode
NOT E: The functi on ma y not w ork fo r some
discs .
1.2 A NGLE MAR K - it is used to sele ct
whet her or not th e multi- angle icon is
display on screen when a Mul ti-angl e DVD
disc is play ing.
O ptions : On: Icon w ill be d isplay ed
Off: Icon w ill be t urned off
3 VIDEO SETUP PAGE
1.3 O SD LA NG - It is us ed to c hoose the
desired OS D lang uage for diff erent user.
In th is play er, you can c hoose Englis h or
your nation langu age.
--VIDEO Q UA LIT Y PAGE-SHARPNESS
B RIGHTN ESS
C ONTR AST
H UE
SATU RATION
1.4 CAPTIONS - It is us ed to s witch the
capt ion ON /OFF when p laying DVD disc.
1.5 S CREE N SAVER - w hen t he pla yer is n ot
in us e for 2 minut es, a r unning DVD logo will
move across the screen to pro tect th e scre en.
O ptions : On: Screen save r is enabled
Off: Screen save r is dis abled
1.6 DE FAULT - It is used to con firm th e
setting being .
Reset :It is used to reset t he set ting.
MID
00
00
00
00
SHARPNESS
Quality -To adjust the quality of the picture.
3.1 SHARPNESS: You can set the sharpness
lev el by choose HIGH MEDIUM or LOW
herein.
23
Viewing from different angle
(DVD only)
S ome D VDs m ay co ntain s cenes which have
b een sh ot sim ultane ously from a numb er of
d ifferen t angl es. Fo r these discs , the s ame
s cene c an be viewe d from each of thes e
d ifferen t angl es usin g the ANGL E butto n.
P ress A NGLE durin g playi ng, nu mber o f ang le
b eing p layed will be displa yed on the s creen,
p ress th e ANG LE bu tton to chan ge to d ifferen t
a ngles.
MUTE
2 1 NEXT button -P ress this button to play th e next chapter(for DVD) or track(for V CD/CD).
2 2 PREV but ton -P ress this button to play th e prev ious c hapter (for DVD) or track( for VCD/CD) .
2 3 REPEAT button -Pres s this button to repeat pla ying o ne chapter o r one title (forDVD ) or
r epeat playin g the current track or the whole tracks (for V CD/CD).
2 4 A-B butto n -Pre ss this button to rep eat pl aying sections between t wo specific points (A-B).
2 5 SETUP button - Press this button to enter initial settings men u.
2 6 UP naviga tion button -Pres s this button to mo ve up.
2 7 RIG HT navigation bu tton -Press this bu tton to move right.
2 8 ENTER button --Press this button to confirm wh at you have selected.
2 9 MENU button -Press this button to return to the root m enu(for DVD) or to turn o n/off th e
P BC (for VCD ).
3 0 DOWN na vigation button -Press this button to move down.
3 1 VOLUME + button- Press this butt on to t urn up the volume .
3 2 VOLUME - button- Pr ess this button to turn down the volume.
STANDBY
1
2
3
4
5
6
7
8
9
0
10+
DISP
NUMERIC
BUTTONS
Initial settings
N/P
Basic connection
GOTO
Once the in itial pr ogram ming is ente red it i s
r etaine d in me mory until c hange d, the player can
a lways be ope rated under the sa me co nditio ns.
The s etting s will b e reta ined in the m emory
u nti l the settin gs are chan ged ev en aft er sett ing
the play er to t he sta ndby m ode.
PLAY/PAUSE
FR
FF
PR EV
NE XT
ZOOM
SLOW
A-B
RE PE AT
SETUP
ANGLE
PROGR AM ANGLE
SET UP
ENTER
Ensure all the cables are d isconn ected from th e mai n unit before conne cting to AC p ower
so urce b y AC p ower adapto r.
Re ad through the ins tructio ns be fore co nnecting oth er equ ipmen t.
ENTER
TFT MODE
Comm on procedure for ini tial settings
S TOP
SUBTI TLE
T IT LE
AV IN/OUT
AU DIO
MENU
VOL
Connecting to AC power sourc e
VOL
1 .Press SETU P button.
2 . Use the navigatio n buttons to select prefer red
item, and press EN TER button , each scree n
for se tting the valu e is di splaye d. The n mov e
the na vigati on but ton to set the item and pre ss
ENTE R button to c onfirm the s ettings.
3 .Press SETU P button to c lose s etup m enu in
any m ode.
To power o utlet
Main unit
N OTE:
Before conn ectin g to AC po wer, push the
POWE R ON /OFF swit ch to OFF.
AC adapter
4 .Use left nav igation butto n to switch to anoth er
main setup items
22
7
Connecting to monitor
Changing subtitle
language (DVD only)
1. Monitor Unit
F R ONT VIEW
1.S TANDBY button- Press it to se t the unit in
standby mode , press it again to ent er work
8
mode.
2. MENU button- Press it to ente r init ial
7
settings menu . Press it again to mo ve u p or
down t o select different OSD item.
3. RE MOTE CONTROL SEN SOR
4.LEFT but ton-Press it to move le ft to red uce
the level of different OSD i tem in OSD menu
mode.
5.RIGHT button -Press it t o move right to
adjust the level of different OSD item higher in
OSD menu m ode..
6.E XI T but ton- Press it t o exit the menu.
7.BUILT-I N SPE AK ER
8.TFT Di spl ay
12
3
4
It is p ossibl e to ch ange t he sub title la nguag e to
a diffe rent langua ge from the o ne se lected at
the in itial se ttings .( This opera tion w orks on ly
with d iscs o n whic h mult iple su btitle
langu ages a re rec orded )
1.Pre ss SU BTITL E butto n duri ng pla y, the
scree n will display the c urrent langua ge.
2. Pre ss SU BTITL E butt on aga in to c hange
langu age or turn o ff.
M UTE
03/0 7 :En glish
Subtitle
2
3
4
5
6
7
8
9
N/P
GOT O
C HANGING S UBTITLE LA NGUAGE
S ubti tle
1
DIS P
NO TE: W hen n o subtitles a re rec orded ,
press th is bu tton w ill not work.
5 6
STANDBY
0
10+
03 /07:Chinese
STOP
PLAY/PAUSE
FR
FF
PR EV
NE XT
ZOOM
S LOW
A-B
RE PEAT
ZOOM
P ROGRA M A NGLE
ZOOM PLAY
9
10
11 12
NAVIGATION
BUTTONS
ENTER
T FT MODE
SUBT ITLE
13 14
This function allo ws you to en joy a m otion or
moti onless pictur e.
Press ZO OM b utton w hen p laying , the s creen
shows:
SID E VI EW
9.P OWER SW ITCH
10.1 2V DC I N JAC K
11.AV IN JA CK -Connect DV D or ot her external
AV equipment to t his jack t o use the monit or.
12.PHONE JACK-C onnect h eadphone to this
jack for privat e listening.
13.VOLUME -Rotate this knob to adjust the
volume lower or louder.
S ETUP
2X
1/ 4
3X
1/3
S UBTITLE
T IT LE
AV IN/OUT
AUDIO
MEN U
VOL
VOL
AU DIO
4X
1/ 2
15
Press NAVIGATION b utton to scro ll acro ss the
enla rged p icture.
14.POWER INDICATO R- it is green i n wor king
mode; it is red in st andby mode.
Changing audio soundtrack language(DVD/VCD disc)
I t is po ssible to cha nge th e audio soun dtrack langu age to a diffe rent la nguag e from the o ne
s electe d at th e initial setti ngs (T his op eration work s only with discs on which multi ple audio
s oundt rack la nguag es are recor ded).
Pres s AUD IO but ton wh ile pla ying D VD dis c the screen will display the nu mber o f curre nt
soun dtrack langu ages,pressing the button again will ch ange the lan guage .
Pressin g AUDIO button wh ile pla ying V CD dis c will c hange audio outpu t mod e: Mon o Left ,
Mono Right, M ix-mo no and Stere o soun dtrack .
NOT E: Wh en no sound track langu ages are re corde d, pressing this button will no t
work .Whe n the p ower is turn ed on or th e disc is rem oved , the la ngua ge hea rd is t he
one select ed at the ini tial se ttings .
BACK VIEW
15. Stand H ol der- Push it out, you can
support and place the unit lev elly on t he
stage..
8
21
Repeat play
REMOTE CONTROL FOR MO NITOR UNIT
P ress R EPEAT butt on during pla y, the player will
r epeat playing one chapte r, one title or the whole
d isc(for DVD) or one track or the whole disc
( for VCD/CD).
N OTE: For VCD and CD d isc, yo u should tur n the
P BC off befor e repe at playing.
A-B repeat playing
M UTE
R epeat ing se ction s betw een tw o spe cific
p oints(A-B repeat)
1 . Pres s A-B b utton during play a t the p oint
wher e repe at play ing is to be s tarted (A).
2 . Pres s A-B b utton at the point where repeat
playi ng is to be en ded(B ). Rep eat pla y of
the s electio n betw een p oints A and B starts .
3 . Pres s A-B b utton to retu rn to n ormal play.
STANDBY
1
2
3
4
5
6
7
8
9
DISP
N/P
G O TO
GOTO
0
TFT MODE
10+
STOP
PLAY/PAU SE
FR
FF
P REV
NEX T
Z OOM
SLOW
A-B
REP EAT
PROGRAM ANGLE
Press TFT MODE button, the s creen will display:
SET UP
1. STANDBY bu tton - press it to se t the monitor
in s tandby mode ; pres s it again to s et the unit
in working mode .
2.M ENU b utton - Pres s it to enter O SD menu
con trol pa ge.
3.LEFT b utton -Press it to move le ft to re duce
the level o f diffe rent O SD item in O SD me nu
mo de.
4.UP butt on- pr ess it to sele ct up i tem in OSD
me nu pag e.
5.RIGHT button -Pres s it to move r ight to
adj ust the level of diffe rent O SD ite m high er in
OSD menu mode.
6.DOWN button - pres s it to select down item
in O SD menu pa ge.
NOTE: Po int the remote control fro m no more
than 6 m f rom th e monitor an d with in about 60 o
of m onito r.
1
4
2
5
3
6
A-B
REPEAT
2.Connecting to AC power source
ENTER
TF T MODE
TF TMODE
SUB TITLE
C ont rast
B righ tnes s
H ue
S aturatio n
S har pnes s
S cali ng
50
50
50
50
2
16:9
ENTER
TITLE
AV IN/OUT A UDIO
MENU
VOL
V OL
To power outlet
DC 12V( bla ck
ca ble )
AC adapt or
3.Connecting to DVD player
Mo ve the UP or DOWN navig ation button to
select Co ntrast, Brigh tness, Hue, S atura tion,
Sha rpnes s or Scaling, then p ress t he LEF T
or R IGHT navigation b utton to adju st the
lev el of th e sele cted it em.
NO TE: Th e leve l of Co ntrast , Brigh tness , Hue
and Satur ation c an be adjus ted 0-1 00. an d
the level o f Sharpness can b e adju sted 0 - 3.Th e S cal ing can be a djusted between 16 :9 and 4:3
two mode s. Pre ss TFT MODE butto n aga in to ex it the TFT M ODE M enu P age.
GO TO
To AV IN/OUT jack
on DVD player
DC power
AV cab le
Pre ss GO TO bu tton, then yo u can enter G OTO Menu page, move UP or DOWN navig ation
butt on to s elect the item you want to set a nd ent er a ti me nu mber, chapte r num ber, track
num ber et c,.Acc ording ly, the disc w ill be played from the sel ected point.
20
To AV IN ja ck
on m onito r
To car a daptor
p ower
NOT E: Set the DV D play er in AV mod e befor e the o perati on ,or it will b e usele ss.
The remot e contr ol is a lso effe ctive t o the m onitor during playin g.
9
It i s reco mmen ded to conne ct a m ulti-sy stem T V.
En sure t hat thi s play er and other e quipm ent to be co nnecte d are set to the sta ndby mode o r
off and d isconn ect th e AC a daptor before com mencing con nectio n.
Do not b lock ve ntilati on hol es of e quipm ent an d arra nge th em so that air can c ircula te free ly.
Re ad thr ough t he ins tructio ns bef ore co nnecti ng oth er equ ipmen t.
En sure t hat yo u obse rve the color codin g whe n conn ecting audio and video ca bles.
N ote:
During DVD play, the TV volum e ma y be at a lower leve l than during TV br oadcasts, et c.
If this is the case, adjus t the vo lume to the desire d level.
If the DVD/ VCD/C D pla yer is c onnec ted to the TV throu gh a v ideo c assett e reco rder,
the p icture may n ot be p layed back n ormally with some DVDs . If this is the case,
do not conn ect th e play er via the VCR.
On screen displ ay
information
W hen th e play er is u nder o peration, pre ss DISP
button c ontinu ously on the remot e cont rol, the
sc reen will dis play sequently parts of
in formation, all information and c lear
in formation.
Title Elapsed
TT 02/03 CH 07 /28
0:19:20
Title Remain
TT 02/03 CH 07/28
M UT E
STANDBY
1:17:00
1
2
3
DISP
DISP
Connecting to TV set
Chapter Rema in
TT 02/03 CH 07 /28
0 :01:34
Chapter E lapsed
TT 02/03 CH 07/2 8
NU MERIC
BU TTONS
0:0 1:53
4
5
6
7
8
9
0
10+
N/P
TV set
GOTO
Displa y Off
T T = Title No.
C H = Cha pter Nu mber
Red;Right audio
White:Left audio
STOP
PLAY/PAU SE
FR
FF
PREV
NE XT
Z OOM
SLOW
A-B
RE PEAT
PROGRAM
PR OGRAM ANGLE
Program play
To vide o inpu t/outpu t conn ector (yellow)
To audi o inpu t/outpu t conn ectors (red, white )
Vid eo/aud io cab le
AV IN /OUT
EQUALIZER
HD CD
Connecting to exterior signal sources
Exte rior DVD
To AV OUT jack
To AV IN jack
AV ca ble
10
ENTER
T FTMODE
The pl ayer p lays th e trac ks in th e disc in an
order you de sired.
1. Pre ss PRO GRAM butt on and the sc reen
will dis play t he pro gram m enu.
SU BTITLE
SET UP
TITLE
AV IN /OUT A UDIO
ENTER
NAVIGATION
BUTTONS
MENU
VOL
VOL
Program: TT(0 3 )/CH(-- )
1 TT: CH: 6 TT: CH:
2 TT: CH: 7 TT: CH:
3 TT: CH: 8 TT: CH:
4 TT: CH: 9 TT: CH:
5 TT: CH: 10 TT: CH:
Exi t
Ne xt
2. Press navigation buttons to ch oose m emor y
index, th en en ter des ired Titles/Chapters
numbers by using the numeric buttons. The
se lected Titles/Chapters will be stored into the
memory. Move navigation buttons to select
N EXT on the menu and press ENTER button,
then you can enter the next page, up to 20 trac ks can be stored.
N OTE: Leading zero is not necessary. If the track number is more than 10, pr ess the 10 bu tton
first and then the unit digit.
Example: Track 3, press "3"
Track 12, press "10+" and then "2"
Track 21, press "10+" twice and then “1"
3. To start program play, m ove navigation buttons to select START on the menu,
then press ENTER b utton.
4. To stop the program, press PROGRAM button and move navigation button s to select STOP
on the m enu, then press ENTER button to confirm. After th at, mo ve navigation buttons to
se lect EXIT on the m enu and press ENTER button to exit the pro gram m enu.
19
Connecting to audio equipment
JPEG CD
10 .Slide show effect s
Press PROGRA M button to select one o f the
eff ects when ch angin g from one p icture to
an other:
1
2
3
4
5
6
7
8
9
10
11
12
13
14
15
16
17
Aud io equ ipmen t
Wipe Top
Wipe Bo ttom
Wipe Left
Wipe Right
Diagonal Wipe Left Top
Diagonal Wipe Right Top
Diagonal Wipe Left B ottom
Diagonal Wipe Right Bottom
Extend From Centre H
Extend From Centre V
Compress To Center H
Compress To Center V
Window H
Window V
Wipe Fr om Edge To Centre
Move In Form Top
None
Vide o/aud io cabl e
To audi o input /outpu t conn ectors (red, white)
STANDBY
M UTE
1
2
3
4
5
6
7
8
9
DISP
Connect Headphones
N/P
GOTO
0
10+
PL AY/
PAUSE
10+
STOP
PLAY/PAUSE
NE XT
Enjoying Video C D with
playback control
FR
FF
PR EV
NE XT
ZOOM
SLOW
A-B
RE PEAT
PR EV
1. Con nect the Headphones.
Adjust t he volum e to minimize the vol ume .
Con nec t the headph ones to p hone jac k s .
2. Adjust the Volume to the level that you want.
PROGRAM
1 . When playing VCD 2.0 w ith PB C, the playe r
will sho w the VCD ve rsion and PBC sta tus on
th e scre en.
VCD 2.0
PBC ON
PROGR AM A NGLE
S ETUP
EN TER
NAVIGATION
BU TTONS
ENTER
TFT MODE
SUBTITLE
T IT LE
AV IN/OUT
AUDIO
ME NU
VOL
VOL
Installation of Monitors
Use su pplied moun ting st raps in stallin g the monito rs ont o the s eat ba ck in a car.
Tightly wrap the m ountin g strap arou nd the headrest.
2. After a fe w sec onds, a men u will a ppear on
the screen .
1 WHAT WILL I DO
2 HEA R ME CRY
3 WITHOUT YOU
3. Press n umer ic buttons to select corres pondin g track , if the track numb er is u nder 10 ,
cho ose o ne of t he num eric b uttons 0 ~ 9. If the
tra ck num ber is excee d 10, press 1 0+ bu tton
firs tly, the n pres s num eric b uttons 0 ~ 9.
4. Press N EXT o r PRE V button to p lay th e next
or p revious trac k.
NO TE: W hen P BC is O FF, th ere w ill be n o men u
pag e on t he scr een, y ou can selec t any track to
pla y by us ing nu meric butto ns. Wh en PB C is O N,ther e will b e a me nu pa ge on the sc reen,
and you c an sel ect an y track on the menu to pla y, how ever,w hen t he selected t rack is being
pla yed, y ou can not ch ange the pla y orde r any more e xcept press ing the MENU butto n to re turn
to t he me nu pag e aga in and select anoth er trac k to pl ay.
18
11
Remote control preparation
JPEG CD
A
Battery installation A
2
1.Ins ert the disc c ontain ing th e files in JPE G
forma t to be playe d and after a few s econd s,
the s creen will dis play:
OPEN
Insert the ba tteries while observing the correct
(+) an d (-) polaritie s as illustrat ed at right.
PUSH
ROTATI NG
00:0 0 0 0:0 0
D ir:002
1
8 .Flipp ing picture s
Pres s UP n avigation bu tton to flip th e
p icture vertic ally.
Pres s DOW N nav igatio n butto n to fl ip the
p icture horizo ntally.
G YM
Service life of batteries
PIC
The batte ries no rmally last f or abo ut one
year althou gh this depen ds on how o ften,
and for wha t operations, the re mote
contr ol is us ed.
If th e rem ote co ntrol f ails to work e ven
when it is o perate d nea r the p layer, r eplac e
the b atterie s.
Us e one t ype C R2025 battery.
LOV E
2. Se lect th e folde r you want to play by the
navig ation button s and press the EN TER
butto n to co nfirm.
3. Th e files in this folder are di splaye d and
selec t the d esired file by navig ation button s,
the s creen will dis play:
3
Vo lu me le ve l in di c ator
P layba ck in di c ator
Cu rren t file/ Total file s
N OTE:
Do n ot use recha rgeabl e (Ni-C d) ba ttery.
Do n ot atte mpt to recha rge, sh ort-ci rcuit,
d isass emble , heat or thro w the b atteri es
i nto the fire.
Do n ot drop , step on or otherwise im pact
t he rem ote co ntrol . This m ay da mage the
p arts o r lead to mal functio n.
If the remo te con trol is n ot goi ng to b e
u sed fo r a lon g time , remo ve the battery
00 :00 0 0:0 0
00 2/ 343
Curr en t fol d er
B
R EMOT E SENSOR
6m
Remote control operation range B
30 C
30 C
MUTE
Point the remo te con trol fr om no more than
ab out 6 m from the re mote contro l sens or and
within about 60 o of th e front of the playe r.
The o perati ng dist ance m ay va ry acc ording to
th e brigh tness of the room.
NOTE:
Do no t point bright lights at rem ote co ntrol
se nsor.
Do no t place objec ts between t he rem ote
co ntrol a nd the remo te con trol se nsor.
Do no t use t his rem ote control unit wh ile
si multan eousl y oper ating t he rem ote co ntrol
of any o ther eq uipme nt.
12
PIC
AL AN
BUZ Z
FL OWER
DIANA
MAN DY
SIMPS ON
4
S TANDBY
1
2
3
4
5
6
7
8
9
0
10+
FR
FF
PREV
NEXT
ZOOM
SLOW
A- B
REPEAT
DISP
N/P
GOTO
STOP P LA Y/PA USE
PROGRAM ANGLE
T FTMODE
SUBTITLE
SETUP
E NT E R
TITLE
AV IN /OUT AUDIO
MENU
VOL
VOL
Reso luti on
9. Zo om/Sh rink p icture s
Pr ess ZO OM b utton t o ente r the z oom
mode
Pr ess FF butto n to en large pictur e to
100% , 125 %, 150 % and 200%
Pr ess FR butto n to sh rink p ictures to
50% , 75%, and 10 0%
512 X 640
then pr ess the PLAY /PAUSE or E NTER
b utton to star t playb ack, O ne pic ture w ill skip
to the n ext pic ture a utoma tically for ev ery 5
s econd s.
4 . Pres s REP EAT bu tton to chan ge rep eat
m ode:
- SH UFFLE : All th e files will b e rand omly
sor ted an d play ed by t he ord er.
- RA NDOM : rand omly s elect any fil e to
pla y.
- SIN GLE: play o ne file only.
- RE PEAT ONE: repeat one fi le.
- RE PEAT FOLDE R: all the fil es in th e
fold er will be pla yed re peate dly.
- FO LDER : all the files in the f older w ill be
pla yed
5 . Pres s the S TOP b utton when playing , then
y ou will enter previe w mod e.
6 . Pres s the M ENU button when playin g, then
y ou wil l retur n to th e MENU.
7 . Rota ting p icture s
P ress R IGHT or LEF T nav igation butto n to
r otate t he picture clockwis e or co unter c lockwise.
ZO O M 2 00%
ZOO M 50%
I f the p icture is enla rged, you may press
n aviga tion bu ttons to see other portion s of
t he pic ture.
17
Before enjoying DVD/Vi deo C D/CD
The on -scree n men u lang uage of you r playe r
has be en fac tory pre-set to Eng lish. If you
want to chan ge the menu langua ge to other
langua ge,ple ase re fer to "Initial settin gs /
Gener al setu p / OSD lang ".In th e expl anatio n
below it is as sume d that Englis h has b een
selected as m enu langua ge.
Volume level indicator
Pla yback indica tor
Current file/ Total files
00:00 00:00
001/124
C urrent folder
GIFT
Mp4
Mp4
Mp4
Mp4
Mp4
Mp4
ALAN
BUZZ
CANDY
DIANA
MAND Y
SIMPS ON
MUTE
Basic play
STANDBY
MUTE
1
2
3
4
5
6
7
8
9
DISP
DISP
NUMERI C
BUTTONS
4.Press the NEXT or PREV bu tton pl ay the
next or prev ious fi le.
5.Press the GO TO butt on to play the disc
from the certain p oint as you want to.
6.Press the DISP button to display the
playing info rmatio n, the time remain, the
time elapse d and so on.
7.Press RE PEAT button to change p lay
mode .
-SHUFFLE : All th e files will be randomly
sorte d and played by the order.
-RANDOM : rand omly s elect any file to
play.
- SIN GLE: p lay on e file only.
-REPEAT O NE: re peat one file.
-REPEAT FOLDER: all the file s in th e folder
will b e played repeatedl y.
-FOL DER: all the files in the fo lder will be
playe d
N/P
GO TO
GOTO
0
FR
10+
FF
S TOP
PLAY/PAUSE
PR EV
NE XT
PLAY/
PAUSE
PREV
NEXT
REPEAT
Z OOM
SLOW
A-B
PROGR AM ANGL E
REPE AT
SET UP
ENTER
TFT MODE
SUBT ITLE
T IT LE
AV IN/OUT
AU DIO
ENTE R
NAVIG ATION
BUTTO NS
1. Switch on the PO WER to the ON
position at th e righ t side of the player to turn
on the player.
NOTE: 1).Ma ke sure that all the conne ctions
including con nectio ns to A C ada pter, other
AV equ ipmen t etc. have b een do ne be fore
switch the PO WER switch to the "ON"positio n.
2).Afte r switc h the POWE R swit ch to t he
"OFF" position, if y ou wa nt to s witch i t to the
"ON"p ositio n again, you should wait a t leas t
2 seco nds, o therw ise som e unn ormal
pheno menon s may appea r, in th is cas e,
please turn the unit off the n turn it on, it will
work n ormall y agai n.
2. Pus h the d isc co ver up to ope n it .
VOL
1
2
3
4
5
6
7
8
9
0
10+
DISP
NUMERIC
BUTT ONS
N/P
GOTO
PLAY/
PAUSE
STOP
PLAY/PAUSE
FR
FF
P REV
NEX T
Z OOM
SLOW
A-B
REP EAT
PROGRAM ANGLE
SET UP
ENTER
TF TMODE
PREV
NEXT
ENTER
NAVIGATION
BU TTONS
M ENU
T ITLE
SUB TITLE
T ITLE
AV IN/OUT AU DIO
Open
MENU
VOL
STANDBY
MENU
VOL
V OL
V I D E O
3. Pla ce a d isc on to the disc co mpart ment.
Hold the dis c with out tou ching either of its
surfa ces, position it with the pr inted title sid e
facing up, a lign it with th e guid es, an d place
I tin i ts prop er position.
4. Aft er clos ing the disc cover , play b egins .
The p layer starts to read the disc imm ediat ely.
NOTE: The player can only pla y the disc
with M PEG- 4 form at.
The d isc wi th other form ats may not be
playe d on this unit .
Loading
Dvd - Video
V I D E O
V I D E O
5. W hen a menu scree n appears on the s creen, move navigation b uttons or pre ss the nume ric
but tons to selec t prefe rred c hapter numb er, the n pres s ENT ER bu tton to play t he cha pter.
1
2
3
4
WHAT WILL I DO
HEAR ME CRY
WIT HOUT YOU
MOVE CLOSER
WITH OUT YOU
6. Press PREV or NEXT but ton to play th e prev ious or next chapte r.
7.To stop play a nd ret urn to the me nu screen, p ress T ITLE button or MENU button.
16
13
Stopping play
Slow-motion play (DVD/VCD )
Pre ss the STO P butto n to st op pla ying a disc.
NOTE: W hen pl ayer is stopp ed, th e playe r
reco rds th e poin t wher e STO P was press ed
(RE SUME function). P ress th e PLAY/PAUSE
butt on aga in, pla yback will re sume from t his
poin t . Wh en the disc d oor is opene d or th e
STO P but ton is p resse d agai n, the RESU ME
func tion will be c leared .
STANDBY
M UT E
Skipping ahead or back
Pres s the S LOW b utton o n the remo te cont rol
durin g playb ack.
1) Pl ays the disc a t a 1/2 of nor mal sp eed a t
first. Each t ime the butto n is pr essed, the
play S peed becom es 1/2 ,1/4,1 /8,1/16 .
2) Pr ess th e PLAY/PAUSE bu tton to resum e
to nor mal pl ay.
1
2
3
4
5
6
7
8
9
0
10+
DI SP
Skipping ahead
Pre ss NEX T
butto n during play
A ch apter (DVD) or a track (V ideo CD/CD) is
skip ped each tim e the button is pre ssed.
Skipping back
Pre ss PRE V
butto n during play
A ch apter(DVD) or a track (Vi deo C D/CD) is
skip ped each tim e the button is pre ssed.
N/P
STANDBY
MUTE
GOTO
STOP
PLAY/PAUSE
FR
FF
FR
Z OOM
FF
SLOW
PRE V
A -B
PR OGRAM AN GLE
NE XT
PLAY/
PAUSE
STOP
NEXT
1
2
3
4
5
6
7
8
9
0
10+
DISP
NUMERIC
BUTTONS
PREV
RE PEAT
SE TUP
ENTER
T FT MODE
Mp4 playback
N/P
1.In sert the disc contai ning th e files in Mp 4
form at to b e play ed and after a few second s,
the s creen of the monit or will show all the
fold ers on the dis c:
GOTO
SLOW
PLAY/
PAUSE
S TOP
PLAY/PAUSE
FR
FF
PR EV
NE XT
ZOOM
SLOW
A-B
RE PE AT
PREV
NEXT
REAPET
SU BTITLE
TIT LE
AV IN /OUT
AUDIO
MEN U
V OL
VOL
Fast forward or backward
00:00 00:00
001/124
PROGR A M ANGLE
SET UP
ENTER
TFT MODE
MUSIC
D uring playba ck, pre ss FF
button o r FR
b utton t o fast forwar d/rewi nd.Pre ss PL AY/
PAUSE button to res ume n ormal play.
SONGS
Fast forw ard
2X
FF4X
FF 8 X
FF 16 X
32 X
2. Select the folder you w ant to play by the
n avigat ion bu ttons and pre ss the ENTER
b utton to conf irm.
Fast back ward
2X
FR 4 X
F R 8X
SUBTI TLE
T IT LE
AV IN/OUT
AU DIO
MENU
LOV E
32 X
FR 16 X
3. The files in th is fold er are displa yed a nd
select the desire d file by nav igation butto ns,
the n pres s the P LAY/PAUSE butto n to sta rt
pla yback.
Pause or play
D uring playba ck, pr ess PL AY/PA USE b utton, the play will be paused, To resume no rmal p lay,
p ress th e PLAY/PAU SE bu tton again.
14
15
VOL
VOL
ENTER
NAVIGATION
BUTTONS