1
DISHWASHER:
MDB/C-2
_t_IY
INgRgCTIONS
.........................
Page 1
Installer: Please leave thismanualwith
this appliance.
_I)II_
.....................................................
Pages 2-3
Consumer:,Please read and keep this
manualfor futurereference.Keep sales
receiptand/orcansefledcheckas proofof
purchase.
"_ABLE DISHWASHER
......................
Page 4
Model Number
_SlilNG
SerialNumber
_ROLS
ESSENTIALS
.................
Page 5
ATAGLANCE
.............
Pages
6-7
%_[_ILATIN6
TIPS
................................
Page
7
DateofPurchase
_L
CARE
ITEMS
............................
Page
8
_AND
CLEANING
...........................
Page
8
'_YOU
If youhaveqLM_I_S,carl:
CALL
..........................
Pages 9-10
_Y.
1-800-688-9900(USA)
1-800-688-2002(CANADA)
1-800-688-2080( U.S.TrY for
hearingor speech impaired)
(Mon.-Fd.,8 am-8 pm EasternTime)
Intemet: I'dtp:llvwt#.maytag.com
.................................................
Page 11
DEL'UTILISATEUR
..................
Page 12
_DEL
USIIARIO
..............................
Pa_,24
Forserviceirzfonzmt_n,
seepage11.
Part NO. 6 917071A
'
,
htt p://www.m
ayt
ag.com
99002462
Lilho U.S.A.
IMPORTANT
SAFETY
INSTRUCTIONS
.
.
9.
Productswitha (_)label havebeen listedwith Underwriter's
Laboratories,Inc. - those with a CSAtag have been listed
with CanadianStandardsAssociation.Nevertheless,as with
any other equipment using electricity and moving parts,
thereis a potentialhazard.
,
Readall instructions
beforeusingthedishwasher.
2.
Use the dishwasheronly for its intendedfunction.
3.
Disconnect electrical power to dishwasher before
attemptingto service.
,
.
6.
Toavoid electricalshockhazard,the sides and back
must be enclosed and the front panels must be
attached before electrical power is applied to the
dishwasher.Refer to the installationinstructionsfor
proper groundingprocedures.
Connect to a properly rated, protected and sized
power supplycircuitto avoidelectricaloverload.
Do not touch the heatingelementon the bottomof the
tub during or at the completionof a cycle. It willbe hot.
Use onlydetergentsand rinseadditivesdesignedfor an
automaticdishwasher.Never use soap, laundrydetergent, or hand washing detergent in your dishwasher.
Keep these productsout of reachof children.
10. Do not sit, stand on or abusethe door or dish racksof
the dishwasher.
11. Under certain conditions, hydrogengas may be produced in a hotwatersystemthat has not been usedfor
twoweeksor more. Hydrogengas is explosive.Ifthe
hotwatersystemhasnotbeenusedfor sucha period,
turnon all hotwaterfaucetsand let thewaterflow from
eachfor severalminutes.Thiswillreleaseanyaccumulated hydrogengas. As the gas is flammable,do not
smoke or usean openflameduringthisprocess.
12. Do not washplastic itemsunless marked"dishwasher
safe"or the equivalent.Forplasticitemsnotso marked,
checkthe manufacturer'srecommendations.
13. Do not tamperwithcontrols.
14. To prevent accidentalchild entrapmentand suffocation
risks, alwaysremovethe doorto the washingcompartmentwhen removingan old dishwasherfrom serviceor
discardingit.
15. Usecautionwhen unloadingthedishwasher.Disheswill
behot if unloadedshortlyaftera cyclehascompleted.
Children should never be permittedto operate, or
play in, with,or aroundthis dishwasher.
Save These Instructions
]
To reduce the risk of injurywhen loading items to be
washed,sharpor pointeditemsshouldbe locatedwith
the handlesup.Also, load sharp items so they are not
likelyto damagethe door seal.
for Future
Reference
lOADING
BEFORE
YOU
START
>
>
Don'tprerinse.Simplyscrapeoffany
bonesor largefood particles.
GENERAL
RECOMMENDED
LOADING
(Rackfeaturesvarybymodel)
RECOMMENDATIONS
For best dishwashing results follow the
Place all items in the racks so they guidelines below to determine the best
If connected
to a foodwastedisposer,
are separatedand facingcenter.
arrangementfor your items.
make certainthe disposeris empty
beforestartingthe dishwasher.
>" Itemscan be centeredbehinda single
tineor loadedat an angle to maximize
Scrapeoff tomato-basedfood soils
space.
(see page8).
Loaditemssothey do notrest overthe
Removecertainfoods (suchas mustop of thewashtower.
tard, mayonnaise,lemon juice, vineAvoid blocking the upper and lower
gar,salt or dressings)from stainless
spray arms by not allowing items to
steel flatware as soon as possible.
extendbeyondthe racks.
These foods may causerustingand
pittingif allowed to remainin contact
withthe surfacefor an extendedperiod oftime.
UPPER
RACK
,:
J
_,
r_
10 Place
¸
Settings
Glasses, cups, stemware, light-weight
plastics, small plates, bowls, pans, longhandledutensilsetc. can be loaded in this
rack.Do not load glassesover the tines.
ADJUSTABLE
UPPERRACK
(Select models)
againstthe outerrack or to the hghtto rest
on top of lightitems.Do not load itemson
top of the wire.
TheStack-Rack(selectmodels)
on theright
sideof theupperrackfolds up or downfor
loadingflexibility.
Foldit downto holdlonghandledknives, spatulas and spoonsor
short_temslikecupsorjuiceglasses.Foldit
upfortalleritemslikeglasses,bowls,plates, The wavy wire on the Vari-Lock"
etc.
Snugger(select models) and the StackThe Vari-Lock"Snugger(selectmodels) Rack (selectmodels)is designedto hold
on the left secures lightweight items in stemwarein place.Tallerstemwarewillfit
place.It can be adjustedby graspingthe betteron therightsideas theupperrackis
wavywireand rotatingit lefttosnugitems deeperon this side.
The Adjustable Upper Rack can be
raisedto accommodate
tallerplates,platters,pans,etc.loadedin thelowerrack.
Toraisetherack:
>" Pull the rack fully out.
Graspthe handleon the rear dghtside
of the rack.
>- Lift andpulltherack slightlyforwardto
lockup intoplace.
Tolowerthe rack:
>- Pull the rackfully out.
>- Graspthe handleon the rearrightside
of the rack.
>- Lift and push the rack slightty back to
lock back downinto place.
I Face soiledsurfacestowardsthe
centerof thedishwasher.
IOkDIHG
(OHTiNUED)
LOWER
RACK
A variety of large items such as dinner
plates, mixing bowls, pots and pans and
bakingdishes can be loadedin this rack.
3 saucersare
loadedonthe
Back
Tall items such as bakeware and large
platters can be placedon the left side or
acrossthe back of this rack.
Stack-Rack Shelf
(select models)
10 Place Settings
Positioningthe Fold-Away"Tines (select
models) fiat in the back, left cornerprovidesconvenientloadingspacefor large,
bulkyitemslike pots and pans or mixing
bow]s.
Back
With theStack-Rack(selectmodels)shelf
raised, thin items like cookie sheets or
pizza pans may be placed along the left
side. With the shelf down, two levels of
glassesand cups can be loaded.
REMOVABLEUTENSIL
BASKET (Design varies by model)
For best cleaning results,prevent items
from nesting together by placing some
items in the basket with handles up and
some with handles down. Load knives,
handlesup,throughthe slotsin the hinged
coveredsection(s)(whenclosed).
3
rack for loading miscellaneousitemsand
utensils.This is also a safe place
to load sharp knivesand
pointeditems.
Be sure that thin, finelypointeditemsdo SPLIT & FIT UTENSIL
not extend through the basket. BASKET (Select models)
This could block the lower
The splitsilverware
basketcanbe separatwasharm.
ed and placedin severallocationsin the
Small, lightweight items bottomrack. Holdthe basketfirmly along
like baby spoons and the sides. Follow the unlock direction
spoons arrowsimprintedon the basketand slide
should be placed in the
the basketapart until it
section(s) with the hinged
splitsinto two.
cover(s).
Load flatware
and
utensils into
ODDS & ENDS BASKET
beth
sections
or just
(Select models)
he, depending upon
Usethissupplemental
basketinthe upper
your load.
ConvertibleTines (selectmodels) in the
back, right comercan be adjustedto provide narrowspacingfor loading platesor
widespacingfor loadingdeep bowls,pots
orpans.Fliptinesupfor narrowspacingor
downfor widerspacing.
REMOYIHG
THE
UPPER
RA(K
The upperrack can be removedwhen tall
or oversizeditems need to be loaded into
the lowerrack.
TO REMOVE:
_- Roll the upper rack 1/3 to 1/2 of the
way out.
>- Removethe plasticrack stop from the
end of each track. To remove each
plastic rack stop, push inward
(towardsthe rack)on the ridged area
of the rack stop. The rack stop will
snapopen and can be easilyremoved
by pulling straight out. Take care to
supportthe track while removingrack
stops.
Roll the rack all the way out of the
track and removefrom the dishwasher.
Reverse the above procedure to
replace the upper rack into the dishwasher.
Rack
Stop
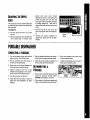
PORTABLE
DISHWASHER
CONNECTING
k PORTABLE
1. Turnon the faucet at the sink untilthe
water runs hot.Turn off the faucet.
7. Pull the electricalcordfrom the recess. 3. Push the connectorand hoses back
into the cabinetrecess.
Plug it into a properlygroundedoutlet.
2. Pull the connectorfrom the recessin
the back of the dishwasher.
8. Select the proper cycleand optionsfor
the load and startthe dishwasher.
3. Press down on the thumbreleaseand
lift the connectorontothe faucet.
DISCONNECTING
A
PORTABLE
4. Remove pressure from the thumb
releaseand tug slightlyon the connector to be sure it is securelyin place.
1. Be sureto turn the watersupplyoffand
press the pressure release button
5. Turnthe hot water on full force.
BEFOREremovingthe connector.
6. Check thatthe sink drain is open so
water from the dishwashercan drain 2. Pressdown on the thumb releaseand
removethe connectorfrom the faucet.
properly.
4. Unplugthe electricalcord and push it
back into the cabinetrecess.
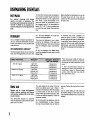
DISflWASHING
ESSENTIALS
HOT
WATER
For optimal cleaning and drying
results, hot water is necessary.The
incomingwater temperatureshould be
120-140° F (49-60° C) to propertyactivatethe detergentand meltgreasyfood
soils.
To checkthe incomingwatertemperature, Beforestartingthedishwasher,
turnon the
turn on the hot water faucet nearest the hot water faucet and let it run untilthe
dishwasher
andletit runintoa glassinthe waterishot.This assuresthattheinitialfill
sink. Place a candy thermometerin the ofwateris hot.
glassand checkthe temperatureonce it
has stoppedrising.If the temperatureis
below120° F (49° C), havea qualifiedpersonraisethe waterheaterthermostatsetting.
DETERGENT
ing. Too muchdetergentcan cause permanentetching/cloudiness.
Use a detergent designedspecificallyfor
usein an automaticdishwasher.Be sure it
isfresh andstored in a cool, dry place(not
underthe sink).
The amount of detergentto use is determined by the hardness of the water and
soil levelof the load. Referto the following
chart for detergent usage recommendations.
RECOMMENDEDAMOUNT
In extremelyhard water conditions (13
grainsper gallon or more*),it is difficultto
achievegood resultswith anydishwasher.
A mechanicalwater softener may be necessaryto improvewater quality,detergent
effectiveness,and protect the dishwasher
partsfrom the damagethat hardwater can
cause.
Do not use detergent with Rinse Only.
Toolittledetergentresultsinpoor cleaning, Leavethedetergentlid openwhenrunning
hard water filming/spottingand poor dry- Rinse Only.
Soft (0-4 gpg)
Light Soil
Normal Soil
Heavy Soil
5 teaspoons
6 teaspoons
8 teaspoons
Medium (5-9 gpg)
Light Soil
Normal Soil
Heavy Soil
7 teaspoons
8 teaspoons
10 teaspoons
Hard (10-12 gpg)
Light Soil
Normal Soil
Heavy Soil
9 teaspoons
10 teaspoons
12 teaspoons
RINSE
AID
The clearwindowin the centerof the dis-
pensercap allowsyou to see if there is
rinseaidin
thereservoir.
Whenthewindow
Regular use of a rinse aid improves
is
colored,there
is
rinseaid
in the disdrying, reduces spotting and filming,
and reducesmoistureleft on the dish- penser.'Whenthe windowbecomesclear,
it istimeto refillthe dispenser.Checkthe
washerinterior.
dispensermonthly.
Your dishwasher features an automatic
rinseaid dispenserlocatednearthe deter- To add rinseaid to thedispenser,turnthe
cap counterclockwise
to open. Remove
gent cups in the door.
the cap andpour liquidrinseaid intothe
S
*Your local water utility or state university extension service can teflyou
the degree of water hardness in your
area.
** Add recommended amount of
detergent to both compartments for
AutoClean, Heavy or Normal wash
cycles, and to the main cup only for
the Light wash cycle.
opening.Replacethecapand turnitclockwise.
Use the LESS setting for soft waterand
the MORE settingfor hard water.Set the
cap anywherebetweenthese amountsas
needed.
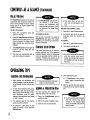
CONTROLS
ATAGLANCE
CYCLES
ANDWATER
USAGEHEAVYWASH
AUTO CLEAN (Selectmodels)
RINSE ONLY
Longcyclefor heavyfoodsoils.10 gallons. Rinsesdishesbeingheld untilthere is a
full load.Controlsodors.2 gallons.
NORMALWASH
Manufacturer's
recommendedcyclechoice
for all day-to-day
soiltypos.
Medium cycle for average food soils.
Dependingon the numberof fills, water
Normal dishloads vary from day to day. usagerangesfrom 4 to 8 gallons.
Auto Clean is recommendedbecause it
selects the numberof fillsand wash time LIGHT WASH
best suited for the soil levelof each load.
Shortcyclefor lightfood soils. Depending
Dependingon the numberof fills required
onthe numberof fills,waterusageranges
waterusagerangesfrom 4 to 10 gallons.
from 4 to 6 gallons.
OPTIONS
TOUGHSCRUB"or TOUGH
SCRUB"PLUS(Selectmodels)
I Cyclefimesshownin thenumerical
display(selectmodels)increase
or
decrease,based on each load's
soil level, water temperatureand
selectedoptions.
finalrinsecycle. If necessary,the heating resultsin hard watersituations. The extra
elementwillturn on and the cycle will be rinseis already built into the cycle when
extendedto heat water to the propertem- Heavy Wash is selected.
perature.
HEATEDDRY
Select AccuTemp"withany cycle(except
Rinse Only) to assure proper hot water Select Heated Dry to turnon the heating
temperature
andtoenhancedryingresults. elementduringdry for enhanceddrying
results.WhenHeatedDry is notselected,
SANITIZE (Select models)
toweldryingof some itemssuchas plastic
and teflonmay be necessaryand more
Select Sanitize with Auto Clean (select
moisture may be noticedadheringto the
models),Heavy, Normal,or Light Wash
interior. With eitherdryoption,
to sanitizedishware. At the end of the dishwasher
it is normalto noticevaporescapingfrom
For baked-on,dried-onsoils, selectHeavy cycle,whenthe cyclemonitor recognizes
the door vent.
havebeenmet,
WashabngwiththeToughScrub"orTough thatthe proper conditions
the SANITIZEDlightilluminates.
Scrub" PlusopEon.
Select ToughScrub" or ToughScrub"
Plus when washingloadswith hard-toremove food soils. Tough Scrub" or
ToughScrub" Plus can be selectedwith
anycycle(exceptRinseOnly). Depending
onwhichcycleisbeingused,selectingthis
optionaddsfills, heatand/or washtimeto
thewashcycle.
DRAIN/OFF
ACCUTEMP (Select models)
EXTRARINSE (Selectmodels)
AccuTemp"providesa watertemperature Select Extra Rinse to add a rinseto the
checkin the mainwash and also in the cycle. An extra rinse helps to improve
INDICATOR
LIGHTS
The CLEANlightilluminatesattheendof
the cycle and remains lit until the door
TheSANITIZED(selectmodels)lightillumi- has been open for 30 seconds continuously.
nateaat the end of the cycle whenconditionshavebeen mettoachievesanitizatJon.The DRY lightilluminatesduringthe entire
dry periodand goes out whenthe cycle is
completed.
I WhenSanitizeis selected,cycles
are monitoredto assure sanitizalion.Unusuallylowwatertemperaturewillpreventthe sar_dzation
protocolfrom beingsatisfiedand
the SANITIZEDlight wiltnot illuminateat theend ofthecycle.
The WASHlightilluminatesduringall dnse
and washportionsof thecycle.
The HEATING DELAY light illumina_s
whenthe cycle is being extendedto heat
thewater.
To drainthedishwasher
andthenturnitoff,
pressDrain/Offonce.PressDrain/Offtwice
toturnthedishwasheroff without
draining.
The CLEANandSANITIZED(selectmodels) indicator lights will not reilluminate
after a powerfailure untilafterthe next
cycleis run.
CONTROLS
ATAGLAHCE
(CONTINUED)
DELAY/RESUME
The Delay/Resumeoption can be usedto
automaticallystartthe cycleat a latertime,
such as during off-peakhoursfor reduced
energy cost or to reduce daytime heat
buildup in the home.
TO SET UPA DELAY:
1. Select the appropriate cycle and
optionsfor the load.
2. Press the Delay/Resumepad untilthe
desired amount of delay time (1 to 9
hours) is selected.The delaytime will
begin counting downwhen the pad is
released.
I If Delay/Resumeis chosenwithout selecting a cycle and/or
options, the dishwasher will
selectthelastcycleused. (Itwill
not rememberthe Rinse Only
cycle.)
TO CANCELA DELAY:
SETTINGTHE CONTROLLOCK:
1. Pressthe {_ padfor three seconds.
2. An indicatorlightabovethe pad will
illuminate when the controls are
locked.
Wait at least 2 seconds,then pressthe
Delay/Resumepad again. The indicator
lightwill go out and the cyclewillstartor TO CANCEL:
resumeimmediately.
1. Pressthe _ padfor threeseconds.
CONTROL
lOCK
OPTION
2. The indicatorlightwillgo off.
3. The Delay/Resumeindicator lightwill
remain lit until the delay time has
The control touchpads con be locked to
counteddown.
prevent unwanteduse. If this feature is
4. The cycle will automatically
start as activatedbetweencycles,the dishwasher
cannot be operateduntilthe controlsare
soon as the delaytime expires.
unlocked. If desired, the controlscon be
locked aftera cycleor delayhasstarted.
I If a cycleor optionpad ispressed
after the controls have been
locked,the indicator light above
the Control Lock pad will flash
five times.
OPERATING
TIPS
STARTING
THE
DISHWASHER
4. Closeand latch the door.
I
.
,
After loading the dishwasher and
adding detergent,close the dishwasher by pressingthe door until the latch
clicks.
=
After five seconds,the cycleresumes
automaticallyat the point of interruption.
ADDING
AFORGOTTEN
ITEM
To start the dishwasher,firmly press
the desiredcycle and optionspads.
For best cleaning, the forgotten item
After a pause,thefill will begin.Topreshouldbe added earlyin the cycle.
vent unplanned cycle or option
changes,these selectionsare "locked 1. Press the Delay/Resume pad or
in"after 1 minute.
unlatchthedoor.
3. The indicatorlights for the selected 2. Wait for the watercirculation
to stop.
cycle andoptions willglow.
3. Openthe door and add the item.
4. To cancel an option, press the pad
again. To cancel a cycle, press the
DmintOffpad.
7
If Delay/Resumewas pushed,
pushit again to restart the dishwasher.
I If a cycleoroptionpadispressed
after the controls have been
"locked in", the indicator light
abovethe ControlLock padwill
flashfive times.
SPECIAL
CARE
ITEMS
Mosttableware,cookwareand flatwarecan safelybe washed in your dishwasher. If you haveany doubtsabout an item,check
with the manufacturer.
Aluminum
Yes, except anodized.
High watertemperatureand detergentsmay affectfinish.
Cast Iron
No
Seasoningwill be removed,and ironwill rust.
China/
Stoneware
No, if antiqueor handpainted,
Alwayscheck manufacturer'srecommendationbeforewashing.Antique,hand-painted or over-the-glazepatterns may fade. Goldleaf may discolor.
Crystal
No, if antiqueor delicate
crystal,
Alwayscheckmanufacturer'srecommendation
beforewashing.Some typesof leaded crystal may etch withrepeatedwashings.
Furnace Filters
Not recommended.
May leave a dingy depositor stain on dishwasherinterior.
Glass
Yes
Milkglasscan yellow with repeateddishwasherwashing.
Gold-Plated
Flatware
No
Will discolor.
Pewter,Tin
No
Plastics
Yes,toprack.
Always checkmanufacturer'srecommendationbefore washing.Plasticsvaryin their
capacity to withstandhigh watertemperaturesand detergents.Disposableplastic
itemsare not dishwashersafefor thisreason.
Stainless Steel
Yes
Runa RinseOnlycycleif notwashingimmediately.
Prolongedcontactwithfoods containingsalt, vinegar,milkproductsor juicecoulddamagefinish.
StealingSilver or
Silverplate
No, if hascommercial
"darkening'.
Always checkmanufacturer's
recommendation
beforewashing.Runa RinseOnly
cycleif not washingimmediately.Prolongedcontactwithfood containingsalt, acidor
sulfide (eggs,mayonnaise and seafood)could damage finish.Commercial"darkening" may be removed by detergent.
Wooden Items
No
Wood may warp, crackor discolor.
CARE
AND
CLEANING
INTERIOR
EXTERIOR
Formoderateto heavysoil,cleanwithBee
Ami*,usinga softclothor damp sponge.
luster
andtoremove
Thedishwasher
interior
is normallyself-.clean-Thefront ofthedishwashercan be cleaned Rinseanddry.Torestore
streaks,
f
ollow
with
StainlessSteel
Magic
ing,Pedodicaliy
checkthe bottomofthe dish- witha softdampclothandliquid
spraycleanSpray*.
washertubto seeif any largepartlotashave er. Do notuseabrasive
powders
or cleaning
For discoloration, wipe with Cameo
not gone throughthe strainerportionof the pads.
module.
StainlessSteelCareand Cleaning(select Stainless Steel Cleaner*, usinga damp
sponge
or softcloth.Rinseimmediately
and
Wipetheedgeoftheinnerdoorlinertoremove models)
dry.Torestore
l
uster
a
ndtoremove
streaks,
anyfoodsol] splashes
whichoccurred
during > Donotuseacleaningproductcontaining
follow
withStainless
SteelMagicSpray*.
loading.
chlerine
bleach.
Thecolorfromsometomate-based
foodsoils
>" Alwayswipewith the grainof the stainhas been knownto occasionallyadhereto
lesssteel,
todaysdishwasher
tubs,causingtemporary
disFor dailycleaningand light soil, usea soft Fill both detergent cups with a fresh-scanted
coloration.
Whenwashinga loadof dishessoiled
tomatosauce:
>- Scrape
excess
tomatoJaaeed
foodsoils_ of
dshes,pdortoloading.
Donotprewash
the
dishes,
however.
>" RuntheHeavyWashcycle.
STOI GE/ ¥1NG
cloth or spongeand one of the following:IV#,d
detergentand water,a solutionof whitev]neger
and water, Formula 409 Glass and Surface
Cleaner* or a similar muW-sorfacecleaner.
Rinseand dry. To polishandto help prevent
fingerprints, followwith Stak'dessSteel Magic
Spray* (part No.20000008)**.
dishwasher detergent or baking soda and
select the Normal Washcycle.Allow the dishwasher to complete the cycle.Then turn the
water supply off and drain the dishwasher.
To
drain, pressthe Drain/Offpad once. Operate
the drain twiceto ensure most of the wateris
removed.Last,disconnectthe electricalsupply
and propopen the door. (SeeImportantSafely
Instructions,#14, page 1).
BEFORE
YOU
CALL
CHECK
THESE
POINTS
TO HELP SAVE YOU TIME AND MONEY.
Be sure door is latchedsecurely,
Be surethe wateris turned on.
Check that the pad is properly selectedfor a cycle.
Allow time to pause beforefilling.
Check your home'scircuit breaker or fuse box.
Check inlet hosefor a kink.
Check water valve inlet for sedimentand clean if necessary.
If hookedupto a foodwastedisposer,besuretheknock-outis removedfromthedisposerinlet.
Besurethedrainhoseiselevatedat least32"sowatercannotsiphonbackintothetub.
Checkforfoodobstructionin thedrainor disposer.
Checkdrainhosefora kink.
Checkyourhome'scircuitbreakeror fusebox.
Checkthatthecycleis completed.
• This is normal. TheAuto Clean (select models)sensorin the pump muststay submergedso a short fill of water is added after the cycle's
lest drain.
.
Checkthatthe cycle iscompleted.
•
•
Be sure dispenseris not blocked bya dish or utensil.
Usefresh detergent storedin a cool, dry place.
Awatervalvehiss dudngfill is normal.
Watercirculationsounds are normal.
A thumpingsound may be a wash arm bumping an item that is extending beyondthe racks.
Choppingor grinding sounds may be heardduringdrain as the internalfood disposerchops hard items like fruit seeds, nuts,etc.
Hummingduringthe drain is normal.
A snapnoise is the detergent cup lid hittingthe door liner when the dishwasherdoor is opened at the end of the cycle.This is normal.
Properinstallationaffectsthe noise level.
• Tough
Scrub"orTough
Scrub
_ Plus(select
models)
orSanilJze
(select
models)
hasbeenselected
andthecycleisextended
toheatwater.
• Checkto seethattheincomingwatertemperature
is 120-140o
F (49.60oC).
•
•
.
•
Rundishes being held in the dishwasherthrough a RinseOnly cycle.
Many dishwashershavea "new"smell when first installed.This will dissipatewith use.
Dishwashermay not be drainingproperly.(See "DishwasherWill Not Drain"section.)
For a strongodor,place bakingsodain bothsides of the detergentcup. Select LightWashand allowthe waterto circulatefor about 10 minutes. Interruptthe cycle by unlatchingthe door and let it stand overnight. Restart the dishwasherby latchingthe door andallow it to complete the cycle. A commercialdishwashercleaningproductsuch as Jet-DryDishwasherCleaner* can also be used.
• Check thatthe dishwasheris levet. (Referto the [nstetlationInstructions.)
• Sudscan causethe dishwasherto overflow.Measurethedetergentcarefullyand use onlydetergentedesignedfor use in a dishwasher.Less
detergentis needed in soft water.Try another brandif sudsing continues.
• Follow directionscloselyon how to add a forgottenitem(pg. 7).
• Be surethe RinseAid lid is securely attachedand not leaking.
• Thisis normalwhen the Auto Clean cycle(select models)is selectedand the dishwasherdecidesto skipor add a drain and refill.
9
•
•
•
•
SelectExtraRinse(selectmodels).
Checkwatertemperature.Incomingwatershouldbe 120°-140
° F (49-60° C),
Alwaysusea rinseaid.
Confirmthat thecloudinessis removable
bysoakingtheitemin whitevinegarforapproximately
5 minutes.If removed,
the problemis due
to hardwater.Adjustdetergentamountbeingusedto matchwaterhardness(pg.5). Be suredetergentis fresh,storedproperlyandis a
highqualitybrand.
• If cloudiness
is notremovable,it isetching.Thisis anerosionof thesurfaceoftheglasswareandcanbecausedbywaterthatistoohot,
fromusingtoomuchdetergent
or byprewashing.Detergent
needsfoodsoiltoact upon. If etchinghasoccurred,theglassware
is permanentlydamaged.Topreventfurtheretching,
adjustthedetergentamountto matchthewaterhardness,
stopprewashing,
andbe sureincoming watertemperature
is not greaterthan140° F (60° C). Use waterheatingoptionsonlywhenincomingwatertemperature
is below
120° F (49° C).
•
Checkwatertemperature (pg5).
Runhot waterat the sink before startingthe dishwasher.
SelectToughScrub" or ToughScrub" Plus (selectmodels).
Checkwater hardnessand adjust detergentamountaccordingly(pg. 5).
Use fresh detergentstored in a cool dry place.
Selectproper cyclefor the soil level.
Load items so they do not block the washarms or centertower (pg. 2-3).
Loadthe utensil basketwith some handles up and somedown to prevent nesting.
Do not place glasses over tines.
Prior to loading, scrape off burnt on foods and wipe the starchy film from utensils used with pasta, rice and oatmeal. These soils require
more energythan the rest of the load to clean.
• Aluminumutensilsor pans can leave markswhen they rub againstother itams.Leave a slight spacebetweenitems.
• Iron depositsin the water can taave a yellow,brown or orange film on dishes or the dishwashertub. A filter may be needed, check with a
water treatmentcompany.RoVer Rust Remover(part no. 057961)**can be used to removerust. Donot use RoVeralongwith dishwasher
detergent. Fill both cups with RoVer and cemp]etea NormalWash cycle. Follow with a short wash cycle using dishwasherdetergent.
• Color from tomato saucesmay adhere to the tub (pg. 8). If lightstaining has occurred,leave the door open to oxidize the stain away. For
removalof heavierstains, try a citric acidcontainingdishwashercleaningproductsuchas Glisten(partno, 18001017)**.Changedishwasher
detergent and be sure to use a dishwasherdetergentthat containschlorine to betterfight staining.
• BesureHeatedDryis selected.
Waterdropletsmayformontheinnerdooraspartofthedryingprocess.
Alwaysusea rinseaid likeJet Dry*or CascadeRinseAid*,
Checkwatertemperature
(pg.5),
SelectToughScrub or ToughScrub"Plus(selectmodels).
Increasedetergentamountto matchwaterhardness(pg.5).
Loadproperly(pg.2-3)
Plasticandteflonitemsare difficultto drybecausetheporoussurfacetendsto collectwaterdroplets.
Toweldryingmaybe necessary.
Glassesandcupswithconcavebottomsholdwaterandrequiretoweldrying.
TM
•
•
•
•
Load dishes accordingto instruclJons
so they do not strike each other(pg. 2-3).
Washingantiquechina/crystalin the dishwasher
is not recommended.
Do not load glasses over the tines.
Do not ovedoad.
• Sanitizewas not selected.
• Sanitizationcan only be achievedwiththe Auto Clean (selectmodels),Heavy, Lightor Normalwashcycles.
• Tbe inoomingwatertemperaturewas too low,interfedngwiththe dishwasher'sabilitytoachieve adequatewaterbeatingin the alintedamount
of time.
DISHWASHERWARRAHTY
WHAT
ISHOT
COVERED
BY
THESE
WARRAHTIES:
1. Conditionsand damagesresultingfrom any of the following:
a. Improperinstallation,delivery,or maintenance.
b. Any repair,m_cation, alteration,or adjustmentnot authorizedby the
manufactureror an authorizedservicer.
c, Misuse,abuse, accidents,or unreasonableuse.
d. Incorrectelectriccurrent,voltage,or supply.
e. Impropersettingof anycontrol.
2. Warrantiesare voidif the originalserialnumbershave beenremoved,
altered,or cannotbe readilydetermined.
3. Productspurchasedfor commercialor industrialuse.
4, The costof serviceor servicecallto:
a. Correctinstallationerrors.
b. Instructthe useron the properuseof the product.
¢. Transportthe applianceto the servicer.
5. Consequentialor incidentaldamagessustainedbyany personas a resultof
any breach of these warranties.Some states do not allowthe exclusionor
limitationof consequentialor incidentaldamages,so the above exclusion
may not apply.
TORECEIVE
WARRANTY
SERVICE
I
To locate an authorizedservicecompanyin your areacontact the Maytag
dealer from whomyour appliancewas purchasedor call MaytagAppliances
Sales Company,MaytagCustomerAssistanceat the numberlisted below.
Should you not receivesatisfactorywarrantyservice,pleasecall or write:
MaytagAppliancesSales Company
Attn: CAIR%enter
P.O. Box2370
Cleveland,TN 37320-2370
U.S.
1-800.688-9900
CANADA
t-800-688-2002
U.S. customersusing TTY for deaf, hearingimpairedor speech
impaired,call 1-800-688.2080.
NOTE:When writing or callingabouta serviceproblem,pleaseincludethe
followinginformation:
a. Your name, addressand telephonenumber;
b, Modelnumberandserialnumberof your appliance;
c. Name and addressof yourdealer or servicerand the date the appliance
was purchased;
d. A cleardescription
ofthe problemyouarehaving;
e. Water hardness,detergentbrandand amount,watertemperatureand
cycle used;
f. Proof of purchase(sales receipt).
User'sguides, servicemanualsand parts informationareavailablefrom Maytag
AppliancesSalesCompany,MaytagCustomerAssistance.
11
MAYTAG
• 403 West Fourth Street North
• P.O. Box 39 • Newton, Iowa 50208