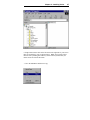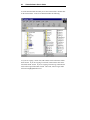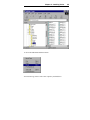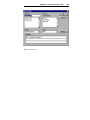
1
VISION SOFTWARE Reference Manual Revision 2 Vision Engraving & Routing Systems 17621 N. Black Canyon Hwy. Phoenix, AZ 85023 www.visionengravers.com COPYRIGHT & TRADEMARK NOTICE Copyright 2001, Western Engravers Supply, Inc. All Rights Reserved. The VISION package may not be reproduced in any form, for any purpose, unless it complies with the terms presented in the LICENSE AGREEMENT which is found in chapter one. Western Engravers Supply, Inc., and the program authors have no liability to the purchaser or any other entity, with respect to any liability, loss, or damage caused, directly or indirectly by this system, including but not limited to, any interruptions of service, loss of business, anticipatory profits, or consequential damages resulting from the use of or operation of this software. Updates may be made to this documentation and incorporated into later editions without notice. Neither Western Engravers Supply, Inc., nor the program authors have any responsibility to provide copies of these updates to existing holders of this manual. The following products and names are the Copyrighted and/or Trademarks of their Copyright and/or Trademark holders respectively: PHOENIX Western Engravers Supply, Inc. VISION Western Engravers Supply, Inc. Windows Microsoft Corporation. All other trademarks and copyrights are the property of their respective holders and are hereby acknowledged. Printed in the UNITED STATES OF AMERICA Table of Contents iii Table of Contents WELCOME TO VISION!........................................................................5 CHAPTER 1 - BEFORE YOU BEGIN ...................................................7 ABOUT THE MANUAL ...............................................................................7 NOTES ......................................................................................................8 TAKING INVENTORY.................................................................................9 REGISTRATION .........................................................................................9 LICENSE AGREEMENT ............................................................................10 SYSTEM REQUIREMENTS ........................................................................12 CHAPTER 2 - INSTALLING VISION .................................................13 THE SOFTWARE PROTECTION KEY .........................................................13 INSTALLING THE VISION SOFTWARE ......................................................15 COPYING LOGOS, FONTS & JOBS FROM A DISK ......................................24 CHAPTER 3 - USING VISION - THE BASICS ..................................30 TERMINOLOGY .......................................................................................30 STARTING VISION ...................................................................................31 INTRO SCREEN .......................................................................................32 CREATING A SIMPLE JOB .........................................................................35 CHAPTER 4 - THE VISION MENUS ..................................................42 MAIN SCREEN ........................................................................................42 FILE MENU .............................................................................................46 EDIT MENU ............................................................................................64 TEXT MENU ...........................................................................................67 LINE MENU ............................................................................................82 PLATE MENU .........................................................................................93 OPTIONS MENU ....................................................................................102 EXTRAS MENU .....................................................................................118 iv Title WINDOW MENU ...................................................................................126 SYSTEM MENU .....................................................................................131 CHAPTER 5 - OTHER FEATURES...................................................145 MOVING LINES GRAPHICALLY..............................................................145 VIEW SCREENS .....................................................................................146 RE-ENGRAVE .......................................................................................151 MULTIPLE JOB ENTRY ..........................................................................152 EXTEND A PLATE .................................................................................153 CHAPTER 6 - CREATING SAMPLE JOBS .....................................157 SAMPLE JOB 1 ......................................................................................157 SAMPLE JOB 2 ......................................................................................165 APPENDIX A: HOT KEYS .................................................................171 APPENDIX B: TROUBLESHOOTING .............................................175 APPENDIX C: ERROR MESSAGES .................................................183 INDEX....................................................................................................185 Welcome to Vision! 5 Welcome to Vision! Congratulations on the purchase of VISION. VISION represents the latest technology in engraving and has been designed to be the most effective and adaptable system available. While developing this product, we have tried to make all operations very user friendly by using the pull down menu, point and click user interface that has been made popular by companies such as Apple®, Microsoft® and IBM®. The greatest advantage of using this type of interface is maintaining ease of use with pull down menus while keeping all the powerful functions that you expect. By utilizing the VISION system you can effortlessly create high quality jobs with speed and precision - saving you time and money. VISION has a vast array of advanced features to help you create stunning results more easily than you thought possible. Features such as: - arcing of lines; - rotation/mirroring of lines or the plate; - choice of eight borders; - producing multiple plates from a single plate; - merging text with set layouts; - plate layout can be automatically calculated; - automatic serializing of plates; - automatic columnizing of groups of lines; - ability to work on multiple jobs; VISION can load logos that were created from any program that supports the HPGL file format, packages such as CorelDraw™ or DesignCAD™. For those of you that like to use on line help (or don’t like written manuals), there is a complete on line help feature built in to Vision. From any menu you can simply press the F1 key to view information about any topic. VISION will continue to adapt to future technologies to keep pace with your changing needs. If there is a feature that you would like VISION to have, or 6 Vision Software User's Guide you think would improve VISION, please send us a note by mail, fax, phone or email. For Your Records To enable us to better assist you if you call for service, please make a note of your machine type and serial numbers below. Machine Type Table Serial Number Controller Serial Number Vision Software Serial Number Chapter 1 - Before You Begin 7 Chapter 1 - Before You Begin About the Manual This manual will enable you to install, set up and use the VISION software. There are nine main sections. The chapters are set out as follows: Chapter 1 This chapter introduces the manual, describes the contents of the packages you receive, explains why and how to register your software, contains the license agreement and tells the requirements for your system. Chapter 2 This chapter describes the software protection key/protection EPROM chip and installation of the software. Chapter 3 This chapter will explain some basic terminology used, tell you how to start Vision and walk you through creating a simple job. Chapter 4 This chapter describes each menu function, its use, and some added ideas and shortcuts. Chapter 5 This chapter describes the features in Vision that are not accessed by a menu item. These are some hidden features. 8 Vision Software User's Guide Chapter 6 This chapter walks you through creating sample jobs step by step. Appendix A This section lists all of the Vision keyboard hot keys and function keys. Appendix B This section has a list of troubleshooting items that may help you if you have a problem with Vision. Appendix C This section lists the Vision error messages. Notes It is recommended that you read through the manual from the start to understand the various functions available. Remember that topics that don’t seem clear at first may be explained in greater depth later in the manual. Once familiar with VISION, you may wish to read the manual again to get a better understanding of the features and available shortcuts in VISION. If you are already familiar with VISION, this manual will be a reference manual, using the index to direct you to the specific topics that you need. VISION Directory At times, the manual will refer to the VISION directory. This means the directory into which VISION was installed. Generally this will be on the C: drive and will be a directory that is named VISWIN. If you installed into a different directory, then the manual is referring to that directory. Keyboard Keys When you see a word between brackets [..], this means that you need to press that key which is found on the keyboard. For example, [Enter] would mean that you press the Enter key (sometimes known as the Return key), [F2] would mean that you press the F2 key, etc. Multiple Keys When you see two keys in the format of [Alt]+[K], this means that you hold down the [Alt] key and then press the [K] key. Chapter 1 - Before You Begin 9 Taking Inventory The first checklist below describes the software package contents for new users. The second checklist is for upgrade users, (users who receive software-only updates). Please verify that all components have been received by you. If your package is incomplete, please call your local VISION distributor. The VISION Engraving package will consist of the following: 1 Vision Manual 1 Software CD 1 Vision Keyboard Template 1 Vision Font Catalog 1 Software Protection Key (the software protection key may be inside the Vision Controller). This is sometimes called the dongle. It is a good idea to write the controller, table, and protection key serial numbers on the inside cover of your manual. By doing this, they are easily available when needed. Upgrade users will receive the following: 1 Software CD or floppy disk 1 Upgrade Instruction Sheet 1 Updated Vision Manual Pages Registration Before you start VISION, please take a minute to fill out your warranty registration card and fax or mail it to us. You may also go to our web site at www.visionengravers.com and click on Register Your Software. 10 Vision Software User's Guide Fax Numbers Domestic Fax 1-800-266-1676 International Fax 602-439-0500 Mailing Address Vision Engraving Systems 17621 N. Black Canyon Hwy Phoenix, AZ. 85023 USA Registering your system will ensure that you will receive the support you need plus any information on updates or new products as they arise. Failure to register your system may cause your warranty to be invalid. When you contact your local service organization, please have your protection key, equipment serial numbers and software version number available. License Agreement “VISION” refers to the executable programs and documentation contained on the distribution diskettes, CD, or compressed archive released by Western Engravers Supply, Inc. 1. Western Engravers Supply, Inc., of 17621 N. Black Canyon Hwy, Phoenix, Arizona 85023 is the exclusive licensee of the CIPHER MULTItask software for the USA, Canada and South America. CIPHER MULTItask software is a product of Project Enterprises Pty., Ltd., and is marketed under the VISION name in North and South America. 2. VISION is Copyrighted (c) 1995-2001 material. It may only be used in accordance with the conditions set out in this license agreement. Chapter 1 - Before You Begin 11 3. VISION has a demonstration trial package provided to determine its suitability for your particular application. This trial package MUST NOT be used for COMMERCIAL USE unless arrangements are first made with Western Engravers Supply, Inc. or its designated licensee. The copy must be then registered with Western Engravers Supply, Inc. 4. Purchase and/or Registration entitles you to use VISION and future versions of VISION for as long as you wish, subject to any special licensing conditions attached to future versions. For further details on Licensing and Registration contact Western Engravers Supply, Inc. or their agent. 5. Western Engravers Supply, Inc. is in no way obligated to provide future versions of, or support for, VISION. 6. Site, Group and Multi-machine Licenses are available, and are dealt with on a case by case basis. 7. You may not modify or otherwise reverse-engineer VISION. 8. You may distribute VISION to potential customers provided that no fee is charged for its distribution, and that the distribution diskette/archive is not modified in any way. 9. VISION may not be included as part of any software library which is distributed on a COMMERCIAL BASIS, without prior written permission from Western Engravers Supply, Inc. 10. VISION may not be used in any unlawful or illegal manner. 11. Western Engravers Supply, Inc. and Project Enterprises Pty. Ltd. accept NO LIABILITY resulting from the use of VISION. In countries in 12 Vision Software User's Guide which this limitation is contravened by law, liability is limited to the amount that the affected party has paid for VISION, or in the event that VISION was registered with a third party for payment to Western Engravers Supply, Inc., liability is limited to the amount that was received by Western Engravers Supply, Inc. from that third party. System Requirements Below are listed the system requirements for VISION to work effectively. At the bottom of each component are some recommendations for most efficient operation. Operating System: Microsoft Windows ’95, '98, NT, 2000 or ME Minimum Computer: PC Pentium 120 or higher 120 Mbyte Hard Disk 32 MB of RAM (64 MB of Ram on Windows NT & 2000) SVGA Monitor (800 x 600 resolution) A mouse supported by Windows One open Serial Port (to connect to Vision Controller) CD ROM Drive One open Parallel Port (only when software protection key is needed) Recommended Computer: Pentium 400 or above 1 Gbyte Hard Disk or above 64 MB of RAM (128 MB or Ram on Windows NT & 2000) SVGA Monitor (at least 800 x 600 resolution) A mouse supported by Windows One open Serial Port (to connect to Vision Controller) CD ROM Drive One open Parallel Port (only when software protection key is needed) Chapter 2 - Installing Vision 13 Chapter 2 - Installing Vision The Software Protection Key Upon purchasing VISION you will receive either a unique Software Protection Key, which plugs into your computers parallel port or a unique EPROM chip inside the Vision Serial Controller. For VISION to output to the engraver or perform a graphical print, it is ESSENTIAL for the key or EPROM to be in place. If you have an EPROM chip type Software Protection device, you may skip over the next set of instructions and proceed to Installing the Vision Software. If you have a Software Protection Key, you must follow these instructions: 1) Turn your computer off. 2) Write down the serial number located on the key for future reference. 3) Plug the male side (the side with the pins) of the key into the computer printer port. 4) Turn the power on. 14 Vision Software User's Guide When VISION detects a valid key it switches into registered mode, identifying itself by placing a serial number in the [F9] EXECUTE screen. It is the CUSTOMERS RESPONSIBILITY to keep and protect the SOFTWARE PROTECTION KEY. This may include having insurance for the key. Keys will normally only be replaced on PROOF OF DESTRUCTION of the original key otherwise a complete software system must be purchased. The SOFTWARE PROTECTION KEY can be plugged into ANY printer port for normal operation. NOTE: The printer port must NOT be configured for Bi-Directional for the Software Protection Key to work properly. If the Key does not work, you must go into your computers CMOS setup. Each computer is a little different, but on most computers, you can press the [DEL] key while the computer is going through the memory test on boot up. Then go to the section that says something about Peripherals. Then find the section that says Parallel Port Mode and use the [Page Down] key to change the selection. Press the [Page Down] key until it says either “Normal” or “ECP”. These settings work the best. Then press the [Esc] key and then go to the section that says Save Settings and press [Enter]. IMPORTANT: DO NOT plug a printer or scanner into the Software Protection key if your printer or scanner has a plug on the back for you to plug the Software Protection key into. Plug the Software Protection key into the printer or scanner. CAUTION: The key will not be detected and may not operate if a printer or device plugged into the rear is switched off. In situations where this may cause difficulties, try plugging the printer or device into another printer port instead of the key. Chapter 2 - Installing Vision 15 If another program is using a different software protection key, they can be plugged together. If one program will not work, swap the order of the two protection keys. ******* WARNING ******* Ensure the SOFTWARE PROTECTION KEY is only installed into a printer port. Attachment of the key to other ports may make it inoperative. Installing The Vision Software The VISION installation program guides you step-by-step. All the information you need appears on the screen as you install the program. Read each screen carefully and follow all prompts. If you make an error in the installation, do not panic. All setup information can be changed later from within VISION. While running Windows, insert the VISION CD-ROM into the CD drive. If your CD-ROM drive has the auto start feature enabled, the Vision Installation will start automatically. If the auto start is not enabled, then you will need to do the following: Select Start… Run… from the toolbar on the Windows desktop. 16 Vision Software User's Guide Type the location of the CD drive followed by “:\setup.exe” in the command line. Click on OK. The installation process will now begin. Chapter 2 - Installing Vision 17 Select Vision Engraving Software and click Next. Note: You can install a demo version of Vision Pro or Vision Pro Scan at a later time if you would like. This will allow you to evaluate the Vision Pro & Vision Pro Scan programs. The Vision Software installation will now continue. 18 Vision Software User's Guide The welcome screen will now appear. Click on Next. Chapter 2 - Installing Vision The Vision Software License Agreement will now be shown. In order to continue the Vision Installation, you must click on Accept. Select a folder or leave the default folder as is and click Next. 19 20 Vision Software User's Guide Select Complete Installation and click Next Select the language you would like to install Vision in and click Next. Chapter 2 - Installing Vision 21 Select the Vision Serial Controller type you have. You can tell by looking at the front panel of the controller. If it says Series II above the large emergency stop button than select Series II controller, otherwise select Series I controller. If you own a VE-810 Engraver, select the VE810 engraver. If you have upgraded a Vision Non Serial Controller to a Serial Controller, select Non Serial Controller Upgrade and click Next. The Vision Software installation will now continue. 22 Vision Software User's Guide Select the system type that you have. Standard Vision Machine is a stand alone flat material engraver. Vision Combo Machine is if you have a stand alone flat material engraver and a Cylindrical engraver. Click Next when finished. Chapter 2 - Installing Vision Select the type of system you have and click Next. 23 24 Vision Software User's Guide Select a Program Group Name or leave it as it is and select Finish. The software installation is now complete. Select OK To run the Vision software, select the Vision icon from the desktop or from the Start Menu - Programs - Vision Engraving Software group. Copying Logos, Fonts & Jobs from a disk There are times when you may have a Vision Logo, Font or Job on a diskette that you would like to copy to your computer’s hard drive. This commonly happens if you purchase a logo or font from a company that makes logos for you. To copy the file from a diskette to the hard drive, follow these steps. Note: It is recommended that you do not run Vision logos, fonts or jobs off of a floppy disk Chapter 2 - Installing Vision 25 1. Put your floppy disk into your computer’s disk drive. This is usually drive A. 2. Using the mouse, RIGHT click on the Start button in the lower left hand corner of your Windows Desktop. 3. The following menu will appear. LEFT mouse click on Explore 4. You will see a screen like the one below. 26 Vision Software User's Guide 5. Press the Page Up button on your keyboard 3 or 4 times until you see the words 3 1/2 Floppy (A:). LEFT mouse click on 3 1/2 Floppy (A:). Your screen should look like the following (except the file names will be the name of your logo, font or job names). Chapter 2 - Installing Vision 27 6. Single LEFT mouse click on the file name in the right side of your screen that you would like to copy to the hard drive. Note: You can select more than one file by holding the CTRL key down on the keyboard when you LEFT mouse click on the file name. 7. Go to the Edit Menu and then to Copy. 28 Vision Software User's Guide 8. Scroll down the folder list until you see the Viswin Folder. Double click on the Viswin folder. Your screen should look like the following. 9. If you are copying a Vision font, LEFT mouse click on the Fonts folder under Viswin. If you are copying a Vision Job, LEFT mouse click on the Jobs folder under Viswin. If you are copying a Vision Logo, LEFT mouse click on the Logos folder under Viswin. The Fonts, Jobs or Logos folder will now be highlighted like below. Chapter 2 - Installing Vision 10. Go to the Edit Menu and then to Paste. Your Vision Logo, Font or Job is now copied to your hard drive. 29 30 Vision Software User's Guide Chapter 3 - Using Vision The Basics Terminology To begin, you should learn some of the common terms used in this manual. When using a mouse, you will see a mouse pointer on the screen (usually an arrow). This pointer is a visual indicator of screen locations. To move the pointer, you move the mouse. The following terms relate to using a mouse. Point Move the pointer to “point” at something on the screen. Click Press and release the left button on the mouse. Right Click Press and release the right button on the mouse. Double-Click Press and release the left button on the mouse two times rapidly. Drag Point at an object and press and hold down the left button. While holding down the button, move the mouse which in turn will “drag” the object. When you let go of the button, the object will be “dropped” at that position. Chapter 3 - Using Vision - The Basics Select 31 Point and click on an object so the object becomes active - the object will generally be highlighted in some way to show that it is currently selected. Starting Vision To start VISION, click on the icon that is labeled “Vision” on your Windows desktop. (You can also start VISION by selecting “Vision” from the Vision Engraving Software program group as in figure below.) VISION will now go through a system check and then load all the available default fonts. You will see the mouse pointer (an arrow) and Vision’s main screen. 32 Vision Software User's Guide Intro Screen This is the first screen you will see. It contains four areas, which are described as follows: A. Windows Reference Line B. Menu select line. C. Toolbar D. Blank Work area. E. Device status area. A. Windows reference line The Windows reference line has the Vision minimize, maximize and close selections. It also has the VISION software version number. Chapter 3 - Using Vision - The Basics 33 Be sure to note the VISION version number at the left side of the line. When calling for software support you will be required to provide this version number as well as your software protection key serial number. B. Menu select line The name of each menu describes its contents. For example, all operations to do with files and jobs are listed under the FILE menu. To select a menu, either position the mouse on the desired menu and click the left button, or hold down the ALT key and press the capital letter in the menu name. For example, to open the file menu by keyboard, hold down the Alt key and press F. You will notice as you open these menus that some of the functions are grayed out and that you cannot select them. They are designed to only work when there is a job open. If you have chosen the wrong menu item, either move the mouse pointer to the correct menu item, click and it will open, or press the escape key once and then press the letter that represents the option. A list of options will appear under each main heading. To select one of them, you can either point to it with the mouse and click or you can use the up/down arrow keys to move to the correct line and press the ENTER key. C. Toolbar 34 Vision Software User's Guide This is a common feature in Windows programs. Clicking the different icons will give you different results. Each icon is explained below. Clicking this icon will create a new blank job. It works the same as going to the file menu and then to new job. Clicking this icon will bring you to the load job screen. Clicking this icon will bring you to the save job screen. Clicking this icon will bring you to the font load screen. Clicking this icon will bring you to the graphical print screen. Clicking this icon will bring you to the graphic display screen. Clicking this icon will bring up the Vision help file. Chapter 3 - Using Vision - The Basics 35 D. Blank work area This is the area that will contain the details of your job when you open, load or create a new job. E. Device status area This area will show you the status of your Vision controller. If the controller is on and connected properly to the computer, it will read “Phoenix: Waiting”. At this point, you can send a job to the Vision controller. When there is no communication between the Vision control unit and the computer, the status line will read “Phoenix: Offline” or “Phoenix: Busy. Other messages could include, i.e. ”Phoenix: Busy R2“ when the machine is busy engraving a repeat job, with ”R2“ being repeat number 2. Creating a simple job With the intro screen showing, click on the File Menu and then New Job. You have now created a new blank job. Click on the Plate Menu and then Autoplate. You should have a screen that looks like the following: 36 Vision Software User's Guide Type in 3 for the Plate Width, 1.25 for the Plate Height and 2 for the Number of lines. The screen should now look like this: Chapter 3 - Using Vision - The Basics Click on the Height for the second line and change it to .2. Your screen should look like this: 37 38 Vision Software User's Guide Click on the Okay button. You will now be taken to the Main screen where you can enter the text for the plate. Chapter 3 - Using Vision - The Basics 39 Type the name John Smith and then press the [Enter] key on your keyboard. The cursor will move to the second line. Type the word ABC Company. You have now created a simple 2-line nametag. Press the [F8] key on your keyboard to get a graphical view of the plate. Click on the Okay button to bring Vision back to the main screen. Let’s save this job for future reference. To save a job, go to the File Menu and then to Save Job. Type in SIMPLE for the job name and click on OK. The job is now saved. 40 Vision Software User's Guide Chapter 3 - Using Vision - The Basics 41 42 Vision Software User's Guide Chapter 4 - The Vision Menus Main Screen Material Type: This feature will allow you to set the maximum engraver speed to specific material types. The space bar will toggle through the different material types. Note: To add different material types or change the material types, you can edit the material.sys file. To do this, go the Windows Start Menu and click Chapter 4 - The Vision Menus 43 on Programs, Vision Engraving Software and Edit Material Types. You can change the Number of material entries to whatever you would like. Then, you can change the XY Maximum cut speed to a number between 1 and 30 and the Z maximum penetrate speed to a number between 1 and 20. The higher the number, the faster the maximum speed will be at the engraver. When you are finished changing the values, go to the File Menu and then Save. Once the file is changed, you must exit Vision and then enter back into Vision for the change to take effect. The maximum speed will be limited to the maximum allowable speed that is set in the Vision Serial Controller. Condense Mode: The space bar will toggle through the different condensing choices. See Condense Mode for more information on this feature. Plate Width & Height: You can enter the plate width & height in here. Plate 1 of 1: This displays the current plate number you are on and how many plates are in the current job. You can move between plates by clicking the up or down arrow to the right or by holding down the <shift> key and pressing <page up> or <page down>. Line 1 of 1: This displays the current line number you are on and how many lines are on your plate. You can move between lines by clicking the up or down arrow to the right or by pressing <page up> or <page down>. Subline 0 of 0: This displays how many sublines you have on your line of text and which one you are currently on. You can move between sublines by clicking the up or down arrow to the right. See Insert Subline for more information on this feature. Text: This is where the text for the plate is entered. If you have more than one line of text, pressing the <enter> key will move you down line by line. The up and down arrows will also move the cursor up and down line by line. 44 Vision Software User's Guide Line Height: This is the letter height of the current line. You can change this by clicking on it with the mouse and then changing the value. Baseline: This is the distance from the top of the plate to the bottom of the current line. Left margin: This is the distance from the left side of the plate to the left edge of the current line. Note: The text will only extend to the left margin if there is enough text to expand it to there. Right margin: This is the distance from the right side of the plate to the right edge of the current line. Note: The text will only extend to the right margin if there is enough text to expand it to there. Font style: This is the font style of the current line. Pressing the space bar toggles through the loaded fonts. Hint: Holding down the shift key while pressing the space bar will toggle through the fonts in the reverse order. See Font Load to load additional fonts. Note: To change the default fonts that Vision comes up with, you can edit the cipfont.sys file. To do this, go the Windows Start Menu and click on Programs, Vision Engraving Software and Edit Default Fonts. This will bring up the Windows Notepad with a file called cipfont.sys. You can change the order of the fonts or add any of the available Vision fonts into this list. The first font name will be the one that Vision defaults to. You must add the .cff extension to the end of the font name. Once you have finished changing the font names, go to the File menu and then Save. Once the file is changed, you must exit Vision and then enter back into Vision for the changes to take effect. Text length: This displays how long the current line is. You can change this number to expand or condense the text. Justification: This is how the text will be placed on the line. There are three choices for justification. Centered - This will center the text from left Chapter 4 - The Vision Menus 45 to right between the left and right margins. Left - This will move the text to the left margin. Right - This will move the text to the right margin. The space bar will toggle through the types of justification. Hint: Holding down the shift key while pressing the space bar will toggle through the choices in the reverse order. Condensation: This shows how wide the current line is in a percentage form. 100% is a standard text width. If this number is 80%, the text will be condensed to 80% of the standard width. If this number is 120%, the text will be expanded to 120% of the standard width. Inter char space: This shows how wide the current spacing between each letter is. The standard inter character space is 100%. If this number is 80%, the inter character space will be condensed to 80% of the standard inter character space. If this number is 120%, the text will be expanded to 120% of the standard inter character space. Italicization: This allows you to italicize or slant your text to the left or right. If you type a positive number in, the text will slant to the right by the amount of degrees entered. If you type a negative number in, the text will slant to the left by the amount of degrees entered. 46 Vision Software User's Guide File Menu New Job This feature creates an empty job in the main VISION screen using the defaults defined in the installation of VISION. These defaults can be changed using the System Preferences option in VISION. VISION is capable of having up to eight (8) jobs open at one time. The New job selection will not be accessible when eight (8) jobs are already open. Chapter 4 - The Vision Menus 47 Load Job This feature allows you to open a previously saved job. Selecting this feature brings up the Load Layout window. Note: If your job is on a floppy disk, it is recommended that you copy it to your computer’s hard drive first. Click here for instructions on how to do this. 48 Vision Software User's Guide You may either, type the filename and click OK, or you can select the name of the job with the mouse pointer and click OK. Note: If you use the pointer to click on the job name, the Comments field will display any comments that you might have saved with the job. There are two choices of Load Layout that you can choose from: Complete details or Dimensions Only. This is selected in the format box. Complete details will load the entire job that was saved including all of the text in the job. Details Only will load the entire job except for text that was in that job. Chapter 4 - The Vision Menus 49 Note: Vision defaults the Job Load and Job Save directories to your hard drive C and in a directory called \Viswin\Jobs. If you would like to change the default Job Load and Job Save directory, you must do the following. Go to the Windows Start Menu, then to Programs, then to Vision Engraving Software and click on Edit Vision defaults. This will bring up the Cipher.sys file into the Windows Notepad. Go to the section in the file that says Default Job Load Directory and change it from C:\VisWin\Jobs to the drive and directory that you installed Vision into. You will also need to change the Default Save Directory. Save Job This feature allows you to save a job to your computers hard drive or to a floppy disk. Selecting this function brings up the Save Layout window. 50 Vision Software User's Guide You will need to type the filename and click OK. If you would like, you can enter in any job comments that you would like saved with the job in the Comments field. A typical item entered into the comments field is the cutter size that was required for the job you are saving. There are two choices of Save Layout that you can choose: Complete details or Dimensions Only. This is selected in the format box. Complete details is the default; to select Dimensions Only, click on the down arrow to the right of the box. Complete details will save the entire job that was created including all of the text in the job. Dimensions Only will save the entire job except for any text that was in that job. Chapter 4 - The Vision Menus 51 Note: Vision defaults the Job Load and Job Save directories to your hard drive C and in a directory called \Viswin\Jobs. If you would like to change the default Job Load and Job Save directory, you must do the following. Go to the Windows Start Menu, then to Programs, then to Vision Engraving Software and click on Edit Vision defaults. This will bring up the Cipher.sys file into the Windows Notepad. Go to the section in the file that says Default Job Load Directory and change it from C:\VisWin\Jobs to the drive and directory that you installed Vision into. You will also need to change the Default Save Directory. Import Job This feature allow you to import a job created in the Dahlgren Superpro program. Selecting this feature brings up the Import Job Layout window. Note: If your job is on a floppy disk, it is recommended that you copy it to your computer’s hard drive first. Click here for instructions on how to do this. Note: Vision defaults the Dahlgren Superpro jobs into your hard drive C and in a directory called \Viswin\SpJobs. If you would like to change the default job import folder, you must do the following. Go to the Windows Start Menu, then to Programs, then to Vision Engraving Software and click 52 Vision Software User's Guide on Edit Vision defaults. This will bring up the Cipher.sys file into the Windows Notepad. Go to the section in the file that says Default import job directory and change it from C:\VisWin\SpJobs to the drive and directory that you installed Vision into. You may either, type the filename and click OK, or you can select the name of the job with the mouse pointer and click OK. There are three choices that you can choose under the format field. The choices are Superpro 3.50, Superpro 3.12, and Superpro 3.02. You must select the correct version of Superpro that the jobs were created in. If you try to load the job using the incorrect type, the following error message will appear: Chapter 4 - The Vision Menus 53 When importing Dahlgren Superpro jobs, you must configure Vision to tell it which fonts are setup in the Superpro jobs. To do this, you must edit a file called Dahl2cip.sys in the Viswin folder. You can open this folder with Windows Notepad. Once it is open, the screen will look like the following: If you are importing jobs from Superpro version 3.02, you must edit the numbers in lines 2 through 9 in the screen above to map out the fonts that are in your Dahlgren control unit. The first 0 in the file above correlates to the Dahlgren font 0. Typically, this is the utility font. So, the number that you would enter for that line would be the Vision font number that correlates to Utility. Since the default Vision fonts are 1- Gothic, 2 - 3 line Roman, 3 - 3 line helvetica, 4 - Century & 5 - Utility, you would enter 5 to match Utility. Typically, the next font in a Dahlgren control unit is Gothic. So, the number you would enter for the next line is 1, which matches the Vision Gothic font. You would change the numbers in this file until you have matched all of the fonts in the Dahlgren control unit. 54 Vision Software User's Guide If you are importing jobs from Superpro versions 3.12 or 3.50, you must edit lines 11 and higher. You must change the name of the Dahlgren font, including the .ft9 extension to match the font that you have in the Dahlgren software. You must then change the number to the right of the font to correlate it to the Vision font number, which is explained in the paragraph above. Note: If a font in a Dahlgren job is not mapped, it will default to the Vision Gothic font. Print Job Print Job Details This feature will print the job specifications to a printer or text file. Such specifications include the plate size, letter heights, text, borders etc. of the job. If you select this option, it will bring up the Print Layout window, shown below. The Printer box displays which printer you will be printing to. Chapter 4 - The Vision Menus 55 The Print range box allows you to either print the entire layout to your printer or just certain plates to your printer if you have a multiple plate job. The No. Of Copies allows you to print multiple copies to your printer. The Print quality allows you to change the print resolution. You can select from high, medium, low or draft. Print to file will send the job to a disk file instead of the printer. Print Options: If you select Job details, Vision will output every parameter of the job to a text file or printer. If you select Text only, Vision will output only the text of the job to a text file or printer. You can print more than one copy of this file to the printer by changing the No. of copies. Setup will allow you to change the printer that you are printing to and also allow you to change the printer defaults. Note: The Print Job Details feature supports almost all Windows compatible printers including network printers. In order to use this feature, the printer must be installed correctly in Windows. See your Windows manual for instructions on installing a printer. Note: Some earlier versions of Vision did not support all Windows compatible printers. If your version does not print job details, please check with your local distributor or with Vision Engraving Systems to get an updated version of Vision. 56 Vision Software User's Guide Graphical Print This feature will print an actual copy of the layout to your printer. It will bring up the Graphical Print Window as shown below. Note: The ”Hot Key“ for this feature is F3. By pressing the F3 key, Vision will automatically bring up the Graphical Print screen. The Printer box displays which printer you will be printing to. The Print range box allows you to either print the entire layout to your printer or just certain plates to your printer if you have a multiple plate job. The No. Of Copies allows you to print multiple copies to your printer. The Print quality allows you to change the print resolution. You can select from high, medium, low or draft. Chapter 4 - The Vision Menus 57 Page control allows you to center your job on the paper if you have them selected. Fit to Page will expand or shrink the job to fit on one sheet of paper. Print to file will send the job to a disk file instead of the printer. Setup will allow you to change the printer that you are printing to and also allow you to change the printer defaults. Note: The Graphical Print feature supports almost all Windows compatible printers including network printers. In order to use this feature, the printer must be installed correctly in Windows. See your Windows manual for instructions on installing a printer. Engrave This feature will send the job to the engraver to be engraved. 58 Vision Software User's Guide Note: The ”Hot Key“ for this feature is F9. By pressing the F9 key, Vision will automatically bring up the Execute Layout screen shown below. Scale Axis: This will increase or decrease the size of the engraved job when it is sent to the engraver. For example, if you select .5 X and .5 Y, it will engrave the job at one half of the size that it was created at. Offsets: This will move the job to be engraved to the right or down the specified amount. Chapter 4 - The Vision Menus 59 Ignore clips: If this is selected, the engraver will try to engrave a job even if it is off of the plate. If it is not selected, the engraver will ”clip“ or cut off anything that is outside of the plate. Note: This command can be used to ensure that items such as cutout borders are engraved completely when they are extended out to the edge of your engraving table. Sometimes the software will cut off or clip parts of your engraving if it is close to the edge of the table and this will allow you to not have the problem. Diameter: This will only be highlighted if you are using a rotary machine such as the Vision Cylindrical Engraver. It is used to enter the diameter of the object you are engraving. Write to HPGL plot file: This will send the job to your hard drive instead of the engraver. This will create a standard HPGL plotter file. You can use this option if you would like to create a file that you can import into another program such as CorelDraw. The file will have a .PLT extension. Driver Select: This will determine which machine the job will be sent to. By clicking the down arrow to the right of the driver name (Phx.cdf), you can change to other machine types. Plate Cut Out: This is used to cut the plate out after you engrave it. By typing a number in, you can increase the distance between the edge of the plate and the cut mark. Spindle Motor Control: This feature is used only with the VE-810 Engraver. It is used to turn the spindle motor on or off while engraving. You select the type you would like, either Rotary Engrave or Diamond Drag. Note: If you click on OK from this screen and get an error message that looks like the following, please see the Appendix B - Troubleshooting section of this manual. 60 Vision Software User's Guide Close Job This feature will close the job that you are currently working on. If you have not saved the job, Vision will give you a message like the one below: Chapter 4 - The Vision Menus 61 This will let you know that the job will be lost unless it is saved. Note: You can also close a job by clicking on the X in the upper right corner of the job window. Flush Job This feature is used to erase either the entire layout or all of the text from the layout. 62 Vision Software User's Guide If you select Clear all lines from layout, Vision will erase the whole job and let you start a new one. If you select Clear all text from layout, Vision will erase only the text from the existing job. Line 1 to 1: This allows you to select the range of lines that the text will be removed from. If your job consists of multiple plates, the screen will look like the following: Chapter 4 - The Vision Menus 63 Plate 1 to 1: This allows you to select the range of plates that the text will be removed from. Exit 64 Vision Software User's Guide This feature will exit you out of the Vision program. If you have not saved the job, Vision will display a message like the one below: This will let you know that the job will be lost unless it is saved. Note: You can also exit Vision by clicking on the X in the upper right corner of the screen. Edit Menu Clipboard Paste This feature will insert any text that is in the Windows Clipboard into the text area on the main screen of Vision. Text is put into the Windows Clipboard from almost any program by selecting Copy from the Edit menu. Note: The ”Hot Key“ for this feature is [shift] & [insert]. By pressing the [shift] & [insert] keys at the same time, Vision will automatically paste any text from the Windows Clipboard into the text area. Chapter 4 - The Vision Menus 65 Copy This feature will Copy or store the information from the current line of text and allow you to Paste the information to another line of text. It will bring up the Details to Copy window as shown below. Note: Using this feature will replace any text that was previously placed on the Vision clipboard or the Windows clipboard. You can select the Details To Use by clicking on any of the specifications from the list on the left. You can select all of the details from a line by 66 Vision Software User's Guide clicking on the Select All Icon. The Clear Icon will erase all of the selections chosen. The Values column to the right shows you the information that is associated with the line you want to copy from. Paste This feature will Paste the information that was Copied to a line or group of lines. There are three selections that you can choose from: 1) Current Line: This feature will ”Paste“ the information that was ”Copied“ to the current line that you are on. 2) Multiple Lines: This feature will ”Paste“ the information that was ”Copied“ to multiple lines. You can select the line you want to paste from Chapter 4 - The Vision Menus 67 and to by entering the line numbers in the Start Paste At Line and Finish Paste On Line section. 3) All Lines: This feature will ”Paste“ the information that was ”Copied“ to all of the lines on your plate. Note: This feature is very useful if you have created a layout with many lines and you would like to change the font on many lines at one time. You can change the first line’s font and ”Copy“ it and then ”Paste“ that font to the rest of the lines on your job. Text Menu Load Logo This feature will load a logo file into the Vision program and allow you to engrave it. Note: If your logo is on a floppy disk, it is recommended that you copy it to your computer’s hard drive first. 68 Vision Software User's Guide There are eight types of logos that can be loaded into Vision. The type of logo you want to load can be changed by clicking on the arrow to the right of the Format: box. 1) Plotter file: This file type is a standard HPGL plotter file. Most CAD programs can output to this type of file. The file extension that is supported is .PLT. 2) DesignCad DC2: This file type is created in a program called Design Cad. It is the standard Design Cad file. The file extension is .DC2. Note: This will only work with Design Cad if you save the file as a DC2 file. It will not read the DW2 file extension. Chapter 4 - The Vision Menus 69 3) Casmate SCA file: This file type is created in some of Scanvec’s programs, such as Casmate or Enroute. This file must be exported from Casmate or Enroute, not just the saved file. This feature can import 3D files created in these programs as well as 2D files. The file extension is .SCA. 4) PhotoEngrave PCX (line): This file type is created in almost any Windows graphics package. It takes a picture file and will engrave it as a group of lines. The file extension is .PCX. Guide to using PhotoEngrave: a) The file must be at a 256 colors or less. b) Best results come from 256 color or 256 grayscale images. Colored images are internally changed into grayscales before photoengraving and give no better results. c) The photoengrave process assumes that the top color to be cut is light (white) and the lower color is dark. If the material is dark on top and light below, you must make a negative PCX file image. d) Each line of the image becomes a cutter line and as a guide, the cutter should be 8% of the distance between the cut lines. Although this will vary slightly depending on the color differential between the top and substrate colors but for white on black, 8% is the desired cutter width. e) Due to the limitations of grinding a fine tip on a cutter, this means that the smallest spacing practical between cuts is about .01 inches, but as a general guide to start with is .020 apart. f) The above means that it is best to know the size of the final work before preparing the PCX image file. The aim is to scan and/or scale the image down to the required resolution. For a .020 cut spacing on a 4 inch x 6 inch wide images, the PCX image resolution would need to be 200 x 300 pixels. g) The time to cut a PCX file varies greatly not only on size, but on the color content. White across will cut much faster than dark areas. It is recommended that you look at the estimated time to complete a job when pricing it out. h) The technique of photoengraving tricks the eye into inducing color variation by area, which is part of the way the human eye 70 Vision Software User's Guide works. Unfortunately the technique differs from reflected light (paper or your engraving) and transmitted light (your crt monitor) and is affected by scaling. Thus can not be accurately represented on the graphics view (F8) screen. i) Initially on the first few lines, the image will always look like it hasn’t worked or is too light or too dark, but wait until you get further because of the eye trick you need a reasonable amount of area to judge. j) If using a nose cone, you must not adjust the depth of the cut while it is in the middle of the photoengrave. This will cause you to see a change in darkness. Troubleshooting PhotoEngrave Problem: My image is solid black. Solution: Check that your PCX file is 256 colors or less. If your PCX file is too high a resolution for your cutter width, reduce the resolution or decrease the PCX file size. Problem: The image is very clear but it is too light. Solution: wider cutter. Increase the PCX file pixel resolution or use a 5) PhotoEngrave PCX (dots): This file type is created in almost any Windows graphics package. It takes a picture file and will engrave it as groups of dots. The file extension is .PCX. Use the same guidelines as above for this feature. 6) AutoCAD DXF file: This file type is created in the AutoCAD program. The file extension is .DXF. 7) BMP Raster (Laser): This file type is used only for outputting to a laser engraver. At this time, this function is not completed and does not work properly. The file extension is .bmp. Chapter 4 - The Vision Menus 71 8)) G-Code ascii: This file type is used for importing G-Code files. There are many types and variations of G-Code and only simple G-Code commands are imported with this feature. The file extension is .nc. Note: Once you have selected the file type and file name and click OK, you MUST type a capital letter A in the text area to represent the logo. If you do not type a capital letter A in the text area, no logo will engrave. Once you load the logo that you would like to use, it will appear in the font style area of the main Vision screen. You can use the space bar to ”toggle“ through the different loaded logos and fonts. 72 Vision Software User's Guide Font Load This feature will allow you to select the font that you would like to use on your layout. Note: If your font is on a floppy disk, it is recommended that you copy it to your computer’s hard drive first. Chapter 4 - The Vision Menus 73 There are two types of fonts that can be loaded into Vision. The type of font you want to load can be changed by clicking on the arrow to the right of the Format: box. 1) Vision CFF font: This is a standard Vision font. The file extension is .CFF. 2) Dahlgren FT9 font: This is a font from Dahlgren SuperPro Software. The file extension is .FT9. Once you load the font that you would like to use, it will appear in the font style area of the main Vision screen. You can use the space bar to ”toggle“ through the different loaded fonts. 74 Vision Software User's Guide Translate to Braille Chapter 4 - The Vision Menus 75 This feature will change the current line of text into Grade II Braille. It will translate the text, change the font to the Braille font and change the letter height to the standard Braille letter height. Note: The standard Braille font included with Vision creates the routed out Braille. If you would like to engrave the Braille dot font, you must load the braille_dot font. Translate to Bar Code This feature will change the current line of text into Bar Code. It will translate the text and change the font to the bar code font. 76 Vision Software User's Guide Insert Subline This feature will allow you to change line information in the middle of a line. It can be used for changing the letter height or font in the middle of a line. Type in the text you would like and then move the cursor to the middle of the line by using the keyboard arrows. Move it to where you would like the change to be and go to Ins Subline. You will see a special character appear in yout text area that looks like this: §. Next, move the cursor left or right to the part you would like to change. Once there, you can change the font, letter height, baseline, italic or any other parameter. Chapter 4 - The Vision Menus Delete Subline This feature will allow you to delete a subline from your text. Move the cursor to the subline area you would like to delete and goto Del Subline. This will delete it. Change Case To Upper This feature will change all of the text on the current line to upper case. 77 78 Vision Software User's Guide To Lower This feature will change all of the text on the current line to lower case. First Word This feature will change the first letter of the first word on the current line to upper case. Each Word This feature will change the first letter in each word on the current line to upper case. Chapter 4 - The Vision Menus 79 Pause Point This feature allows you to program a cutter pause anywhere in your job. Move the cursor to the place that you would like the engraver to pause and go to Pause point. You will see a symbol like the following: . When the engraver gets to this point, it will stop and wait for you to press the start button on the controller to restart it. Note: This is useful if you need to change cutters in the middle of your job. 80 Vision Software User's Guide Merge Text This feature is used to import a standard text file into Vision. The text file can be created in many programs and exported with any file extension; however, it is easiest if the file has a .TXT extension. The text file must be set up so that each line of text you would like to import is on it’s own line. See the picture below. Chapter 4 - The Vision Menus 81 You can import the text to a single line or multiple lines easily. If you are importing to a single line, goto Merge text and select the text file you wish to import. Next you need to select which line of text on your plate you would like to import the text to. You do this by entering the line number into the Merge From Line and Merge To Line and click OK. (The Merge From and To line will have the same line number) There are two scenarios of merging text to multiple lines: The first scenario is if you want to import text to a consecutive group of lines (such as to lines 3 through 5). To do this, you follow the same steps as importing to a single line except you would change the Merge From and To parameters to match the lines on your plate that you want to merge to. The second scenario is if you want to import text to non-consecutive lines (such as to line 3 and to line 5). To do this, you must have two text files. One text file for the text that you want on the first line and a second text file for the text that you want on the second line. Once you have two text files, you will follow the same steps as importing to a single line for the first line. 82 Vision Software User's Guide When you are done importing the first line, you simply go back into merge text and import the text for the second line the same way you would a single line. Note: All text merging is normally done after you have created the plates. This allows you to have a place to merge the text to. Line Menu Insert Line This feature will let you insert a line after the current line that you are on. Move the cursor to the line that you would like to copy and then goto Ins line. The new line will have all of the same parameters of the original line except the text that was on the original line. The font, letter height, baseline, etc. will all be the same. Chapter 4 - The Vision Menus 83 Delete Line This feature will delete the current line. Move the cursor to anywhere in the line that you would like to delete and goto Del line. The line is now deleted. Fixed Arc This feature will change a normal line of text into an arced line allowing you to enter all of the parameters. 84 Vision Software User's Guide When determining the parameters for arcing, it is helpful to think of a circle with the text going around the circle. We need to place the circle on our plate in a certain area. X Center: This number will determine where the arc is from left to right on our plate. It is calculated from the left side of our plate. Y Center: This number will determine where the arc is from top to bottom on our plate. It is calculated from the top of our plate. Note: The X & Y centers are the points of rotation of the arc. If the wrong numbers are entered, the text can actually be off of the plate. Arc radius: This number will determine the radius of the arc. The radius is measured from the center point of the arc (X & Y Center) to the inside of the text. The larger the number is, the larger the arc will be. Start angle: This number will determine the degree amount that the arc will start. Chapter 4 - The Vision Menus 85 End angle: This number will determine the degree amount that the arc will end. Zero degrees is at 12 o'clock. 270 or -90 degrees is at 9 o'clock 90 or -270 degrees is at 3 o'clock 180 degrees is at 6 o'clock If you have an arced line and want the line to be straight again, click on the clear button and then click on Okay. The page up and page down keys will move you up and down from line to line. Note: If you go into the autoplate feature after you have a line that is arced, autoplate will erase the arc parameters. You will need to enter the arc parameters after you are finished using the autoplate feature. Easy Arc 86 Vision Software User's Guide This feature will change a normal line into an arced line by defining the margins on your plate. The only parameters needed to create an easy arc are the margins on the plate. Enter the top, bottom, left and right margins of your plate and then select if you want the arc to Bubble Upwards or Bubble Downwards. You can toggle between the Bubble options by pressing the space bar. Note: When using the easy arc feature, there is a limitation to what you can do. For example, when you enter in your margins, the area that you are allowing the arc to be created in must be at least two times as wide as the height. If not, Vision will show an error message to that effect. You can not create a 360 degree arc with easy arc. This must be done using the fixed arc feature. If you go into the autoplate feature after you have a line that is arced, autoplate will erase the arc parameters. You will need to enter the arc parameters after you are finished using the autoplate feature. Chapter 4 - The Vision Menus Rotation This feature will allow you to rotate your line. 87 88 Vision Software User's Guide You can select which way you would like to rotate your line by clicking on the selection you want. If you click on Reverse Engrave, the line will be reversed. If you know the angle you would like the line to be rotated, you can enter it in the Specific angle area. As you make your selection, the F in the box to the right will show you how the final rotation will be. The reverse engrave feature is commonly used to invert a logo. For example, this can be used to make a right handed baseball player left handed, or make a flower that faces left face right. Note: This feature will only rotate a line, not the entire plate. If you need to rotate the entire plate, you must go to the Plate menu and then to Rotation. Underline This feature will underline the current line of text. Move the cursor to the line that you would like to underline and goto the Underline menu from the Line menu. The Underline Details window opens. Chapter 4 - The Vision Menus 89 Number of cuts: This allows you to make a wider cut for the underline without changing cutters. If you enter in 3 for the number of cuts, it will go over the underline 3 times. Distance between: This allows you to specify how far apart the cuts are. (Ex. If you enter 3 for the number of cuts and .03 for the Distance between, you could use a .060 cutter to get an underline that is .18 wide.) Percent below text: This number will let you choose how far below the text that the underline will be. The percentage you enter will be that percentage of the letter size below the line. Or as a distance: This number will let you choose how far below the text that the underline will be. The number you enter will be that distance below the line. Note: You can use either Percent below text or as a distance. You can’t use both at the same time. When you type one in, the other is automatically calculated. Note: To underline an individual word or letters in a line of text, you must use the sublines feature. Once the sublines are created, move the cursor 90 Vision Software User's Guide with the arrows to the text section that you would like underlined and then go to the underline feature. Edit By Centers This feature will allow you to move your text or logo on the plate by changing the center of the object. Chapter 4 - The Vision Menus 91 X Center: This number is how far from the left side of the plate that the center of your line will be. Y Center: This number is how far from the top of the plate that the center of your line will be. This function can be used to quickly align a number of lines of text by setting each line’s X Center to the same value. Note: The ”Hot Key“ for this feature is F2. Manual Edit This feature will allow you to change the parameters of each line individually. 92 Vision Software User's Guide Baseline: This is the distance from the top of the plate to the bottom of the letter. Line Ht: This is the height of the letter or logo. Left: This is the margin of the line from the left side of the plate. Right: This is the margin of the line from the right side of the plate. Depth: This is the depth of engraving for the line. This option will only work properly if you are engraving without a nose cone. If you are using a nose cone, the depth should be left at 0.000 since the engraving depth is controlled by the nose cone. If you enter a depth on this screen, the text will have a blue color on the Graphical Display. Note: The ”Hot Key“ for this feature is F4. Chapter 4 - The Vision Menus 93 Plate Menu Autoplate This feature is used to create a layout in which Vision calculates the spacing of the layout. 94 Vision Software User's Guide If you enter in the numbers that Autoplate asks for, Vision will create the layout. Plate Width: The width of the plate. Plate Height: The height of the plate. Number of lines: The number of lines on the plate. From Line Number: Autoplate calculates the spacing for specific lines on your plate. You can have it space the whole plate or just selected lines of text. This number would be used if you only wanted Autoplate to space a portion of the lines on the plate, not all of the lines. This would be the first line to be calculated. To Line Number: Autoplate calculates the spacing for specific lines on your plate. You can have it space the whole plate or just selected lines of text. This number would be used if you only wanted Autoplate to space a portion of the lines on the plate, not all of the lines. This would be the last line to be calculated. Text occupies: This is the percentage of the plate that will be covered by text. If you have a one-inch tall plate with one line and the percentage set at 45 percent, the letter height would be .45 inches. This is what calculates the suggested letter height. Note: This applies to your layout as long as you do not change the top and bottom margin. If you do change the top and bottom margins, then the Text occupies value will calculate the letter height based off of the plate size less the top and bottom margins. Top Margin: This is the top margin of your plate. Autoplate will not let text inside of this margin. Chapter 4 - The Vision Menus 95 Bottom Margin: This is the bottom margin of your plate. Autoplate will not let text inside of this margin. Left Margin: This is the left margin of your plate. Autoplate will not let text inside of this margin. Right Margin: This is the right margin of your plate. Autoplate will not let text inside of this margin. Note: Autoplate will automatically calculate the margins. The only reason to change them is if you would like to enter different values than the suggested values. Ratios: This number is used to calculate letter heights. It is relative to all of the other line’s ratios. Ex. If you have one line that has a ratio of 2 and one line that has a ratio of 1, the line with the 2 will be exactly 2 times larger than the line with a ratio of 1. Height: This number is used to calculate letter heights. You can enter the exact letter height for each line. Space: This number is used to create more space around a line. The higher the number you enter, the more space there will be around that line. Note: The space is added above and below the line specified. Clear: This button will clear all of the numbers and return them to what they were the previous time you were in autolayout. If you use the Autoplate feature after creating multiple plates, then the Autoplate feature will ONLY apply to the current plate. The other plates in the multiple will remain unchanged. 96 Vision Software User's Guide Note: The ”Hot Key“ for this feature is F5. If you have a line that is arced, Autoplate will clear the arc parameters and you will need to re-enter the parameters if you wish to arc the line. Dimensions This feature allows you to change the size of your plate and the number of lines. The Plate Width and Plate Height values are also changeable in the upper right corner of the main screen. If you are using the autolayout feaure, the values can also be entered there or on the main Vision screen. Chapter 4 - The Vision Menus 97 Condense Mode This feature allows you to change the Condensation mode of the plate. Condensation is how tight the text is compressed to make it fit in an area so it doesn’t go off of the sign blank. It is measured in a percentage. Ex. A condensation of 80 percent would condense or compress the text by 80 percent and a condensation of 120 percent would stretch the text to 120 percent. A ”normal“ condensation is 100 percent. Lines individually: This would treat each line as a separate entity and will condense only if needed. Equal height lines: This would tell Vision to condense all the lines with the same letter height at the condensation rate of the longest line. 98 Vision Software User's Guide All lines equally: This looks at the entire job and applies the condensation of the longest line to all other lines on the plate. The condense mode can be changed in the condense mode section of the main screen. Note: You can change the ”default“ condense mode in the Preferences option in the System menu. Borders This feature will place a decorative border on your plate. Chapter 4 - The Vision Menus 99 Number of Borders: This is the total number of borders on the plate. Vision allows you to have up to eight borders on a single plate. You can make a sign look unique by using multiple borders. Border Record No: This is the border number that you are working on. Left Margin: This is the distance from the left edge of the plate to the left edge of the border. Right Margin: This is the distance from the right edge of the plate to the right edge of the border. Top Margin: This is the distance from the top edge of the plate to the top edge of the border. Bottom Margin: This is the distance from the bottom edge of the plate to the bottom edge of the border. 100 Vision Software User's Guide Corner Radius: This is the radius amount of the corner of the border. The larger the number is, the ”more round“ the corner will be. Border Type: This is the type of border that you would like to use. There are eight different borders to choose from. The space bar will toggle through the different types of borders. Extra Depth: This will add a depth for the border. It is used if you want to use the border feature to cut out your plates in a multiple plate instead of engraving a border. Enter the depth you would like to engrave. This will usually be the thickness of the material you would like to cut out. Number of Cuts: This will make multiple passes of the border to give it a different look. It works with the item below. Distance Between: This is the distance between the multiple cuts as described above. Clear: This will clear the settings for the border you are on. Delete: This will delete the border you are currently working on. Note: If you set the margins to 0, it is best to select the ”Ignore Clips“ option from the Execute Layout screen. If you do not do this, the border may not engrave completely. Chapter 4 - The Vision Menus Rotation This feature is used to rotate the entire plate. 101 102 Vision Software User's Guide You can select which way you would like to rotate your plate by clicking on the selection you want. If you click on Reverse Engrave, the entire plate (or plates if multiple plates have been created) will be reversed. As you make your selection, the F in the box to the right will show you how the final rotation will be. Options Menu Multiples This feature will allow you to engrave multiple plates on either one large sheet of material or on individual, pre-cut plates. Chapter 4 - The Vision Menus 103 Material width: This is the width of the piece of material that you would be putting on your machine. Material height: This is the height of the piece of material that you would be putting on your machine. Note: The material width and height entered will determine the maximum number of plates that can be engraved at one time. Left margin: This is the margin from the left side of the material to the left edge of the multiple plates. Right margin: This is the margin from the right side of the material to the right edge of the multiple plates. 104 Vision Software User's Guide Top margin: This is the margin from the top edge of the material to the top edge of the multiple plates. Bottom margin: This is the margin from the bottom edge of the material to the bottom edge of the multiple plates. Horizontal: This is the horizontal distance that you would like between your multiple plates. Vertical: This is the vertical distance that you would like between your multiple plates. Number of plates: This is the total number of plates that you would like to engrave. Batches required: You cannot change this number. This is calculated based upon the number of plates you entered and the size of your material. Plates per sheet: You cannot change this number. This is calculated based upon the size of the final plate and the size of your material. Duplicate Plate 1: This will copy all of the information from plate 1 to all of the multiple plates created. Score between plates: This will engrave a score line between the multiple plates. You can use this feature to have the machine cut the plates out. Note: If the score lines do not completely engrave around the outside edges of your material, you will need to select the ”Ignore Clips“ option from the Execute Layout screen. Pause before score: This will stop the machine after all of the text has been engraved to allow you to change the cutter or depth to cut the plates out. Chapter 4 - The Vision Menus 105 Plates go down first: This will change the order of the way the multiple plates are calculated. If this is selected, the order will go from top to bottom and then move to the right. Cut all borders last: This will allow you to use the border function as a plate cut out. You can create plates with rounded corners this way. It will engrave all of the text first and then cut the border out last, allowing you to change the cutter. Clear: This will clear out all of the multiple plates that were previously created. Repeats This feature will allow you to engrave the entire job multiple times. 106 Vision Software User's Guide Times to repeat layout: This will engrave the job the entered amount of times. Stop before each layout repeat: If this is selected, the machine will stop between repeats. If it is not selected, the machine will repeat the job the number of times entered without stopping in between. Serialize This feature will automatically serialize text to any line on your plate or multiple plates. Chapter 4 - The Vision Menus 107 This works with multiple plates or batching of single plates. First serial number: This is the number you would like Vision to start with. Increase serial by: This is the amount that Vision will increase your number by. Repeat each serial: This will let you enter how many of each serial number you would like. Prefix string: This is the text that you would like before the serial number. Note: If you would like a space between the text and the number, you must add a space. Suffix string: This is the text that you would like after the serial number. Note: If you would like a space between the number and the text, you must add a space. 108 Vision Software User's Guide Serial number: This defines how the text will look. You can use the space bar to ”toggle“ through the selections, which are: 1) No format - The serial number will have no spaces or zeros in front of it. 2) Leading Spaces - This number will leave spaces in front of the number by the amount that is entered in the format length section. 3) Leading Zeros - This number will put zeros in front of the number by the amount that is entered in the format length section. Format Length: This is how many numbers the serial number will have. Ex. If your number is 100, the format length will be 3. Serialize plates: If this is selected, Vision will put one serial number per plate. Serialize lines: If this is selected, Vision will put one serial number per line. Last to serialize: This is the last plate or line that you would like serialized. First to serialize: This is the first plate or line that you would like serialized. Line to serialize: This is the line on your plate that you would like serialized. You can only change it if you have multiple lines on your plate. Existing text: This tells Vision what to do if you already have text on the line you would like to serialize. You can use the space bar to ”toggle“ through the selections, which are: Chapter 4 - The Vision Menus 109 1) Overwrite it: This will get rid of the existing text and replace it with the serial number. 2) Append to end: This will add the serial number after the existing text. 3) Append in front: This will add the serial number before the existing text. Columnize This feature will break your layout into columns. In order to use the columnize feature, you must first have the lines that are not going to be columns to be setup. Go into autolayout by pressing the F5 key and enter the information as in the picture below and then click OK. 110 Vision Software User's Guide The first two lines of text that will not be columnized are now setup. From the text screen, press the down arrow on the keyboard until the cursor is on the last line of text. Next, go to the Options menu and then columnize. The following screen will appear: Chapter 4 - The Vision Menus 111 Click on Show existing line graphics. You will then notice that the 2 lines that are not columnized will appear on the preview screen to the right. 112 Vision Software User's Guide Number of Columns: This is how many columns you would like on the plate. Lines per Column: This is how many individual lines you would like inside the columns. Top margin: This is the distance from the top edge of the material to the top edge of the column of text. Bottom margin: This is the distance from the bottom edge of the material to the bottom edge of the column of text. Left margin: This is the distance from the left edge of the material to the left edge of the column of text. Right margin: This is the distance from the right edge of the material to the right edge of the column of text. Note: In the graphic to the upper right of the screen, the light blue represents the entire length of the existing line of text, the red represents the text area of the existing lines of text, the dark blue represents the individual column lines and the yellow is the area in which the columns will be. Enter in the parameters like the picture below: Chapter 4 - The Vision Menus 113 If you like the way the preview looks, you can click OK to accept the column layout. If you would like to change some of the other parameters, click on the Details tab. You will see the following screen: 114 Vision Software User's Guide Width: This is how wide each column is. It is automatically calculated, but you can change it if you would like. Lock: This is only checked if you enter in a column width manually. When this is checked, the width of the column will be fixed and not changeable by the software. Gap: This is how large the space is between the columns. This is automatically calculated, but you can change it if you would like. Lock: This is only checked if you enter in a gap between columns manually. When this is checked, the gap between columns will be fixed and not changeable by the software. Justify: This allows you to change the justification of each column. Pressing the space bar toggles between Center, Left and Right. Next click on the Lines tab. You will see the following screen: Chapter 4 - The Vision Menus 115 Line Height: This is the height of the characters in the columns. This number is calculated automatically, but you can increase or decrease the height manually if you would like. Line Percent: This is also related to the height of the characters in the columns. By changing this number up or down, the letter height will change. This percentage calculates the letter height by a percentage of the available height of the column. Note: As you change the line height value, the line percentage will change also. Also, if you change the line percentage value, the line height value will change. Undo Columnize This feature will undo or erase a column layout that was created in the columnize feature. 116 Vision Software User's Guide Pass Depths This feature will allow you to enter the depth you wish to engrave either in one pass or multiple passes. Chapter 4 - The Vision Menus 117 To surface: This value is ignored when using the Vision Serial Controller or the VE-810 Engraver. The surface is set on the controller and in the VE810. Total depth: This is the total depth that you would like to engrave. This value is only needed when you are engraving without a nose cone. If you are using a nose cone, the value should be left at 0.000 because the depth is controlled by the nose cone. Z Lift: This value is ignored when using the Vision Serial Controller or the VE-810 engraver. The Z lift between characters is controlled from the Vision Serial Controller and from the front panel on the VE-810 Passes: This is how many passes you would like to make to get to the total depth. Note: Vision will show you how deep every pass will be. Cleanup: This is how deep you would like the final pass to be. Pause before each pass: If this is selected, the engraving table will stop before it goes to a different depth pass. This would be used if you would like to change the cutter between passes. Pause before clean up pass: If this is selected, the engraving table will stop before it goes to the cleanup pass. This would be used if you would like to change the cutter before the cleanup pass. Clear: This will reset all of the parameters in the Pass Depths window to zero. 118 Vision Software User's Guide Extras Menu Suggestions This feature will recommend a cutter size that you should use for each line on your sign. Chapter 4 - The Vision Menus 119 Note: These are only suggestions. You will need to round to the closest cutter size that you have. Vision will only suggest a cutter size for Vision fonts. Logos and Dahlgren fonts will not show any cutter suggestion. Estimates This feature will give you an approximate engraving time for the job you are doing. The time estimate is based on the maximum allowable engraving speed defined for the material type selected. The maximum speed for the material will determine the maximum speed of the controller when the X/Y speed know is turned full clockwise. The maximum speed values for each material type can be modified by accessing the Windows Start menu/Programs/Vision Engraving Software/Edit material types. See the 120 Vision Software User's Guide section in the manual on the Vision Main Screen for more information on changing the material type speeds. Note: This is only an estimate. The actual time will vary depending on how fast you set the engraver to run. Counts This feature will tell you how many characters, words and spaces are on your plate. Chapter 4 - The Vision Menus 121 Block Display This feature will show you a block view of your layout. Since the Block Display uses boxes in place of the actual text in your layout, you will get a quicker display of the layout. It is much faster than getting a graphic display. Pressing the Enter key or clicking on Exit will exit this display. Note: The ”Hot Key“ for this feature is F7. 122 Vision Software User's Guide Graphic Display This feature will show you an actual graphical view of your layout. This is a good way to proof what the sign will look like on the screen before engraving it. Pressing the Enter key or clicking on Exit will exit this display. Note: The ”Hot Key“ for this feature is F8. Chapter 4 - The Vision Menus 123 Re-order This feature will allow you to change the engraving order of your lines in your layout. It is often used to reduce the amount of cutter up travel or to minimize the need to change the cutter during the job. BaseLine Ascending: This will change the order of engraving to work from the top of the plate to the bottom of the plate. LineHeight Ascending: This will change the order of engraving to work from the smallest letter size to the largest letter size. 124 Vision Software User's Guide LineHeight Descending: This will change the order of engraving to work from the largest letter size to the smallest letter size. Cutter Suggestion: This will change the order of engraving to work from the smallest cutter size to the largest cutter size. Note: Vision always engraves the lines in the job in the order that the lines appear in the main screen. Goto XY This feature will allow you to move the cutter out to a position based on the X & Y position. Chapter 4 - The Vision Menus 125 X Position: The distance from the left home point that you want the cutter to move. Y Position: The distance from the top home point that you want the cutter to move. Undo SetXY: If this button is clicked, any offset that is previously set in the Goto X,Y screen will be erased in the Vision Serial Controller. Set As Home: If you click on this button, the start light will come on in the controller. Then you press start and the table will move to the position entered and then go back to the home position. However, this position is now set in the controller as its offset home point. Okay: If you click on this button, the start light will come on in the controller. Then you press start button on the controller and the table will move to the position entered and stay there until you press enter on the keyboard. 126 Vision Software User's Guide Window Menu Cascade This feature will layer all of the open jobs on the screen so that the title areas of each can be seen. You can make any of the jobs active by clicking on the job title bar. Notepad This feature will open the Windows Notepad program. Chapter 4 - The Vision Menus 127 Calculator This feature will open the Windows Calculator program. It is handy if you need to figure out the decimal value of a fractional number. 128 Vision Software User's Guide Calendar This feature will open up a calendar program. Chapter 4 - The Vision Menus International Characters This feature will show you a list of the international characters and the ASCII number needed to engrave them. Clicking on the International Characters menu choice will open up the following dialogue box. 129 130 Vision Software User's Guide To use an international character, click on the desired character and make a note of the number shown at the bottom of the window. Close the international character window. Then with the cursor in the text area of the main screen, hold down the ALT key and type the number that was shown on the international character window. Note: You must use the numeric keypad on the right side of your keyboard for the international characters to work. Explorer This feature will open up the Windows Explorer program. This is commonly used if you would like to copy files from a floppy disk to a hard drive or from a hard drive to a floppy disk. Chapter 4 - The Vision Menus 131 System Menu Devices This feature will allow you to change information about the machine driver that you are using. It is only available when there are no open jobs on the screen. 132 Vision Software User's Guide To change any of the parameters relative to the driver you are using, you must first click on the driver name under the Avail Drivers: section. Version Number: This is the version number of the driver. Buffer Size: This is not used with the Vision Serial Controller. Priority level: This is a Windows number that tells Windows how important the output to the controller is. Serial port: This is the serial port in which the Vision Serial Controller is hooked to. Note: For Vision to work properly, the serial port must be installed, working correctly, and set up properly. For more information on setting up the serial port, see Appendix B - Troubleshooting in the back of this manual. Ramp Ctrl and Cut Control are not used with the Vision Serial Controller or the VE-810. Table: See picture below. Chapter 4 - The Vision Menus 133 X, Y and Z Size: This is the size of your engraving table. This number is entered in metric which is the calculated by multiplying the table size in inches by 25.4. X, Y and Z-Axis Pitch: This defines the pitch of the lead screws on your engraving table. You should not need to change these parameters. X, Y and Z Home Offset: This is used to set an offset in the driver from the upper left corner of the engraving table. Note: To activate any changes made in this section, you MUST exit Vision and re-start the program. If this is not done, the changes will not be activated. 134 Vision Software User's Guide Chg Devices Temp This feature is used to change the current device that you are using temporarily. It is only available when there are no open jobs on the screen. Chapter 4 - The Vision Menus 135 To change the devices temporarily, click on the first device under Select Device. Then click on the driver you would like to use under Avail Drivers and click Add. Your new device is now active. Note: Once you exit the Vision program and go back in, Vision will use the original driver, not the added driver. To make the change permanent, you will need to go to Save Device Change under the System menu. Preferences This feature is used to define the default parameters that Vision will use when you create a new job. 136 Vision Software User's Guide You can change any of these numbers to make it ”Default“ to the new values when you create a new job in the Vision Software. Save Device Change This feature is used to assign the ”Default“ driver that you wish to use. It is only available when there are no open jobs on the screen. Chapter 4 - The Vision Menus Select the device you would like to change and click Okay. 137 138 Vision Software User's Guide Select the type of device you want. There are two choices of devices available: Single Driver and Driver Group. The single driver selection will allow you to install a single device and the driver group will allow you to install a group of drivers. To specify which drivers you would like to add in a driver group, you must use the Windows notepad and create a file such as the one below: You can add as many devices that you would like in the above file. You must make sure that the Number of combined drivers is equal to the number of drivers that you have entered. Note: You can select which driver you would like to engrave to from the Execute Layout screen by clicking on the down arrow next to the driver name. Chapter 4 - The Vision Menus Select the device you want. Note: If the driver is not shown than the driver file is not in the Vision directory. You will need to re-install the Vision device driver from the Vision CD. You must now exit Vision and re-start the program. 139 140 Vision Software User's Guide Change Screen Font This feature allows you to customize the way that the Vision screen and menus look. Selecting this menu choice brings up the following screen: Chapter 4 - The Vision Menus 141 You can choose the Windows font that you like. Note: Choosing too large of a font size may cause the menus to be unreadeable. Email Technical Support This feature will start up your default email editor and address a new email to Vision’s technical support department. If the email address is not in there, you can manually address the email to . Note: If your computer does not have email setup, this feature will not work. 142 Vision Software User's Guide Goto Vision Web Site This feature will start up your default web browser and enter in Vision Engraving Systems home web site page. If the web address is not in your web browser, you can manually enter it at . Note: If your computer does not have an Internet connection setup properly, this feature will not work. Chapter 4 - The Vision Menus 143 About Vision This feature will display the version number and build number of the Vision program. 144 Vision Software User's Guide Chapter 5 - Other Features 145 Chapter 5 - Other Features Moving Lines Graphically Let’s load the simple job that you created in Chapter 3. To do this, go to the File Menu and then to Load Job. Click on the job called SIMPLE and then click OK. 146 Vision Software User's Guide You should now have the job on your screen. Press the F8 key to get a graphical view of the job. Click on the line John Smith with the left mouse button. You will notice that a light blue box will surround the line you clicked on. Move the mouse up and down. You will notice that the blue box will move as you move the mouse. You can place the line of text in a new position by clicking the left mouse button. When you do that, you will see the text move to that point. Now left click on the ABC Company. This time, press and hold down the CTRL key on your keyboard as you move the mouse. You will notice that the line of text will only move straight up or down, or straight to the left or right. This is works very well if you would like to move a line of text up or down, but want to leave the text centered on your plate. Once again, when you want to place the text in at a certain point, you need to press the left mouse button. You can also move multiple lines at one time. To do this from the F8 screen, click on the first line that you want to move. Then, hold the SHIFT key down on the keyboard and click on the second line you would like to move. Then release the SHIFT key. You will see that there are two light blue boxes on the screen. You can now move the mouse and both lines will move at the same time. You can still use the CTRL key to move the lines up and down or left and right. View Screens You can do many things to your layout with the graphical display (F8) or Block display (F7) on the screen. With the SIMPLE job loaded, press the F8 key. Move the mouse over the John Smith line and press the RIGHT mouse button. You will get a screen that looks like this: Chapter 5 - Other Features 147 This has many of the line parameters for that line that you can change. As you change these, they will be shown on the screen when you click on the Okay button. These values are explained in Chapter 4 under the Main Screen section. There is also a tool bar on the graphic screens (F7 & F8 Keys). Press the F8 key to get a graphical view of the simple job. You will see the following: You will notice the tool bar to the upper left corner of the screen. 148 Vision Software User's Guide The first icon is the exit icon. Clicking on this icon will exit out of the graphic display window and return you to the main Vision screen. The next icon is the zoom icon. Clicking this icon will allow you to zoom into an area on your graphics screen. Once you click on it, you will need to click the mouse to the upper left corner of the area you would like to zoom. Then move the mouse to the lower right corner of the area you would like to zoom and click the left mouse button. The area inside the box will be zoomed on screen. Below is a picture of what the screen will look like after you press the first mouse button after clicking the zoom icon. Once you click the mouse button a second time, the zoomed area will look like the following: Chapter 5 - Other Features The next icon is the zoom out icon. Clicking this icon will zoom out to the normal view. The next icon is the grid icon. Clicking this icon will turn the grid on and off as shown below. 149 150 Vision Software User's Guide The next icon is the grid size icon. Clicking this icon will allow you to adjust the space between each grid when the grids are turned on. You adjust the spacing by entering the value in on the following screen. The final icon in the tool bar is the rulers icon. Clicking this icon will toggle between rulers on and off as shown below. Chapter 5 - Other Features 151 Re-Engrave Re-Engrave is a very important feature. There are two types of re-engrave: plate Re-Engrave and line Re-Engrave. Plate Re-Engrave is done easily by pressing the F1 button on the Vision Serial Controller Series I, the B1 button on the Vision Serial Controller Series II or the Home/Save button on the VE-810 Engraver. When you press one of those buttons, the start light will turn green. All you need to do is press the start button and the entire job that was last engraved will engrave. It does not matter if the job has been closed or not, but Vision Windows must remain open. Line Re-Engrave comes in handy especially in multiple jobs in which a certain line or group of lines did not engrave completely. If you would like to re-engrave a line, press the F8 or F7 key. This will bring up the display of the job on the screen. Click on the line that you would like to re-engrave and press the F9 key. This will bring up the Execute Layout screen. 152 Vision Software User's Guide Click the OK button and then only the selected line will be sent to the engraver. You can re-engrave multiple lines by selecting more than one line on the display screen. Multiple Job Entry With VISION, more than one job can be created at once. This is useful in creating new jobs while one is already engraving. For example, go to the File-New menu. You will see a new blank job on the screen. The job number should be ”1“. If not, close all jobs and start again. Now that we have a blank job in front of us, go to the File Menu and then to the Load job option. Load the simple job we created earlier. The screen should appear to have replaced your blank job with Simple Job. Nothing Chapter 5 - Other Features 153 has been lost, you have simply added another job on top of your existing job. Now that we have Simple Job in front of us, go to the File Menu and then to the New job option. Again the screen then should appear to have replaced your job with a new job. Nothing has been lost, you have simply added another job on top of your existing jobs. The new job’s title bar will have the title NoName3.job. If you keep creating new jobs, you will notice that after the eighth job, the New job and Load job options will be grayed out. Only eight (8) jobs are allowed to be opened at any one time, so in order to open new jobs after the eighth job, you will need to close one of the existing jobs. Now with the eight jobs you have on screen, let’s assume that you want to display job four so you can input some information to it. Hold down the Alt key and press the number four key. Job four should come to the front. Another method to select jobs is from the Window Menu under Cascade. This option will cascade or evenly put all open jobs on the screen so that you can see the job title bar of each job. To make a job active, click on the title bar. Extend A Plate Extend A Plate is used for engraving a piece of material that is longer than your engraving table size. To use this feature, simply set up your layout as you would a normal layout. Type in the actual plate size even though it is larger than your table size. When you press the F9 key to Execute the layout, the normal screen will appear. 154 Vision Software User's Guide Click on the OK button and a picture of your layout will appear on the screen. You will notice that there will be a yellow vertical line in the center of your plate as seen below. Chapter 5 - Other Features 155 You can drag this yellow line to the right or left to try to move it in between as many characters as you can. It is best if you do not move the line in the middle of a letter. When you click the Okay button, the following screen will appear. 156 Vision Software User's Guide This will show you how far to move your plate for each section that Vision needed to break the larger job into. Take a pencil and put a mark on your material that is at the distance listed on your screen from the bottom left edge of your material. Put as many marks as there are section numbers. Now click on Okay. Vision will automatically turn the plate sideways for you. Put your material on the engraving table sideways with the left edge of the material against the horizontal edge guide on the table. Press the Start button on the Vision controller and it will engrave the first section of the sign. When it is done with the first section, the spindle will move to the home position and wait for you to move your material. Move the piece of material so that the first mark that you put on it is where the back edge guide would normally be. You will need to lower the edge guide to do this. Press the Start button and the engraver will now engrave the next section of your plate. Repeat this process for each section that there is on the plate. Note: When performing this operation, it is a good idea to use re-usable double-sided engravers tape to hold your plate down. Chapter 6 - Creating Sample Jobs 157 Chapter 6 - Creating Sample Jobs Sample Job 1 In this sample job, we will create a nametag with 3 lines of text and a logo on it. This will be the basis for the rest of this sample, as we will expand upon it. Go into the Vision Program. Click on the File Menu and then New Job. You should now have a blank job on the screen. Click on the Plate Menu and then Autoplate. Enter in the values as in the picture below. 158 Vision Software User's Guide Note that you do not need to change the Text occupies section. This will be calculated by the Vision program when you enter in all three of the line height amounts. Click on the Okay button. The 3 lines of text have now been created. Next, we will add the logo to our layout. Click on the Plate Menu and then click on Autoplate. Change the number of lines to 4. You may get an autoplate message warning you that something is wrong. This is okay for this exercise, so click on OK. In the Autoplate Layout window, change the From Line Number in the Extended Autoplate section to 4. By doing this, the autoplate program will leave the original 3 lines in the position that we created earlier and only work on the single line which we will place the logo in. Enter in the values as in the picture below. Chapter 6 - Creating Sample Jobs 159 Click on the Okay button. Our layout is now created. For line 1 type ”John Smith“and press Enter. For line 2 type ”President“ and press Enter. For line 3 type ”Computer Repairs, Inc.“ and press Enter. Note that you do not need to type the ”. This is only there to show you which text to type in. The fourth line of text should now be highlighted. Go to the Text Menu and click on Logo Load. Scroll down and click on compduck.plt and Click OK. 160 Vision Software User's Guide Type in a capital letter A in the text area for line 4. Press the F8 key to get a graphical view of the layout that we just created. Click on the OK button to return to the layout screen. Now that we have the layout created, let’s modify some of the lines. Press the up arrow on the keyboard 3 times to move the cursor to the first line of text (John Smith). Now click on the word Gothic that is next to Font Style. Press the space bar one time. The font style will now change to say 3 Line Rom. Chapter 6 - Creating Sample Jobs 161 Next, press the Page Down button on your keyboard twice. You will notice that the cursor moved from the line John Smith to the line Computer Repairs, Inc. Click on the 0.00 next to Italicization and type in 20 and press Enter. The screen should now look like the following: 162 Vision Software User's Guide Press the F8 key to look at the layout we have created. Press the <enter> key on your keyboard to return to the main screen. Next we will save the job to the hard disk. Go to the File Menu and then click on Save Job. Type in SAMPLE1 under the filename. Also, type in This is Sample Job number 1 in the Comments field. You can add comments to any job as you save it. This can have information such as the cutter size that you use on the job or any notes that may be helpful the next time that you run that job. Click on OK. Chapter 6 - Creating Sample Jobs 163 The job is now saved. Next we will set up a job involving multiple plates and merge a text file into the multiple job. This is a commonly used feature that allows you to create a matrix with many plates on it. If you can get a text file with the job information from your customer, you will not need to type the text in. The machine will even cut the plates out when it is done. For this example, we will be importing a text file with the list of names in it, so we will need to get rid of the text on the first two lines of our plate. Press the up arrow on the keyboard twice to bring the cursor to the first line (John Smith). Hold the <Shift> key down and press the <Delete> key. This will erase the entire line of text. Press Enter to move to the second line and do the same thing again. 164 Vision Software User's Guide Go to the Options Menu and click on Multiples and enter the information that is shown in the picture below: This will set up a 4 plate matrix and add the lines to cut the plates out. Click on the Okay button. Press the F8 key and you will see that we have now created the multiple plate. Next, we will import a list of names into our job. Go to the Text Menu and then to Merge Text. Type in Sample1.txt in the filename area. Then change the Merge To Line to 2. Your screen should match the one below. Click on the OK button. Chapter 6 - Creating Sample Jobs 165 Now press the F8 key. The matrix will now have four different names and titles. Sample Job 2 In this sample, we will create a plaque with an arced line of text and a border. In this job we will enter the text in before we create the layout. This is useful if you do not know the total number of lines that the job will have when you start it. Go to the File Menu and then to New Job. Click on the word Gothic that is next to Font Style and press the space bar one time. The font style will now change to read 3 Line Rom. Press the F6 key to bring the cursor to the text entry section. Press the <Insert> key on the keyboard. Type in “Presented To” and then press <Enter> twice. (This will leave a blank line on your plate) Next, type in “JOHN SMITH” and <Enter> twice. Next type “In recognition for” and <Enter> and then “your help and” and then <Enter>. Then type “support throughout” and <Enter> and then “the year.” and <Enter>. Next press the space bar and then <Enter> and finally type “November 1998”. Press the <Insert> key. Now press the <F8> key. You will see that all of the lines are actually stacked on top of each other. This is due to the fact that when entering new lines in the job by using the insert key, the line parameters are taken from the line above until they are changed by the user or by using a feature such as autoplate. Click on OK or press <Enter> to exit the graphical view screen. 166 Vision Software User's Guide Go to the Plate Menu and click on Autoplate. Type in the information as shown in the picture below. There are actually more lines on the plate than can be shown on the picture above, so below is the information for lines 8 through 10. Chapter 6 - Creating Sample Jobs 167 Click on the Okay button. Make sure that the line that is highlighted is the first line. If it isn’t, press the up arrow key until the highlighted line is on Presented to. Goto the Line Menu and then to Easy Arc. Enter the following numbers in. 168 Vision Software User's Guide Click on Okay. We have just arced the first line of our plate. Press the F8 key to look at the layout so far. When done, click on Okay. Next we will add a border to our plate. Go to the Plate Menu and then to Borders. Enter the following information in. Click on Okay. We have just added a border to our plate. Press the F8 key to look at our layout. When done, click on Okay. Finally, let’s save this job for future reference. Go to the File Menu and then to Save Job. Name the job SAMPLE2 and enter the job comments in. Press OK when finished. Chapter 6 - Creating Sample Jobs The job is now saved. 169 170 Vision Software User's Guide Appendix A: Hot Keys 171 Appendix A: Hot Keys The following is a list of all of the keyboard functions and hot keys for the Vision Program: While a job is open and you are in the main screen. [TAB] Moves to the next entry area. [SHIFT]+[TAB] Moves to the previous entry area. [BACKSPACE] Removes the next character or number to the left. [DELETE] Removes the character or number at the current cursor position. [ENTER] Accepts the field and moves to the next position. [ALT] When pressed in conjunction with other keys will give the extended key functions. [NUMLOCK] Will lock the numeric keypad into operation. [CAPLOCK] Will lock the keyboard on capital letters. [ARROW UP] Moves to the previous entry field. [ARROW DOWN] Moves to next entry field. [ESC] Will return the previous figure if a wrong entry is typed. 172 Vision Software User's Guide [PAGE UP] Moves to the previous line’s information. [PAGE DOWN] Move to next line’s information. [SHIFT]+[PAGE UP] Moves to the previous plate, only when multiple plates or batches are present. [SHIFT]+[PAGE DOWN] Moves to the next plate, only when multiple plates or batches are present. VISION special keys [FUNCTION KEY 1] F1 On Line Help [FUNCTION KEY 2] F2 Edit By Centers screen. [FUNCTION KEY 4] F4 Manual Entry screen. [FUNCTION KEY 5] F5 Auto Layout selection. [FUNCTION KEY 7] F7 Box display screen. [FUNCTION KEY 8] F8 Full graphic display screen. [FUNCTION KEY 9] F9 Output current job to device driver. [ALT]+[F] Opens the File menu. [ALT]+[E] Opens the Extras menu. [ALT]+[T] Opens the Text menu. [ALT]+[L] Opens the Line menu. [ALT]+[P] Opens the Plate menu. [ALT]+[O] Opens the Options menu. [ALT]+[X] Opens the Extras menu. [ALT]+[W] Opens the Window menu. [ALT]+[S] Opens the System menu. [ALT]+[Number] Selects that job number to be the current job. Appendix A: Hot Keys 173 Within the text entry area, the following commands are available. [ARROW LEFT] Moves to the next character left. [ARROW RIGHT] Moves to the next character right. [ARROW UP] Moves to the previous text line. [ARROW DOWN] Moves to next text line. [SHIFT]+[ARROW LEFT] Moves to the character after the previous subline marker. [SHIFT]+[ARROW RIGHT Moves to the character after the next subline marker. [HOME] Sends the cursor to the first character of the line. [END] Sends the cursor to the end of the line. [DELETE] Deletes the character at the current cursor position. [SHIFT]+[DELETE] Deletes all characters on the current line. [BACKSPACE] Deletes the character left of the cursor position. [SHIFT]+[BACKSPACE] Same as Shift-delete. [SHIFT]+[PAGE UP] Only when multiple plates or batches are present, it moves to the previous plate. [SHIFT]+[PAGE DOWN] Only when multiple plates or batches are present, it moves to the next plate. [ALT]+[INSERT] Will turn on/off the line insert mode. [INSERT] Allows you to insert text in the middle of an existing line of text. [>] This will add one quarter of a space between the characters in the text area of the main screen. 174 Vision Software User's Guide [<] This will subtract one quarter of a space between the characters in the text area of the main screen. VISION Serial Controller Hot keys Series I Controller F1 This will re-engrave the entire job that was previously engraved. Series II Controller B1 This will re-engrave the entire job that was previously engraved. B2 This will backup 1 character for each time you press this button. B3 This will backup 1 line for each time you press this button. VE-810 Engraver Home/Save This will re-engrave the entire job that was previously engraved. Backup ABC This will backup 1 character for each time you press this button. Appendix B: Troubleshooting 175 Appendix B: Troubleshooting Problem 1: When you try to engrave the job and it shows you an error like the following: Solution: The software protection is not being recognized by the Vision Program. If you have a Vision software chip in the Vision Serial Controller, please see the following: 1) Make sure that the Vision Serial Controller is turned on and functioning properly. (You can press the jog keys and if the table moves, then the controller is functioning properly). 2) Make sure the Vision Engraving Software is configured for the correct serial port in your computer. See problem 2 below for possible fix. 176 Vision Software User's Guide 3) Is there a dongle chip installed in the Vision Serial Controller? To check this, take the cover of the serial controller off. Turn the controller on and look at the back, right side of the main board inside the controller. If the chip is installed, you will see a flashing red light on the main board labeled LD13. If this is not flashing, then there is either no chip in socket IC10, a pin is bent on the dongle chip or the dongle chip is bad. If you have a Vision software key, please see the following: 1) The Key will not be detected and may not operate if a printer or device plugged into the rear is switched off. Make sure that the printer plugged into the Vision software protection key is turned ON. In situations where this may cause difficulties, try plugging the printer or device into another printer port instead of the key. 2) If another program is using a different software protection key, they can be plugged together. If one program will not work, swap the order of the two protection keys 3) The printer port must NOT be configured for Bi-Directional for the Software Protection Key to work properly. If the Key does not work, you must go into your computers CMOS setup. Each computer is a little different, but on most computers, you can press the [DEL] key while the computer is going through the memory test on boot up. Then go to the section that says something about Peripherals. Then find the section that says Parallel Port Mode and use the [Page Down] key to change the selection. Press the [Page Down] key until it says either “Normal” or “ECP”. These settings work the best. Then press the [Esc] key and then go to the section that says Save Settings and press [Enter]. IMPORTANT: DO NOT plug a printer or scanner into the Software Protection key if your printer or scanner has a plug on the back for you to plug the Software Protection key into. Plug the dongle into the printer or scanner. Problem 2: The status line at the bottom left corner of the screen says Device Failure. Appendix B: Troubleshooting 177 Solution: The engraver is probably connected to the wrong serial port. Close all jobs, go to the System Menu and then to Devices. Click on the machine type that you have under the Avail Drivers. You will see a screen like the one below. Change the Serial port number to a different port. Generally, the engraver will be hooked up to either port 1 or 2. Once you change the serial port number, click on Okay. You will now need to exit Vision and go back into the program for the changes to take effect. Problem 3: The status line at the bottom left corner of the screen says Busy or Offline. Solution: 1. Is the controller turned on? 2. Unplug the white cable that goes into the back of the Vision Serial Controller and plug it back in. Make sure that the screws are tightened securely. 3. There is a possible problem with the serial port in the computer. Shut the system down and swap the mouse plug with the plug that goes to the 178 Vision Software User's Guide engraver at the back of your computer. Turn the system back on and see if the mouse works. If it does, go into Vision and see if the status line now reads “Waiting”. Problem 4: You send the job to the controller but the start light on the Vision Serial Controller doesn’t turn green. Solution: 1. Check the cable that runs from your computer to the Vision Serial Controller. Unplug both ends and plug back in. 2. Make sure that the controller is in the proper mode. This can only be a problem if you have been using the D1.4 program to run the Vision engraver and have not changed it back to the standard Vision mode. You do this by pressing the F2 key on the Vision Controller and then pressing the Set Surface/Lift key. 3. Make sure that your engraver is hooked up to the correct serial port. A quick way to check this is to look at the status line at the bottom left corner of the screen. If it says “Waiting”, then unplug the cable that runs from your computer to the Vision Serial Controller and follow the steps below: A) If the status line changes to “Offline” than you are hooked up to the correct port. There could possibly be a problem with the Vision Serial Controller. Call your local sales representative or Vision Engraving Systems. B) If the status line stays at “Waiting” than you are not on the correct port. Vision is probably detecting a modem or sound card in your computer as being the engraver. Close all jobs, go to the System Menu and then to Devices. Click on the machine type that you have under the Avail Drivers. You will see a screen like the one below. Appendix B: Troubleshooting 179 Change the Serial port number to a different port. Generally the engraver will be hooked up to either port 1 or 2. Once you change the Serial port number, click on Okay. You will now need to exit from Vision and go back into the program for the changes to take effect. If the status line now says “Offline”, then plug the cable back into the controller and see if the status line changes to “Waiting”. If it does, then the problem should be fixed. If not, repeat the last step but change the Serial port to a different number. Problem 5: The engraver will stop in the middle of a job or take off and move to the wrong place in the middle of a job. Solution: Check the Windows Com Port settings to make sure they are correct. To do this, follow this sequence: Right mouse click on the My Computer icon on your Windows desktop. Go to properties. Click on Device Manager. Double click on Ports and then double click on the serial port that the engraver is connected to. Click on Port Settings. The settings should look like the picture below. If not, change them to match. 180 Vision Software User's Guide Click on OK twice and then re start Vision. Problem 6: You start the Vision program and it gives you an error that reads: Appendix B: Troubleshooting 181 This problem normally occurs if you install Vision into a directory other than the default directory (c:\viswin). This would have been done when you installed Vision. It can easily be corrected by doing the following. Solution: The Vision fonts are not in the correct place or the Vision Program looks for them in the wrong place. Go to the Windows Start Menu and click on Programs. Then click on Vision Engraving Software and click on Edit Vision Defaults. You will get the Windows notepad with a file called Cipher.sys opened that will look like the following: 182 Vision Software User's Guide You will need to change the default font directory to match the directory where your Vision fonts are installed. Once you change this, go to the File menu and save. Problem 7: You try to engrave a plate with a border or cut out lines and it does not engrave the outside edge. Solution: From the Execute layout screen, make sure that you have selected the “Ignore Clips” field. Problem 8: You have loaded a logo, but it does not engrave anything where the logo should be. Solution: Make sure that you have a capital letter A entered in the text area for the line that the logo is loaded. Appendix C: Error Messages 183 Appendix C: Error Messages The following is a list of the known Vision error messages. # Error Message Probable Cause 2 File not found Invalid name entered in load screens 3 Path not found Invalid path entered in load screens 5 File access denied A network file is in use 100 Disk read error Floppy disk is removed 101 Disk write error Floppy disk is removed 106 Invalid numeric format Cipher.sys or driver file (.cdf) is corrupt 150 Disk is write-protected Change write protect on disk 152 Drive not ready Floppy disk is removed 154 CRC error in data Bad sector on hard or floppy disk 156 Disk seek error Bad file on disk 157 Unknown media type Unformatted disk 158 Sector not found Disk has an error 159 Printer out of paper Printer is out of paper 160 Device write fault Printer paper is jammed 200 Division by zero Zero was entered somewhere 184 Vision Software User's Guide Index 185 Index A E About the Manual.................... 7 About Vision ....................... 143 Autoplate............................... 93 Each Word............................. 78 Easy Arc ................................ 85 Edit By Centers ..................... 90 Email Technical Support ..... 141 Engrave ................................. 57 Error Messages.................... 183 Estimates ............................. 119 Exit ........................................ 63 Explorer............................... 130 Extend A Plate..................... 153 B Blank work area .................... 35 Block Display...................... 121 Borders.................................. 98 C Calculator ............................ 127 Calendar .............................. 128 Cascade ............................... 126 Change Screen Font ............ 140 Chg Devices Temp .............. 134 Clipboard Paste ..................... 64 Close Job ............................... 60 Columnize ........................... 109 Condense Mode..................... 97 Copy...................................... 65 Copying from a disk .............. 24 Counts ................................. 120 Creating a simple job............. 35 D Delete Line ............................ 83 Delete Subline ....................... 77 Device status area.................. 35 Devices................................ 131 Dimensions............................ 96 F First Word ............................. 78 Fixed Arc............................... 83 Flush Job ............................... 61 Font Load .............................. 72 G Goto Vision Web Site ......... 142 Goty XY .............................. 124 Graphic Display................... 122 Graphical Print ...................... 56 H Hot Keys.............................. 171 I Import Job ............................. 51 Insert Line ............................. 82 Insert Subline......................... 76 Installing The Vision Software15 186 Vision Software User's Guide International Characters....... 129 Intro Screen ........................... 32 Repeats ................................ 105 Rotation ......................... 87, 101 L S License Agreement ................ 10 Load Job ................................ 47 Load Logo ............................. 67 Sample Job 1 ....................... 157 Sample Job 2 ....................... 165 Save Device Change............ 136 Save Job................................. 49 Serialize............................... 106 Starting Vision....................... 31 Suggestions.......................... 118 System Requirements ............ 12 M Main Screen........................... 42 Manual Edit ........................... 91 Menu select line..................... 33 Merge Text ............................ 80 Moving Lines Graphically... 145 Multiple Job Entry............... 152 Multiples ............................. 102 N New Job................................. 46 Notepad ............................... 126 Notes ....................................... 8 P Pass Depths ......................... 116 Paste ...................................... 66 Pause Point ............................ 79 Preferences .......................... 135 Print Job Details .................... 54 R Re-Engrave.......................... 151 Registration ............................. 9 Re-order............................... 123 T Taking Inventory ..................... 9 Terminology .......................... 30 The Software Protection Key. 13 To Upper ............................... 77 Toolbar .................................. 33 Translate to Bar Code............ 75 Translate to Braille ................ 74 Troubleshooting................... 175 U Underline ............................... 88 Undo Columnize.................. 115 V View Screens ....................... 146 W Welcome to Vision!................. 5 Windows reference line ......... 32 Index 187