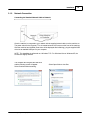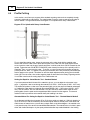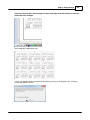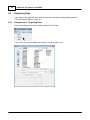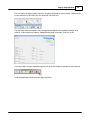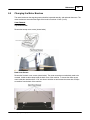
1
Engrave-IT Pro Series 4
User Manual
© 2012 Vision Engraving & Routing Systems
Revised: 8/3/2012
Engrave-IT Pro Series 4 User Manual
© 2012 Vision Engraving & Routing Systems
All rights reserved. No parts of this work may be reproduced in any form or by any means - graphic, electronic, or
mechanical, including photocopying, recording, taping, or information storage and retrieval systems - without the written
permission of the publisher.
Products that are referred to in this document may be either trademarks and/or registered trademarks of the respective
owners. The publisher and the author make no claim to these trademarks.
While every precaution has been taken in the preparation of this document, the publisher and the author assume no
responsibility for errors or omissions, or for damages resulting from the use of information contained in this document or
from the use of programs and source code that may accompany it. In no event shall the publisher and the author be liable
for any loss of profit or any other commercial damage caused or alleged to have been caused directly or indirectly by this
document.
Revised: 8/3/2012
Contents
3
Table of Contents
Part I Introduction
5
1 Disclaimer
...................................................................................................................................
and Warranty Information
5
2 Safety ...................................................................................................................................
Precautions
7
Part II General Information
8
1 Unpacking
...................................................................................................................................
and Taking Inventory
8
2 Machine
...................................................................................................................................
Description and Terminology
9
Part III Installation
11
1 Machine
...................................................................................................................................
Connections
11
Direct Connection
..........................................................................................................................................................
to Computer
12
Network ..........................................................................................................................................................
Connection
19
Using a Network
..........................................................................................................................................................
Hub - ONLY
22
2 Engrave-IT
...................................................................................................................................
Pro Software Installation
29
3 The Front
...................................................................................................................................
Panel
39
4 Holding
...................................................................................................................................
Down Material
49
Part IV Step by Step Operation
52
1 Diamond
...................................................................................................................................
Drag Engraving
52
Example..........................................................................................................................................................
Job 1 - Diamond Drag
53
2 Rotary
...................................................................................................................................
Engraving
62
Example..........................................................................................................................................................
Job 2 - Rotary Engraving
63
3 Burnishing
................................................................................................................................... 67
Example..........................................................................................................................................................
Job 3 - Burnishing
69
4 Profile
...................................................................................................................................
Cutting
78
Example..........................................................................................................................................................
Job 4 - Profile Cutting
80
5 Engraving
...................................................................................................................................
Keys
92
Example..........................................................................................................................................................
Job 5 - Engraving Keys
92
6 Engraving
...................................................................................................................................
IC cores
100
Example
..........................................................................................................................................................
Job 6 - Engraving IC Cores
100
7 Engraving
...................................................................................................................................
Cylinders
101
Example
..........................................................................................................................................................
Job 7 - Engraving Cylinders
101
8 Engraving
...................................................................................................................................
Locks
104
Example
..........................................................................................................................................................
Job 8 - Engraving Locks
104
9 Vectorizing
...................................................................................................................................
Bitmaps and Creating Vector Fills
106
Vectorizing
..........................................................................................................................................................
a Bitmap in Vision 9 Software
106
Vector (Hatch)
..........................................................................................................................................................
Fills
108
Part V Advanced Operation
115
1 Using
...................................................................................................................................
the Measure Feature
115
2 Custom
...................................................................................................................................
Home Positions - Using Set Offset
118
© 2012 Vision Engraving & Routing Systems
3
4
Engrave-IT Pro Series 4 User Manual
3 Creating
...................................................................................................................................
a Center Driver
122
4 Installing
...................................................................................................................................
Additional Drivers
129
Part VI Maintenance
131
1 Multi...................................................................................................................................
Mat Information
131
2 General
...................................................................................................................................
Cleaning
132
3 Motion
...................................................................................................................................
System Cleaning and Lubrication
133
4 Changing
...................................................................................................................................
the Motor Belt
138
5 Changing
...................................................................................................................................
the Motor Brushes
141
6 Cleaning
...................................................................................................................................
the Fan Filter
144
Part VII Troubleshooting
145
1 Engraving
...................................................................................................................................
Problems
145
2 Mechanical
...................................................................................................................................
Problems
148
Part VIII Optional Accessories
149
1 Vacuum
...................................................................................................................................
Chip Removal System
149
2 Hold...................................................................................................................................
Down Clamps
150
3 Fixtures
................................................................................................................................... 152
4 Clamping
...................................................................................................................................
Vises
155
© 2012 Vision Engraving & Routing Systems
Introduction
1
5
Introduction
About This Manual
This manual is designed to provide you with information about your Engrave-IT Pro engraver.
Beginning with unpacking the machine and continuing through installation, operation and lifetime
machine maintenance, this manual does not attempt to teach the user how to become an expert in
engraving, computer usage, or engraving software usage. Some previous knowledge of engraving
terms and the engraving process is certainly beneficial. For information on the Engrave-IT Pro
Engraving Software, see the software manual. For more information on your individual computer
system, see your computer's user manual or contact your computer distributor.
1.1
Disclaimer and Warranty Information
Limits of Liability / Disclaimer of Warranty
The information contained within this manual has been carefully checked and is believed to be
accurate, however, Vision makes no representations or warranties for this manual, and assumes no
responsibility for inaccuracies, errors, or omissions that may be contained within this manual. In no
event shall Vision be liable for any loss of profit including (but not limited to) direct, indirect, special,
incidental, consequential, or other damages resulting from any defect or omission in this manual, even
if previously advised of the possibility of such damages.
In the interest of continued product development, Vision reserves the right to make improvements to this
manual and the products it describes at any time, without notice or obligation.
Vision Engraving Systems Warranty for the Engrave-IT Pro machine:
Limited Warranty:
Vision Computerized Engraving and Routing Systems
Vision Computerized Engraving and Routing Systems (Vision) warrants that for a period of one (1) year
from the date of shipment to the original purchaser of the Engrave-IT Pro (the System), that the System
will be free from defects in material and workmanship under normal use and service. Upon written
notification, we will transfer the remaining warranty to a new customer. This warranty shall cover all
elements except for items covered by separate manufacturer’s warranties and consumable items.
“Consumable” items include, but shall not be limited to, belts, brushes, lubricants, and cutters furnished
with the System, for which no warranty is provided.
In the event a defect is discovered during the warranty period, within thirty days of discovery, but no
later than the last day of the warranty period as described above, the user shall contact Vision for
instructions regarding disposition of the problem. Vision shall, at its option, either (1) repair the affected
product with new or refurbished parts, or (2) provide a replacement. Any incidental costs, including the
cost of shipment from the user’s location to the point of repair and return, and any installation
performed by the user, shall be at the expense of the user.
This warranty covers normal use only and shall be void in the event that the System is altered or
modified without authorization by Vision, or is subject to abuse, neglect, or other misuse by the user.
The warranties for Third-Party Hardware and Third-Party Software shall run directly from the
manufacturers of such hardware and software to the user. Vision makes no warranties, expressed or
implied, with regard to Third-Party Hardware or Third-Party Software.
© 2012 Vision Engraving & Routing Systems
6
Engrave-IT Pro Series 4 User Manual
Vision does not warrant any product, component, or part not manufactured by Vision that was not
supplied by Vision. (Third-party items, including but not limited to software, are subject to their own
manufacturer’s warranties.) Vision does not warrant defects caused by a failure to provide a suitable
environment for the system, by unauthorized attachments, by modifications or repairs other than by
Vision, by use of the System for other than its original intention, or by other misuse or abuse of the
System.
Extended Warranty
An Extended Warranty may be purchased which extends the terms of the original equipment Warranty
in 1 year increments for a period of up to 30 days after the original equipment Warranty expires. An
Extended Warranty may also be purchased for a period of up to 30 days after an existing Extended
Warranty expires. Extended Warranties cannot be purchased on any equipment that is 7 or more years
old, or if there is a Lapse of Warranty. Age of equipment is determined from the date of shipment to the
original buyer.
Lapse of Warranty
If an Extended Warranty is not purchased within 30 days of the expiration of the original equipment
Warranty, or within 30 days of the expiration of an existing Extended Warranty, the equipment will be in
Lapse of Warranty. An Extended Warranty can never again be purchased for any equipment that is in
Lapse of Warranty. It is the responsibility of the purchaser of the equipment to maintain accurate
records and to know the expiration date of any Warranty.
The above and foregoing is the only warranty of any kind, either expressed or implied, by statute or
otherwise, regarding the System, its fitness, quality, merchantability, or otherwise. Any warranties
implied by law are hereby expressly disclaimed. No oral or written information or advice given by
Vision, its Dealers, Distributors, Agents, or Employees shall create a warranty or in any way increase
the scope of this warranty. Neither Vision, nor anyone else who has been involved in the creation,
production, or delivery of the System shall be liable for any direct, indirect, consequential, or incidental
damages (including damages for loss of business profits, business interruption, loss of business
information, and the like) arising out of the use of, or inability to use, the product.
Any software supplied by Vision in conjunction with the purchase of the System for use therewith shall
be governed by its own separate software license and warranty agreement.
Terms and Conditions are subject to change
For Warranty Service Call: (602) 439-0700
Please have your machine serial number ready before calling.
Vision Engraving & Routing Systems is owned and operated by Western Engraver's Supply, Inc.
Phoenix, Arizona, USA
© 2012 Vision Engraving & Routing Systems
Introduction
1.2
7
Safety Precautions
Keep hands clear of the bottom of the spindle during operation.
Always stop the machine before making any adjustments.
Do not operate the machine with the covers removed.
Wear safety glasses when cutting any materials that emit chips.
Use extreme caution when inserting or removing cutters.
Before any servicing, disconnect the power cord.
To avoid electric shock or equipment damage, ensure that the machine is connected to the
appropriate electrical source as noted in the installation procedures.
Never operate the equipment with damaged or frayed power cords, loose connections, or exposed
extension cords where the cord could create a tripping hazard.
Be sure to hold the plug, not the cord, when disconnecting the machine from an electrical socket or
power source.
Place the machine in a location with low humidity and a minimum of dust. Avoid placing the
equipment in direct sunlight or in locations with excessive heat. Follow the maintenance instructions
for proper cleaning of the controller air filter.
If your machine does not operate properly; in particular, if there are any unusual sounds or smells
coming from it, immediately unplug it and contact a service technician or your local distributor.
Unplug the machine when it is going to be left unused for an extended period of time.
© 2012 Vision Engraving & Routing Systems
8
Engrave-IT Pro Series 4 User Manual
2
General Information
2.1
Unpacking and Taking Inventory
The Engrave-IT Pro engraving system has been shipped in one carton, unless other accessories have
been ordered with the machine that will not fit in the box. Examine the condition of the box for external
damage. In the event of apparent external damage, notify your shipping carrier upon receipt, and call
your sales representative or Kaba immediately at 800-334-1381.
Note: The shipping container is considered reusable and should be stored for use in the event of
service need or upgrade.
Step1:
Open the foam packed shipping carton. In the top of the carton will be a cardboard box with all of the
machine accessories (including this manual). Open the accessory box and the following items should
be included:
1 Engrave-IT machine
1 Installation Guide
1 Engrave-IT warranty card
1 Deep vise
1 Power cord
1 Standard Ethernet cable
1 Crossover Ethernet cable
1 Spare 14 3/4“ Motor Belt
1 Allen wrench Set
1 Cutter wrench
1 Quick lock vice (mounted on the T-Slot table)
1 Flex Cutter - .015" tip
1 Multimat
2 Diamond tip cutters
1 USB 2.0 to Fast Ethernet Adapter
Check to see that all of the items are included. Should any of the contents be missing, damaged, or of
the incorrect type, please call your sales representative or Kaba immediately at 800-334-1381.
Step 2:
Prepare a clean, level surface to put the engraving machine on. Carefully lift the machine out of the
carton and place it on the table.
Step 3:
After unpacking the machine, make sure that you SAVE THE CARTON, FOAM PACK and ANY OTHER
BOXES. They can be reused in the event the system must be transported to another location or
returned for service. Improper packaging for shipment can damage the machine and may void the
warranty.
© 2012 Vision Engraving & Routing Systems
General Information
2.2
9
Machine Description and Terminology
This chapter briefly describes the major components of the Engrave-IT Pro machine. This chapter will
help you identify the parts of your machine discussed in this manual.
TABLE SPECIFICATIONS:
Z-Axis Clearance:
1 inch (25.4 mm)
(Definition: the distance between the bottom of the spindle and the work surface)
Z-Axis Stroke:
1 inch (25.4 mm)
(Definition: the travel distance of the Z-axis mechanism or spindle)
Table Resolution:
.001 inch (0.025 mm)
(Definition: the smallest controlled motion the table is capable of)
Engraving Area:
8 x 10 inches (203.2 x 254 mm)
Overall Dimensions:
14 1/2 x 19 x 22 inches (H x W x D)
36.8 x 48.3 x 55.9 cm (H x W x D)
Table Top:
Removable T-Slot
Shipping Weight:
65 lbs. (29.5 kg)
Shipping Dimensions:
27 x 22 x 19 inches
68.6 x 55.9 x 48.3 cm
DEFINITION OF TERMS
1. X-Axis Leadscrew - The screw that drives the left to right motion of the machine.
2. X-Axis Linear Rails - The 1/2 inch (12.7 mm) round rails that the carriage assembly rides on.
3. Y-Axis Linear Rails - The 1/2 inch (12.7 mm) round rails that the t-slot table rides on.
4. Y-Axis Leadscrew - The screw that drives the front to back motion of the machine.
5. T-Slot Table - Also referred to as the work surface, this aluminum bed supported by the Y-Axis
linear rails, allows placement of the engraving material or special clamps and fixtures. The slots in the
table are shaped with an upside-down T, with the bottom of the T being a single-line slot across the top
of the table. The slots are used to hold various accessory holders, clamps, and fixtures.
6. Front Panel - This is the area in which you control the table movement. You can start, stop, pause,
cancel a job and set the spindle surface. Also, you can control the speed at which the table moves and
the spindle RPM.
7. Quick Lock Vise - This clamp is included with the Engrave-IT Pro machine. It allows you to lock
your material on the T-Slot table.
8. Table Home Position - The upper-left corner of the T-Slot table. All work is referenced from this
position.
9. Spindle - This is the part where the engraving cutters are inserted and adjusted for depth of cut.
© 2012 Vision Engraving & Routing Systems
10
Engrave-IT Pro Series 4 User Manual
10. Spindle Motor Pulley - The spindle motor pulley is mounted to the top of the spindle motor and
drives the motor belt. The motor belt drives the spindle, enabling it to rotate the cutting tool. (The spindle
motor pulley is hidden by the spindle cover. In order to see it, you must remove the cover).
Engrave-IT Pro top view
11. Z-Axis leadscrew - This drives the spindle up and down while engraving.
12. Down Pressure Spring Adjust - This knob adjusts the amount of pressure that the spindle applies
to the material when engraving. When viewed from the top, turning the knob clockwise will increase
pressure and turning it counter-clockwise will decrease pressure.
13. Spindle Pulley - This is the top part of the spindle where the motor belt rides.
14. Spindle Micrometer - This is the part of the spindle that you adjust to set the depth of engraving.
Turning it to the right (counter-clockwise when viewed from the top) will create deeper engraving.
15. Spindle Nose Cone - This is the part of the spindle that rides on the material while engraving. The
cutter protrudes from the bottom of the nose cone creating your depth of cut.
Engrave-IT Pro carriage view
© 2012 Vision Engraving & Routing Systems
Installation
3
11
Installation
In the following sections, the complete machine and Vision software installation will be outlined. There
are three connection configurations possible with the Engrave-IT Pro.
The first is a direct cable connection from the Engrave-IT Pro to your computer via the network port.
There is a special "crossover" cable supplied with the machine for this connection type. This
configuration is for a stand alone computer that is NOT connected to a WIRED network or internet. The
machine can be connected to a computer that is connected to a wireless network in this manner.
The second configuration is for connection to the Engrave-IT Pro through a wired network using a
standard network cable (DO NOT use the crossover cable when connecting to a network). In this
configuration, the Engrave-IT Pro will be recognized as a network device. Connection to the machine in
this manner is the easier of the two connection types. If there are no network connections available, a
network hub can be added to allow connection of the engraver to your network.
The third configuration is for a connection from the computer to a hub (or router) and then to the
Engrave-IT Pro. This is WITHOUT a computer network. Standard Ethernet cables are used in this
configuration.
Please call your distributor or the service department at Vision for assistance if you are having
problems connecting your machine.
3.1
Machine Connections
On the rear of the Engrave-IT Pro, there are three connection ports. The power cord, the network
cable (or crossover cable) RJ-45 Ethernet port, and the remote on/off port for optional equipment.
Engrave-IT Pro (rear view)
Connect the power cord to a 110 - 220 VAC source, then plug the power cable into the port on the back
of the machine. Plug in the network cable (or the crossover cable) to the back of the machine and
either plug the network cable into your network, your hub, or using the crossover cable, plug into the
network port on the back of your computer.
© 2012 Vision Engraving & Routing Systems
12
Engrave-IT Pro Series 4 User Manual
NOTE - The crossover cable is colored white with green ends. The standard network cable is one solid
color.
3.1.1
Direct Connection to Computer
Direct Connection to Computer Using Crossover Cable
Once the machine is connected directly to your computer's network port with the crossover cable (the
cable with green ends), turn the machine on. The power switch for the Engrave-IT Pro is located below
the LCD screen on the front of the machine. Once the machine has initialized, the LCD screen on the
machine will display Goto Home. Plug the supplied USB drive into an available USB port on your
computer.
NOTE - This installation is performed on a Windows 7 PC. For Windows Vista or Windows XP, the
screens are slightly different.
The computer will recognize the USB drive
and the following screen will appear.
Select Continue without scanning.
Select Open folder to view files.
© 2012 Vision Engraving & Routing Systems
Installation
Locate the file named Start and double click on the file to begin the installation. The screen below
shows Start.exe, but your computer might not show the .exe portion.
Select Step 1 - Setup Machine. This installs the Vision Connectivity Manager software.
© 2012 Vision Engraving & Routing Systems
13
14
Engrave-IT Pro Series 4 User Manual
When the software is installed, select Finish.
The Connectivity Manager will search for available devices.
© 2012 Vision Engraving & Routing Systems
Installation
15
The computer's IP address will need to be set. NOTE - this should not cause any conflicts with your
computer's wireless IP address, which is determined by the computer's wireless network card. To set
the computer's IP address, open the Windows Control Panel. Depending on how you have this folder
set, you will either see Network and Internet, or you will see the Network and Sharing Center
immediately. If you see Network and Internet, select View Network Status and Tasks (which opens the
Network and Sharing Center). If you see the Network and Sharing Center, open it. Then select Local
Area Connection (as shown below).
Select Properties.
© 2012 Vision Engraving & Routing Systems
16
Engrave-IT Pro Series 4 User Manual
Then, select Internet Protocol Version 4 (TCP/IPv4).
Select Properties, then select Use the following IP address: and enter 192.168.5.100 as shown. Then
click in the Subnet Mask area, which will populate the correct location of 255.255.255.0. Select OK
and close any other network configuration windows.
© 2012 Vision Engraving & Routing Systems
Installation
17
The IP address of the machine will need to be configured in order to set up the connections properly.
Select the + box next to the machine now listed in the Discover Machine Tools window to expand the
information. Then select Configure Vision VE810 s4 at the bottom of the screen.
Select Use Static IP.
© 2012 Vision Engraving & Routing Systems
18
Engrave-IT Pro Series 4 User Manual
Set the IP address (as shown) to 192.168.5.101, then select OK. This sets the machine's IP address.
The configuration is complete at this point. Close the Discover Machine Tools window and return to the
Main Installation Screen to proceed with the software installation detailed in the next section.
© 2012 Vision Engraving & Routing Systems
Installation
3.1.2
19
Network Connection
Connecting via Standard Network Cable to Network
Once the machine is connected to your network with the supplied network cable, turn the machine on.
The power switch for the Engrave-IT Pro is located below the LCD screen on the front of the machine.
After the machine has initialized (Goto Home will be displayed after initializing), plug the supplied USB
drive into an available USB port on your computer.
NOTE - This installation is performed on a Windows 7 PC. For Windows Vista or Windows XP, the
screens are slightly different.
The computer will recognize the USB drive
and the following screen will appear.
Select Continue without scanning.
© 2012 Vision Engraving & Routing Systems
Select Open folder to view files.
20
Engrave-IT Pro Series 4 User Manual
Locate the file named Start and double click on the file to start the installation. The screen below shows
Start.exe, but your computer might not show the .exe portion.
Select Step 1 - Setup Machine. This installs the Vision Connectivity Manager software.
© 2012 Vision Engraving & Routing Systems
Installation
21
When the software is installed, select Finish.
The Connectivity Manager will search for available devices.
The configuration is complete at this point. Close the Discover Machine Tools window and return to the
Main Installation Screen to proceed with the software installation in the next section.
© 2012 Vision Engraving & Routing Systems
22
3.1.3
Engrave-IT Pro Series 4 User Manual
Using a Network Hub - ONLY
Connection from PC to Hub or Router to Machine or Controller
Once the machine is connected to a hub or router, and the hub or router is connected to your
computer's network port, turn the machine on. The power switch for the Engrave-IT Pro is located
below the LCD screen on the front of the machine. After the machine has initialized (Goto Home will be
displayed after initializing), plug the supplied USB drive into an available USB port on your computer.
NOTE - This installation is performed on a Windows 7 PC. For Windows Vista or Windows XP, the
screens are slightly different.
The computer will recognize the USB drive
and the following screen will appear.
Select Continue without scanning.
Select Open folder to view files.
© 2012 Vision Engraving & Routing Systems
Installation
23
Locate the file named Start and double click on the file to start the installation. The screen below shows
Start.exe, but your computer might not show the .exe portion.
Select Step 1 - Setup Machine. This installs the Vision Connectivity Manager software.
© 2012 Vision Engraving & Routing Systems
24
Engrave-IT Pro Series 4 User Manual
When the software is installed, select Finish.
The Connectivity Manager will search for available Vision devices.
© 2012 Vision Engraving & Routing Systems
Installation
25
The computer's IP address will need to be set. To set the computer's IP address, open the Window's
Control Panel. Depending on how you have this folder set, you will either see Network and Internet, or
you will see the Network and Sharing Center immediately. If you see Network and Internet, select View
Network Status and Tasks (which opens the Network and Sharing Center). If you see the Network and
Sharing Center, open it. Then select Local Area Connection (as shown below).
Select Properties.
© 2012 Vision Engraving & Routing Systems
26
Engrave-IT Pro Series 4 User Manual
Then, select Internet Protocol Version 4 (TCP/IPv4).
Then select Properties. Select Use the following IP address: and enter 192.168.5.100 and set the
Subnet mask to 255.255.255.0 as shown. Then select OK and close any other network configuration
windows.
© 2012 Vision Engraving & Routing Systems
Installation
27
The IP address of the machine will need to be set to set up the connections properly. Select the + box
next to the machine now listed in the Discover Machine Tools window to expand the information. Then
select Configure (Your Machine) at the bottom of the screen.
Select Use Static IP.
© 2012 Vision Engraving & Routing Systems
28
Engrave-IT Pro Series 4 User Manual
Set the IP address (as shown) to 192.168.5.101, then select OK. This sets the machine's IP address.
The configuration is complete at this point. The new IP address should appear in a few seconds in the
Discover Machine Tools window. Close the Discover Machine Tools window and return to the Main
Installation Screen to proceed with the software installation in the next section.
© 2012 Vision Engraving & Routing Systems
Installation
3.2
Engrave-IT Pro Software Installation
Select Step 2 - Install Engrave-IT Pro Software.
The Windows Installer will prepare the installation.
Select Next.
© 2012 Vision Engraving & Routing Systems
29
30
Engrave-IT Pro Series 4 User Manual
Select Install.
The installation will proceed.
Select the appropriate language and select OK.
© 2012 Vision Engraving & Routing Systems
Installation
31
The following window may appear. If so, enter the drive letter path for the USB memory stick with your
license file on it (Example - F:\), then select OK.
Select Next to begin the installer.
Select Accept the license agreement, then select Next.
© 2012 Vision Engraving & Routing Systems
32
Engrave-IT Pro Series 4 User Manual
Select Next (or change the destination folder - not recommended).
Select Next to create the folder.
© 2012 Vision Engraving & Routing Systems
Installation
The installation will continue.
Select the Vision VE810 S4 from the manufacturer's list on the left side of this window, then select
Next.
© 2012 Vision Engraving & Routing Systems
33
34
Engrave-IT Pro Series 4 User Manual
Select Continue to install True Type fonts and Vision Engraving Fonts on your computer.
The software will look for True Type fonts on your computer and allow the Vision software to use them.
Once the True Type fonts are installed, select OK.
© 2012 Vision Engraving & Routing Systems
Installation
35
In this step, the software will install any Engraving fonts on your computer.
When complete, click on OK.
In order to install the fonts from the USB drive, select A Removable drive and from the drop down list,
select the drive letter for the USB drive plugged into your computer.
© 2012 Vision Engraving & Routing Systems
36
Engrave-IT Pro Series 4 User Manual
Select OK to install to the default folder.
Select OK. All fonts and clipart have been installed from the USB drive at this time.
Select OK to return to the main installation screen.
© 2012 Vision Engraving & Routing Systems
Installation
To complete the installation, select Finish.
To close the Software Setup window, select Finish.
© 2012 Vision Engraving & Routing Systems
37
38
Engrave-IT Pro Series 4 User Manual
Select Exit Menu to close the installer.
The Engrave-IT manuals icon should now appear on your computer's desktop along with an icon for
your version of Vision 9 software.
Clicking on this link will give the user access to User Manuals, Installation Guides, Accessories and
Training Videos for the Engrave-IT Pro or Engrave-IT XP.
The USB drive can be removed at this time from your computer. Installation is now complete.
© 2012 Vision Engraving & Routing Systems
Installation
3.3
39
The Front Panel
The front panel controls all of the movement and speeds of the Engrave-IT Pro. Below is a picture of the
front panel. The function of each button and knob are explained below.
XY Speed knob - This knob controls the engraving speed of the Engrave-IT Pro. Turning
the knob clockwise will increase the speed and turning the knob counter clockwise will decrease the
speed. You can change the engraving speed depending on the type of material you are engraving and
the type of cutter you are using. If you are using a diamond drag cutter (non-rotating), you can
generally run the machine at higher speeds. If you are using a rotary cutter, you will need to adjust the
speed depending on what type of material you are cutting. Harder materials, such as acrylic and
engraver's brass, will need to be engraved at slower speeds. Softer materials such as engraver's plastic
can be engraved at higher speeds. A rule of thumb for setting the engraving speed is to start off
engraving at a slow speed, then gradually increase the engraving speed while the machine is engraving.
Increase the speed until you get to a speed where it sounds like the machine is working freely. If your
speed is too fast, the machine will sound like it is working very hard, or putting a heavy load on the
engraving spindle. If this happens, you can possibly dull the engraving cutter or the engraving quality
will not be very good. Fortunately, engraving speeds presets for most materials are sent to the engraver
with the job file. There is much less trial and error as a result.
Z Speed knob - This knob controls how fast the spindle will move down into the material.
Clockwise is faster, counter-clockwise is slower. Typically, you can leave this all the way clockwise,
unless you are engraving into hard materials such as acrylic or deep engraving into metals. In cases
such as these, slow the speed down (counter-clockwise). Again, this is part of the presets sent to the
engraver after a material is selected in the Vision software.
Spindle Speed knob - This knob controls the rotational speed (RPM) of the engraving
spindle. Turning the knob clockwise will increase the RPM, and turning the knob counter-clockwise will
decrease the RPM. You would change the RPM of the engraving spindle depending on the type of
material you are engraving or for different sizes of engraving cutters. The harder the material you are
using, the higher the RPM you would use. Also, the larger the cutter you are using, the higher the RPM
you would use. A rule of thumb for setting the spindle speed is to start out at a higher RPM. You can
gradually lower the RPM while the machine is working. Keep lowering the spindle speed until the spindle
sounds like there is a load (or drag) on the spindle. When you reach that point, you should turn the
© 2012 Vision Engraving & Routing Systems
40
Engrave-IT Pro Series 4 User Manual
spindle speed knob up a little bit. The spindle speed also has presets based on the material selected in
the Vision software.
Start button- The start button is used to start the engraving machine. When there is a job in
the Engrave-IT Pro, the green light above the start button will be flashing on and off. When it is flashing,
pressing the start button will start engraving. Also, if you have pressed the pause or stop button to stop
the engraving, pressing the start button will resume the job. When a job is ready to be engraved, the
LCD screen will also display:
If a job has been sent to the machine and has been run, the start button has another feature. If you are
using the Connectivity Manager (not Machine Tools), pressing the start button after the job has been
run, will recall the job. Pressing the start button once more will run the same job.
+
ALT + Start button
When connected via Connectivity Manager - Pressing ALT + Start with no job in the machine will
attempt to connect to your computer. You will need to press Stop twice in order to reset the machine. If
there is a job in the machine, this function will perform a dry run of the job with the red pointer on the
machine. The red pointer will outline the job to be engraved.
When connected to Vision Machine Tools - If there is no job in the machine, pressing ALT + Start will
display a list of jobs that are stored on the computer's hard drive. Use the Y up and down jog buttons to
move the cursor on the LCD screen to the job to be engraved and then press start to load the job into
the machine. Pressing start a second time will run the job. If a job is in the machine and ready to be
engraved, pressing ALT + Start will perform a dry run of the job with the red pointer on the machine.
The red pointer will outline the job to be engraved.
(Screen shown if using Vision Machine Tools only)
Pause button - The pause button is used to momentarily stop the machine from engraving. If
you press the pause button while the machine is engraving, the Engrave-IT Pro will lift the cutter up from
the material and stop engraving. The spindle motor and vacuum will power off while in Pause mode.
Pressing the Start button will resume the engraving where it left off and pressing the stop button will
cancel the job. When in Pause mode, the LCD screen will display:
© 2012 Vision Engraving & Routing Systems
Installation
41
Stop button - The stop button is used to stop the machine from engraving. If you
press the stop button while the machine is engraving, the Engrave-IT Pro will stop immediately, lift the
cutter up from the material, shut the engraving motor off and turn the vacuum off. Once you are ready
to engrave, you must press the Goto Home button to move the spindle back to the home position.
Pressing the start button will recall the job. Pressing the start button again will run the last job. You can
re-engrave the previous job, or send a new job to the machine
B3 Button - The B3 button will toggle the jog speed between Fast, Medium and Slow. The
current jog speed can be seen on the LCD screen.
X & Y Jog buttons - The X & Y jog buttons are used to move the position of the
spindle on the T-Slot table work area. This is used to position graphics, or to move the material. The X
jog buttons will move the engraving spindle left and right. The Y jog buttons will move the t-slot table front
to back. The machine will jog at the speed displayed on the LCD screen (medium, slow or fast).
Pressing the B3 button toggles between speeds. As you use the X & Y jog buttons, the spindle position
will be displayed on the LCD screen.
Z Jog Buttons - These will move the spindle up and down. These buttons are commonly used
for setting the surface of your material when you are not using the proximity sensor. The spindle will jog
up and down at the speed displayed on the LCD screen (medium, slow or fast). Pressing the B3 button
toggles between speeds. As you use the Z jog buttons, the spindle position will be displayed on the LCD
screen.
© 2012 Vision Engraving & Routing Systems
42
Engrave-IT Pro Series 4 User Manual
ALT button - The ALT button is used to access different functions. Typically this button will
need to be held down and another button pressed at the same time to access the function.
Set Surface button - The set surface button is used to set the surface point of the material
you are engraving. The procedure for setting the surface is as follows:
a) Use the X & Y jog buttons to move the spindle over the material to be engraved.
b) Press the Set Surface button. The LCD screen will display the message below for approximately 3
seconds. NOTE: The Set Surface button will flash green.
c) Once the message above disappears, press and hold down the Z down jog button until the spindle
touches the engraving material.
d) Press the Start button to set this as the surface position. The spindle will then move up to its lift
position.
HINT: It is sometimes easier to set the surface right before engraving the job. To do this, send a job to
the machine to be engraved. Press Pause. Press Start. The spindle will move to the first point to be
engraved and pause. You can then jog the Z down until it touches the surface and press Start to set the
surface. Then press Start and the job will engrave.
+
ALT + Set Surface button - When you hold down the ALT button and press the Set
Surface button, the red pointer will power on. Holding down the ALT button and pressing Set Surface
again will power the red pointer off.
Goto Home button - When you press the Goto Home button, the engraver will return to the
top left corner of the T-Slot table, which is the machine's main home position. Pressing this while a job
is running will lift the spindle up, move to the home position and cancel the job from the machine.
IMPORTANT: When the machine is first powered on, the Goto Home button must be pressed in order to
set the home position of the machine before running any jobs.
+
ALT + Goto Home button - When you hold down the ALT button and press the
Goto Home button, the engraver will return to the top left corner of the T-Slot table and "re-home". This
is used if the machine has lost position for some reason.
© 2012 Vision Engraving & Routing Systems
Installation
43
Set Offset button - The Set Offset button is used to set a temporary home position. To set a
temporary offset position, use the Jog Buttons to move the spindle to a point you want to set as the
home position. Press the Set Offset Button. The message Home Set will appear on the LCD. This
position is now set as the temporary home (0,0) position. To reset the temporary origin back to the
machine's home position at the upper left corner of the T-Slot table, press Goto Home, then press the
Set Offset button.
+
ALT + Set Offset - Pressing the ALT + Set Offset uses the red dot laser pointer
position as the offset position. To use this function, turn on the red dot laser pointer with the ALT + Set
Surface buttons, then jog the motion system to the desired location, using the red dot laser pointer for
positioning. Press the ALT + Set Offset buttons to save the offset position in the machine permanently.
Turning the machine off, then back on will not erase this offset position. It does not overwrite the factory
machine origin. If you want to use another offset temporarily, move the spindle to the desired position
and press Set Offset as described above. If you want to save a new permanent offset, repeat this
procedure.
Goto Offset button - When you press the Goto Offset button, the engraver will return to the
offset position previously set (either temporary or stored). Pressing this while a job is running will lift the
spindle up, move to the offset position and cancel the job from the machine.
+
ALT + Goto Offset button - When you hold down the ALT button and press the
Goto Offset button, the spindle will move to the stored offset position (if one has been saved) and use
this position as the engraving origin. To store an offset position, use the X and Y jog buttons to move the
spindle to the location desired. Then press the Set Offset button. Once this is done, hold down the ALT
button and press the B1 button to save the location. To reset the origin back to the machine's default
offset position at the upper left corner of the T-Slot table, hold the ALT button down and press Goto
Home. Then press the Set Offset button.
Limits On/Off button - The Limits ON/OFF button is used to turn the limit switches on and off.
When the limit switches are active, the light above the button is green. When the limit switches are not
active, the light above the button is off. This button is typically used for troubleshooting procedures in
the event the machine is not working properly.
Prox On/Off button - This button allows you to turn the Proximity Sensor on and off. The Prox
sensor enables the machine to determine the Z position of the material. This feature works when
© 2012 Vision Engraving & Routing Systems
44
Engrave-IT Pro Series 4 User Manual
engraving with a nose cone or diamond drag only; it is not designed for non-nose cone engraving or
burnishing. When the light above the button is green, the Prox is on, when it light above the button is
red, the Prox is off.
Note: The proximity sensor can be turned on or off from within the Vision Pro software. When the
Engrave icon is selected, the proximity icon can be selected or deselected to turn the proximity sensor
on or off.
Proximity sensor on icon:
Proximity sensor off icon:
Spindle On/Off button - The spindle motor can be either in automatic mode or off. You can
toggle between these two modes by pressing the Spindle On/Off button. When the light is red, the
spindle will be off. When the light is orange, the spindle will automatically turn on and off at the
beginning and end of the engraving job. If you depress the PAUSE or STOP button, the spindle will turn
off for safety reasons. Always make sure you have the spindle turned on when appropriate, otherwise
you may run the risk of breaking your cutter. When pressing the spindle on/off button, the LCD will also
display one of the following briefly:
Note: The spindle can be changed from auto mode to off from within the Vision Pro software. When the
Engrave icon is selected, the spindle icon can be selected or de-selected to turn the spindle on or off.
Spindle on icon:
Spindle off icon:
© 2012 Vision Engraving & Routing Systems
Installation
45
+
ALT + Spindle On/Off button - When you hold down the ALT button and press the
Spindle On/Off button, the spindle motor will start. Pressing the Spindle On/Off button again will shut the
spindle motor off.
Aux On/Off button - The auxiliary for an optional vacuum system motor can be either in
automatic mode or off. You can toggle between these two modes by pressing the Aux On/Off button.
When the light is red, the vacuum system will be off. When the light is orange, the vacuum system will
automatically turn on and off at the beginning and end of the engraving job. If you press the PAUSE or
STOP button, the vacuum will turn off for safety reasons. Always make sure you have the vacuum
turned on when appropriate to remove chips that will be created during engraving. When pressing the
Aux on/off button, the LCD will also display one of the following briefly:
Note: The auxiliary can be changed from auto mode to off from within the Vision Pro software. When
the Engrave icon is selected, the auxiliary icon can be selected or de-selected to turn the vacuum on or
off.
Auxiliary on icon:
Auxiliary off icon:
+
ALT + Aux On/Off button - When you hold down the ALT button and press the Aux
On/Off button, the optional vacuum pump will start. Pressing the Aux On/Off button again will shut the
vacuum pump off.
4th Axis button - The 4th Axis button is not used at this time.
© 2012 Vision Engraving & Routing Systems
46
Engrave-IT Pro Series 4 User Manual
B1 button - The B1 button is used to set the spindle lift height when moving between
characters. To set the Z lift from the Engrave-IT Pro front panel, follow the steps below:
a) Press the B1 button.
b) The LCD display will show the current lift distance.
c) Press the Z up or down arrows to increase or decrease the Z lift distance. The changes will be shown
on the LCD screen. Pressing the Z up and down arrows changes the distance in 0.01" increments (.25
mm). Holding the ALT button down while pressing the Z up and down arrows will change the distance in
0.1" increments (2.5 mm).
d) Press the Start button to save the Z lift distance or press the Stop button to cancel the change.
NOTE: The Z lift height can be set from the Vision Pro software. When the Engrave icon is selected,
select the icon with three dots to the right of All Tools as shown below.
Change the Z lift height value to the desired distance and select OK. The job will now be sent to the
machine with the value entered.
+
ALT + B1 button - When you hold down the ALT button and press the B1 button,
the current status of the Spindle Motor, Aux, Proximity Sensor, Z Surface location, offset position and Z
lift distance will be stored into the machine and used as the default settings. To use this feature, adjust
all of the settings listed above on the front panel as desired. Once they are correct, hold the ALT button
down and press the B1 button. The Save Settings screen will appear on the LCD. Press Start to save
the default settings into the machine or Stop to abort saving the settings. Once complete, the settings will
remain in the machine even after it is powered off and back on.
© 2012 Vision Engraving & Routing Systems
Installation
47
Special Functions
B2 button - The B2 button is currently used in conjunction with the ALT button only.
+
ALT + B2 button - When you hold down the ALT button and press the B2 button,
the factory default settings will be loaded back into the machine. This will clear any user settings that
were stored in the machine. When pressed, the Load Settings screen will appear on the LCD. Press
Start to restore the default settings or Stop to cancel the default settings load. After Start is pressed, the
LCD will display a Reboot Now message. Press Start to reboot the machine. Once it has rebooted, the
default settings will be in the machine.
+
ALT + B3 button - Holding down the ALT button and pressing the B3 button will
toggle the display units on the LCD from Standard to Metric.
+
ALT + Stop button - Holding down the ALT button and pressing the Stop
button will display machine specific information. The first information that will be displayed is the IP
Address of the machine. Pressing the Z up and down jog buttons will scroll through other information
such as the machine network Net Mask, Host PC IP Address, status of DHCP setting, internal firmware
version number and serial number of the main board inside the machine. Pressing the Stop button will
exit from this screen.
+
Then
ALT + Stop button then B1 - Holding down the ALT
button and pressing the Stop button and then pressing the B1 button will display the Modify IP address
screen. Pressing Start will toggle between setting the machine's IP address from DHCP to a manual IP
address. If the LCD displays Enabling DHCP when this button combination is pressed, the machines
network setting will be DHCP. If the LCD displays Disabling DHCP and then shows an IP address of
© 2012 Vision Engraving & Routing Systems
48
Engrave-IT Pro Series 4 User Manual
192.168.5.101, then the machine is set for a Static IP addess of 192.168.5.101. If you need to
manually enter an IP address different than this, see the Direct Connection to Computer section earlier
in this manual.
+
Then
ALT + Stop button then B2 - Holding down the ALT
button and pressing the Stop button and then pressing the B2 button will load a test job into the machine.
Pressing Start will load the job and pressing Start again will run the job.
+
ALT + Limits On/Off button - Holding down the ALT button and pressing the Limits
On/Off button will display a test menu on the LCD screen. Pressing the X limit switch with your hand will
change the X from 0 to 1. Pressing the Y limit switch with your hand will change the Y from 0 to 1.
Pressing the Z limit switch with your hand will change the Z from 0 to 1. Pressing the proximity switch
will change the P from 0 to 1. The S is reserved for future use. If there is a drive board fault inside the
controller, the F will display 1.
© 2012 Vision Engraving & Routing Systems
Installation
3.4
49
Holding Down Material
There are many ways to hold material down on the t-slot table. One of the major things to remember is
that the material must be placed in the upper left corner of the t-slot table. This will ensure that the
engraving is in the correct position on your material.
You can use double-sided tape, Multi Mat hold down material, the quick lock vise, or optional clamps
and fixtures (see the Optional Accessories section of this manual for more details) to hold down
material to the t-slot table. Double-sided tape or Multi Mat material are available from your Vision
Distributor or directly from Vision. The quick lock vise is included with the Engrave-IT Pro
Hold Down Techniques
Holding material in place is critical for engraving and cutting applications. The Multi Mat material is
useful for both applications, but using double-sided tape or a spray adhesive can be a better choice
for some applications. For most materials and engraving applications, the Multi Mat material is the
easiest to use. Simply place it on the table and place the material to be engraved on top of it. When
cutting completely through, or kiss-cutting materials, care must be taken to not cut too far through the
material, or the Multi Mat will be slightly cut in the process. The most common approach to cutting when
using the Multi Mat is to set the cut depth using the machines micrometer or the "stacked material
method" as described below and in the section on Profile Cutting. When using the micrometer, the
material thickness should be measured with calipers. Keep in mind that some materials can vary in
thickness and there may be areas that remain uncut. For a detailed explanation on the use of the
micrometer for setting cutting depth, see Example Job 4 in the Profile Cutting section.
Stacked Material Method
Many times, double sided tape can be a quick and very secure way to hold material down the the t-slot
table. The downside to using tape is that it will remain on the table and can be a problem to remove. A
better solution is to place Multi Mat material on the t-slot table, then place a piece of sacrificial material
(of the same type as being cut) on top of the Multi Mat. Then apply double-sided tape to the sacrificial
material and place the material to be cut on top of the sacrificial material. In this manner, while the
machine is engraving or cutting other jobs, the sacrificial material/cut material can be removed and
separated by the user, making better use of machine time and allowing for easier clean up. Note - if
double-sided tape is used, be careful to cover a sufficient area to keep the material in place and also
to hold smaller pieces in place so they to not move when the last section of the small piece is cut.
Spray Adhesives
Using a spray adhesive, in conjunction with "transfer tape" or "application tape" is yet another method
often used. As with the other methods, place Multi Mat on the t-slot table, A piece of sacrificial material
is then covered with transfer tape on its top surface and a spray adhesive is applied on top of the tape.
Place the sacrificial material with the tape/adhesive side facing up on the Mutli Mat material. Then, the
material to be cut should have transfer tape applied to its back side and adhesive is sprayed on to the
transfer tape. Place the material to be cut, tape/adhesive side down, on to the sacrificial material. This
is a very secure way to cut through materials and once cutting is finished, the tape/adhesive can be
easily removed from the back sides of cut pieces.
© 2012 Vision Engraving & Routing Systems
50
Engrave-IT Pro Series 4 User Manual
Edge Guides: The t-slot table edge guides need to be adjusted to the thickness of material that you
are engraving. If they are higher than the material's surface, the nose cone may ride on top of the
edge guides and the machine may not engrave characters completely.
Edge Guides (Side View)
To adjust the edge guides, loosen the edge guide thumbscrews and raise them above the surface of
the T-slot table. Place the material on the table, then loosen the edge guide thumbscrews and lower the
edge guides until they are even with (or just below) the material surface. Tighten the edge guide
thumbscrews. This process should be repeated any time materials of different thicknesses are to be
engraved.
© 2012 Vision Engraving & Routing Systems
Installation
51
Quick Lock Vise
The Quick Lock Vise is used to clamp rigid materials against the top Edge Guide in order to prevent
movement.
Put the material you would like to engrave on the t-slot table and push it to the home position corner.
Next, loosen the quick lock vise locking screw and slide the quick lock vise so that there is about 1/16th
inch gap between the edge of the vise and the material. Tighten the quick lock vise locking screw.
Once this is done, the material can easily be secured by turning the quick lock vise handle. When
changing the engraving material, simply loosen the quick lock vise handle, remove the engraved
material, put the new material in and tighten up the quick lock handle.
Note: For larger pieces of material, you may need to put a small piece of double-sided tape on the tslot table in the middle of the engraving material. This will keep the material from bowing in the center.
The quick lock vise will only work on square or rectangular material. To hold down irregular shaped
objects, you must use some other method. Ask your Vision Distributor or Vision if you need more
information on this feature.
© 2012 Vision Engraving & Routing Systems
52
4
Engrave-IT Pro Series 4 User Manual
Step by Step Operation
In the following sections, there are 8 example jobs the user can use to learn the different ways to use
the Engrave-IT Pro. In the first section, the machine will be set up to perform a diamond drag operation
on coated aluminum and a simple plate will be engraved. In the second example, engravers plastic will
be rotary engraved to make a small sign. The third example is a coated brass burnishing operation
which will cover the importing of text variables for multi-plate engraving. In the fourth example job, a set
of name badges will be engraved and cut out of engravers plastic. Example jobs 5 - 8 are specific
applications for engraving Keys, IC Cores, Lock Cylinders and Locks.
The sections and example jobs are designed to incrementally teach the user how to use the machine, as
well as use some of the common functions within the Vision software. It is recommended that the first
time user read through and practice the techniques in these example files in the sequence they are
provided in this manual.
4.1
Diamond Drag Engraving
Engraving - Non Rotating
In this section, we will set up to engrave with a non-rotating cutter, such as a diamond drag cutter. The
figure below shows the Engrave-IT Pro spindle with a diamond drag cutter.
The Engrave-IT Pro spindle with diamond drag cutter
First, to install the diamond drag cutter, loosen the set screw on the cutter knob with the supplied cutter
wrench and move the cutter knob to about the mid-point of the cutter tool, then lightly tighten the set
screw. Note that the set screw on the cutter knob is NOT a standard Allen screw. It is a Spline Wrench.
DO NOT attempt to turn the set screw with any tool other than the cutter wrench. Insert the cutter into
the top of spindle and lower it until the cutter knob can be screwed into the spindle. The cutter knob is
REVERSE threaded, so in order to tighten the cutter knob, turn the knob COUNTER-CLOCKWISE
(when viewed from the top of the spindle) until it is hand tight.
© 2012 Vision Engraving & Routing Systems
Step by Step Operation
53
With your finger at the bottom of the nose cone, loosen the cutter knob set screw and lower the cutter
so that the cutting tip extends below the bottom of the nose cone by approximately 1/4 inch (6 mm).
Then tighten the cutter knob set screw.
Turn the machine's power switch on. Set up the job you would like to engrave in the Vision Software
(for an example job, please refer to the following section). Place the material on the t-slot table. There
is no need to adjust the Z-Axis height of the machine (also known as Set Surface). In this type of
engraving, the Proximity Sensor will automatically sense when the cutter tip contacts the material and
will adjust the Z-Axis height and cutting pressure. Also, the spindle does not need to rotate. The
material selection (shown in the next section) will preset the engraver to turn the spindle rotation off and
turn the proximity sensor on.
4.1.1
Example Job 1 - Diamond Drag
In this first example, Diamond Drag engraving will be performed on a 3" x 2" plate. The material used for
this example application is black painted aluminum.
Starting with a new file in Vision Expert 9 software, the first step is to adjust the plate size to match the
plate to be engraved.
Click on the Plate Size icon.
© 2012 Vision Engraving & Routing Systems
54
Engrave-IT Pro Series 4 User Manual
The Plate Size window will appear.
Click on the Current Selection drop down list and select Custom.
Enter the plate size to be engraved - for this example 3" x 2".
© 2012 Vision Engraving & Routing Systems
Step by Step Operation
To add text, click on the Text Tools icon.
The flyout icons will appear, then select the Text Compose icon.
© 2012 Vision Engraving & Routing Systems
55
56
Engrave-IT Pro Series 4 User Manual
Click somewhere in the drawing to begin typing text. Note that on the top toolbar, the various font editing
fields have appeared. The user should become familiar with the various ways fonts can be formatted
with the toolbar options. For this example, the only change was for the font height, which was set to
0.500".
Begin typing text to be engraved.
© 2012 Vision Engraving & Routing Systems
Step by Step Operation
57
In order to align the text to the center of the plate, select Layout
Arrange and Distribute
Align to
Sign Blank
Center (as shown below) from the top toolbar. Note that there are several ways to align
objects within the Vision software.
The Break Text warning may appear. If so, select No. If Yes is chosen, and more than one line of text
has been entered, each line will align on top of one another in the center of the plate.
At this point, the screen should appear as below.
© 2012 Vision Engraving & Routing Systems
58
Engrave-IT Pro Series 4 User Manual
Next, the material should be placed on the engraving table, with the upper left corner of the material
positioned in the home position (upper left corner of the engraving table). Note that the Multi Mat
material has been placed on the t-slot table in order to hold the engraving material in place.
Select the Engrave icon from the left toolbar.
The Cut Toolbox will appear and the options for engraving will appear on the top toolbar. Make sure the
Device selected is for your machine, then select the Tool Setup icon.
© 2012 Vision Engraving & Routing Systems
Step by Step Operation
59
The Tool Setup window will appear. Select the appropriate material from the Material Selection drop
down list. In this example, the material - Metals(Diamond Drag) is selected. Then click on OK.
Since we are running a file for the first time, we will select the Dry Run option from the Cut Toolbox.
Make sure the "D" appears by selecting it. The default is "Off" for the Dry Run, which will engrave the
plate. We want to make sure our file has been set up properly in this example and that the material is
positioned correctly.
NOTE - Dry Run Operation - There is an offset between the spindle and the red laser pointer of
approximately 0.40 inches (10.1 mm) in the X and 0.55 inches (14 mm) in the Y directions. Therefore,
if the characters to be engraved extend beyond 9.6 inches (244 mm) X (to the right) and 8.45 inches
(214.6 mm) Y (toward the bottom) of the machine's home position, the file will not run because the
motion system would have to move beyond its limits.
When ready to send the file to the engraver, make sure the power switch is turned on and the machine
has initialized (the Goto Home message has appeared and you've pressed Goto Home), then select the
Engrave icon from the Cut Toolbox.
Note - keeps hands and other loose objects away from the engraver during operation.
Press the Start Button on the engraver to begin the Dry Run. The Dry Run feature will automatically
activate the red dot laser pointer and show the user where the machine will engrave.
Note - If the spindle turns, or begins to drop toward the material, either press the Pause Button
or the Stop Button on the machine. If either of these occur, make sure that Dry Run was
selected in the Cut Toolbox (shown as the letter "D") and that the spindle has not been turned
on. The Spindle icon on the Cut Toolbox is show below for reference.
© 2012 Vision Engraving & Routing Systems
60
Engrave-IT Pro Series 4 User Manual
Spindle icon (shown as disabled)
Red Laser Pointer
If the file and material appear to be positioned properly and you are ready to engrave, select the
Engrave icon from the left toolbar, turn off the Dry Run option and check to make sure the Proximity
Sensor (see the Prox icon below) is enabled, then select the Engrave icon on the Cut Toolbox to send
the file to the engraver.
Engrave icon (from toolbar)
Prox icon (shown as enabled)
Dry Run Off
Engrave icon
© 2012 Vision Engraving & Routing Systems
Step by Step Operation
61
Make sure the material is positioned properly and secured on the engraving table, then press the Start
Button on the engraver to begin engraving.
The finished piece should appear as shown below.
© 2012 Vision Engraving & Routing Systems
62
4.2
Engrave-IT Pro Series 4 User Manual
Rotary Engraving
In this section, we will set up to engrave with a rotating cutter. The figure below shows the Engrave-IT
Pro spindle with a rotary cutter.
Engrave-IT Pro Spindle with Rotary Cutter
First, to install the rotating cutter, loosen the set screw on the cutter knob with the supplied cutter
wrench and move the cutter knob to about the mid-point of the cutter tool, then lightly tighten the set
screw. Note that the set screw on the cutter knob is NOT a standard Allen screw. It is a Spline Wrench.
DO NOT attempt to turn the set screw with any tool other than the cutter wrench. Insert the cutter into
the top of spindle and lower it until the cutter knob can be screwed into the spindle. The cutter knob is
REVERSE threaded, so in order to tighten the cutter knob, turn the knob COUNTER-CLOCKWISE
(when viewed from the top of the spindle) until it is hand tight. Then, you must zero the cutter. To do
this, you must first turn the micrometer so that the pointer points to 0. Note - it is helpful to first turn the
micrometer to the left (clockwise) until threads just start to appear on the spindle. This will be about 3 4 full turns of the micrometer from it's uppermost position. This allows for sufficient depth adjustment
when turning the micrometer to the right.
With the machine powered off, take a scrap piece of material and push it up underneath the nose
cone and hold it there. As a option to this method, jog the spindle over your material and lower the
spindle until the nose cone come in contact with your material by using the Z jog button. Loosen the
cutter knob set screw and push the cutter down until it just touches the material. Tighten the cutter knob
set screw. The cutter is now zeroed.
To run a job, turn the machine on, then set up the job in the Vision Software. (For more information on
this, see the Vision Engraving Software manual and the example job file in the next section). Put the
material on the t-slot table as described in the previous section.
© 2012 Vision Engraving & Routing Systems
Step by Step Operation
63
Adjusting Depth of Cut
Cutting depth depends on the type of material being engraved. Generally, manufacturer's of engraving
plastic provide recommendations for cut depth. If a recommended depth is unavailable, trial and error
can be used to find the appropriate cut depth. Since the depth is set to zero at this time, in order to
increase cut depth, the micrometer at the bottom of the spindle should be rotated to the right (counterclockwise when viewing from the top of the spindle). To set a depth of 0.010 inches (0.25 mm) turn the
micrometer to the right 10 clicks. Each "click" of the micrometer is 0.001 inches (0.025 mm). Run a
job with an initial setting of 0.005 - 0.010 inches (0.12 - 0.25 mm). After the job has run for a short
time, press the Pause Button on the front panel, then adjust the micrometer for more or less depth,
depending on the whether the engraving is acceptable. Note - be careful not to set the depth of cut
greater than the material thickness. This will cut completely through the material and potentially cut into
the t-slot table. Press Start to resume engraving and to determine if the depth is appropriate.
For a detailed example of running an rotary engraving job, please see the following section.
4.2.1
Example Job 2 - Rotary Engraving
In this example, a sign will be made using engraver's plastic. The piece is pre-cut and measures 4
inches x 6 inches (100 x 150 mm).
Note - In this application, it is highly recommended to use the Vacuum Chip Removal System as
described in the Optional Accessories section. The process of engraving or cutting plastics, acrylics,
sign foam and wood, produces a significant amount of debris that can clog the nose cone and/or get
trapped between the nose cone and the material, which will cause engraving/cutting depth
inconsistencies as well as potentially scratch the surface of the material. The Vacuum Chip Removal
System significantly reduces these problems and provides for a cleaner work area.
As with Example Job 1, the first step is to set the plate size in the Vision Expert software.
© 2012 Vision Engraving & Routing Systems
64
Engrave-IT Pro Series 4 User Manual
Then, we will enter the text using the Frame Text Compose tool as shown below.
With this tool selected, text will automatically be centered and have automatic Kerning. In the below
example, the font was changed to Casual1, with a height of 1.250 inches and a slant of 19 degrees. The
top and center lines are left justified and the bottom is center justified in order to produce a sloping look
to the sign. All of these adjustments are available when entering text in the Frame Text Compose mode.
© 2012 Vision Engraving & Routing Systems
Step by Step Operation
65
Once the file has been set up, select the Engrave Icon and click on the Tool Setup icon to open the Tool
Setup Window, then from the Materials selection drop down list, select Engravers Plastic(Engraving)
and click on OK. In the picture below, the Cut Toolbox shows that the Vacuum, Prox, Dry Run, and
Spindle are all enabled. Since this is the second example job, sending a Dry Run job to the engraver is
suggested. Select the Engrave Icon to send the file to the engraver.
If the Dry Run showed no set up errors, the job can be re-sent to the engraver with the Dry Run
disabled.
Place the material on the table (shown with Multi Mat on the t-slot table to hold the engraving material in
place), and press the start button on the machine to begin engraving.
© 2012 Vision Engraving & Routing Systems
66
Engrave-IT Pro Series 4 User Manual
NOTE - The design of the Vacuum Chip Removal System is to clear the debris away from the engraved
material and prevent the chips from scratching the surface of the material during operation, and/or
getting trapped between the nose cone and the material (when using the proximity sensor function) and
causing the engraver to not engrave to the proper depth.
When the file is complete, remove the material from the table. HINT - Use a light bristle brush to clean
out any debris that may remain in the engraved characters.
© 2012 Vision Engraving & Routing Systems
Step by Step Operation
4.3
67
Burnishing
In this section, we will set up to engrave with a burnishing cutter. The figure below shows the EngraveIT Pro spindle with a burnishing cutter and an optional EZ Rider burnishing adapter.
The Engrave-IT Pro spindle with burnishing cutter
Burnishing is different than standard rotary engraving mainly because the nose cone is not used to set
the depth of cut. Burnishing does not actually cut deep into metals, rather it cuts the painted surface
off of metals. To effectively burnish, it is recommended to use an optional EZ Rider burnishing adapter.
This helps to control the pressure of the cutter applied to the material. Burnishing requires less
pressure than other types of engraving and the EZ Rider attachment applies the proper amount of
pressure for burnishing.
Installing the EZ Rider is similar to using a cutter knob. First, screw the EZ Rider into the top of the
spindle hand tight. Next, insert the cutter through the EZ Rider and spindle so that the cutter sticks out
below the nose cone approximately 1/8 inch (3 mm). Tighten the set screw in the EZ Rider to hold the
cutter in place.
In order to set the engraver up for burnishing, we will need to perform a "Set Surface" function. Turn
the machine on and place the material on the table. Use the X,Y Jog Buttons to move the spindle over
your material.
Press the Set Surface button.
The LCD screen will display the message below for approximately
3 seconds. NOTE: The Set Surface button will flash green.
© 2012 Vision Engraving & Routing Systems
68
Engrave-IT Pro Series 4 User Manual
Once the message above disappears, press and hold down the Z Down Jog Button until the cutter tip
touches the engraving material, then continue moving the spindle down for another 0.030 - 0.050
inches (0.75 - 1.25 mm). This is called "pre-loading" the adapter. Pre-loading the EZ Rider Burnishing
Adapter sets the pressure applied by the cutter on to the material. More or less pre-load can be used,
depending on the material to be engraved. The LCD display can be used to view the Z position, and
assist in the pre-loading procedure.
To toggle the jog speed, press the B3 Button.
Once the correct Z position has been set, press the Start button
spindle will then move up.
to set the surface position. The
HINT: There is a quick way to set the surface just prior to engraving a job. To do this, send a job to the
machine to be engraved. Press Pause. Press Start. The spindle will move to the first point to be
engraved and pause. You can then jog the Z down until the proper pre-load is achieved, then press Set
Surface to set the surface. Pressing Start will begin the engraving process.
In the following example job, a burnishing file will be set up and run on coated brass material.
© 2012 Vision Engraving & Routing Systems
Step by Step Operation
4.3.1
69
Example Job 3 - Burnishing
In this example, another feature in the Vision Software will be introduced. We will create a Plate Object
in order to create multiple items with different text engraved on a single 7.85 x 5.4 inch (199.4 x 137.2
mm) piece of coated brass (also known as black brass or trophy brass). The plate will use a text import
function from an external text file that will be copied into a plate template and the Vision software will
automatically format the imported text.
Begin by selecting the Plate Size Icon and setting the engraving area to a custom plate size with a 7.85
x 5.4 inch area.
To create the Plate Object, select Layout
© 2012 Vision Engraving & Routing Systems
Plate Object
Create Plate from the top toolbar menu.
70
Engrave-IT Pro Series 4 User Manual
Adjust the number of plates to 1, leave spacing at 0.000 inches, width and height to 2.500 and 1.25
inches, set the left margin to 0.175 inches and the top margin to 0.200 inches as shown, then click on
Apply. Note that the page margins on the toolbar are located such that the top field is for the top margin,
the left field is the left margin, etc.
The screen should then appear as below.
Select the Text Compose Icon.
© 2012 Vision Engraving & Routing Systems
Step by Step Operation
71
Click in the middle of the Plate Object.
Enter any text in the format you wish to use. In this example, two lines of text are entered as variables (it
does not matter what you type. The text entered is only for formatting and will be replaced with the text
imported from the .txt file).
© 2012 Vision Engraving & Routing Systems
72
Engrave-IT Pro Series 4 User Manual
Each line of text can be independently set for font and size. Highlight the text to be changed, then from
the font list on the top toolbar, choose the font to be used for the selected text and double click on the
font name. If the size or other parameters need to be revised, use the toolbar fields to modify the font
style. Please note that in this example, the Width Compression for the text was adjusted. In order to
adjust the Width Compression, select the text, then click on the Toolbar Mode icon (shown below).
Select Frame mode.
Select all text and select the Width Compression Mode by clicking on the drop down list (as shown).
© 2012 Vision Engraving & Routing Systems
Step by Step Operation
73
Change the settings to Always compress or expand text to fit width, Method: Width compress/expand,
and Apply to: Each Line Individually. Deselect Word Wrap, then select OK.
For a detailed description of all the font modifications possible, refer to the Vision software help or user
manual.
Once changes have been made, deselect text mode by clicking in any open area of the screen, away
from the plate object.
© 2012 Vision Engraving & Routing Systems
74
Engrave-IT Pro Series 4 User Manual
In this example, a text file was created in order to copy and paste the variables into the Vision software.
Highlight the text and select copy from the edit menu (or right click and select copy). Note that in this
example, the two variables are entered as subsequent lines in the text file and that there may be
difficulties when importing from other file formats. A simple text file created in Windows Notepad is
suggested.
To insert the copied text, select Layout
Plate Object
Paste Clipboard Into Plate.
© 2012 Vision Engraving & Routing Systems
Step by Step Operation
75
Click in the center of the plate.
After clicking in the center of the plate, all fields are merged and multiple plate objects will be created
based on the number of text variables selected.
© 2012 Vision Engraving & Routing Systems
76
Engrave-IT Pro Series 4 User Manual
Also, if there are more variables than can be fit into one plate in the Vision software, multiple plates (or
pages) are automatically generated for individual output to the engraver. The lower right corner of the
Vision software screen allows the user to view the individual pages. During the Engrave operation, the
user will select the page to be sent to the engraver.
To finish this example job, set up the engraver for a metal burnishing application as described in the
previous section and select the Engrave icon from the left toolbar. Click on the Tool Setup icon, select
Metals(Burnishing) from the drop down list, then click on OK. If you choose to run a Dry Run (as
shown) to make sure the setup is correct, proceed as in prior sections to send the file to the engraver.
Make sure you have performed the set surface procedure as well.
Note that if the plate objects are left as part of the file sent to the engraver, they will engrave as well. If
this is not desirable, simply select the plate object within the Vision software and delete it prior to
sending the file to the engraver. Alternatively, the plate object may be changed to a different color than
the text to be engraved, or you can print selected objects by changing a setting in the Engrave
Engraving Default screen from the top menu bar. The Engrave by Color option is discussed in the next
example job.
© 2012 Vision Engraving & Routing Systems
Step by Step Operation
In this example, the plate object lines were engraved.
© 2012 Vision Engraving & Routing Systems
77
78
4.4
Engrave-IT Pro Series 4 User Manual
Profile Cutting
In this section, we will set up to engrave with a standard engraving cutter and cut completely through
engraver's plastic with a cutter/beveler. The cutter/beveler is used to create a contrast on the edge of
the cut material. The figure below shows the Engrave-IT Pro spindle with a rotary cutter/beveler.
Engrave-IT Pro Spindle with Rotary Cutter/Beveler
First, to install the rotating cutter, loosen the set screw on the cutter knob with the supplied cutter
wrench and move the cutter knob to about the mid-point of the cutter tool, then lightly tighten the set
screw. Insert the cutter into the top of spindle and lower it until the cutter knob can be screwed into the
spindle. Tighten the knob COUNTER-CLOCKWISE (when viewed from the top of the spindle) until it is
hand tight. Then, you must zero the cutter. To do this, you must first turn the micrometer so that the
pointer points to 0. Note - it is helpful to first turn the micrometer to the left (clockwise) until threads just
start to appear on the spindle. This allows for sufficient depth adjustment when turning the micrometer
to the right. Zero the cutter, then set the engraving depth as described in the Rotary Engraving section.
You will then need to set the cutting depth of the cutter/beveler tool.
Setting Cut Depth for Cutter/Beveler Tool - Standard Method
If you have measured the thickness of the material to be cut, you can adjust the micrometer in two
ways - 1) adjust the cutter to cut through the material PLUS 0.001 - 0.003 inches (0.0250 - 0.075 mm).
This method will produce a clean cut of the parts and lightly cut into the sacrificial material underneath,
or 2) adjust the cutter depth to cut through the material MINUS 0.001 - 0.003 inches (0.0250 - 0.075
mm). This will create a "kiss cut" that will leave a very thin amount of material which holds all of the
parts together, then the parts can be snapped apart after removal from the engraver. This second
method is ideal in production environments where part handling is an issue.
Alternate Method For Setting Cut Depth for Cutter/Beveler Tool - "Stacked Material Method"
As an alternate to dialing the micrometer 50 or 60 clicks to set the cut depth on 1/16th inch plastics (or
up to 130 clicks for 1/8th inch material), this second method utilizes a second piece of the same kind
and thickness of material to be cut to set the cut depth. Refer to the below diagram - the material to be
cut is placed on top of the sacrificial material/Multi Mat materials. The material to be cut is held in place
either with double sided tape or by the spreay adhesive/transfer tape method detailed in the Holding
© 2012 Vision Engraving & Routing Systems
Step by Step Operation
79
Down Materials section. Then a second piece of material is placed on top of the material to be cut. The
nose cone is lowered on top of the second piece of material (near its edge) and the cutter is adjusted
downward until it touches the top of the material to be cut. This, in effect, sets the cut depth to match
the material thickness. The cutter knob set screw is tightened, then the micrometer is adjusted, either
for a through cut (turning clockwise) or a kiss cut (turning counter-clockwise), 1 - 3 clicks.
Holding Down Material
Secure the material on the t-slot table. It is best to use Multi Mat to hold the material in place, but keep
in mind that since we are cutting completely through, there will likely be cut marks into the Multi Mat
when the job is complete. A better procedure is to use a piece of sacrificial material on top of the Multi
Mat. DO NOT place the material to be cut directly on the t-slot table. If you do, then the cutter will cut
into the t-slot table and permanently damage the surface. Other methods for holding material down are
in the section Holding Down Material.
© 2012 Vision Engraving & Routing Systems
80
4.4.1
Engrave-IT Pro Series 4 User Manual
Example Job 4 - Profile Cutting
In this example job, engravers plastic will be set up to engrave several name badges, then the badges
will be cut out. 1/16th inch standard engravers plastic is used. Two different tools will be used - one to
engrave, and one to cut/bevel the edges.
As with Example Job 2, the Vacuum Chip Removal System is highly recommended for this application
and is shown in this example.
First, the plate size will be adjusted to the standard Vision VE810 10 x 8 inch area.
A single Plate Object will be created (from the top toolbar menu - Layout
Plate Object
Create
Plate) with a size of 3 x 2 inches (75 x 50 mm) and margins on the top and left side will be set to 0.25
inches (6.4 mm). The margins are necessary so that during the cutting operation, the cutter will not cut
right on the edge of the material, or on the edge guides.
© 2012 Vision Engraving & Routing Systems
Step by Step Operation
81
A Clip Art image will be added to the badge. The image is GENE0038.CDL from the Vision software clip
art in the General folder (installed as C:\Vision Expert 9\ClipArt\GENERAL). To import the clip art,
simply browse the folder in Windows Explorer and drag the file to the engraving area on the plate within
the Vision software. the image will be quite large, so it must be re-sized to fit, either by changing the
size manually on the toolbar, or by selecting the object and clicking on a corner node (holding down the
left mouse button) and dragging the corner to make the image smaller.
For this example, the image was re-sized to 0.5 x 0.5 inches (12.7 x 12.7 mm) and located at X 0.75, Y
1.875 as shown below.
Next, three text fields are entered with the Text Compose tool. At first, when clicking in the middle of the
Plate Object, the text field is set to centered within the plate and auto sized. We will adjust the text frame
size and location using text Frame mode. To enable, select the Toolbar Mode Icon on the toolbar (only
visible after selecting text, or after clicking on the Text Compose icon, then clicking within the plate
object), then select the Frame mode. This will allow sizing and placement of the text field.
© 2012 Vision Engraving & Routing Systems
82
Engrave-IT Pro Series 4 User Manual
Select Frame mode.
Next, we will re-size the text area and type in some text (it does not matter what text is entered here. It is
just entered to create the text object). To re-size the text frame, click and hold with the left mouse button
on the black edge of the text frame and drag the frame to the appropriate size.
then,
Two more text fields are entered in the same manner, re-sized, and fonts are changed.
© 2012 Vision Engraving & Routing Systems
Step by Step Operation
83
At this point, we need to change the two fixed text fields to graphics, so that when we import the text file
for multiple badges, the correct text is replaced. Select the two text fields shown and from the toolbar,
select Arrange
Text To Graphics. HINT - to select more than one object, click on the first object,
hold down the Shift Key, then click on additional objects.
The two text fields are now non-editable graphics and will not be replaced when importing a text file with
variable text. Next, copy the list of text variables from a Notepad text file and select Paste Clipboard Into
Plate, then click in the middle of the Plate Object.
© 2012 Vision Engraving & Routing Systems
84
Engrave-IT Pro Series 4 User Manual
The screen should appear as below after pasting the names into the plate.
Lastly, before we send the file to the engraver, we will separate the graphics into two different colors,
one for engraving and one for cutting. This is necessary so that two files can be sent to the engraver
independently and a cutting tool change can be performed after engraving. To change the Plate Object
frames to another color (red in this example), select the Plate Object frame, then click on the Red color
icon on the bottom toolbar of the Vision software. It is also a good idea to verify the color of the other
objects on the screen. If all other objects are to be Black, then select everything except for the Plate
Object frame and click on the Black color icon at the bottom of the screen. Many times, when importing
graphics, the color is unknown, so making sure the graphics are the correct color is good practice.
© 2012 Vision Engraving & Routing Systems
Step by Step Operation
85
Note that is there is more than one page of names, each page of the file will need to have the
plate frame color changed.
After changing the plate frame color.
If you try to send this file to the engraver at this point (by clicking on the Engrave icon), a warning
screen may appear as below.
© 2012 Vision Engraving & Routing Systems
86
Engrave-IT Pro Series 4 User Manual
In order to engrave by color, from the toolbar menu select Engrave
Engraving Defaults (Note that
the Cut Order Warning screen refers to the "Plotting Defaults", but the menu item is "Engraving
Defaults"),
then make sure Engrave by Color checkbox is selected, then Apply and Close.
In order to send the engrave file to the engraver, select the Engrave icon from the left toolbar, at which
time the Filter by Color window will appear. Select the color to send to the engraver in the Filter Layer
drop down box. In this example, all text and graphics are Black, so the color Black (P1) was selected
from the drop down menu in the Filter by Color window.
© 2012 Vision Engraving & Routing Systems
Step by Step Operation
87
After clicking on Select, the Vision software window will show only the color being sent to the engraver,
in this case, black. Open the Tool Setup window and choose Engraver's Plastic(Engraving) as the
material, then click on OK. Make sure all options are turned on in the Cut Toolbox, including Dry Run for
this example file. Select the Engrave icon from the Cut Toolbox to send the file to the engraver.
If there are multiple pages, the Page Selection screen will appear for you to choose which page(s) to
send to the engraver. In this example, the Current page will be sent by itself so that the cut file can be
sent afterward.
© 2012 Vision Engraving & Routing Systems
88
Engrave-IT Pro Series 4 User Manual
After selecting OK, the Dry Run file is sent to the machine. Place the material on the table and make
sure the engraver is set up as in Rotary Engraving section before running the file. If the Dry Run shows
proper set up, resend the file with the Dry Run turned off. Use the proper cutting tool for the engraving
application. Note that the nose cone for the vacuum chip removal system has been installed in this
picture.
After pressing Start and finishing the job,the engraved portion of the file should appear as shown.
© 2012 Vision Engraving & Routing Systems
Step by Step Operation
89
Cutting
After sending the engrave file to the machine, the Filter by Color window will re-appear, signaling that
the software is ready for you to send another file to the engraver. Since we need to change the material
setting, select Stop Cutting.
To change to the material setting for cutting, select Engrave from the top toolbar menu, then Tool
Options. (Or, you can click on the Engrave icon, then open the Tool Setup Window and select the
material).
Select Engravers Plastic(Cutting) from the Material drop down list, then select OK.
© 2012 Vision Engraving & Routing Systems
90
Engrave-IT Pro Series 4 User Manual
Select the Engrave icon from the left side toolbar, then select the color for cutting in the Filter Layer
drop down box in the Filter by Color window (select Red for this example),
then select Engrave from the Cut Toolbox. The screen will show only objects in the color selected in the
Filter by Color window.
The page selection screen will re-appear, for this example, choose Current Page and select OK. The
file will be sent to the engraver. Make sure you have installed the cutter/beveler tool for this process and
set up the cutting depth as described in the previous section. When the file is complete, is should
appear as shown.
© 2012 Vision Engraving & Routing Systems
Step by Step Operation
91
Note - The Filter by Color screen will once again appear. Since we have no further colors to send to the
engraver, select Stop Cutting.
© 2012 Vision Engraving & Routing Systems
92
4.5
Engrave-IT Pro Series 4 User Manual
Engraving Keys
Cutter setup for this application is the same as described in the Diamond Drag Engraving section.
Follow the setup procedure in section 4.1.
4.5.1
Example Job 5 - Engraving Keys
Open a new drawing in the Vision 9 software. Select File, then Open.
Look in the C:\Vision Expert 9\Kaba Jobs folder for the file you wish to use.
© 2012 Vision Engraving & Routing Systems
Step by Step Operation
93
Either double click on the file you wish to use, or select the file and click on Open.
In order to engrave the keys with the fixture properly, make sure that the key is selected completely by
pressing the F3 key. You should see all the nubs around the key and the text will appear in blue. Select
the Multiples icon on the top toolbar to open the multiple key window.
© 2012 Vision Engraving & Routing Systems
94
Engrave-IT Pro Series 4 User Manual
The correct information will open up in the multiples screen shown below. Enter the desired number of
keys to be engraved in the Number of copies field. Select the line of text in the Replaceable items / text
field. It will turn blue when selected, then select OK.
The text substitution screen will appear.
© 2012 Vision Engraving & Routing Systems
Step by Step Operation
95
The text for the keys can be manually entered by typing in the text and pressing Enter on your computer
keyboard. Once the text has been entered for all of the keys, select OK.
If the keys are to be automatically serialized, there is no need to manually enter the text. From the Text
Substitution screen, click the text column header as shown. All of the blank fields will be selected and
turn blue, then click on Serialization.
© 2012 Vision Engraving & Routing Systems
96
Engrave-IT Pro Series 4 User Manual
The Serialize window will appear. Enter the text for the first key in the Start field. Enter the number that
each key number should be incremented by in the Increment field. To create more than one copy of
each serial number, Enter the number of each serial numbered key that should be engraved in the
Repeat field. If only one key is to be made per serial number, set the Repeat to 1. Highlight the number
in the Start field that will be serialized and select Set Base, then Select OK
.
The serialized text will be shown in the Text Substitution window. If there is an error, select Serialization
and re-enter the information, then select OK.
© 2012 Vision Engraving & Routing Systems
Step by Step Operation
97
The complete layout of the keys with text will be shown on the screen.
Installing the key template
From the key templates shipped with your machine select the template to be used. (Shown are several
of the available templates).
© 2012 Vision Engraving & Routing Systems
98
Engrave-IT Pro Series 4 User Manual
Select the desired key template and attach the two T-Slot screws through the front with washers and
then turn over to attach the T-Nuts as shown below.
Turn the fixture back over and slide the fixture on the engraving table. Tighten the T-slot screws as
shown below. To load the keys, insert the top of the key against the top of the key opening and then
press the key into the slot. This is the simple and fast method of putting the keys in the holder.
Once the keys have been installed in the fixture, send the file to the Engrave-IT Pro by first selecting
the Engrave icon from the left toolbar.
© 2012 Vision Engraving & Routing Systems
Step by Step Operation
99
The Cut Toolbox will appear and the options for engraving will appear on the top toolbar. Make sure the
Device selected is for the VE810 S4, then select the Tool Setup icon.
The Tool Setup window will appear. Select the appropriate material from the Material Selection drop
down list. In this example, the material - Metals(Diamond Drag) is selected. Then click on OK.
If you are ready to engrave, select the Engrave icon on the Cut Toolbox to send the file to the machine.
Press the Start Button on the machine to begin engraving.
© 2012 Vision Engraving & Routing Systems
100
4.6
Engrave-IT Pro Series 4 User Manual
Engraving IC cores
Cutter setup for this application is the same as described in the Diamond Drag Engraving section.
Follow the setup procedure in section 4.1.
4.6.1
Example Job 6 - Engraving IC Cores
The software setup for engraving IC cores is the same as for setting up keys, except for the name of
the filed used. When engraving an IC core, open the job called "IC Core".
Select the IC Core holder, attach the T-Nuts and slide the fixture on the T Slot table.
Sending the job to the Engrave-IT Pro is also the same as the keys. Please follow the steps in the
engraving keys section of this manual.
© 2012 Vision Engraving & Routing Systems
Step by Step Operation
4.7
101
Engraving Cylinders
Cutter setup for this application is the same as described in the Diamond Drag Engraving section.
Follow the setup procedure in section 4.1.
4.7.1
Example Job 7 - Engraving Cylinders
The software setup for engraving cylinders is the same as for setting up keys, except for the job file
name being used. When engraving a cylinder, open the job called "Cylinder".
To hold the cylinders, the T-Slot table must be removed from the Engrave-IT Pro and a vise must be
mounted to the machine.
Remove the four thumbscrews that hold the T-Slot table down per the picture below.
Remove the T-Slot table.
© 2012 Vision Engraving & Routing Systems
102
Engrave-IT Pro Series 4 User Manual
Install the vise and secure it by tightening the 4 mounting screws. Make sure the 4 vise pins are installed
on the top of the vise.
Slide the acrylic cylinder fixture onto the vise pins on the top of the vise. Install the cylinders into the
fixture and tighten the handle on the vise to lock the cylinders securely.
Once the job has been set up in the Vision 9 software, select the Engrave icon from the left toolbar
.
© 2012 Vision Engraving & Routing Systems
Step by Step Operation
103
The Cut Toolbox will appear and the options for engraving will appear on the top toolbar. Select the
Device drop down arrow. Then, select the VE810 Vise S4 as the device.
Select the Tool Setup icon from the top toolbar.
The Tool Setup window will appear. Select the appropriate material from the Material Selection drop
down list. In this example, the material - Metals(Diamond Drag) is selected. Then click on OK.
If you are ready to engrave, select the Engrave icon on the Cut Toolbox to send the file to the machine.
Press the Start Button on the machine to begin engraving.
© 2012 Vision Engraving & Routing Systems
104
4.8
Engrave-IT Pro Series 4 User Manual
Engraving Locks
Cutter setup for this application is the same as described in the Diamond Drag Engraving section.
Follow the setup procedure in section 4.1.
4.8.1
Example Job 8 - Engraving Locks
The software setup for engraving locks is the same as for setting up keys, except the job file name that
is used. When engraving a lock, there are four different jobs used for different locks and engraving
locations. Open the job you wish to use.
A1105KA BACK - Used for engraving the A1105KA lock on the back side.
A1105KA SIDE - Used for engraving the A1105KA lock on the side of the lock.
A1205 BACK - Used for engraving the A1205 lock on the back side.
A1205 SIDE - Used for engraving the A1205 lock on the side of the lock.
If the T-Slot table is installed on the Engrave-IT Pro, remove it and install the vise as performed in
Example Job 7 - Engraving Cylinders section of this manual. Install the lock holder on the vice and
tighten the knob on the vise to secure the lock.
Once the job has been set up in the Vision 9 software, select the Engrave icon from the left toolbar The
Cut Toolbox will appear and the options for engraving will appear on the top toolbar. Select the Device
drop down arrow.
.
© 2012 Vision Engraving & Routing Systems
Step by Step Operation
105
Select the VE810 Vise S4 as the device, then select the Tool Setup icon from the top toolbar.
The Tool Setup window will appear. Select the appropriate material from the Material Selection drop
down list. In this example, the material - Metals(Diamond Drag) is selected. Then click on OK.
If you are ready to engrave, select the Engrave icon on the Cut Toolbox to send the file to the machine.
Press the Start Button on the machine to begin engraving.
© 2012 Vision Engraving & Routing Systems
106
4.9
Engrave-IT Pro Series 4 User Manual
Vectorizing Bitmaps and Creating Vector Fills
In this brief section, the commonly used techniques of importing a bitmap and vectorizing it for
engraving/cutting, and the process or adding a vector fill to an outline will be demonstrated.
It is often required that a scanned image or a bitmap file is requested to be engraved. Since the Vision
engraver is vector based and requires vector lines in order to follow a path for engraving, these bitmaps
will need to be converted to vector images before being sent to the engraver. In many cases, the outline
itself does not represent the graphic properly. The middle of the image will need to be engraved as well,
and this requires a vector fill to be added to the vector image, so that the engraver can create larger/
wider engraved areas.
4.9.1
Vectorizing a Bitmap in Vision 9 Software
The Vision 9 software has a new and vastly simplified method of creating a vector outline from a bitmap
image. Vector outlines are automatically created when the bitmap is imported in the drawing. The
following procedure can be used to import custom logos or images into the Vision 9 software for
engraving purposes.
Compatible file types - Whether the user wishes to scan an image and import it, or will be using a file
already created in another program, the image MUST be in a .bmp format in order for the software to
quickly create a vector outline. It is critical that the image be created at a high enough quality before
creating the vector outline.
If the image has been printed and the user needs to scan it before importing it into the Vision 9
software, the image must be scanned at a recommended 300 dpi, then saved as a .bmp file format.
Lower resolution images may not allow the software to create a good quality outline.
Open the Vision 9 software and create a new file in the desired plate size. Then simply select File
Import from the top toolbar menu.
© 2012 Vision Engraving & Routing Systems
Step by Step Operation
107
Using the drop down menu for Files of type, select Vectorize bmp (*.bmp), then choose the file and
select Import.
The next screen has only one adjustment - Alignment Bitmap Density. There is a slider bar for
darkening or lightening the image to show more or less detail. The default slider position is
recommended. Select OK and the bitmap will be automatically converted to a vector outline for
engraving.
© 2012 Vision Engraving & Routing Systems
108
Engrave-IT Pro Series 4 User Manual
The final image is shown below after it was imported and converted to a vector outline. It is ready to cut
or engrave.
4.9.2
Vector (Hatch) Fills
When an outline of an object needs to have the interior, or sections of the interior engraved, the Hatch
Fill tool is used. As an example, if a simple circle is drawn in the Vision 9 software, but the user wants to
engrave the entire circle, not just the outline, a hatch fill is used to create the vector fill path for the
engraver to follow. In this section, three applications of a hatch fill will be shown.
Filling a simple object
After creating a new file in the Vision 9 software, draw a circle using the Circle icon from the Shape
Tools flyout menu,
© 2012 Vision Engraving & Routing Systems
Step by Step Operation
109
Click, hold and drag a circle, then select the Hatch Fill icon from the Stroke and Fill Tools flyout menu.
After selecting the Hatch Fill icon, the selected circle will be vector filled with the default settings. Note
that on the top toolbar menu, tool options are now shown and the Tool width is set to 0.015 inches, Fill
angle is at 0.000 degrees, the Fill style is S sweep and the color is Red. When selecting the Tool width,
it is recommended the have a 20 - 25% overlap on each stroke. To determine Tool width, the cutter tip
width will determine the Tool width. If a cutter with a cutter tip width of 0.020 is being used, then the
recommended overlap for the Hatch Fill would be 0.020 x 25% = 0.005 inches. To produce an overlap
of 0.005 inches, subtract 0.005 from the cutter tip width (0.020 - 0.005 = 0.015 Tool width). If a cutter
tip of 0.050 is used, then the overlap would be 0.050 x 25% = 0.0125 inches, so the Tool width for the
Hatch Fill would be 0.050 - 0.0125 = 0.038 inches.
The user can experiment with different Fill angles and Fill styles to determine what looks best. Tool
widths can be changed as well. More overlap creates a smoother background engraving, but requires
more time. Less overlap will be faster, but the background can become rough. If the Tool width is
greater than the cutter tip width, portions of the background will not be engraved. Doing so creates a
visible hatch fill, which may be desirable for some applications.
© 2012 Vision Engraving & Routing Systems
110
Engrave-IT Pro Series 4 User Manual
Once the Hatch Fill has been adjusted, select Close from the toolbar menu. The image is ready to be
sent to the engraver. You may want to change the hatch fill color to match the color of the outline,
although it is not necessary.
Filling Outline Text
Hatch fills can be applied to outline text, but not single line text. In the below example, Arial text was used
by selecting the Frame Text Compose icon and clicking in the middle of the plate to create the text as
shown.
© 2012 Vision Engraving & Routing Systems
Step by Step Operation
111
Before filling text, the user must first select the text with the Select Tools icon. Click on the Select Tools
icon and select the text to apply the hatch fill to.
Select the Hatch Fill icon.
© 2012 Vision Engraving & Routing Systems
112
Engrave-IT Pro Series 4 User Manual
As with the previous example, the hatch fill is applied. Adjust the Tool width, Tool angle, Tool style and
color as desired, then select Close. The file is ready to be sent to the engraver.
Complex Hatch Fills
Some graphics have portions that do not need to be engraved and are within the boundaries of outside
vector outlines. Using the Flower example file, import the file to vectorize the bitmap, then select the
Break Path icon to separate the individual outlines.
© 2012 Vision Engraving & Routing Systems
Step by Step Operation
113
Next, we will need to create a path. The Vision 9 software has an intelligent path tool that will
automatically detect portions of the graphic that are within outside vector lines and will create a hatch fill
with the center portions left as unfilled. Press the F3 button on the computer keyboard to select all items,
then select the Make Path icon.
Then click and hold on the node in the center of the graphic. The automatic detection will display the
areas that can be hatch filled.
© 2012 Vision Engraving & Routing Systems
114
Engrave-IT Pro Series 4 User Manual
If this looks correct, select the Hatch Fill icon.
The hatch fill will be applied. Adjust the tool options as desired and select Close from the toolbar menu.
The file is ready to be sent to the engraver.
© 2012 Vision Engraving & Routing Systems
Step by Step Operation
5
115
Advanced Operation
The following sections are for users that have progressed through the step-by-step operation of the
Engrave-IT Pro and want to know how to get the most out of their engraver.
It can be challenging to correctly position text and/or graphics. Odd shaped items, which are difficult to
measure or locate on the engraving table, pose the biggest problem to most users. The Engrave-IT Pro
has features to help with positioning items and graphics. Three of these features are; Using the
Measure Feature, Setting a Custom Home Position, and using the Vise (or Center) driver. These
techniques will assist the user when setting up more challenging applications.
5.1
Using the Measure Feature
The Measure Feature is a very useful tool that can be used to set up both the machine's home position
and the plate size in the Vision 9 software.
To use this feature, turn on the engraver and press the Go to Home button. Open the Vision 9 software
with a new drawing and select the Plate Size icon on the top toolbar.
At the bottom of the plate size window, click on the Measure icon.
© 2012 Vision Engraving & Routing Systems
116
Engrave-IT Pro Series 4 User Manual
The Measure Wizard window will open. The engraver will turn on its red dot laser pointer. Move the
spindle over the material and position the laser pointer so that it is in the upper left hand corner of the
engraving area you wish to define. Then, click on Next in the Measure Wizard window.
Move the laser pointer to the lower right corner of the engraving are you wish to define, then click on
Finish in the Measure Wizard window.
© 2012 Vision Engraving & Routing Systems
Advanced Operation
117
The dimensions of the plate size shown in the Plate Size window will now reflect the engraving area you
have defined on the machine. The Home Position of the machine has also been set to the upper left
corner of this area.
The machine will also allow you to outline the engraving area you just defined. Follow the instructions on
your machine or controller to have the machine outline this engraving area with the red dot laser
pointer. If the area appears to be correct. click on OK in the Plate Size window. The plate size in the
Vision 9 software now shows the area defined with the measure feature. Design your job and send the
job to the engraver.
Note that when using the measure feature, the machine will have its home position changed. You will
need to reset the home position to the upper left hand corner of the engraving table in order to use the
machine normally.
© 2012 Vision Engraving & Routing Systems
118
5.2
Engrave-IT Pro Series 4 User Manual
Custom Home Positions - Using Set Offset
For some applications, it may be easier to engrave an item by setting a custom home position.
Typically, the home is set to a point on your material in the upper left hand corner of the area to be
engraved. An example of this is shown below using an electrical outlet cover.
In this example, the user has identified the engraving area on an item, and the home (0,0) position of
the machine will be set to match the upper left corner of the engraving area. Referencing the drawing
above, the engraving area is 1.25 inches wide x 0.25 inches high.
© 2012 Vision Engraving & Routing Systems
Advanced Operation
119
In the Vision 9 software, begin by making the plate size the same as the engraving area (1.25 inches x
0.25 inches), as shown below.
Add text: The Frame Text Compose tool will center and adjust text to fit the plate/engraving area.
© 2012 Vision Engraving & Routing Systems
120
Engrave-IT Pro Series 4 User Manual
To set the home position of the machine to the upper left corner of the engraving area, place the
material (in this example, the plate cover) on the engraving table and secure it. Install a cutter and set it
so that the cutter tip extends below the nose cone and the tip can easily be seen. It is best to use a
cutter with a defined point when performing this setup, such as the diamond drag cutter used here. The
picture below shows a 1.25" x 0.25" piece of paper applied to the material to make it easier to reference
and locate the upper left corner of the engraving area.
Move the spindle using the X, Y and Z buttons on the engraver, so that the tip of the cutter is directly
over the upper left hand corner of the engraving area. The pictures below show the spindle/cutter tip
correctly positioned in the upper left corner of the engraving area.
To set this point as the Home Position, press the Set Offset button on the engraver. A message will
appear on the LCD Display reading "Home Set."
All files sent to the engraver will now use this location as the Home Position (0,0) of the engraving area.
When you want to return to using the default Home Position, press the Go To Home button on the
machine, then press the Set Offset button. The home is now reset to the default home position. Send the
job to the engraver as a dry run to determine whether or not the job is positioned correctly. If it is, you
are ready to engrave the item. If the positioning is not correct, you can either adjust the graphics within
the Vision 9 software, or reset the custom home position to the proper location.
© 2012 Vision Engraving & Routing Systems
Advanced Operation
121
Hint - It may be useful to send the dry run job to the engraver including a simple rectangle that is
slightly smaller than the engraving area, as shown below. The Red Dot Laser Pointer will follow the
path of this rectangle and outline the engraving area. This can make it much easier to properly
position your custom home and graphics before sending the final job to the machine.
© 2012 Vision Engraving & Routing Systems
122
5.3
Engrave-IT Pro Series 4 User Manual
Creating a Center Driver
In this section, a custom driver will be created based on the VE810 S4 Vise driver that will allow the user
to set a home position in the center of an engraving area. The Vision 9 software will automatically
position the job based on this center location. An illustration of this process is shown below.
For simplicity in this example, a circular piece of acrylic will be engraved. The material is 3 inches in
diameter, and an engraving area of 1.75" x 0.75" needs to be centered on the piece of acrylic.
Referencing the drawing below, the job will be quickly set up using a custom "Center" driver.
First, we need to create and save a custom Center driver. Open up the Vision 9 software and select
Engrave, then Engraving Defaults from the top menu bar.
© 2012 Vision Engraving & Routing Systems
Advanced Operation
The Plot widow will appear and from the Selected Driver drop down list, select the VE810 S4 Vise
driver.
If this driver has not been installed, refer to the section - Installing Additional Drivers 129 .
Select Setup.
© 2012 Vision Engraving & Routing Systems
123
124
Engrave-IT Pro Series 4 User Manual
Under the Installed Drivers section, make sure the VE810 S4 Vise driver is selected, then select Create
custom copy of selected driver.
Type in VE810 Center Driver, then click on OK.
© 2012 Vision Engraving & Routing Systems
Advanced Operation
Click on Apply, then click on OK.
Select the VE810 Center Driver we just created from the Selected Driver drop down list.
© 2012 Vision Engraving & Routing Systems
125
126
Engrave-IT Pro Series 4 User Manual
Change the settings in the Move fields to 0 for both X and Y move, click on Apply and then click on
Close.
Set the plate size to match the engraving area you determined for your item. In this example, a 1.75" x
0.75" size was entered. Make sure the Selected Driver is the VE810 Center Driver, then click on OK.
© 2012 Vision Engraving & Routing Systems
Advanced Operation
127
Type in the text or import the graphics you wish to use and center them in the plate.
Now, we need to set the home position (set offset) for the item we are engraving. Move the spindle to
the center of the engraving area. In this case, it is the center of the 3.0" piece of acrylic. Press the Set
Offset button on the engraver. This is now the center of the engraving area for our job. The below
picture shows the spindle positioned over the center of the engraving area.
© 2012 Vision Engraving & Routing Systems
128
Engrave-IT Pro Series 4 User Manual
Select the Engrave icon from the left side toolbar. Double check to make sure that the Device is set to
the VE810 Center Driver (on the top toolbar). Choose your material from the Material Setting drop down
list on the top toolbar.
Select Engrave from the Cut Toolbox, then press the Start button on the engraver to begin engraving the
job. You may want to perform a dry run before engraving to check for setup errors.
Since we have now created a Center Driver, if we want to use the centering feature in the future, we
only need to select the Center Driver from the Device drop down list and set the home position (set
offset) on the machine to the center of the engraving area on your item before running the job.
© 2012 Vision Engraving & Routing Systems
Advanced Operation
5.4
129
Installing Additional Drivers
If you need to install additional drivers, such as the VE810 S4 Vise driver or for another machine, in the
Vision 9 software, select File from the top menu bar, then select Install and click on Cutting Devices.
The Installation Wizard will begin.
The Driver Installation Wizard window will appear. Select the machine series from the Manufacturer list
on the left side by placing a check mark in the box to the left of the machine you wish to use the driver
for, then select the driver(s) from the Output Device list on the right side of this window by placing a
check mark in the box to the left of the driver(s) you wish to install. Click on Next to install the driver(s).
© 2012 Vision Engraving & Routing Systems
130
Engrave-IT Pro Series 4 User Manual
The installation will proceed and the below window will appear briefly. When this window closes
automatically, the driver(s) will then be available in the Device drop down list.
If you wish to uninstall driver(s), simply follow the above procedure, and deselect the drivers by
removing the check mark to the left of the machines you want to uninstall from the Manufacturer section
of the Driver Installation Wizard window, then click on Next to remove those drivers.
© 2012 Vision Engraving & Routing Systems
Advanced Operation
6
131
Maintenance
Vision strives for the highest quality in their manufacturing process to provide you with the
most cost effective, reliable engraving machine in use today. Please remember that proper
maintenance and care is necessary to achieve maximum product life expectancy.
The engraving environment generates small plastic and metal chips as well as other particles during
operation. As with any machinery, your engraving system should be kept as clean as possible to
minimize wear and tear, and to improve the final quality of engraved products.
6.1
Multi Mat Information
How long will Multi Mat last?
The life span of Multi Mat depends on many factors, including type of use, proper cleaning and
handling. One great advantage is that it is double sided, thereby providing double the life span when
compared to other single sided products.
What is the cleaning procedure of Multi Mat?
Cleaning Multi Mat is simple and easy. Merely use a soft sponge and running water to remove chips,
dust, or dirt, and then allow to dry. No chemicals or cleaners are required.
How is Multi Mat affixed to the engraving table top?
No double stick tape, vacuums, or clamps are necessary. Multi Mat can be easily removed and stored,
then reinstalled by placing it in position and gently pressing down. No other hold down system is so fast
and easy to use.
Is there any clean up required after using Multi Mat?
For most situations the answer is no. However, Multi Mat does leave a slight residue on the back of
some engraving plates.
What happens if I engrave through the engraving material into Multi Mat? Is it ruined?
Multi Mat has a self healing feature. Small cuts in the surface of Multi Mat should not cause a problem
and seem to heal. Of course, continued cuts over a long period of time will degrade the effectiveness of
Multi Mat. Many small enclosed cuts (closed path such as a series of circles or squares) could cause
sections of the mat to come out, which of course would degrade its performance.
© 2012 Vision Engraving & Routing Systems
132
6.2
Engrave-IT Pro Series 4 User Manual
General Cleaning
Chip Removal
Plastic and metal chips generated during the engraving process should be removed from the engraving
surface periodically. A portable vacuum is suggested for chip removal, but applying direct suction to
the spindle area is not recommended. Note that this cleaning can be minimized and greatly simplified
through the use of the optional vacuum chip removal system. The vacuum chip removal system
removes chips and dust created by engraving. This system can also extend the life of other
components in the system, as prompt removal of chips reduces contamination and overheating in the
spindle area. The vacuum chip removal system also keeps the nose cone from skipping over letters
when chips become trapped between the nose cone and the engraving material.
Cleaning The Nose Cone
The nose cone around the cutter may accumulate dust and chips that cannot be removed by
vacuuming or blowing on them with low pressure air. CAUTION! High pressure air can damage the
spindle. Two types of nose cones are available; one nose cone is designed to be used with the vacuum
system, the other is not. Cleaning methods depend on the type of nose cone in use.
With a vacuum chip removal system, most of the chips will be removed during the engraving process.
If the suction nozzle becomes clogged, remove the hose connection to the nose cone. Remove the
cutter, then unscrew the vacuum nose cone. Using a vacuum or an air hose, clean out the nose and
the vacuum tube leading to the nose cone. Reinstall the nose cone and the vacuum hose.
Without a vacuum chip removal system you should remove the cutter before attempting to clean the
nose cone. The nose cone retainer ring, the nose cone, and the micrometer collar should all be
removed and cleaned using a vacuum or compressed air. The three nose cone components should be
removed and cleaned at least every day, or as frequently as necessary. Failure to clean the nose cone
regularly will result in premature spindle failure.
Cleaning the Vacuum Filter (only with the vacuum chip removal option)
On systems with a vacuum chip removal system, frequent cleaning of the vacuum filter is necessary
for proper performance. When engraving with the vacuum filter system, the filter should be checked
and cleaned several times a day, depending on the amount of engraving performed. If the vacuum
does not appear to be functioning efficiently, clean the filter more frequently.
To clean the vacuum filter system, disconnect the vacuum hose from the canister. Loosen the three
wing nuts on top of the canister enough to allow the attached bolts to swing away from the lid, then
remove the lid. Do not completely remove the wing nuts. There are two filters inside the canister.
Carefully remove the inner, paper filter. (The paper and cloth filters tend to stick together). Empty the
paper filter, and shake it out completely, being careful not to damage it as the filters are reusable. After
shaking out the paper filter remove and empty the cloth filter in the same manner as the paper filter. Do
not wash either filter. Place the paper filter back inside the cloth filter, and place the cloth filter back
inside the vacuum canister.
© 2012 Vision Engraving & Routing Systems
Maintenance
6.3
133
Motion System Cleaning and Lubrication
Materials Needed
3-in-1 oil
Teflon-free Silicon Spray
Phillips Screw Driver
11/32" Nut Driver
Paper Towels
Isopropyl Alcohol
NOTE - With the machine POWERED OFF, you can move the carriage, table and spindle
manually to access areas for cleaning and lubricating the machine. To move the table, press on
the front or rear edge of the table. To move the carriage, press on the left or right side of the
carriage cover. To move the Spindle, press on the top of the Spindle to move the Spindle down
and press on the bottom of the Spindle to move it up.
Cover Removal
Top Cover Screws
Remove the two top cover screws (shown below).
© 2012 Vision Engraving & Routing Systems
134
Engrave-IT Pro Series 4 User Manual
Back Cover Screws
Remove the five back cover screws (shown below). The center screw does not absolutely need to be
removed. It holds a cable clamp inside the back cover of the machine. To remove the center screw,
reach inside the machine with a 11/32" nut driver to hold the nut and remove the screw with a Phillips
screwdriver from the back of the machine.
Spindle Cover
To remove the spindle cover, slide the cover up. Squeezing the sides of the cover will facilitate removal.
© 2012 Vision Engraving & Routing Systems
Maintenance
135
Carriage Cover
Remove the four screws on each side of the Carriage Cover .
Cleaning
Apply isopropyl alcohol to a paper towel and wipe down the X-Axis (carriage) leadscrew and the
stainless steel rails for the carriage. Move the carriage by hand to access all areas of the leadscrew
and rails.
© 2012 Vision Engraving & Routing Systems
136
Engrave-IT Pro Series 4 User Manual
Apply isopropyl alcohol to a paper towel and wipe down the Y-Axis leadscrews and the stainless steel
rails for the t-slot table.
NOTE: Clean the leadscrew, rail and baseplate (the area underneath the table) with the table in the fully
extended (forward) and fully retracted positions.
Raise and lower the spindle to access the upper and lower sections of the spindle rail. The rail is
located behind the spindle. Apply isopropyl alcohol to a paper towel and wipe down the sides and front
of the spindle rail.
Move the Spindle down to expose the Z-Axis leadscrew for cleaning. Apply isopropyl alcohol to a paper
towel and wipe down the Z-Axis leadscrew.
© 2012 Vision Engraving & Routing Systems
Maintenance
137
Lubrication
X&Y-Axis Linear Rails
Apply 2-3 drops of a light oil (such as 3-in-1 oil) on the rails and spread it out evenly.
X-Y-Z-Axis lead screws
A light lubrication of the X, Y and Z-Axis leadscrews should be performed periodically. At a minimum,
lubrication should be performed every 6 months, although if applications that produce large amounts of
debris are run (such as wood or plastic engraving), cleaning and lubrication should be performed more
often. Only use Teflon-free silicone spray on the leadscrews. DO NOT use any lubricant other than
Teflon-free silicone spray, as it may attract debris and create a buildup that can cause mechanical
failure.
NOTE: Place a paper towel underneath the leadscrews to prevent over spray as shown below.
Working in the lubricants
After completing this procedure and re-installing the carriage and top covers, the lubricants should be
worked in to the motion system for several minutes prior to using the machine. To move the motion
system, use the X,Y and Z Jog Buttons to move the carriage, table and spindle through their range of
motion and evenly distribute the lubricants.
What not to lubricate
Many of the bearings and assemblies in your engraving machine are sealed and/or coated using
special low-friction methods and should not be lubricated.
DO NOT attempt to lubricate the spindle or the spindle bearings. This will attract particles and dust,
which will build up between the shaft and sleeve and possibly prevent movement. If you suspect
lubrication problems, call your dealer/representative or the service department at Vision.
DO NOT oil the stepper drive motors. None of the motors on the Engrave-IT Pro require lubrication.
Oiling the stepper motors can permanently damage them.
DO NOT use any type of grease product to lubricate this machine.
© 2012 Vision Engraving & Routing Systems
138
6.4
Engrave-IT Pro Series 4 User Manual
Changing the Motor Belt
Over a period of time, the Engrave-IT Pro motor belt will wear. When the motor belt wears, it will stretch
and cause the spindle to slip or stall. When this happens, the motor belt generally needs to be changed.
The following explains the procedure for changing the motor belt.
Cover Removal
Top Cover Screws
Remove the two top cover screws (shown below).
Back Cover Screws
Remove the five back cover screws (shown below). The center screw does not absolutely need to be
removed. It holds a cable clamp inside the back cover of the machine. To remove the center screw,
reach inside the machine with a 11/32" nut driver to hold the nut and remove the screw with a Phillips
screwdriver from the back of the machine.
© 2012 Vision Engraving & Routing Systems
Maintenance
139
Spindle Cover
To remove the spindle cover, slide the cover up. Squeezing the sides of the cover will facilitate removal.
Carriage Cover
Remove the four screws on each side of the Carriage Cover .
© 2012 Vision Engraving & Routing Systems
140
Engrave-IT Pro Series 4 User Manual
Motor Belt Removal/Replacement
To remove the motor belt, roll the front edge of the belt up towards the top of the spindle and over the lip
at the top. To replace the belt, align the belt in the motor pulley and pull the belt forward and roll it down
over the front edge of the lip on the top of the spindle. Do not excessively stretch the belt when replacing
it.
© 2012 Vision Engraving & Routing Systems
Maintenance
6.5
141
Changing the Motor Brushes
The motor brushes on the engraving motor should be inspected annually, and replaced when worn. The
motor brushes are worn when the length of the brush is less than 1/8 inch (3 mm).
Cover Removal
Top Cover Screws
Remove the two top cover screws (shown below).
Back Cover Screws
Remove the five back cover screws (shown below). The center screw does not absolutely need to be
removed. It holds a cable clamp inside the back cover of the machine. To remove the center screw,
reach inside the machine with a 11/32" nut driver to hold the nut and remove the screw with a Phillips
screwdriver from the back of the machine.
© 2012 Vision Engraving & Routing Systems
142
Engrave-IT Pro Series 4 User Manual
Spindle Cover
To remove the spindle cover, slide the cover up. Squeezing the sides of the cover will facilitate removal.
Carriage Cover
Remove the four screws on each side of the Carriage Cover .
© 2012 Vision Engraving & Routing Systems
Maintenance
143
Motor Brush Inspection and Replacement
Use a flat blade screwdriver to loosen the motor brush cap. Inspect the motor brush for length. If the
length is under 1/8 inch (3 mm), the motor brush needs to be replaced. If the motor brush is over 1/8
inch (3 mm), put the existing brush back into the motor and replace the motor brush cap.
© 2012 Vision Engraving & Routing Systems
144
6.6
Engrave-IT Pro Series 4 User Manual
Cleaning the Fan Filter
Weekly preventative maintenance should be performed to ensure reliable operation of your Engrave-IT
Pro. It is recommended that the input fan filter be removed weekly and cleaned to ensure proper cooling
of the electronics.
1. Unplug the power cable that goes into the back of the machine.
2. Remove the filter guard by using a small flat blade screwdriver to pop the guard open.
3. Remove the filter and blow out the filter with low-pressure compressed air.
4. Replace the filter and filter guard by snapping it back in place.
Cooling Fan Filter and Cover
© 2012 Vision Engraving & Routing Systems
Maintenance
7
Troubleshooting
7.1
Engraving Problems
145
Problem: Engraving on the plate is ”slanted“.
Possible solutions:
1. Check material for squareness. Is the engraving material square?
2. Check to see if the material on the table is indeed at a true home and is square to your T-slot edge
guides.
3. Check to insure that the T-slot edge guides are secure and flush to the T-Slot table.
Hint: Always inspect the job before removing your plate from the system. You may be able to salvage it
by re-engraving the job, or you may be able to analyze the problem and prevent repeating it. Perhaps
the plate moved during engraving. Removing it without inspection would prevent you from detecting this
problem.
Problem: When using a nose cone, the engraving is ”shallow“ across the top or left margin of your
plate. It engraves properly when the spindle is away from the edge.
Possible solutions:
1. The nose cone is riding on the T-slot edge guides. Loosen and lower the edge guides so that they
are below the level of your material surface. Re-tighten the thumbscrews.
2. Check to see if the material is riding on the T-slot edge guides. It’s not hard to miss during set-up
especially if the plate is thin material.
Problem: When using a nose cone, the engraving is uneven.
Possible solutions:
1. The spindle is not ”zeroed“ to your material.
2. When burnishing, there may not be enough pre-load set to adjust for material thickness changes. If
using the Set Surface function to control engraving depth and not the Prox sensor, the surface position
may not be low enough to consistently engrave. Increasing the Set Surface depth should correct the
problem.
3. The engraving speed may be too fast for the type of material being engraved. Check the
manufacturer’s recommendation. The cutter may be bouncing on the surface. Some hard materials
may exhibit this problem.
4. The cutter may be defective or broken. Replace it.
5. The material may be defective, or of poor quality.
6. The vacuum chip removal system may be plugged, or the hose is blocked and engraving chips are
caught between the nose cone and the material.
7. The nose cone or vacuum nose is loose.
Problem: ”Shadowing“ occurs while engraving certain materials.
Possible solutions:
1. Leave the protective film on the engraving material during engraving.
2. Use a plastic nose cone instead of a metal one.
3. The nose cone may be damaged. Inspect for burrs or roughness. Try using an emery cloth to polish
the nose.
4. Use less spindle spring pressure. Excessive down pressure will leave a rub mark on almost any
plastic material.
Problem: You are not using a nose cone and you have uneven engraving.
Possible solutions:
1. Switch to a nose-riding method.
2. Use a different method of holding the material. If double-sided tape is being used, it may be thick
enough to change your surface flatness and the engraving depth.
© 2012 Vision Engraving & Routing Systems
146
Engrave-IT Pro Series 4 User Manual
3. The T-slot table may not be flat, or has been installed improperly.
4. The table the machine is sitting on may not be a level surface.
5. Make sure the spindle spring pressure knob is locked all the way down.
Hint: While it’s true that you can do non-nose riding engraving, it’s not easy to hold any controlled
accuracy on the depth. This takes flat material, a very flat table and some degree of skill and
confidence. It also takes an application where some amount of uneven engraving may be tolerated.
Problem: There are ”tails“ or ”swirls“ in the corners of my engraving.
Possible solutions:
1. The cutter speed is too fast relative to your X-Y speed. Slow your spindle speed down or increase
your table speed.
2. The cutter is worn or damaged. Replace it, or have it re-sharpened.
Problem: There is ”fuzz“, ”fur“ or lines in the bottom of my cut showing each cutter path. Steps are
noticeable in the bottom of the cut.
Possible solutions:
1. This can be caused by dull cutters, the wrong cutter, or not enough overlap for each cut. Try
changing cutter size slightly. You may get better clean up.
2. Try taking a second pass cut at .001-.002 deeper. This may clean up the roughness.
3. Resharpen the cutter. There are various cutter angles that can cause these kinds of problems. There
is a relief angle that if too great can cause noticeable ridges in the bottom of the cut.
4. Ensure that the spindle is square in the mount or block. An out of square spindle means the cutter is
not perpendicular to the material surface.
5. Turn the spindle RPM speed up.
Problem: Poor letter quality.
Possible solutions:
1. The engraving speed may be too fast. Engraving quality improves with the right engraving and spindle
speeds.
2. When diamond drag engraving, there may be too much down pressure. Check the grain of the
material; it should be left to right.
3. The cutter may be dull or worn.
4. The material is not securely fastened to the table.
Problem: Ragged engraved characters.
Possible solutions:
1. If the quality of cut is ragged or exhibits steps, there may be play in the cutter. This could be in the
gap between the cutter and the spindle shaft. Maybe the shaft is worn or the spindle bearings need to
be replaced. Once a shaft starts to wear and a cutter is loose, the problem can worsen quickly.
2. The spindle is loose in the housing or block.
3. The carriage is loose or has excessive play. Check the Z-Axis bearings or slide.
4. Lubricate the lead screws as explained in the Maintenance section.
Problem: My baseline is off.
Possible solutions:
1. The machine's home position may have changed. The table or carriage may have been bumped
during set-up. Maybe the previous job was cut short and the system did not return back to its
mechanical home or limit switches. Move the table, bridge or carriage physically to home or send it
home via the software.
2. Check your software layout for errors.
Problem: While burnishing anodized aluminum, I have voids or non-engraved areas.
Possible solutions:
1. Try re-engraving the same plate again. Some anodized aluminum plates have a very hard surface
and two passes are required.
2. Switch to a diamond burnisher. The more common carbide tools may have difficulty getting through
© 2012 Vision Engraving & Routing Systems
Troubleshooting
the surface and are more easily worn, thus sometimes skipping across the surface.
3. Increase the pre-load of the burnishing adapter.
4. Try other materials. Same reasons as above. Some materials are too tough to engrave.
© 2012 Vision Engraving & Routing Systems
147
148
7.2
Engrave-IT Pro Series 4 User Manual
Mechanical Problems
Problem: No X, Y or Z-Axis movement.
Possible solutions:
1. Check that the power switch is on.
2. Check the power cable to make sure it is plugged in properly to the machine.
3. If the power cord is plugged in to a power strip, make sure that the power strip is working properly
and turned on.
4. Check to make sure that the X-Y Speed knob on the front panel is turned all the way clockwise.
5. Ensure that the job has been transferred to the controller (Green Start button LED is flashing).
Problem: System has no movement in any one axis.
Possible solutions:
1. Try to jog the problem axis using the X/Y/Z jog keys on the front panel. If OK, retry the job.
2. There is possibly a bad drive board in the machine. Contact your distributor.
Problem: Unusually loud noises during the engraving process.
Possible solutions:
1. Make sure the cutter or nose cone is not loose.
2. Make sure the speed settings are correct for the material being cut.
3. Isolate the cause of the unusual noise. Perform a dry run with:
a. No changes to the machine.
b. The cutter removed.
c. The engraving motor turned OFF. This is done in the Cut Toolbox by turning the Spindle
control to OFF.
If the noise persists, it may be confined to the X, Y or Z-axis. Check for proper lubrication of lead
screws. Follow lubrication instructions in the Maintenance section. If the noise persists, further isolate
the cause by doing the following:
a. Remove the motor belt.
b. Run the engraving motor without starting a job. Loose motor belts may cause some noises,
so removal will narrow down the problem. If the noise is present with the spindle motor on, check the
motor brushes. If there is no unusual noise when running the spindle motor with no belt attached, do the
following:
a. Attach the motor belt.
b. Run the spindle motor and vary the RPM by turning the spindle speed control knob.
Noise levels may vary. If the noise persists, check the spindle for overheating. Excessive overheating of
the outside housing of the spindle is a sign of defective bearings. The noise may be caused by the
bearings.
Problem: Spindle is hot.
Possible solutions:
1. Ensure that the nose cone area is free of debris. Check the vacuum system (if used) for clogging.
2. Inspect the spindle for other obstructions that may prevent proper rotation.
3. The spindle bearings may need to be replaced.
Problem: Spindle motor will not turn on.
Possible solutions:
1. Check motor brushes.
Problem: Motor belt will not stay on pulley.
Possible solutions:
1. Motor belt is probably worn and needs to be replaced.
© 2012 Vision Engraving & Routing Systems
Troubleshooting
8
149
Optional Accessories
These accessories are available for purchase directly from Vision, or you local distributor, as well as
through www.visionengravers.com. If you have any questions about these accessories, please contact
Vision or your distributor for advice for choosing the best accessories for your applications. Vision can
also help if you have a need for special fixtures, or modifications to our standard accessories. Please
call us for details.
8.1
Vacuum Chip Removal System
Processing plastics, acrylics, sign foam and wood, produces a significant amount of debris that can
clog the nose cone and/or get trapped between the nose cone and the material, which will cause
engraving/cutting depth inconsistencies, potentially scratch the surface of the material and cause
overheating in the spindle area. The vacuum chip removal system is designed to simplify the engraving
process and minimize wear and tear on the engraver. It uses a vacuum nose cone to remove chips
created during the engraving process before they have the chance to create problems. The quiet pump,
coupled with the micro-fine layered filters, assures that your unwanted chips are whisked away
effortlessly. The vacuum pump canister uses replaceable/reusable filters to assure maximum efficiency
and cost-effectiveness. This vacuum chip removal system is available with or without a Vision vacuum
nose cone.
The Optional Vacuum Chip Removal System
© 2012 Vision Engraving & Routing Systems
150
8.2
Engrave-IT Pro Series 4 User Manual
Hold Down Clamps
Wedge Clamps
Simply slide the clamp onto the T-slot table surface and position it over the edge of the engraving stock.
The downward clamping force eliminates bowing. This clamp can be used with material up to 1/4” thick.
Push Down Clamps
This double-sided clamp secures items from the edge. It is ideal for heavy-duty items that are being cut,
contoured or engraved.
© 2012 Vision Engraving & Routing Systems
Optional Accessories
151
Edge Clamps
This clamp is designed to secure engraving materials from the top surface and avoids bowing in most
applications. This clamp will hold material thicknesses of .020, .032, .062, and .125 by rotating the
clamp and tightening a thumbscrew.
Corner Clamps
This clamp is designed to hold down square or rectangular plates. By lining up the “V” cut-out of the
clamp with the corner of the plate, the engraver is allowed maximum engraving space. It will hold
material as thin as 1/32”.
© 2012 Vision Engraving & Routing Systems
152
8.3
Engrave-IT Pro Series 4 User Manual
Fixtures
Universal Pin Fixtures
Available for the Versa Vise, T-slot table, and Self-Centering Vise. Also usable with other computerized
engravers and Pantographs. These fixtures enable engraving on uniquely shaped items such as pens,
lighters, knives, keychains, and more.
Universal Clamping Bars w/Medallion Holder
These clamping bars hold 1 to 3 round objects at a time. Engrave multiple notary seals, paperweights,
and a variety of other circular items. With a place for the “eye” of medallions, this clamp adapts to any
vise or table that has a T-slot system.
© 2012 Vision Engraving & Routing Systems
Optional Accessories
153
Seal Fixture
The Seal Fixture enables engraving on notary seals, medallions, coasters, paperweights, dog tags, and
other round objects. Usable with the Quick-Lock or Versa Vise.
Adjustable Pen Fixture
Enables engraving on most pens and cylindrical items that vary in diameter from end to end. Available
for most computerized engravers and Pantographs. It is also usable with the Versa Vise and SelfCentering Vise.
© 2012 Vision Engraving & Routing Systems
154
Engrave-IT Pro Series 4 User Manual
Pen & Medallion Fixture
This is a double-sided fixture that, when turned in one direction, accommodates a pen, and when turned
in the other direction, accommodates a medallion, seal, or other circular item. With a space for the
“eye” of the medallion, this fixture is usable with the Versa Vise or Quick-Lock Vise.
© 2012 Vision Engraving & Routing Systems
Optional Accessories
8.4
155
Clamping Vises
Quick Lock Vise
The Quick-Lock Vise is specifically designed for T-slot table users. The “cam” type locking device
allows for quick changing of parts. This vise is supplied with a removable front clamping plate which
allows for the holding of thicker items.
Self-Centering Deep Vise
This self-centering vise allows for easy setup of odd-shaped items up to 3 1/4” deep.
© 2012 Vision Engraving & Routing Systems