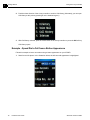
1
ShoreTel IP Phone 930D Handset User Guide May 2013 Legal Notices Document and Software Copyrights Copyright © 1998-2013 by ShoreTel Inc., Sunnyvale, California, USA. All rights reserved. Printed in the United States of America. Contents of this publication may not be reproduced or transmitted in any form or by any means, electronic or mechanical, for any purpose, without prior written authorization of ShoreTel, Inc. ShoreTel, Inc. reserves the right to make changes without notice to the specifications and materials contained herein and shall not be responsible for any damage (including consequential) caused by reliance on the materials presented, including, but not limited to typographical, arithmetic or listing errors. Trademarks and Patents ShoreTel, ShoreTel (and logo), ControlPoint, Brilliantly Simple, Brilliantly Simple Communication, ShoreCare, ShoreGear, ShorePhone, and ShoreWare are registered trademarks of ShoreTel, Inc. in the United States and/or other countries. The ShoreTel logo is a trademark of ShoreTel, Inc. in the United States and/or other countries. All other copyrights and trademarks herein are the property of their respective owners. The ShoreTel Mobility solution is covered by patents as listed at http://www.shoretel.com/about/patents.html. Version Information ShoreTel IP Phone 930D Handset User Guide Part Number: 800-1805-01 Date: May 2013 Company Information ShoreTel, Inc. 960 Stewart Drive Sunnyvale, California 94085 USA +1.408.331.3300 +1.408.331.3333 (fax) www.shoretel.com 2 Handset User Guide ShoreTel IP Phone 930D Table of Contents Before You Start . . . . . . . . . . . . . . . . . . . . . . . . . . . . . . . . . . . . . . . . . . . . . . . . . . . . . . . . . . . .7 About This Book . . . . . . . . . . . . . . . . . . . . . . . . . . . . . . . . . . . . . . . . . . . . . . . . . . . . . . . . . . . . . Organization . . . . . . . . . . . . . . . . . . . . . . . . . . . . . . . . . . . . . . . . . . . . . . . . . . . . . . . . . . . . Conventions . . . . . . . . . . . . . . . . . . . . . . . . . . . . . . . . . . . . . . . . . . . . . . . . . . . . . . . . . . . . Related Documents . . . . . . . . . . . . . . . . . . . . . . . . . . . . . . . . . . . . . . . . . . . . . . . . . . . . . . . . . . Chapter 1 7 7 8 8 Getting Started . . . . . . . . . . . . . . . . . . . . . . . . . . . . . . . . . . . . . . . . . . . . . . . . .9 Getting Started with Your New Phone . . . . . . . . . . . . . . . . . . . . . . . . . . . . . . . . . . . . . . . . . . . . 9 Unpacking the Box . . . . . . . . . . . . . . . . . . . . . . . . . . . . . . . . . . . . . . . . . . . . . . . . . . . . . . . 9 Installing and Charging the Battery . . . . . . . . . . . . . . . . . . . . . . . . . . . . . . . . . . . . . . . . . . 10 Attaching the Belt Clip (Optional) . . . . . . . . . . . . . . . . . . . . . . . . . . . . . . . . . . . . . . . . . . . 12 Plugging in a Headset (Optional) . . . . . . . . . . . . . . . . . . . . . . . . . . . . . . . . . . . . . . . . . . . 12 Logging In (If needed) . . . . . . . . . . . . . . . . . . . . . . . . . . . . . . . . . . . . . . . . . . . . . . . . . . . . 13 Overview of the IP930D . . . . . . . . . . . . . . . . . . . . . . . . . . . . . . . . . . . . . . . . . . . . . . . . . . . . . . 14 Handset Side Views . . . . . . . . . . . . . . . . . . . . . . . . . . . . . . . . . . . . . . . . . . . . . . . . . . . . . 15 Your Phone’s Display . . . . . . . . . . . . . . . . . . . . . . . . . . . . . . . . . . . . . . . . . . . . . . . . . . . . 16 Powering on the Handset . . . . . . . . . . . . . . . . . . . . . . . . . . . . . . . . . . . . . . . . . . . . . . . . . 16 Turning on the Backlight after Inactivity . . . . . . . . . . . . . . . . . . . . . . . . . . . . . . . . . . . . . . 17 Using Soft Keys . . . . . . . . . . . . . . . . . . . . . . . . . . . . . . . . . . . . . . . . . . . . . . . . . . . . . . . . . 17 Using the 4-way Controller . . . . . . . . . . . . . . . . . . . . . . . . . . . . . . . . . . . . . . . . . . . . . . . . 17 Example - Check the Call History . . . . . . . . . . . . . . . . . . . . . . . . . . . . . . . . . . . . . . . . 17 Example - Speed Dial a Call from a Button Appearance . . . . . . . . . . . . . . . . . . . . . . 18 Setting the Language Preference for the Handset . . . . . . . . . . . . . . . . . . . . . . . . . . . . . . 19 Setting the Keypad to Automatically Lock when Idle . . . . . . . . . . . . . . . . . . . . . . . . . . . . . 19 Setting Keypad Sounds . . . . . . . . . . . . . . . . . . . . . . . . . . . . . . . . . . . . . . . . . . . . . . . . . . . 20 Choosing a Vibration Setting . . . . . . . . . . . . . . . . . . . . . . . . . . . . . . . . . . . . . . . . . . . . . . . 20 Setting up an Audible Alert for Low Signal Strength . . . . . . . . . . . . . . . . . . . . . . . . . . . . . 20 Setting up a Charging Alert . . . . . . . . . . . . . . . . . . . . . . . . . . . . . . . . . . . . . . . . . . . . . . . . 21 Disabling Ringing while Charging . . . . . . . . . . . . . . . . . . . . . . . . . . . . . . . . . . . . . . . . . . . 21 Checking the Battery Level . . . . . . . . . . . . . . . . . . . . . . . . . . . . . . . . . . . . . . . . . . . . . . . . 21 Guide to Call Status Icons . . . . . . . . . . . . . . . . . . . . . . . . . . . . . . . . . . . . . . . . . . . . . . . . . 22 Additional Status Icons . . . . . . . . . . . . . . . . . . . . . . . . . . . . . . . . . . . . . . . . . . . . . . . . . . . 24 LED Indicator States . . . . . . . . . . . . . . . . . . . . . . . . . . . . . . . . . . . . . . . . . . . . . . . . . . . . . 25 Chapter 2 Managing Calls . . . . . . . . . . . . . . . . . . . . . . . . . . . . . . . . . . . . . . . . . . . . . . . . 27 Basic Call Management . . . . . . . . . . . . . . . . . . . . . . . . . . . . . . . . . . . . . . . . . . . . . . . . . . . . . . 27 ShoreTel IP Phone 930D Handset User Guide 3 Table of Contents Placing Calls . . . . . . . . . . . . . . . . . . . . . . . . . . . . . . . . . . . . . . . . . . . . . . . . . . . . . . . . . . . Using the Handset . . . . . . . . . . . . . . . . . . . . . . . . . . . . . . . . . . . . . . . . . . . . . . . . . . . Using the Speakerphone . . . . . . . . . . . . . . . . . . . . . . . . . . . . . . . . . . . . . . . . . . . . . . Using a Headset . . . . . . . . . . . . . . . . . . . . . . . . . . . . . . . . . . . . . . . . . . . . . . . . . . . . . Display Overview with an Outbound Call . . . . . . . . . . . . . . . . . . . . . . . . . . . . . . . . . . Answering Calls . . . . . . . . . . . . . . . . . . . . . . . . . . . . . . . . . . . . . . . . . . . . . . . . . . . . . . . . . Display Overview with an Incoming Call . . . . . . . . . . . . . . . . . . . . . . . . . . . . . . . . . . . Answer using the Handset . . . . . . . . . . . . . . . . . . . . . . . . . . . . . . . . . . . . . . . . . . . . . Answer using the Speakerphone . . . . . . . . . . . . . . . . . . . . . . . . . . . . . . . . . . . . . . . . Answer using the Headset . . . . . . . . . . . . . . . . . . . . . . . . . . . . . . . . . . . . . . . . . . . . . Sending a Call to Voicemail . . . . . . . . . . . . . . . . . . . . . . . . . . . . . . . . . . . . . . . . . . . . Diverting a Call . . . . . . . . . . . . . . . . . . . . . . . . . . . . . . . . . . . . . . . . . . . . . . . . . . . . . . Answering Additional Calls . . . . . . . . . . . . . . . . . . . . . . . . . . . . . . . . . . . . . . . . . . . . . . . . Transferring a Call . . . . . . . . . . . . . . . . . . . . . . . . . . . . . . . . . . . . . . . . . . . . . . . . . . . . . . . Making a Conference Call . . . . . . . . . . . . . . . . . . . . . . . . . . . . . . . . . . . . . . . . . . . . . . . . . Display or Drop Conference Participants . . . . . . . . . . . . . . . . . . . . . . . . . . . . . . . . . . Using the Intercom . . . . . . . . . . . . . . . . . . . . . . . . . . . . . . . . . . . . . . . . . . . . . . . . . . . . . . Placing a Call On or Off Hold . . . . . . . . . . . . . . . . . . . . . . . . . . . . . . . . . . . . . . . . . . . . . . Redialing Calls . . . . . . . . . . . . . . . . . . . . . . . . . . . . . . . . . . . . . . . . . . . . . . . . . . . . . . . . . Using Audio Controls . . . . . . . . . . . . . . . . . . . . . . . . . . . . . . . . . . . . . . . . . . . . . . . . . . . . . Adjusting Ring Tone Volume . . . . . . . . . . . . . . . . . . . . . . . . . . . . . . . . . . . . . . . . . . . Adjusting Handset Volume . . . . . . . . . . . . . . . . . . . . . . . . . . . . . . . . . . . . . . . . . . . . . Adjusting Headset Volume . . . . . . . . . . . . . . . . . . . . . . . . . . . . . . . . . . . . . . . . . . . . . Adjusting Speakerphone Volume . . . . . . . . . . . . . . . . . . . . . . . . . . . . . . . . . . . . . . . . Muting an Active Call . . . . . . . . . . . . . . . . . . . . . . . . . . . . . . . . . . . . . . . . . . . . . . . . . Options to Configure Your Handset . . . . . . . . . . . . . . . . . . . . . . . . . . . . . . . . . . . . . . . . . . . . . Changing Call-Handling Mode and Forwarding . . . . . . . . . . . . . . . . . . . . . . . . . . . . . . . . Changing Automatic Off Hook Preference . . . . . . . . . . . . . . . . . . . . . . . . . . . . . . . . . . . . Changing Ring Tone . . . . . . . . . . . . . . . . . . . . . . . . . . . . . . . . . . . . . . . . . . . . . . . . . . . . . Programming Your Custom Buttons . . . . . . . . . . . . . . . . . . . . . . . . . . . . . . . . . . . . . . . . . Changing the Agent State . . . . . . . . . . . . . . . . . . . . . . . . . . . . . . . . . . . . . . . . . . . . . . . . . Using the Directory to Find Numbers and Place Calls . . . . . . . . . . . . . . . . . . . . . . . . . . . . . . . Managing Calls with Advanced or Optional Features . . . . . . . . . . . . . . . . . . . . . . . . . . . . . . . Programmable Custom Buttons . . . . . . . . . . . . . . . . . . . . . . . . . . . . . . . . . . . . . . . . . . . . Bridged Call Appearances . . . . . . . . . . . . . . . . . . . . . . . . . . . . . . . . . . . . . . . . . . . . . Silent Monitor / Barge In . . . . . . . . . . . . . . . . . . . . . . . . . . . . . . . . . . . . . . . . . . . . . . . Extension Monitoring . . . . . . . . . . . . . . . . . . . . . . . . . . . . . . . . . . . . . . . . . . . . . . . . . Answering a Monitored Extension’s Call . . . . . . . . . . . . . . . . . . . . . . . . . . . . . . . . . . . Whisper Page . . . . . . . . . . . . . . . . . . . . . . . . . . . . . . . . . . . . . . . . . . . . . . . . . . . . . . . Picking Up the Night Bell . . . . . . . . . . . . . . . . . . . . . . . . . . . . . . . . . . . . . . . . . . . . . . Toggling the Hunt Group Status . . . . . . . . . . . . . . . . . . . . . . . . . . . . . . . . . . . . . . . . . Overhead Paging . . . . . . . . . . . . . . . . . . . . . . . . . . . . . . . . . . . . . . . . . . . . . . . . . . . . Using Group Paging . . . . . . . . . . . . . . . . . . . . . . . . . . . . . . . . . . . . . . . . . . . . . . . . . . Parking and Unparking Calls . . . . . . . . . . . . . . . . . . . . . . . . . . . . . . . . . . . . . . . . . . . ShoreTel Communicator Software . . . . . . . . . . . . . . . . . . . . . . . . . . . . . . . . . . . . . . . . . . Web Access . . . . . . . . . . . . . . . . . . . . . . . . . . . . . . . . . . . . . . . . . . . . . . . . . . . . . . . . . . . Chapter 3 27 27 28 28 29 29 30 30 31 31 31 32 32 32 33 33 33 34 34 35 35 35 35 35 35 35 35 36 36 36 36 37 38 38 38 38 39 39 40 40 40 41 41 41 41 42 Using Voicemail . . . . . . . . . . . . . . . . . . . . . . . . . . . . . . . . . . . . . . . . . . . . . . . 43 Understanding Voicemail Indicators . . . . . . . . . . . . . . . . . . . . . . . . . . . . . . . . . . . . . . . . . . . . 43 Logging In . . . . . . . . . . . . . . . . . . . . . . . . . . . . . . . . . . . . . . . . . . . . . . . . . . . . . . . . . . . . . . . . 44 Logging In from Your ShoreTel Phone . . . . . . . . . . . . . . . . . . . . . . . . . . . . . . . . . . . . . . . 44 4 Handset User Guide ShoreTel IP Phone 930D Table of Contents Logging In from Another Extension . . . . . . . . . . . . . . . . . . . . . . . . . . . . . . . . . . . . . . . . . . Logging In from an External Phone . . . . . . . . . . . . . . . . . . . . . . . . . . . . . . . . . . . . . . . . . . Using Your Voicemail Menu . . . . . . . . . . . . . . . . . . . . . . . . . . . . . . . . . . . . . . . . . . . . . . . . . . . Listening to and Interacting with New Messages . . . . . . . . . . . . . . . . . . . . . . . . . . . . . . . Sending Messages from Voice Mail . . . . . . . . . . . . . . . . . . . . . . . . . . . . . . . . . . . . . . . . . Listening to Saved Messages . . . . . . . . . . . . . . . . . . . . . . . . . . . . . . . . . . . . . . . . . . . . . . Accessing Mailbox Options . . . . . . . . . . . . . . . . . . . . . . . . . . . . . . . . . . . . . . . . . . . . . . . . Logging Off . . . . . . . . . . . . . . . . . . . . . . . . . . . . . . . . . . . . . . . . . . . . . . . . . . . . . . . . . . . . Returning to the Auto-Attendant . . . . . . . . . . . . . . . . . . . . . . . . . . . . . . . . . . . . . . . . . . . . Transferring to Assistant . . . . . . . . . . . . . . . . . . . . . . . . . . . . . . . . . . . . . . . . . . . . . . . . . . Listening to Mailbox Status . . . . . . . . . . . . . . . . . . . . . . . . . . . . . . . . . . . . . . . . . . . . . . . . Leaving a Message . . . . . . . . . . . . . . . . . . . . . . . . . . . . . . . . . . . . . . . . . . . . . . . . . . . . . . . . . Chapter 4 Troubleshooting . . . . . . . . . . . . . . . . . . . . . . . . . . . . . . . . . . . . . . . . . . . . . . . 51 Problems and Solutions . . . . . . . . . . . . . . . . . . . . . . . . . . . . . . . . . . . . . . . . . . . . . . . . . . . . . . Viewing Phone Information . . . . . . . . . . . . . . . . . . . . . . . . . . . . . . . . . . . . . . . . . . . . . . . . . . . Status Information . . . . . . . . . . . . . . . . . . . . . . . . . . . . . . . . . . . . . . . . . . . . . . . . . . . . . . . Quick Reference of IP930D Shortcuts . . . . . . . . . . . . . . . . . . . . . . . . . . . . . . . . . . . . . . . . . . . Chapter 5 44 44 44 44 45 46 46 48 48 48 48 49 51 52 54 55 Important Information. . . . . . . . . . . . . . . . . . . . . . . . . . . . . . . . . . . . . . . . . . . 57 Battery and AC Adapter . . . . . . . . . . . . . . . . . . . . . . . . . . . . . . . . . . . . . . . . . . . . . . . . . . . . . . 57 Rechargeable Battery Information . . . . . . . . . . . . . . . . . . . . . . . . . . . . . . . . . . . . . . . . . . . 58 Radio Frequency (RF) Exposure Information . . . . . . . . . . . . . . . . . . . . . . . . . . . . . . . . . . . . . 58 ShoreTel IP Phone 930D Handset User Guide 5 Table of Contents 6 Handset User Guide ShoreTel IP Phone 930D Before You Start This preface contains the following topics: About This Book on page 7 Related Documents on page 8 About This Book This book is intended for those who install, administer, or use the ShoreTel IP Phone 930D. This book specifically describes how to install and use the IP930D handset. Organization This document is divided into the following chapters: Chapter 1, Getting Started on page 9, describes how to install the handset and provides an overview of features and settings. Chapter 2, Managing Calls on page 27, describes how to use the handset for call-handling tasks. Chapter 3, Using Voicemail on page 43, provides information about the voicemail menu and related features. Chapter 4, Troubleshooting on page 51, offers help for identifying and fixing issues. Chapter 5, Important Information on page 57, contains guidelines for using the batteries and AC adapter, as well as information to about radiation exposure compliance. Technical Publications Handset User Guide 7 Before You Start Conventions Conventions The following typographical marking conventions are used in this document. Marking Meaning Bold Names of interface objects, such as buttons and menus. Blue Cross references with hyperlinks. Click the blue text to go to the indicated section. All chapters have a list of section links on the first page. Note: Table of Contents entries are also links, but they are not shown in blue. Related Documents The following documents are also available: 8 ShoreTel IP Phone 930D Planning and Installation Guide ShoreTel IP Phone 930D Base Station and Repeater User Guide Handset User Guide Technical Publications CHAPTER 1. Getting Started This chapter contains these main topics: Getting Started with Your New Phone on page 9 Overview of the IP930D on page 14 Getting Started with Your New Phone This section describes how to set up your new ShoreTel IP Phone 930D. Unpacking the Box Make sure that all of the following items are included in your handset package: 1 x IP930D handset with battery cover 1 x battery 1 x charging stand 1 x AC adapter with plug adapters 1 x belt clip ShoreTel IP Phone 930D Handset User Guide 9 1 Getting Started Installing and Charging the Battery Installing and Charging the Battery 1. Remove the battery cover by pushing down at the horizontal mark on the cover and sliding downward. 2. Align the battery so that the battery contacts face the bottom of the handset and the contacts align. Insert the bottom end of the battery first. 3. Push the downward on the battery until it snaps into place. 4. Replace the cover and slide it upward into place until it locks. 10 Handset User Guide ShoreTel IP Phone 930D 1 Getting Started Installing and Charging the Battery 5. Connect the AC adapter to the jack on the charging stand and route the cable through the cable guide so the charging stand sits flat on a horizontal surface. 6. Slide the AC power plug with the correct shape for your AC outlet into the AC adapter until it locks in place. Plug the AC adapter into the AC outlet. ShoreTel IP Phone 930D Handset User Guide 11 1 Getting Started Attaching the Belt Clip (Optional) 7. Place the handset in the charging stand with the display facing forward. The display on the handset light ups and the blue charging LED turns on. When using the battery for the first time, it is necessary to leave the handset in the charging stand for at least 10 hours before the handset is ready for use. Before you can use the handset, it must be registered with the system. Contact your system administrator if your handset displays “Searching,” “Deregistered,” or “No Service.” Note Do not place the handset or charger in direct sunlight. The battery has a built-in heat sensor that will stop charging if the battery temperature is too high. Attaching the Belt Clip (Optional) Line up the holes on each side of the handset with the clip opening facing down. Press down on the clip until it locks into place. Plugging in a Headset (Optional) You can plug a wired headset into the 2.5mm jack on the side of the handset, as shown in the illustration below. The Panasonic KX-TCA60 Hands-Free Headset is recommended for use with the IP930D handset (headset not included). Note If you plan to use a headset to handle most of your calls, you might want to set your default audio path to be for a headset. See Changing Automatic Off Hook Preference on page 36. 12 Handset User Guide ShoreTel IP Phone 930D 1 Getting Started Logging In (If needed) Logging In (If needed) If you are using your phone for the first time and no extension has been assigned, the phone’s display shows “Available.” In this state, you can place calls but you cannot receive them. You need to log in, change your password, record your name, and assign your extension to this phone. Follow these steps: 1. Press the # button, then the Speakerphone button. 2. Enter the extension number assigned to you by your system administrator. 3. If your system administrator assigned you a password, enter it now (otherwise, enter a default password of 1234). Press the # button. 4. Enter a new password followed by the # button. (Your system administrator can provide guidelines about password length.) Repeat to confirm password. 5. Press the # button to record your name (if you have not previously saved a recording of your name in the system). 6. Press one of the following options: # button- Accept 1 button- Review 2 button- Re-record 3 button- Delete * button- Cancel 7. To assign your extension to this phone, do the following: a. Press the 7 button for mail box options. b. Press the 3 button to re-assign the extension. c. Press the 1 button to assign your extension to this phone. d. End the call by pushing the End/Power button. You are now logged in and should see your name and extension on the display. Your phone can receive calls, and you can check for new messages. ShoreTel IP Phone 930D Handset User Guide 13 1 Getting Started Overview of the IP930D Overview of the IP930D The illustration below provides an overview of your phone’s components. 14 Handset User Guide ShoreTel IP Phone 930D 1 Getting Started Handset Side Views Handset Side Views ShoreTel IP Phone 930D Handset User Guide 15 1 Getting Started Your Phone’s Display Your Phone’s Display The display screen on your phone shows your name and extension, call handling mode, call appearance, monitored extensions, calls, duration of call, voice messages, date and time, soft key functions, and other information. Some features need to be setup by your administrator before they will appear on your phone. Note The illustration below shows a handset with optional features configured, such as a monitored extension and speed dials. Your IP930D might not be configured to offer these specific features. Powering on the Handset To power on the handset, press the End/Power button. To turn off the handset, press and hold the End/Power button until the display turns off. Additionally, the handset powers on when it is placed into the charging stand. 16 Handset User Guide ShoreTel IP Phone 930D 1 Getting Started Turning on the Backlight after Inactivity Turning on the Backlight after Inactivity The display’s backlight turns off after about 40 seconds of inactivity (this duration can be changed by your administrator). When the backlight is off, you can push any button to illuminate the display; the first button push turns on the backlight. Using Soft Keys Three soft keys at the bottom of the display provide context-sensitive access to features and functions. Soft keys change depending on the state of your phone. For example, if your phone is idle, the soft keys let you modify settings, such as your call handling mode. If the phone has an active call, you can use the soft keys to do such things as hang up or park the call. If more than three soft keys are available, the right-most soft key will change to >>> to indicate that not all soft keys are visible. Push the soft key >>> to cycle through all available soft key choices. To select a soft key, press the button beneath the soft key label. Using the 4-way Controller The 4-way controller can be used to scroll through lists (such as the Directory and call logs) and to select an on-screen button appearance or call appearance (located near the top of the LCD). To use the controller, first select/highlight an item, then push the center button of the 4-way controller to open the item. Note Call appearances are highlighted when they have a black background; non-highlighted appearances are blue. Example - Check the Call History Follow this example to learn more about how to open menu items on your IP930D. 1. Push the Menu button. The Menu screen appears, as shown below. In this example, the Directory is currently selected, as indicated by the > symbol. ShoreTel IP Phone 930D Handset User Guide 17 1 Getting Started Using the 4-way Controller 2. Push the down direction of the 4-way controller to scroll to Call History. (Alternately, you can open Call History at this point by pressing 3 on the handset keypad.) 3. With Call History selected, push the center button of the 4-way controller or press the OK soft key. Call History opens. Example - Speed Dial a Call from a Button Appearance Follow this example to learn more about using a button appearance on your IP930D. 1. Start from an idle phone. In the illustration below, the left-most call appearance is highlighted. 18 Handset User Guide ShoreTel IP Phone 930D 1 Getting Started Setting the Language Preference for the Handset 2. Push the right direction of the 4-way controller twice to highlight the Speed Dial button appearance labeled “Home.” 3. Push the center button of the 4-way controller to dial the Speed Dial number. Setting the Language Preference for the Handset You can change the language used by menus on the handset by following this procedure: 1. Press and hold the Menu button for 3 seconds until the Settings menu appears. 2. With Language selected, press the center button on the 4-way controller. A list of available languages is shown. 3. Use the 4-way controller to highlight the language you wish to select and push the Select soft key (or the center button of the 4-way controller). 4. Push the End/Power button to exit. Setting the Keypad to Automatically Lock when Idle You can set the phone to lock the keypad automatically after a specified time period of inactivity. This feature is useful to prevent accidental calling or feature activation on the handset. 1. Press and hold the Menu button for 3 seconds until the Settings menu appears. 2. Use the 4-way controller to highlight the Security menu item and press the center button on the 4-way controller. The current status of the Automatic keylock feature is displayed. 3. Turn the feature off or select a time period after which the keys will lock by highlighting the desired setting and pushing the Select soft key (or the center button of the 4-way controller). To unlock the handset, press and hold the center button of the 4-way controller for two seconds. ShoreTel IP Phone 930D Handset User Guide 19 1 Getting Started Setting Keypad Sounds Setting Keypad Sounds You can set your handset to play a beep or a clicking sound whenever a key is pushed. To change the behavior, follow these steps: 1. Press and hold the Menu button for 3 seconds until the Settings menu appears. 2. Use the 4-way controller to highlight the Audio settings menu item and push the center button on the 4-way controller. 3. Highlight the Key sound option and push the Select soft key (or the center button of the 4-way controller). 4. Highlight the setting you prefer (Silent, Click, or Tone) and push the center button of the 4-way controller. Choosing a Vibration Setting You can set the handset to vibrate (with or without ringing) when you get a new call. Follow these steps to change the handset alerting behavior. 1. Press and hold the Menu button for 3 seconds until the Settings menu appears. 2. Use the 4-way controller to highlight the Audio settings menu item and push the center button on the 4-way controller. 3. Highlight the Vibrator menu item and push the Select soft key (or the center button of the 4-way controller). 4. Highlight the setting you prefer (Off, Vibrate then ring, Vibrate only, or Vibrate and ring) and push the center button of the 4-way controller. Setting up an Audible Alert for Low Signal Strength On the left side of the blue status bar at the top of the display is a received signal strength indicator that shows as many as five bars of signal. In addition, you can enable an audible coverage alert (four quick beeps) to warn you when you are near the edge of the signal coverage area for the handset. To enable or disable this feature: 1. Press and hold the Menu button for 3 seconds until the Settings menu appears. 2. Use the 4-way controller to highlight the Audio settings menu item and push the center button on the 4-way controller. 3. Highlight the Coverage warning menu item and push the Off or On soft key to turn the warning on or off. If you move completely out of the coverage area, the handset will display “Searching” and the LED indicator at the top-left of the handset will flash with an amber color. 20 Handset User Guide ShoreTel IP Phone 930D 1 Getting Started Setting up a Charging Alert Setting up a Charging Alert If you would like to be alerted by a beep when your handset is correctly connected to the charging stand (and charging), follow these steps: 1. Press and hold the Menu button for 3 seconds until the Settings menu appears. 2. Use the 4-way controller to highlight the Audio Settings menu item and push the center button on the 4-way controller. 3. Highlight the Charger warning menu item and push the On or Off soft key to turn the alert on or off. Disabling Ringing while Charging If you would like your phone not to ring whenever it is in the charger, follow these steps: 1. Press and hold the Menu button for 3 seconds until the Settings menu appears. 2. Use the 4-way controller to highlight the Silent charging menu item and push the center button on the 4-way controller. 3. Highlight the Silent option and push the Select soft key (or the center button of the 4-way controller). If you would like to turn ringer alerts back on for new calls when the handset is in the charger, repeat the above steps and choose off in Step 3. Checking the Battery Level On the right side of the blue status bar at the top of the display is a battery charge level indicator. The indicator shows a full-to-empty battery in 10 increments. When the handset is charging, animation shows the battery level increasing. ShoreTel IP Phone 930D Handset User Guide 21 1 Getting Started Guide to Call Status Icons Guide to Call Status Icons Your IP930D handset offers icons to indicate the call state. The table below lists the static and blinking icons, as well as the associated operational state. 22 Handset User Guide ShoreTel IP Phone 930D 1 Getting Started ShoreTel IP Phone 930D Guide to Call Status Icons Handset User Guide 23 1 Getting Started Additional Status Icons Additional Status Icons These status icons appear in the blue bar at the top of the display. 24 Handset User Guide ShoreTel IP Phone 930D 1 Getting Started LED Indicator States LED Indicator States On the top left-hand side of the handset is an LED indicator for indicating various handset alerts. LED Indicator Meaning Double red flash Incoming call Red flash Message waiting Green flash Low battery Amber flash Out of range (low signal) Note At times, there may be overlapping LED indicators, such as if you receive an incoming call when the battery is low. ShoreTel IP Phone 930D Handset User Guide 25 1 Getting Started 26 Handset User Guide LED Indicator States ShoreTel IP Phone 930D CHAPTER 2. Managing Calls This chapter describes how to manage calls with your ShoreTel IP930D and contains these main topics: Basic Call Management on page 27 Options to Configure Your Handset on page 35 Using the Directory to Find Numbers and Place Calls on page 37 Managing Calls with Advanced or Optional Features on page 38 Basic Call Management Basic call management includes placing and transferring calls, putting calls on hold, conference and intercom calling, setting audio controls, and using voicemail and directory features. Placing Calls You can place a call using a handset, headset, or speakerphone. Using the Handset To place an internal call, press the Talk button and dial the extension. To place an external call, dial the trunk access code, then the phone number. To end a call, press the End/Power button. ShoreTel IP Phone 930D Handset User Guide 27 2 Managing Calls Placing Calls Using the Speakerphone To place an internal call, press the Speakerphone button and dial the extension. To place an external call, dial the trunk access code, then the phone number. To end a call, press End/Power button. Using a Headset These actions work with a headset if you have one plugged in to your phone. See Plugging in a Headset (Optional) on page 12. 28 To place an internal call, press the Talk button and dial the extension. To place an external call, dial the trunk access code, then the phone number. To end a call, press End/Power. Handset User Guide ShoreTel IP Phone 930D 2 Managing Calls Answering Calls Display Overview with an Outbound Call The figure below shows the information that appears on your IP930D handset when an outbound call is active. Note Soft keys are context sensitive. For example, the soft keys that appear when the phone has an outbound call are different from the soft keys that appear when the phone is idle. Answering Calls Ring tones, the blinking Incoming Call Icon, and the flashing red LED light in the top left-most corner of your handset all identify an incoming call on your handset. A double ring signals an internal call, while a single ring signals an external call. ShoreTel IP Phone 930D Handset User Guide 29 2 Managing Calls Answering Calls Display Overview with an Incoming Call If the information is available, the caller’s name, number, and the incoming call icon appear on your display, as shown in the figure below. (The caller’s name may be abbreviated to fit on one line.) To answer an incoming call, use the handset, speakerphone, or headset (if available). See the topics below for more information Answer using the Handset To answer a call, push the Talk button when the phone rings. The handset icon appears in the blue status bar at the top of the display. 30 To end the call, press the End/Power button. Handset User Guide ShoreTel IP Phone 930D 2 Managing Calls Answering Calls Answer using the Speakerphone To answer a call, press the Speakerphone button. The speakerphone icon appears in the blue status bar at the top of the display and the Speakerphone button illuminates and turns red. To end the call, press the End/Power button. Answer using the Headset These actions work with a headset if you have one plugged in to your phone. See Plugging in a Headset (Optional) on page 12. To answer a call, push Talk button when the phone rings. The headset icon appears in the blue status bar at the top of the display. To end the call, press the End/Power button. Sending a Call to Voicemail When an incoming call arrives, a To VM soft key becomes available, as shown in the figure below. Press the To VM soft key to send the caller directly to your voice mailbox (assuming you have voicemail privileges). ShoreTel IP Phone 930D Handset User Guide 31 2 Managing Calls Answering Additional Calls Diverting a Call You can send an incoming call to another extension or to an outside number without answering the call. 1. While the call is ringing, press the Transfer button. 2. Enter the number where you want the call sent, or press the extension’s button appearance, if you have one programmed (a speed dial or monitored extension, located near the top of the screen). 3. Press the Transf soft key to complete the transfer to an extension. Answering Additional Calls If you receive an incoming call while you are on another call, you will hear a beep. To answer the incoming call and put the existing call on hold automatically, do one of these: Use the 4-way controller to select the blinking call appearance button for the incoming call. Press the Hold button. To return to the previous call, press the call appearance key or press the Hold button again. Continuing to press the Hold button allows you to toggle between the calls. Note With the appropriate permissions, you can receive up to 16 incoming calls at once. (Your system administrator determines the maximum number.) Transferring a Call To transfer a call from your extension to another number: 1. Press the Transfer button. The call is put on hold. 2. Upon hearing dial tone, dial the number (or use the Directory to find the party), then do one of the following: 32 Complete a blind transfer (when you do not want to first talk to the party receiving the transfer) by hanging up or by pressing the Transf soft key. Initiate a consult transfer (when you do want to speak to the recipient before transferring) by pressing the Conslt soft key or waiting for the recipient to answer. After consultation, press the Yes soft key to complete the transfer, or press the Cancel soft key to abandon the transfer and return to the original call. Consult by intercom by pressing the More soft key, and then pressing the Intcom soft key. Send the call to the recipient’s voice mailbox by pressing the More soft key, and then pressing To MB. Handset User Guide ShoreTel IP Phone 930D 2 Managing Calls Making a Conference Call Making a Conference Call To conference a party into a connected call: 1. With a connected call on the line, press the Conference button. The call is put on hold. 2. Dial the extension of the party you would like to conference. 3. Do one of the following: Press the Confrn soft key to add the party to the conference call. Press the Conslt soft key to speak with the recipient before bringing him or her into the conference call. After consultation, press the Yes soft key to complete the conference call, or press the Cancel soft key to return to the original two-party call. 4. Repeat to add additional parties. Note With the appropriate permissions (set by your system administrator), you can conference up to six parties into a single call. Display or Drop Conference Participants After a conference is established, you can use the Show soft key to display all conference participants. If you wish to disconnect a participant, scroll to the entry and press the Drop soft key. Using the Intercom The Intercom function allows you to connect with another party without ringing the party through a call line. Both you and the recipient must be using a ShoreTel IP phone and have permission to use this feature (set by your system administrator). To intercom another party: 1. Press Menu button and then press the 4 button to choose Intercom from the menu. 2. Dial the party’s extension, or press the button appearance associated with the extension. 3. Press the Intcom soft key. 4. To end the call, press the HangUp soft key. Alternately, you can dial the recipient’s number, then press the Intcom soft key to intercom another party. To use the Directory to make an Intercom call, press the Intcom soft key from the Directory screen. ShoreTel IP Phone 930D Handset User Guide 33 2 Managing Calls Placing a Call On or Off Hold Note An intercom call overrides all other call handling modes on the dialed extension. This allows you to intercom a user whose phone is forwarded to voicemail. Placing a Call On or Off Hold To place a call on hold, press the Hold button, or highlight the call appearance and press the center button on the 4-way controller. To take the call off hold, highlight the held call appearance and press the center button on the 4-way controller, or press the Hold button again. If you are not on another call while a call is on hold, you will hear a reminder ring in 15 seconds and at one-minute intervals after that. If you have received several calls, you will receive a reminder ring for the call that has been on hold the longest. If you have multiple calls on hold, you can navigate to the call that you want to retrieve from hold by using the 4-way controller to highlight that call’s appearance, and then push the 4-way controller’s center button to answer that call. At this time, you can press the Hold button again to make the next call in the stack active. Note An active call shows this icon , while calls that have been placed on hold show this icon . Redialing Calls You can use the Redial function to dial not only the last number you called, but the last several calls you made and received, including those you missed (denoted by the icon). The date and time information appears directly above the soft keys for the selected call. To redial a call, do one of these: 34 Press the Redial button. Press it again to dial the last number you called. Use the 4-way controller to highlight the number you want to call, then press the Dial soft key or press the 4-way controller’s center button. (You can also press the Intcom soft key to intercom the recipient.) Handset User Guide ShoreTel IP Phone 930D 2 Managing Calls Using Audio Controls Using Audio Controls Audio controls include ring tone, handset, headset, and speakerphone volume, as well as mute. Adjusting Ring Tone Volume To adjust the ring volume, while the handset is on hook and the speakerphone is off, press + or - on the volume button on the left side of the handset. By pressing - repeatedly, you can turn the ringer volume off. Adjusting Handset Volume To adjust the handset volume, while the handset is off hook, press + or - on the volume button. Adjusting Headset Volume To adjust the headset volume, while the headset is plugged in and off hook, press + or - on the volume button. Adjusting Speakerphone Volume To adjust the speakerphone volume, while the speakerphone is active, press + or - on the volume button. Muting an Active Call To mute the active call, press the Mute button on the left side of the handset. This icon will appear in the blue status bar at the top of the display . To un-mute the call, press the Mute button again. Options to Configure Your Handset This section contains information about configurable options for your handset. You might need to use ShoreTel Communicator or get help from your system administrator to use these features. Changing Call-Handling Mode and Forwarding Use ShoreTel Communicator to configure the modes and to set call forwarding destinations and personal greetings. ShoreTel IP Phone 930D Handset User Guide 35 2 Managing Calls Changing Automatic Off Hook Preference Changing Automatic Off Hook Preference ShoreTel users who frequently use a headset may want to use the Automatic Off Hook Preference feature to select which audio path (speakerphone or headset) is automatically activated when placing or receiving calls. Use ShoreTel Communicator to set the Off Hook Preference. Changing Ring Tone You can choose from four distinctive ring tones to help you distinguish your phone from neighboring phones. Contact your System Administrator to have your ring tone changed. Programming Your Custom Buttons You can program the custom buttons as shortcuts to operations that would normally require pressing two or three buttons to accomplish the same task. Contact your System Administrator to customize the buttons on your handset. Changing the Agent State If you are a member of a workgroup and you need to log in to the workgroup at the start of your day, or log out to take a break, you can change your agent state via ShoreTel Communicator or from voicemail menus. 36 Handset User Guide ShoreTel IP Phone 930D 2 Managing Calls Using the Directory to Find Numbers and Place Calls Using the Directory to Find Numbers and Place Calls You can use the Directory to find phone numbers on your network by pressing the Menu button, then 1. The Directory screen appears. Push >>> to see the other soft keys. Push it again to cycle through all available soft keys. Using the Directory, you can: Enter the first few letters of the extension owner’s first or last name to narrow the number of entries that Directory displays. Press # for a space in a person's name and press * for a wildcard character. If you press an incorrect key, press the Back soft key to delete the character. Press up or down on the 4-way controller to highlight the desired name. Press the center button on the 4-way controller or the Dial soft key to dial the number. Note The Directory lists any keypad speed dials you have configured in ShoreTel Communicator. To dial a number from this screen, press and hold the corresponding number on the keypad, or use the Scroll button to highlight an entry, and then press the Dial soft key. You can access the Directory when using other features, such as Intercom, Transfer, Park, Unpark, and Conference. Refer to those sections in this guide for more information. ShoreTel IP Phone 930D Handset User Guide 37 2 Managing Calls Managing Calls with Advanced or Optional Features Managing Calls with Advanced or Optional Features In addition to performing the regular operations of placing and answering calls, your phone supports several other advanced or optional functions. If you use any of these features on a regular basis, you may benefit by having your system administrator assign the desired function to the programmable custom buttons on your phone. Note The features in this section are not available by default; your system administrator must enable or provision them for you. Programmable Custom Buttons Programmable buttons can be assigned to the features in the sections that follow. Bridged Call Appearances The Bridged Call Appearances feature provides “bridged” information between many separate IP phones, offering the benefit of faster call handling between users. The feature is intended for key system environments (a small office or branch office), such as an auto dealership or small bank with 4 trunks and 8 IP phones. On your IP930D handset, the call status icon is used with Bridged Call Appearances for incoming calls. If someone answers the call, the handset status icon changes to this . You can place an outbound call using a bridged call appearance so others users can view the call activity. To place an outbound call, press the programmed bridged call appearance button, dial the trunk access code and then dial the number. When an outbound call is placed, the status icon on the IP930D shows . If the call is placed on hold, the status icon shows . For more information about Bridged Call Appearances, see your system administrator. Silent Monitor / Barge In With the appropriate permissions (set by your system administrator for both your phone and the target phone), you can listen to a call without being heard, or join a call as a fully conferenced participant (“barge in”). • To silently monitor a call, dial *17, then the extension on which the call is active. • To barge in on a call, dial *16, then the extension on which the call is active. 38 Handset User Guide ShoreTel IP Phone 930D 2 Managing Calls Programmable Custom Buttons Note If you use the Silent Monitor and Barge In features often, consider asking your system administrator to configure a button for these features for easy access. Extension Monitoring A monitored extension is a custom key (set by your system administrator) that helps you manage incoming calls for that extension. It also serves as a shortcut when performing any of the following functions: dialing that extension, or using transfer, conference, call parking, call pickup and intercom with that extension. Additionally, you can see when the monitored extension has unheard messages. The phone displays icons in the monitored extension’s label area to help you determine the operational status of the monitored extension. Answering a Monitored Extension’s Call In addition to the visual cues the monitored extension’s icons provide, you will also hear a different ring when a call comes in, and if you are on a call, you will hear a higher pitched call waiting tone. An incoming call for a monitored extension appears on your phone as shown below. ShoreTel IP Phone 930D Handset User Guide 39 2 Managing Calls Programmable Custom Buttons You can pick up the call while it is ringing by first highlighting and then selecting the monitored extension using the 4-way controller (or by pressing the Answer soft key). You can send the call to the monitored extension’s voicemail by pressing To VM. You can also answer a call after the owner of the monitored extension has put it on hold by pressing the Pickup soft key. When you put a call on hold that has come in to the monitored extension, the call is parked on the owner’s phone, so that either of you may pick up the call again. The system administrator can configure your monitored extensions to deliver Caller ID for inbound calls, display Caller ID for active calls, and turn on, turn off, or delay the ringing for inbound calls. Whisper Page With the appropriate permissions (set by your system administrator for both your phone and the target phone), the Whisper Page feature lets you break into an active call in order to speak with an internal user. This occurs without the remote caller hearing the interruption and without you hearing the remote caller. To issue a Whisper Page to another user who is on a call, dial *19, then the extension of that user. Note The recipient must be using an supported ShoreTel IP Phone model. Ask your system administrator for a list of supported models. If a Whisper Page call is sent to an unsupported phone, such as a SoftPhone or an analog phone, the call will be treated as an intercom call. Picking Up the Night Bell A night bell, when activated by your system administrator, allows calls to route to an extension that will ring on an overhead speaker. This feature can be convenient for off-hours when a caller needs to speak with anyone at a site. If you have access to the night bell function (set by your system administrator), dial *14 to answer the call at your site. If you hear an error tone when you try to pick up the night bell, the feature may not be configured at your site or you may not have the necessary permissions. Contact your system administrator. Toggling the Hunt Group Status With the appropriate permissions, you can toggle the hunt group status from busy to not busy (or vice versa) by dialing *18, then the extension of the hunt group. This feature is especially useful when hunt group members are in a meeting or leave work early. If you are a member of more than one hunt group, you must enter the extension associated with the desired hunt group after dialing the access code above. 40 Handset User Guide ShoreTel IP Phone 930D 2 Managing Calls ShoreTel Communicator Software Overhead Paging If you have permission (set by your system administrator) to access the overhead paging system, dial the number given to you by your system administrator and wait for the confirmation tone, and then begin speaking. Hang up when you are finished. If you hear a re-order tone or intercept tone when you try to page, paging may not be configured at your site or you may not have the necessary permissions. Contact your system administrator. Using Group Paging Similar to the paging feature, you can also send an audible message to a select group of users that have been configured for group paging. By dialing the paging group extension associated with those users, you can record a message that will be broadcast over the individual speakers of those users’ ShoreTel IP phones. To use this feature, dial the Group Paging Extension given to you by your system administrator and wait for the confirmation tone. After you hear the tone, begin speaking. Hang up when you have finished recording. Your recording will be broadcast to other members of the Paging Group. Parking and Unparking Calls With the appropriate permissions (set by your system administrator), you can park a connected call on another extension by doing the following: 1. Press the Park soft key. 2. Dial the extension, press its button appearance, or use the Directory to find the party. 3. Press the Park soft key again. 4. To unpark the call, press Unpark, repeat step 2, and press Unpark again. ShoreTel Communicator Software You can accomplish many call management tasks from a computer with ShoreTel Communicator software. ShoreTel Communicator provides a visual interface for managing and controlling communications. The software works in concert with your IP930D to let you perform tasks such as dialing by name or number, changing the call handling mode, and interacting with voice messaging. ShoreTel Communicator software comes in five flavors: Personal Communicator Professional Communicator Workgroup Agent Communicator Workgroup Supervisor Communicator Operator Communicator For more information about ShoreTel Communicator and the features available to you, see your system administrator. ShoreTel IP Phone 930D Handset User Guide 41 2 Managing Calls Web Access Web Access ShoreTel Communicator for Web Access is a browser-based interface by which users can manage personal options and settings securely and easily from any web browser, anywhere in the world. For more information about web access and what features are available to you, see your system administrator. 42 Handset User Guide ShoreTel IP Phone 930D CHAPTER 3. Using Voicemail This chapter describes how to use the voicemail system with your ShoreTel IP930D and contains these main topics: Understanding Voicemail Indicators on page 43 Logging In on page 44 Using Your Voicemail Menu on page 44 Leaving a Message on page 49 Understanding Voicemail Indicators A steadily flashing light on your phone’s left-most upper corner and stutter dial tone signifies that you have unheard messages. The number of unheard messages appears on the idle screen of your phone’s display by the ShoreTel IP Phone 930D icon. Handset User Guide 43 3 Using Voicemail Logging In Logging In You can log into voicemail from your phone, from another extension, or from an external phone. Logging In from Your ShoreTel Phone To log in to the main voicemail menu on your phone, press the Voicemail button and go off hook on the handset or speaker. Alternately, you can press the Menu button, then press 2 on the keypad to select the Voice Mail menu item. At the login prompt, enter your password, then press the Voicemail button again. (Your default password is 1234.) Logging In from Another Extension To log in to the main voicemail menu from another extension, press the Voicemail button, followed by #, then your extension, followed by your password, and then #. To log in to the main voicemail menu from an analog phone, press # twice, then your extension, followed by your password, and then #. Logging In from an External Phone To log in to the main voicemail menu from an external phone, dial the voicemail access number provided by your system administrator, press #, then your extension, then your password, followed by #. Using Your Voicemail Menu You can use the voicemail menu to listen to and interact with messages, send messages from voicemail, access mailbox options, and more. Listening to and Interacting with New Messages From the Main Menu, you can listen to and replay new messages by pressing 1.To interact with new messages, do one of the following: 44 To replay the message, press 1. To save the message, press 2. To delete the message, press 3. Handset User Guide ShoreTel IP Phone 930D 3 Using Voicemail Sending Messages from Voice Mail To forward the message, press 4. When prompted, record a prefacing remark. Then choose an action from the sub-menu: To send, press #. To review, press 1. To re-record, press 2. To cancel recording, press *. After addressing the message, press 1 to mark it urgent, or hang up to send the message. To reply to the message, press 5. Then choose an action from the sub-menu: To reply with a voice message, press 1. To reply with a call back, press 2. To return to the previous menu, press *. To hear envelope information about the message (date and time sent), press 6. To “rewind” several seconds in the message, press 7. To pause the message, press 8. To “fast forward” several seconds in the message, press 9. To transfer to an assistant, press 0 twice. To continue to next message, press #. To continue message review, press *. Sending Messages from Voice Mail From the Main Menu, you can send messages by pressing 2. The following options are available while recording your message: To cancel, press *. To stop recording, press #. To review, press 1. To re-record, press 2. ShoreTel IP Phone 930D Handset User Guide 45 3 Using Voicemail Listening to Saved Messages After you are satisfied with your recording, you will be prompted to enter the recipient’s extension. At this time, you have the option to do the following: To choose additional addressing options, press 0. Then choose from the sub-menu: To look up recipient by name in a directory, press 1. To specify a personal distribution list, press 2. To broadcast to all extensions, press 3. To cancel addressing options, press *. After the message is addressed, if desired, you can choose one these: To mark / unmark urgent, press 1. To request return receipt, press 2. Listening to Saved Messages From the Main Menu, you can listen to saved messages by pressing 3. To interact with saved messages, press any one of the options under Listening to and Interacting with New Messages on page 44 (except for option 2). Accessing Mailbox Options Press 7 to access various options for your personal mailbox, then choose one of the following: To record a personal greeting, press 1. Note When you record a personal greeting, it is linked to the current active call handling mode. Record your personal greeting at the tone and press #, then select from the following options: 46 To accept your recording, press #. To review, press 1. To re-record, press 2. To delete, press 3. To cancel, press *. Handset User Guide ShoreTel IP Phone 930D 3 Using Voicemail Accessing Mailbox Options To choose a call handling mode, press 2, then choose one of the following: Standard, press 1. In a Meeting, press 2. Out of the Office, press 3. Extended Absence, press 4. Custom, press 5. Cancel, press *. Reassign extension If you have the proper permission, you can assign your extension to any phone. The following options are available: To assign the extension, press 1. To unassign the extension (the phone reverts to the extension originally assigned to it), press 2. To assign your extension to your last external number, press 3. Set your password Enter your new password, followed by # and repeat to confirm. Press * to cancel. Disable or enable envelope information To disable or enable envelope information, press 5. Use this option to turn on/off the envelope information which contains the date/time of the message, caller ID and/or the recorded name of the person who left the voice mail message. To record your name, press 6. Press # when you are finished recording your name, then choose from the following options: To accept your recording, press #. To review, press 1. To re-record, press 2. To delete and use default system recording, press 3. To cancel, press *. To listen to your deleted messages, press 7. Voicemail plays all the deleted messages still available to the system. During playback, you can manage deleted messages as if they were newly arrived messages. Press 2 to restore the deleted message to a saved message. ShoreTel IP Phone 930D Handset User Guide 47 3 Using Voicemail Logging Off To remove deleted messages, press 8, then press 1 to confirm or # to cancel. To access additional options, press 9, then choose one of the following: To enable or disable Outlook-automated call handling, press 1. To change e-mail delivery options, press 2, then choose one of the following: To disable e-mail delivery, press 1. To enable e-mail delivery, press 2. To enable e-mail delivery with voice message attached, press 3. To mark voice messages heard after e-mail delivery, press 8. To change agent state, press 3, then choose one of the following: To log in and assign extension, press 1. To log out, press 2. To log in without assigning extension, press 3. To change the Find Me forwarding state, press 5, then choose 1 for enable or 2 for disable. By enabling Find Me, callers who are routed to your voice mail box can be instructed to press 1 and the voicemail system will call you at one of two possible numbers where you can be located. To set the Find Me destinations, ask your system administrator or use Web Access. To return to the previous menu, press *. To cancel current operation, press *. Logging Off To log off, press 8. Returning to the Auto-Attendant To return to the auto-attendant, press 9. Transferring to Assistant To Transfer to the Assistant, press 0. Listening to Mailbox Status To listen to mailbox status, press #. Select this option to hear the number of unheard messages. 48 Handset User Guide ShoreTel IP Phone 930D 3 Using Voicemail Leaving a Message Leaving a Message When your call is sent to voice mail, leave a message when prompted, or use one of the following options while listening to the mailbox greeting: To bypass greeting and leave a message press #, then hang up to send it. To transfer to assistant, press 0. To forward to recipient’s Find Me destination (if enabled), press 1. To transfer to auto-attendant, press 9. After recording your message, select from one of the following options: To access Message Options, press #, then choose one of the following: To send message, press #. To cancel, press *. To review, press 1. To re-record, press 2. To mark / unmark urgent, press 3. To transfer to auto-attendant, press 9. To transfer to assistant, press 0. To re-record, press *. To send message, transfer main menu, press 0. To send message, forward to recipient’s Find Me destination (if enabled), press 1. To send message, transfer to auto-attendant, press 9. Note Hanging up sends the message. ShoreTel IP Phone 930D Handset User Guide 49 3 Using Voicemail 50 Handset User Guide Leaving a Message ShoreTel IP Phone 930D CHAPTER 4. Troubleshooting This chapter contains these main topics: Problems and Solutions on page 51 Viewing Phone Information on page 52 Quick Reference of IP930D Shortcuts on page 55 Problems and Solutions Problem: Handset does not turn on. Solutions: The battery may be dead. Place the handset in the charger and the handset should turn on and begin charging. If that does not work, try replacing the battery with a new one or one from another handset to check if the battery can no longer hold a charge. If the handset does not light when you place it in the charging stand during initial installation, check whether the outlet you are using is controlled by a switch that is off. Also check that all power connections are secure. Problem: Handset does not ring. Solution: Check that the ringer volume is not turned all the way down. Push the volume control + button to increase the ringer level. If the handset does not ring while in the charger, check the setting of the Silent Charging feature by following the procedure in Disabling Ringing while Charging on page 21 to make sure Silent Charging is turned off. ShoreTel IP Phone 930D Handset User Guide 51 4 Troubleshooting Viewing Phone Information Problem: Handset Displays “Deregistered.” Solution: Your handset has become deregistered. Contact your system administrator to have your handset re-registered. Note The re-register function in the Settings Menu under the Connection menu item will not work unless your administrator enables registration. Problem: Handset displays “Searching.” Solution: The handset is out of range of coverage or a component in the infrastructure has failed. For the latter, contact your system administrator. Viewing Phone Information To view information about your phone, such as IP address, subnet mask, version, and MAC address, follow these steps: 1. With the phone on hook, press the Mute button. 2. Dial I-N-F-O (4636) on the keypad and then press #. Note Viewing phone information as described in this topic should be done only at the direction of your system administrator. 52 Handset User Guide ShoreTel IP Phone 930D 4 Troubleshooting Viewing Phone Information The following information is displayed and can be scrolled through by pressing #: Base IP Address (DHCP or Static) Subnet Mask Gateway Handset IP Address Link Speed FTP Server Media Gateway Controller (MGC) Server SNTP Server 802.1Q Tagging and VLAN ID Application File Name Boot File Name MAC Config File MAC Config File Date Config File Date Country Language App Version Boot Version Handset App Version Base Model Number Handset Model Number Base MAC address Handset IPUI Base Hardware Version Handset Hardware Version 802.1x Enable LLDP Enable ShoreTel IP Phone 930D Handset User Guide 53 4 Troubleshooting Status Information Status Information Additional status information is available by following these steps: 1. Press and hold the Menu button for 3 seconds to display the Settings menu. 2. Use the 4-way controller to highlight the Status menu item and push the center button of the 4way controller to display this information: 54 Base Station SW Version HW Version IP Address MAC Address Handset SW Version HW Version DECT Band Battery Level IPUI Handset User Guide ShoreTel IP Phone 930D 4 Troubleshooting Quick Reference of IP930D Shortcuts Quick Reference of IP930D Shortcuts Task Enter this code Park a call *11 followed by the extension Unpark a call *12 followed by the extension Pick up a remote extension *13 followed by the extension Pick up a night bell *14 followed by the extension Use the intercom *15 followed by the extension Barge in *16 followed by the extension Silent monitor *17 followed by the extension Toggle hunt group status *18 followed by the extension Whisper page *19 followed by the extension Change the call handling mode and forwarding Menu button, 2 (Voicemail), password, #72 Change extension Assignment Menu button, 2 (Voicemail), password, #731 Unassign extension assignment Menu button, 2 (Voicemail), password, # 732 Assign extension to external number Menu button, 2 (Voicemail), password, # 733 Transfer a call (if OfficeAnywhere feature is configured) **, destination, ## Conference a call (if OfficeAnywhere feature is configured) **, destination, ** Hold a call (if OfficeAnywhere feature is configured) ** Hang up (if OfficeAnywhere feature is configured) ## ShoreTel IP Phone 930D Handset User Guide 55 4 Troubleshooting 56 Handset User Guide Quick Reference of IP930D Shortcuts ShoreTel IP Phone 930D CHAPTER 5. Important Information This chapter contains these topics: Battery and AC Adapter on page 57 Radio Frequency (RF) Exposure Information on page 58 Battery and AC Adapter Use only the supplied AC adapter and battery. Be sure to use the proper adapter for the charging stand. Do not place the power cord where it creates a trip hazard or where it could become chafed and create a fire or electrical hazard. Do not connect the AC adapter to an outlet controlled by a wall switch. Do not place the charging stand in direct sunlight or subject it to high temperatures. Fully charged, the battery should provide about 12 hours of talk time and about five days of standby time. For best results, return the handset to the charger after each call to keep it fully charged. When the battery gets too low, the handset shows a low battery alert. ShoreTel IP Phone 930D Handset User Guide 57 5 Important Information Rechargeable Battery Information If you hear a beep during a call, check the display: if you see the low battery alert , finish your conversation as quickly as possible and return the handset to the charger. With normal use, the battery should last about one year. Replace the battery when the talk time becomes short even when the battery is charged. Rechargeable Battery Information WARNING! There is a risk of explosion if the battery is replaced by the incorrect type. Do not open or mutilate the battery. Disconnect the battery before shipping this product. This equipment contains a rechargeable Lithium-Ion (Li-Ion) battery. The battery is not user-serviceable. Do not attempt to open the battery cell. In case of exposure to the cell contents, wash the affected area thoroughly and seek medical attention. Do not expose the battery to temperatures in excess of 140º F (60ºC). Do not short-circuit the battery. Exercise care when handling the battery around conducting materials such as rings, bracelets, and buttons: conducting materials can short the battery, and the battery or conductor can overheat and cause burns. When charging this equipment only use the charger designed to charge the battery. Using any other charger may damage the product or cause the battery pack to explode. Before placing the handset in the charger, make sure the battery is installed and the battery cover is securely in place. Do not place the batteries in your regular trash. All batteries must be recycled or disposed of in an environmentally sound manner. Contact your local waste management officials for information and regulations on the proper collection, recycling, and disposal of batteries. Rechargeable batteries must be recycled or disposed of properly. Radio Frequency (RF) Exposure Information This product complies with FCC radiation exposure limits under the following conditions: 58 The IP930D bases must be positioned in such a way as to allow a minimum of 20 cm (8 inches) between the antenna and all persons during normal operation. IP930D bases must not be co-located or operated in conjunction with any other antenna or transmitter. Handset User Guide ShoreTel IP Phone 930D 5 Important Information Radio Frequency (RF) Exposure Information The IP930D handset is designed for body-worn operation and meets FCC RF exposure guidelines when used with any belt clip, carrying case, or other accessory supplied with this product. All necessary accessories are included in the package; any additional or optional accessories are not required for compliance with the guidelines. Third party accessories (unless approved by the manufacturer) should be avoided, as these might not comply with FCC RF exposure guidelines. ShoreTel IP Phone 930D Handset User Guide 59