1
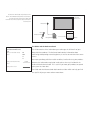
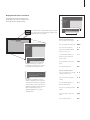
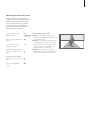
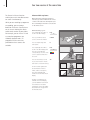
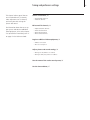
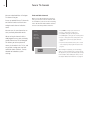
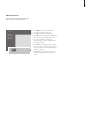
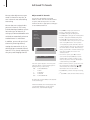
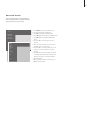
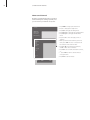
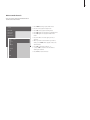
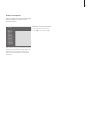
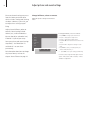
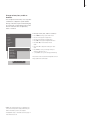
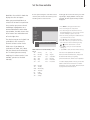
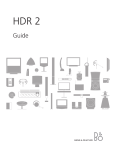
BeoVision 4–42
Guide
BeoVision 4–42 includes the products shown
above. The individual components are referred to
by their respective names in the Guide and
Reference book. The complete setup is referred to
as BeoVision 4.
BeoVision 4
plasma screen
IR receiver
Beo4
remote control
BeoSystem 2
An explanation of symbols
in the Guide and Reference
book
Buttons on the Beo4 remote
control
Cabinet
The Guide and the Reference book
TV
LIST
m
p
Display on the Beo4 remote
control
STORE
Display on the screen
T V 12
This Guide contains all the information you need to get the full benefit of your
Bang & Olufsen products. The Reference book contains information about
connecting and operating external equipment, as well as an overview of on-screen
menus.
We expect your Bang & Olufsen retailer to deliver, install and set up your products.
However, the information required to install and set them up is included in the
Guide and the Reference book. This is useful if you move your products or expand
your system at a later date.
The Guide and the Reference book both contain an index which can help you find
the specific subject you want to know more about.
Contents
Introducing your BeoVision 4, 4
Find out how to use the Beo4 remote control and bring up the menus on the
screen.
Daily use, 7
Find out all there is to know about daily use, including how to turn your system
into a Home Theatre for watching movies and how to use teletext functions.
Advanced operation, 15
All you need to know about using your system beyond daily use, such as advanced
teletext, set-top box operation, and the pincode system.
Tuning and preference settings, 25
Find out how to tune in channels. This chapter also contains information about
settings for time, date, picture and sound.
Index, 39
3
Introducing BeoVision 4 and Beo4
4
Only the buttons used with this product are
shown. Other buttons may be used with, for
example, connected equipment. For
information about how to operate connected
equipment, refer to the Guide enclosed with
it.
The Beo4 remote control gives you
access to all functions. When a
function is in use, you are informed
via displays on Beo4 or on the screen.
TV
TV
Switch on BeoVision 4
TV
FORMAT
SAT
Switch on a connected set-top box. Only available
if a set-top box is registered as STB (SAT)
SAT
Select channels or teletext pages. Enter data in onscreen menus
0–9
Switch on teletext
TEXT
Step between channels and move through menu
options
7
8
9
4
5
6
1
2
3
TEXT
0
MENU
m
p
The Beo4 display shows the source you have
selected, or extra functions available when you
press the LIST button
MENU
Bring up the main menu for access to a TV list,
timed playback and timed standby, and setup
options
STOP
Press to go from one menu back to a previous
menu
EXIT
Exit all on-screen menus
GO
Move the cursor from setting to setting in a fill-in
menu
Accept and store instructions or settings
l
n
GO
LIST
EXIT
r
u
Adjust sound volume. Press in the middle to mute
the sound
•
Switch BeoVision 4 to standby
STOP
Reveal additional functions in the Beo4 display,
such as FORMAT
LIST
For information on how to add extra functions to
those shown in the Beo4 display, refer to the
chapter ‘Customise Beo4’ on page 30 in the
Reference book.
5
Displayed information and menus
Option menu
Information about the selected source is
shown at the top of the screen. On-screen
menus allow you to adjust settings.
Menu
1 Timer play
2 TV list
3 Setup
Source Pr Start
TV
12
VOL
30
The selected source is shown briefly when you switch
it on. Volume level is shown while you adjust it, and
disappears after a few seconds.
Menu
TV
Stop
Date
1 13:30 - 14:30 27 Oct OK
Press MENU for Timer index
Fill-in menu
How to use option menus…
Press to switch on the system
TV
Press to bring up the main menu
MENU
Press to move through the
option menu and press GO to
enter your choice, or…
m p
GO
1 Timer play
2 TV list
3 Setup
Source Pr Start
TV
Stop
…use the number buttons on
Beo4 to select a numbered
option in a list
Date
1 13:30 - 14:30 27 Oct OK
1–9
Press MENU for Timer index
On-screen menus give you either a
vertical list of options to choose from or
a horizontal list of settings to fill in.
Source Pr Start
TV
Stop
Date
1 13:30 - 14:30 27 Oct OK
Press to go back to a previous
menu
STOP
Press to leave all menus
EXIT
How to use fill-in menus…
Press to view options for a single
setting in a fill-in menu
m p
Press MENU for Timer index
You can choose whether or not you
want the navigation cues in the menus
to be shown. The function is activated
from the factory, but you can choose to
deactivate it. Bring up ‘Menu’ from the
‘Setup’ menu and choose ‘On’ to
activate navigation cues or ‘Off’ to
deactivate them.
Press to move from setting to
setting
l
Press the number buttons on
Beo4 to enter settings
0–9
Press to store a setting you have
made
GO
Press to go back to a previous
menu
STOP
Press to leave all menus
EXIT
n
6
Daily use
This chapter contains information
about the basic functions of your
BeoVision 4.
For information about more
advanced operation, such as timed
playback and standby, and the
pincode system, refer to the chapter
‘Advanced operation’ on page 15.
Watch TV, 8
•
•
•
•
Select a TV channel
Bring up a TV list
Adjust or mute the volume
Change sound type or language
Home Theatre, 10
• Select speakers for movie sound
• Make the picture fill out the screen
Teletext, 12
•
•
•
•
Basic teletext functions
Store favourite teletext pages
Day-to-day use of memory pages
Activate subtitles from teletext
See two sources at the same time, 14
7
Watch TV
8
Select a TV channel directly or via a
list. Select a new source, adjust the
sound volume or change the sound
type or language.
Select a TV channel
Bring up a TV list
When you switch the system on, the last
channel viewed appears on the screen.
You can see a list of all your TV channels at
any time. The list contains channel numbers
and names, and can contain 99 TV channels.
Press to switch on the system
TV
Press to switch on the system
TV
TV 2
TV 2
Press a channel number to go
directly to that channel
0–9
Press and hold to bring up a TV
list on the screen
GO
Press to change channels one by
one
m
p
Press to view the previous or
following page of the TV list
l
Press to swap between the
current and the previous TV
channel
0
To select a channel, enter the
channel number, or…
0–9
Press to switch the system to
standby
•
…press until the desired channel
is highlighted
m
p
You can change source at any
time without switching the
system off first. Press for
example DVD, if available.
n
Press to switch on the chosen
channel
GO
Press to leave the menu
EXIT
You can also bring up the TV list
by pressing MENU to bring up
the main menu, and then
pressing 2 to select the TV list.
9
1
2
3
4
5
6
7
8
9
10
11
12
13
14
15
16
17
18
19
BBC 1
BBC 2
ITV
Super Ch
SKÝ
ZDF
Children
CNN
........
........
........
Eurosprt
........
........
MTV
The TV channel list. Dotted lines indicate that a
channel has been stored, but not named. An
empty slot in the list indicates that no channel has
been stored.
Adjust volume or mute the sound
Change sound type or language
You can adjust volume or mute the sound at
any time.
While you are watching TV, you can switch
between the types of sound that are
available.
Press either end of the button to
adjust the volume up or down
Press repeatedly to display
SOUND on Beo4
LIST
Press to bring up the current
sound type in the display
GO
Press repeatedly to switch to
another sound type or language
in a multi-language programme
GO
GO
Press to leave the SOUND
function
EXIT
r
u
Press in the middle of the button
to mute the sound
Press either end of the button to
bring the sound back
Prolonged listening at high
volume can cause hearing
damage!
r
u
In order to display SOUND on
Beo4, you must first add it to
the Beo4 list of functions. Refer
to the chapter ‘Customise Beo4’
on page 30 in the Reference
book.
You can store your favourite
sound type when tuning in your
TV channels. For further
information, refer to the chapter
‘Edit tuned TV channels’ on page
28.
SOUND
STEREO
Home Theatre
10
You can extend your system into a
fully equipped Home Theatre by
connecting six Bang & Olufsen
loudspeakers and a BeoLab 2
subwoofer*.
When you switch on one of the
sources, speakers in a surround
sound system can be cut in or out,
depending on what kind of sound
suits the source you are using.
A speaker combination may be
switched on automatically. This
happens if a broadcasted programme
contains information about the
number of speakers to be switched
on. You are still free to choose the
speaker combination you prefer.
*NOTE! For further information about how to
connect speakers, refer to the chapter
‘Loudspeaker setup – surround sound’ on page 15
in the Reference book.
Select speakers for movie sound
You can select the speaker combination that
suits the source you are using, provided that
the various sound modes are available in your
system.
Press repeatedly to display
SPEAKER on Beo4
LIST
Press the number of the speaker
combination you want. The
selected speakers cut in
automatically
1–5
Press to adjust the balance
between the front and rear
speakers
m
p
Press to adjust the balance
between the left and right
speakers
l n
Press to remove SPEAKER from
the Beo4 display and to return to
the source you were using
EXIT
SPEAKER
Speaker combinations
SPEAKER 1… Sound in the centre speakers only.
SPEAKER 2… Stereo sound in the two front
speakers. The BeoLab 2 subwoofer is active.
SPEAKER 3… The centre speakers, front speakers
and the BeoLab 2 subwoofer are active.
SPEAKER 4… Enhanced stereo sound in the front
and rear speakers. The BeoLab 2 subwoofer is
active.
SPEAKER 5… Surround sound from all speakers
including the BeoLab 2 subwoofer. For
programmes encoded in Surround Sound.
Your speaker setup determines which speaker
settings are available. For example, if you have
connected only front and centre speakers, you will
only be able to choose SPEAKER 1–3.
11
Make the picture fill out the screen
BeoVision 4 always ensures you the best
possible picture. It automatically adapts the
picture so that it fills out as much of the
screen as possible. However, you can still
choose the format you prefer. When you
select a format yourself, the automatic
format selection is deactivated.
Press repeatedly to display
FORMAT on Beo4
LIST
Press if you want to optimise the
picture, or…
GO
…press the number of the
desired picture format
FORMAT
1–3
If you have chosen Format 1…
Press to select variations of this
format
m
p
If you have chosen Format 2…
Press to move the picture up and
down
m
p
Press to leave the FORMAT
function
EXIT
Picture formats to choose from
FORMAT 1… For standard TV pictures. Two
variations are available: 4:3 and Panoramic view
(for the largest picture).
FORMAT 2… For letter-box pictures. When you
select FORMAT 2, the picture is automatically
adjusted vertically. This ensures that channel
names or subtitles – if these appear in the
broadcasted picture – can be seen.
FORMAT 3… For 16:9 widescreen pictures.
FORMAT 3 is usually selected automatically. If
this is not the case, you can select it yourself.
Teletext
12
If you select a channel and the
broadcaster offers a teletext service,
BeoVision 4 gives you access to
teletext pages.
To make your favourite teletext pages
appear first when you bring up
teletext, store them as memory
pages.
When you store the teletext subtitles
page as memory page number four,
you can activate subtitles for that
particular channel automatically.
NOTE! If BeoVision 4 is linked via a Master Link
cable to another television, stored memory pages
are not shared among these televisions. Memory
pages must be stored manually on each linked
television.
Basic teletext functions
Store favourite teletext pages
You can find information on teletext pages in
three steps: switch on the teletext service,
read the index page to find the desired page
number, and call up the desired page.
Four memory pages are available for each
channel’s teletext service.
Press to bring up the teletext
index page
TEXT
Press to bring up teletext
TEXT
Press the number of a teletext
page you want to see
0–9
Press the number buttons, or
m or p to go to a page you refer
to often
0–9
m
p
Press to move to the next or
previous page
m
p
Press repeatedly to display
STORE on Beo4
LIST
If the current page contains
subpages, you can press STOP
to pause subpage turning
STOP
Press to select the current page
for storing
GO
0–9
m
p
Enter the number of the memory
page you want to use
1–4
To view a particular subpage,
enter the four-digit number of
the desired page, or press
m or p to step to the page
Press to store the page as a
memory page, or…
GO
Press again to resume subpage
turning
STOP
Press to leave teletext and return
to the channel you were
watching
EXIT
…press to leave the STORE
function and return to teletext
without storing
Note that set-top box teletext
pages can be viewed, but not
stored as memory pages!
STORE
EXIT
13
Day-to-day use of memory pages
Activate subtitles from teletext
You may wish to refer to your teletext
memory pages quickly, for example, if you
are leaving for work and wish to check traffic
information on a teletext service.
You can activate subtitles for a channel, if
that channel offers teletext subtitles. The
teletext subtitles page number can often be
found in an index on teletext page 100.
Press to switch on a TV channel
which offers a teletext service
TV
Press to switch on teletext. The
page stored as memory page 1
appears automatically
TEXT
Press to view the other memory
pages
l
To view stored memory pages
from another channel’s
teletext service…
Press to return to channel
viewing
n
EXIT
Press to bring up teletext
TEXT
Press the number buttons or
m p to locate the teletext
subtitles page. Subtitles appear
on the screen
0–9
m
p
Press to cancel subtitles
EXIT
To store subtitles permanently
from the teletext subtitles
page…
Press repeatedly to display
LIST
STORE on Beo4
STORE
Press to select the page
GO
Press the channel number,
m or p to change channels
0–9
m
p
Press to store the subtitles page
as memory page number 4
4
Press to bring up teletext
TEXT
Press to return to TV viewing
TV
To cancel stored subtitles, simply
store another teletext page as
memory page number 4.
A typical teletext page. The current page number,
channel name, date and time appear at the top of
the screen, as well as a three-digit number
showing the progress of the page search function.
See two sources at the same time
14
The Picture-in-Picture function
enables you to see two video sources
on-screen simultaneously.
While you are watching a programme
or recording, you can prompt
BeoVision 4 to insert a small picture
on the screen showing the source
and channel number of your choice.
For example, you can view a TV and
a set-top box programme or a
videotape playback and a TV
programme at the same time,
provided that these sources are
available.
Picture within a picture
When the Picture-in-Picture function is
activated, operation with the Beo4 remote
control is directed at the small picture, but
the sound always follows the source shown
on the whole screen.
While watching e.g. TV…
Press repeatedly until P-IN-P* is
shown in the Beo4 display
LIST
P-IN-P
Press e.g. V TAPE to select a
source to view in the window
V TAPE
Press to swap the large and
small picture
0
Press repeatedly until P-IN-P is
shown in the Beo4 display, then
press the coloured button
corresponding to a corner of the
screen to place the window on
the screen
LIST
Press a source button, such as
TV, to cancel Picture-in-Picture
and return to normal TV viewing
TV
To view a source registered in
the ‘Connections’ menu as
V.AUX, such as a set-top box,
press LIST repeatedly until
P-V.AUX* is shown in the Beo4
display.
*If P-IN-P or P-V.AUX are not
available on the Beo4 display,
you must add them to the Beo4
list of functions. For further
information, refer to the chapter
‘Customise Beo4’ on page 30 in
the Reference book.
P-IN-P
Advanced operation
Find out how to operate BeoVision 4
beyond daily use.
This is also the chapter that informs
you of how to operate a connected
set-top box.
Advanced teletext functions, 16
• Extra teletext functions
• See updated teletext pages
• Go directly to a page via Fastext
Make your BeoVision 4 start and stop automatically, 18
•
•
•
•
Timed play and timed standby
Timed play via teletext
To activate the timed play function
View, edit or delete a Timer
Set-top box operation, 20
•
•
•
•
Set-top Box Controller menu
Universal Beo4 operation
Use the set-top box’s own menu
Use a set-top box in a link room
The pincode system, 22
•
•
•
•
Activate the pincode system
Change or delete your pincode
Use your pincode
Did you forget your pincode?
15
Advanced teletext functions
16
BeoVision 4 supports three extra
teletext functions: text enlargement
for easy reading, placement of a
teletext page over a TV picture, and
display of hidden text, such as the
answer to a quiz or joke.
BeoVision 4 can also notify you when
a desired page has been found or
updated. This is useful, for example,
if you want to see the latest news
headlines while watching TV.
If your teletext broadcaster offers a
Fastext service, you can use the
coloured buttons on Beo4 to step to
one of four linked teletext pages.
Basic teletext functions are described
on page 12.
NOTE! For information about presetting
recordings from teletext pages, refer to your video
tape recorder’s own Guide.
Extra teletext functions
See updated teletext pages
While using teletext, you can enlarge the
text, place the teletext page over the TV
picture or reveal hidden text.
BeoVision 4 supports the page update
function, provided by some teletext
broadcasters to announce that a teletext
page has been updated.
To enlarge the screen text
size…
Press repeatedly to display
LARGE on Beo4
Bring up the relevant teletext
page…
Press repeatedly to display
UPDATE on Beo4
LIST
L ARGE
LIST
UPDATE
Press to activate – the upper half
of the page is shown
GO
Press to activate
GO
When the page is found, FOUND
appears on the screen
FOUND
Press to view the lower half
Press to restore the normal text
size
GO
When the page has been
updated, UPDATE appears on
the screen
UPDATE
To keep the TV picture in
teletext…
Press repeatedly to display MIX
on Beo4
LIST
GO
Press to bring up the located or
updated page
GO
Press to leave teletext
EXIT
MIX
Press to superimpose the teletext
page on the TV picture
GO
Press to remove the TV picture
GO
To reveal hidden text…
Press repeatedly to display
REVEAL on Beo4
LIST
The function is cancelled when
you change channels.
REVEAL
Press to activate – if there is
concealed text on that page, it
becomes visible
GO
Press to remove the revealed text
GO
17
Go directly to a page via Fastext
Some teletext broadcasters offer a Fastext
service that enables you to step directly to
one of four linked teletext pages.
While the system is switched
on…
Press to bring up teletext
Press to find a Fastext page, or…
…enter the page number using
the number buttons
TEXT
m
p
0–9
A teletext page with the colour bar at the top
right indicating that it is a Fastext page.
Press one of the coloured
buttons on Beo4 to gain access
to the Fastext function. The titles
of the four linked pages appear
at the top of the screen
The titles of the four linked pages appear at the
top of the activated Fastext page, each with their
own colour.
Press the coloured button which
corresponds to the linked page
you wish to see
Press to leave Fastext and return
to normal teletext viewing, or…
…press to leave teletext
TEXT
EXIT
Make your BeoVision 4 start and stop automatically
18
You can use the timed play function if
there is a programme you do not
want to miss, or if you want a
morning wake-up call. Use timed
standby to make BeoVision 4 switch
off automatically when you leave for
work in the morning.
Enter as many as eight Timer settings,
and view all the Timer settings you
have entered. From this list, you can
edit or delete your Timer settings.
If your BeoVision 4 is integrated with
a Bang & Olufsen audio or video
system with a Master Link cable,
these systems can perform the timed
play or timed standby functions.
If you wish to enter Timer settings,
make sure that the built-in clock is set
to the correct time. For further
information, refer to the chapter ‘Set
the time and date’ on page 37.
Timed play and timed standby
You can preset BeoVision 4 to start and stop
automatically on a specific date and time, or
at the same time and day every week.
Menu
1 Timer play
2 TV list
3 Setup
Timer play
1 Set timer
2 Activate timer
Source Pr Start
TV
Date
Press MENU for Teletext programming
The system writes:
Jan… January
Feb… February
Mar… March
Apr… April
May… May
Jun… June
Mon…
Tue…
Wed…
Thu…
Fri…
Sat…
Sun…
NOTE! If BeoVision 4 is set up in a link room,
Timer programming must be carried out via your
main room system.
Stop
1 13:30 - 14:30 27 Oct OK
Monday
Tuesday
Wednesday
Thursday
Friday
Saturday
Sunday
Jul…
Aug…
Sep…
Oct…
Nov…
Dec…
July
August
September
October
November
December
To enter settings for timed play or timed
standby…
> Press MENU to bring up the main menu.
> Press GO to bring up the Timer play menu.
> Press GO to bring up the Set timer menu.
> Press l or n to move through menu
items.
> Press m or p to choose options for a menu
item. For example, set Source (source) to
Standby if you want to switch the system to
standby, or TV if you want to view a TV channel
at a specific time.
> Press the number buttons to fill in e.g. a channel
number or start and stop times.
> If you want to set Timers for certain days of the
week, press n to highlight Date and then press
MENU to change Date to Days. Select the
specific weekday(s) on which you want your
Timer executed. All the weekdays are displayed –
starting with M for Monday. Press n to move
through the days and press p to remove any
day you do not want. When the weekday(s) you
want are displayed, press GO. OK is then
highlighted.
> When you have filled in the required
information, press GO to store your Timer
settings, or…
> …press EXIT to leave all menus without storing.
19
Timed play via teletext
To activate the timed play function
View, edit or delete a Timer
It is also possible to program timed play
settings via teletext.
You must activate the timed play function in
order for your Timers to be executed.
Bring up an on-screen list of the Timer
settings you have entered. From this list, you
can edit or delete your Timer settings.
To enter timed play settings via teletext…
> Press MENU while Start (start) is highlighted to
bring up teletext.
> Enter the number of the teletext page you
want.
> When the page is found, press MENU to make
a timed play programming. A cursor highlights
the first start time on the list.
> Press m or p to move the cursor to the
programme you wish to make a timed play for.
> Press GO to accept the start time.
> Press m or p to move to the stop time you
want, and press GO to accept it.
> A line appears on top of the teletext page listing
the start and stop time, followed by ‘OK? ’.
> Press GO to store your timed play settings.
To activate the timed play function…
> Press MENU to bring up the main menu.
> Press GO to bring up the Timer play menu.
> Press 2 to bring up the Activate timer menu.
> Press m or p to reveal Yes. To switch off the
Timer play function, select No instead.
> Press GO to store your timed play settings, or…
> …press EXIT to leave all menus without storing.
To view, edit or delete your Timer settings…
> Press MENU while Source (source) or
Pr (program) is highlighted in the Set timer
menu to bring up a current Timer index of
previously entered Timer settings.
> Press p or m to move through the list to a
setting you wish to edit or delete.
> To edit a setting, press GO and follow the
procedure described earlier.
> To be able to delete a setting, press MENU. The
date is replaced by Clear?
> Press GO to delete the setting, or EXIT to keep
it.
If you connect a Bang & Olufsen audio or video
product to BeoVision 4 with a Master Link cable,
you can exclude or include it in timed functions
via the Timer play menu. For example, set the
BeoVision 4 Timer to Yes and the audio system
Timer to OFF if you wish timed functions to apply
only to BeoVision 4.
For further information about how to switch the
Play Timer on or off for a connected Bang &
Olufsen audio or video product, refer to the Guide
enclosed with the product.
Set-top box operation
20
The built-in Set-top Box Controller acts
as an interpreter between the set-top
box of your choice and the Beo4 remote
control. When a set-top box is
connected, you can use the Beo4
remote control to gain access to the
programmes and functions offered by
the set-top box.
For further information about how to
connect and register a set-top box, refer
to the chapter ‘Connect additional
equipment’ on page 19 in the Reference
book and the chapter ‘Register
additional video equipment’ on
page 32.
Set-top Box Controller menu
Some of the buttons on your set-top box
remote control are not immediately available
on Beo4. To find out which Beo4 buttons
activate specific services or functions in your
set-top box, bring up the Set-top Box
Controller menu on the screen.
If your set-top box is
registered as STB (SAT)…
Press to switch on the set-top
box
If your set-top box is
registered as STB (V.AUX)…
Press repeatedly to display
V.AUX on Beo4
Press to switch on the set-top
box
SAT
LIST
V.AUX
MENU
3
TEXT
4
INFO
5
WIDE
MENU
3
TEXT
4
INFO
5
WIDE
Example of a Set-top Box Controller menu – The
Beo4 buttons are shown to the left on the menu
and the set-top box buttons are shown to the
right.
Press to bring up the Set-top Box
Controller menu
MENU
Press the number button that
activates the function you want,
or…
1–9
If you have selected set-top box
as source, press MENU twice to
bring up the system’s main
menu.
GUIDE
2
GUIDE
2
GO
Then,
…press one of the coloured
buttons to activate a function
1
1
21
Universal Beo4 operation
Use the set-top box’s own menu
Use a set-top box in a link room
If you know which Beo4 button activates the
function you want, you can bring up the
function without activating the Set-top Box
Controller menu first.
Once you have activated your set-top box,
you can operate the set-top box’s own
menus, such as the Program Guide, via Beo4.
When your set-top box is connected to the
television in the main room, you can operate
the set-top box from the link room television.
However, the Set-top Box Controller menu
cannot be displayed on the television screen
in the link room.
While your set-top box is
activated…
Press GO and then the number
button that activates the
function you want
While the set-top box’s own
menu is shown…
Press to move the cursor up or
down
m
p
If your set-top box is
registered as STB (SAT)…
Press to switch on the set-top
box in the main room
Press to move the cursor
l
Press twice to select and activate
a function
GO
GO
If your set-top box is
registered as STB (V.AUX)…
Press repeatedly to display
V.AUX on Beo4
Press GO and then l or n to
step between menu pages or
step in program lists
GO
l n
Press to switch on the set-top
box in the main room
GO
Press to select a function, and…
GO
Press to exit menus, or return to
a previous menu*
STOP
Press to exit menus, enter or exit
different modes, such as radio
EXIT
GO
0–9
Press GO and then or
to step up or down through
programs directly
GO
m
p
Press and hold GO to bring up
the Program guide or the ‘Now/
Next’ banner on the screen
depending on your set-top box
GO
Use the coloured buttons as
indicated in the menus of your
set-top box
*Depending on your set-top box,
you may have to press EXIT
twice instead of STOP to return
to a previous menu.
n
…press the number button that
activates the function you want
Press one of the coloured
buttons to activate a function
SAT
LIST
V.AUX
1–9
The pincode system
22
You choose whether or not to
activate the pincode system. The
pincode system is deactivated when
you delete your pincode.
The pincode system is intended to
make normal use of BeoSystem 2
impossible for someone who does
not know the pincode.
When BeoSystem 2 has been
disconnected from the mains for 15–
30 minutes, the pincode system goes
into effect.
When reconnected and switched on,
BeoSystem 2 automatically switches
itself off after four minutes. Entering
the pincode returns BeoSystem 2 to
normal.
When the pincode system is active
and you reconnect your BeoSystem 2
to the mains, you may not be able to
switch it on immediately – wait
approximately 30 seconds and try
again.
Should you lose or forget your code,
contact your Bang & Olufsen retailer
to receive a mastercode which
disables your pincode.
Activate the pincode system
Menu
Change or delete your pincode
Pincode
1 Timer play
3 TV list
4 Setup
1 Delete code
2 New code
Pincode
----
Confirm pincode
----
While the system is switched
on…
Press to bring up the main menu
New pincode Confirm pincode
----
----
MENU
Press l twice, followed by
STOP. The Pincode menu
appears on the screen
l l
STOP
Use the number buttons on
Beo4 to enter the four digits of
your code
0–9
Press to move the cursor to
Confirm pincode when you have
entered your code once
n
Re-enter the code. If the two
codes are not identical, the input
fields are cleared and you must
enter the code again
0–9
Press to store the code
GO
To cancel a code entry…
Press to cancel a code entry, and
the input fields are cleared
STOP
While the system is switched
on…
Press to bring up the main menu
MENU
Press l twice, followed by
STOP. BeoSystem 2 prompts you
for your pincode
l l
STOP
Enter your pincode
0–9
PIN _ _ _ _
PIN ** _ _
If the code is incorrect, the input
fields are cleared and you must
enter the code again
PIN _ _ _ _
When you have entered your
code, the Pincode menu
prompts you to delete your code
or enter a new code
Press 1 to delete your code, or 2
to enter a new code
1
2
Enter the new code
0–9
Press to move the cursor to
Confirm pincode, when you have
entered your new code once
n
Re-enter the new code
NOTE! You can change your pincode up to five
times within a three-hour period.
Press to store the new code
GO
To cancel a pincode entry…
Press to cancel a code entry, and
the input fields are cleared
STOP
23
Use your pincode
Did you forget your pincode?
If BeoSystem 2 has been disconnected from
the mains for 15–30 minutes, BeoSystem 2
prompts you for the pincode when you
switch it on. You may not be able to switch
the system on immediately – wait
approximately 30 seconds and try again.
Contact a Bang & Olufsen retailer to receive a
five-digit mastercode.
Switch BeoSystem 2 on…
BeoSystem 2 prompts you for
your pincode
When you have received a
mastercode…
When BeoSystem 2 prompts you
for your pincode, press and hold
l to bring up the mastercode
display
Enter your pincode
PIN _ _ _ _
0–9
PIN * * _ _
The picture appears when the
last digit is entered
If an incorrect code is entered,
ERROR is shown. Re-enter the
code
To cancel a code entry…
Press to cancel a code entry, and
the input fields are cleared
Five incorrect entries cause
BeoSystem 2 to shut down for
three hours, during which time
operation is not possible.
PIN * * * *
ERROR
Entering this five-digit code
deactivates your pincode and
reactivates BeoSystem 2.
DELETED is displayed
PIN _ _ _ _
STOP
To use the pincode system
again…
Follow the procedure for
activating the pincode system
PIN _ _ _ _
l
PIN_ _ _ _ _
0–9
DELETED
24
Tuning and preference settings
This chapter informs you of how to
tune in and add new TV channels,
make adjustments to TV channels,
and enter your own settings for
picture and sound.
For information about how to set up
your system and connect additional
video equipment, refer to the chapter
‘Set up BeoVision 4 and BeoSystem 2’
on page 4 in the Reference book.
Tune in TV channels, 26
• Find available channels
• Add new channels
Edit tuned TV channels, 28
•
•
•
•
Adjust tuned TV channels
Move tuned channels
Name tuned channels
Delete tuned channels
Register additional video equipment, 32
• What is connected?
• Choose a set-top box
Adjust picture and sound settings, 34
• Change colour, brilliance or contrast
• Change volume, bass, treble or loudness
See the name of the active sound system, 36
Set the time and date, 37
25
Tune in TV channels
26
You can make BeoVision 4 find your
TV channels for you.
Preset up to 99 different TV channels
on channel numbers of their own
and give each channel a distinct
name.
Find available channels
When you set up BeoVision 4 for the first
time, you can tune in the TV channels that
are available in your area via the TV tuning
menu. BeoVision 4 finds available channels
and stores them by number and name.
You can tune in new channels or retune previously deleted channels.
When tuning in channels via the
Add program menu, your previously
tuned channels are left unchanged.
This allows you to keep channel
names, their order in the TV list, and
any special settings you may have
stored for those channels, such as
decoder or broadcast system
settings.
Press MENU to bring up the main menu.
Press 3 to bring up the Setup menu.
Press GO to bring up the Tuning menu.
Press GO again to bring up the TV tuning menu.
Press 3 to bring up the Auto tuning menu. The
Freq (frequency) and Pr (program) fields are
shown.
> Press m to start automatic tuning. The content
of the frequency and program fields show the
progress.
>
>
>
>
>
TV tuning
1
2
3
4
Edit TV list
Add program
Auto tuning
Manual tuning
Freq
Pr
210 12
When tuning is completed, you can rearrange,
delete or rename channels from a TV list. This list
also appears if you press STOP during auto tuning.
For information about editing the TV list, refer to
the chapter ‘Edit tuned TV channels’ on page 28.
27
Add new channels
You can add new or previously deleted TV
channels to your TV list at any time.
1
2
3
4
Edit TV list
Add program
Auto tuning
Manual tuning
Freq
Press MENU to bring up the main menu.
Press 3 to bring up the Setup menu.
Press GO to bring up the Tuning menu.
Press GO again to bring up the TV tuning menu.
Press 2 to bring up the Add program menu.
Press m to start adding new channels.
The Freq (frequency) and Pr (program) fields
show tuning progress.
> Press STOP to stop adding channels. You can
then move, rename or delete channels from a
list, as described in the chapter ‘Edit tuned TV
channels’ on page 28.
> Press EXIT when your channels have been
tuned in, named and placed in the order you
choose.
>
>
>
>
>
>
TV tuning
Pr
210 12
Edit tuned TV channels
28
You can make adjustments to your
tuned TV channels at any time, or
tune in channels not stored during
auto tuning.
You can also enter settings before
you tune in channels. These may
include choosing a broadcast system
for certain types of channels, or
setting up a connected decoder to be
switched on automatically whenever
a coded channel is switched on.
In addition, you can edit your list of
channels by renaming channels,
moving them around in the list, or
deleting all your unwanted channels
from the TV list, thereby reducing the
time you spend changing channels.
Adjust tuned TV channels
You can store TV channels on program
numbers of their own. Fine tune the channel
reception, indicate the presence of coded
channels and choose appropriate sound types
for the individual channels.
>
>
>
>
>
>
TV tuning
1
2
3
4
Edit TV list
Add program
Auto tuning
Manual tuning
Freq
Pr
210 1
Fine
0
Decoder
Off
Name
........
More
Sound
>
Stereo-2
If the item ‘System’ appears on the menu, then
make sure that the correct broadcast system is
displayed before you start tuning:
B/G… for PAL/SECAM B/G
I…
for PAL I
L…
for SECAM L
M…
for NTSC M
D/K… for PAL/SECAM D/K
All options may not be available, as this depends
on the television type.
If channel broadcasts are in two languages and
you want both languages, you can store the
channel twice, once with each language.
>
>
>
Press MENU to bring up the main menu.
Press 3 to bring up the Setup menu.
Press GO to bring up the Tuning menu.
Press GO again to bring up the TV tuning menu.
Press 4 to bring up the Manual tuning menu.
Press l or n to move between items on the
menu and m or p to view your choices for each
item. Pressing m when the cursor is placed
on Freq (frequency) starts automatic search for
a channel. Numeric values can be entered using
the number buttons on Beo4. When entering
names, press m or p to reveal the character you
want. Then press n to move to the next
character position.
To view more options, press n to move the
cursor to More and press GO. If you set the
item Decoder to On, Dec1 or Dec2, you can
return to the previous menu to start tuning in
coded channels by pressing GO.
When a channel is tuned in, you can also select
the sound system you want; press or to
switch between the sound modes currently
transmitted or fine tune the channel.
Press GO when you have entered your settings,
or…
…press EXIT to leave all menus without storing.
29
Move tuned channels
You can rearrange the order in which your
channels appear when you switch channels,
as well as in the on-screen TV list.
TV tuning
1
2
3
4
Edit TV list
Add program
Auto tuning
Manual tuning
>
>
>
>
>
>
1
2
3
4
5
6
7
8
9
10
11
12
13
14
15
16
17
18
19
BBC 1
BBC 2
ITV
SUPER CH
Sky
ZDF
CHILDREN
CNN
........
........
........
EUROSPRT
........
........
MTV
Press >> to
move
>
>
>
>
Press MENU to bring up the main menu.
Press 3 to bring up the Setup menu.
Press GO to bring up the Tuning menu.
Press GO again to bring up the TV tuning menu.
Press GO again to bring up the Edit TV list
menu.
Press p or m to move through your list of
channels.
When you find a channel you wish to move,
press n to move it out of the list.
Press p or m to move the channel to its new
location, or press the number of the new
location.
Press l to move the channel back into the list.
If it changes place with another channel, this
channel is moved out of the list and can be
placed elsewhere.
When you have moved your channels, press
EXIT to leave all menus.
30
>> Edit tuned TV channels
Name tuned channels
BeoVision 4 automatically names your tuned
channels during auto tuning, if possible, but
you can rename your channels at any time.
>
>
>
>
>
TV tuning
1
2
3
4
Edit TV list
Add program
Auto tuning
Manual tuning
>
1
2
3
4
5
6
7
8
9
10
11
12
13
14
15
16
17
18
19
BBC 1
BBC 2
ITV
SUPER CH
SKY
ZDF
CHILDREN
CNN
........
........
........
EUROSPRT
........
........
MTV
>
>
>
>
Press >> to
move
Freq
48
>
Pr
1
Name
BBC 1
More
Press MENU to bring up the main menu.
Press 3 to bring up the Setup menu.
Press GO to bring up the Tuning menu.
Press GO again to bring up the TV tuning menu.
Press GO again to bring up the Edit TV list
menu.
Press p or m to move through your list of
channels.
When you have found a channel you wish to
name, press GO. The cursor is located on the
first character in the channel name.
Press l or n to move between characters,
and m or p to choose characters.
Press GO to store a name and return to the list,
or…
…press STOP to return to the list without
storing the name.
Press EXIT to leave all menus.
31
Delete tuned channels
You can remove all your unwanted tuned
channels from the TV list.
>
>
>
>
>
TV tuning
1
2
3
4
Edit TV list
Add program
Auto tuning
Manual tuning
>
1
2
3
4
5
6
7
8
9
10
11
12
13
14
15
16
17
18
19
BBC 1
BBC 2
ITV
SUPER CH
SKY
ZDF
CHILDREN
CNN
........
........
........
EUROSPRT
........
........
MTV
Press GO
to delete
Del?
>
>
>
>
Press MENU to bring up the main menu.
Press 3 to bring up the Setup menu.
Press GO to bring up the Tuning menu.
Press GO again to bring up the TV tuning menu.
Press GO again to bring up the Edit TV list
menu.
Press p or m to move through your list of
channels.
When you have found a channel you wish to
delete, press MENU. Del? appears next to the
channel name.
Press GO to delete the channel, or…
…press STOP to return to the list without
deleting the channel.
Press EXIT to leave all menus.
Register additional video equipment
32
If you connect additional video
sources or equipment to BeoSystem 2,
you must register the equipment in
the Connections menu.
What is connected?
Registering the equipment connected to
BeoSystem 2 enables you to activate it with
the Beo4 remote control.
The settings you select in the
Connections menu tell BeoSystem 2
what is connected.
For information about where and
how to connect extra equipment,
refer to the chapters ‘Connect
additional equipment’ on page 19 in
the Reference book as well as ‘Socket
panels’ on page 12 in the Reference
book.
When your additional video
equipment has been connected and
registered in the Connections menu,
as described, you can operate it with
the Beo4 remote control.
*NOTE: Choose STB (SAT) for a primary set-top
box and STB (V.AUX) for a secondary set-top box.
1
2
3
4
5
6
Tuning
Sound
Picture
Connections
Menu
Clock
V. Tape
V. Tape
Press MENU to bring up the main menu.
Press 3 to bring up the Setup menu.
Press 4 to bring up the Connections menu.
Press n to select a socket.
Press m or p to step through the list of
available equipment types until you find what
you have connected. Select None if nothing is
connected.
> When you have selected your equipment types,
press GO to store your settings, or…
> …press EXIT to leave all menus without storing.
>
>
>
>
>
Setup
AV
DVD
Decoder
Decoder
Equipment you can connect to each socket
V.Tape
V.Tape… for a Bang & Olufsen video tape
recorder
DVD… for a DVD player
STB (SAT), STB (V.AUX)… for a set-top box*
None… if nothing is connected
AV
DVD… for a DVD player
STB (SAT), STB (V.AUX)… for a set-top box*
V.AUX… for other equipment
Non B&O V.Tape2… for a non-Bang & Olufsen
video tape recorder
V.Tape2… for a Bang & Olufsen video tape
recorder
S-VHS V.TP2… for a Super-VHS video tape
recorder
Decoder(2)… for a second decoder – connect
your primary decoder to the DECODER socket
Doorcam… for a door camera
None… if nothing is connected
Decoder
Decoder(1)… for a primary decoder or expander
box
STB (SAT), STB (V.AUX)… for a set-top box*
V.AUX… for other non-Bang & Olufsen
equipment
Non B&O V.Tape2… for a non-Bang & Olufsen
video tape recorder
None… if nothing is connected
33
Choose a set-top box
A list of set-top boxes to choose from appears
when you register a set-top box in the
Connections menu.
STB (V.AUX)
1
2
3
4
5
6
7
8
9
10
11
12
13
14
15
16
17
18
19
SELECTOR
NOKIA 9800S/02S
NOKIA 9602S
NOKIA 9820T
NOKIA 9200
NOKIA D-BOX II
NOKIA D-BOX
NOKIA 9850T
PACE DTR730-IM
PHILIPS DTX637x
PACE DSR600
SKY DIGITAL
CANALdig DK/S/N
CANAL+ SAT r2
CANALdigital I
CANALdigital E
CANALdigital NL
CANALdigital B+
MACAB DCB-101
If all sockets are in use, you can connect a second
set-top box to the Camcorder socket. Refer to the
chapter ‘Connect a set-top box or decoder’ on
pages 20–21 in the Reference book for further
information.
When the set-top box list appears…
> Press p to move down the list.
> Press GO to select your STB type.
Adjust picture and sound settings
34
Picture and sound settings are preset
from the factory to neutral values
which suit most viewing and listening
situations. However, if you wish, you
can adjust these settings to your
liking.
Adjust picture brilliance, colour or
contrast. Sound settings include
volume, bass, treble and loudness.
You can also adjust subwoofer level,
if BeoLab 2 is part of your setup.
Store your picture and sound settings
temporarily – until BeoVision 4 is
switched off – or store them
permanently.
For information about how to change
the picture format, refer to the
chapter ‘Home Theatre’ on page 10.
Change brilliance, colour or contrast
Adjust the picture settings via the Picture
menu.
Setup
1
2
3
4
5
6
Tuning
Sound
Picture
Connections
Menu
Clock
Brilliance
32
Colour
32
Contrast
20
To change brilliance, colour or contrast…
> Press MENU to bring up the main menu.
> Press 3 to bring up the Setup menu.
> Press 3 to bring up the Picture menu.
> Press l or n to move between the items on the
menu.
> Press m or p to adjust the settings for each
item.
> Press EXIT to store your settings until you
switch off BeoVision 4, or…
> …press GO to store your settings permanently.
For video sources using the NTSC signal a fourth
option – TINT (colour shade or nuance) – will be
available for adjustment.
35
Change volume, bass, treble or
loudness
You can adjust sound volume, select a speaker
combination or adjust the speaker balance
directly on Beo4 at any time without bringing
up a menu, but you must bring up the Sound
menu in order to be able to adjust bass,
treble or loudness.
To change volume, bass, treble or loudness…
> Press MENU to bring up the main menu.
> Press 3 to bring up the Setup menu.
> Press 2 to bring up the Sound* menu.
> Press GO to bring up the Adjustment menu.
> Press l or n to move between menu
items.
> Press m or p to adjust the settings for each
item.
> Press EXIT to store your settings until you
switch off BeoVision 4, or…
> …press GO to store your settings permanently.
Setup
1
2
3
4
5
6
Tuning
Sound
Picture
Connections
Menu
Clock
Sound
1
2
3
4
5
Adjustment
Speaker type
Speaker distance
Speaker level
Sound system
Volume
Counter
The content of the ‘Sound’ menu depends on how
many speakers are connected.
BassTapeTreble
SpeedLoudness
PDC&VPS
32 used
0 2400 SP OnOn
Time
Marker
On
*NOTE! The Sound menu lets you calibrate your
surround sound speaker setup permanently. For
further information, refer to the chapter
‘Loudspeaker setup – surround sound’ on page 15
in the Reference book.
See the name of the active sound system
36
The surround sound module in your
television allows you to see which
active sound system is currently
playing on the source or programme
you are watching.
The sound system is an integrated
part of a programme or, for example,
a DVD disc. Therefore, as the sound
system is distributed to you from the
broadcaster, you can not preset a
sound system in this menu.
A given sound system signal may
automatically switch on the speaker
combination considered optimal for
the specific sound system. You can
always choose to disregard such
automatic change in speaker
combination. For further information,
refer to the chapter ‘Home Theatre’
on page 10.
Sound systems that can appear in the menu
are: Dolby Digital, Dolby Surround Pro Logic,
Dolby 3 Stereo, Dolby Digital + Dolby
Surround Pro Logic, Mono/Stereo and DTS
Digital Surround.
Sound
1 Adjustment
2 Speaker type
3 Speaker distance
4 Speaker level
5 Sound system
Press MENU to bring up the main menu.
Press 3 to bring up the Setup menu.
Press 2 to bring up the Sound menu.
Press 5 to bring up the Sound system menu.
The current sound system is shown. Mono/
Stereo appears if Dolby sound is not active.
> Press EXIT to exit all menus.
>
>
>
>
Set the time and date
BeoVision 4 has a built-in clock that
displays the time on request.
When you preset BeoVision 4 to
switch itself on or off at a particular
time, or when you preset a timed
recording of a programme on a
connected BeoCord V 8000 video
tape recorder, the clock ensures that
these features are switched on and
off at the right times.
The simplest way to set the clock is to
synchronise it with a tuned TV
channel’s teletext service via the
Clock menu. If you choose to
synchronise the clock, this is done
with the teletext service offered by
the TV channel you are currently
watching. If a teletext service is not
available, you can set the clock
manually.
Before synchronising the clock with a tuned
channel, make sure that the channel you are
watching offers a teletext service.
Setup
1
2
3
4
5
6
Tuning
Sound
Picture
Connections
Menu
Clock
Time
Date
Year
Synch
14:25 Fri 2 Nov 2001 No
Abbreviations for month and day of the
week
Jan… January
Jul…
July
Feb… February
Aug… August
Mar… March
Sep… September
Apr… April
Oct… October
May… May
Nov… November
Jun… June
Dec… December
Mon…
Tue…
Wed…
Thu…
Fri…
Sat…
Sun…
Monday
Tuesday
Wednesday
Thursday
Friday
Saturday
Sunday
37
To bring up the clock on the screen, press LIST
repeatedly to display CLOCK* on Beo4, then
press GO. The time appears briefly and then
disappears.
> Press MENU to bring up the main menu.
> Press 3 to bring up the Setup menu.
> Press 6 to bring up the Clock menu. Time is
already highlighted. It is only necessary to enter
the time manually if Synch is set to No.
> Enter the time by pressing the number buttons
on your Beo4 remote control.
> Press l or n to move through menu items.
> Press m or p to see your options for a menu
item. Select the current channel by pressing
or until the channel name is shown.
> Press GO to store your clock and calendar
settings, or…
>…press EXIT to leave all menus without storing.
If the clock is not updated in the transition
between summer and winter time, simply select
the channel with which you originally
synchronised the clock, and the clock is updated.
*In order to display CLOCK on Beo4, you must first
add it to the Beo4 list of functions. For further
information, refer to the chapter ‘Customise Beo4’
on page 30 in the Reference book.
38
Index
Beo4 remote control
Add a ‘button’ to the Beo4 list, Reference book
p. 30
Changing the Beo4 batteries, Reference book
p. 11
Get access to extra equipment via Beo4, 33
Introducing BeoVision 4 and Beo4, 4
Move extra ‘buttons’, Reference book p. 31
Remove a ‘button’ from the Beo4 list,
Reference book p. 31
Set up Beo4, Reference book p. 30
Using Beo4, 4
BeoLink
BeoVision 4 in a link room – connection,
Reference book p. 28
BeoVision 4 in a link room – operation,
Reference book p. 29
Distribute sound and picture, Reference book
p. 26
Link connections, Reference book p. 26
Link frequency, Reference book p. 27
Link socket – Master Link, Reference book p. 26
System modulator, Reference book p. 27
39
Close-up socket panel on BeoSystem 2,
Reference book p. 14
Connect speakers, Reference book p. 16
Connect the screen to BeoSystem 2, Reference
book p. 10
Decoder – AV or RF decoder, Reference book
p. 22
Decoder – Two decoders, Reference book p. 22
Headphones, Reference book p. 14
Link connections, Reference book p. 26
Register and use additional video equipment,
32
Set-top box – Alternative set-top box
connection, Reference book p. 21
Set-top box – AV connection, Reference book
p. 20
Set-top box – IR transmitter, Reference book
p. 20
Socket panels, Reference book pp. 12–13
What’s on the Connections menu, Reference
book p. 39
Contact
Contact Bang & Olufsen, 42
Decoder
Camcorder
Connect a Camcorder, Reference book p. 14
Copy from a Camcorder to a videotape,
Reference book p. 14
Watch Camcorder on BeoVision 4, Reference
book p. 14
Connect AV or RF decoder, Reference book
p. 22
Connect two decoders, Reference book p. 22
Socket panels, Reference book pp. 12–13
Displays and menus
Clock
Enter settings for the built-in clock, 37
What’s on the Clock menu, Reference book
p. 38
Displayed information and menus, 5
On-screen display, 5
On-screen menus, Reference book pp. 33–39
Format
Connections
Additional video equipment, Reference book
p. 19
– AV 2 Expander, Video tape recorder, DVD player,
Game console, Camcorder, etc.
Aerial and mains connection, Reference book
p. 10
Audio system – connect to BeoSystem 2,
Reference book p. 24
How to choose a picture format, 11
Headphones
Close-up socket panel on BeoSystem 2,
Reference book p. 14
40
>> Index
Home Theatre
Pincode
Make the picture fill out the screen, 11
Select speakers for movie sound, 10
Activate the pincode system, 22
Change or delete your pincode, 22
Did you forget your pincode?, 23
Use your pincode, 23
IR receiver
Enable Beo4 operation – connect the
IR receiver, Reference book p. 9
Placement
Place BeoVision 4, Reference book p. 4
Placing external speakers, Reference book p. 15
Language
Change sound type or language, 9
Loudspeakers
Calibrate the sound level, Reference book p. 18
Connect speakers, Reference book p. 16
Place external speakers, Reference book p. 15
Select speakers for movie sound, 10
Set speaker distance, Reference book p. 17
What’s on the Speaker distance menu,
Reference book p. 37
What’s on the Speaker level menu, Reference
book p. 37
What’s on the Speaker type menu, Reference
book p. 37
Maintenance
BeoVision 4, Reference book p. 11
Changing the Beo4 batteries, Reference book
p. 11
Plasma screen
Connect the screen to BeoSystem 2, Reference
book p. 10
Handling the screen, Reference book p. 4
Maintenance, Reference book p. 11
Mount the screen to the wall bracket,
Reference book p. 6–8
Sockets, Reference book p. 13
Set-top box
Alternative set-top box connection, Reference
book p. 21
Set-top Box Controller menu, 21
Set-top box – AV connection, Reference book
p. 20
Set-top box – IR-transmitter, Reference book
p. 20
Set-top box operation, 20
Socket panels
Master Link
BeoVision 4 in a link room, Reference book
p. 28
Connect and operate an audio system,
Reference book p. 24
Distribute sound and picture with BeoLink,
Reference book p. 26
Picture
Adjust brilliance, colour or contrast, 34
Make the picture fill out the screen, 11
Picture within a picture, 14
What’s on the Picture menu, Reference book
p. 39
Additional sockets, Reference book p. 13
AV and aerial socket panel, Reference book
p. 12
Close-up socket panel on BeoSystem 2,
Reference book p. 14
Connect additional equipment, Reference
book p. 19
Plasma screen socket panel, Reference book
p. 13
Speaker and digital input socket panel,
Reference book p. 13
41
Sound
Tune
Adjust or mute the sound, 9
Adjust volume, bass, treble or loudness, 35
Calibrate the sound level, Reference book p. 18
Change sound type or language, 9
Choose a speaker combination, 10
See the name of the active sound system, 36
Select speakers for movie sound, 10
What’s on the Adjustment menu, Reference
book p. 36
Activate subtitles from teletext, 13
Add new channels, 27
Adjust tuned channels, 28
Delete tuned channels, 31
Find available channels, 26
Move tuned channels, 29
Name tuned channels, 30
What’s on the Add program menu, Reference
book p. 35
What’s on the Auto tuning menu, Reference
book p. 35
What’s on the first TV manual tuning menu,
Reference book p. 36
What’s on the second TV manual tuning
menu, Reference book p. 36
Surround sound
TV channels
Loudspeaker setup – surround sound,
Reference book pp. 15–18
Select speakers for movie sound, 10
Speaker and digital input socket panel,
Reference book p. 13
Add new channels, 27
Adjust tuned channels, 28
Delete tuned channels, 31
Find available channels, 26
Move tuned channels, 29
Name tuned channels, 30
See the channel list, 8
Select a TV channel, 8
What’s on the Edit TV list menu, Reference
book p. 35
Subtitles
Teletext
Activate subtitles from teletext, 13
Basic teletext functions, 12
Go directly to a page via Fastext, 17
Store favourite teletext pages – memory
pages, 12
Teletext – large, mix and reveal, 16
Updated teletext pages, 16
Timer
Activate the timed play function, 19
Enter settings for the built-in clock, 37
Make your BeoVision 4 start and stop
automatically, 18
Timed play via teletext, 19
To view, edit or delete a Timer, 19
What’s on the Activate Timer menu, Reference
book p. 34
What’s on the Set Timer menu, Reference book
p. 34
Wall bracket
Mount BeoVision 4 to the wall bracket,
Reference book p. 8
Mount the wall bracket, Reference book pp. 6–
8
42
For your information…
This product fulfils the conditions stated
in the EEU directives 89/336 and 73/23.
Til det norske marked:
Mekaniske og elektroniske komponenter i
produktene slites ved bruk. Det må derfor
påregnes reparasjoner og utskiftning af
komponenter innenfor kjøpslovens
reklamasjonstid, som må regnes som vedlikehold
av produktene. Slik vedligehold gir ikke grunnlag
for å rette mangelskrav mot forhandler eller
leverandør, og må bekostes af kjøper.
Your needs as a user are given careful
consideration during the design and
development process of a Bang & Olufsen
product and we strive to make our products
easy and comfortable to operate.
Therefore, we hope that you will take the
time to tell us about your experiences with
your Bang & Olufsen product. Anything
which you consider important – positive or
negative – may help us in our efforts to refine
our products.
Manufactured under license from Dolby
Laboratories. “Dolby” and the double-D
symbol are trademarks of Dolby Laboratories.
Confidential unpublished works.
Copyright 1992–1997. All rights reserved.
DTS and DTS Digital Surround are registered
trademarks of Digital Theater Systems, Inc.
Thank you!
Write to:
Bang & Olufsen a/s
Customer Service
dept. 7205
Peter Bangsvej 15
DK–7600 Struer
or fax:
Bang & Olufsen
Customer Service
+45 97 85 39 11 (fax)
or e-mail:
[email protected]
Visit our Web-site on…
www.bang-olufsen.com
Technical specifications, features and the use
thereof are subject to change without notice.
3508764
0401
Printed in Denmark by Bogtrykkergården a-s, Struer
www.bang-olufsen.com