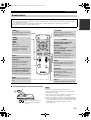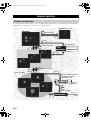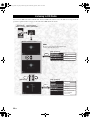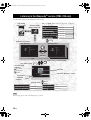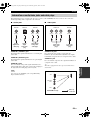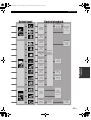
1
01EN_00_YMC-700_500_U.book Page 1 Wednesday, April 8, 2009 11:46 AM
U
Media Controller
YMC-700
YMC-500
OWNER’S MANUAL
01EN_00_YMC-700_500_U.book Page 1 Wednesday, April 8, 2009 11:46 AM
CONTENTS
Contents
INTRODUCTION
Features ................................................................... 2
Notices ....................................................................... 3
Supplied accessories .................................................. 3
Front/side/top panel ................................................... 4
Remote control........................................................... 5
Viewing photos........................................................ 27
Slide show................................................................ 27
Shuffle browsing...................................................... 27
Using the photos as a screen saver .......................... 27
Enjoying contents stored on your iPod ...............28
Listening to music contents ..................................... 29
Watching video contents ......................................... 29
Repeat play and shuffle play.................................... 29
Listening to Internet Radio
(YMC-700 only).................................................30
Listening to the Rhapsody® service
(YMC-700 only).................................................32
SETUP
Controls and functions ........................................... 4
Viewing photos stored on your PC
(YMC-700 only) or USB device........................26
INTRODUCTION
IMPORTANT
Before installing this unit, be sure to read the supplied
Quick Start Guide.
Useful functions....................................................... 33
Enjoying Bluetooth™ components ......................35
SETUP
Before starting the Initial Setup............................... 10
Step 1: Auto Speaker Setup ..................................... 10
Step 2: TV Remote Control Setup ........................... 13
Step 3: Source Device Setup.................................... 14
General operation ................................................. 18
Screens and operation .............................................. 18
Basic playback operation......................................... 19
Regular pop up menu items ..................................... 19
Setup menu ............................................................36
Setup menu tree ....................................................... 36
Initial Setup.............................................................. 37
Speaker menu .......................................................... 37
Sound menu ............................................................. 38
Input menu ............................................................... 39
Network menu (YMC-700 only) ............................. 40
Rhapsody® Information menu
(YMC-700 only).................................................. 41
Remote Control menu.............................................. 42
Option menu ............................................................ 43
Signal Information ................................................... 44
Update menu............................................................ 44
ADVANCED
OPERATION
BASIC OPERATION
ADVANCED OPERATION
BASIC
OPERATION
Connections ............................................................. 6
Remote control connection .................................... 8
Placing speakers...................................................... 9
Initial Setup ........................................................... 10
Pairing...................................................................... 35
Enjoying the contents on an external devices .... 20
Listening to FM Radio ......................................... 22
Automatic station preset .......................................... 23
Recalling a preset station ......................................... 23
Frequency tuning ..................................................... 23
Editing the station preset list.................................... 23
Listening to music stored on your PC
(YMC-700 only) or USB device ....................... 24
ADDITIONAL INFORMATION
Troubleshooting.....................................................45
Glossary..................................................................51
Information on audio/video jacks and
cable plugs ........................................................... 53
Information on HDMI™.......................................... 54
Specifications .........................................................55
Quick reference .....................................................56
Before enjoying the contents on your PC
(YMC-700 only).................................................. 25
Playing music files................................................... 25
Repeat play and shuffle play.................................... 25
■ About this manual
• This manual describes how to operate this unit using a remote control. Most operations are also available using the buttons on the
top panel.
• y indicates a tip for your operation.
• Notes contain important information about safety and operating instructions.
• This manual is printed prior to production. Design and specifications are subject to change in part as a result of improvements, etc.
In case of differences between the manual and the product, the product has priority.
1 En
ADDITIONAL
INFORMATION
Watching/listening to the source content................. 20
Using the remote control to operate external
devices from the playback screen........................ 21
Using virtual remote control to operate external
devices ................................................................. 21
01EN_00_YMC-700_500_U.book Page 2 Wednesday, April 8, 2009 11:46 AM
FEATURES
Features
Thank you for your purchasing a Yamaha neoHD. The neoHD can control all of your devices through a simplified remote
control unit and stylish/intuitive graphical user interface. Enjoy the Yamaha neoHD experience.
Stylish and Intuitive
Graphical User Interface
Variety of
Input Sources
Surround Sound
Video
Power
Control
Power and
Playback
Control
Audio
Audio
and
Video
Simplified
Remote Control
Easy and intuitive operation
Digital audio decoders
◆ Sophisticated graphical user interface
◆ Power control of connected TV and audio/video components
◆ Physical and virtual remote control to control playback of
connected audio/video components
◆ Dolby TrueHD, Dolby Digital Plus, Dolby Digital decoder
◆ DTS 96/24, DTS decoder
Audio features
◆ Decoding and mixing of multi-channel sources (up to
7.1-channel input and 5.1-channel output)
◆ Proprietary Yamaha technology for the creation of sound
fields (DSP Program)
◆ AIR SURROUND XTREME for 2.1-channel speaker layout
◆ Compressed Music Enhancer mode
◆ YPAO (Yamaha Parametric room Acoustic Optimizer)
technology for Auto Speaker Setup
◆ Adaptive Dynamic Range Controlling to improve listenability
at low volumes
HDMI™ (High-Definition Multimedia Interface)
◆ HDMI interface for standard, enhanced or high-definition
video as well as multi-channel digital audio based on HDMI
version 1.3a (HDMI is licensed by HDMI Licensing, LLC.)
– Automatic audio and video synchronization (lip sync)
information capability
– Deep Color video signal (30/36 bit) transmission capability
– “x.v.Color” video signal transmission capability
– High resolution video signal capability
– High definition digital audio format signal capability
◆ HDCP (High-bandwidth Digital Content Protection System)
licensed by Digital Content Protection, LLC.
◆ Analog to HDMI video up conversion
2 En
Radio tuner
◆ FM tuning capability, 40-station preset tuning
DOCK terminal
◆ DOCK terminal to connect a Yamaha iPod universal dock
(such as the YDS-11, sold separately) or Bluetooth wireless
audio receiver (such as the YBA-10, sold separately)
Network (YMC-700 only) and USB features
◆ NETWORK port and Wi-Fi to connect a PC or access Internet
Radio and Rhapsody® via LAN
◆ DHCP automatic or manual network configuration
◆ USB port to connect a USB storage device (not including
USB hard disk drives)
Notes
• This unit supports USB mass storage class devices (FAT 16
or FAT 32 format).
• This unit supports audio files in following format: WAV
(PCM format only), MP3, WMA, MPEG-4 AAC, and
FLAC.
• For FLAC, the unit only supports bit lengths of 16 bits.
Frequencies of up to 48 kHz are supported.
• This unit supports image files in the JPEG format.
01EN_00_YMC-700_500_U.book Page 3 Wednesday, April 8, 2009 11:46 AM
Features
Notices
Supplied accessories
Check that you received all of the following accessories.
POWER
TV
POWER
GUIDE
MENU
ENTER
PREV.
Manufactured under license under U.S. Patent #’s: 5,451,942;
5,956,674; 5,974,380; 5,978,762; 6,226,616; 6,487,535 & other
U.S. and worldwide patents issued & pending. DTS and DTS
Digital Surround are registered trademarks and the DTS logos,
Symbol and DTS 96/24 are trademarks of DTS, Inc. © 1996-2008
DTS, Inc. All Rights Reserved.
iPodTM
INTRODUCTION
Manufactured under license from Dolby Laboratories.
Dolby, Pro Logic and the double-D symbol are trademarks of
Dolby Laboratories.
EXIT
CONTROL
BACK
CH
VOL
PAGE
MUTE
Power cable
(☞ P. 6)
Remote control
(☞ P. 5)
Battery
(AAA, LR03) ×2
(☞ P. 5)
YPAO Microphone
(YPAO Mic)
(☞ P. 11)
Indoor FM antenna
(☞ P. 7)
IR flasher (3 m) ×2
(☞ P. 8)
Quick Start Guide
(☞ P. 14)
“iPod” is a trademark of Apple Inc., registered in the U.S. and
other countries.
MPEG Layer-3 audio coding technology licensed from
Fraunhofer IIS and Thomson.
“HDMI”, the “HDMI” logo and “High-Definition Multimedia
Interface” are trademarks, or registered trademarks of HDMI
Licensing LLC.
x.v.Color™
“x.v.Color” is a trademark of Sony Corporation.
Rhapsody and the Rhapsody logo are registered trademarks of
RealNetworks, Inc.
The Wi-Fi CERTIFIED Logo is a certification mark of the Wi-Fi
Alliance.
IMPORTANT
Before installing this unit, be sure
to read the Quick Start Guide.
Windows XP, Windows Vista, Windows Media Audio, Windows
Media Connect and Windows Media Player are either registered
trademarks or trademarks of Microsoft corporation in the United
States and/or other countries.
This product is manufactured under license from Allegro
Software Development Corporation. ©1996-2008 Allegro
Software Development Corporation. All rights reserved.
3 En
01EN_00_YMC-700_500_U.book Page 4 Wednesday, April 8, 2009 11:46 AM
CONTROLS AND FUNCTIONS
Controls and functions
Front/side/top panel
Power indicator
Lights up when this unit is
turned on.
WIRELESS antenna
(YMC-700 only)
CONTROL,
u / d / j / i,
ENTER,
BACK
These buttons work in the same way
as the corresponding buttons on the
remote control. (☞ P. 5)
POWER
TV
POWER
GUIDE
MENU
ENTER
PREV.
EXIT
CONTROL
BACK
CH
VOL
Within
6 m (20 ft.)
30°
30°
Remote control
sensor
Volume knob
Controls the volume level.
YPAO Mic jack
Used for Auto Speaker
Setup. (☞ P. 10)
Turns on this unit or sets it to the standby mode.
Note
In the standby mode, this unit consumes a small amount of power
in order to receive infrared-signals from the remote control.
4 En
01EN_00_YMC-700_500_U.book Page 5 Wednesday, April 8, 2009 11:46 AM
Controls and functions
Remote control
POWER
Turns on this unit or sets it to the
standby mode. (☞ P. 19, 43)
• MENU
• GUIDE
• EXIT
• PREV.
• CH u / d
POWER
TV
POWER
GUIDE
MENU
ENTER
These buttons work differently
depending on the currently
selected source component.
(☞ P. 21)
PREV.
EXIT
CONTROL
BACK
CH
VOL
PAGE u / d
When the playback screen is
displayed
These buttons work differently
depending on the currently
selected source component.
(☞ P. 21)
PAGE
MUTE
MUTE
Mutes the audio output of this
unit.
4
1
2
3
Batteries (supplied)
Make sure you insert the batteries as
indicated by the polarity markings
(+ and –).
j / i / u / d /ENTER
When the GUI screen or the
virtual remote control is
displayed
Move the highlight with j / i / u / d and
select it with ENTER.
When the playback screen is
displayed
These buttons work differently
depending on the currently selected
source component. (☞ P. 21)
BACK
Returns to the previous menu level.
Press and hold to return to the top
menu level.
CONTROL
Turns on or off the pop up menu and
virtual remote control.
Press and hold to return to the top
menu level.
Turns on this unit. (☞ P. 43)
When the virtual remote control
or contents list is displayed
These buttons scroll up/down the
virtual remote control or contents list.
■ Installing batteries in the remote control
TV POWER
Turns on the TV or sets it to the
standby mode individually while this
unit is turned on.
VOL +/–
Controls the volume level of this unit.
Notes
• Do not use an old battery together with a new one.
• Do not use different types of batteries (for example, alkaline
and manganese) together.
• If the batteries run out, immediately remove them from the
remote control to prevent an explosion or acid leak.
• Dispose of the batteries according to the regional regulations.
• If a battery starts leaking, dispose of it immediately. Be careful
not to let leaking battery acid come into contact with your skin
or clothing. Before inserting new batteries, wipe the
compartment clean.
5 En
INTRODUCTION
IMPORTANT
• To control TV and source components, you need to make remote control connections (☞ P. 8) and set the remote
control code (☞ P. 13, 14).
• To control a TV or source component, aim the remote control at the remote control sensor of this unit.
Operating instructions for activities (☞ P. 18-35)
01EN_00_YMC-700_500_U.book Page 6 Wednesday, April 8, 2009 11:46 AM
Connections
Make sure that this unit and
other components are
unplugged from the AC wall
outlets.
Remote control
Connect the supplied IR flashers to
the REMOTE CONTROL OUT 1 and 2 jacks.
y
You can attach the IR flashers to any of the
components used in conjunction with this
unit because the same signal is output from
the REMOTE CONTROL OUT 1, 2, and 3 jacks.
☞ P. 8
IR flashers
(supplied)
USB storage device
00
YMC-7
only
Wired network
Modem
Be sure to insert in the
proper direction.
You can connect
or disconnect USB
storage devices
while this unit is
turned on.
WAN
LAN
Router
Supported devices
☞ P. 2
PC
Setup ☞ P. 25, 40
Use CAT-5 or higher
STP cable
Power cable
IN
OUT
1
Power cable
(supplied)
3
HDMI OUT
AUDIO IN
2
R
REMOTE CONTROL
To AC
wall outlet
AC IN
2
1
NETWORK
USB
R
L
FRONT
R
L
SURROUND CENTER
3
L
SUB
WOOFER
3
OUTPUT
SPEAKERS
Speaker cables
Subwoofer
cable
Speakers and Subwoofer
Center
Speaker
Front
Speakers
Speaker layout ☞ P. 9
Also refer to the supplied Quick Start Guide.
Subwoofer
Surround
Speakers
Caution
· Be sure to use speakers with 6 ohm or higher impedance.
· Do not let the bare speaker wires touch each other or do not let them touch any metal part of this unit.
This could damage this unit and/or speakers.
· Be sure to connect the left channel (L), right channel (R), “+” and “–” properly. If the connections are
faulty, this unit cannot reproduce the input sources accurately.
· If speakers have color coded terminals, match the color. If not, connect the striped (grooved, etc.)
cable to the “+” terminals of this unit and your speaker and connect the plain cable to the “–” terminals.
6 En
01EN_00_YMC-700_500_U.book Page 7 Wednesday, April 8, 2009 11:46 AM
Connections
TV
Wireless network
00
YMC-7
only
SETUP
Modem
TV
WAN
Router
HDMI IN
PC
Setup ☞ P. 25, 40
HDMI cable
FM antenna
Indoor FM antenna (supplied)
1
NETWORK
3
2
HDMI OUT
AUDIO IN
R
3
2
VIDEO IN
1
HDMI IN
L
WIRELESS
DOCK
1
R
L
SURROUND CENTER
SUB
WOOFER
OUTPUT
3
2
ANTENNA
FM
75 Ω
UNBAL.
If you experience poor
reception quality, install
an outdoor antenna.
Consult the nearest
authorized Yamaha dealer
or service center about
outdoor antennas.
KERS
Audio/Video components
Connect your audio/video components
to these jacks. Refer to the supplied
Quick Start Guide for connections.
iPod dock/Bluetooth receiver
Connect a Yamaha iPod
universal dock (such as
the YDS-11, sold separately)
or Bluetooth wireless
audio receiver (such as
the YBA-10, sold separately)
using its dedicated cable.
Yamaha iPod universal
dock or Bluetooth wireless
audio receiver
7 En
01EN_00_YMC-700_500_U.book Page 8 Wednesday, April 8, 2009 11:46 AM
Remote control connections
You can control your TV and the components connected to this unit using the remote control of this unit by connecting
the IR flashers between this unit and the components, and by setting the IR codes. You can also turn on or off the TV and
the components in conjunction with the operation of this unit.
TV
Note
While this unit is turned on, this unit passes all remote control
codes (of the TV and source devices) input at the remote control
sensor to the TV and the devices via IR flashers.
About the remote control codes
This unit equips built-in remote control codes for most
functions of many audio/video components. The
remote control codes can be “learned”, assigning them
to the remote control of this unit or to the virtual
remote control (☞ P. 21). The unit transmits the proper
codes to the different devices through the IR flasher.
Source device
■ Connections
TV
Peel off the wax paper
before attaching the flashers.
SENSOR
IN
OUT
1
USB
3
2
REMOTE CONTROL
Source device
AC IN
R
FRONT
SPE
SENSOR
To other
source devices
Connect the plugs of the supplied IR flashers to the
REMOTE CONTROL OUT 1 and 2 jacks, and attach the
flashers to the remote control sensors of your TV and the
components connected to this unit. The supplied IR flashers
have two flasher heads each. Both flasher heads function
equivalently. You can also connect a commercially available
flasher to the REMOTE CONTROL OUT 3 jack.
y
• You can connect the IR flashers to any of the REMOTE
CONTROL OUT 1, 2, and 3 jacks because the same signal is
output.
• Refer to the owner’s manual of the TV and source devices for the
position of the remote control sensor.
■ Settings
Make the following settings.
• The IR setting for your TV
Initial Setup ☞ P. 10, Setup Menu ☞ P. 42
• The IR settings for the components connected to this
unit
Initial Setup ☞ P. 10, Setup Menu ☞ P. 39
• Other settings
“Initial Screen” menu ☞ P. 43
8 En
■ Operations
To control the TV and the components connected to this
unit, aim the remote control at the remote control sensor of
this unit.
Enjoying the contents on an external device ☞ P. 20
About the REMOTE CONTROL IN jack
You can connect a commercially available IR receiver
to this jack to control this unit even if it is concealed.
Place the IR receiver within sight.
01EN_00_YMC-700_500_U.book Page 9 Wednesday, April 8, 2009 11:46 AM
Placing speakers
The speaker layout below shows the speaker setting we recommend.
■ 5.1-channel speaker layout
C
FR
FL
FR
SW
FL
30˚
SETUP
C
SR
SL
SR
60˚
SL
80˚
SR
SL
FL: Front left speaker
FR: Front right speaker
C: Center speaker
SR: Surround right speaker
SL: Surround left speaker
SW: Subwoofer
■ 2.1-channel speaker layout
FR
FL
FR
FL
SW
30˚ to 60˚
FL: Front left speaker
FR: Front right speaker
SW: Subwoofer
You can enjoy 2.1-channel playback using two front
speakers and a subwoofer. Also, you can enjoy surround
playback using the AIR SURROUND XTREME function
of this unit (☞ P. 38, 51).
For other speaker combinations
You can enjoy multi-channel sources by using a
speaker combination other than the 5.1-channel or
2.1-channel speaker combinations.
9 En
01EN_00_YMC-700_500_U.book Page 10 Wednesday, April 8, 2009 11:46 AM
Initial Setup
Once all the connections are finished, optimize this unit for your watching/listening/playing environment by using the
“Initial Setup” menu.
Step 1: Auto Speaker Setup
Step 2: TV Remote Control Setup
Step 1: Auto Speaker Setup
Auto Speaker Setup (YPAO) uses unique technology to
optimally calibrate the frequency response and level
according to the speaker configuration, characteristics,
and their distance.
1
Turn on the TV, then set the video input
source selector of the TV to “HDMI 1” (etc.).
Refer to the owner’s manual of the TV for details.
2
Turn on the connected source devices and
subwoofer.
3
Press POWER to turn on this unit.
The “neoHD” logo mark appears, followed by the
“Initial Setup” menu.
Step 3: Source Device Setup
Before starting the Initial Setup
Make sure of the following check points.
❏ Speakers are connected appropriately.
❏ The IR flashers are correctly connected to this
unit and attached to the connected components.
❏ The connected subwoofer is turned on and the
volume level is set to about half way (or slightly
less).
❏ The crossover frequency control of the
connected subwoofer is set to the maximum.
VOLUME
CROSSOVER
HIGH CUT
y
MIN
MAX
MIN
MAX
Controls of a subwoofer (example)
❏
The room is sufficiently quiet.
Notes
• Be advised that it is normal for loud test tones to be output
during the Auto Speaker Setup procedure.
• To achieve the best results, make sure the room is as quiet as
possible while the Auto Speaker Setup procedure is in progress.
If there is too much ambient noise, the results may not be
satisfactory.
10 En
If the Initial Setup menu does not appear, check the
following check points:
– Is the video input source selector of the TV set correctly?
– Is the TV connected to this unit correctly?
– Is the TV turned on?
– Is this unit connected to the AC wall outlet?
01EN_00_YMC-700_500_U.book Page 11 Wednesday, April 8, 2009 11:46 AM
Initial Setup
4
Select “Yes” to start the initial setup procedure.
POWER
TV
POWER
GUIDE
MENU
6
Connect the supplied YPAO Mic to the YPAO
MIC jack.
(Left side)
ENTER
PREV.
CONTROL
EXIT
BACK
Use these buttons to operate during
the Initial Setup procedure. ☞ P. 5
YPAO MIC
The following screen appears:
SETUP
Top
YPAO Mic
y
If you select “No”, the Initial Setup procedure will be
skipped. You can perform it in Setup menu later. (☞ P. 37)
5
Select “Yes” to enter the Auto Speaker Setup
menu.
Read the displayed message carefully.
7
Place the YPAO Mic at your normal listening
position.
y
It is recommended that you use a tripod, the backrest of the sofa,
etc. to affix the YPAO Mic at the same height as your ears would
be when you are seated in your listening position. You can use the
attached screw of a tripod (etc.) to fix the YPAO Mic to the tripod
(etc.).
YPAO Mic
If you select “No”, the Auto Speaker Setup procedure
will be skipped. You can perform it later. (☞ P. 37)
Continued
11 En
01EN_00_YMC-700_500_U.book Page 12 Wednesday, April 8, 2009 11:46 AM
Initial Setup
If a warning message (☞ P. 50) appears
Before proceeding to the next operation
Once you perform the next operation, this unit starts the Auto
Speaker Setup procedure in 10 seconds. During the Auto
Speaker Setup procedure, do not perform any operation on
this unit. For more accurate measurements, we recommend
that you get out of the room or move to a wall away from any
speakers in the meantime. It takes a few minutes.
8
Select “Start” to start the measurement.
This unit starts the count down for the measurement.
Warning message (example)
If the warning message “SWFR LEVEL ERROR”
appears, the adjustments are made, but the adjustment
may not be optimal. Select “Next” to continue the
process.
9
Loud test tones are output from each speaker during
the measurement. Once all items are measured, the
following screen appears:
Yes:
No:
Speaker is connected.
Speaker is not installed, or speaker cable
is disconnected.
Too Loud: Subwoofer (SWFR) only. The level of
the subwoofer is too high.
Too Low: Subwoofer (SWFR) only. The level of
the subwoofer is too low.
If you are not satisfied with the result, check the
speaker connections and/or subwoofer level, then
select “Retry”.
y
Results (example)
If you want to proceed with the Initial Setup process without
using the result of the measurements, select “Cancel”.
If an error message (☞ P. 50) appears
10
Error message (example)
• Solve the problem (☞ P. 50), then select “Retry” to
retry the measurement.
• Select “Cancel” to cancel the setup process.
12 En
Check the status of each speaker, then select
“Save” to proceed with the Initial Setup
process.
The speaker statuses are as follows:
Disconnect the YPAO Mic from this unit and
select “OK”.
The YPAO Mic is sensitive to heat. Keep it away
from direct sunlight.
01EN_00_YMC-700_500_U.book Page 13 Wednesday, April 8, 2009 11:46 AM
Initial Setup
Step 2: TV Remote Control Setup
3
By making the TV remote control settings, this unit will
control the power of the TV in accordance with the power
of this unit.
Save:
Test:
Change Code:
Learn Code:
Select “Yes” to start the TV Remote Control
Setup procedure.
Cancel:
Confirm the displayed setting.
Perform the function test.
Select another code.
Jump to the TV Remote Code
Learning screen. (☞ P. 42)
Select this if you want to program
the remote control code manually.
Skip the TV remote control
settings. You can set them later.
(☞ P. 42)
4
Check the information, then select “Test”.
The “TV Remote Code Test” screen appears.
5
Read the displayed information, then select
“Start” to start the function test.
The following test screen appears:
If you select “No”, the TV Remote Control Setup
procedure will be skipped. You can perform it later.
(☞ P. 42)
2
Select the brand of the TV connected to this
unit.
Press CH u / d to skip through the brand list
alphabetically.
Press PAGE u / d to scroll the list page by page.
Note
This unit tries to turn off/on the TV for test purposes.
Continued
13 En
SETUP
1
Select the TV remote control code.
When multiple remote control codes are displayed,
select the first one. Registration confirmation
appears.
01EN_00_YMC-700_500_U.book Page 14 Wednesday, April 8, 2009 11:46 AM
Initial Setup
6
Check whether the TV turned on and off
correctly.
Step 3: Source Device Setup
y
• To cancel the TV Remote Code Test procedure, press
BACK.
• If the TV turns off during the test and does not turn back
on after waiting over a minute, turn the TV on using the
TV’s remote control.
7
When the following message appears, select
“Yes” or “No - Try next code”.
y
Prepare the A Connection Planning Chart of the Quick Setup
Guide in advance.
In these instructions, the examples assume that the
connections below are made.
Device 1
Select “Yes” to finish the TV Remote Code Test
procedure or “No - Try next code” to check another
remote control code. When you select “No - Try next
code”, the test mode of the other code starts
immediately.
Cable box
Time W
CB-528
15 pt
Note
This unit does not contain all possible codes for
commercially available TVs. If this unit does not turn the
TV off/on with the codes provided for that brand, select
“Learn Code” to recall the TV Remote Code Learning
screen (☞ P. 42) and program the remote control code
manually.
9 pt
3 pt
3 pt
8
Select “Save” to finish the TV remote control
code setting and proceed with the Initial
Setup process.
y
When you want to set the TV remote control code again,
select “Change Code”.
14 En
2 pt
1 pt
15 pt
01EN_00_YMC-700_500_U.book Page 15 Wednesday, April 8, 2009 11:46 AM
Initial Setup
1
Select “Yes” to start the input source device
setting.
The “Source Device Setup” screen appears.
4
y
When you want to change the setting, select “Retry”.
If you want to discard the setting, select “Cancel”.
Select the type of the device.
5
Device 1
Cable box
Time W
CB-528
Select “Yes” to set the remote control code
of the device.
The “Source Device Setup - Remote Control” screen
appears.
Cable TV
SAT - Satellite TV
DVD
If you select “Other” in step 2, you need to select the
type of the input source device. For example, select
“Cable TV”.
y
You can change the name of input source displayed in the
source menu screen (☞ P. 18) to the desired one later
(☞ P. 40).
3
Select the terminal to which the source
component is connected.
y
You can skip the remote control code settings and set them
later. (☞ P. 40)
6
Select the brand of the device.
Press CH u / d to skip through the brand list
alphabetically.
Press PAGE u / d to scroll the list page by page.
7
Select the remote control code.
When the selected brand has multiple remote control
codes, select the first one.
2 pt
1 pt
15 pt
HDMI 1
15 points
If you select “Game” in step 2, “Will you use this
device to Watch Movies?” appears. Select “Yes” or
“No” in accordance with the intended use.
Continued
If you select “DVD”, “Blu-ray”, or “Game” in step 2,
“Will you use this device to Listen to CD’s?” appears.
Select “Yes” or “No” in accordance with the intended
use.
15 En
SETUP
The device type, connection method, and names of
the input displayed in the Watch/Listen/Play source
menu screens (☞ P. 18) are shown.
If you select “No”, the Source Device Setup
procedure will be skipped. You can perform it later.
(☞ P. 39)
2
Check the confirmation screen, then select
“Yes”.
01EN_00_YMC-700_500_U.book Page 16 Wednesday, April 8, 2009 11:46 AM
Initial Setup
8
Check the confirmation screen, then select
“Test”.
The following test screen appears:
11
y
• If you want to discard the setting and make a new setting,
select “Change Code”.
• If this unit does not control the device with any of the
codes provided for the brand, select “Learn Code” to recall
the Remote Code Learning screen (☞ P. 40) and program
the remote control code manually.
The remote control code being tested
NEXT CODE
Virtual remote control
9
12
Select “Yes” to register another input source
device and repeat steps 2 to 11 until all
devices listed in the Quick Start Guide are
set.
13
Select “No” to complete the input source
device registration.
14
Select the first screen to be displayed when
you turn on this unit by pressing POWER or
CONTROL.
For example, you can set this unit to display the cable
box (STB) screen when you turn on this unit by
pressing CONTROL.
Function of the
selected button
Test some of the controls on the virtual
remote control which is displayed on the
screen to check whether the controls
function correctly.
u / d / j / i: Moves the highlight.
ENTER: Tests the function.
We recommend that you select some buttons besides
“ (Power On/Off)” to test the function.
If controls do not function properly, select “NEXT
CODE” at the left edge of the virtual remote control.
The remote control code switches and you can try the
next remote control code. (Example: from Yamaha1
to Yamaha2)
Note
If the brand has only one set of remote control codes,
“NEXT CODE” does not function.
10
When you find a proper remote control code,
select “Save” to complete the registration.
When you find the remote control code
works (or not), press BACK on the remote
control to return to the confirmation screen.
16 En
01EN_00_YMC-700_500_U.book Page 17 Wednesday, April 8, 2009 11:46 AM
Initial Setup
15
Select “OK” to complete the Initial Setup
procedure.
SETUP
y
You can change the first screen to be displayed later.
(☞ P. 43)
17 En
01EN_00_YMC-700_500_U.book Page 18 Wednesday, April 8, 2009 11:46 AM
General operation
Screens and operation
To control playback and make settings, operate the GUI (graphical user interface) screen displayed on the TV using the
supplied remote control. In most cases, the screen changes as follows.
[Setup menu] ☞ P. 36
[Top menu]
ENTER
Select “Setup
Setup”
BACK
CONTROL
[Pop up menu]
ENTER
[Source menu]
Select an activity
☞ Next page (Source
Reorder
menu screen only)
BACK
Now playing
☞ Next page
(Example)
CONTROL
ENTER
Select a source
BACK
CONTROL
[Source screen]
[Virtual remote control
for external source
devices] ☞ P. 21
Disc+
Disc –
(Example)
Select the “Pop up menu”
icon
Examples
ENTER
[Pop up menu]
☞ Next page
DSP Program
☞ Next page
Audio Adjustment
CONTROL
18 En
etc.
01EN_00_YMC-700_500_U.book Page 19 Wednesday, April 8, 2009 11:46 AM
General operation
Remote control operations for the GUI
GUIDE
MENU
Moves the highlight up
Selects the item
Moves the highlight right / Moves to the next menu
Moves the highlight left / Moves to the previous menu
Moves the highlight down
ENTER
PREV.
EXIT
CONTROL
BACK
Displays the pop up menu or the virtual remote control /
Returns to the top menu (press and hold)
Returns to the previous menu / Returns to the top menu (press and hold)
Basic playback operation
Press POWER or CONTROL to turn
on this unit.
1
POWER
Connection ☞P. 8, IR setting ☞P. 42,
TV Power Control ☞P. 42
2
Select an input source.
Select an input source using the GUI screen on
the TV. Refer to the previous page and the
instructions above. The source component turns
on automatically. You can change the behavior of
the power control function.
Connection ☞P. 8, IR settings ☞P. 40,
Source Power Control ☞P. 42
ENTER
3
Start playback on the selected
component.
or
Select a program or file to play back.
You may need to make some settings before
beginning playback.
Playback instructions ☞ P. 22-35
4
Adjust the volume level.
You can mute the sound by pressing MUTE.
MUTE
VOL
5
Make various settings using the pop
up menu.
Regular pop up menu items
☞“Regular pop up menu items” on this page.
Pop up menu items provided for the different
sources ☞P. 22-35
6
POWER
Press POWER to turn off this unit.
If you have finished the remote control settings
for the TV and components connected to this
unit and IR flashers are connected/attached
correctly, those components turn off
automatically.
The following pop up menu items are available on the top menu,
the source menu, or the playback screen for all sources:
Now Playing
Select this menu to jump back to the playback screen of
the source that is currently being played.
Reorder
Select this menu to reorder the icons on the source menu
screen. Move the icon using u / d / j / i then press ENTER.
Audio Adjustment
Select this menu to adjust the sound settings (bass/treble/
subwoofer level). Change the value using j / i.
Parameter
Value
Treble / Bass
–6 to +6
SWFR Level
–20 to +20
DSP Program
Select this menu to select a DSP program.
DSP Program
Feature
Movie
For movie contents.
Entertainment
For TV programs, video games, etc.
Live Music
For music contents.
Music Enhancer
For compression artifacts (such as the MP3
format). This program enhances your
listening experience by regenerating the
missing harmonics in a compression artifact.
All Channel Stereo
To output stereo sound from all
speakers.
Off
To enjoy unprocessed sound.
y
• You can select a DSP Program for each activity of each source
individually so that you can easily recall the input sources
together with your favorite DSP Program.
• The DSP program is turned “Off” when decoding Dolby
TrueHD and Dolby Digital Plus sources, as well as PCM
sources of over 96 kHz.
y
You can turn on/off the TV by pressing TV POWER.
19 En
BASIC
OPERATION
If you have finished the TV remote control setting
and an IR flasher is connected/attached correctly,
the TV turns on automatically. You can change
the behavior of the TV power control function.
Regular pop up menu items
01EN_00_YMC-700_500_U.book Page 20 Wednesday, April 8, 2009 11:46 AM
Enjoying the contents on an external devices
By connecting external components (players/recorders, STBs, game consoles, etc.) to this unit, you can enjoy the
contents played back on the components with rich surround sound. Also you can control the components with the remote
control of this unit by connecting/attaching the IR flashers and making the remote control code settings.
An example of selecting an activity
[Top menu]
Select an activity
[Source menu]
Select the
desired source
etc.
Watching/listening to the source
content
[Playback
aybac sc
screen]
ee ]
CONTROL
[Virtual remote control]
☞ next page
1
Select the desired source on the source
menu screen.
The source device turns on automatically. You can
change this setting. ☞ P. 42
2
Start playing back the content or desired TV
program by using the supplied remote
control or the virtual remote control.
Disc+
POWER
TV
POWER
GUIDE
MENU
Disc –
Setup Display Angle
Audio Subtitle
ENTER
ENTER
1
6
L
L
1
8
2
7
L
L
2
9
3
8
L
3
L
10
4
9
L
4
L
11
5 +100/10
0
L
5
L
12
Ent
L
6
L
13
PREV.
L
7
EXIT
CONTROL
BACK
CH
VOL
PAGE
MUTE
L
14
Select the “Pop up
menu” icon
ENTER
CONTROL
DSP program
Audio adjustment
[Pop up menu]
☞ P. 19
☞ P. 19
☞ Next page
y
• When the virtual remote control is not displayed, you can
control the menu screen of the DVD, etc.
• If you do not use the IR flashers, control playback using
the remote controls of the individual component.
20 En
01EN_00_YMC-700_500_U.book Page 21 Wednesday, April 8, 2009 11:46 AM
Enjoying the contents on an external devices
Using the remote control to operate external devices from the playback screen
While the playback screen is displayed, you can control the source component using the buttons shown below (☞ step 2
of the previous page). Aim the remote control at the remote control sensor of this unit.
Make sure that you have finished the remote control settings for the component and an IR flasher is connected/attached correctly.
Button on the remote control
GUIDE
MENU
u
d
j
i
ENTER
PREV.
EXIT
CH u
CH d
PAGE u
PAGE d
DVD
DVR
Apple TV
CD
—
—
—
Stop
Pause
Skip Down
Skip Up
—
—
—
—
—
—
Play
—
—
Skip Up
Skip Down
Disc Up
Disc Down
• When the virtual remote control is displayed, the shaded buttons do not function as listed above, but control the virtual remote control.
• Some buttons may not work depending on the source device or the source contents.
Using virtual remote control to operate external devices
You can control the components connected to this unit using the virtual remote control. The function of each button is
displayed at the right bottom of the screen.
Make sure that you have finished the remote control settings for the component and an IR flasher is connected/attached correctly.
Control guide
Current input and
DSP Program
Function of the
selected button
Virtual remote control
Select “
” to open the pop up menu to control this unit.
Aim the remote control at the remote control sensor of this unit.
Press u / d / j / i and PAGE u / d to select a button, then press ENTER.
TV Favorite button (Fav)
This button is displayed when the type of the external component is “Cable”, “Satellite/DSS”, or “DVR”. You can
register your favorite TV stations and recall them easily. TV Favorite ☞ P. 42
Exclusive learning buttons (L1-L14)
Use these exclusive learning buttons (L1-L14) on the virtual remote control to recall the programmed function of the
other remote control. You can name the buttons freely. (☞ P. 40)
y
The displayed buttons vary depending on the type of the component being played back.
Note
Some buttons may not work depending on the source device or the source contents.
21 En
BASIC
OPERATION
Type of component you set in the setup menu
Cable,
Other Video Other Audio
Satellite/DSS Component Component
Top Menu
Guide
—
Pop Up Menu
Disc Menu
Menu
Menu Up
Menu Down
Menu Left
Menu Right
Menu Select
—
—
Last Channel
Last Channel
—
—
Return
Return
Exit
Exit
Back
Exit
Skip Up
Skip Up
Channel Up
Channel Up
Channel Up
Preset Up
Skip Down
Skip Down
Channel Down Channel Down Channel Down Preset Down
Sub Menu
Play
Page Up
Skip Up
Pause
Page Down
Skip Down
Blu-ray
01EN_00_YMC-700_500_U.book Page 22 Wednesday, April 8, 2009 11:46 AM
Listening to FM Radio
You can receive FM radio stations with this unit. To listen to FM radio stations, refer to the GUI screen and perform the
operations explained on the next page. Connect the indoor FM antenna in advance.
[Top menu]
[Source menu]
Select “Listen” Select “FM Radio”
[Preset search screen]
Note
The preset search screen is only displayed when
at least 1 station has been preset.
[Pop up menu]
CONTROL
DSP Program
☞ P. 19
Audio Adjustment
☞ P. 19
Preset List
Jump to preset list
Add to Preset*
☞ Next page
* Displayed only on the manual search screen.
[Manual search screen]
BACK
ENTER
[Pop up menu]
[Preset list]
CONTROL
22 En
Rename
☞ Next page
Reorder
☞ Next page
Remove from Preset ☞ Next page
Auto Preset
☞ Next page
Add to Preset
☞ Next page
Now Playing
Jump to Preset search
screen or Manual
search screen
01EN_00_YMC-700_500_U.book Page 23 Wednesday, April 8, 2009 11:46 AM
Listening to FM Radio
Automatic station preset
This unit scans all FM frequencies and registers receivable
stations on the preset list. The registered stations can be
recalled easily.
Editing the station preset list
■ Renaming the station name on the
station preset list
1
On the preset list screen, select “ Rename ”
from the pop up menu.
2
Enter the desired station name, then select
“ OK
”.
Select “ Auto Preset ” from the pop up menu on
the preset list screen and select “ Start ” to start
automatic station presetting.
This unit starts to seek frequencies and register receivable
FM radio stations on the preset list.
y
• To stop the automatic station preset procedure, press BACK.
• You can preset up to 40 stations.
■ Reordering the preset stations
On the preset list screen, select “ Reorder ”
from the pop up menu.
2
Move the selected station, then press
ENTER on the remote control.
Note
When you perform automatic station presetting, any stations
which were previously registered are deleted from the preset list.
Recalling a preset station
■ Recalling a preset station from the preset
list
■ Deleting a station from the station preset
list
1
On the preset list screen, select
“ Remove from Preset ” from the pop up menu.
2
Select “ Remove ” to remove the station.
Select the desired station on the preset list.
■ Recalling a preset station on the preset
search screen.
Press j/i to tune in to the previous/next preset
station.
Frequency tuning
On the manual search screen, tune into the desired station
as follows:
• Press and hold i to search for a higher
frequency station.
• Press and hold j to search for a lower frequency
station.
• Press i to repeatedly to tune in to a higher
frequency manually.
• Press j to repeatedly to tune in to a lower
frequency manually.
y
• When this unit is tuned in to a station, “TUNED” appears.
• If the station is not registered on the preset list, select
“ Add to Preset ” from the pop up menu.
23 En
BASIC
OPERATION
1
01EN_00_YMC-700_500_U.book Page 24 Wednesday, April 8, 2009 11:46 AM
Listening to music stored on your PC (YMC-700 only) or USB device
Use this feature to enjoy the music contents stored on your PCs and USB storage devices.
[Top menu] [Source menu]
Select “Listen” Select “USB”
or “PC Content”
[Pop up menu]
Now Playing
Jump to playback screen
Refresh
Refresh the server list.
(Available at the server list screen)
CONTROL
[Contents list screen]
Root folder
Sub folders
ENTER
Select folder
If you press and hold PAGE u / d,
the list scrolls rapidly.
ENTER
[Playback screen]
Select a file to start playback
BACK
Playback mode
indicator
1
Repeat all
Repeat one
Shuffle
Cover art
Input name
Title/Artist/Album
Selected DSP
program
CONTROL
[Pop up menu]
DSP Program
☞ P. 19
Audio Adjustment
☞ P. 19
Repeat
☞ Next page
Shuffle
☞ Next page
Note
If any message appears, refer to “Troubleshooting”. (☞ P. 48)
24 En
01EN_00_YMC-700_500_U.book Page 25 Wednesday, April 8, 2009 11:46 AM
Listening to music stored on your PC (YMC-700 only) or USB device
Supported USB storage devices ☞ P. 2
Network settings ☞ P. 40
Note
Some audio files may not be playable or may be noisy when
played.
Notes on USB devices
• When you connect your USB storage device, there may be a
delay of about 10 seconds.
• Only the first partition is displayed on the GUI menu. You
cannot select files in other partitions.
• Up to 8 levels of folder hierarchy and 500 files and folders
per folder are recognized.
• Some devices may not work properly even if they meet the
requirements.
Playing music files
1
Select a music file on the contents list screen.
2
Perform the playback operations by remote
control.
■ Operation on the playback screen
GUIDE
MENU
Play/Stop
Skip forward
ENTER
Skip backward
PREV.
CONTROL
EXIT
BACK
Back to the previous
screen
With Windows Media Player 11, you can play back the
audio files on your PC. For details, refer to the attached
documents about Windows Media Player 11.
Note
1
Some audio files may not be playable or may be noisy when
played.
2
Install Windows Media Player 11 on your PC.
You can download the installer of Windows Media
Player 11 from the Microsoft website, or use the
upgrade function of the installed Microsoft Windows
Media Player.
Turn on your PC then allow media sharing.
Activate Windows Media Player 11 first.
Click the arrow below the “Library” tab, click “Media
check box”, then select the “Share my media” check
box in the “Media Sharing” dialog box.
Select “YMC-700” in the list of devices below the
“Share my media to” checkbox, and then click
“Allow”.
YMC-700
Notes
• If the operating system (OS) of your PC is Windows Vista,
Windows Media Player 11 is pre-installed (except some
products).
• Some types of security software installed on your PC (anti-virus
software, firewall software, etc.) may block access of this unit
to your PC. In such cases, configure the security software
appropriately.
• You can connect this unit to up to 16 PC servers, and each
server must be connected to the same subnet as this unit.
Repeat play and shuffle play
■ Repeat play
Select “ Repeat ” from the pop up menu on the
playback screen and select a repeat mode
option.
Choice
Function
Off
Cancel repeat playback.
Single
Repeat a file.
All
Repeat a sequence of files.
■ Shuffle play
Select “ Shuffle ” from the pop up menu on the
playback screen and select a shuffle mode option.
Choice
Function
Off
Cancel shuffle playback.
On
Shuffle playback.
25 En
BASIC
OPERATION
Before enjoying the contents on
your PC (YMC-700 only)
01EN_00_YMC-700_500_U.book Page 26 Wednesday, April 8, 2009 11:46 AM
Viewing photos stored on your PC (YMC-700 only) or USB device
Use this feature to enjoy the photos stored on your PCs and USB storage devices.
[Top menu]
Select “Play”
[Source menu]
Select “USB”
” or “PC Content”
[Pop up menu]
Now Playing
Jump to playback screen
Refresh
Refresh the server list.
(Available at the server list screen)
CONTROL
[Contents List] screen
Root folder
Sub folder
ENTER
Select folder
If you press and hold PAGE u / d,
the list scrolls rapidly.
ENTER
[Picture screen]
Select a file
BACK
Picture
Input source
Control guide
CONTROL
[Pop up menu]
Slide Show Interval
☞ Next page
Set as Screen Saver
☞ Next page
Shuffle
☞ Next page
Start Slide Show
☞ Next page
Now Playing
Jump to playback screen
Note
If any message appears, refer to “Troubleshooting”. (☞ P. 48)
26 En
01EN_00_YMC-700_500_U.book Page 27 Wednesday, April 8, 2009 11:46 AM
Viewing photos stored on your PC (YMC-700 only) or USB device
Supported USB storage devices ☞ P. 2
Network settings ☞ P. 40
Viewing photos
Photos are displayed at random. This setting is valid for
the slide show function.
To view the photos stored on your PC, allow sharing on
the PC. ☞ “Before enjoying the contents on your PC
(YMC-700 only)” on P. 25.
1
2
Shuffle browsing
Select “ Shuffle ” from the pop up menu on the
picture screen and select a shuffle mode option.
Select a photo file on the contents list
screen.
Browse photos.
If any video or music source is being played back,
playback of the audio continues.
■ Operation on the picture screen
Function
Off
Invalidate shuffle browsing.
On
Shuffle browsing.
Using photos as a screen saver
You can set your favorite photos as a screen saver.
Screen saver ☞ p. 44
MENU
Start a slide show
Next photo
ENTER
Previous photo
Display a photo, select “ Set as Screen Saver ”
from the pop up menu on the picture screen, then
select “ Set ”.
The photos in that folder are used for the screen saver.
y
PREV.
EXIT
CONTROL
BACK
Back to the contents
list
You can test the screen saver by selecting “Preview” in the
“Screen Saver” menu (☞ P. 44).
Slide show
The slide show function shows the photos in the folders
automatically. The slide show repeats itself.
Select “ Start Slide Show ” from the pop up menu
on the picture screen to start a slide show.
To stop the slide show, press BACK.
y
You can start a slide show by pressing ENTER on the Picture
screen.
■ Setting the slide show interval time
Select “ Slide Show Interval ” from the pop up
menu on the playback screen and select the
interval time.
2sec
3sec
5sec
10sec 20sec
Note
Depending on the size of the photos and the playback status of
this unit, the actual interval may be longer than the specified one.
27 En
BASIC
OPERATION
GUIDE
Choice
01EN_00_YMC-700_500_U.book Page 28 Wednesday, April 8, 2009 11:46 AM
Enjoying contents stored on your iPod
Once you have stationed your iPod in a Yamaha iPod dock (such as the YDS-11, sold separately) connected to the DOCK
terminal of this unit (☞ P. 7), you can enjoy the music or video contents stored on the iPod.
[Top menu]
Select “Watch”
or “Listen”
[Source menu]
Select “iPod”
[Pop up menu]
Jump to playback screen
Now Playing
CONTROL
[Contents list screen]
Root directory
Sub directories
ENTER
Select
directory
If you press and hold PAGE u / d, the list scrolls rapidly.
ENTER
[Playback screen]
Select the file to be played
BACK
Playback mode
indicator
1
Cover art
Repeat all
Repeat one
Shuffle
Title/Artist/Album
Input name
Selected DSP
program
Note
CONTROL
[Pop up menu]
When a movie is played back, source
information (Title/Artist/Album) is not
available.
DSP Program
☞ P. 19
Audio Adjustment
☞ P. 19
Repeat
☞ Next page
Shuffle
☞ Next page
Notes
•
•
•
•
•
•
This unit is not compatible with photos stored on your iPod.
This unit supports iPod touch, iPod (Click Wheel, including iPod classic), iPod nano and iPod mini.
If any message appears, refer to “Troubleshooting”. (☞ P. 49)
Some features may not be compatible depending on the model or the software version of your iPod.
Some features may not be compatible depending on the model of your Yamaha iPod universal dock.
Depending on the type of iPod to be connected, the area for cover art may be narrowed.
28 En
01EN_00_YMC-700_500_U.book Page 29 Wednesday, April 8, 2009 11:46 AM
Enjoying contents stored on your iPod
Listening to music contents
Repeat play and shuffle play
1
Select a song on the contents list screen.
The following functions are available upon playback of
music/video contents. The detailed functions may differ
depending on the connected iPod.
2
Perform the playback operations by remote
control.
■ Repeat play
GUIDE
MENU
Play/Pause
Skip forward/Search
forward (press hold)
ENTER
Skip backward/Search
backward (press hold)
PREV.
EXIT
CONTROL
BACK
Select “ Repeat ” from the pop up menu on the
playback screen, then select a repeat mode
option.
Choice
Function
Off
Cancel repeat playback.
One
Repeat a song.
All
Repeat a sequence of songs.
Back to the song list
Watching video contents
1
Select a video file on the contents list screen.
2
Perform the playback operations by remote
control.
GUIDE
MENU
Select “ Shuffle ” from the pop up menu on the
playback screen, then select a repeat mode
option.
Choice
Function
Off
Cancel shuffle playback.
Songs
Play songs in random order.
Albums
Play albums in random order.
Play/Pause
Skip forward/Search
forward (press hold)
ENTER
Skip backward/Search
backward (press hold)
PREV.
CONTROL
EXIT
BACK
Back to the previous
screen
29 En
BASIC
OPERATION
■ Shuffle play
01EN_00_YMC-700_500_U.book Page 30 Wednesday, April 8, 2009 11:46 AM
Listening to Internet Radio (YMC-700 only)
Use this feature to listen to Internet Radio stations. This unit uses the vTuner Internet Radio station database service
particularly customized for this unit, providing a database of over 2000 radio stations. You can store your favorite stations
with bookmarks.
[Top menu]
Select “Listen”
[Source menu]
Select “Net Radio”
[Pop up menu]
Jump to playback screen
Now Playing
Remove from Bookmark* ☞ Next page
* Available under Bookmark directory
CONTROL
[Contents list screen]
Root directory
Sub directories
ENTER
Select
directory
If you press and hold PAGE u / d, the list scrolls rapidly.
ENTER
[Playback screen]
Select a station to start playback
BACK
Playback mode
indicator
Internet Radio station
Input name
Selected DSP
program
CONTROL
[Pop up menu]
30 En
DSP Program
☞ P. 19
Audio Adjustment
☞ P. 19
Add to Bookmark
☞ Next page
01EN_00_YMC-700_500_U.book Page 31 Wednesday, April 8, 2009 11:46 AM
Listening to Internet Radio (YMC-700 only)
Notes
• To use this feature, you need a network connection.
Connection ☞ P. 6
Network setting ☞ P.40
• A narrowband Internet connection (i.e. 56k modem ISDN) will
not provide satisfactory results. And a broadband connection is
strongly recommended (i.e. a cable modem, an xDSL modem,
etc.). For detailed information, consult with your ISP.
• Some security devices (such as firewalls) may block the access
of this unit to Internet Radio stations or to the Rhapsody®
server. In such cases, configure the security settings
appropriately.
• If any message appears, refer to “Troubleshooting”. (☞ P. 48)
■ Operation on the playback screen
GUIDE
MENU
Play/Stop
ENTER
PREV.
CONTROL
EXIT
BACK
Back to the previous
screen
■ Storing your favorite Internet Radio
stations with bookmarks
Use this feature to select your favorite Internet Radio
stations quickly.
BASIC
OPERATION
Select the desired Internet Radio station, then
select “ Add to Bookmark ” from the pop up menu.
The stored Internet Radio station is added to the
“Bookmarks” list in “Net Radio”.
y
• To remove the stored station from the “Bookmarks” list, select
the station under “Bookmarks”, then select
“ Remove from Bookmark ” from the pop up menu.
• You can also register your favorite Internet Radio stations on
this unit by accessing the website with the web browser on your
PC. To use this feature, you need the vTuner ID of this unit and
your e-mail address to create your personal account. Refer to
“Information” in the “Network” menu for the vTuner ID of this
unit (☞ P. 41). For details, refer to the help information on the
website. URL: http://yradio.vtuner.com/
Notes
• This service may be discontinued without notice.
• Some Internet Radio stations may not be played.
31 En
01EN_00_YMC-700_500_U.book Page 32 Wednesday, April 8, 2009 11:46 AM
Listening to the Rhapsody® service (YMC-700 only)
Use this feature to listen to the Rhapsody® music service.
[Top menu]
Select “Listen”
[Pop up menu] (Menu items vary depending on directory.)
[Source menu]
Select “Rhapsody”
Now Playing
Jump to playback screen
Play
☞ Next page
Remove from My Library
☞ Next page
Show Album Page
☞ Next page
Add Album to My Library ☞ Next page
Add Track to My Library
☞ Next page
Add to My Library
☞ Next page
CONTROL
[Contents list screen]
Root directory
Sub directories
ENTER
Select
directory
If you press and hold PAGE u / d, the list scrolls rapidly.
ENTER
[Playback screen]
Select a song to start playback
BACK
Playback mode
indicator
1
Repeat all
Repeat one
Shuffle
Cover art
Title/Artist/Album or Channel
Input name
Selected DSP
program
CONTROL
[Pop up menu]
Shuffle
☞ Next page
Add Album to My Library ☞ Next page
Add Track to My Library
☞ Next page
Note
If any message appears, refer to “Troubleshooting”. (☞ P. 48)
32 En
DSP Program
☞ P. 19
Audio Adjustment
☞ P. 19
Repeat
☞ Next page
01EN_00_YMC-700_500_U.book Page 33 Wednesday, April 8, 2009 11:46 AM
Listening to the Rhapsody® service (YMC-700 only)
■ Account setup for Rhapsody®
When you select “Rhapsody” for the first time, the
account setup screen appears. Follow the procedure below
to set up your account for the Rhapsody® service.
1
Select “Sign In to your account” on the account
setup screen.
y
If you select “Start Free 30-day trial”, you can try the
service for free for 30 days.
2
Useful functions
■ Library
You can gather your favorite tracks and albums into a
library called “My Library”.
Use the following pop up menu items to edit “My
Library”:
Add to My Library
Enter your user name and password (up to 64
characters each) by using the displayed
keyboard, then select “ OK
”.
Add the currently selected track or album to “My
Library”.
“Please wait...” appears, followed by the confirmation
screen.
Add the currently selected track to “My Library”.
Select “OK” to complete the Sign In procedure.
Add the currently selected album to “My Library”.
Add Track to My Library
Add Album to My Library
Remove from My Library
y
Use “Rhapsody Information” in “Setup” to check and edit the
account information of the Rhapsody® service (☞ P. 41).
Remove the currently selected track or album from “My
Library”. Select “ Remove ” to remove it.
■ Playback
■ Repeat play
1
Select “Rhapsody Music Guide”.
y
• Use “Rhapsody Channels” to browse the channels
provided by the Rhapsody® service.
• Use “My Library” to register and access the desired
albums and songs easily.
• You can search contents by keyword. Select “Search”,
then “Artist”, “Album”, or “Track”. Enter the desired
keyword using the virtual keyboard, then select “OK”.
2
Browse the contents list to select the desired song.
The playback screen appears.
y
• Select “ Play ” from the pop up menu to play back the
selected item directly.
• You can move to the album of the selected item in the list
directly. Select a song, then select “ Show Album Page ”
from the pop up menu.
■ Operations on the playback screen
GUIDE
MENU
CONTROL
Choice
Function
Off
Cancel repeat playback.
Single
Repeat a song.
All
Repeat a sequence of songs.
■ Shuffle play
Select “ Shuffle ” from the pop up menu on the
playback screen and select a shuffle mode
option.
Choice
Function
Off
Cancel shuffle playback.
On
Shuffle playback.
Play/Pause (While
playing back a track)
Play/Stop (While playing
back a Rhapsody channel)
Skip forward
ENTER
PREV.
Select “ Repeat ” from the pop up menu on the
playback screen and select a repeat mode
option.
EXIT
BACK
Skip backward
(Unavailable under
Rhapsody channel)
Back to the previous
screen
33 En
BASIC
OPERATION
3
01EN_00_YMC-700_500_U.book Page 34 Wednesday, April 8, 2009 11:46 AM
Listening to the Rhapsody® service (YMC-700 only)
Prohibition
It is strictly prohibited to modify, reproduce, reverse-engineer
or use this unit and/or built-in software for use other than
audiovisual purposes.
The Rhapsody® service is the power behind the
Rhapsody® Media Player (the Rhapsody® player software
that you can download to your computer). Rhapsody®
service supplies the music, keeps My Library up to date,
provides you with Rhapsody® channels, the Playlist
Central online community, and manages your downloads.
Your software connects to Rhapsody® service through the
internet. Because your account information and
Rhapsody® content are on servers instead of any
individual computer, your music is infinitely portable.
Much of what you see in the Display area comes from
Rhapsody® service. What you can do with Rhapsody®
service depends on your subscription. You can use
Rhapsody® service for free, or get even more from a paid
membership. The Rhapsody® service also brings you
Rhapsody® Online, a streamlined, internet version of
Rhapsody® that you can access from almost anywhere.
Just sign in to your Rhapsody® account to start letting the
Rhapsody® service work for you.
For more information, http://www.rhapsody-free.com/.
34 En
01EN_00_YMC-700_500_U.book Page 35 Wednesday, April 8, 2009 11:46 AM
Enjoying Bluetooth™ components
Use this feature to enjoy the music contents stored on your Bluetooth component (such as a portable music player)
without wiring between this unit and the Bluetooth component.
[Top menu]
Select “Listen”
[Source menu]
Select “Bluetooth”
[Pop up menu]
DSP Program
☞ P. 19
Audio Adjustment
☞ P. 19
Pairing
See below
Connect
Search for the last connected Bluetooth component
Disconnect
Disconnect the Bluetooth component
CONTROL
[Playback]
ck] screen
BASIC
OPERATION
Start playback on your Bluetooth component.
To use this feature, you need perform the following
operations in advance.
• Connecting a Yamaha Bluetooth receiver (☞ P. 7).
• Pairing the desired Bluetooth component (see below).
• Establishing the connection between the desired
Bluetooth component and the Bluetooth receiver.
y
1
Turn on your Bluetooth component, then set
the Bluetooth component to the pairing
mode.
2
Select “ Pairing ” from the pop up menu and
check that the Bluetooth component detects
the Bluetooth receiver.
This unit supports A2DP (Advanced Audio Distribution Profile)
Bluetooth profiles.
If the Bluetooth component detects the Bluetooth
receiver, “YBA-10 YAMAHA” (example) appears on
the Bluetooth device list.
Pairing
Pairing must be performed when using a Bluetooth
component with the Bluetooth receiver connected to this
unit for the first time or if the pairing data has been
deleted. “Pairing” refers to the operation of registering a
Bluetooth component for Bluetooth communications.
y
• You only need to perform the pairing operation the first time.
• Pairing requires operations on this unit and on the other
component with which Bluetooth communications are to be
established. If necessary, refer to the other component’s
operating instructions.
To ensure security, a time limit of 8 minutes is set for the
pairing operation. You are recommended to read and fully
understand all the instructions before starting.
3
Select the Bluetooth receiver on the
Bluetooth device list, then enter the pass key
“0000” on the Bluetooth component.
When the pairing procedure is successful, “Pairing
Completed” appears.
Notes
• If any message appears, refer to “Troubleshooting”. (☞ P. 50)
• The Yamaha Bluetooth receiver can be paired with up to eight
Bluetooth components. When pairing is conducted successfully
with a ninth component and the pairing data is registered, the
pairing data for the least recently used other component is
cleared.
35 En
01EN_00_YMC-700_500_U.book Page 36 Wednesday, April 8, 2009 11:46 AM
Setup menu
Setup menu tree
You can change the settings of this unit with the Setup menu. Enter the Setup menu from the bottom right corner of the
top menu.
Setup
Initial Setup (P. 37)
Speaker
Sound
Input
Auto Speaker Setup (P. 37)
Speaker Configuration
Speaker Level (P. 38)
Reset (P. 38)
Air Surround Xtreme (P. 38)
Adaptive DRC (P. 39)
Lipsync (P. 39)
Dynamic Range (P. 39)
HDMI Audio Out (P. 39)
Add New Input (P. 39)
User Input
Front (P. 37)
Center (P. 37)
Surround (P. 37)
Bass Out (P. 38)
Crossover (P. 38)
Subwoofer Phase (P. 38)
Watch/Listen/Play
Icon (P. 40)
Rename (P. 40)
Remote Code (P. 40)
Remote Code Learning (P. 40)
Remove (P. 40)
Network Select (P. 40)
IP Address (P. 41)
Wireless LAN (P. 41)
MAC Address Filter (P. 41)
Information (P. 41)
Rhapsody
Account Status (P. 41)
Sign In (P. 41)
Information
Rhapsody Free Trial (P. 41)
Remove Account (P. 41)
Remote
TV Favorite
Preset channels
Control
Source Power Control (P. 42)
TV Power Control (P. 42)
TV Remote Code (P. 42)
TV Remote Code Learning (P. 42)
Option
Initial Screen - POWER Button (P. 43)
Initial Screen - CONTROL Button (P. 43)
GUI position (P. 43)
HDMI Standby Through (P. 43)
Network Standby (P. 44)
Screen Saver
Screen Saver (P. 44)
Waiting Time (P. 44)
Preview (P. 44)
Factory Reset (P. 44)
Signal Information (P. 44)
USB Update (P. 44)
Update
Network Update (P. 44)
System Information (P. 44)
Network
Note
The shaded menu items are only applicable to YMC-700.
36 En
Channel Number (P. 42)
Rename (P. 42)
01EN_00_YMC-700_500_U.book Page 37 Wednesday, April 8, 2009 11:46 AM
Setup menu
[Setup menu]
[Sub menu]
[Setting screen]
ENTER
ENTER
BACK
ENTER
or
BACK
Apply the change and return. Discard the change and return.
(Note that some changes are
applied immediately.)
Center
Initial Setup
Choice
Initial Setup ☞ P. 10
Speaker menu
Large
Select this setting when the center speaker is
large.
Small
Select this setting when the center speaker is
small.
None
Select this setting when no center speaker is
being used.
Surround
Choice
Descriptions
■ Auto Speaker Setup
Large
Select “Start” and follow steps 6 to 11 at “Step 1: Auto
Speaker Setup”. (☞ P. 10)
Select this setting when the surround
speakers are large.
Small
Select this setting when the surround
speakers are small.
None
Select this setting when no surround
speakers are being used.
■ Speaker Configuration
Determining the speaker size
If the speaker’s woofer section is:
– 16 cm (6.5 in) or larger: large
– smaller than 16 cm (6.5 in): small
ADVANCED
OPERATION
Almost all settings are optimized by the Initial Setup
procedure (☞ P. 10). If you change the speaker layout or
the speakers themselves after executing the Initial Setup
process, use this menu to re-optimize the sound. The
choices indicated in bold are selected by default.
Descriptions
Front
Choice
Descriptions
Large
Select this setting when the front speakers
are large.
Small
Select this setting when the front speakers
are small.
Note
When “Bass Out” is set to “Front”, you can only select “Large”
for “Front”. If “Front” has been set to anything other than
“Large” before, this unit changes the value to “Large”
automatically.
37 En
01EN_00_YMC-700_500_U.book Page 38 Wednesday, April 8, 2009 11:46 AM
Setup menu
Bass Out
Use this feature to select the speakers from which the LFE
(low-frequency effect) and the low-frequency signals will
be output.
Output of LFE signals
■ Speaker Level
Use this feature to manually balance the speaker levels.
Control range: –20 to +20 (Test Tone: Off, On)
Initial setting: 0 (Test Tone: Off, SWFR: +6)
Control step: 1
Choice
Subwoofer and speakers
Choice
Subwoofers
Front
speakers
Other
speakers
Adjusted speaker
Test Tone
Turns the test tone output on or off.
FL
Adjusts the front left speaker level.
Both
Output
Not output
Not output
FR
Adjusts the front right speaker level.
Subwoofer
Output
Not output
Not output
C
Adjusts the center speaker level.
Front
Not output
Output
Not output
SL
Adjusts the surround left speaker level.
SR
Adjusts the surround right speaker level.
SWFR
Adjusts the subwoofer level.
Output of low-frequency signals
Subwoofer and speakers
Choice
Subwoofers
Front
speakers
Other
speakers
■ Reset
Use this menu to reset the speaker settings.
Both
*1
*2
*3
Subwoofer
*4
*3
*3
Yes
Resets the speaker related settings.
Front
Not output
*1
*3
No
Cancels resetting.
*1 Output(s) the low-frequency signals of the front channels and
other speakers set to “Small”.
*2 Always output the low-frequency signals of the front
channels.
*3 Output the low-frequency signals if the speakers are set to
“Large”.
*4 Outputs the low-frequency signals of the speakers set to
“Small”.
Note
When “Front” is selected, you cannot adjust the subwoofer level
using the pop up menu.
Crossover
Use this feature to select the crossover frequency of
speakers that are set to “Small”. All frequencies below the
selected frequency are sent to the subwoofer or to the
speakers set to “Large”.
Choices: 40Hz, 60Hz, 80Hz, 100Hz, 120Hz, 160Hz,
200Hz
Subwoofer Phase
Use this feature to switch the phase of your subwoofer if
the bass sound is too weak or unclear.
Choice
Functions
Normal
Does not change the phase of your
subwoofer.
Reverse
Sets the phase of the subwoofer to reverse.
38 En
Choice
Functions
Sound menu
Use this menu to change the various sound settings.
The choices indicated in bold are selected by default.
■ Air Surround Xtreme
The AIR SURROUND XTREME technology enables you
to enjoy up to 7.1-channel sound (when multi-channel
PCM signals are input) without using surround speakers
by simulating sound from virtual speakers.
Choice
Functions
On
Turns on the AIR SURROUND XTREME
function.
Off
Turns off the AIR SURROUND XTREME
function.
Notes
• When surround speakers are connected, “- - -” is displayed and
you cannot set the “Air Surround Xtreme” setting. The AIR
SURROUND XTREME function is not available in this case.
• When DSP Program is set to “Off” or “Music Enhancer”, the
AIR SURROUND XTREME function is deactivated.
• When “Air Surround Xtreme” is set to “Yes”, the connected
external sources output Dolby Digital or PCM signals instead of
Dolby TrueHD or Dolby Digital Plus signals. For details, refer
to the owner’s manual of the component.
01EN_00_YMC-700_500_U.book Page 39 Wednesday, April 8, 2009 11:46 AM
Setup menu
■ Adaptive DRC (dynamic range control)
■ Dynamic Range
Use this feature to adjust the dynamic range in
conjunction with the volume level. It improves
listenability at low volume.
Selects the dynamic range adjustment method for
reproducing bitstream signals (Dolby Digital, Dolby
Digital Plus, Dolby True HD and DTS signal).
Choice
Functions
Auto
Adjusts the dynamic range automatically.
Off
Does not adjust the dynamic range
automatically.
When “Adaptive DRC” is set to “Auto”, this unit controls
the dynamic range as follows:
– If the volume setting is low: the dynamic range is
narrow
– If the volume setting is high: the dynamic range is
wide
Choice
Functions
Min/Auto
(Min) Sets the dynamic range suitable for
low volume or a quiet environment, such as
at night, for bitstream signals (excluding
Dolby TrueHD signals).
(Auto) Adjusts the dynamic range for Dolby
TrueHD signals based on input signal
information.
Std
Sets the standard dynamic range
recommended for regular home use.
Max
Outputs sound without adjusting the
dynamic range of the input signals.
Auto
Off
Input level
Volume: low
Output level
Output level
■ HDMI Audio Out
Use this menu to select whether to play back HDMI audio
signals on this unit or on the TV connected to this unit.
Auto
Choice
Off
Input level
Amp
Outputs HDMI audio signals from the
speakers connected to this unit.
TV
Outputs HDMI audio signals from the
speakers of the TV.
Volume: high
y
■ Lipsync
Use this menu to adjust the audio and video
synchronization.
If the connected TV is compatible with the
automatic lip sync function
The Lipsync mode of this unit is set to “Auto”, and you
can fine-adjust the audio and video synchronization by
adjusting the offset value.
Control range: –240 through 0 to 240 ms (the range varies
depending on the result of automatic measurement)
Control step: 1 ms
If the connected TV is not compatible with the
automatic lip sync function
The Lipsync mode of this unit is set to “Manual”. Adjust
the delay of the sound output manually to synchronize the
sound with the picture.
Control range: 0 to 240 ms
Control step: 1 ms
Notes
• If “HDMI Audio Out” is set to “TV”, the available audio signals
vary depending on the specifications of the connected TV.
• When “HDMI Audio Out” is set to “TV” and the audio signals
are output from the HDMI OUT jack, the speakers connected to
this unit output no sound.
• Even if “HDMI Audio Out” is set to “TV”, the sound signals of
some sources are not output from the HDMI OUT jack. In this
case, sound is output from the speakers connected to this unit.
Input menu
Use this menu to add new input sources or change the
input source settings you have made with the Initial Setup
procedure.
The choices indicated in bold are selected by default.
■ Add new input
When you connect new components to this unit or modify
the connections between this unit and other components,
use this menu to reflect the new connections. Follow steps
2 to 4 at “Step 3: Source Device Setup”. (☞ P. 15)
39 En
ADVANCED
OPERATION
You can also adjust the dynamic range of the bitstream signal
sources (Dolby Digital, Dolby Digital Plus, Dolby True HD and
DTS signal) by using the “Dynamic Range” menu.
Functions
01EN_00_YMC-700_500_U.book Page 40 Wednesday, April 8, 2009 11:46 AM
Setup menu
■ User Input (“Cable”, “SAT”, “DVD”, etc.
— the name of an input source you have
added before)
3
Watch/Listen/Play
You can customize the icons under the activities displayed
on the source screen for each component. For example, if
you listen to a CD using the DVD player frequently, you
can add the “CD” icon under the “Listen” activity and
rename the icon to “CD/DVD-P”.
Selectable icons are as follows:
LiveTV, Movie, DVR, Game, Apple TV, CD, Other,
None (Select “None” when you want to delete the
assigned icon from the selected activity.)
You can rename icons with up to eight characters.
Remote Code
Use this menu to switch the remote control code for the
component. Follow steps 6 to 15 at “Step 3: Source Device
Setup”. (☞ P. 15)
y
Aim the remote control of other devices at the remote
control sensor of this unit within the range of 10 cm to 2.5 m
(4 in. to 8 ft.).
4
To learn other codes, select “Learn next
code” and repeat steps 1 to 3 until you finish
“learning” all the desired code.
5
Select “Finished” and then “Yes” to exit the
learning process.
Remote Code Learning
Use this menu to add/change remote control codes. See
below.
Remove
Use this menu to remove any component you have added.
y
If you change the connections between this unit and source
devices, first remove the input settings, then make new settings
using the “Add new input” menu (☞ P. 39).
■ Programming remote control codes from
other remote controls
You can program remote control codes from other remote
controls. Use the learning feature if you want to program
functions not included in the basic operations.
1
2
Select the source device’s type.
If any remote control code has been set already, skip
this step.
Select “Learn” and immediately press and
hold the button you want to program on the
remote control until “Code learning was
successful” appears.
If the target button is one of the L1 to L14 buttons,
you can rename the button. Select “Rename” and
rename the button.
If learning was unsuccessful, “Code learning failed”
appears. In this case, place the remote control near
the remote control sensor of this unit and select
“Retry”, or select “Cancel” to cancel the learning
process.
Notes
• If the other remote control uses infrared rays, this unit can learn
most of its function. However, you may not be able to program
some special signals or extremely long transmissions.
• This unit does not support the control interfaces for game
consoles.
Network menu (YMC-700 only)
Use this menu to adjust the network parameters.
■ Network Select
Use this menu to select a connection method (wired or
wireless).
Choice
Select a button on the remote control or the
virtual remote control.
You can program the functions of other remote
controls to the following buttons.
• GUIDE, MENU, PREV., EXIT, u / d / j / i,
ENTER, CH u / d, and PAGE u / d on the
remote control.
• Any of the virtual remote control buttons
(including buttons L1 to L14 (☞ P. 22))
40 En
Functions
Ethernet
This unit connects to a wired network.
WLAN
This unit connects to a wireless network.
01EN_00_YMC-700_500_U.book Page 41 Wednesday, April 8, 2009 11:46 AM
Setup menu
■ IP Address
■ MAC Address Filter
Use this menu to change the network parameters (IP
address, etc.) manually.
Use this feature to filter the access to this unit via LAN to
control this unit by the MAC address of the accessing PC.
Control range: 00 to FF for each field (Mac Address Filter:
On, Off)
DHCP (DHCP setting)
Use this feature to select whether to allow this unit to
obtain the network parameters (IP address, subnet mask,
default gateway, primary DNS server and secondary DNS
server) from the DHCP server of the connected network.
Choice
Select this setting to allow this unit to obtain the
network parameters from the DHCP server of
the connected network.
Off
Select this setting when you want to set the
network parameters manually.
IP Address (IP address)
Use this parameter to specify the IP address assigned to
this unit. This value must not be the same as the one used
for other devices in the target network.
Subnet Mask (Subnet mask)
Use this parameter to specify the subnet mask value
assigned to this unit.
DNS Server (P) (Primary DNS server),
DNS Server (S) (Secondary DNS server)
Use this parameter to specify the IP address of the primary
and secondary DNS (Domain Name System) servers.
y
If you have only one DNS address, enter the DNS address in “DNS
Server (P)”. If you have two or more DNS addresses, enter one of
them in “DNS Server (P)” and another in “DNS Server (S)”.
■ Wireless LAN
When you select this menu item, this unit automatically
begins to search for wireless networks. After searching is
completed, follow the steps below.
2
Select an access point, or select “Manual
Setup” and enter the ESSID (the name of the
wireless network named in the Wi-Fi
settings).
Select the security type and input the
security key for the network.
When you select “None” as the security type, you are not
required to input the security key.
3
Turns the MAC address filter function on
or off. When “On” is selected, this unit
accepts PCs whose MAC address is
registered.
MAC Address 1 - 10
The MAC addresses of network devices
which are allowed to connect to this unit.
Select “Yes” to confirm the setting.
■ Information
You can display the following network system
information:
• MAC Address assigned to this unit
• IP Address
• Subnet Mask
• Default Gateway
• DNS Server (P)
• DNS Server (S)
• Link Status of the network (No Link/10Base-T/
100Base-TX) and method of communication (Full
Duplex/Half Duplex)
• WLAN Signal Level
• vTuner ID
Rhapsody® Information menu
(YMC-700 only)
Use this menu to check and change the account status of
your Rhapsody® account.
■ Account Status
Shows the information regarding the account status.
If “NOT AVAILABLE” appears, check the network
settings.
■ Sign In
Enter your user name (up to 64 characters) and password
(up to 64 characters) provided by the Rhapsody® service,
then select “OK”.
Note
If Sign In fails, an error message appears. In this case, perform
the Sign In procedure again.
■ Rhapsody Free Trial
A free 30-day trial of the Rhapsody® service is available.
When you select this menu, the URL at which the terms of
the trial service can be found appears. If you agree, select
“Yes” to activate the trial account.
■ Remove Account
Select this menu to remove your account.
41 En
ADVANCED
OPERATION
Default Gateway (Default gateway)
Use this parameter to specify the IP address of the default
gateway.
Functions
Mac Address Filter
Descriptions
On
1
Choice
01EN_00_YMC-700_500_U.book Page 42 Wednesday, April 8, 2009 11:46 AM
Setup menu
Remote Control menu
Use this menu to set up remote control settings.
The choices indicated in bold are selected by default.
■ TV Favorite
You can store up to 8 favorite TV channels and recall them by
selecting the corresponding buttons on the virtual remote
control.
y
The keys for the TV Favorite functions are displayed on the
virtual remote control when Cable, Satellite/DSS, or DVR is
selected as the type of the source device. Select “Fav” and the
station name you registered.
Channel Number
Enter the channel number of your favorite TV stations.
You can enter up to 8 characters (numbers and hyphen).
Rename
Use this menu to change the name of channels on the pop
up menu displayed when you select “Fav” on the virtual
remote control. (☞ P. 21)
■ Source Power Control
Use this menu to turn the Source Power Control function
of this unit on or off (standby). The Source Power Control
function controls the power of the components to which
IR flashers are attached. This function works as follows:
• When you select an input source, this unit turns on the
corresponding component.
• When you set this unit to the standby mode, this unit
turns off the connected components.
Choice
Functions
Enable
The Source Power Control function is enabled.
Disable
The Source Power Control function is disabled.
Note
You need to attach the IR flashers to the components and
configure the remote control settings in advance.
■ TV Power Control
Use this menu to turn on or off the TV Power Control
function of this unit. The TV Power control function
controls the power of the TV to which the IR flasher is
attached. This function works as follows:
• When you turn on this unit, this unit turns on the TV.
• When you set this unit to the standby mode, this unit
turns off the TV.
Choice
Functions
Enable
The TV Power Control function is
enabled.
Disable
The TV Power Control function is
disabled.
Note
You need to attach the IR flasher to the TV and configure the
remote control setting in advance.
■ TV Remote Code
Use this menu to change the remote control code of the
connected TV. Follow steps from 2 to 8 of “Step 2: TV
Remote Control Setup” (☞ P. 13).
■ TV Remote Code Learning
If the remote control code set with the “TV Remote Code”
menu does not function correctly, use the learning feature
to program the remote control code manually.
1
Select a button to learn.
TV POWER
Learn the code of the button for switching the TV’s
power on and off (standby) on the remote control
included with the TV to control the TV’s power using
TV POWER on the remote control included with this
unit. There is no need to learn the code here if the
code is properly set at “TV Remote Control Setup” in
the Initial Setup procedure.
TV On
If the remote control included with the TV has a
button exclusively for turning the TV’s power on,
learn its code.
TV Off
If the remote control included with the TV has a
button exclusively for turning the TV’s power off,
learn its code.
y
When the TV On and TV Off codes are learned, the TV’s
power can be accurately controlled from this unit.
42 En
01EN_00_YMC-700_500_U.book Page 43 Wednesday, April 8, 2009 11:46 AM
Setup menu
2
■ Initial Screen - CONTROL Button
Select “Learn” and immediately press the TV
power control button on the remote control
of the TV.
When learning was successful, “Code learning was
successful” appears.
If learning was unsuccessful, “Code learning failed”
appears. In this case, place the remote control near
the remote control sensor of this unit and select
“Retry”, or select “Cancel” to cancel the learning
process.
You can set the initial screen displayed when this unit is
turned on using CONTROL on the remote control.
Note
You cannot use this feature with CONTROL on the top panel.
Choice
Functions
Top Menu
The top menu is displayed when this unit is
turned on.
Last
The playback screen of the audio source you
listened to the last time is displayed when
this unit is turned on.
Activities
The playback screen of the selected input
source is displayed when this unit is turned
on.
You cannot select FM Radio, Rhapsody, Net
Radio, PC Content, Bluetooth, or USB.
y
Aim the remote control of the TV at the remote control
sensor of this unit within the range of 10 cm to 2.5 m (4 in.
to 8 ft.).
3
Select “Finished” and then “Yes” to exit the
learning process.
Note
If the other remote control uses infrared rays, this unit can learn
most of its function. However, you may not be able to program
some special signals or extremely long transmissions.
Option menu
■ Initial Screen - POWER Button
You can set the initial screen displayed when this unit is
turned on using POWER.
Choice
Functions
Top Menu
The top menu is displayed when this unit is
turned on.
Last
The playback screen of the audio source you
listened to the last time is displayed when
this unit is turned on.
Activities
The playback screen of the selected input
source is displayed when this unit is turned
on.
You cannot select FM Radio, Rhapsody, Net
Radio, PC Content, Bluetooth, or USB.
Use this feature to adjust the vertical and horizontal
position of the menu screen.
Control range: –5 (downward/left) to +5 (upward/right)
Button
Direction in which the GUI display moves
u
Up
d
Down
i
Right
j
Left
ADVANCED
OPERATION
You can adjust the optional system settings.
The choices indicated in bold are selected by default.
■ GUI position
y
Press ENTER when the adjustment is finished.
■ HDMI Standby Through
Use this feature to decide whether or not to allow the
HDMI signals input to the HDMI IN jacks to pass through
this unit when this unit is in the standby mode.
Choice
Functions
Off
Disables the HDMI standby through feature.
HDMI signals do not pass through this unit
when this unit is in the standby mode.
HDMI 1 - 3
HDMI signals pass through this unit (from the
corresponding HDMI IN jack) even when this
unit is in the standby mode.
When in the standby mode, the power indicator
is lit dimly.
Note
When “HDMI Standby Through” is set to options other than
“Off”, the amount of power consumed in the standby mode
increases.
43 En
01EN_00_YMC-700_500_U.book Page 44 Wednesday, April 8, 2009 11:46 AM
Setup menu
■ Network Standby (YMC-700 only)
Use this feature to select whether or not this unit will
accept commands via LAN network when it is in the
standby mode.
Choice
Off
Descriptions
Signal information
Use this to display audio and video signal information.
The displayed information is as follows:
Video information
Does not accept operations via LAN network
when in the standby mode.
Accepts operations via LAN network when in
the standby mode.
When in the standby mode, the power indicator
is lit dimly.
On
Note
Choice
Functions
Signal Type
Type of source video signal and video signal
output from the HDMI OUT jack.
Resolution
Resolution of the input signal (analog or
HDMI) and the output signal (HDMI).
Audio information
When “Network Standby” is set to “On”, the amount of power
consumed in the standby mode increases.
■ Screen Saver
Screen saver
Select a type of screen saver.
Choice
Functions
Choice
Functions
Decode Status
Signal format.
Decode Channel
Number of source channels in the input
signal.
Air Surround
Xtreme
State of the Air Surround Xtreme function.
Off
Screen saver is not activated.
Note
Logos
The Yamaha logo and neoHD logo are used
for the screen saver.
Photos
The selected photos (☞ P. 27) are used for
the screen saver.
• “– – –” appears when this unit cannot display the corresponding
information.
• Even if you make settings to output bitstreams directly, some
players convert Dolby TrueHD or Dolby Digital Plus bitstreams
to Dolby Digital bitstreams.
Waiting time
Use this menu to set the amount of time before the screen
saver is activated.
Control range: 1min to 10min
Initial setting: 5min
Control step: 1min
Press ENTER to set the value.
Update menu
Use this menu to update the firmware of this unit. For
details on how to update the firmware, refer to the
information supplied with updates.
Choice
Functions
Preview
When you select this menu, preview is displayed. Press
BACK to return to the previous screen.
USB Update
Updates the firmware of this unit using the
USB memory.
■ Factory Reset
Network Update
(YMC-700 only)
Updates the firmware of this unit via the
network.
System
Information
Displays the software version and system ID
of this unit.
Use this menu to reset the system to the factory defaults.
Notes
• This procedure completely resets all the parameters of this unit.
• When you execute the “factory reset” command, this unit turns
off then back on automatically.
Choice
Functions
Yes
Resets the system to the factory defaults.
No
Cancels resetting.
44 En
y
To start updating the firmware, select “USB Update” or “Network
Update”.
Note
• Do not use this feature unless you need to update the firmware.
• Be sure to read the information supplied with updates before
performing firmware updates.
• DO NOT unplug the power cord during updating.
01EN_00_YMC-700_500_U.book Page 45 Wednesday, April 8, 2009 11:46 AM
TROUBLESHOOTING
Troubleshooting
Refer to the table below when this unit does not function properly. If the problem you are experiencing is not listed below
or if the instructions below do not help, turn off this unit, disconnect the power cable, and contact the nearest authorized
Yamaha dealer or service center.
■ General
Problem
This unit fails to turn
on or enters the
standby mode soon
after the power is
turned on.
Cause
Remedy
See
page
The power cable is not connected or the
plug is not completely inserted.
Connect the power cable firmly.
—
The protection circuitry has been
activated.
Make sure that all speaker wire connections on this
unit and on all speakers are secure and that the wire
for each connection is not touching anything other
than its respective connection.
—
This unit has been exposed to a strong
external electric shock (such as lightning
or strong static electricity).
Turn off this unit, disconnect the power cable, plug it
back in after 30 seconds, then use it normally.
—
Incorrect input assignment settings.
Use the Input menu and correct the assignment
settings according to the actual connections.
39
Incorrect input or output cable
connections.
Connect the cables properly. If the problem persists,
the cables may be defective.
No appropriate input source has been
selected.
Select an appropriate input source.
19
Speaker connections are not secure.
Secure the connections.
6
The volume is turned down or muted.
Turn up the volume.
19
Signals this unit cannot reproduce are
being input from a source component,
such as a CD-ROM.
Play a source whose signals can be reproduced by this
unit.
—
The “HDMI Audio Out” setting is set to
“TV”.
Set the “HDMI Audio Out” setting to “Amp” to
output sounds from speakers connected to this unit.
39
The number of connected HDMI
components is over the limit.
Reduce the number of HDMI components connected
to the HDMI OUT jack.
—
HDCP authentication failed because the
HDMI components connected to this unit
do not support the HDCP copy protection
standards.
Connect HDMI components that support the HDCP
copy protection standards.
—
Non-standard video signals are being
input.
Non-standard video signals may interfere the GUI
screen of this unit. In this case, switch the format of
the input signal or stop the signal.
—
The number of connected HDMI
components is over the limit.
Reduce the number of HDMI components connected
to the HDMI OUT jack.
—
HDCP authentication failed because the
HDMI components connected to this unit
do not support the HDCP copy protection
standards.
Connect HDMI components that support the HDCP
copy protection standards.
—
The sound suddenly
goes off.
The protection circuitry has been activated
because of a short circuit, etc.
Check that the speaker wires are not touching each
other, then turn this unit back on.
—
Sound is heard from
the speaker on one
side only.
Incorrect cable connections.
Connect the cables properly. If the problem persists,
the cables may be defective.
6
The speaker level settings are incorrect.
Adjust the speaker level settings using the “Auto
Speaker Setup” menu.
37
No sound.
45 En
ADDITIONAL
INFORMATION
No picture.
6, Quick
Start Guide
01EN_00_YMC-700_500_U.book Page 46 Wednesday, April 8, 2009 11:46 AM
Troubleshooting
Problem
Cause
Remedy
See
page
Only the center
speaker outputs
substantial sound.
When playing a monaural source with
certain sound field programs, the source
signal may be directed to the center
channel, and the front and surround
speakers only output effect sounds.
Select another DSP Program.
19
No sound is heard
from the center
speaker.
“Center” at “Speaker Configuration” is set
to “None”.
Set “Center” to “Small” or “Large”.
37
No sound is heard
from the surround
speakers.
“Surround” at “Speaker Configuration” is
set to “None”.
Set “Surround” to “Small” or “Large”.
37
“Off” or “Music Enhancer” is selected as
the DSP program and the source being
played back contains no surround sound.
Select another DSP Program.
19
A monaural source is being played back,
and a certain DSP Program is selected.
Select another DSP Program.
19
“Bass Out” in “Speaker Configuration” is
set to “Front”.
Set “Bass Out” to “Subwoofer” or “Both”.
38
No sound is heard
from the subwoofer.
The source does not contain lowfrequency signals.
The audio input
sources cannot be
played in the desired
digital audio signal
format.
The connected component is not set to
output the desired digital audio signals.
Make an appropriate setting following the owner’s
manual of your component.
—
A humming sound is
heard.
Incorrect cable connections.
Connect the audio cables firmly. If the problem
persists, the cables may be defective.
—
This unit does not
operate properly.
The internal microcomputer has been
frozen by an external electric shock (such
as lightning or excessive static electricity)
or by a power supply with low voltage.
Disconnect the power cable from the AC wall outlet,
then plug it in again after about 30 seconds.
—
There is noise
interference from
digital or radio
frequency equipment.
This unit is too close to the digital or highfrequency equipment.
Move this unit further away from such equipment.
—
The picture is
disturbed.
The video source uses scrambled or
encoded signals to prevent dubbing.
This unit suddenly
enters the standby
mode.
The internal temperature is too high and
the overheat protection circuitry has been
activated.
Wait about 1 hour for this unit to cool down, then turn
it back on.
—
46 En
01EN_00_YMC-700_500_U.book Page 47 Wednesday, April 8, 2009 11:46 AM
Troubleshooting
■ FM Tuner
Problem
FM stereo reception
is noisy.
Cause
Remedy
See
page
The characteristics of FM stereo
broadcasts may cause this problem when
the transmitter is too far away or the
antenna input is poor.
Check the antenna connections.
7
Try using a high-quality directional FM antenna.
—
Use the manual tuning method.
23
There is distortion,
and clear reception
cannot be obtained
even with a good FM
antenna.
There is multi-path interference.
Adjust the antenna position to eliminate multi-path
interference.
—
The desired station
cannot be tuned in
with the automatic
tuning method.
The signal is too weak.
Use a high-quality directional FM antenna.
—
Use the manual tuning method.
23
■ Remote control
Problem
The remote control
does not work or
does not function
properly.
Cause
Remedy
See
page
Wrong distance or angle.
The remote control will function within a maximum
range of 6 m (20 ft) and no more than 30 degrees offaxis from the front panel.
4
Direct sunlight or lighting (from an inverter
type fluorescent lamp, etc.) is striking the
remote control sensor of this unit.
Reposition this unit.
—
The batteries are weak.
Replace all the batteries.
5
The batteries do not last long.
Using alkaline batteries is strongly recommended.
—
The remote control code is not correctly
set.
Set the remote control code correctly.
40, 42
Try setting another code of the same manufacturer.
40, 42
Connect/attach the IR flashers properly. Also refer to
the owner’s manual of the external components.
8
Some buttons on the
virtual remote control
do not function.
Remote control codes are directly
transmitted to the remote control sensor of
the target device.
Conceal the remote control sensor of the target device
so that the remote control codes are received directly
from the remote control.
—
The remote control
does not learn new
functions.
This unit and the remote control are too
far apart or too close together.
Place the remote control within the range of 10 cm to
2.5 m (4 in. to 8 ft.).
—
The batteries of the other remote control
are too weak.
Replace all the batteries.
—
There is noise interference from digital or
radio frequency equipment.
If a CRT display or equipment connected to a CRT
display is placed near this unit, move this unit away
from such equipment.
—
If metal objects are near this unit, move this unit away
from them.
—
47 En
ADDITIONAL
INFORMATION
The IR flashers are not connected/attached
correctly.
01EN_00_YMC-700_500_U.book Page 48 Wednesday, April 8, 2009 11:46 AM
Troubleshooting
■ USB, Network, and Rhapsody
Cause
“Access Error” is
displayed even when
a USB device is
present.
This unit has recognized the USB storage
device as an unauthorized device.
Turn this unit off then on again.
—
The music files and
directories in the USB
device cannot be
viewed.
The music files and directories are placed
in locations other than the FAT area.
Place music files and directories in the FAT area.
—
You are attempting to browse directory
hierarchies of over 8 levels or a directory
with more than 500 files.
Modify the data structure on your USB device.
—
The PC server/
Internet Radio/
Rhapsody® does not
function properly.
The IP address is not set properly.
Set the DHCP server function of the router to ON.
Alternately, perform manual configuration according
to the current operating environment.
40
The network cable is not connected.
Connect it properly.
6
The music on the PC
server cannot be
played back.
The PC does not have Windows Media
Player 11 installed on it.
Install Windows Media Player 11 on the PC.
—
The music is recorded in a format that
cannot be played on this unit. This unit
cannot play music formats other than
WAV (PCM format only), MP3, WMA,
MPEG-4 AAC, or FLAC. Also note that it
cannot play certain music files even if
these are recorded in the WAV (PCM
format only), MP3, WMA, MPEG-4
AAC, or FLAC format.
Play music recorded in a format that this unit is
compatible with.
—
Internet Radio
stations cannot be
played.
The firewall of the network device is
activated. Internet Radio stations can only
be played when the signal pass through
the port designated by the individual radio
stations. The port number varies from
station to station.
Check the firewall setting of the network device.
—
Connection to the Internet is
disconnected.
Check the configuration of the network device, then
contact the network connection provider.
—
The file format is other than JPEG.
Select JPEG image files.
—
Image files cannot be
displayed.
48 En
Remedy
See
page
Problem
01EN_00_YMC-700_500_U.book Page 49 Wednesday, April 8, 2009 11:46 AM
Troubleshooting
Status message
Access error
Cause
Remedy
See
page
This unit cannot access your USB storage
device.
Try another USB storage device.
—
There is a problem with the signal path
from your USB storage device to this unit.
Turn off this unit and reconnect your USB storage device to
the USB port of this unit.
—
Try resetting your USB storage device.
—
Check the network settings, then contact the network
connection provider.
—
This unit cannot connect to the data server
due to network error, etc.
USB Connected
A USB storage device is properly
connected to this unit.
USB Disconnected
The USB storage device is disconnected.
Connect the USB storage device securely.
6
Access Denied
The PC you are attempting to connect has
denied connection.
Accept the YMC-700 on the “Media Sharing” screen
of Windows Media Player 11.
25
Unable to play
This unit cannot play back the songs
currently stored on your PC.
Make sure Windows Media Player 11 is installed on
your PC.
—
Check that the songs currently stored on your PC are
playable (MP3, WMA, MPEG-4 AAC, and WAV).
—
Store some other playable music files (MP3, WMA,
MPEG-4 AAC, and WAV) on your PC.
—
The network may be overloaded with
heavy traffic, and playback is interrupted.
Try preparing a network exclusively for use with this
unit to separate it from general network traffic.
—
You are attempting to play back expired
digital rights management (DRM)
encrypted content.
Select a file that is not protected by DRM.
—
Windows Media Player 11 does not
acquire the DRM license for the file.
Acquire the license to play back the file on Windows
Media Player 11.
—
License Unavailable
■ iPod
Note
Status message
Loading...
Cause
Remedy
See
page
This unit is in the process of recognizing
the connection with your iPod.
This unit is in the process of acquiring
song lists from your iPod.
Connect Error
There is a problem with the signal path
from your iPod to this unit.
Unknown iPod
The iPod being used is not supported by
this unit.
iPod Connected
Your iPod is properly stationed in a Yamaha
iPod universal dock (such as the YDS-11,
sold separately) connected to the DOCK
terminal of this unit, and the connection
between your iPod and this unit is complete.
iPod Disconnected
Your iPod was removed from a Yamaha
iPod universal dock (such as the YDS-11,
sold separately) connected to the DOCK
terminal of this unit.
Turn off this unit and reconnect the Yamaha iPod
universal dock to the DOCK terminal of this unit.
7
Try resetting your iPod.
—
This unit supports iPod touch, iPod (Click Wheel,
including iPod classic), iPod nano and iPod mini.
—
Station your iPod back in a Yamaha iPod universal
dock (such as the YDS-11, sold separately) connected
to the DOCK terminal of this unit.
7
49 En
ADDITIONAL
INFORMATION
If there is a transmission error but no status message appears on the GUI screen, check the connection of your iPod.
01EN_00_YMC-700_500_U.book Page 50 Wednesday, April 8, 2009 11:46 AM
Troubleshooting
■ Bluetooth
Status message
Searching...
Cause
The Bluetooth wireless audio receiver and the Bluetooth component are in the process of the pairing.
The Bluetooth wireless audio receiver and the Bluetooth component are in the process of establishing the
connection.
Pairing Completed
The pairing is completed.
Pairing Canceled
The pairing has been canceled.
Bluetooth Connected
The connection between the Yamaha Bluetooth wireless audio receiver (such as the YBA-10, sold separately)
and the Bluetooth component is established.
Bluetooth
Disconnected
The Bluetooth component is disconnected from the Yamaha Bluetooth wireless audio receiver (such as the
YBA-10, sold separately).
No Bluetooth
Receiver
The Bluetooth wireless audio receiver (such as the YBA-10, sold separately) is not connected to this unit.
Bluetooth Receiver
Error
The Bluetooth wireless audio receiver has returned an error. Contact the nearest authorized Yamaha dealer or
service center.
■ Auto Speaker Setup
If an error or warning message appears, check the cause of the problem, then perform the Auto Speaker Setup procedure
again.
Error message
Cause
Remedy
See
page
E-1: NO FRONT SP
Front L/R channel signals are not detected.
Check the front L/R speaker connections.
6
E-2: NO SUR. SP
No surround channel signals are detected.
Check the surround L/R speaker
connections.
6
E-3: NOISY
Background noise is too loud.
Perform the Auto Speaker Setup in a quiet
environment.
—
Turn off noisy electric equipment like air
conditioners or move them away from the
YPAO Mic.
—
Connect the supplied YPAO Mic to the
YPAO Mic jack.
11
E-4: NO MIC
The YPAO Mic was unplugged during the
“Auto Speaker Setup” procedure.
E-5: NO SIGNAL
The YPAO Mic does not detect test tones.
Check the YPAO Mic setting.
11
Check the speaker connections and
placement.
6, 9
The YPAO Mic or YPAO Mic jack may be
defective. Contact the nearest Yamaha
dealer or service center.
—
E-6: USER CANCEL
The “Auto Speaker Setup” procedure was
cancelled due to user activity.
Perform the Auto Speaker Setup procedure
again.
10
E-7: INTERNAL ERROR
An internal error occurred.
Perform the Auto Speaker Setup procedure
again.
If this error occurs repeatedly, contact a
qualified Yamaha service center.
10
Warning message
SWFR LEVEL ERROR
50 En
Cause
The difference of volume level between
speakers and subwoofer is excessive.
Remedy
Adjust the volume of the subwoofer to
compensate the status of “SWFR” on the
results display.
See
page
10
01EN_00_YMC-700_500_U.book Page 51 Wednesday, April 8, 2009 11:46 AM
GLOSSARY
Glossary
■ AIR SURROUND XTREME
■ Dolby Digital Plus
New Surround technology developed by Yamaha enables
surround with fewer speakers. In comparison to traditional front
surround technology, the AIR SURROUND XTREME provides a
natural surround sound field.
Dolby Digital Plus is an advanced audio technology developed for
high-definition programming and media including HD broadcasts
and Blu-ray Disc. Selected as an optional audio standard for Bluray Disc, this technology delivers multichannel sound with
discrete channel output. Supporting bitrates up to 6.0 Mbps, Dolby
Digital Plus can carry up to 7.1 discreet audio channels
simultaneously. Supported by HDMI version 1.3 and designed for
the optical disc players and AV receivers/amplifiers of the future,
Dolby Digital Plus also remains fully compatible with the existing
multichannel audio systems that incorporate Dolby Digital.
■ Audio and video synchronization
(lip sync)
Lip sync, an abbreviation for lip synchronization, is a technical
term that involves both a problem and a capability of maintaining
audio and video signals synchronized during post-production and
transmission. Whereas the audio and video latency requires
complex end-user adjustments, HDMI version 1.3 incorporates an
automatic audio and video syncing capability that allows devices
to perform this synchronization automatically and accurately
without user interaction.
■ Dolby TrueHD
■ Composite video signal
■ DTS 96/24
With the composite video signal system, the video signal is
composed of three basic elements of a video picture: color,
brightness and synchronization data. A composite video jack on a
video component transmits these three elements combined.
DTS 96/24 offers an unprecedented level of audio quality for multichannel sound on DVD video, and is fully backward-compatible with
all DTS decoders. “96” refers to a 96 kHz sampling rate compared to
the typical 48 kHz sampling rate. “24” refers to 24-bit word length.
DTS 96/24 offers sound quality transparent to the original 96/24
master, and 96/24 5.1-channel sound with full-quality full-motion
video for music programs and motion picture soundtracks on DVD
video.
■ Component video signal
■ Deep Color
Deep Color refers to the use of various color depths in displays,
up from the 24-bit depths in previous versions of the HDMI
specification. This extra bit depth allows HDTVs and other
displays go from millions of colors to billions of colors and
eliminate on-screen color banding for smooth tonal transitions
and subtle gradations between colors. The increased contrast ratio
can represent many times more shades of gray between black and
white. Also Deep Color increases the number of available colors
within the boundaries defined by the RGB or YCbCr color space.
■ Dolby Digital
Dolby Digital is a digital surround sound system that gives you
completely independent multi-channel audio. With 3 front
channels (front L/R and center), and 2 surround stereo channels,
Dolby Digital provides 5 full-range audio channels. With an
additional channel especially for bass effects, called LFE (Low
Frequency Effect), the system has a total of 5.1-channels (LFE is
counted as 0.1 channel). By using 2-channel stereo for the
surround speakers, more accurate moving sound effects and
surround sound environment are possible. The wide dynamic
range from maximum to minimum volume reproduced by the 5
full-range channels and the precise sound orientation generated
using digital sound processing provide listeners with
unprecedented excitement and realism. With this unit, any sound
environment from monaural up to a 5.1-channel configuration can
be freely selected for your enjoyment.
■ DTS Digital Surround
DTS digital surround was developed to replace the analog
soundtracks of movies with a 6.1-channel digital sound track.
DTS, Inc. has developed a home theater system so that you can
enjoy the depth of sound and natural spatial representation of DTS
digital surround in your home. This system produces practically
distortion-free 6-channel sound (technically, front left and right,
center, surround left and right, and LFE 0.1 (subwoofer) channels
for a total of 5.1 channels). This unit incorporates a DTS-ES
decoder that enables 6.1-channel reproduction by adding the
surround back channel to the existing 5.1-channel format.
■ FLAC
FLAC (Free Lossless Audio Codec) is an audio compression
format.
FLAC uses lossless compression, allowing the signals to be
compressed with absolutely no loss of the original sound’s data.
51 En
ADDITIONAL
INFORMATION
With the component video signal system, the video signal is
separated into the Y signal for the luminance and the PB and PR
signals for the chrominance. Color can be reproduced more
faithfully with this system because each of these signals is
independent. The component signal is also called the “color
difference signal” because the luminance signal is subtracted
from the color signal.
Dolby TrueHD is an advanced lossless audio technology
developed for high-definition disc-based media including Blu-ray
Disc. Selected as an optional audio standard for Blu-ray Disc, this
technology delivers sound that is bit-for-bit identical to the studio
master, offering a high-definition home theater experience.
Supporting bitrates up to 18.0 Mbps, Dolby TrueHD can carry up
to 8 discrete channels of 24-bit/96 kHz audio simultaneously.
Supported by HDMI version 1.3 and designed for the optical disc
players and AV receivers/amplifiers of the future, Dolby TrueHD
also remains fully compatible with the existing multichannel audio
systems and retains the metadata capability of Dolby Digital,
allowing dialog normalization and dynamic range control.
01EN_00_YMC-700_500_U.book Page 52 Wednesday, April 8, 2009 11:46 AM
Glossary
■ HDMI
HDMI (High-Definition Multimedia Interface) is the first
industry-supported, uncompressed, all-digital audio/video
interface. Providing an interface between any source (such as a
set-top box or AV receiver) and an audio/video monitor (such as a
digital television), HDMI supports standard, enhanced or highdefinition video as well as multi-channel digital audio using a
single cable. HDMI transmits all ATSC HDTV standards and
supports 8-channel digital audio, with bandwidth to spare to
accommodate future enhancements and requirements.
When used in combination with HDCP (High-bandwidth Digital
Content Protection), HDMI provides a secure audio/video
interface that meets the security requirements of content
providers and system operators. For further information on
HDMI, visit the HDMI website at “http://www.hdmi.org/”.
■ LFE 0.1 channel
This channel reproduces low-frequency signals. The frequency
range of this channel is from 20 Hz to 120 Hz. This channel is
counted as 0.1 because it only enforces a low-frequency range
compared to the full-range reproduced by the other channels in
systems.
■ MP3
One of the audio compression methods used by MPEG. It
employs the irreversible compression method, which achieves a
high compression rate by thinning out the data of hardly audible
part to the human ears. It is said to be capable of compressing the
data quantity by about 1/11 (128 kbps) while maintaining a
similar audio quality to music CD.
■ MPEG-4 AAC
An MPEG-4 audio standard. As it allows compression of data at a
bit rate lower than that of MPEG-2 AAC, it is used among others
for mobile telephones, portable audio players and other lowcapacity devices requiring high sound quality.
In addition to the above types of devices, MPEG-4 AAC is also
used to distribute contents on the Internet, and as such is
supported by computers, media servers and many other devices.
■ PCM (Linear PCM)
Linear PCM is a signal format under which an analog audio
signal is digitized, recorded and transmitted without using any
compression. The PCM system uses a technique for sampling the
size of the analog signal per very small unit of time. Standing for
“Pulse Code Modulation”, the analog signal is encoded as pulses
and then modulated for recording.
52 En
■ Sampling frequency and number of
quantized bits
When digitizing an analog audio signal, the number of times the
signal is sampled per second is called the sampling frequency,
while the degree of fineness when converting the sound level into a
numeric value is called the number of quantized bits. The range of
rates that can be played back is determined based on the sampling
rate, while the dynamic range representing the sound level
difference is determined by the number of quantized bits. In
principle, the higher the sampling frequency, the wider the range of
frequencies that can be played back, and the higher the number of
quantized bits, the more finely the sound level can be reproduced.
■ WAV
Windows standard audio file format, which defines the method of
recording the digital data obtained by converting audio signals. It
does not specify the compression (coding) method so a desired
compression method can be used with it. By default, it is
compatible with the PCM method (no compression) and some
compression methods including the ADPCM method.
■ WMA
An audio compression method developed by Microsoft
Corporation. It employs the irreversible compression method,
which achieves a high compression rate by thinning out the data
of hardly audible part to the human ears. It is said to be capable of
compressing the data quantity by about 1/22 (64 kbps) while
maintaining a similar audio quality to music CD.
■ “x.v.Color”
A color space standard supported by HDMI version 1.3. It is a
more extensive color space than sRGB, and allows the expression
of colors that could not be expressed before. While remaining
compatible with the color gamut of sRGB standards, “x.v.Color”
expands the color space and can thus produce more vivid, natural
images. It is particularly effective for still pictures and computer
graphics.
01EN_00_YMC-700_500_U.book Page 53 Wednesday, April 8, 2009 11:46 AM
Glossary
Information on audio/video jacks and cable plugs
This unit has three types of audio jacks, two types of video jacks and HDMI jacks. You can choose the connection
method depending on the component to be connected.
■ Audio jacks
AUDIO IN 1
■ Video jacks
AUDIO IN 2
(Orange)
C
Coaxial
digital audio
cable plug
(Red)
O
Optical
digital
audio cable
plug
R
VIDEO IN 3
VIDEO IN 1/2
AUDIO IN 3
(White)
(Green)
(Blue)
(Red)
(Yellow)
L
Y
PB
PR
V
Left and right
analog audio
cable plugs
AUDIO IN 1 (COAXIAL) jack
For digital audio signals transmitted via a coaxial digital
audio cable.
AUDIO IN 2 (OPTICAL) jack
For digital audio signals transmitted via an optical digital
audio cable.
Composite
video cable
plug
VIDEO IN 1/2 jacks
For component video signals, separated into the
luminance (Y) and chrominance (PB, PR) video signals
transmitted on separate wires of component video cables.
VIDEO IN 3 jack
For conventional composite video signals transmitted via
composite video cable.
y
This unit is equipped with a video up-conversion function as
shown below.
Note
Input
You cannot use the AUDIO IN 3 jacks to input PCM, Dolby
Digital and DTS bitstreams.
Output
HDMI
COMPONENT
VIDEO
VIDEO
Through
Video upconversion
53 En
ADDITIONAL
INFORMATION
AUDIO IN 3 jacks
For conventional analog audio signals transmitted via a
left and right analog audio cable. Connect the red plugs to
the right jacks, the white plugs to the left jacks.
Component
video cable
plugs
01EN_00_YMC-700_500_U.book Page 54 Wednesday, April 8, 2009 11:46 AM
Glossary
Information on HDMI™
This unit has three HDMI input jacks and an HDMI output
jack for digital audio and video signal input/output.
■ HDMI jack and cable plug
HDMI
HDMI cable plug
y
• We recommend that you use a commercially available HDMI
cable shorter than 5 meters (16 feet) with the HDMI logo
printed on it.
• Use a conversion cable (HDMI jack ↔ DVI-D jack) to connect
this unit to other DVI components.
• If you set “HDMI Standby Through” in “Option” to “HDMI 1”,
“HDMI 2” or “HDMI 3”, this unit allows the HDMI signals
input at the corresponding HDMI IN jack to pass through this
unit and be output from the HDMI OUT jack.
Notes
• Do not disconnect or connect the cable or turn off the power of
the HDMI component connected to the HDMI OUT jack of this
unit while data is being transferred. Doing so may disrupt
playback or cause noise.
• The HDMI OUT jack outputs the audio signals input at the
HDMI input jacks only.
• If you turn off the TV connected to the HDMI OUT jacks via a
DVI connection, the connection may fail.
■ HDMI signal compatibility with this unit
Audio signals
Audio signal
types
Audio signal
formats
Compatible
media
2ch Linear
PCM
2ch, 32-192 kHz,
16/20/24 bit
CD, DVD-Video,
DVD-Audio, etc.
Multi channel
Linear PCM
8ch, 32-192 kHz,
16/20/24 bit
DVD-Audio,
Blu-ray Disc,
HD DVD, etc.
Bitstream
Dolby Digital,
DTS
DVD-Video,
Blu-ray Disc,
HD DVD
Bitstream (High Dolby TrueHD,
definition
Dolby Digital Plus
audio)
Blu-ray Disc,
HD DVD, etc.
y
Refer to the owner’s manual of the input source component and
set the component appropriately.
54 En
Notes
• When CPPM copy-protected DVD audio is played back, video
and audio signals may not be output, depending on the type of
DVD player being used.
• This unit is not compatible with non HDCP compliant HDMI or
DVI components.
• To decode bitstream audio signals on this unit, you may need to
change some settings on the source component.
Video signals
This unit is compatible with video signals of the following
resolutions:
– 480i/60 Hz
– 576i/50 Hz
– 480p/60 Hz
– 576p/50 Hz
– 720p/60 Hz, 50 Hz
– 1080i/60 Hz, 50 Hz
– 1080p/60 Hz, 50 Hz, 24Hz
Compatibility with Deep Color and x.v.Color
video signals
This unit accepts Deep Color (30 or 36-bit) and x.v.Color
video signals.
Note
If the TV is not compatible with Deep Color or x.v.Color video
signals, the video source may not be played back correctly.
01EN_00_YMC-700_500_U.book Page 55 Wednesday, April 8, 2009 11:46 AM
SPECIFICATIONS
Specifications
• Power Supply ........................................................ AC 120 V, 60 Hz
• Power Consumption
YMC-700 .............................................................................. 60 W
YMC-500 .............................................................................. 50 W
• Standby Power Consumption (Reference Data) ..................... 0.6 W
• Maximum Power Consumption
5 ch, 10% THD ................................................................... 170 W
• Dimensions (W x H x D) ...................................................................
YMC-700 ......... 298 x 93 x 332 mm (11-3/4” × 3-5/8” × 13-1/8”)
YMC-500 ......... 298 x 93 x 313 mm (11-3/4” × 3-5/8” × 12-3/8”)
• Weight ....................................................................... 3.6 kg (7.9 lbs)
* Specifications are subject to change without notice.
ADDITIONAL
INFORMATION
COMPLIANCE INFORMATION STATEMENT (DECLARATION OF CONFORMITY PROCEDURE)
Responsible Party:
Address:
Yamaha Electronics Corporation, U.S.A.
6660 Orangethorpe Avenue
Buena Park, CA 90620
Telephone:
714-522-9105
1-800-492-6242 (toll free)
Fax:
714-228-3390
Type of Equipment: Media Controller
Model Name:
YMC-700/YMC-500
• This device complies with Part 15 of the FCC Rules.
• Operation is subject to the following conditions:
– This device may not cause harmful interference.
– This device must accept any interference received including
interference that may cause undesired operation.
See the “Troubleshooting” section of this manual if interference
to radio reception is suspected.
We Want You Listening For A Lifetime
Yamaha and the Electronic Industries Association’s Consumer Electronics Group want you to get the most out of your
equipment by playing it at a safe level. One that lets the sound come through loud and clear without annoying blaring or
distortion – and, most importantly, without affecting your sensitive hearing. Since hearing damage from loud sounds is
often undetectable until it is too late, Yamaha and the Electronic Industries Association’s Consumer Electronics Group
recommend you to avoid prolonged exposure from excessive volume levels.
55 En
01EN_00_YMC-700_500_U.book Page 56 Wednesday, April 8, 2009 11:46 AM
QUICK REFERENCE
Quick reference
Activity
Setup
Watching TV programs
Watching DVDs or
Blu-ray discs
Connecting
an iPod dock
(☞ P. 7)
Watching video contents
stored on your iPod
Listening to CDs
Listening to music
stored on your iPod
Connecting
an iPod dock
(☞ P. 7)
Listening to music
using Bluetooth
Connecting
a Bluetooth
receiver
(☞ P. 7)
Listening to
FM radio stations
Listening to music
stored on USB
storage devices
Making basic
connections
(☞ Quick
Start Guide)
Setting up
the speakers,
input sources
and remote
control codes
(☞ P. 10)
Connecting
an FM antenna
(☞ P. 7)
Connecting
a USB storage
device (☞ P. 6)
Listening to
Rhapsody ® music
(YMC-700 only)
Listening to Internet radio
(YMC-700 only)
Listening to music
stored on PCs
(YMC-700 only)
Connecting
to a router
(☞ P. 7)
and
Setting up
the network
(☞ P. 40)
Setting up
Your PC
(☞ P. 25)
Viewing photos
stored on PCs
(YMC-700 only)
Playing back photos
stored on USB
storage devices
Playing games
56 En
Connecting
a USB storage
device (☞ P. 6)
01EN_00_YMC-700_500_U.book Page 57 Wednesday, April 8, 2009 11:46 AM
Quick reference
Select input
Control playback
Registering
your favorite
TV stations
(☞ P. 42)
Controlling
playback
(☞ P. 20)
Customizing
the remote
control
(☞ P. 40)
Controlling
iPod
(☞ P. 28)
Customizing
the remote
control
(☞ P. 40)
Controlling
playback
(☞ P. 20)
Controlling
iPod
(☞ P. 28)
Pairing (☞ P. 35)
and playback
on your
Bluetooth device
Select DSP
Programs /
Adjusting the
tone (☞ P. 19)
Presetting
stations
(☞ P. 23)
Tuning in to
a station
(☞ P. 22)
Searching
music
(☞ P. 32)
Adding to the
library
(☞ P. 33)
Selecting a
station
(☞ P. 30)
Adding to the
bookmark
(☞ P. 31)
ADDITIONAL
INFORMATION
Controlling
playback
(☞ P. 24)
Controlling
playback
(☞ P. 24)
Using
photos as
a screen saver
(☞ P. 27)
Viewing
photos
(☞ P. 26)
Controlling
playback
(☞ P. 20)
Select DSP
Programs /
Adjusting tone
(☞ P. 19)
Customizing
the remote
control
(☞ P. 40)
57 En
01EN_00_YMC-700_500_U.book Page 58 Wednesday, April 8, 2009 11:46 AM
© 2009
All rights reserved.
Printed in China
WR17640
Read Me First
Use this guide to make sure all connections are properly done prior to powering the unit ON.
YMC-700/YMC-500
Quick Start Guide Quick Start Guide
Start
1
Items used for setup in this guide
2
On the “Connection Planning Chart A ”, write
down the source devices (except TV) that you will
connect in order of most frequently used (from
left to right) as follows.
Supplied items
& YMC-700/YMC-500 (this unit)
& Power cable
& Remote control
A Connection Planning Chart
Write down the
device you want
to connect
& IR flasher x2
Device name
Brand
Device 1
Device 2
Device 3
Game
Blu-ray
Time W
CB-528
HDMI
Required items
& TV with an HDMI connection
& HDMI cable from this unit to TV
& Source devices (Cable box, DVD, etc.)
& HDMI and/or Audio/Video cables from source devices
& Speakers and speaker cables
& Subwoofer and subwoofer cable
Play2
No 666
15 pt
9 pt
Better
Standard
Device 4
Device 5
Device 6
Write down the
device you want
to connect
BD-S2900
15 pt
15 pt
HDMI
15 pt
Device name
Brand
Device 1
Device 2
Device 3
Cable box
Game
Blu-ray
Time W
Model No.
CB-528
15 pt
14 pt
14 pt
14 pt
Best 14 pt
13 pt
13 pt
13 pt
13 pt
9 pt
9 pt
9 pt
9 pt
6 pt
6 pt
6 pt
6 pt
14 pt
Video
Video
Better
Play2
No 666
15 pt
9 pt
Yamaha
Device 4
Device 5
Device 6
15 pt
15 pt
15 pt
15 pt
15 pt
14 pt
14 pt
14 pt
14 pt
14 pt
13 pt
13 pt
13 pt
13 pt
9 pt
9 pt
9 pt
9 pt
9 pt
6 pt
6 pt
6 pt
6 pt
6 pt
9 pt
6 pt
3 pt
3 pt
3 pt
3 pt
3 pt
Standard
3 pt
3 pt
3 pt
3 pt
3 pt
3 pt
3 pt
3 pt
3 pt
3 pt
3 pt
3 pt
Audio Better3 pt
3 pt
3 pt
3 pt
3 pt
3 pt
3 pt
Better
2 pt
2 pt
2 pt
2 pt
2 pt
Better2 pt
2 pt
2 pt
2 pt
2 pt
2 pt
2 pt
Standard
1 pt
1 pt
1 pt
1 pt
1 pt
Standard
1 pt
1 pt
1 pt
1 pt
1 pt
1 pt
1 pt
15
15
pt
15
pt
15
pt
15
pt
15
15
Total pt of the circled items
pt
pt
y
The numbers of pts are used in the Initial Setup procedure.
15
pt
Write down the
device you want
to connect
BD-S2900
Audio Better
Total pt of the circled items
For operation and installation details, refer to the owner’s
manual of each source device item.
Yamaha
15 pt
Best
Device 1
Use this chart to find the best possible connections.
The source device you will use most frequently
Cable box
Model No.
Use this chart to find the best possible connections.
The source device you will use most frequently
A Connection Planning Chart
Use this chart to find the best possible connections.
The source device you will use most frequently
* Install the supplied batteries to the remote control in advance.
A Connection Planning Chart
View the output jacks available on each source
device and then fill in the check box.
15
pt
15
pt
15
pt
15
pt
Device 2
3
4
• When there is a check mark on the HDMI jack, circle the top HDMI 1,
HDMI 2, or HDMI 3. If another previous device has already selected
an input, then select the next one available.
• If there are NO check marks in the any of the HDMI jacks, then make
sure to select a video jack with an audio jack.
15 pt
A Connection Planning Chart
Write down the
device you want
to connect
Use this chart to find the best possible connections.
The source device you will use most frequently
Device name
Brand
Device 1
Device 2
Device 3
Game
Blu-ray
CB-528
HDMI
Play2
15 pt
Best
Video
9 pt
Better
Standard
3 pt
Audio Better
3 pt
No 666
Yamaha
Cable box
Game
15 pt
15 pt
15 pt
15 pt
14 pt
14 pt
14 pt
14 pt
14 pt
13 pt
13 pt
13 pt
13 pt
9 pt
9 pt
9 pt
9 pt
9 pt
6 pt
6 pt
6 pt
6 pt
6 pt
3 pt
3 pt
3 pt
3 pt
3 pt
3 pt
Audio Better
3 pt
3 pt
3 pt
3 pt
3 pt
3 pt
Better
2 pt
2 pt
2 pt
2 pt
2 pt
2 pt
Standard
1 pt
1 pt
1 pt
1 pt
1 pt
1 pt
Best
pt
Video
9 pt
Better
Device 4
Time W
Model No.
CB-528
Play2
Device 4
Device 5
Video
9 pt
Better
15 pt
15 pt
15 pt
15 pt
14 pt
14 pt
14 pt
14 pt
14 pt
Standard
13 pt
13 pt
13 pt
9 pt
9 pt
9 pt
9 pt
6 pt
6 pt
6 pt
6 pt
3 pt
3 pt
3 pt
3 pt
3 pt
3 pt
13 pt
Audio Better
9 pt
Better
6 pt
Standard
3 pt
2 pt
2 pt
2 pt
2 pt
2 pt
Standard
1 pt
1 pt
1 pt
1 pt
1 pt
12
OUT
1
USB
1
NETWORK
3
2
HDMI OUT
AUDIO IN
2
R
AC IN
R
L
R
FRONT
15 pt
15 pt
15 pt
3
2
1
HDMI IN
VIDEO IN
L
SUB
WOOFER
L
ANTENNA
WIRELESS
DOCK
3
OUTPUT
SURROUND CENTER
14 pt
14 pt
14 pt
13 pt
13 pt
9 pt
9 pt
15 pt
pt
IN
1
USB
3 pt
1
NETWORK
3
2
HDMI OUT
AUDIO IN
2
R
REMOTE CONTROL
3
2
VIDEO IN
L
1
HDMI IN
R
L
FRONT
R
SUB
WOOFER
L
3
OUTPUT
SURROUND CENTER
15
15
pt
pt
15
15
pt
15
pt
2
1
2
1
AUDIO IN
R
R
AC IN
L
FRONT
R
14 pt
HDMI IN
USB
1
NETWORK
3
2
HDMI OUT
AUDIO IN
2
R
3
2
VIDEO IN
1
HDMI IN
L
ANTENNA
WIRELESS
DOCK
AC IN
R
L
R
FRONT
L
SUB
WOOFER
3
OUTPUT
SURROUND CENTER
3
R
6 pt
6 pt
3 pt
3 pt
3 pt
3 pt
3 pt
3 pt
3 pt
3 pt
2 pt
2 pt
2 pt
2 pt
2 pt
H
1 pt
1 pt
1 pt
1 pt
1 pt
3 pt
OUT
1
USB
1
NETWORK
3
2
AUDIO IN
2
R
REMOTE CONTROL
3
HDMI OUT
2
VIDEO IN
R
L
FRONT
15
pt
pt
15
pt
15
OUT
NETWORK
USB
SUB
WOOFER
L
11
pt
AUDIO IN
HDMI OUT
VIDEO IN
HDMI IN
L
R
L
1
1
1
NETWORK
3
2
HDMI OUT
AUDIO IN
2
R
REMOTE CONTROL
3
2
VIDEO IN
R
L
R
L
SURROUND CENTER
SUB
WOOFER
8
1
pt
pt
IN
B Connection Diagrams
1
USB
1
NETWORK
3
2
HDMI OUT
AUDIO IN
2
R
REMOTE CONTROL
3
2
VIDEO IN
ANTENNA
FM
75 W
UNBAL.
AUDIO IN
R
IN
R
L
R
L
SURROUND CENTER
SUB
WOOFER
3
OUTPUT
ANTENNA
FM
75 W
UNBAL.
2
15
SPEAKERS
2
1
WIRELESS
DOCK
IN
L
REMOTE CONTRO
R
L
R
AC IN
Device
name:
10
pt
HDMI OUT
3
VIDEO IN
HDMI IN
L
1
6
7
R
AC IN
L
FRONT
R
3
OUTPUT
L
OUT
2
1
2
1
NETWORK
USB
AUDIO IN
R
IN
HDMI OUT
3
VIDEO IN
R
HDMI OUT
3
2
VIDEO IN
L
1
HDMI IN
ANTENNA
WIRELESS
DOCK
R
L
R
SUB
WOOFER
L
3
OUTPUT
SURROUND CENTER
WIRELESS
DOCK
Brand:
Game
Model No.:
Play2
No 666
Brand:
Device
name:
1
1
USB
1
NETWORK
3
2
HDMI OUT
AUDIO IN
2
R
3
2
VIDEO IN
L
1
HDMI IN
AC IN
R
L
FRONT
R
SUB
WOOFER
L
3
OUTPUT
SURROUND CENTER
pt
ANTENNA
WIRELESS
DOCK
IN
1
USB
1
NETWORK
3
2
HDMI OUT
AUDIO IN
2
R
REMOTE CONTROL
3
2
VIDEO IN
1
HDMI IN
L
AC IN
R
L
R
FRONT
SPEAKERS
L
SUB
WOOFER
3
OUTPUT
SURROUND CENTER
pt
ANTENNA
WIRELESS
DOCK
IN
1
USB
1
NETWORK
3
2
HDMI OUT
AUDIO IN
2
R
REMOTE CONTROL
3
2
VIDEO IN
L
1
HDMI IN
AC IN
R
L
FRONT
R
SUB
WOOFER
L
3
OUTPUT
SURROUND CENTER
pt
ANTENNA
WIRELESS
DOCK
IN
OUT
1
USB
3
3
2
HDMI OUT
AUDIO IN
R
3
2
VIDEO IN
L
1
HDMI IN
ANTENNA
WIRELESS
DOCK
FM
75 W
UNBAL.
1
2
AC IN
R
L
R
FRONT
SPEAKERS
SPEAKERS
1
NETWORK
2
REMOTE CONTROL
FM
75 W
UNBAL.
1
2
3
OUT
3
FM
75 W
UNBAL.
1
2
6
OUT
3
FM
75 W
UNBAL.
1
SUB
WOOFER
L
3
OUTPUT
SURROUND CENTER
2
SPEAKERS
Model No.:
7
pt
pt
2
1
2
NETWORK
USB
AUDIO IN
R
HDMI OUT
1
2
3
VIDEO IN
HDMI IN
1
R
AC IN
L
FRONT
L
R
CENTER
SURROUND
AUDIO IN
R
HDMI OUT
HDMI IN
VIDEO IN
H
OUTPUT
AC IN
WIRELESS
DOCK
IN
L
R
FRONT
L
R
2
3
SUB
WOOFER
CENTER
SURROUND
Device
name:
AC IN
FRONT
IN
1
USB
1
NETWORK
3
2
HDMI OUT
AUDIO IN
2
R
REMOTE CONTROL
This unit
AC IN
R
L
FRONT
3
2
VIDEO IN
L
R
SUB
WOOFER
L
11
1
pt
IN
1
USB
3
ANTENNA
WIRELESS
DOCK
1
NETWORK
3
2
R
HDMI OUT
3
2
VIDEO IN
L
R
L
FRONT
SPEAKERS
R
SUB
WOOFER
L
3
OUTPUT
SURROUND CENTER
HDMI IN
VIDEO IN
1
NETWORK
USB
L
R
L
R
pt
IN
1
USB
1
NETWORK
A
AC IN
3
2
R
HDMI OUT
3
2
VIDEO IN
L
5
1
FRONT
AC IN
R
L
R
FRONT
SPEAKERS
L
SUB
WOOFER
3
OUTPUT
SURROUND CENTER
2
3
OUTPUT
CENTER
SURROUND
A
Brand:
Device
name:
pt
IN
Model No.:
1
USB
1
NETWORK
3
2
HDMI OUT
AUDIO IN
2
R
REMOTE CONTROL
3
2
VIDEO IN
L
1
AC IN
R
L
FRONT
SPEAKERS
R
SUB
WOOFER
L
IN
OUT
1
USB
3
ANTENNA
WIRELESS
DOCK
3
OUTPUT
SURROUND CENTER
pt
HDMI IN
1
NETWORK
3
2
HDMI OUT
AUDIO IN
2
R
REMOTE CONTROL
3
2
VIDEO IN
L
1
HDMI IN
ANTENNA
WIRELESS
DOCK
FM
75 W
UNBAL.
1
2
2
OUT
3
FM
75 W
UNBAL.
1
FM
75 W
UNBAL.
1
SUB
WOOFER
L
V
Brand:
ANTENNA
WIRELESS
DOCK
ANTENNA
WIRELESS
DOCK
SPEAKERS
HDMI IN
FM
75 W
UNBAL.
2
R
L
R
Model No.:
AUDIO IN
2
REMOTE CONTROL
HDMI IN
3
OUTPUT
Device
name:
OUT
3
ANTENNA
VIDEO IN
L
3
R
2
3
SUB
WOOFER
CENTER
SURROUND
FRONT
A
Brand:
HDMI OUT
AUDIO IN
75 W
UNBAL.
IN
TROL
REMOTE CON
V
AC IN
FM
2
1
ANTENNA
2
1 SS
WIRELE
DOCK
L
1
2
3
OUT
SPEAKERS
8
1
WIRELESS
DOCK
1
AC IN
HDMI OUT
3
3
OUTPUT
HDMI IN
FM
75 W
UNBAL.
2
R
Model No.:
AUDIO IN
2
REMOTE CONTROL
2
AUDIO IN
75 W
UNBAL.
2
3
SUB
WOOFER
L
CENTER
SURROUND
Device
name:
OUT
HDMI IN
3
OUTPUT
SURROUND CENTER
R
Model No.:
OUT
3
1
NETWORK
USBFM
DOCK
IN
1
ANTENNA
1 WIRELE2SS
1
2
3
OUT
SPEAKERS
A
Model No.:
pt
L
Brand:
Device
name:
VIDEO IN
L
3
R
V
R
SPEAKERS
HDMI OUT
AUDIO IN
FM
75 W
UNBAL.
HDMI IN
TROL
REMOTE CON
OUTPUT
SPEAKERS
Brand:
USB
1 3
TROL
REMOTE CON
1
ANTENNA
NETWORK
2
1
L
3
3
2
3
NETWORK
USB
2
1
2
3
OUT
TROL
REMOTE CON
TROL
REMOTE CON
SUB
WOOFER
2
1
2
1
FM IN
75 W
UNBAL.
1
2
3
OUT
ANTENNA
WIRELESS
DOCK
L
3
14
FM
75 W
UNBAL.
9
OUT
REMOTE CONTROL
A
3
ANTENNA
IN
3
2
1
HDMI IN
pt
FM
75 W
UNBAL.
V
CENTER
SURROUND
A
1
L
3
3
2
AUDIO IN
SPEAKERS
This unit
2
1
NETWORK
2
Connect the supplied IR flashers to the REMOTE
OUT jacks on the back of this unit, then attach
the IR flasher to the remote control sensor on the
front of the devices as follows. (☞ P. 8 for details)
This will allow this unit to control the attached
source devices.
TV
Source device
3
USB
2
1
IN
8
1
FRONT
SUB
WOOFER
12
OUT
REMOTE CONTROL
OUT
Use an HDMI cable to connect this unit to your
TV’s HDMI input.
IN
3
FM
75 W
UNBAL.
1
Refer to “Connection Diagrams B ” and then
connect the cables from the source devices to
this unit as indicated. See page 6 about further
connections (iPod dock, network, etc.)
pt
ANTENNA
WIRELESS
DOCK
SPEAKERS
Model No.:
13
R
V
SPEAKERS
Brand:
AUDIO IN
FM
75 W
UNBAL.
AC IN
OUTPUT
L
CENTER
SURROUND
FRONT
CENTER
SURROUND
2
3
SUB
WOOFER
2
1
ANTENNA
NETWORK
USB
1 3
3
H
OUTPUT
HDMI IN
1
2
3
OUT
VIDEO IN
L
3
1
2
HDMI OUT
A : AUDIO
1
WIRELESS
DOCK
1
AC IN
FRONT
L
REMOTE CONTRO
2
3
SUB
WOOFER
NETWORK
USB
V : VIDEO
HDMI IN
L
FM
75 W
UNBAL.
2
H : HDMI
OUT
3
ANTENNA
WIRELESS
DOCK
3
OUTPUT
3
2
1
2
1
pt
V
A
Brand:
HDMI IN
L
1
OUT
pt
1
Device
name:
y
The numbers of pts are used in the Initial Setup procedure.
OUTPUT
L
FM
75 W
UNBAL.
Model No.:
OUT
USB
15
pt
2
CENTER
SURROUND
SPEAKERS
WIRELESS
DOCK
L
3
3
FRONT
IN
3
AC IN
L
REMOTE CONTRO
R
R
ANTENNA
WIRELESS
DOCK
1
3
Device
name:
FM
75 W
UNBAL.
FRONT
15
2
3
2
R
AC IN
pt
ANTENNA
15
pt
SPEAKERS
Brand:
2
VIDEO IN
L
3
R
SUB
WOOFER
Model No.:
1
WIRELESS
DOCK
3
OUTPUT
FRONT
A
2 pt
15
pt
y
The numbers of pts are used in the Initial Setup procedure.
1 pt
1
2
1
R
SURROUND CENTER
SPEAKERS
L
R
AC IN
Device
name:
HDMI OUT
AUDIO IN
FM
75 W
UNBAL.
HDMI IN
V
OUTPUT
HDMI IN
L
1
AC IN
2
2
1
ANTENNA
NETWORK
USB
1 3
SPEAKERS
3 pt
IN
WIRELESS
DOCK
IN
CENTER
SURROUND
FRONT
pt Time W
Cable box Model6 No.:
CB-528
3
2
1
3
SUB
WOOFER
L
R
L
R
Brand:
pt
VIDEO IN
L
L
REMOTE CONTRO
AC IN
14
HDMI IN
1
2
3
OUT
HDMI OUT
3
1
2
3
9 pt
Device
name:
AUDIO IN
15
pt
2
SPEAKERS
L
REMOTE CONTRO
2
OUTPUT
L
NETWORK
USB
FM IN
75 W
UNBAL.
13 pt
SUB
WOOFER
2
1
ANTENNA
WIRELESS
DOCK
2
1
15
pt
FM
75 W
UNBAL.
1
2
3
OUT
1
9 pt
6 pt
15
11
VIDEO IN
L
CENTER
SURROUND
SPEAKERS
3 pt
+
HDMI OUT
3
13 pt
6 pt
1 pt
15
1
SPEAKERS
1
15
OUT
REMOTE CONTROL
15 pt
NETWORK
USB
3
L
REMOTE CONTRO
3 pt
2 pt
y
The numbers of pts are used in the Initial Setup procedure.
pt
IN
3
FM
75 W
UNBAL.
SPEAKERS
Total pt of the circled items
pt
ANTENNA
WIRELESS
DOCK
1
AC IN
Total pt of the circled items
9
OUT
3
FM
75 W
UNBAL.
2
2
3
14 pt
OUT
IN
Better
IN
3
1
9 pt
15 pt
15
Total pt of the circled items
3 pt
pt
REMOTE CONTROL
IN
BD-S2900
Device 6
15
No 666
Device 6 Best
Device 5
B Connection Diagrams
Device 3
SPEAKERS
Brand
15 pt
15 pt
3 pt
Device 2
HDMI
Cable box
Time W
Model No.
Device name
Device 1
Device 6
15 pt
Using the points, write down the names of the
devices on the “Connection Diagrams B ”.
Use this chart to find the best possible connections.
The source device you will use most frequently
A Connection Planning Chart
Write down the
device you want
to connect
5
Write down the total points (pt) of the circled
item(s).
Device 5
Model No.
Standard
Choose the best connections available for your
source device as follows:
Device 4
Device name
Brand
HDMI
y
The numbers of pts are used in the Initial Setup procedure.
Device 3
FM
75 W
UNBAL.
1
2
AC IN
R
L
R
FRONT
SPEAKERS
SUB
WOOFER
L
3
OUTPUT
SURROUND CENTER
2
SPEAKERS
OL
REMOTE CONTR
AC IN
R
L
FRONT
R
L
SUB
WOOFER
2
3
OUTPUT
CENTER
SURROUND
SPEAKERS
Source device
Source device
2
1
1
NETWORK
USB
AUDIO IN
R
HDMI OUT
VIDEO IN
HDMI IN
WIRELESS
DOCK
L
3
IN
1
R
L
FRONT
L
R
CENTER
SURROUND
3
SUB
WOOFER
AUDIO IN
R
ANTENNA
HDMI OUT
3
VIDEO IN
HDMI IN
WIRELESS
DOCK
L
1
2
3
FM
75 W
UNBAL.
ANTENNA
FM
75 W
UNBAL.
OL
REMOTE CONTR
ROL
REMOTE CONT
AC IN
2
1
NETWORK
USB
1
2
3
OUT
1
2
3
1
2
3
OUT
IN
AC IN
2
R
L
FRONT
R
L
SUB
WOOFER
3
2
OUTPUT
RE
SE MO
NS TE
OR
CENTER
SURROUND
SPEAKERS
OUTPUT
TE
MOOR
RENS
SE
SPEAKERS
Source
device
Source device
To TV
3
OUT
2
1
2
1
NETWORK
USB
AUDIO IN
R
IN
10
up
Initial Set
IN
OUT
1
USB
3
1
NETWORK
2
HDMI OUT
AUDIO IN
2
R
REMOTE CONTROL
FR
3
3
L
2
VIDEO IN
HDMI IN
WIRELESS
DOCK
1
SW
FL
AC IN
R
L
FRONT
R
SUB
WOOFER
L
SURROUND CENTER
OUTPUT
SPEAKERS
3
2
D!
nts have
e to neoH
Welcom llowing compone step:
next
the fo
e
at
th
th
to
irm
ding
1 lease conf
re procee
P
alled befo
been inst
ers
ANTENNA
3 Speak evices
FM
eD
75 W
3 Sourc
UNBAL.
ers
3 IR flash
tup?
e initial se
ue with th
in
nt
co
y to
ad
re
u
Yes
Are yo
No
TE
MOOR
RENS
SE
L
R
AC IN
1
FRONT
R
L
3
SUB
WOOFER
This unit
C
SL
FR
FL
SR
y
C, SL, and SR speakers are used with 5.1-channel speaker layout.
WR17650
SL
Subwoofer (SW)
VIDEO IN
L
FRONT
L
R
CENTER
SURROUND
2
3
SUB
WOOFER
2
1
13
3
IN
1
USB
1
NETWORK
FRONT
HDMI OUT
3
2
VIDEO IN
10
1
HDMI IN
L
R
L
FRONT
R
L
SUB
WOOFER
SURROUND CENTER
OUTPUT
3
R
IN
1
USB
NETWORK
AUDIO IN
R
HDMI OUT
3
VIDEO IN
AC IN
R
WIRELESS
DOCK
L
1
L
FRONT
L
R
CENTER
SURROUND
3
SUB
WOOFER
ANTENNA
FM
75 W
UNBAL.
2
1
2
NETWORK
USB
AUDIO IN
R
IN
R
L
SURROUND CENTER
SUB
WOOFER
2
VIDEO IN
7
1
pt
IN
L
1
USB
H
L
FRONT
R
SUB
WOOFER
CENTER
SURROUND
3
2
HDMI OUT
AUDIO IN
R
3
L
2
VIDEO IN
AC IN
R
L
FRONT
R
L
SURROUND CENTER
SUB
WOOFER
OUTPUT
3
VIDEO IN
HDMI IN
1
WIRELESS
DOCK
USB
2
AUDIO IN
FM
75 W
UNBAL.
1 3
3
1
ANTENNA
NETWORK
2
2
pt
IN
R
HDMI OUT
3
AC IN
L
FRONT
1
USB
VIDEO IN
L
3
2
HDMI OUT
AUDIO IN
R
3
L
2
VIDEO IN
L
R
CENTER
SURROUND
SUB
WOOFER
Device
name:
1
1
R
L
R
L
SURROUND CENTER
SUB
WOOFER
Component
video cable
1
USB
2
1
ANTENNA
1 WIRELE2SS
NETWORK
USBFM
DOCK
AUDIO IN
75 W
UNBAL.
R
R
AC IN
3
VIDEO IN
HDMI IN
R
AC IN
Coaxial digital
audio cable
1
HDMI IN
WIRELESS
DOCK
L
R
SUB
WOOFER
L
SURROUND CENTER
3
OUTPUT
ANTENNA
FM
75 W
UNBAL.
2
2
1
ANTENNA
FM
NETWORK
USB
AUDIO IN
75 W
UNBAL.
IN
2
R
HDMI OUT
3
1
2
VIDEO IN
HDMI IN
WIRELESS
DOCK
L
1
3
TROL
REMOTE CON
R
L
FRONT
R
L
CENTER
SURROUND
3
SUB
WOOFER
A
Device
name:
2
OUTPUT
AC IN
V
SPEAKERS
Brand:
2
VIDEO IN
3
OUT
1 SS
WIRELE
DOCK
1
2
V
L
1
2
L
3
OUTPUT
HDMI OUT
3
SPEAKERS
HDMI OUT
3
3
2
AUDIO IN
FRONT
3
2
1
NETWORK
2
1
1
OUT
1
Model No.:
Composite
video cable
OUT
REMOTE CONTROL
FM
75 W
UNBAL.
Brand:
A
L
R
FRONT
Device
name:
L
CENTER
SURROUND
3
SUB
WOOFER
RCA stereo
cable
2
OUTPUT
A
Brand:
Model No.:
Model No.:
Optical digital
audio cable
R
SPEAKERS
Use the following cables for connections.
HDMI cable
IN
3
ANTENNA
WIRELESS
DOCK
3
OUTPUT
pt
HDMI IN
1
AC IN
IN
A
Model No.:
1
NETWORK
2
REMOTE CONTROL
FM
75 W
UNBAL.
SPEAKERS
Brand:
Model No.:
TROL
REMOTE CON
R
Brand:
Device
name:
OUT
3
ANTENNA
2
A
OUTPUT
SPEAKERS
V
OUTPUT
FRONT
2
3
SUB
WOOFER
L
R
CENTER
SURROUND
L
R
V
Brand:
2
HDMI IN
FM
75 W
UNBAL.
1
SPEAKERS
FRONT
3
OUT
SPEAKERS
Device
name:
4
1
WIRELESS
DOCK
1
2
A
AC IN
OUTPUT
Device
name:
HDMI IN
1
2
TROL
REMOTE CON
L
1
NETWORK
2
REMOTE CONTROL
ANTENNA
WIRELESS
DOCK
3
Model No.:
FM
75 W
UNBAL.
IN
TROL
REMOTE CON
R
FRONT
OUT
3
ANTENNA
WIRELESS
DOCK
VIDEO IN
L
3
R
2
3
SUB
WOOFER
SPEAKERS
HDMI OUT
3
L
R
CENTER
SURROUND
L
R
A
Brand:
HDMI OUT
AUDIO IN
HDMI IN
TROL
REMOTE CON
V
AC IN
NETWORK
FM USB
75 W
UNBAL.
IN
1
1
ANTENNA
2
1 SS
WIRELE
DOCK
SPEAKERS
HDMI IN
3
OUTPUT
3
AC IN
Model No.:
L
3
OUT
2
Brand:
HDMI OUT
3
VIDEO IN
L
2
1
2
3
OUT
HDMI IN
3
OUTPUT
SPEAKERS
OUTPUT
Device
name:
L
FRONT
1
HDMI IN
3
2
AUDIO IN
R
HDMI OUT
3
Model No.:
1
2
1
2
3
2
1
NETWORK
2
REMOTE CONTROL
R
2
3
SUB
WOOFER
Device
name:
OUT
3
SPEAKERS
1
L
R
CENTER
SURROUND
A
FM
75 W
UNBAL.
1
AC IN
pt
ANTENNA
WIRELESS
DOCK
TROL
REMOTE CON
AC IN
Source device
3
2
R
AUDIO IN
75 W
UNBAL.
SPEAKERS
Brand:
NETWORK
USBFM
DOCK
IN
1
ANTENNA
1 WIRELE2SS
2
1
2
3
OUT
1
Model No.:
AUDIO IN
2
REMOTE CONTROL
L
R
AC IN
Device
name:
OUT
3
USB
IN
pt
VIDEO IN
L
3
R
V
SPEAKERS
Brand:
HDMI OUT
AUDIO IN
FM
75 W
UNBAL.
HDMI IN
TROL
REMOTE CON
OUTPUT
Model No.:
OUT
USB
1 3
TROL
REMOTE CON
R
AC IN
WIRELESS
DOCK
IN
2
1
ANTENNA
NETWORK
2
1
L
3
H
Device
name:
• Connect the power cable to this unit and plug it
to a wall outlet.
• Turn all connected devices ON including this
unit, subwoofer and TV. Make sure to select the
appropriate HDMI input on the TV to display
neoHD “Initial Setup” screen.
• Follow the setup process of this unit by using
the “Initial Setup” on screen guide to complete
the basic configuration. (☞ P. 10)
Subwoofer
HDMI OUT
3
TROL
REMOTE CON
OUTPUT
CENTER
SURROUND
AUDIO IN
R
2
SPEAKERS
SR
Printed in China
FM
75 W
UNBAL.
NETWORK
USB
IN
HDMI IN
1
2
3
OUT
SPEAKERS
C
U
L
3
Begin the Initial Setup
9
3
ANTENNA
WIRELESS
DOCK
1
2
1
HDMI IN
VIDEO IN
2
1
2
3
OUT
TROL
REMOTE CON
Source device
Connect speakers to the SPEAKERS terminals. If speakers have color
coded terminals, match the colors. If the speakers are not color coded on
the terminals, then match + and –. (☞ P. 6 for details)
HDMI OUT
1
2
ANTENNA
FM
75 W
UNBAL.
IMPORTANT SAFETY INSTRUCTIONS
CAUTION
RISK OF ELECTRIC SHOCK
DO NOT OPEN
CAUTION: TO REDUCE THE RISK OF
ELECTRIC SHOCK, DO NOT REMOVE
COVER (OR BACK). NO USER-SERVICEABLE
PARTS INSIDE. REFER SERVICING TO
QUALIFIED SERVICE PERSONNEL.
1
2
3
4
5
6
7
8
9
•
Explanation of Graphical Symbols
The lightning flash with arrowhead symbol, within an
equilateral triangle, is intended to alert you to the
presence of uninsulated “dangerous voltage” within
the product’s enclosure that may be of sufficient
magnitude to constitute a risk of electric shock to
persons.
The exclamation point within an equilateral triangle
is intended to alert you to the presence of important
operating and maintenance (servicing) instructions in
the literature accompanying the appliance.
Note to CATV system installer:
This reminder is provided to call the CATV system
installer’s attention to Article 820-40 of the NEC that
provides guidelines for proper grounding and, in
particular, specifies that the cable ground shall be
connected to the grounding system of the building, as
close to the point of cable entry as practical.
10
11
12
13
14
Read these instructions.
Keep these instructions.
Heed all warnings.
Follow all instructions.
Do not use this apparatus near water.
Clean only with dry cloth.
Do not block any ventilation openings. Install in accordance
with the manufacturer’s instructions.
Do not install near any heat sources such as radiators, heat
registers, stoves, or other apparatus (including amplifiers)
that produce heat.
Do not defeat the safety purpose of the polarized or
grounding-type plug. A polarized plug has two blades with
one wider than the other. A grounding type plug has two
blades and a third grounding prong. The wide blade or the
third prong are provided for your safety. If the provided plug
does not fit into your outlet, consult an electrician for
replacement of the obsolete outlet.
Protect the power cord from being walked on or pinched
particularly at plugs, convenience receptacles, and the point
where they exit from the apparatus.
Only use attachments/accessories specified by the
manufacturer.
Use only with the cart, stand, tripod, bracket,
or table specified by the manufacturer, or sold
with the apparatus. When a cart is used, use
caution when moving the cart/apparatus
combination to avoid injury from tip-over.
Unplug this apparatus during lightning storms or when
unused for long periods of time.
Refer all servicing to qualified service personnel. Servicing
is required when the apparatus has been damaged in any
way, such as power-supply cord or plug is damaged, liquid
has been spilled or objects have fallen into the apparatus, the
apparatus has been exposed to rain or moisture, does not
operate normally, or has been dropped.
FCC INFORMATION (for US customers)
1 IMPORTANT NOTICE: DO NOT MODIFY THIS UNIT!
This product, when installed as indicated in the instructions
contained in this manual, meets FCC requirements. Modifications
not expressly approved by Yamaha may void your authority,
granted by the FCC, to use the product.
2 IMPORTANT: When connecting this product to accessories
and/or another product use only high quality shielded cables.
Cable/s supplied with this product MUST be used. Follow all
installation instructions. Failure to follow instructions could void
your FCC authorization to use this product in the USA.
3 NOTE: This product has been tested and found to comply with
the requirements listed in FCC Regulations, Part 15 for Class “B”
digital devices. Compliance with these requirements provides a
reasonable level of assurance that your use of this product in a
residential environment will not result in harmful interference with
other electronic devices.
This equipment generates/uses radio frequencies and, if not
installed and used according to the instructions found in the users
manual, may cause interference harmful to the operation of other
electronic devices.
Compliance with FCC regulations does not guarantee that
interference will not occur in all installations. If this product is
found to be the source of interference, which can be determined by
turning the unit “OFF” and “ON”, please try to eliminate the
problem by using one of the following measures:
Relocate either this product or the device that is being affected by
the interference.
Utilize power outlets that are on different branch (circuit breaker or
fuse) circuits or install AC line filter/s.
In the case of radio or TV interference, relocate/reorient the
antenna. If the antenna lead-in is 300 ohm ribbon lead, change the
lead-in to coaxial type cable.
If these corrective measures do not produce satisfactory results,
please contact the local retailer authorized to distribute this type of
product. If you can not locate the appropriate retailer, please
contact Yamaha Electronics Corp., U.S.A. 6660 Orangethorpe
Ave, Buena Park, CA 90620.
The above statements apply ONLY to those products distributed by
Yamaha Corporation of America or its subsidiaries.
The following information applies for YMC-700 only.
COMPLIANCE INFORMATION STATEMENT
This device complies with Part 15 of the FCC Rules and RSS-Gen of IC Rules.
Operation is subject to the following two conditions:
1) this device may not cause harmful interference, and
2) this device must accept any interference received including interference that may cause undesired operation of this device.
See user manual instructions if interference to radio reception is suspected.
Caution: Read this before operating your unit.
1 To assure the finest performance, please read this manual
carefully. Keep it in a safe place for future reference.
2 Install this sound system in a well ventilated, cool, dry, clean
place – away from direct sunlight, heat sources, vibration,
dust, moisture, and/or cold. Allow ventilation space of at least
10 cm on the top, 5 cm on the left and right, and 5 cm on the
back of this unit.
3 Locate this unit away from other electrical appliances, motors,
or transformers to avoid humming sounds.
4 Do not expose this unit to sudden temperature changes from
cold to hot, and do not locate this unit in an environment with
high humidity (i.e. a room with a humidifier) to prevent
condensation inside this unit, which may cause an electrical
shock, fire, damage to this unit, and/or personal injury.
5 Avoid installing this unit where foreign objects may fall onto
this unit and/or this unit may be exposed to liquid dripping or
splashing. On the top of this unit, do not place:
– Other components, as they may cause damage and/or
discoloration on the surface of this unit.
– Burning objects (i.e. candles), as they may cause fire,
damage to this unit, and/or personal injury.
– Containers with liquid in them, as they may fall and liquid
may cause electrical shock to the user and/or damage to
this unit.
6 Do not cover this unit with a newspaper, tablecloth, curtain,
etc. in order not to obstruct heat radiation. If the temperature
inside this unit rises, it may cause fire, damage to this unit,
and/or personal injury.
7 Do not plug in this unit to a wall outlet until all connections
are complete.
8 Do not operate this unit upside-down. It may overheat,
possibly causing damage.
9 Do not use force on switches, knobs and/or cords.
10 When disconnecting the power cable from the wall outlet,
grasp the plug; do not pull the cable.
11 Do not clean this unit with chemical solvents; this might
damage the finish. Use a clean, dry cloth.
12 Only voltage specified on this unit must be used. Using this
unit with a higher voltage than specified is dangerous and may
cause fire, damage to this unit, and/or personal injury. Yamaha
will not be held responsible for any damage resulting from use
of this unit with a voltage other than specified.
13 To prevent damage by lightning, keep the power cord and
outdoor antennas disconnected from a wall outlet or the unit
during a lightning storm.
14 Do not attempt to modify or fix this unit. Contact qualified
Yamaha service personnel when any service is needed. The
cabinet should never be opened for any reasons.
15 When not planning to use this unit for long periods of time
(i.e. vacation), disconnect the AC power plug from the wall
outlet.
16 Install this unit near the AC outlet and where the AC power
plug can be reached easily.
17 Be sure to read the “Troubleshooting” section on common
operating errors before concluding that this unit is faulty.
18 Before moving this unit, press to set this unit to the standby
mode, and disconnect the AC power plug from the AC wall
outlet.
19 The batteries shall not be exposed to excessive heat such as
sunshine, fire or like.
20 When replacing the batteries, be sure to use batteries of the
same type. Danger of explosion may happen if batteries are
incorrectly replaced.
WARNING
TO REDUCE THE RISK OF FIRE OR ELECTRIC
SHOCK, DO NOT EXPOSE THIS UNIT TO RAIN
OR MOISTURE.
As long as this unit is connected to the AC wall outlet,
it is not disconnected from the AC power source even
if you turn off this unit by . In this state, this unit is
designed to consume a very small quantity of power.
FOR CANADIAN CUSTOMERS
To prevent electric shock, match wide blade of plug to
wide slot and fully insert.
This Class B digital apparatus complies with Canadian
ICES-003.
IMPORTANT
Please record the serial number of this unit in the space
below.
MODEL:
Serial No.:
The serial number is located on the bottom of the unit.
Retain this guide and Owner’s Manual in a safe place
for future reference.
The label is located on the bottom of this unit.
Information about free software
This product uses the following free software.
For information (copyright, etc) about each software, read the original sentences stated below.
About curl
COPYRIGHT AND PERMISSION NOTICE
Copyright (c) 1996 - 2007, Daniel Stenberg, <[email protected]>.
All rights reserved.Permission to use, copy, modify, and distribute this software for any purpose with or without fee is hereby granted, provided that the
above copyright notice and this permission notice appear in all copies.
THE SOFTWARE IS PROVIDED “AS IS”, WITHOUT WARRANTY OF ANY KIND, EXPRESS OR IMPLIED, INCLUDING BUT NOT LIMITED TO
THE WARRANTIES OF MERCHANTABILITY, FITNESS FOR A PARTICULAR PURPOSE AND NONINFRINGEMENT OF THIRD PARTY
RIGHTS. IN NO EVENT SHALL THE AUTHORS OR COPYRIGHT HOLDERS BE LIABLE FOR ANY CLAIM, DAMAGES OR OTHER
LIABILITY, WHETHER IN AN ACTION OF CONTRACT, TORT OR OTHERWISE, ARISING FROM, OUT OF OR IN CONNECTION WITH THE
SOFTWARE OR THE USE OR OTHER DEALINGS IN THE SOFTWARE.
Except as contained in this notice, the name of a copyright holder shall not be used in advertising or otherwise to promote the sale, use or other dealings in
this Software without prior written authorization of the copyright holder.
Copyright (c) 1995, 1996, 1997, 1998, 1999 Kungliga Tekniska Högskolan (Royal Institute of Technology, Stockholm, Sweden).
Copyright (c) 2004 - 2007 Daniel Stenberg
All rights reserved.
Redistribution and use in source and binary forms, with or without modification, are permitted provided that the following conditions are met:
1. Redistributions of source code must retain the above copyright notice, this list of conditions and the following disclaimer.
2. Redistributions in binary form must reproduce the above copyright notice, this list of conditions and the following disclaimer in the documentation and/
or other materials provided with the distribution.
3. Neither the name of the Institute nor the names of its contributors may be used to endorse or promote products derived from this software without
specific prior written permission.
THIS SOFTWARE IS PROVIDED BY THE INSTITUTE AND CONTRIBUTORS “AS IS” AND ANY EXPRESS OR IMPLIED WARRANTIES,
INCLUDING, BUT NOT LIMITED TO, THE IMPLIED WARRANTIES OF MERCHANTABILITY AND FITNESS FOR A PARTICULAR PURPOSE
ARE DISCLAIMED. IN NO EVENT SHALL THE INSTITUTE OR CONTRIBUTORS BE LIABLE FOR ANY DIRECT, INDIRECT, INCIDENTAL,
SPECIAL, EXEMPLARY, OR CONSEQUENTIAL DAMAGES (INCLUDING, BUT NOT LIMITED TO, PROCUREMENT OF SUBSTITUTE GOODS
OR SERVICES; LOSS OF USE, DATA, OR PROFITS; OR BUSINESS INTERRUPTION) HOWEVER CAUSED AND ON ANY THEORY OF
LIABILITY, WHETHER IN CONTRACT, STRICT LIABILITY, OR TORT (INCLUDING NEGLIGENCE OR OTHERWISE) ARISING IN ANY WAY
OUT OF THE USE OF THIS SOFTWARE, EVEN IF ADVISED OF THE POSSIBILITY OF SUCH DAMAGE.
About lwip
Copyright (c) 2001, 2002 Swedish Institute of Computer Science.
Copyright (c) 2001-2004 Leon Woestenberg <[email protected]>
Copyright (c) 2001-2004 Axon Digital Design B.V., The Netherlands.
All rights reserved.
Redistribution and use in source and binary forms, with or without modification, are permitted provided that the following conditions are met:
1. Redistributions of source code must retain the above copyright notice, this list of conditions and the following disclaimer.
2. Redistributions in binary form must reproduce the above copyright notice, this list of conditions and the following disclaimer in the documentation and/
or other materials provided with the distribution.
3. The name of the author may not be used to endorse or promote products derived from this software without specific prior written permission.
THIS SOFTWARE IS PROVIDED BY THE AUTHOR “AS IS” AND ANY EXPRESS OR IMPLIED WARRANTIES, INCLUDING, BUT NOT
LIMITED TO, THE IMPLIED WARRANTIES OF MERCHANTABILITY AND FITNESS FOR A PARTICULAR PURPOSE ARE DISCLAIMED. IN
NO EVENT SHALL THE AUTHOR BE LIABLE FOR ANY DIRECT, INDIRECT, INCIDENTAL, SPECIAL, EXEMPLARY, OR CONSEQUENTIAL
DAMAGES (INCLUDING, BUT NOT LIMITED TO, PROCUREMENT OF SUBSTITUTE GOODS OR SERVICES; LOSS OF USE, DATA, OR
PROFITS; OR BUSINESS INTERRUPTION) HOWEVER CAUSED AND ON ANY THEORY OF LIABILITY, WHETHER IN CONTRACT, STRICT
LIABILITY, OR TORT (INCLUDING NEGLIGENCE OR OTHERWISE) ARISING IN ANY WAY OUT OF THE USE OF THIS SOFTWARE, EVEN
IF ADVISED OF THE POSSIBILITY OF SUCH DAMAGE.
Copyright (c) 2002 CITEL Technologies Ltd. All rights reserved.
Redistribution and use in source and binary forms, with or without modification, are permitted provided that the following conditions are met:
1. Redistributions of source code must retain the above copyright notice, this list of conditions and the following disclaimer.
2. Redistributions in binary form must reproduce the above copyright notice, this list of conditions and the following disclaimer in the documentation and/
or other materials provided with the distribution.
3. Neither the name of CITEL Technologies Ltd nor the names of its contributors may be used to endorse or promote products derived from this software
without specific prior written permission.
THIS SOFTWARE IS PROVIDED BY CITEL TECHNOLOGIES AND CONTRIBUTORS “AS IS” AND ANY EXPRESS OR IMPLIED WARRANTIES,
INCLUDING, BUT NOT LIMITED TO, THE IMPLIED WARRANTIES OF MERCHANTABILITY AND FITNESS FOR A PARTICULAR PURPOSE
ARE DISCLAIMED. IN NO EVENT SHALL CITEL TECHNOLOGIES OR CONTRIBUTORS BE LIABLE FOR ANY DIRECT, INDIRECT,
INCIDENTAL, SPECIAL, EXEMPLARY, OR CONSEQUENTIAL DAMAGES (INCLUDING, BUT NOT LIMITED TO, PROCUREMENT OF
SUBSTITUTE GOODS OR SERVICES; LOSS OF USE, DATA, OR PROFITS; OR BUSINESS INTERRUPTION) HOWEVER CAUSED AND ON ANY
THEORY OF LIABILITY, WHETHER IN CONTRACT, STRICT LIABILITY, OR TORT (INCLUDING NEGLIGENCE OR OTHERWISE) ARISING IN
ANY WAY OUT OF THE USE OF THIS SOFTWARE, EVEN IF ADVISED OF THE POSSIBILITY OF SUCH DAMAGE.
Copyright (c) 2003 by Marc Boucher, Services Informatiques (MBSI) inc.
Copyright (c) 1997, 1998 by Global Election Systems Inc. All rights reserved.
Copyright (c) 2001 by Cognizant Pty Ltd.
The authors hereby grant permission to use, copy, modify, distribute, and license this software and its documentation for any purpose, provided that existing
copyright notices are retained in all copies and that this notice and the following disclaimer are included verbatim in any distributions. No written agreement,
license, or royalty fee is required for any of the authorized uses.
THIS SOFTWARE IS PROVIDED BY THE CONTRIBUTORS “AS IS” AND ANY EXPRESS OR IMPLIED WARRANTIES, INCLUDING, BUT NOT
LIMITED TO, THE IMPLIED WARRANTIES OF MERCHANTABILITY AND FITNESS FOR A PARTICULAR PURPOSE ARE DISCLAIMED. IN
NO EVENT SHALL THE CONTRIBUTORS BE LIABLE FOR ANY DIRECT, INDIRECT, INCIDENTAL, SPECIAL, EXEMPLARY, OR
CONSEQUENTIAL DAMAGES (INCLUDING, BUT NOT LIMITED TO, PROCUREMENT OF SUBSTITUTE GOODS OR SERVICES; LOSS OF
USE DATA, OR PROFITS; OR BUSINESS INTERRUPTION) HOWEVER CAUSED AND ON ANY THEORY OF LIABILITY, WHETHER IN
CONTRACT, STRICT LIABILITY, OR TORT (INCLUDING NEGLIGENCE OR OTHERWISE) ARISING IN ANY WAY OUT OF THE USE OF THIS
SOFTWARE, EVEN IF ADVISED OF THE POSSIBILITY OF SUCH DAMAGE.
Copyright (c) 1993, 1994 The Australian National University. All rights reserved.
Redistribution and use in source and binary forms are permitted provided that the above copyright notice and this paragraph are duplicated in all such forms
and that any documentation, advertising materials, and other materials related to such distribution and use acknowledge that the software was developed by
the Australian National University. The name of the University may not be used to endorse or promote products derived from this software without specific
prior written permission.
THIS SOFTWARE IS PROVIDED “AS IS” AND WITHOUT ANY EXPRESS OR IMPLIED WARRANTIES, INCLUDING, WITHOUT LIMITATION,
THE IMPLIED WARRANTIES OF MERCHANTIBILITY AND FITNESS FOR A PARTICULAR PURPOSE.
Copyright (c) 1989 Carnegie Mellon University. All rights reserved.
Redistribution and use in source and binary forms are permitted provided that the above copyright notice and this paragraph are duplicated in all such forms
and that any documentation, advertising materials, and other materials related to such distribution and use acknowledge that the software was developed by
Carnegie Mellon University. The name of the University may not be used to endorse or promote products derived from this software without specific prior
written permission.
THIS SOFTWARE IS PROVIDED “AS IS” AND WITHOUT ANY EXPRESS OR IMPLIED WARRANTIES, INCLUDING, WITHOUT LIMITATION,
THE IMPLIED WARRANTIES OF MERCHANTIBILITY AND FITNESS FOR A PARTICULAR PURPOSE.
Copyright (c) 1991 Gregory M. Christy. All rights reserved.
This equipment compiles with FCC/IC radiation exposure limits set forth for uncontrolled equipment and meets the FCC radio
frequency (RF) Exposure Guidelines in Supplement C to OET65 and RSS-102 of the IC radio frequency (RF) Exposure rules. This
equipment should be installed and operated with at least 20 cm and more between the radiator and person’s body (excluding
extremities: hands, wrists, feet and ankles).
Redistribution and use in source and binary forms are permitted provided that the above copyright notice and this paragraph are duplicated in all such forms
and that any documentation, advertising materials, and other materials related to such distribution and use acknowledge that the software was developed by
Gregory M. Christy. The name of the author may not be used to endorse or promote products derived from this software without specific prior written
permission.
THIS SOFTWARE IS PROVIDED “AS IS” AND WITHOUT ANY EXPRESS OR IMPLIED WARRANTIES, INCLUDING, WITHOUT LIMITATION,
THE IMPLIED WARRANTIES OF MERCHANTIBILITY AND FITNESS FOR A PARTICULAR PURPOSE.
NOTICE
This equipment has been tested and found to comply with the limits for a Class B digital device, pursuant to part 15 of the FCC
Rules. These limits are designed to provide reasonable protection against harmful interference in a residential installation.
This equipment generates, uses and can radiate radio frequency energy and, if not installed and used in accordance with the
instructions, may cause harmful interference to radio communications. However, there is no guarantee that interference will not
occur in a particular installation. If this equipment does cause harmful interference to radio or television reception, which can be
determined by turning the equipment off and on, the user is encouraged to try to correct the interference by one or more of the
following measures:
– Reorient or relocate the receiving antenna.
– Increase the separation between the equipment and receiver.
– Connect the equipment into an outlet on a circuit different from that to which the receiver is connected.
– Consult the dealer or an experienced radio/TV technician for help.
FCC WARNING
Change or modifications not expressly approved by the party responsible for compliance could void the user’s authority to operate
the equipment.
This transmitter must not be co-located or operated in conjunction with any other antenna or transmitter.
Precautions
Copyright (c) 1995 Eric Rosenquist, Strata Software Limited. http://www.strataware.com/ All rights reserved.
About OpenSSL
LICENSE ISSUES
The OpenSSL toolkit stays under a dual license, i.e. both the conditions of the OpenSSL License and the original SSLeay license apply to the toolkit. See
below for the actual license texts. Actually both licenses are BSD-style Open Source licenses. In case of any license issues related to OpenSSL please
contact [email protected].
OpenSSL License
Copyright (c) 1998-2007 The OpenSSL Project. All rights reserved.
Redistribution and use in source and binary forms, with or without modification, are permitted provided that the following conditions are met:
1. Redistributions of source code must retain the above copyright notice, this list of conditions and the following disclaimer.
2. Redistributions in binary form must reproduce the above copyright notice, this list of conditions and the following disclaimer in the documentation and/
or other materials provided with the distribution.
3. All advertising materials mentioning features or use of this software must display the following acknowledgment:
“This product includes software developed by the OpenSSL Project for use in the OpenSSL Toolkit. (http://www.openssl.org/)”
4. The names “OpenSSL Toolkit” and “OpenSSL Project” must not be used to endorse or promote products derived from this software without prior
written permission. For written permission, please contact [email protected].
5. Products derived from this software may not be called “OpenSSL” nor may “OpenSSL” appear in their names without prior written permission of the
OpenSSL Project.
6. Redistributions of any form whatsoever must retain the following acknowledgment:
“This product includes software developed by the OpenSSL Project for use in the OpenSSL Toolkit (http://www.openssl.org/)”
THIS SOFTWARE IS PROVIDED BY THE OpenSSL PROJECT “AS IS” AND ANY EXPRESSED OR IMPLIED WARRANTIES, INCLUDING, BUT
NOT LIMITED TO, THE IMPLIED WARRANTIES OF MERCHANTABILITY AND FITNESS FOR A PARTICULAR PURPOSE ARE DISCLAIMED.
IN NO EVENT SHALL THE OpenSSL PROJECT OR ITS CONTRIBUTORS BE LIABLE FOR ANY DIRECT, INDIRECT, INCIDENTAL, SPECIAL,
EXEMPLARY, OR CONSEQUENTIAL DAMAGES (INCLUDING, BUT NOT LIMITED TO, PROCUREMENT OF SUBSTITUTE GOODS OR
SERVICES; LOSS OF USE, DATA, OR PROFITS; OR BUSINESS INTERRUPTION) HOWEVER CAUSED AND ON ANY THEORY OF LIABILITY,
WHETHER IN CONTRACT, STRICT LIABILITY, OR TORT (INCLUDING NEGLIGENCE OR OTHERWISE) ARISING IN ANY WAY OUT OF
THE USE OF THIS SOFTWARE, EVEN IF ADVISED OF THE POSSIBILITY OF SUCH DAMAGE.
This product includes cryptographic software written by Eric Young ([email protected]). This product includes software written by Tim Hudson
([email protected]).
Original SSLeay License
Copyright (C) 1995-1998 Eric Young ([email protected])
All rights reserved.
This package is an SSL implementation written by Eric Young ([email protected]).
The implementation was written so as to conform with Netscapes SSL.
This library is free for commercial and non-commercial use as long as the following conditions are aheared to. The following conditions apply to all code
found in this distribution, be it the RC4, RSA, lhash, DES, etc., code; not just the SSL code. The SSL documentation included with this distribution is
covered by the same copyright terms except that the holder is Tim Hudson ([email protected]).
Copyright remains Eric Young's, and as such any Copyright notices in the code are not to be removed. If this package is used in a product, Eric Young
should be given attribution as the author of the parts of the library used. This can be in the form of a textual message at program startup or in documentation
(online or textual) provided with the package.
Redistribution and use in source and binary forms, with or without modification, are permitted provided that the following conditions are met:
1. Redistributions of source code must retain the copyright notice, this list of conditions and the following disclaimer.
2. Redistributions in binary form must reproduce the above copyright notice, this list of conditions and the following disclaimer in the documentation and/
or other materials provided with the distribution.
3. All advertising materials mentioning features or use of this software must display the following acknowledgement:
“This product includes cryptographic software written by Eric Young ([email protected])”
The word ‘cryptographic’ can be left out if the rouines from the library being used are not cryptographic related :-).
4. If you include any Windows specific code (or a derivative thereof) from the apps directory (application code) you must include an acknowledgement:
“This product includes software written by Tim Hudson ([email protected])”
THIS SOFTWARE IS PROVIDED BY ERIC YOUNG “AS IS” AND ANY EXPRESS OR IMPLIED WARRANTIES, INCLUDING, BUT NOT
LIMITED TO, THE IMPLIED WARRANTIES OF MERCHANTABILITY AND FITNESS FOR A PARTICULAR PURPOSE ARE DISCLAIMED. IN
NO EVENT SHALL THE AUTHOR OR CONTRIBUTORS BE LIABLE FOR ANY DIRECT, INDIRECT, INCIDENTAL, SPECIAL, EXEMPLARY,
OR CONSEQUENTIAL DAMAGES (INCLUDING, BUT NOT LIMITED TO, PROCUREMENT OF SUBSTITUTE GOODS OR SERVICES; LOSS OF
USE, DATA, OR PROFITS; OR BUSINESS INTERRUPTION) HOWEVER CAUSED AND ON ANY THEORY OF LIABILITY, WHETHER IN
CONTRACT, STRICT LIABILITY, OR TORT (INCLUDING NEGLIGENCE OR OTHERWISE) ARISING IN ANY WAY OUT OF THE USE OF THIS
SOFTWARE, EVEN IF ADVISED OF THE POSSIBILITY OF SUCH DAMAGE.
The licence and distribution terms for any publically available version or derivative of this code cannot be changed. i.e. this code cannot simply be copied
and put under another distribution licence [including the GNU Public Licence.]
About FLAC codec library
Copyright (C) 2000,2001,2002,2003,2004 Josh Coalson
Redistribution and use in source and binary forms, with or without modification, are permitted provided that the following conditions are met:
- Redistributions of source code must retain the above copyright notice, this list of conditions and the following disclaimer.
- Redistributions in binary form must reproduce the above copyright notice, this list of conditions and the following disclaimer in the documentation and/
or other materials provided with the distribution.
- Neither the name of the Xiph.org Foundation nor the names of its contributors may be used to endorse or promote products derived from this software
without specific prior written permission.
THIS SOFTWARE IS PROVIDED BY THE COPYRIGHT HOLDERS AND CONTRIBUTORS “AS IS” AND ANY EXPRESS OR IMPLIED
WARRANTIES, INCLUDING, BUT NOT LIMITED TO, THE IMPLIED WARRANTIES OF MERCHANTABILITY AND FITNESS FOR A
PARTICULAR PURPOSE ARE DISCLAIMED. IN NO EVENT SHALL THE FOUNDATION OR CONTRIBUTORS BE LIABLE FOR ANY DIRECT,
INDIRECT, INCIDENTAL, SPECIAL, EXEMPLARY, OR CONSEQUENTIAL DAMAGES (INCLUDING, BUT NOT LIMITED TO, PROCUREMENT
OF SUBSTITUTE GOODS OR SERVICES; LOSS OF USE, DATA, OR PROFITS; OR BUSINESS INTERRUPTION) HOWEVER CAUSED AND ON
ANY THEORY OF LIABILITY, WHETHER IN CONTRACT, STRICT LIABILITY, OR TORT (INCLUDING NEGLIGENCE OR OTHERWISE)
ARISING IN ANY WAY OUT OF THE USE OF THIS SOFTWARE, EVEN IF ADVISED OF THE POSSIBILITY OF SUCH DAMAGE.
About Vorbis library
Copyright (c) 2001, Xiphophorus
Redistribution and use in source and binary forms, with or without modification, are permitted provided that the following conditions are met:
- Redistributions of source code must retain the above copyright notice, this list of conditions and the following disclaimer.
- Redistributions in binary form must reproduce the above copyright notice, this list of conditions and the following disclaimer in the documentation and/
or other materials provided with the distribution.
- Neither the name of the Xiphophorus nor the names of its contributors may be used to endorse or promote products derived from this software without
specific prior written permission.
THIS SOFTWARE IS PROVIDED BY THE COPYRIGHT HOLDERS AND CONTRIBUTORS “AS IS” AND ANY EXPRESS OR IMPLIED
WARRANTIES, INCLUDING, BUT NOT LIMITED TO, THE IMPLIED WARRANTIES OF MERCHANTABILITY AND FITNESS FOR A
PARTICULAR PURPOSE ARE DISCLAIMED. IN NO EVENT SHALL THE REGENTS OR CONTRIBUTORS BE LIABLE FOR ANY DIRECT,
INDIRECT, INCIDENTAL, SPECIAL, EXEMPLARY, OR CONSEQUENTIAL DAMAGES (INCLUDING, BUT NOT LIMITED TO, PROCUREMENT
OF SUBSTITUTE GOODS OR SERVICES; LOSS OF USE, DATA, OR PROFITS; OR BUSINESS INTERRUPTION) HOWEVER CAUSED AND ON
ANY THEORY OF LIABILITY, WHETHER IN CONTRACT, STRICT LIABILITY, OR TORT (INCLUDING NEGLIGENCE OR OTHERWISE)
ARISING IN ANY WAY OUT OF THE USE OF THIS SOFTWARE, EVEN IF ADVISED OF THE POSSIBILITY OF SUCH DAMAGE.
Notice for Windows Media DRM
The Certified For Windows Vista logo, Windows Media and the Windows logo are trademarks or registered trademarks of Microsoft Corporation in the
United States and/or other countries.
Content providers are using the digital rights management technology for Windows Media contained in this device (WMDRM) to protect the integrity of
their content (Secure Content) so that their intellectual property, including copyright, in such content is not misappropriated.
This device uses WM-DRM software to play Secure Content (WM-DRM Software).
If the security of the WM-DRM Software in this device has been compromised, owners of Secure Content (Secure Content Owners) may request that
Microsoft revoke the WM-DRM Software s right to acquire new licenses to copy, display and/or play Secure Content. Revocation does not alter the WMDRM Software s ability to play unprotected content. A list of revoked WM-DRM Software is sent to your device whenever you
download a license for Secure Content from the Internet or from a PC. Microsoft may, in conjunction with such license, also download revocation list
onto your device on behalf of Secure Content Owners.
Redistribution and use in source and binary forms are permitted provided that the above copyright notice and this paragraph are duplicated in all such forms
and that any documentation, advertising materials, and other materials related to such distribution and use acknowledge that the software was developed by
Eric Rosenquist. The name of the author may not be used to endorse or promote products derived from this software without specific prior written
permission.
THIS SOFTWARE IS PROVIDED “AS IS” AND WITHOUT ANY EXPRESS OR IMPLIED WARRANTIES, INCLUDING, WITHOUT LIMITATION,
THE IMPLIED WARRANTIES OF MERCHANTIBILITY AND FITNESS FOR A PARTICULAR PURPOSE.
Copyright (C) 1990, RSA Data Security, Inc. All rights reserved.
License to copy and use this software is granted provided that it is identified as the “RSA Data Security, Inc. MD5 Message-Digest Algorithm” in all
material mentioning or referencing this software or this function.
License is also granted to make and use derivative works provided that such works are identified as “derived from the RSA Data Security, Inc. MD5
Message-Digest Algorithm” in all material mentioning or referencing the derived work.
RSA Data Security, Inc. makes no representations concerning either the merchantability of this software or the suitability of this software for any particular
purpose. It is provided “AS IS” without express or implied warranty of any kind.
These notices must be retained in any copies of any part of this documentation and/or software.
Copyright (c) 1989 Regents of the University of California. All rights reserved.
Redistribution and use in source and binary forms are permitted provided that the above copyright notice and this paragraph are duplicated in all such forms
and that any documentation, advertising materials, and other materials related to such distribution and use acknowledge that the software was developed by
the University of California, Berkeley. The name of the University may not be used to endorse or promote products derived from this software without
specific prior written permission.
THIS SOFTWARE IS PROVIDED “AS IS” AND WITHOUT ANY EXPRESS OR IMPLIED WARRANTIES, INCLUDING, WITHOUT LIMITATION,
THE IMPLIED WARRANTIES OF MERCHANTIBILITY AND FITNESS FOR A PARTICULAR PURPOSE.
Read this before using this unit.
To assure the finest performance, please read this manual carefully. Keep it in a safe place for future reference.
1 Install this unit in a cool, dry, clean place away from direct
sunlight, heat sources, and sources of excessive vibration, dust,
moisture, and/or cold. (Do not use/keep this unit in a car etc.)
2 Locate this unit away from other electrical appliances, motors,
or transformers to avoid humming sounds.
3 Do not expose this unit to sudden temperature changes from
cold to hot, and do not locate this unit in an environment with
high humidity (i.e. a room with a humidifier) to prevent
condensation inside this unit, which may cause an electrical
shock, fire, damage to this unit, and/or personal injury.
4 Do not clean this unit with chemical solvents; this might
damage the finish. Use a clean, dry cloth.
5 Do not attempt to modify or fix this unit. Contact qualified
Yamaha service personnel when any service is needed. The
cabinet should never be opened for any reason.
6 Be sure to read the “Troubleshooting” section regarding
common operating errors before concluding that the unit is
faulty.
If there should be color blotching or noise when used near a TV, move this unit away from the TV when using it.
Do not use this unit within 22 cm (9 inches) of persons with a heart pacemaker implant or defibrillator implant.
We, the manufacturer Yamaha hereby declare that the YMC-700 is in compliance with the essential requirements and other
relevant provisions of Directive 1999/5/EC.
The user shall not reverse engineer, decompile, alter, translate or disassemble the software used in this unit, whether in part or in
whole. For corporate users, employees of the corporation itself as well as its business partners shall observe the contractual bans
stipulated within this clause. If the stipulations of this clause and this contract cannot be observed, the user shall immediately
discontinue using the software.
© 2009 Yamaha Corporation All rights reserved.