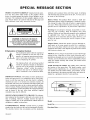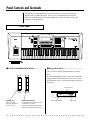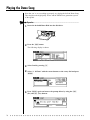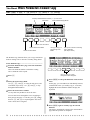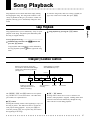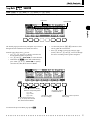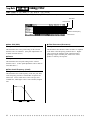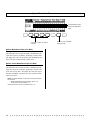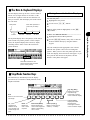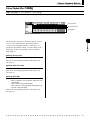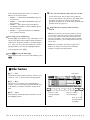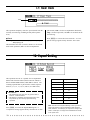
1
Welcome to the QS300
❖•❖•❖•❖•❖•❖•❖•❖•❖•❖•❖•❖•❖•❖•❖•❖•❖•❖•❖•❖•❖•❖ •❖
Congratulations and thank you for purchasing the Yamaha QS300 Music Production Synthesizer.
As its name indicates, the QS300 Music Production Synthesizer provides all you
need to create and perform fully orchestrated and professional-sounding
music. The QS300 features an advanced tone generator, plus a comprehensive
sequencer for recording and editing your performances.
The tone generator of the QS300 provides 954 high-quality Voices, full General
MIDI and new XG-MIDI compatibility, and three separate digital effects
sections for processing the Voices. To ensure playback of even the most sophisticated song data, the QS300 also has 16-channel multi-timbral capacity and full
32-note polyphony. The comprehensive, yet easy-to-use functions let you subtly
change and customize the Voices, or create completely new and unique Voices of
your own.
The sequencer section features 16 tracks for recording your own performances
— either in real time or manually (by Step recording). Punch-in recording
allows you to re-record any portion of an already recorded track. Sophisticated
editing functions let you perform various transformations on the recorded data
— such as transposing, quantizing, changing note length and velocity, copying,
and much more.
More than just a performance recorder, the sequencer has flexible and convenient automatic accompaniment functions. These include special Phrases and
Patterns that provide complete backing band parts (for example: drums/bass/
guitar/keyboards/strings) in a wide variety of musical styles. Plus, these backing
parts change harmonically according to the chords you specify. You can even
create your own original Phrases to be used with the automatic accompaniment.
All of this gives you the means to easily create complete and musically appropriate rhythmic/chordal accompaniment in a fraction of the time it would take if
you recorded all the parts yourself.
Table of Contents
Precautions . . . . . . . . . . . . . . . . . . . . . . . . . . . . . . . . . . 4
How to Use This Manual . . . . . . . . . . . . . . . . . . . . . . . 6
The QS300 — What It Is and What It Can Do . . . . . 7
Panel Controls and Terminals . . . . . . . . . . . . . . . . . . 10
GUIDED TOUR
Setting Up . . . . . . . . . . . . . . . . . . . . . . . . . . . . . . . . . .
Playing the Demo Song . . . . . . . . . . . . . . . . . . . . . . .
Auto Load . . . . . . . . . . . . . . . . . . . . . . . . . . . . . . .
Selecting and Playing Voices . . . . . . . . . . . . . . . . . . .
Changing the Voice Bank . . . . . . . . . . . . . . . . . . . . .
Quick Selection of Voice Variations in Different
Banks — Variation Voice Auto-Search . . . .
Editing a Voice . . . . . . . . . . . . . . . . . . . . . . . . . . . . . .
Changing the Amount of Reverb . . . . . . . . . . . . .
Changing the Amount of Chorus . . . . . . . . . . . . .
Selecting a Variation Effect . . . . . . . . . . . . . . . . .
Setting the Pitch Bend . . . . . . . . . . . . . . . . . . . . .
■ Comparing the Edited Voice with the Original . . .
Changing the Envelope Generator Setting . . . . .
Naming and Storing the New Voice . . . . . . . . . .
Recording a Song . . . . . . . . . . . . . . . . . . . . . . . . . . . .
Enter the Song Mode and Select an Empty Song . . .
Record the Accompaniment Patterns . . . . . . . . .
Record the Accompaniment Chords . . . . . . . . . .
Record Your Own Keyboard Performance . . . . .
Naming and Saving the New Song . . . . . . . . . . .
Other Sequencer Features . . . . . . . . . . . . . . . . . .
16
18
19
20
21
22
23
23
24
25
26
27
28
30
32
32
33
36
38
39
40
REFERENCE
Voice Edit Mode
Voice Common
Overall Parameters . . . . . . . . . . . . . . . . . . . . . . . . . . .
Controller Parameters . . . . . . . . . . . . . . . . . . . . . . . .
Variation Effect Parameters . . . . . . . . . . . . . . . . . . . .
Voice Element
Wave Parameters . . . . . . . . . . . . . . . . . . . . . . . . . . . .
Wave Parameters Element Copy . . . . . . . . . . . . . . . .
Amplitude Parameters . . . . . . . . . . . . . . . . . . . . . . . .
Filter EG Parameters . . . . . . . . . . . . . . . . . . . . . . . . .
Pitch EG Parameters . . . . . . . . . . . . . . . . . . . . . . . . .
Graphic EG Edit Parameters — Amp, Filter and Pitch . .
Template Copy — Amp, Filter and Pitch . . . . . . . . .
Tuning Parameters . . . . . . . . . . . . . . . . . . . . . . . . . . .
LFO Parameters . . . . . . . . . . . . . . . . . . . . . . . . . . . . .
Other Voice Functions
Drum Set . . . . . . . . . . . . . . . . . . . . . . . . . . . . . . . . . .
Voice Name . . . . . . . . . . . . . . . . . . . . . . . . . . . . . . . .
Voice Store . . . . . . . . . . . . . . . . . . . . . . . . . . . . . . . . .
Voice Compare . . . . . . . . . . . . . . . . . . . . . . . . . . . . . .
Voice Job — Edit Recall . . . . . . . . . . . . . . . . . . . . . .
43
44
46
47
48
50
51
53
54
55
57
58
59
60
63
63
64
64
Song Mode
65
Loading a Song . . . . . . . . . . . . . . . . . . . . . . . . . . . . . 66
Song Playback
Loop Playback . . . . . . . . . . . . . . . . . . . . . . . . . . . . . . 67
2
Transport/Location Controls . . . . . . . . . . . . . . . . . . .
Measure/Beat Parameter . . . . . . . . . . . . . . . . . . . . . .
Mark/Jump Function . . . . . . . . . . . . . . . . . . . . . . . . .
Tempo . . . . . . . . . . . . . . . . . . . . . . . . . . . . . . . . . . . .
Mute . . . . . . . . . . . . . . . . . . . . . . . . . . . . . . . . . . . .
Play Effect Bypass . . . . . . . . . . . . . . . . . . . . . . . . . . .
Multi Controls
Storing the Multi Control Parameter Values . . . . . . .
Pages
Volume . . . . . . . . . . . . . . . . . . . . . . . . . . . . . . . . . . .
Voice . . . . . . . . . . . . . . . . . . . . . . . . . . . . . . . . . . . .
Search . . . . . . . . . . . . . . . . . . . . . . . . . . . . . . . . . . . .
Pages
Send . . . . . . . . . . . . . . . . . . . . . . . . . . . . . . . . . . . .
Type . . . . . . . . . . . . . . . . . . . . . . . . . . . . . . . . . . . .
Effect Parameters . . . . . . . . . . . . . . . . . . . . . . . . . . .
Pages
Tuning/Filter . . . . . . . . . . . . . . . . . . . . . . . . . . . . . .
Mode/Velocity . . . . . . . . . . . . . . . . . . . . . . . . . . . . .
EG Time . . . . . . . . . . . . . . . . . . . . . . . . . . . . . . . . . .
Vibrato . . . . . . . . . . . . . . . . . . . . . . . . . . . . . . . . . . .
Controller Edit
Portamento . . . . . . . . . . . . . . . . . . . . . . . . . . . . . . . . .
Real-time Controllers: MODULATION Wheel /
PITCH Wheel / After Touch / Foot Controller . . .
Song Playback Effects
Per Track . . . . . . . . . . . . . . . . . . . . . . . . . . . . . . . . . .
Quantize . . . . . . . . . . . . . . . . . . . . . . . . . . . . . . . . . . .
Swing . . . . . . . . . . . . . . . . . . . . . . . . . . . . . . . . . . . .
Transpose/Clock Shift . . . . . . . . . . . . . . . . . . . . . . . .
Gate Time/Velocity . . . . . . . . . . . . . . . . . . . . . . . . . .
Other Song Functions
Track Transmit Channel . . . . . . . . . . . . . . . . . . . . . . .
Song Chain . . . . . . . . . . . . . . . . . . . . . . . . . . . . . . . . .
67
68
68
69
69
70
72
73
74
75
76
77
79
82
83
84
85
86
87
89
90
91
92
93
94
95
Song Mode: Recording Operations
97
Realtime Recording . . . . . . . . . . . . . . . . . . . . . . . . . . 98
Punch-in Recording . . . . . . . . . . . . . . . . . . . . . . . . . . 99
All-track Recording (Realtime and Punch-in) . . . . 100
Step Recording . . . . . . . . . . . . . . . . . . . . . . . . . . . . . 101
■ Measure/Beat/Clock Display . . . . . . . . . . . . . 102
■ The Note and Keyboard Displays . . . . . . . . . 103
■ Step Mode Function Keys . . . . . . . . . . . . . . . 103
Pattern Mode
About Phrases, Sections, Patterns and Styles . . . . .
Selecting and Playing Patterns . . . . . . . . . . . . . . . .
Changing Chords . . . . . . . . . . . . . . . . . . . . . . . . . . .
■ Specifying the Bass Note For a Chord . . . . .
■ Specifying the Bass Phrase Chord Type
(Harmonization) . . . . . . . . . . . . . . . . . . . . . . .
Multi Controls
Pages
Volume . . . . . . . . . . . . . . . . . . . . . . . . . . . . . . . . . .
Voice . . . . . . . . . . . . . . . . . . . . . . . . . . . . . . . . . . .
Search . . . . . . . . . . . . . . . . . . . . . . . . . . . . . . . . . . .
Page
Send . . . . . . . . . . . . . . . . . . . . . . . . . . . . . . . . . . .
105
106
107
108
109
109
110
111
111
112
◆ ◆ ◆ ◆ ◆ ◆ ◆ ◆ ◆ ◆ ◆ ◆ ◆ ◆ ◆ ◆ ◆ ◆ ◆ ◆ ◆ ◆ ◆ ◆ ◆ ◆ ◆ ◆ ◆ ◆ ◆ ◆ ◆ ◆ ◆ ◆ ◆ ◆ ◆ ◆ ◆
Table of Contents
Pattern Playback Effects
Per Track . . . . . . . . . . . . . . . . . . . . . . . . . . . . . . . . .
Quantize . . . . . . . . . . . . . . . . . . . . . . . . . . . . . . . . . .
Swing . . . . . . . . . . . . . . . . . . . . . . . . . . . . . . . . . . .
Transpose/Clock Shift . . . . . . . . . . . . . . . . . . . . . . .
Gate Time/Velocity . . . . . . . . . . . . . . . . . . . . . . . . .
Other Pattern Functions
Track Transmit Channel . . . . . . . . . . . . . . . . . . . . . .
Track Mute . . . . . . . . . . . . . . . . . . . . . . . . . . . . . . . .
113
114
115
116
116
117
118
Accompaniment Recording
Realtime Accompaniment Recording . . . . . . . . . . .
Step Accompaniment Recording . . . . . . . . . . . . . . .
■ Pattern Entry . . . . . . . . . . . . . . . . . . . . . . . . . .
■ Chord Entry . . . . . . . . . . . . . . . . . . . . . . . . . .
119
120
122
123
124
Phrase Mode
Selecting and Playing Phrases . . . . . . . . . . . . . . . . .
Combining Phrases (in the Pattern Mode) . . . . . . .
■ Other Functions . . . . . . . . . . . . . . . . . . . . . . .
Recording Original Phrases . . . . . . . . . . . . . . . . . . .
Realtime Phrase Recording . . . . . . . . . . . . . . . .
■ Retrigger and Type Parameters . . . . . . . .
Step Phrase Recording . . . . . . . . . . . . . . . . . . . .
■ Measure/Beat/Clock Display . . . . . . . . . .
■ The Note and Keyboard Displays . . . . . .
■ Step Mode Function Keys . . . . . . . . . . . .
125
126
127
128
129
129
131
132
133
134
134
Disk Operations
135
Direct Load and Save Operations
Load Operation . . . . . . . . . . . . . . . . . . . . . . . . . . . . 136
Save Operation . . . . . . . . . . . . . . . . . . . . . . . . . . . . . 137
00:
01:
02:
03:
04:
05:
06:
07:
08:
09:
10:
11:
12:
13:
14:
15:
16:
17:
18:
19:
20:
21:
22:
23:
Song Jobs
Undo/Redo . . . . . . . . . . . . . . . . . . . . . . . . . . . .
Quantize . . . . . . . . . . . . . . . . . . . . . . . . . . . . . .
Modify Velocity . . . . . . . . . . . . . . . . . . . . . . . .
Modify Gate Time . . . . . . . . . . . . . . . . . . . . . .
Crescendo . . . . . . . . . . . . . . . . . . . . . . . . . . . . .
Transpose . . . . . . . . . . . . . . . . . . . . . . . . . . . . . .
Shift Note . . . . . . . . . . . . . . . . . . . . . . . . . . . . .
Shift Clock . . . . . . . . . . . . . . . . . . . . . . . . . . . .
Chord Sort . . . . . . . . . . . . . . . . . . . . . . . . . . . . .
Copy Event . . . . . . . . . . . . . . . . . . . . . . . . . . . .
Erase Event . . . . . . . . . . . . . . . . . . . . . . . . . . . .
Extract Event . . . . . . . . . . . . . . . . . . . . . . . . . . .
Thin Out . . . . . . . . . . . . . . . . . . . . . . . . . . . . . .
Create Measure . . . . . . . . . . . . . . . . . . . . . . . . .
Delete Measure . . . . . . . . . . . . . . . . . . . . . . . . .
Copy Track . . . . . . . . . . . . . . . . . . . . . . . . . . . .
Mix Track . . . . . . . . . . . . . . . . . . . . . . . . . . . . .
Clear Track . . . . . . . . . . . . . . . . . . . . . . . . . . . .
Expand Backing . . . . . . . . . . . . . . . . . . . . . . . .
Init (Initialize) Play Effect . . . . . . . . . . . . . . . .
Normalize Effect . . . . . . . . . . . . . . . . . . . . . . . .
Copy Song . . . . . . . . . . . . . . . . . . . . . . . . . . . . .
Clear Song . . . . . . . . . . . . . . . . . . . . . . . . . . . . .
Song Name . . . . . . . . . . . . . . . . . . . . . . . . . . . .
139
140
141
143
144
145
146
147
148
149
150
151
152
153
154
155
156
157
158
158
159
159
160
160
161
00:
01:
02:
03:
04:
05:
06:
Pattern Jobs
Undo/Redo . . . . . . . . . . . . . . . . . . . . . . . . . . . .
Copy Pattern . . . . . . . . . . . . . . . . . . . . . . . . . . .
Append Pattern . . . . . . . . . . . . . . . . . . . . . . . . .
Split Pattern . . . . . . . . . . . . . . . . . . . . . . . . . . . .
Init (Initialize) Play Effect . . . . . . . . . . . . . . . .
Clear Pattern . . . . . . . . . . . . . . . . . . . . . . . . . . .
Style Name . . . . . . . . . . . . . . . . . . . . . . . . . . . .
163
164
165
166
167
168
168
168
00:
01:
02:
03:
04:
05:
06:
07:
08:
09:
10:
11:
12:
13:
14:
Phrase Jobs
Undo/Redo . . . . . . . . . . . . . . . . . . . . . . . . . . . .
Quantize . . . . . . . . . . . . . . . . . . . . . . . . . . . . . .
Modify Velocity . . . . . . . . . . . . . . . . . . . . . . . .
Modify Gate Time . . . . . . . . . . . . . . . . . . . . . .
Crescendo . . . . . . . . . . . . . . . . . . . . . . . . . . . . .
Transpose . . . . . . . . . . . . . . . . . . . . . . . . . . . . . .
Shift Note . . . . . . . . . . . . . . . . . . . . . . . . . . . . .
Shift Clock . . . . . . . . . . . . . . . . . . . . . . . . . . . .
Copy Phrase . . . . . . . . . . . . . . . . . . . . . . . . . . .
Append Phrase . . . . . . . . . . . . . . . . . . . . . . . . .
Split Phrase . . . . . . . . . . . . . . . . . . . . . . . . . . . .
Get Phrase . . . . . . . . . . . . . . . . . . . . . . . . . . . . .
Put Phrase . . . . . . . . . . . . . . . . . . . . . . . . . . . . .
Clear Phrase . . . . . . . . . . . . . . . . . . . . . . . . . . .
Phrase Name . . . . . . . . . . . . . . . . . . . . . . . . . . .
169
170
171
171
171
172
172
172
173
173
174
174
175
176
177
177
Editing Songs and Phrases
Edit Change Mode . . . . . . . . . . . . . . . . . . . . . . . . . .
■ Other Functions . . . . . . . . . . . . . . . . . . . . . . .
Edit Insert Mode . . . . . . . . . . . . . . . . . . . . . . . . . . .
■ Editing Tempo Track . . . . . . . . . . . . . . . . . . .
179
180
183
184
186
Utility Mode
Synthesizer Setup . . . . . . . . . . . . . . . . . . . . . . . . . . .
MIDI Setup . . . . . . . . . . . . . . . . . . . . . . . . . . . . . . . .
MIDI Input Filter . . . . . . . . . . . . . . . . . . . . . . . . . . .
Sequencer Setup . . . . . . . . . . . . . . . . . . . . . . . . . . . .
Fingered Chord Zone . . . . . . . . . . . . . . . . . . . . . . . .
Others Setup . . . . . . . . . . . . . . . . . . . . . . . . . . . . . . .
187
188
190
191
192
193
194
Disk Mode
Save Operation . . . . . . . . . . . . . . . . . . . . . . . . . . . . .
Load Operation . . . . . . . . . . . . . . . . . . . . . . . . . . . .
Delete Operation . . . . . . . . . . . . . . . . . . . . . . . . . . .
Rename Operation . . . . . . . . . . . . . . . . . . . . . . . . . .
Format Operation . . . . . . . . . . . . . . . . . . . . . . . . . . .
195
197
198
200
201
202
Appendix
Troubleshooting . . . . . . . . . . . . . . . . . . . . . . . . . . . .
Warning and Error Messages . . . . . . . . . . . . . . . . . .
Specifications . . . . . . . . . . . . . . . . . . . . . . . . . . . . . .
Index . . . . . . . . . . . . . . . . . . . . . . . . . . . . . . . . . . .
203
204
206
208
209
◆ ◆ ◆ ◆ ◆ ◆ ◆ ◆ ◆ ◆ ◆ ◆ ◆ ◆ ◆ ◆ ◆ ◆ ◆ ◆ ◆ ◆ ◆ ◆ ◆ ◆ ◆ ◆ ◆ ◆ ◆ ◆ ◆ ◆ ◆ ◆ ◆ ◆ ◆ ◆ ◆
3
Precautions
(PLEASE READ THIS BEFORE PROCEEDING!!)
■ Location
Keep the instrument away from locations where it is likely to be exposed to high
temperatures (such as direct sunlight) or humidity. Also avoid locations which
are subject to excessive dust accumulation or vibration which could cause mechanical damage.
■ Power Supply
Avoid plugging the instrument into the same AC outlet as appliances with high
power consumption, such as electric heaters or ovens. Also avoid using multiplug adaptors since these can result in reduced sound quality and possibly
damage.
■ MAKE SURE POWER IS OFF WHEN MAKING OR REMOVING
CONNECTIONS
To prevent damage to the instrument and other connected equipment, always
turn off the power prior to connecting or disconnecting cables. Also, turn the
power off when the instrument is not in use, and disconnect the power cord
during electric storms.
■ MIDI CABLES
When connecting the QS300 to other MIDI equipment, be sure to use only highquality cables made especially for MIDI data transmission. Also, avoid using
cables longer than 15 meters, since long cables can result in data errors.
■ HANDLE THE INSTRUMENT WITH CARE
Although the instrument has been constructed to withstand the rigors of normal
use for optimum sturdiness and reliability, avoid subjecting it to strong physical
shocks (such as dropping or hitting it). Since the QS300 is a precision-made
electronic device, also avoid applying excessive force to the various controls.
When moving the instrument, first unplug the power adaptor and all other cables
to prevent damage to cords and jacks. Always unplug cables by gripping the
plug firmly, not by pulling on the cable.
■ CLEAN WITH A SOFT, DRY CLOTH
Never use solvents such as benzine or thinner to clean the instrument, since
these will damage the cabinet finish or dull the keys. Wipe clean with a soft,
dry cloth. If necessary, use a soft, clean, slightly moistened cloth — making
sure to wipe the case off again with a dry cloth.
■ ELECTROMAGNETIC INTERFERENCE
Avoid using the unit near televisions, radios or other equipment generating
electromagnetic fields. Proximity to such equipment may cause the unit to
malfunction, and may generate interference noise in the other appliance as well.
■ Data Backup
The QS300 contains a special long-life battery that retains the contents of its
internal memory (User Voice data and System data) even when the power is
turned OFF. The backup battery should last for several years. When the backup
battery needs to be replaced “Battery Low” will appear on the display when the
4
◆ ◆ ◆ ◆ ◆ ◆ ◆ ◆ ◆ ◆ ◆ ◆ ◆ ◆ ◆ ◆ ◆ ◆ ◆ ◆ ◆ ◆ ◆ ◆ ◆ ◆ ◆ ◆ ◆ ◆ ◆ ◆ ◆ ◆ ◆ ◆ ◆ ◆ ◆ ◆ ◆
Precautions
power is turned on. When this happens, have the backup battery replaced by
qualified Yamaha service personnel. DO NOT ATTEMPT TO REPLACE THE
BACKUP BATTERY YOURSELF!
Internal memory data can be corrupted due to incorrect operation. Be sure to
save important data to floppy disk frequently so you have a backup to revert to
if something happens to damage the data in memory. Also note that magnetic
fields can damage data on the disk, so it is advisable to make a second back-up
copy of disks that contain very important data, and keep backup disks in a safe
place away from stray magnetic fields (i.e., away from speakers, appliances
containing motors, etc.).
■ Handle Floppy Disks and the Disk Drive With Care
• Use only 3.5” 2DD or 2HD floppy disks. (2HD disks having 2DD format
cannot be used.)
• Do not bend or apply pressure to the floppy disk. Do not open the shutter and
touch the surface of the floppy disk inside.
• Do not expose the disk to high temperatures (e.g., direct sunlight, a car
interior, etc.).
• Do not expose the disk to magnetic fields. Magnetic fields can partially or
totally erase data on the disk, rendering the disk unreadable.
• To eject a floppy disk, press the eject button slowly as far as it will go then,
when the disk is fully ejected, remove it by hand.
• Do not attempt to eject a disk while the disk-in-use indicator is lit.
The disk may not be ejected properly if the eject button is pressed too quickly,
or it is not pressed in as far as it will go (the eject button may become stuck in a
half-pressed position and the disk extends from the drive slot by only a few
millimeters). If this happens, do not attempt to pull out the partially ejected disk.
Using force in this situation can damage the disk-drive mechanism or the floppy
disk. To remove a partially ejected disk, try pressing the eject button once again,
or push the disk back into the slot and then repeat the eject procedure carefully.
Do not insert anything but floppy disks into the disk drive. Other objects may
cause damage to the disk drive or the floppy disk.
■ DO NOT OPEN THE CASE OR TRY REPAIRING THE INSTRUMENT
YOURSELF
The instrument contains no user-serviceable parts. Never open the case or
tamper with the internal circuitry in any way, since doing so may result in
damage to the instrument. Refer all servicing to qualified Yamaha service
personnel.
■ Third-party Software
Yamaha cannot take any responsibility for software produced for this product by
third-party manufacturers. Please direct any questions or comments about such
software to the manufacturer or their agents.
YAMAHA is not responsible for damage caused by improper handling or operation.
◆ ◆ ◆ ◆ ◆ ◆ ◆ ◆ ◆ ◆ ◆ ◆ ◆ ◆ ◆ ◆ ◆ ◆ ◆ ◆ ◆ ◆ ◆ ◆ ◆ ◆ ◆ ◆ ◆ ◆ ◆ ◆ ◆ ◆ ◆ ◆ ◆ ◆ ◆ ◆ ◆
5
How to Use This Manual
You are probably eager to try out your new QS300 Music Production Synthesizer right away and hear what it can do, rather than have to read through a lot
of instructions before you can even get a sound out of it.
However, to get the most out of your QS300, we strongly suggest that you read
the following sections in the order given:
1) Precautions
This gives you important information on how to care for your new QS300, how
to avoid damaging, and how to ensure long-term, reliable operation.
2) The QS300 — What It Is and What It Can Do
This briefly provides an overview of the functions and features of the QS300
and offers some important hints on how you can use it effectively.
3) Panel Controls and Terminals
This section introduces you to the panel controls and terminals, and reading
through it is a good way to familiarize yourself with some of the basic operations.
4) Tutorial
This very important section gets you started using your new QS300. It helps
you set up the QS300, play it, and use some of the fundamental functions and
features. The hands-on experience you gain in this section will help you navigate easily through more advanced sections of the manual later.
5) Reference
Once you’re familiar with everything above, skim through this comprehensive
guide to all editing functions. You won’t need (or want) to read everything at
once, but it is there for you to refer to when you need information about a
certain feature or function.
6) Appendix
Use the sections in the Appendix as necessary. For example, the Index will
come in handy when you need to quickly find information on a specific topic.
Other sections, such as Troubleshooting and Error Messages provide additional
useful information.
7) Sound Lists and MIDI Data Supplement
Finally, this separate supplement provides complete lists of the available Voices,
Effects and Effect parameters, as well as detailed information concerning MIDI
data.
6
◆ ◆ ◆ ◆ ◆ ◆ ◆ ◆ ◆ ◆ ◆ ◆ ◆ ◆ ◆ ◆ ◆ ◆ ◆ ◆ ◆ ◆ ◆ ◆ ◆ ◆ ◆ ◆ ◆ ◆ ◆ ◆ ◆ ◆ ◆ ◆ ◆ ◆ ◆ ◆ ◆
How to Use This Manual / The QS300 — What It Is and What It Can Do
The QS300 — What It Is and What It Can Do
As its name indicates, the QS300 Music Production Synthesizer is more than just
a synthesizer — it is a fully equipped music production machine that has everything you need to play and produce professional-sounding music.
What It Is
Built into the QS300 are an advanced tone generator,
with comprehensive editing functions, three digital
multi-effect sections, and a full-featured sequencer
for recording and editing your performances, and a
flexible automatic accompaniment system that
produces complete backing in a variety of styles. The
QS300 also has a floppy disk drive, for storing and
organizing your important data.
■ Tone Generator Section
The tone generator of the QS300 features 954 highquality Voices, in 47 different Voice Banks. (See the
separate “Sound Lists & MIDI Data” supplement.) It
also provides complete compatibility with General
MIDI and the new XG-MIDI format, and gives you
full 32-note polyphony for even the most complex
song data. A set of comprehensive Voice editing
functions lets you create your own User Voices. (See
Voice Editing below.) And there’s internal memory
space for saving up to 128 User Voices — plus unlimited storage capacity with the floppy disk drive.
■ Effect Sections
The three effect sections of the QS300 — Reverb,
Chorus and Variation — provide an enormous variety
of tools for enhancing the Voices. There are 11 types
of Reverb, 11 types of Chorus, and a full 42 different
Variation effect types, including Delay, Rotary
Speaker, Distortion and Auto Wah.
■ Voice Editing
The Voice editing functions give you an exceptionally
wide range of controls for changing both the actual
sound of a Voice and how that Voice responds to
various real-time performance controls. Altogether,
these functions give you the power to either subtly
enhance a Voice, or completely change its basic
character.
A single Voice can be created by combining up to four
different waveforms, or “Elements.” These are the
basic sonic building blocks of the QS300 and there
are 205 waveforms available. These can be assigned
to different sections of the keyboard, played at different velocities, with different envelopes, and be given
completely independent filter, pitch EG, tuning and
LFO settings (page 43). This flexibility allows you to
create extremely complex Voices that can shift in
texture and pitch, and change dynamically according
to how you play.
In addition, each Voice that you create can be given
its own volume, velocity response and portamento
settings (page 45).
■ Sequencer Section — Song Playback and
Recording
The sequencer section features 16 tracks for recording
your own performances (page 97) — either in real
time or manually, by Step recording. Three additional
tracks — Pattern, Chord, and Tempo — let you record
fully automatic backing tracks and tempo changes
(page 119). You can use Punch-in recording to rerecord any part of an already recorded track (page 99).
In addition to independent Voice, pan, volume, tuning
and effect send settings, each track’s Voice can have
different filter and vibrato settings, velocity response,
and even be given independent EG and MIDI controller settings (page 71). And all controls are available
in a “mixing console” layout for exceptional ease of
use. Moreover, there are a host of editing functions
— in the Song Jobs (page 139) — for transforming
the recorded data — such as transposing, quantizing,
changing note length and velocity, copying, and much
more.
◆ ◆ ◆ ◆ ◆ ◆ ◆ ◆ ◆ ◆ ◆ ◆ ◆ ◆ ◆ ◆ ◆ ◆ ◆ ◆ ◆ ◆ ◆ ◆ ◆ ◆ ◆ ◆ ◆ ◆ ◆ ◆ ◆ ◆ ◆ ◆ ◆ ◆ ◆ ◆ ◆
7
■ Automatic Accompaniment
What sets the QS300’s sequencer apart is its versatile
automatic accompaniment functions, which give you
complete backing band parts in a wide variety of
musical styles (page 33). Plus, these backing parts
change harmonically according to the chords you
specify. You can even create your own original parts
to be used with the automatic accompaniment. This
means you can create complete rhythmic/chordal
accompaniment for your song more quickly and easily
than ever before.
■ Comprehensive Compatibility and Playback
Controls
Thanks to full compatibility with the General MIDI
and new XG-MIDI formats, the QS300 ensures highquality playback and reproduction of virtually any
song data. And the QS300 provides extensive playback-only controls (page 89), allowing you to change
various aspects of how the song data is played back,
including quantization, transposition/tuning, gate time,
and velocity response.
8
■ Editing Recorded Data
The QS300 also features comprehensive and flexible
editing controls that make it easy to correct mistakes
or change recorded tracks, and generally help you to
refine your sound. These controls let you individually
modify the timing, pitch (note), gate time (length) and
velocity (loudness) of each recorded note. They also
allow you to change the data values of other recorded
events, such as pitch bend, program change and after
touch. A special Edit Insert mode lets you insert
specific note, pitch bend, program change, control
change, after touch, or exclusive events at any point in
the recorded data. (See page 179.)
■ Disk Operations and Utility Mode
The QS300 has a built-in floppy disk drive that
provides easy storage and retrieval of all data. It also
facilitates data management, allowing you to create a
well-organized personal floppy disk data library. (See
page 195.)
The Utility mode includes a number of functions that
are important for general operation. These functions
include MIDI data handling, interfacing with external
equipment, global sequencer settings and controls,
ABC system operation, and more. (See page 187.)
◆ ◆ ◆ ◆ ◆ ◆ ◆ ◆ ◆ ◆ ◆ ◆ ◆ ◆ ◆ ◆ ◆ ◆ ◆ ◆ ◆ ◆ ◆ ◆ ◆ ◆ ◆ ◆ ◆ ◆ ◆ ◆ ◆ ◆ ◆ ◆ ◆ ◆ ◆ ◆ ◆
The QS300 — What It Is and What It Can Do
What It Can Do
Here are a few ideas on how you can use the QS300.
This section is not comprehensive, but gives you a
good general guide to the overall possibilities and
provides a starting point or springboard for your own
creative ideas and explorations.
■ Live Performance — Including Solo Gigs
The huge number of high-quality Voices and professional-level effects makes the QS300 a perfect keyboard for live performance. Add the 16-track sequencer and the sophisticated automatic accompaniment, and you’ve got a single, easy-to-use instrument
that can take the place of an entire band! Moreover,
the GM and XG compatibility let you take advantage
of the vast library of song files on the market, allowing you to cover virtually any tune in any style of
music.
■ Home Studio
For an all-in-one music production instrument, the
QS300 also has amazing depth. The comprehensive
editing controls, MIDI implementation, 16-part
multitimbral capacity — and, of course, the stunning
Voices and effects — make the QS300 an ideal centerpiece for the recording or project studio.
■ All-in-one Practice Instrument
The automatic accompaniment features of the QS300
give you authentic sounding rhythm, bass and chordal
backing in a wide variety of musical styles — which
are perfect for practicing and playing along with. Use
material from the vast library of GM- and XG-compatible song data, or create your own songs — then,
play the keyboard while the songs play back. Compared to a metronome, it’s a much more exciting and
effective way of practicing.
■ Composing & Arranging Tool
The accompaniment features can also be used to
quickly and easily flesh out your own musical ideas.
With the wealth of chords, Phrases and Patterns —
and the comprehensive Song and Phrase editing
functions — the QS300 makes it exceptionally easy to
instantly turn your inspirations into complete compositions. Plus, the quality of the sounds and the authentic backing let you create polished versions of
your ideas to others.
■ Multimedia Sound & Music Creation
With the explosive growth in multimedia software and
applications, the QS300 serves as a handy computer
sound and music tool, as well. Since it’s fully compatible with the GM and new XG formats, song data
that you create on the QS300 can be used with any
GM-compatible application. And there’s even a
special SFX Bank of sound effect Voices to add sonic
realism and power to your next multimedia presentation.
◆ ◆ ◆ ◆ ◆ ◆ ◆ ◆ ◆ ◆ ◆ ◆ ◆ ◆ ◆ ◆ ◆ ◆ ◆ ◆ ◆ ◆ ◆ ◆ ◆ ◆ ◆ ◆ ◆ ◆ ◆ ◆ ◆ ◆ ◆ ◆ ◆ ◆ ◆ ◆ ◆
9
Panel Controls and Terminals
The QS300 is exceptionally easy to use and features a simple, consistent and
highly intuitive control interface. Even so, we recommend that you take the
time to look through this section and familiarize yourself with the controls and
terminals of the instrument.
Front Panel
e
r
3
MODE
VOLUME
SONG
PATTERN
y
PHRASE
F1
SHIFT
UTILITY
EDIT
PITCH
F2
F3
F4
F5
F6
F7
F8
JOB
SEQUENCER
STORE
CHORD ROOT
M
M7
RECORD
6
7
m
m7
m6
mM7 m7
( 5)
dim
TOP
aug
sus4 Madd9 M7
(9)
(9)
6
4
5
MAIN A
MAIN B
1
2
FILL AA
FILL BB
0
—
FILL AB
FILL BA
9
6
t
3
ENTER
NO
YES
DEC
INC
u
RUN
STOP
3
8
ENDING
EXIT
DISK
COMPARE
q
3
7
INTRO
VOICE
7
(9)
madd9 m7
(9)
m7
(11)
( 5)
7
7
( 5)
7
( 9)
7
( 9)
7
(13)
7
( 13)
7sus4
7
( 11)
MODULATION
w
q PITCH and MODULATION Wheels ..................
w Floppy Disk Drive ................................................
This is used for storing important data to a floppy
disk.
(For more information, refer to the section “Handle
Floppy Disks and the Disk Drive with Care” in the
Precaution on Page 5, and the Disk Mode Section on
Page 195.)
Disk drive door
PITCH
● PITCH Wheel
For continuously
raising or lowering the
pitch of a Voice.
10
MODULATION
● MODULATION Wheel
For continuously changing the amount
of modulation in a Voice.
(The actual modulation effect depends
on the Voice’s settings;see page 46.)
Disk-in-use indicator
Eject button
◆ ◆ ◆ ◆ ◆ ◆ ◆ ◆ ◆ ◆ ◆ ◆ ◆ ◆ ◆ ◆ ◆ ◆ ◆ ◆ ◆ ◆ ◆ ◆ ◆ ◆ ◆ ◆ ◆ ◆ ◆ ◆ ◆ ◆ ◆ ◆ ◆ ◆ ◆ ◆ ◆
Panel Controls and Terminals
e VOLUME Slider .................................................................................................
VOLUME
● VOLUME Slider
For adjusting the volume of the sound
output (in both the OUTPUT and
PHONES jacks).
r MODE Buttons ..................................................................................................
These buttons call up the main operating modes of the QS300. When the Song,
Voice, Pattern, or Phrase mode is selected, the lamp of the corresponding button
lights.
s
Calls up the Song mode, for sequencer recording & playback
operations. (See page 65.)
v
Calls up the Voice mode, for selecting
and playing the Voices. (See page
43.)
MODE
SONG
p
Calls up the Pattern mode, for
combining Phrases to create accompaniment Patterns. (See page 105.)
VOICE
PATTERN
PHRASE
UTILITY
DISK
u
Calls up the Utility mode, for performing various functions related to the
overall operation. (See page 187.)
P
Calls up the Phrase mode, for
selecting, playing back and creating
accompaniment Phrases used in
Patterns. (See page 125.)
d
Calls up the Disk mode, for performing
all data storage and disk-related
operations. (See page 195.)
EDIT
JOB
COMPARE
e
When the Song, Voice, or Phrase
mode is selected, this calls up the
corresponding Edit mode. (See page
23.)
STORE
j
When the Song, Voice, Pattern, or
Phrase mode is selected, this calls up
the corresponding set of Jobs
(important functions related
to each mode). (See page 139.)
S
Not strictly a MODE button, this calls
up the Voice Store operation (when
the Voice mode is selected). (See
page 31.)
◆ ◆ ◆ ◆ ◆ ◆ ◆ ◆ ◆ ◆ ◆ ◆ ◆ ◆ ◆ ◆ ◆ ◆ ◆ ◆ ◆ ◆ ◆ ◆ ◆ ◆ ◆ ◆ ◆ ◆ ◆ ◆ ◆ ◆ ◆ ◆ ◆ ◆ ◆ ◆ ◆
11
t Data Entry Controls: .......................................................................................
•
•
•
•
•
These controls are used to move the cursor (highlight) in the display and change
or set values (e.g., Voice numbers, parameter settings, etc.).
Numeric Keypad
E Button
Rotary Dial
D/I Buttons
Cursor Buttons
The numeric keypad is generally used for typing in specific values. The E
button is used to actually enter values, and execute certain functions and operations. The rotary dial lets you quickly increment or decrement values, and is
especially handy for covering large value ranges. The D/I buttons
respectively decrement or increment values. The cursor buttons move the cursor
(highlight) around in the display, letting you select available parameters for
editing.
The keypad can also be used (in certain editing and recording
operations) to enter specific note lengths and dynamic (velocity)
values, as indicated above each button. (See page 102.)
3
In addition, some of the
keypad buttons can be used
to change Pattern “sections”
(Intro, Fills, Ending, etc.) in
Pattern playback and Song
recording. (See page 102.)
3
The rotary dial is used for incrementing/
decrementing values. It is handy for quickly
scrolling through a large range of values.
3
7
8
INTRO
ENDING
4
5
MAIN A
MAIN B
1
2
FILL AA
FILL BB
0
—
FILL AB
FILL BA
The minus button is for entering
negative values.
(Press before or after typing a value
on the keypad.)
9
6
3
ENTER
The E button is used to actually enter a specified
value. It is also used to execute certain functions.
The D/I buttons are used to
decrement or increment through values.
Hold either button down to continuously
move through values.
NO
YES
DEC
INC
The cursor buttons are used to move the
cursor or highlight around in the display.
12
◆ ◆ ◆ ◆ ◆ ◆ ◆ ◆ ◆ ◆ ◆ ◆ ◆ ◆ ◆ ◆ ◆ ◆ ◆ ◆ ◆ ◆ ◆ ◆ ◆ ◆ ◆ ◆ ◆ ◆ ◆ ◆ ◆ ◆ ◆ ◆ ◆ ◆ ◆ ◆ ◆
Panel Controls and Terminals
y ( Button / Function Buttons (! - *) / ) Button ............
The ( button is used with some buttons (in certain situations) to access
some secondary or alternate functions. The function buttons — ! through
* — are special “soft” keys that change in function depending on the current
display. They select the corresponding menu items that appear directly above
them in the display. The ) button allows you to return to the previously
selected display page, or to “escape” from a particular operation or function.
The ) button allows you to return
to the previous display page, or leave
a particular function.
The ( button is used to access
certain secondary functions.
SHIFT
F1
F2
F3
F4
F5
F6
F7
F8
EXIT
The function buttons (! - *) are used to select corresponding
menu items and pages from the display.
u Sequencer Controls ........................................................................................
These are used to control recording and playback, as well as perform certain
location functions, in the Song, Pattern, and Phrase modes.
The R button starts recording
or playback (depending on
whether or not recording is
enabled). The lamp flashes at
the current tempo during
recording or playback.
The t button returns to
the beginning of the current
Song or Phrase.
SEQUENCER
RECORD
The r button enables
recording (sets to standby).
The lamp lights when recording
is enabled.
TOP
STOP
RUN
The T button stops
playback or recording.
These are used to move through
the measures of a Song, Pattern,
or Phrase.
◆ ◆ ◆ ◆ ◆ ◆ ◆ ◆ ◆ ◆ ◆ ◆ ◆ ◆ ◆ ◆ ◆ ◆ ◆ ◆ ◆ ◆ ◆ ◆ ◆ ◆ ◆ ◆ ◆ ◆ ◆ ◆ ◆ ◆ ◆ ◆ ◆ ◆ ◆ ◆ ◆
13
Rear Panel
RISK OF ELECTRIC SHOCK
DO NOT OPEN
: RISQUE DE CHOC ELECTRIQUE NE PAS OUVRIR.
TO REDUCE THE RISK OF FIRE OR ELECTRIC SHOCK,
DO NOT EXPOSE THIS PRODUCT TO RAIN OR MOISTURE.
THIS DEVICE COMPLIES WITH PART 15 OF THE FCC RULES. OPERATION IS SUBJECT TO THE
FOLLOWING TWO CONDITIONS: (1)THIS DEVICE MAY NOT CAUSE HARMFUL INTERFERENCE, AND
(2)THIS DEVICE MUST ACCEPT ANY INTERFERENCE RECEIVED, INCLUDING INTERFERENCE THAT
MAY CAUSE UNDESIRED OPERATION.
MODEL
SER.NO.
MIDI
POWER
ON/ OFF
q
AC INLET
w
q POWER Switch .....................................................
Push this in to turn the power on, and push again to
turn it off.
w AC INLET ................................................................
Plug one end of the included power cable to this
terminal and the other end to an appropriate AC
electrical outlet.
e MIDI IN/OUT/THRU Terminals ...........................
For connection to other MIDI devices, such as a MIDI
keyboard, tone generator, sequencer, or to a computer
(with MIDI interface). MIDI IN is for input of MIDI
data. MIDI OUT is for output of MIDI data; connect
this to the MIDI IN of another device, when you want
to control/play/record to that device from the QS300.
MIDI THRU is for “daisy-chain” connections of
additional QS300s or other MIDI instruments.
r SUSTAIN Jack .......................................................
For connecting a pedal switch (such as the optional
Yamaha FC4 or FC5). When connected, the switch
controls sustain on/off.
THRU
OUT
e
OUTPUT
IN
SUSTAIN
FOOT
CONTROLLER
FOOT
VOLUME
r ty
R
PHONES
L/MONO
u
i
y FOOT VOLUME Jack ...........................................
For connecting a foot controller (such as the optional
Yamaha FC7). When connected, the foot controller is
used to continuously change the overall volume of the
instrument.
u OUTPUT (L/MONO, R) Jacks ............................
For mono or stereo output. Connect these to the
inputs of a mixer or amplifier. When only the L/
MONO jack is connected, a mono mix of the stereo
signal is output though the jack.
CAUTION To avoid possible damage to your equipment (and
ears!), make sure that both the QS300 and your sound system
are turned off when making connections.
i PHONES Jack ........................................................
For connection to a set of stereo headphones. Connecting headphones to this jack does not cancel the
output through the OUTPUT jacks.
t FOOT CONTROLLER Jack ................................
For connecting a foot controller (such as the optional
Yamaha FC7). When connected, the foot controller
can be used to continuously change various functions
and aspects of the sound, depending on settings made
in the Voice and Song modes. (See pages 46 and 87.)
14
◆ ◆ ◆ ◆ ◆ ◆ ◆ ◆ ◆ ◆ ◆ ◆ ◆ ◆ ◆ ◆ ◆ ◆ ◆ ◆ ◆ ◆ ◆ ◆ ◆ ◆ ◆ ◆ ◆ ◆ ◆ ◆ ◆ ◆ ◆ ◆ ◆ ◆ ◆ ◆ ◆
Q S 3 0 0
GUIDED TOUR
GUIDED TOUR
This short but important part of the manual will guide you
through the basics of operating your QS300. In the sections
that follow, you’ll learn how to:
• Properly set up the QS300.
• Play the Demo Song.
• Select and play Voices.
• Make changes to (or “edit”) a Voice, then save that
Voice for future recall.
• Record a Song using the Patterns and automatic accompaniment as well as your own keyboard performance.
• Use some of the other convenient features of the sequencer.
• Save your original song for future recall.
Master the basics in these sections, and you’ll have the
experience and know-how necessary to confidently use any of
the more advanced functions covered later in the Reference
section.
◆ ◆ ◆ ◆ ◆ ◆ ◆ ◆ ◆ ◆ ◆ ◆ ◆ ◆ ◆ ◆ ◆ ◆ ◆ ◆ ◆ ◆ ◆ ◆ ◆ ◆ ◆ ◆ ◆ ◆ ◆ ◆ ◆ ◆ ◆ ◆ ◆ ◆ ◆ ◆ ◆
15
Setting Up
Here, you’ll learn how to set up the QS300 — either by itself or as part of your
current system. We strongly recommend that you follow the instructions to the
letter to avoid damaging any of your equipment.
What You’ll Need
• The QS300 and the included power cord.
• An amplifier/speaker system, preferably stereo. Alternately, you can use a set
of stereo headphones.
• Audio connecting cables.
Making the Connections
● Operation ................................................................................................................
CAUTION! Before
making any connections,
make sure that all
equipment to be
connected is turned off,
and that the QS300
power cord is not
connected to an
electrical outlet.
1. Connect the audio cables from the R and L/MONO OUTPUT jacks of the
QS300 to the appropriate inputs on the amplifier speaker system (as shown
in the illustration below).
Amplifier
Speaker System
MIDI Keyboard
FOOT CONTROLLER/
FOOT VOLUME
R
L/MONO
MIDI OUT
SUSTAIN
PHONES
MIDI IN
AC INLET
3
MODE
VOLUME
SONG
VOICE
PATTERN
PHRASE
UTILITY
DISK
3
8
ENDING
4
EDIT
F2
F3
F4
JOB
F5
F6
F7
F8
5
9
6
MAIN B
1
2
FILL AA
FILL BB
EXIT
SEQUENCER
3
7
INTRO
MAIN A
F1
SHIFT
0
—
FILL AB
FILL BA
3
ENTER
NO
YES
DEC
INC
COMPARE
STORE
CHORD ROOT
PITCH
16
M
M7
RECORD
6
7
m
m7
m6
mM7 m7
( 5)
dim
TOP
aug
RUN
STOP
sus4 Madd9 M7
(9)
6
(9)
7
(9)
madd9 m7
(9)
m7
(11)
7
( 5)
7
( 5)
7
( 9)
7
( 9)
7
(13)
7
( 13)
7sus4
7
( 11)
MODULATION
◆ ◆ ◆ ◆ ◆ ◆ ◆ ◆ ◆ ◆ ◆ ◆ ◆ ◆ ◆ ◆ ◆ ◆ ◆ ◆ ◆ ◆ ◆ ◆ ◆ ◆ ◆ ◆ ◆ ◆ ◆ ◆ ◆ ◆ ◆ ◆ ◆ ◆ ◆ ◆ ◆
Setting Up
GUIDED TOUR
If the amplifier has only one input, use the L/MONO jack on the QS300. If
you are using stereo headphones, connect them to the rear panel PHONES
jack.
2. Connect the power cord to the AC INLET terminal on the QS300 and plug
the other end of the cord into an appropriate electrical outlet.
3. Make sure that all volume controls (on the QS300 and the connected amplifier) are turned down. Then, turn on the power of the QS300.
After the greeting display, one of the following displays will appear (depending on the mode last selected):
● Voice mode:
● Song mode:
● Pattern mode:
● Phrase mode:
CAUTION! To avoid
possible damage to your
amplifier/speaker
system, use this simple
rule of thumb: The
amplifier is the last thing
you should turn on and
the first thing you should
turn off.
4. Finally, set the volume control on the QS300 to roughly the 3/4 position, set
the volume on the amplifier to a suitable level, and then turn on the amplifier.
◆ ◆ ◆ ◆ ◆ ◆ ◆ ◆ ◆ ◆ ◆ ◆ ◆ ◆ ◆ ◆ ◆ ◆ ◆ ◆ ◆ ◆ ◆ ◆ ◆ ◆ ◆ ◆ ◆ ◆ ◆ ◆ ◆ ◆ ◆ ◆ ◆ ◆ ◆ ◆ ◆
17
Playing the Demo Song
Now that you’ve set everything up properly, try playing the built-in Demo Song.
This showcases the high-quality Voices and the AWM2 tone generation system
of the QS300.
● Operation ................................................................................................................
1. Insert the included Demo Disk into the disk drive.
2. Press the d button.
The following display is shown:
3. Select Load by pressing @.
4. Select “1
All Data” with the cursor buttons or the rotary dial and press
E.
5. Press E again and answer the prompt below by using the D
(No) and I (Yes) buttons.
18
◆ ◆ ◆ ◆ ◆ ◆ ◆ ◆ ◆ ◆ ◆ ◆ ◆ ◆ ◆ ◆ ◆ ◆ ◆ ◆ ◆ ◆ ◆ ◆ ◆ ◆ ◆ ◆ ◆ ◆ ◆ ◆ ◆ ◆ ◆ ◆ ◆ ◆ ◆ ◆ ◆
Playing the Demo Song
6. Press the s button to return to the Song mode.
NOTE: If you wish to
playback all Demo Songs
continuously, use the
Song Chain function by
pressing ^ (Chain).
(See page 95 for details.)
7. Select the desired Demo Song number (highlight the Song number and
GUIDED TOUR
NOTE: During Demo
Song playback, no panel
controls (with the exception of the ) button
and the VOLUME control)
can be used.
change the value), then press the R button to start playback of the
selected Song.
The Demo Song starts playing immediately and repeats indefinitely until
stopped (in step 8 below).
8. To stop playback of the song, press the T button.
RECORD
TOP
STOP
RUN
To return to the Voice Play mode, press the v button.
Auto Load
The Auto Load function automatically loads the contents of a floppy disk to
internal memory when the power is turned on.
To use Auto Load: ...............................................................................................
With the power off, insert an appropriate disk into the disk drive, then turn on
the power of the QS300.
CAUTION:
• Do not attempt to
eject the disk or
otherwise interrupt the
Auto Load operation
while it is in progress.
• Any User Voices
contained in memory
will be erased by the
Auto Load operation.
Make sure that any
necessary User
Voices have been
properly saved to disk
before using Auto
Load.
An “Auto Loading...” message appears in the display, along with a moving bar
graph that indicates the progress of the operation.
◆ ◆ ◆ ◆ ◆ ◆ ◆ ◆ ◆ ◆ ◆ ◆ ◆ ◆ ◆ ◆ ◆ ◆ ◆ ◆ ◆ ◆ ◆ ◆ ◆ ◆ ◆ ◆ ◆ ◆ ◆ ◆ ◆ ◆ ◆ ◆ ◆ ◆ ◆ ◆ ◆
19
Selecting and Playing Voices
The QS300 features a total of 954 high-quality Voices, created by the AWM2
(Advanced Wave Memory 2) tone generation system.
1. Press the v button.
This calls up the normal Voice display.
2. Use the rotary dial, D/I buttons or numeric keypad to select the
desired Voice.
Indicates the category or general type of
Voice. (Here, “Pf” means Pianoforte or
Piano category.)
Program number
Voice name
Quick Program Change
You can use the Quick Program Change function to quickly select program
numbers within a group of ten from the numeric keypad.
To do this: ..................................................................................................................
1. Press v from the Voice Play mode, so that the Quick Program
Change indication below appears.
Indicates Quick
Program Change.
2. Press the button on the numeric keypad corresponding to the last digit
of the program you wish to select.
For example, from the condition above, pressing 0 - 9 directly selects
Voices 030 - 039, respectively.
Press v again to cancel the function. You can call up another “bank”
of ten (with any data entry method) and repeat steps 1 and 2 above to select
Voices in that “bank.”
20
◆ ◆ ◆ ◆ ◆ ◆ ◆ ◆ ◆ ◆ ◆ ◆ ◆ ◆ ◆ ◆ ◆ ◆ ◆ ◆ ◆ ◆ ◆ ◆ ◆ ◆ ◆ ◆ ◆ ◆ ◆ ◆ ◆ ◆ ◆ ◆ ◆ ◆ ◆ ◆ ◆
Selecting and Playing Voices / Changing the Voice Bank
Changing the Voice Bank
GUIDED TOUR
You can also change the Voice Bank of the QS300. Each Bank can contain up
to 128 different Voices. There are a total of 47 Banks: XG 001-101, SFX
(sound effects), Pre (Preset) and Usr (User). Though not all of the Banks have a
completely different set of Voices, there are 954 Voices available in the 105
Banks.
To select a Bank: .......................................................................................................
• Use the Bank </> controls (^ and &).
• Press !, @ or # to directly select the XG, Preset or User Bank,
respectively.
• Hold down the ( button and simultaneously press one of the Bank </>
controls (^ or &) to quickly select the XG, SFX (sound effect), Preset
and User Banks.
Voice Bank and number.
SHIFT
Hold this down and press ^
or & to quickly select the XG,
SFX, Preset and User Banks.
F1
F2
F3
Press one of these to
directly select the corresponding Bank:
• !: XG
• @: Preset
• #: User
F4
F5
F6
F7
F8
Press ^ or & to
step through the
Banks.
Press * to call up the Voice
directory (see below).
To browse through the Voice directory and call up different Voices in a specific
Bank: ...........................................................................................................................
• Press * (Dir).
Use the cursor buttons or the rotary dial to move through the list, highlighting
different Voices and then playing them. The highlighted Voice is automatically
selected for playing.
Indicates scrolling
position of displayed
Voice names.
Selected Voice.
◆ ◆ ◆ ◆ ◆ ◆ ◆ ◆ ◆ ◆ ◆ ◆ ◆ ◆ ◆ ◆ ◆ ◆ ◆ ◆ ◆ ◆ ◆ ◆ ◆ ◆ ◆ ◆ ◆ ◆ ◆ ◆ ◆ ◆ ◆ ◆ ◆ ◆ ◆ ◆ ◆
21
Quick Selection of Voice Variations in Different Banks — Variation Voice Auto-Search
The 47 Banks contain different Voice variations for many of the program numbers. However, for some program numbers, the Voice is the same for many of
the Banks. You can quickly skip over duplicate programs in the Banks, to find
and call up only those Voices that are different by using the Variation Voice
Auto-Search function.
To use Variation Voice Auto-Search: .......................................................................
Select the desired program number, then press and hold down either ^ or
&, depending on whether you want to skip backward or forward through the
Banks. The QS300 searches through successive Banks at the selected program
number, and automatically stops at the first Voice it finds that is different (from
preceding ones in the search).
Voice Categories
You can also browse through the Voices according to their general categories.
To do this, press * (Catg), then use $ and % to step through the
Voice categories. Remember that you can still use ^ and & from this
display page to select different Banks, if you wish.
F1
F2
F3
F4
F5
F6
F7
F8
Use these to step through the
Voice categories.
Each press of $ or % selects the first Voice in a different Voice category.
These make it easy to quickly browse through the Voices, according to the type
of Voice you want.
To return from any of the Directory pages above to the normal Voice
display: ........................................................................................................................
• Press ) (or v).
22
◆ ◆ ◆ ◆ ◆ ◆ ◆ ◆ ◆ ◆ ◆ ◆ ◆ ◆ ◆ ◆ ◆ ◆ ◆ ◆ ◆ ◆ ◆ ◆ ◆ ◆ ◆ ◆ ◆ ◆ ◆ ◆ ◆ ◆ ◆ ◆ ◆ ◆ ◆ ◆ ◆
Changing the Voice Bank / Editing a Voice
Editing a Voice
GUIDED TOUR
This short section introduces you to some of the Voice editing functions of the
QS300. These allow you to change the sound of a Voice, or “customize” it for
your own purposes.
The QS300 packs a huge variety of editable settings (also referred to as “parameters”). This section explores but a few of them. In this section you’ll learn
how to:
• Change the amount of Reverb and Chorus applied to the Voice.
• Change the Variation effect type.
• Set the amount of Pitch Bend.
• Compare the newly edited Voice with the original.
• Change the Envelope Generator setting (the shape of the sound in time).
• Store the newly created Voice for future recall.
Changing the Amount of Reverb
Built into the QS300 are three separate effect sections: Reverb, Chorus and
Variation. Here, you’ll learn how to change the amount of Reverb that is applied
to the Voice.
1. From the Voice mode display, press the e button.
If the display above is not shown, press ! (Overall) to select the Overall
page above.
2. From this page, select the Reverb Send “dial” — use the cursor buttons
to move around in the display.
Selected parameter name and value.
Reverb Send “dial.”
◆ ◆ ◆ ◆ ◆ ◆ ◆ ◆ ◆ ◆ ◆ ◆ ◆ ◆ ◆ ◆ ◆ ◆ ◆ ◆ ◆ ◆ ◆ ◆ ◆ ◆ ◆ ◆ ◆ ◆ ◆ ◆ ◆ ◆ ◆ ◆ ◆ ◆ ◆ ◆ ◆
23
3. With the Reverb “dial” highlighted, use the rotary dial to turn the
Reverb Send parameter down to about 0.
Play the Voice and hear the difference in the Reverb sound; notice how “dry”
it is. Note also that the dial setting in the display also changes to reflect the
new value.
4. Now, use the rotary dial to turn Reverb Send up to about 110.
Play the Voice again and hear the difference in the Reverb sound.
Changing the Amount of Chorus
The Chorus effects of the QS300 modulate the sound, and are capable either of
adding subtle enhancement or creating wild, special effects.
Just as you did with Reverb above, try changing the Chorus Send setting. First
(from the display page in the last section), select Chorus Send with the cursor
keys.
Chorus Send.
Then set the value to about the halfway point or higher, using the rotary dial.
Finally, play the Voice again to hear how Chorus affects the sound.
24
◆ ◆ ◆ ◆ ◆ ◆ ◆ ◆ ◆ ◆ ◆ ◆ ◆ ◆ ◆ ◆ ◆ ◆ ◆ ◆ ◆ ◆ ◆ ◆ ◆ ◆ ◆ ◆ ◆ ◆ ◆ ◆ ◆ ◆ ◆ ◆ ◆ ◆ ◆ ◆ ◆
Editing a Voice
Selecting a Variation Effect
GUIDED TOUR
The third set of effects on the QS300 are the Variation effects. Variation provides all of the effects found in Reverb and Chorus, plus many additional effects
such as Distortion, Delay, Rotary Speaker, and others. In this short section,
you’ll learn how to change the Variation effect.
1. From the display page in the last section, press # (Effect).
The following display (or one similar) appears:
Current Variation effect.
Effect parameters and values.
2. Use the D/I buttons or the rotary dial to select Auto Wah.
Play the Voice and hear how the sound has changed once again. Try selecting other Variation effects and hearing how they sound as well.
For more details on Variation and how to change the Variation settings, see
page 47 in the Reference section.
◆ ◆ ◆ ◆ ◆ ◆ ◆ ◆ ◆ ◆ ◆ ◆ ◆ ◆ ◆ ◆ ◆ ◆ ◆ ◆ ◆ ◆ ◆ ◆ ◆ ◆ ◆ ◆ ◆ ◆ ◆ ◆ ◆ ◆ ◆ ◆ ◆ ◆ ◆ ◆ ◆
25
Setting the Pitch Bend
The PITCH wheel at the left of the keyboard lets you bend the pitch of a Voice
up or down as you play. With the Pitch Bend controls, you can change how the
wheel affects the sound in a variety of ways. In this short section, we’ll explore
two of them. For more details on the Pitch Bend controls, see page 46 in the
Reference section.
1. From the display page in the last section (or from the Overall page),
press @ (Control).
The following display appears:
2. Using the cursor keys, select the “Pch” (Pitch Bias) dial in the Pitch
Bend controls.
Pitch Bend controls.
Current parameter and value.
Pitch Bias dial.
Try playing the Voice at this setting, while moving the PITCH wheel up and
down, and notice how the Voice sounds.
3. Now, change the setting (with the D/I buttons or the rotary dial).
Try a setting of +12. Play with the PITCH wheel again, and notice how the
Pitch Bend has changed.
26
◆ ◆ ◆ ◆ ◆ ◆ ◆ ◆ ◆ ◆ ◆ ◆ ◆ ◆ ◆ ◆ ◆ ◆ ◆ ◆ ◆ ◆ ◆ ◆ ◆ ◆ ◆ ◆ ◆ ◆ ◆ ◆ ◆ ◆ ◆ ◆ ◆ ◆ ◆ ◆ ◆
Editing a Voice
GUIDED TOUR
HINT — Using the Numeric Keypad
You can quickly enter parameter values by using the numeric keypad. For example, to
enter a value of 12:
1. Type 1-2. (The value will flash in the display.)
2. Press E to actually enter the value.
Some parameters, such as Pitch Bias above, also allow for negative values. To enter a
negative value:
1. Press -, then type the number on the numeric keypad (or vice versa).
2. Press E.
4. While you’re still in the Pitch Bend controls, try changing another Pitch
Bend parameter: Pitch Modulation.
To do this, select the Pitch Modulation slider in the display by pressing the
down cursor button (>), and change the value to around 100 or so.
Pitch Modulation slider.
Now play the Voice again, and move the PITCH wheel up. Notice how the
original sound completely changes character as you play with the wheel.
■ Comparing the Edited Voice with the Original
.....................................
The QS300 has a convenient Compare function that allows you to hear the
changes you’ve made to a Voice and instantly compare them with the sound of
the original Voice. To use Compare, you must be in the Edit mode and have
made at least one change to a parameter.
When you’ve made any change to a Voice, the letter “V” (Edit) appears at the
top left of the display:
“V” indicates Edit condition.
◆ ◆ ◆ ◆ ◆ ◆ ◆ ◆ ◆ ◆ ◆ ◆ ◆ ◆ ◆ ◆ ◆ ◆ ◆ ◆ ◆ ◆ ◆ ◆ ◆ ◆ ◆ ◆ ◆ ◆ ◆ ◆ ◆ ◆ ◆ ◆ ◆ ◆ ◆ ◆ ◆
27
From a Voice display in which “V” is shown at the top, simply press the e
button to use Compare. When in the Compare condition, the VOICE lamp
flashes and the letter “C” (Compare) appears at the top of the display, replacing
“V”. The original parameter values are also shown.
MODE
SONG
VOICE
Lamp
flashes.
“C” indicates Compare condition.
NOTE In the Compare
condition, all parameters
are “locked” and cannot
be changed.
Pressing e again returns to the newly edited Voice (and “C” changes to
“V”). You can continue editing other parameters, pressing the e button as
needed to compare the edited sound with the original. (Pressing e toggles
between the original Voice and edited Voice.)
Changing the Envelope Generator Setting
Before we save the new Voice, let’s make a couple of final edits. Here, we’ll
change the Rate parameters of the sound level — which make up what is called
the Envelope Generator (EG). These parameters allow you to shape the sound
of the Voice, or in other words, set how the sound changes over time.
In the steps below, we’ll make the attack of the sound slower and the release
longer.
1. From the display page in the last section, press * (Element).
The following display appears:
28
◆ ◆ ◆ ◆ ◆ ◆ ◆ ◆ ◆ ◆ ◆ ◆ ◆ ◆ ◆ ◆ ◆ ◆ ◆ ◆ ◆ ◆ ◆ ◆ ◆ ◆ ◆ ◆ ◆ ◆ ◆ ◆ ◆ ◆ ◆ ◆ ◆ ◆ ◆ ◆ ◆
Editing a Voice
GUIDED TOUR
2. Then, press @ (Amp).
The following display appears:
3. From the above page (Element Amp), select the first Rate dial for Element 1 (EG Attack Rate), and change the value to around 15.
Amplitude (level) EG Attack Rate
parameter/value.
Element 1, Rate dial 1 (EG Attack Rate).
4. Use the cursor buttons to select the fourth Rate dial of Element 1 (EG
Release Rate), and also change this value to around 15.
Amplitude (level) EG Release Rate
parameter/value.
Element 1, Rate dial 4 (EG Release Rate).
Now, play the Voice again. Use the e button to turn the Compare
function on and off, and listen to how much the sound has changed from the
original Voice.
◆ ◆ ◆ ◆ ◆ ◆ ◆ ◆ ◆ ◆ ◆ ◆ ◆ ◆ ◆ ◆ ◆ ◆ ◆ ◆ ◆ ◆ ◆ ◆ ◆ ◆ ◆ ◆ ◆ ◆ ◆ ◆ ◆ ◆ ◆ ◆ ◆ ◆ ◆ ◆ ◆
29
Naming and Storing the New Voice
Now that you’ve created a new Voice, you’ll want to give it a different name and
store it to internal memory, so that you can call it up again when you want it.
● Naming the Voice ..................................................................................................
1. From the last display page (Element), press * (Common).
This returns you to the Common page.
2. From the above page, press & (Name).
The following display with the list of characters appears:
3. Change the character at the highlight by using the rotary dial or the
D/I buttons.
Here, we’ll select a capital “W” for the first letter, by moving the highlight
in the character set to “W.”
4. Select the other characters in the name by pressing the right cursor
(.) button. Then use the rotary dial (as in step 3 above) to change
the character at the highlight.
Use the left and right cursor buttons to move among the characters in the
Voice Name box. Let’s name this Voice “WaverPno.”
30
◆ ◆ ◆ ◆ ◆ ◆ ◆ ◆ ◆ ◆ ◆ ◆ ◆ ◆ ◆ ◆ ◆ ◆ ◆ ◆ ◆ ◆ ◆ ◆ ◆ ◆ ◆ ◆ ◆ ◆ ◆ ◆ ◆ ◆ ◆ ◆ ◆ ◆ ◆ ◆ ◆
Editing a Voice
● Storing the Voice ..................................................................................................
EDIT
GUIDED TOUR
1. Once you’ve named the Voice, press S.
JOB
COMPARE
STORE
You can select another number here (by using the rotary dial or the D/
I buttons); for this example, however, let’s store the Voice to User (Usr)
number 001.
2. Press E to store your new Voice to the selected User memory
number.
3. Answer the prompt above by pressing the I button for “Yes” or the
D button for “No.”
Pressing the I button stores the Voice. When the operation is finished, a
“Completed” message appears, and the display returns to the Voice Play
mode.
All the settings you’ve made in the above sections, including the amount of
Reverb/Chorus and the Variation effect, are saved with the Voice to the new
User location.
◆ ◆ ◆ ◆ ◆ ◆ ◆ ◆ ◆ ◆ ◆ ◆ ◆ ◆ ◆ ◆ ◆ ◆ ◆ ◆ ◆ ◆ ◆ ◆ ◆ ◆ ◆ ◆ ◆ ◆ ◆ ◆ ◆ ◆ ◆ ◆ ◆ ◆ ◆ ◆ ◆
31
Recording a Song
This section guides you through the basic steps of recording a song using the
sequencer and accompaniment functions of the QS300. These extremely versatile features let you quickly and easily record complete songs and compositions
using the high-quality Voices of the QS300.
In this section you’ll learn how to:
• Enter the Song mode and select an empty song for recording.
• Record some accompaniment Patterns and chords.
• Record your own keyboard performance.
Enter the Song Mode and Select an Empty Song
1. Press s to enter the Song mode.
MODE
SONG lamp
lights.
SONG
VOICE
2. Select an empty song.
Move the highlight to the Song number with the cursor buttons and use the
D/I buttons or rotary dial to change the number. Empty songs are
indicated by a line of asterisks after the song number.
Song number and name.
(Line of asterisks indicates empty song.)
32
◆ ◆ ◆ ◆ ◆ ◆ ◆ ◆ ◆ ◆ ◆ ◆ ◆ ◆ ◆ ◆ ◆ ◆ ◆ ◆ ◆ ◆ ◆ ◆ ◆ ◆ ◆ ◆ ◆ ◆ ◆ ◆ ◆ ◆ ◆ ◆ ◆ ◆ ◆ ◆ ◆
Recording a Song
Record the Accompaniment Patterns
GUIDED TOUR
1. Select the Pattern (Pat) track for recording.
NOTE: Using patterns in
a recording is optional —
you can record your own
performance to any of the
16 numbered tracks
without using the accompaniment Patterns.
Move the highlight to the Pattern (Pat) track with the cursor buttons. The
track name is shown just below the Song number and name.
Track name.
Pattern track.
2. Move the highlight to the Pattern number (in the Pattern window) and
select a number other than 0.
Doing this calls up the User bank of Patterns (which is currently empty).
Pattern number and name. (Line of asterisks
indicates blank pattern.)
Pattern bank (User).
3. Move the highlight to the Pattern bank (Usr) and change it to Preset
(Pre).
Preset Pattern bank.
4. Now, select the musical style of the Pattern.
For this example, we’ll select 007, “Casa.” First, move the highlight back to
the Pattern number. You can then select the style quickly by pressing number 7 on the numeric keypad, and then E.
◆ ◆ ◆ ◆ ◆ ◆ ◆ ◆ ◆ ◆ ◆ ◆ ◆ ◆ ◆ ◆ ◆ ◆ ◆ ◆ ◆ ◆ ◆ ◆ ◆ ◆ ◆ ◆ ◆ ◆ ◆ ◆ ◆ ◆ ◆ ◆ ◆ ◆ ◆ ◆ ◆
33
5. Select the section of the style (Intro, Main, Fill or Ending).
We’ll select Intro here, since this is to be the beginning of the song. Move
the highlight to the bracketed section in the Pattern window and select
[Intro].
Section name (Intro, Main A/B, Fill AA/BB/AB/BA,
and Ending).
HINT — Auditioning the Patterns
You can audition the styles and sections before actually recording with them. To do this,
highlight the desired parameter, change it, then press R. Change styles and sections as
the pattern is playing back if you wish. To stop, simply press T.
HINT — Setting a Different Tempo for Recording
You may want to set the tempo to a slower speed, to give you more time to make the
pattern and chord changes you will be recording. To do this, highlight the tempo parameter
in the display and enter an appropriate tempo. Press R to play the pattern and “feel”
your way to the desired tempo.
Press r. (The lamp
lights.) Then, press R to start recording. (The lamp flashes.)
6. Now you’re ready to record the patterns.
RECORD lamp lights.
RECORD
RUN lamp flashes.
TOP
STOP
RUN
The metronome sounds, and after a two-measure lead-in, the selected pattern
is recorded. When Intro is selected in a song, it is immediately and automatically followed by the Main A section, which then repeats until another
section or style is selected (or until the T button is pressed).
As long as you don’t mind using the Main A section for the first few measures of the song, you can let the sequencer run for a while without making
any changes.
34
◆ ◆ ◆ ◆ ◆ ◆ ◆ ◆ ◆ ◆ ◆ ◆ ◆ ◆ ◆ ◆ ◆ ◆ ◆ ◆ ◆ ◆ ◆ ◆ ◆ ◆ ◆ ◆ ◆ ◆ ◆ ◆ ◆ ◆ ◆ ◆ ◆ ◆ ◆ ◆ ◆
Recording a Song
7. Change to other sections as the sequencer records.
The selected section
starts playing at the start of the next measure.
GUIDED TOUR
During recording, move the highlight to the section parameter, and then
select the other sections. The Fill sections (AA, BB, AB and BA) are used
as one-measure transitions between the Main A and B sections. (The last
letter of the Fill section indicates which section is to follow, Main A or Main
B; for example, Main B automatically follows the Fill AB section.) The
Ending section, as its name suggests, plays one time and then automatically
stops the recording, ending the song.
Though you can use the D/I buttons or rotary dial to change sections,
the easiest method is to use the numeric keypad. While the section parameter is highlighted, simply press the appropriate button (as shown below) to
change to the desired section.
3
Intro
Main A
Fill AA
Fill AB
3
3
7
8
INTRO
ENDING
4
5
MAIN A
MAIN B
1
2
FILL AA
FILL BB
0
—
FILL AB
FILL BA
9
Ending
6
Main B
3
Fill BB
ENTER
Fill BA
8. To end the song, select the Ending section, or press T.
The Mute dot in the display for the Pattern track is now solid, indicating that
the track has recorded data.
NOTE: Recording an
Ending section to a Song
(or entering an End mark
in Step Recording, page
123) automatically stops
the Song at that point,
even when there is
recorded data past that
point on tracks 1 - 16.
Solid Mute dot indicates that the
track contains data.
Note that the sequencer also returns to the first measure (or “top”) of the
song, so that you can immediately play it back from the beginning, or record
additional tracks.
9. To play back what you’ve recorded, press R.
◆ ◆ ◆ ◆ ◆ ◆ ◆ ◆ ◆ ◆ ◆ ◆ ◆ ◆ ◆ ◆ ◆ ◆ ◆ ◆ ◆ ◆ ◆ ◆ ◆ ◆ ◆ ◆ ◆ ◆ ◆ ◆ ◆ ◆ ◆ ◆ ◆ ◆ ◆ ◆ ◆
35
■ Erasing Song Data ...........................................................................................
If you make a mistake in recording the patterns and want to start over, you’ll
have to clear (erase) the song first.
To do this:
1. Press j.
2. Use the cursor buttons to select Job number 22 (Clear Song). (If you want
to clear only one recorded track, you can use Job number 17, Clear Track.)
3. Press E once to call up the Job, and press it again to actually execute
the function.
4. When the operation is completed, press s to return to the Song mode,
and start recording again.
If you only need to make some minor changes to the recorded track, you can use
the Step Recording functions to edit the track manually. (See page 101.)
Record the Accompaniment Chords
Now that you have recorded some basic accompaniment sections, you can add
some chord changes to your song. We’ll suggest some simple chord changes to
use here, but feel free to try out your own ideas, using these instructions as a
guide.
1. If necessary, press t to return to the beginning of the new song.
2. Select the Chord (Chd) track for recording.
Chord track.
3. Select the Chord window in the display.
Fingering setting.
(See HINT below.)
Chord window.
36
◆ ◆ ◆ ◆ ◆ ◆ ◆ ◆ ◆ ◆ ◆ ◆ ◆ ◆ ◆ ◆ ◆ ◆ ◆ ◆ ◆ ◆ ◆ ◆ ◆ ◆ ◆ ◆ ◆ ◆ ◆ ◆ ◆ ◆ ◆ ◆ ◆ ◆ ◆ ◆ ◆
Recording a Song
4.
CHORD ROOT
M
Select the root note for the first chord of
the song.
GUIDED TOUR
HINT — Using Fingering
You can play the full chords yourself (in the Fingered Zone at lower part of the keyboard)
by turning Fingering to on. Or turn Fingering off and enter the chords by “typing” them in
— as described in the steps below. (For more about the Fingering function and Fingered
Zone, see page 193.)
M7
Press the lowest D key (D1) to select D as
the root note. (The Chord name in the
display flashes.)
aug
5.
sus4 Madd9 M7 (9)
6 (9)
7 (9)
madd9 m7 (9) m7 (11)
7 (b9)
7 (#5)
7 (b9)
7 (#9)
7 (13)
7 (b13) 7sus4
Select the chord type from the keyboard, and press E to actually
enter the new chord.
Press the C#3 key to select M7(9) (major
seventh/ninth).
6. Now, press r and then R to start recording.
Enter chord changes “on the fly,” changing the chord type and/or root note as
the pattern plays back. For this example song, try changing between M7(9)
and 6 chords (keys: C#3 and D2). Also try changing the root note to G and
use 6 and m6 chords for that root (keys: D2 and F#2).
HINT
Chord changes normally occur on quarter-note divisions, so try to press the E button
to enter each chord either exactly on the beat or just before the beat on which you want the
chord change to occur. Syncopated chord changes can be recorded by entering the chord
an eighth or sixteenth note before the beat. (Syncopated changes can also be programmed in the Step Record mode; see page 124.)
◆ ◆ ◆ ◆ ◆ ◆ ◆ ◆ ◆ ◆ ◆ ◆ ◆ ◆ ◆ ◆ ◆ ◆ ◆ ◆ ◆ ◆ ◆ ◆ ◆ ◆ ◆ ◆ ◆ ◆ ◆ ◆ ◆ ◆ ◆ ◆ ◆ ◆ ◆ ◆ ◆
37
If you make a mistake or want to record a different chord progression,
simply press t to go back to the beginning, and then start recording the
Chord track again.
If you want to make minor changes to the recorded track without having to
record the entire track over again, use Step Recording (page 101) to edit the
track manually, or use Punch-in Recording (page 99) to selectively record a
certain section of the song.
Record Your Own Keyboard Performance
Now that you’ve recorded some accompaniment backing parts with a chord
progression, try recording your own keyboard performance over the backing.
1. Select one of the numbered tracks.
Here, we’ll select track 1.
2. Select a Voice for the track
Move the highlight to the Voice number in the Voice window and select 012,
Vibes.
Voice window (with Voice
number/name).
HINT — Turning Off the Metronome
Once you have the basic rhythm tracks recorded (as you did in the section Recording the
Accompaniment Patterns above), you may want to turn off the metronome click. For
more details, see the Click parameter in the Utility mode, page 192.
38
◆ ◆ ◆ ◆ ◆ ◆ ◆ ◆ ◆ ◆ ◆ ◆ ◆ ◆ ◆ ◆ ◆ ◆ ◆ ◆ ◆ ◆ ◆ ◆ ◆ ◆ ◆ ◆ ◆ ◆ ◆ ◆ ◆ ◆ ◆ ◆ ◆ ◆ ◆ ◆ ◆
Recording a Song
3. Start recording.
GUIDED TOUR
Play the keyboard along with the backing tracks. Recording begins at the
first beat of the first measure (001:1) — after the two-measure lead-in. Keep
recording until the end of the song, or press T to stop recording.
IMPORTANT
Recording with the method above — realtime recording — is “replace” recording, meaning
that any previous data in the track will be erased and replaced when new data is recorded
to that track. This differs from “overdub” recording in which new data is recorded over the
existing data and the existing data remains intact. Another method of recording — step
recording (page 101) — allows new material to be added to a track without erasing the
previous data. You can also use the Mix Track Job (page 157) to mix data from two tracks
and place the result on a single track.
4. If you’re satisfied with the newly recorded track, go on and record to
other tracks, as desired.
Repeat steps 1 through 3 above to record additional tracks.
HINT — Tempo Changes Within a Song
The sequencer also has a Tempo track that allows you to make tempo (speed) changes
within a song. This lets you create a more “human” feel in your recorded tracks, or set up
sudden, dramatic shifts in tempo within a single song.
Naming and Saving the New Song
Once you’ve recorded a Song, you’ll want to give it a unique name and save it
to floppy disk, so that you can call it up again for playback or further recording.
Use the Song Name Job (page 161) to name your new Song. (For instructions
on calling up the Song Jobs, refer to page 140.) For instructions on saving the
Song, refer to page 197.
◆ ◆ ◆ ◆ ◆ ◆ ◆ ◆ ◆ ◆ ◆ ◆ ◆ ◆ ◆ ◆ ◆ ◆ ◆ ◆ ◆ ◆ ◆ ◆ ◆ ◆ ◆ ◆ ◆ ◆ ◆ ◆ ◆ ◆ ◆ ◆ ◆ ◆ ◆ ◆ ◆
39
Other Sequencer Features
Once you’ve had some experience in recording your own songs, you may want
to explore some of the convenient features of the QS300’s sequencer, briefly
mentioned below. Also, be sure to look through the Reference section for details
on all the sequencer functions.
■ Using the t and k / l Buttons
In addition to the r, T and R buttons, the t and k/l
buttons give you controls for moving around in a Song.
RECORD
TOP
STOP
Pressing this returns to the
beginning of the Song.
RUN
Press or hold either of these
down to move through the
measures of a Song.
Pressing the t button returns to the “top” or beginning of a Song. Pressing
either of the k/l buttons steps backward or forward through the measures of a Song; holding either button down allows you to “rewind” or “fastforward” through the measures of a Song, and the operation increases in speed
the longer the button is held. The k/l buttons can also be used during
playback.
■ Mark/Jump
The Mark/Jump function lets you “mark” (memorize) up to 10 locations within
the current song and “jump” to any one of the marked locations in one easy step.
For instructions on using the Mark/Jump function, see page 68.
■ Punch-in Recording
Punch-in recording lets you record over a specific range of measures in an
already recorded track, leaving all other material on the track intact. This is
useful for fixing small mistakes or changing a short segment of a track —
without having to re-record the entire track.
For instructions on using Punch-in recording, refer to page 99.
40
◆ ◆ ◆ ◆ ◆ ◆ ◆ ◆ ◆ ◆ ◆ ◆ ◆ ◆ ◆ ◆ ◆ ◆ ◆ ◆ ◆ ◆ ◆ ◆ ◆ ◆ ◆ ◆ ◆ ◆ ◆ ◆ ◆ ◆ ◆ ◆ ◆ ◆ ◆ ◆ ◆
Recording a Song
■ Muting/Unmuting Tracks
GUIDED TOUR
During playback, you can selectively mute or unmute specific tracks. This is
useful since it allows you to “isolate” certain tracks for playback. Keep in mind
that it can also be used in recording, letting you monitor the tracks that you most
want to hear (and shutting off the ones you don’t) when recording a new track.
For instructions on using the Mute function, refer to page 69.
■ Song Jobs
The Song Jobs contain various functions for changing the recorded data in a
Song. For example, Copy Track (page 156) allows you to duplicate a recorded
track. Once you’ve copied a track, you can give it a different Voice from the
original, or change it in other ways to make it complement the original — such
as by changing its pitch with the Transpose Job (page 146).
For more details and instructions on the Song Jobs, refer to page 139.
◆ ◆ ◆ ◆ ◆ ◆ ◆ ◆ ◆ ◆ ◆ ◆ ◆ ◆ ◆ ◆ ◆ ◆ ◆ ◆ ◆ ◆ ◆ ◆ ◆ ◆ ◆ ◆ ◆ ◆ ◆ ◆ ◆ ◆ ◆ ◆ ◆ ◆ ◆ ◆ ◆
41
42
◆ ◆ ◆ ◆ ◆ ◆ ◆ ◆ ◆ ◆ ◆ ◆ ◆ ◆ ◆ ◆ ◆ ◆ ◆ ◆ ◆ ◆ ◆ ◆ ◆ ◆ ◆ ◆ ◆ ◆ ◆ ◆ ◆ ◆ ◆ ◆ ◆ ◆ ◆ ◆ ◆
R E F E R E N C E
Voice Edit Mode
NOTE: The Voice Edit mode is not available when the
System Mode parameter (in Utility mode) is set to TG-B.
(See page 189.)
Voice Edit Mode
The Voice Edit mode provides a wide range of
controls and parameters for changing the sound and
performance response of the Voices. These controls
allow you to either subtly enhance a Voice, or completely alter its character.
Voice Edit
Voice Common
Overall Parameters ..................................... 44
Controller Parameters ................................ 46
Variation Effect Parameters ........................ 47
Voice Name ................................................ 63
Voice Element
Wave Parameters ....................................... 48
Element Copy ........................... 50
Amplitude Parameters ................................ 51
Filter EG Parameters .................................. 53
Pitch EG Parameters .................................. 54
Graphic EG Edit Parameters ..................... 55
Template Copy ............................................ 57
Tuning Parameters ..................................... 58
LFO Parameters ......................................... 59
Drum Set ..................................................... 60
Voice Store ................................................. 63
Voice Compare ........................................... 64
Voice Job — Edit Recall ............................. 64
◆ ◆ ◆ ◆ ◆ ◆ ◆ ◆ ◆ ◆ ◆ ◆ ◆ ◆ ◆ ◆ ◆ ◆ ◆ ◆ ◆ ◆ ◆ ◆ ◆ ◆ ◆ ◆ ◆ ◆ ◆ ◆ ◆ ◆ ◆ ◆ ◆ ◆ ◆ ◆ ◆
43
Voice Common
○○○○○○○○○○○○○○○○○○○○○○○○○○○○○○○○○○○○○○○○○○○○○○○○
Voice Common
Path:
Overall Parameters
v ➞ e ➞ ** (Comon) ➞ *! (Overall)
* Press this only if the page shown below is not currently selected.
Volume
Effect Send
Portamento
Velocity
Mode (number of
available notes)
Voice Category
● Voice Category
Settings:
44
--
(No assignment)
Pf
Piano
Cp
Chromatic percussion
Or
Organ
Gt
Guitar
Ba
Bass
St
Strings/Orchestra
En
Ensemble instruments
Br
Brass
Rd
Reed
Pi
Pipe (Woodwinds)
Ld
Synth lead
Pd
Synth pad
Fx
Synth sound effects
Et
Ethnic instruments
Pc
Percussive instruments
Se
Sound effects
Dr
Drums
Sc
Synth comping
Vo
Vocal
Co
Combination
Wv
Material Wave
This determines the Voice category under which the Voice
is to be stored. Grouping your original Voices according to
categories helps in organizing the Voices and makes it
easier to select the Voice you need when calling up User
Voices.
● Voice Volume (Vol)
Range: 0 — 127
This determines the volume of the Voice.
◆ ◆ ◆ ◆ ◆ ◆ ◆ ◆ ◆ ◆ ◆ ◆ ◆ ◆ ◆ ◆ ◆ ◆ ◆ ◆ ◆ ◆ ◆ ◆ ◆ ◆ ◆ ◆ ◆ ◆ ◆ ◆ ◆ ◆ ◆ ◆ ◆ ◆ ◆ ◆ ◆
Voice
Common
○ ○ ○ ○ ○ ○ ○ ○ ○ ○ ○ ○
Effect Send Parameters (Send)
L Reverb Send
Range: 0 — 127
NOTE: Keep in mind that the Reverb effect must be properly
enabled and set for this parameter to work as intended. (See
page 47.)
HINT: For best results, set this parameter after setting Velocity
Depth (below).
NOTE: Depending on the Voice used, if Velocity Offset is set
to too low of a value, the Voice may not sound, no matter how
strong the velocity.
L Velocity Depth
Voice Edit Mode
This determines the level of the selected Voice that is sent
to the Reverb effect. A value of 0 results in a completely
“dry” Voice sound (no Reverb effect).
○
Range: 0 — 127
This determines the degree to which velocity affects the
Voice. Higher values make the Voice more sensitive to
changes in velocity.
L Chorus Send
Range: 0 — 127
This determines the level of the selected Voice that is sent
to the Chorus effect. A value of 0 results in a completely
“dry” Voice sound (no Chorus effect).
NOTE: Keep in mind that the Chorus effect must be properly
enabled and set for this parameter to work as intended. (See
page 47.)
L Chorus Send to Reverb
Range: 0 — 127
Portamento is a function that creates a smooth pitch glide
from one note to another.
NOTE: Portamento may have little or no effect on some
percussive Voices.
L Portamento Switch
This determines the level of the Chorus signal sent to and
processed by the Reverb effect. A setting of 0 results in
none of the Chorus-processed signal going to the Reverb.
HINT: Setting this to a relatively high level gives you a more
natural sound, since the Chorus-processed sound is also being
processed by the Reverb. More unusual effects can be
created by having a long Reverb and setting this to 0, so that
the Chorus sound is dry (no Reverb) and the original sound is
“drenched” in Reverb.
Velocity Parameters (Velocty)
L Velocity Offset
Settings: off, on
This determines whether Portamento is on or off for the
Voice.
L Portamento Time
Range: 0 — 127
This determines the time of the Portamento effect, or how
long it takes to glide the pitch from one note to the next.
Higher values result in a longer pitch glide time. (This
parameter is not available when Portamento Switch above
is set to off.)
● Mode
Range: 0 — 127
This determines the volume range over which velocity
affects. For lower values, the velocity affects a volume
range from minimum to medium-loud. For higher values,
velocity affects a range from medium-soft to maximum.
Settings: mono, poly
This determines whether the Voice is played monophonically (only one note at a time) or polyphonically (up to 32
notes at a time).
HINT: The mono setting works well for certain synth lead
sounds and fretless bass Voices. Unless you’re after an
unusual effect, acoustic instrument Voices (such as piano and
guitar) work best with the poly setting.
127
at
Level
Portamento Parameters (Portmnt)
96
at
96
64
at
32
64
0
Velocity
127
32
◆ ◆ ◆ ◆ ◆ ◆ ◆ ◆ ◆ ◆ ◆ ◆ ◆ ◆ ◆ ◆ ◆ ◆ ◆ ◆ ◆ ◆ ◆ ◆ ◆ ◆ ◆ ◆ ◆ ◆ ◆ ◆ ◆ ◆ ◆ ◆ ◆ ◆ ◆ ◆ ◆
45
Voice Common
Path:
Controller Parameters
v ➞ e ➞ ** (Comon) ➞ *@ (Contrl)
* Press this only if the page shown below is not currently selected.
Modulation Wheel
Pitch Bend
After Touch
Foot Controller
Bias parameters
Modulation
parameters
The Controller parameters determine how the various
performance controllers affect the sound. The four controllers are: MODULATION wheel, PITCH wheel
(PitchBend), After Touch (AfterToch), and Foot Controller
(FootCntrl).
These controllers can be used to change three different
aspects of the sound: volume (Amp), pitch (Pch), or
timbre/filter (Fltr). The Bias parameters (shown as dials in
the display) control the depth of the effect. The Modulation parameters (shown as sliders below the Bias parameter
dials) control the modulation — creating a wavering
vibrato/wah type of effect. Each controller has the same
five parameters, and they are explained together below.
● Amplitude EG Bias Depth (Amp dial)
Range: -64 (-100%) — +63 (+100%)
This determines how the controller affects the Amplitude or
volume of the sound. For positive values, the volume level
increases as the controller is moved toward the maximum.
For negative values, the effect is reversed: moving the
controller to the maximum results in a decrease in volume.
● Pitch Bias Depth (Pch dial)
Range: -24 — +24 semitones
This determines how the controller affects the pitch of the
sound. For positive values, the pitch is raised as the
controller is moved toward the maximum. For negative
values, the effect is reversed: moving the controller to the
maximum results in a lowering of the pitch.
46
● Pitch Modulation Depth (Pch slider)
Range: 0 — 127
This determines how widely the pitch is modulated by the
LFO (low frequency oscillator), producing a vibrato effect.
The higher the value, the deeper the pitch modulation, and
hence, the more pronounced the vibrato effect.
● Filter Cutoff Bias (Fltr dial)
Range: -64 (-100%) — +63 (+100%)
This determines how the controller changes the filter
setting, which affects the timbre or tonal quality of the
sound. For positive values, the tone becomes brighter as
the controller is moved toward the maximum. For negative
values, the effect is reversed: moving the controller to the
maximum results in a warmer, more round sound.
● Filter Modulation Depth (Fltr slider)
Range: 0 — 127
This determines how widely the filter is modulated by the
LFO (low frequency oscillator), producing a regular “wahwah” filter sweep effect. The higher the value, the deeper
the filter modulation, and hence, the more pronounced the
filter sweep effect.
NOTE: The default settings for the above parameters are as
follows:
• MODULATION wheel Pitch Modulation Depth: +10
• PITCH wheel Pitch Bias Depth: +2
• All other parameters are set to a default value of 0.
◆ ◆ ◆ ◆ ◆ ◆ ◆ ◆ ◆ ◆ ◆ ◆ ◆ ◆ ◆ ◆ ◆ ◆ ◆ ◆ ◆ ◆ ◆ ◆ ◆ ◆ ◆ ◆ ◆ ◆ ◆ ◆ ◆ ◆ ◆ ◆ ◆ ◆ ◆ ◆ ◆
Voice
Common
○ ○ ○ ○ ○ ○ ○ ○ ○ ○ ○ ○
Voice Common
Path:
○
Variation Effect Parameters
v ➞ e ➞ ** (Comon) ➞ *# (Effect)
* Press this only if the page shown below is not currently selected.
Variation Effect Type
Wet/Dry (Available depending on selected effect.)
Other effect parameters
Voice Edit Mode
MODULATION Wheel Depth
The Variation effects are separate from the Reverb and
Chorus effects, and provide a wealth of additional and
unusual ways to change the sound of a Voice. It features
some of the same effects found in the Reverb and Chorus
sections. This is not mere redundancy; it allows you to use
one type of Reverb or Chorus for a special effect for the
selected Voice. Naturally, this Variation effect can be saved
as part of the Voice data. Variation also gives you many
special effects not found in the other sections, such as
Delay, Gate Reverb and Wah.
Explanations of the parameters that are common to all
Variation types are given below. For individual descriptions of the Variation types and explanations for all other
Variation parameters, refer to the separate “Sound Lists and
MIDI Data” supplement.
Foot Controller Depth
NOTE: When the Type is set to No Effect, no sound is output.
When set to THRU, the Variation effect is canceled and the
sound of the Voice is output without any Variation effect.
● Wet/Dry
Range: W<D63 (0) — W=D (64) — W63>D (127)
NOTE: Numbers in parentheses indicate the corresponding
values, which can be entered directly from the numeric keypad
to change the settings. (Range: 0 - 127.)
This determines the balance between the original sound
(dry, or D) and the processed sound (wet, or W). A setting
of W=D results in an equal balance of dry and wet sound.
The Wet/Dry parameter is not available for some of the
effect types.
● MODULATION Wheel Depth (Mod.Whl)
Range: -63 — +63
● Variation Effect Type
Settings:
No Effect;
Reverb (Rev) Hall 1 & 2;
Reverb (Rev) Stage 1 & 2;
Delay L-C-R;
Echo;
Early Reflection (Ref.) 1 & 2;
Reverse Gate (ReversGate);
Chorus 1 - 4;
Flanger 1 - 3;
Rotary Speaker (Sp.);
Auto Pan;
Distortion;
Guitar Amp Simulator (G-Amp.Sim.);
2-Band EQ;
Reverb (Rev) Room 1 - 3;
Reverb (Rev) Plate;
Delay L,R;
Cross Delay;
Gate Reverb;
Reverb Karaoke (RevKaraok) 1 - 3;
Celeste 1 - 4;
Symphonic;
Tremolo;
Phaser 1 & 2;
Overdrive;
3-Band EQ;
Auto Wah;
THRU
This determines the Variation effect type for the Voice. For
details on specific effect types and parameters, refer to the
separate “Sound Lists and MIDI Data” supplement.
This determines the depth of the effect that is controlled by
the MODULATION Wheel. This allows you to use the
MODULATION Wheel as a kind of effect level control for
the Variation effect. A setting of 0 results in no MODULATION Wheel control. This parameter is not available for
the 3-band EQ and 2-band EQ effect types.
● Foot Controller Depth (Foot Cnt)
Range: -63 — +63
This determines the depth of the effect that is controlled by
the Foot Controller. This allows you to use the Foot
Controller as a kind of effect level control for the Variation
effect. A setting of 0 results in no Foot Controller control.
This parameter is not available for the 3-band EQ and 2band EQ effect types.
◆ ◆ ◆ ◆ ◆ ◆ ◆ ◆ ◆ ◆ ◆ ◆ ◆ ◆ ◆ ◆ ◆ ◆ ◆ ◆ ◆ ◆ ◆ ◆ ◆ ◆ ◆ ◆ ◆ ◆ ◆ ◆ ◆ ◆ ◆ ◆ ◆ ◆ ◆ ◆ ◆
47
Voice Element
○○○○○○○○○○○○○○○○○○○○○○○○○○○○○○○○○○○○○○○○○○○○○○○○
About Elements
Elements are the basic building blocks of the Voices. An
Element is a basic waveform of a certain sound (such as an
acoustic piano or violin), and there are a total of 205
different waveforms available. Up to four different Elements can be used to create a single Voice. In the Voice
Element pages, these can be assigned to different sections
of the keyboard, played at different velocities, with different envelopes, and be given completely independent filter,
pitch EG, tuning and LFO settings. This flexibility allows
you to create extremely complex Voices that can shift in
Voice Element
Path:
texture and pitch, and change dynamically according to
how you play.
There is a limit to the total amount of Elements that can be
used for all User Voices — specifically, if all of the User
Voices use the maximum four Elements, only 70 Voices
will be available for playing. Practically however, this
should not be a problem, since the individual Elements are
rich and complex sounds in themselves. For most Voices,
one Element is all you will need.
Wave Parameters
v ➞ e ➞ ** (Elmnt) ➞ *! (Wave)
* Press this only if the page shown below is not currently selected.
Element numbers 1 - 4. Dashes (--) indicate element is disabled or off.
Element Mute
Element Enable
Wave Group/Number
Mode (number of
available notes)
Note Limit Low/High
F1
F2
F3
F4
F5
F6
F7
F8
Pressing & from the Wave menu selects
the Element Copy page. (See page 57.)
In this page you should:
1) Select an Element number. Or, copy an Element from
an existing Voice (by pressing & and using the
Element Copy page).
2) Turn the Element on (with Element Enable).
3) Un-mute it, if necessary (with Element Mute).
4) Select the desired waveform for the Element (with Wave
Group and Number).
5) Change the Note Limit parameters, if desired.
● Element Mute
Settings: mute, off
This determines whether the selected Element (1 - 4) is
muted or not. When set to off, the Element sounds (or is
unmuted). (This parameter has no effect for Elements not
enabled in the Element Enable parameter below.)
● Element Enable (El.Enabl)
Settings: off, on
This determines whether the Element (1 - 4) is enabled for
the Voice or not.
48
◆ ◆ ◆ ◆ ◆ ◆ ◆ ◆ ◆ ◆ ◆ ◆ ◆ ◆ ◆ ◆ ◆ ◆ ◆ ◆ ◆ ◆ ◆ ◆ ◆ ◆ ◆ ◆ ◆ ◆ ◆ ◆ ◆ ◆ ◆ ◆ ◆ ◆ ◆ ◆ ◆
Voice
Element
○ ○ ○ ○ ○ ○ ○ ○ ○ ○ ○
● Wave Group (Grp.)
Settings:
○
● Wave Number (No.)
Range: 000 — 204
Acoustic pianos
Ep
Electric pianos
Mk
Misc. keyboards
Cp
Chromatic percussion
Ao
Acoustic organs
Eo
Electric organs
Ag
Acoustic guitars
Eg
Electric guitars
Ab
Acoustic basses
Eb
Electric basses
Mb
Misc. basses
Bw
Bowed strings
Oe
Orchestra ensemble
Ch
Choir
Ar
Acoustic brass
Sr
Synthesizer brass
Rd
Reeds
Pi
Pipes (woodwinds)
Et
Ethnic instruments
Pc
Percussive instruments
Me
Musical sound effects
Ne
Natural sound effects
Ow
One-cycle waves
Lw
Long-loop waves
Mw
Misc. waves
This determines the waveform used for the Element. For a
complete list of individual Elements available, refer to the
separate “Sound Lists and MIDI Data” supplement.
● Note Limit Low/High (NoteL/H)
Range: C-2 — G8
This determines the range of notes over which an Element
can be played. Notes played outside the range will not be
sounded by the Element.
In the display, the left parameter is Note Limit Low (which
determines the lowest responding note), and the right is
Note Limit High (which determines the highest responding
note). You can use the D/I buttons or rotary dial to
change the setting, or use the keyboard to enter the desired
note directly.
HINT: You can use the Note Limit Low/High parameter to set
up keyboard splits among the Elements.
NOTE: After changing the Note Limit settings, be sure to move
the highlight away from the parameters before playing the
keyboard, to avoid inadvertently changing the setting again.
This allows you to select the basic sound group or category
for the Element. If you know which group of sounds
contains the desired waveform, this parameter lets you
quickly select it.
◆ ◆ ◆ ◆ ◆ ◆ ◆ ◆ ◆ ◆ ◆ ◆ ◆ ◆ ◆ ◆ ◆ ◆ ◆ ◆ ◆ ◆ ◆ ◆ ◆ ◆ ◆ ◆ ◆ ◆ ◆ ◆ ◆ ◆ ◆ ◆ ◆ ◆ ◆ ◆ ◆
49
Voice Edit Mode
Ap
Voice Element
Path:
Wave Parameters Element Copy
v ➞ e ➞ ** (Elmnt) ➞ *! (Wave) ➞ *& (ElCopy)
* Pressing this may not be necessary if the appropriate page has already been called up.
Currently selected Element number (1 - 4) of the Voice.
Voice Bank
F1
F2
F3
F4
Voice Number/Category/Name
F5
F6
F7
F8
Selects User Voice Bank.
Selects Preset Voice Bank.
Selects XG Voice Bank.
Use ^ and & to
step through Voice
Banks.
Calls up the controls for selecting
Voice categories.
(See step 3 below.)
The Element Copy function allows you to copy an Element
from an existing Voice to the Voice currently being edited.
To use Element Copy: ...........................................................
1. From the Element Wave page, select the destination
Element number.
This is the Element number to which the existing
Voice’s Element will be copied.
2. Press &.
3. Select the desired Voice Bank.
Use !, @, and # to select the XG, Preset, and
User Banks, respectively. Use ^ and & to step
through the Bank numbers.
F1
F2
F3
F4
F5
F6
F7
F8
Use $ and % to step
through the Voice categories.
5. Press E to call up the Elements of the selected
Voice.
In this page, you can audition (or individually listen to)
each Element before you actually copy it. To do this,
highlight the desired Element number and play the
keyboard.
4. Select the desired Voice number.
Use any data entry method to select the Voice.
You can also browse through the Voices according to
their general categories. To do this, press * (Catg),
then use $ and % to step through the first Voices
in the various Voice categories.
6. Press E again to actually copy the selected
Element.
The display automatically returns to the Element Wave
page after the operation is completed.
50
◆ ◆ ◆ ◆ ◆ ◆ ◆ ◆ ◆ ◆ ◆ ◆ ◆ ◆ ◆ ◆ ◆ ◆ ◆ ◆ ◆ ◆ ◆ ◆ ◆ ◆ ◆ ◆ ◆ ◆ ◆ ◆ ◆ ◆ ◆ ◆ ◆ ◆ ◆ ◆ ◆
Voice
Element
○ ○ ○ ○ ○ ○ ○ ○ ○ ○ ○
Voice Element
Path:
○
Amplitude Parameters
v ➞ e ➞ ** (Elmnt) ➞ *@ (Amp)
* Pressing this may not be necessary if the appropriate page has already been called up.
Mute status for each Element (1 - 4).
Element Level
Voice Edit Mode
Amplitude EG Rate
Pan
Velocity Limit Low/High
Velocity Curve
F1
F2
F3
F4
F5
F6
F7
F8
Pressing & from the Amp menu selects the
graphic Amp EG Edit page. (See page 55.)
Amplitude EG Rate Parameters (Rate)
The Amplitude EG (envelope generator) parameters allow
you to shape how the level of the Voice changes over time.
By pressing & from this page, you can select the graphic
Amp EG Edit page, for more detailed editing of the EG
parameters. (See page 55.)
Keep in mind that the EG parameters affect each other, and
are affected by how long a note is held. For example, if
Decay is set to a low value and the note is held for a long
time, you may not be able to hear changes made to the
Release parameter. Also keep in mind that the EG parameters may have little or no effect, depending on the particular Voice selected.
L Release Rate (Amp EG Rel Rate)
Range: 0 — 63
This determines the Release rate of the EG, or how long the
sound sustains after a note is released.
● Pan
Range: -7 (left) — 0 (center) — 7 (right); 8 (scaling)
This determines the pan setting for the Element, or its
placement in the stereo image. A setting of 8 (scaling)
results in the pan setting being tracked across the keyboard,
with left - right corresponding to low - high. In other
words, the lower the note, the greater the sound is panned
to the left; the higher the note, the greater the sound is
panned to the right.
L Attack Rate (Amp EG Atk Rate)
Range: 0 — 63
This determines the Attack rate of the EG, or how long it
takes for the sound to reach full volume when a note is
played.
L Decay 1 Rate (Amp EG Dcy1 Rate)
Range: 0 — 63
This determines the first Decay rate of the EG, or how
rapidly the sound goes to the Decay 1 Level setting. (See
page 56.)
L Decay 2 Rate (Amp EG Dcy2 Rate)
● Velocity Limit Low/High (Vel.Lim L/H)
Range: 0 — 127
This determines the velocity range over which an Element
can be played. Velocities played outside the range will not
be sounded by the Element. This can be used to set up
velocity splits among the Elements, in which different
Elements sound depending on how hard or soft you play
the keyboard.
In the display, the left parameter dial is Velocity Limit
Low (which determines the softest responding velocity),
and the right is Velocity Limit High (which determines the
hardest responding velocity).
Range: 0 — 63
This determines the second Decay rate of the EG, or how
rapidly the sound goes to the Decay 2 Level setting. (See
page 56.)
◆ ◆ ◆ ◆ ◆ ◆ ◆ ◆ ◆ ◆ ◆ ◆ ◆ ◆ ◆ ◆ ◆ ◆ ◆ ◆ ◆ ◆ ◆ ◆ ◆ ◆ ◆ ◆ ◆ ◆ ◆ ◆ ◆ ◆ ◆ ◆ ◆ ◆ ◆ ◆ ◆
51
● Velocity Curve (Vel.Crv)
Settings:
normal, hard 1, hard 2, soft 1, soft 2, cross 1, cross 2
This determines how the strength of your playing affects
the volume of the selected Element. The various curves let
you tailor the velocity response to your particular needs or
technique. By assigning different curves to different
Elements, you can set up velocity crossfades — letting you
crossfade between different Elements depending on how
softly or strongly you play.
Each curve is represented by a corresponding icon in the
display, as shown below. The Hard 1 and 2 curves are
good for when you want to have strong volume even at
medium playing strength. The Soft 1 and 2 curves are
good for when you want greater, more subtle control when
playing softly. The Cross 1 and 2 curves are specifically
for crossfade applications; to use them, assign Cross 1 to
one Element and Cross 2 to the other.
normal
hard 1
hard 2
soft 1
soft 2
cross 1
cross 2
● Element Level (Level)
Range: 0 — 127
This determines the volume of the Element.
52
◆ ◆ ◆ ◆ ◆ ◆ ◆ ◆ ◆ ◆ ◆ ◆ ◆ ◆ ◆ ◆ ◆ ◆ ◆ ◆ ◆ ◆ ◆ ◆ ◆ ◆ ◆ ◆ ◆ ◆ ◆ ◆ ◆ ◆ ◆ ◆ ◆ ◆ ◆ ◆ ◆
Voice
Element
○ ○ ○ ○ ○ ○ ○ ○ ○ ○ ○
Voice Element
Path:
○
Filter EG Parameters
v ➞ e ➞ ** (Elmnt) ➞ *# (Filter)
* Pressing this may not be necessary if the appropriate page has already been called up.
Mute status for each Element (1 - 4).
Cutoff Frequency
Voice Edit Mode
Filter EG Rate
Resonance
Rate Velocity
Sensitivity
Level Velocity
Sensitivity
F1
F2
F3
F4
F5
F6
F7
F8
Pressing & from the Filter menu selects the
graphic Filter EG Edit page. (See page 55.)
Filter EG Rate Parameters (Rate)
The Filter EG (envelope generator) parameters allow you to
shape how the tone or timbre of the Voice changes over
time. By pressing & from this page, you can select the
graphic Filter EG Edit page, for more detailed editing of
the Filter EG parameters. (See page 55.)
Keep in mind that the EG parameters affect each other, and
are affected by how long a note is held. For example, if
Decay is set to a low value and the note is held for a long
time, you may not be able to hear changes made to the
Release parameter. Also keep in mind that the EG parameters may have little or no effect, depending on the particular Voice selected.
L Attack Rate (Flt EG Atk Rate)
Range: 0 — 63
This determines the Attack rate of the Filter EG, or how
long it takes for the filter to “open up” or reach full effect,
after a note is played.
L Decay 1 Rate (Flt EG Dcy1 Rate)
Range: 0 — 63
This determines the first Decay rate of the Filter EG. This
determines how rapidly the filter setting goes to the Decay
1 Level value. (See page 56.)
L Decay 2 Rate (Flt EG Dcy2 Rate)
● Resonance
Range: 0 — 63
This determines the amount of filter resonance or emphasis
of the Filter Cutoff Frequency parameter below. Higher
values increase the emphasis of the Filter Cutoff Frequency,
producing a higher resonant peak, while lower values
produce a relatively flat response.
● Rate Velocity Sensitivity (Sens.Rate)
Range: -7 — +7
This determines the degree to which the Filter EG Rate is
affected by velocity. For a setting of 0, velocity has no
effect on the Filter EG Rate. For positive settings, the
stronger you play, the faster the filter changes (shorter EG
rates). For negative settings, the softer you play, the faster
the filter changes.
● Level Velocity Sensitivity (Sens.Level)
Range: -7 — +7
This determines the degree to which the Filter EG Level is
affected by velocity. For a setting of 0, velocity has no
effect on the Filter EG Level. For positive settings, the
stronger you play, the more effect the filter has on the
sound (higher EG levels). For negative settings, the softer
you play, the more effect the filter has on the sound (lower
EG levels).
Range: 0 — 63
This determines the second Decay rate of the Filter EG.
This determines how rapidly the filter setting goes to the
Decay 2 Level value. (See page 56.)
L Release Rate (Flt EG Rel Rate)
Range: 0 — 63
This determines the Release rate of the Filter EG, or how
long the filter effect sustains after a note is released.
● Cutoff Frequency
Range: 0 — 127
This determines the cutoff frequency of the filter, or the
frequency point above which other frequencies are filtered
out. Lower cutoff values create a deeper, more rounded
tone, while higher values create a thinner, brighter tone.
◆ ◆ ◆ ◆ ◆ ◆ ◆ ◆ ◆ ◆ ◆ ◆ ◆ ◆ ◆ ◆ ◆ ◆ ◆ ◆ ◆ ◆ ◆ ◆ ◆ ◆ ◆ ◆ ◆ ◆ ◆ ◆ ◆ ◆ ◆ ◆ ◆ ◆ ◆ ◆ ◆
53
Voice Element
Path:
Pitch EG Parameters
v ➞ e ➞ ** (Elmnt) ➞ *$ (Pitch)
* Pressing this may not be necessary if the appropriate page has already been called up.
Mute status for each Element (1 - 4).
Pitch EG Depth
Pitch EG Rate
Rate Velocity
Sensitivity
Level Velocity
Sensitivity
F1
F2
F3
F4
F5
F6
F7
F8
Pressing & from the Pitch menu selects the
graphic Pitch EG Edit page. (See page 55.)
Pitch EG Rate Parameters (Rate)
The Pitch EG (envelope generator) parameters allow you to
shape how the pitch of the Voice changes over time. By
pressing & from this page, you can select the graphic
Pitch EG Edit page, for more detailed editing of the Pitch
EG parameters. (See page 55.)
Keep in mind that the EG parameters affect each other, and
are affected by how long a note is held. For example, if
Decay is set to a low value and the note is held for a long
time, you may not be able to hear changes made to the
Release parameter.
L Attack Rate (Pch EG Atk Rate)
L Release Rate (Pch EG Rel Rate)
Range: 0 — 63
This determines the Release rate of the Pitch EG, or how
long the Pitch EG effect sustains after a note is released.
● Rate Velocity Sensitivity (Sens.Rate)
Range: -7 — +7
This determines the degree to which the Pitch EG Rate is
affected by velocity. For a setting of 0, velocity has no
effect on the Pitch EG. For positive settings, the stronger
you play, the faster the Pitch changes (shorter EG rates).
For negative settings, the softer you play, the faster the
Pitch changes (longer EG rates).
Range: 0 — 63
This determines the Attack rate of the Pitch EG, or how
long it takes for the pitch to change after a note is played.
● Level Velocity Sensitivity (Sens.Lvl)
Range: -7 — +7
This determines the first Decay rate of the Pitch EG, or
how rapidly the pitch goes to the Decay 1 Level value.
(See page 56.)
This determines the degree to which the Pitch EG Level is
affected by velocity. For a setting of 0, velocity has no
effect on the Pitch EG Level. For positive settings, the
stronger you play, the the greater the amount of pitch
change (higher EG levels). For negative settings, the softer
you play, the greater the amount of pitch change.
L Decay 2 Rate (Pch EG Dcy2 Rate)
● Depth (Pch EG Depth)
L Decay 1 Rate (Pch EG Dcy1 Rate)
Range: 0 — 63
Range: 0 — 63
This determines the second Decay rate of the Pitch EG, or
how rapidly the pitch goes to the Decay 2 Level value.
(See page 56.)
54
Range: 1/2, 1, 2, 4 octaves
This determines the overall pitch range (in octaves) of the
Pitch EG.
◆ ◆ ◆ ◆ ◆ ◆ ◆ ◆ ◆ ◆ ◆ ◆ ◆ ◆ ◆ ◆ ◆ ◆ ◆ ◆ ◆ ◆ ◆ ◆ ◆ ◆ ◆ ◆ ◆ ◆ ◆ ◆ ◆ ◆ ◆ ◆ ◆ ◆ ◆ ◆ ◆
Voice
Element
○ ○ ○ ○ ○ ○ ○ ○ ○ ○ ○
Voice Element
Path:
○
Graphic EG Edit Parameters — Amp, Filter and Pitch
v ➞ e ➞ ** (Elmnt) ➞ **@ (Amp) or # (Filter) or $ (Pitch) ➞ *& (
➞ *! (Parm)
)
* Pressing this may not be necessary if the appropriate page has already been called up.
**Press one of these — Amp, Filter, or Pitch — to select the desired corresponding set of EG controls.
EG pages are provided for the three main aspects of the
sound: volume (Amp), tone (Filter), and pitch. To select
one of the three, press the appropriate button — @
(Amp), # (Filter) or $ (Pitch) — from any of the
Voice Element pages described above.
Voice Edit Mode
These parameters give you fine control over the EG parameters. With the graphic display, the controls are very
intuitive and easy to understand. Moreover, a set of preprogrammed EG Templates make it easy and quick to get
suitable EG settings. Once you’ve copied a Template, you
can then “tweak” it with the individual edit controls.
Mute status for each Element (1 - 4).
Also selects Element for editing.
Rate parameters
Level parameters
F1
F2
Selects Template
Copy page.
F3
F4
F5
F6
Moves to previous
EG segment.
F7
F8
Zoom in.
Zoom out.
Moves to next EG segment.
In this page you should:
1) Select an Element number (by moving the highlight to
the Mute status oval in the display). This calls up the
entire set of EG parameters for the Element.
2) Select and adjust the parameters as desired.
3) Use % and ^ to select different segments of the
graphic EG for viewing (see About the EG Segments
below). Also, use & and * to zoom in and out of
the graphic EG — displaying as much or as little of the
EG as desired.
About the EG Segments
For display purposes and ease of editing, the EG graphic is
divided into four segments: Segments (Seg) 1 - 3, and
Release (Rel). Segment 1 corresponds to the Attack portion
of the EG, Segment 2 to the Decay 1 portion, Segment 3 to
the Decay 2 portion, and Release to the Release.
● Attack Rate (At Rate)
Range: 0 — 63
For the Amplitude EG, this determines how long it takes
for the sound to reach full volume when a note is played.
For the Filter and Pitch EGs, this determines how long it
takes the tone/pitch to go from the EG Initial Level setting
to the EG Attack Level.
● Decay 1 Rate (D1 Rate)
Range: 0 — 63
This determines the first Decay rate of the EG. This
determines how rapidly the sound/tone/pitch goes to the
Decay 1 Level setting. (See page 56.)
● Decay 2 Rate (D2 Rate)
Range: 0 — 63
This determines the second Decay rate of the EG. This
determines how rapidly the sound/tone/pitch goes to the
Decay 2 Level setting. (See page 56.)
◆ ◆ ◆ ◆ ◆ ◆ ◆ ◆ ◆ ◆ ◆ ◆ ◆ ◆ ◆ ◆ ◆ ◆ ◆ ◆ ◆ ◆ ◆ ◆ ◆ ◆ ◆ ◆ ◆ ◆ ◆ ◆ ◆ ◆ ◆ ◆ ◆ ◆ ◆ ◆ ◆
55
● Release Rate (Rl Rate)
Range: 0 — 63
For the Amplitude EG, this determines the Release rate of
the EG, or how long the level of the sound sustains after a
note is released. For the Filter and Pitch EGs, this determines how long it takes the tone/pitch to reach the EG
Release Level setting.
● Initial Level (Int Lvl)
(Filter EG and Pitch EG only)
Range: -63 — +63
This determines the initial setting of the filter or pitch,
before the note is played.
● Attack Level (At Lvl)
(Filter EG and Pitch EG only)
Range: -63 — +63
This determines the filter/pitch level setting that follows the
Initial Level.
● Decay 1 Level (D1 Lvl)
Range: 0 — 127 (Amplitude EG)
-63 — +63 (Filter EG and Pitch EG)
For the Amplitude EG, this determines the level setting that
follows the maximum level reached at the end of the
Attack. For the Filter and Pitch EGs, this determines the
level setting that follows the Attack Level.
● Decay 2 Level (D2 Lvl)
Range: 0 — 127 (Amplitude EG)
-63 — +63 (Filter EG and Pitch EG)
This determines the level setting that follows the Decay 1
Level.
NOTE: Regarding the Decay 1 and Decay 2 Level parameters,
Decay 2 can set to a higher value than Decay 1, yet the actual
levels of the two remain equal. (In other words, the actual level
of Decay 2 cannot be greater than that of Decay 1.)
● Release Level (Rl Lvl)
(Filter EG and Pitch EG only)
Range: -63 — +63
This determines the final setting of the filter or pitch, after
the note is released.
56
◆ ◆ ◆ ◆ ◆ ◆ ◆ ◆ ◆ ◆ ◆ ◆ ◆ ◆ ◆ ◆ ◆ ◆ ◆ ◆ ◆ ◆ ◆ ◆ ◆ ◆ ◆ ◆ ◆ ◆ ◆ ◆ ◆ ◆ ◆ ◆ ◆ ◆ ◆ ◆ ◆
Voice
Element
○ ○ ○ ○ ○ ○ ○ ○ ○ ○ ○
Voice Element
Path:
Template Copy
○
— Amp, Filter and Pitch
v ➞ e ➞ ** (Elmnt) ➞ **@ (Amp) or # (Filter) or $ (Pitch) ➞ *& (
➞ *@ (Temp)
)
* Pressing this may not be necessary if the appropriate page has already been called up.
**Press one of these — Amp, Filter, or Pitch — to select the desired corresponding set of EG controls.
F1
Selects EG
parameter page.
F2
F3
F4
F5
F6
Moves to previous
EG segment.
F7
Voice Edit Mode
Mute status for each Element (1 - 4).
Also selects Element for Template Copy.
F8
Zoom in.
Zoom out.
Moves to next EG segment.
The EG Templates are pre-programmed Amp/Filter/Pitch
EG settings that let you quickly and easily get the type of
EG you need. Once you’ve copied a Template, you can
return to the page of EG parameters (! — Parm), then
“tweak” it with the individual edit controls.
● Operation ...........................................................................
Move the highlight to the Template type.
1.
2. Select a Template.
(Use the rotary dial or D/I
buttons.)
Refer to EG Template List in the separate “Sound Lists
and MIDI Data” supplement.
If you want to restore the original edited EG setting,
select User.
3. Press E to actually copy the Template.
4. Press ) to return to the previous Voice Edit
page.
◆ ◆ ◆ ◆ ◆ ◆ ◆ ◆ ◆ ◆ ◆ ◆ ◆ ◆ ◆ ◆ ◆ ◆ ◆ ◆ ◆ ◆ ◆ ◆ ◆ ◆ ◆ ◆ ◆ ◆ ◆ ◆ ◆ ◆ ◆ ◆ ◆ ◆ ◆ ◆ ◆
57
Voice Element
Path:
Tuning Parameters
v ➞ e ➞ ** (Elmnt) ➞ *% (Tuning)
* Pressing this may not be necessary if the appropriate page has already been called up.
Mute status for each Element (1 - 4).
Detune
Note Shift
Pitch Scaling
Center Note
Pitch Scaling
Depth
● Note Shift (Shift)
Range: -32 — +32 (semitones)
This determines the coarse pitch setting for the Element in
semitones. (Fine pitch adjustments can be made in Detune
below.)
● Pitch Scaling Center Note (Center)
Range: C-2 — G8
This determines the central note around which the Pitch
Scaling is based. For example, when this is set to C3, the
C3 key (middle C) plays at conventional pitch, and all other
notes around it are scaled in pitch according to the Pitch
Scaling Depth setting below.
● Pitch Scaling Depth (Scaling)
Settings: 0%, 5%, 10%, 20%, 50%, 100%
This determines the Pitch Scaling, or how pitch is tracked
across the keyboard. A setting of 0% results in normal
scaling; in other words, conventional pitch intervals are
used. A setting of 100% results in constant pitch across the
keyboard; all notes sound at the same pitch. Intermediate
settings provide microtonal scaling. For example, a 5%
setting results in a 24-note octave; in other words, a oneoctave interval corresponds to two octaves on the keyboard.
● Detune
Range: -50 — +50 cents (approx. +/- 1 semitone)
This determines the fine pitch setting for the Element in
cents. (Coarse pitch adjustments can be made in Note Shift
above.)
58
◆ ◆ ◆ ◆ ◆ ◆ ◆ ◆ ◆ ◆ ◆ ◆ ◆ ◆ ◆ ◆ ◆ ◆ ◆ ◆ ◆ ◆ ◆ ◆ ◆ ◆ ◆ ◆ ◆ ◆ ◆ ◆ ◆ ◆ ◆ ◆ ◆ ◆ ◆ ◆ ◆
Voice
Element
○ ○ ○ ○ ○ ○ ○ ○ ○ ○ ○
Voice Element
Path:
○
LFO Parameters
v ➞ e ➞ ** (Elmnt) ➞ *^ (LFO)
* Pressing this may not be necessary if the appropriate page has already been called up.
Mute status for each Element (1 - 4).
LFO Delay Time
LFO Wave
Voice Edit Mode
LFO Speed
Amplitude
Modulation
Depth
Pitch
Modulation
Depth
Filter
Modulation
Depth
About LFO
The LFO (low frequency oscillator) is a low frequency
waveform that is used to modulate, or regularly waver,
some aspect of the sound. This modulation can be applied
to the level (Amplitude), pitch, or tone (Filter).
● Amplitude Modulation Depth (AM)
The LFO here is separate from the modulation found in the
Common page’s Control menu. (See page 46.) The LFO
modulation here is applied constantly and is not affected by
the controllers (MODULATION wheel, after touch, PITCH
wheel, or Foot Controller).
● Pitch Modulation Depth (PM)
● Delay Time
Range: 0 — 127
This determines the amount of time before the onset of the
LFO modulation. (This only affects Pitch modulation.)
Range: 0 — 31
This determines how widely the level (Amplitude) is
modulated by the LFO. The higher the value, the greater
the modulation of the sound level .
Range: 0 — 63
This determines how widely the pitch is modulated by the
LFO. The higher the value, the greater the pitch modulation.
● Filter Modulation Depth (FM)
Range: 0 — 15
This determines how widely the tone (Filter) is modulated
by the LFO. The higher the value, the greater the tone
modulation.
● Wave
Settings: sawtooth, triangle, sample & hold (S&H)
This determines the particular waveform for the LFO. The
modulation characteristics differ depending on the waveform selected. The sample & hold setting produces a
random modulation effect.
● Speed
Range: 0 — 63
This determines the speed of the LFO modulation. Higher
values result in faster modulation.
◆ ◆ ◆ ◆ ◆ ◆ ◆ ◆ ◆ ◆ ◆ ◆ ◆ ◆ ◆ ◆ ◆ ◆ ◆ ◆ ◆ ◆ ◆ ◆ ◆ ◆ ◆ ◆ ◆ ◆ ◆ ◆ ◆ ◆ ◆ ◆ ◆ ◆ ◆ ◆ ◆
59
Other Voice Functions
○○○○○○○○○○○○○○○○○○○○○○○○○○○○○○○○○○○○○○○○○○○○○○○○
Voice
Drum Set
Amplitude EG
(Attack, Decay, Release)
Volume
(Pan, Volume)
Reverb Send
Currently selected
parameter/value.
Note Number
Mode (Alternate
Switch, Assign Mode)
Drum Map
Selected instrument name.
Note On/Off Receive Filters
Tuning (Note Shift, Detune)
Filter (Resonance, Cutoff)
The Drum Set controls allow you to change a wide variety
of settings of the drum/percussion sounds in the User Drum
Kit. These settings include pitch, level, panning, Reverb
send, filter controls and EG (Envelope Generator), among
others. Moreover, these parameters can be set to completely independent values for each of the drum sounds in
the User Kit.
4. Select the note number/instrument for editing.
This can also be done directly from the keyboard, no
matter which other parameter is highlighted. Simply
play a key, and the note number changes and the
instrument name appears at the bottom of the display.
5. Edit the drum sound as desired.
Edit other sounds by repeating steps 4 and 5.
● Operation ...........................................................................
1. Select the User Kit (D12 or program #140).
(None of the other Drum Voices can be selected for
editing.)
NOTE: There is no Store operation for the User Kit; the Kit
is saved to internal memory automatically. Also, for this
reason, there is no Compare function in Drum Set editing.
2. Press e.
3. Select the type of Drum Voice.
60
◆ ◆ ◆ ◆ ◆ ◆ ◆ ◆ ◆ ◆ ◆ ◆ ◆ ◆ ◆ ◆ ◆ ◆ ◆ ◆ ◆ ◆ ◆ ◆ ◆ ◆ ◆ ◆ ◆ ◆ ◆ ◆ ◆ ◆ ◆ ◆ ◆ ◆ ◆ ◆ ◆
Other Voice Functions
○ ○ ○ ○ ○ ○ ○ ○ ○ ○ ○ ○ ○ ○ ○ ○ ○ ○ ○
● Note Number/Instrument (Inst)
Range: C0 — C5
Range: 0 — 127
NOTE: You should avoid playing the keyboard while editing an
instrument sound, since doing so will automatically select a
different Note Number/Instrument, depending on the key you
press.
This determines the Decay Rate of the level EG, or how
rapidly the sound dies down as the note is held. Higher
values result in a longer Decay rate. (For more information
about EG parameters, see page 55.)
NOTE: This parameter may little or no effect for certain short
percussion sounds.
● Amplitude EG Release Rate (Amp Rls)
Range: 0 — 127
● Drum Map
Settings:
Room,
Electronic (Electrnic),
Jazz,
Classic,
SFX 2
This determines the basic type of drum kit that will be used
for the User Kit. Selecting a particular Drum Map calls up
a certain set of drum sounds and key assignment. (For a
list of the drum sounds and key assignments in each Drum
Map, refer to the separate “Voice Lists and MIDI Data”
supplement.)
NOTE: Be careful not to switch Drum Maps in the middle of
editing a User Kit, otherwise all your parameter edits will be
reset to the default values of the newly selected kit.
● Pan
Range: random, Left 63 (-63) — Right 63 (+63)
This determines the stereo position of the selected drum
sound. The random setting randomly assigns the drum to a
pan position. This is useful when you want to quickly
assign different drum sounds to be heard from different
random parts of the stereo image.
● Volume (Vol)
Range: 0 — 127
This determines the volume of the selected drum sound.
● Amplitude EG Attack Rate (Amp Atk)
Range: 0 — 127
This determines the Attack Rate of the level EG, or how
long it takes for the sound of the selected drum sound to
reach full volume when a note is played. (For more
information about EG parameters, see page 55.)
This determines the Release Rate of the level EG, or how
rapidly the sound dies out after the note is released. (For
more information about EG parameters, see page 55.)
NOTE: This parameter may little or no effect for certain short
percussion sounds.
● Reverb Send (Send Rev)
Range: 0 — 127
This determines the level of the selected drum sound that is
sent to the Reverb effect. A value of 0 results in a completely “dry” drum sound, no matter how much Reverb is
applied to the User Kit.
NOTE: Keep in mind that the Reverb effect must be properly
enabled and set for this parameter to work as intended. Also,
the Reverb Send parameter (page 45) must be set to an
appropriate value.
● Filter Cutoff (Filter Cut)
Range: 0 — 127
This determines the cutoff frequency of the filter applied to
the selected drum sound, or the frequency point around
which other frequencies are filtered out. Lower cutoff
values create a deeper, more rounded tone, while higher
values create a thinner, brighter tone.
● Filter Resonance (Filter Res)
Range: -64 — +63
This determines the amount of filter resonance or emphasis
of the Filter Cutoff parameter above. Higher values
increase the emphasis of the cutoff frequency, producing a
higher resonant peak, while lower values produce a relatively flat response.
◆ ◆ ◆ ◆ ◆ ◆ ◆ ◆ ◆ ◆ ◆ ◆ ◆ ◆ ◆ ◆ ◆ ◆ ◆ ◆ ◆ ◆ ◆ ◆ ◆ ◆ ◆ ◆ ◆ ◆ ◆ ◆ ◆ ◆ ◆ ◆ ◆ ◆ ◆ ◆ ◆
61
Voice Edit Mode
This determines the Note Number in the Kit, and hence, the
specific drum/percussion instrument assigned to the note.
You can also select the desired note number by simply
pressing the appropriate key on the keyboard.
Standard,
Rock,
Analog,
Brush,
SFX 1,
● Amplitude EG Decay Rate (Amp Dcy)
● Note Shift (Tuning Shft)
Range: -64 — +63
This determines the coarse pitch setting of the selected
drum sound.
● Detune (Tuning Detn)
Range: -64 — +63
This determines the fine pitch setting of the selected drum
sound.
● Instrument Assign Mode (Mode Asign)
Settings: single (sgl), multi (mlt)
This determines how the Voices are sounded when two or
more notes are played from the same key. When this is set
to single and the same key is played twice, the first note is
cut off as soon as the second note is played. When set to
multi and the same key is played twice, the first note
continues to sound and is overlapped by the second note.
● Note On Receive Filter (Note RcvOn)
Settings: off, on
This determines how the selected drum sound responds to
MIDI Note On messages. Normally, this should be set to
on so that the corresponding drum sound plays when a
MIDI Note On message is received. Set this to off when
you want to keep the selected drum sound from playing.
● Note Off Receive Filter (Note RcvOff)
Settings: off, on
This determines how the selected drum sound responds to
MIDI Note Off messages. When this is set to on, the
selected sound will stop in response to the corresponding
MIDI Note Off message. An on setting is good for some
sustained sounds (like a whistle), or for key-controlled
cymbal “chokes.” For most drum sounds, however, this
should be set to off so that the drum sound plays back in its
entirety (is not cut off).
● Alternate Group (Mode Alter)
Range: off, 1 — 127
This determines the group assignment of the selected drum
sound. Drums assigned to the same group cannot be
sounded simultaneously. In other words, if one drum in a
group is sounding while a second in the same group is
played, the first drum sound will be cut off and the second
will sound.
HINT: The main use for this parameter is in creating realistic
hi-hat sounds. By assigning an open hi-hat and a closed hi-hat
to the same group, you can “choke” or stop the open hi-hat
sound by simply playing the closed hi-hat — just like pressing
the pedal on an actual hi-hat set.
62
◆ ◆ ◆ ◆ ◆ ◆ ◆ ◆ ◆ ◆ ◆ ◆ ◆ ◆ ◆ ◆ ◆ ◆ ◆ ◆ ◆ ◆ ◆ ◆ ◆ ◆ ◆ ◆ ◆ ◆ ◆ ◆ ◆ ◆ ◆ ◆ ◆ ◆ ◆ ◆ ◆
Other Voice Functions
○ ○ ○ ○ ○ ○ ○ ○ ○ ○ ○ ○ ○ ○ ○ ○ ○ ○ ○
Voice
Path:
Name
v ➞ e ➞ ** (Comon) ➞ *& (Name)
* Pressing this may not be necessary if the appropriate page has already been called up.
F2
F3
F4
F5
F6
F7
F8
Press * to delete the
character at the highlight.
Press & to insert a space at
the highlight.
● Operation ...........................................................................
1. Move the highlight in the name to the desired position with the left/right cursor buttons (,/.).
2. Change the character at the highlight by using the
rotary dial.
3. After entering the name, press ) to leave the
Other functions
● & — Insert
This inserts a blank space at the highlight position.
● * — Delete
This deletes the character at the highlight position.
Name page.
Once you leave the Name page, further editing can be
done, or you can store the newly named Voice.
Voice
Path:
Store
v➞e➞S
Destination Voice Number.
Newly edited Voice Number/Name.
● Operation ...........................................................................
1. Once you’ve edited and named a Voice, press
S.
2.
Select the User Voice number to which you want to
store the newly created Voice.
The default number is the same as the Voice you called
up for editing.
Number of free Elements.
3. Press E.
4. Answer the “Are you sure?” prompt by pressing the
I button for “Yes” or the D button for “No.”
Press the I button to store the Voice, or press D
to cancel. When the operation is finished, a “Completed” message appears, and the display returns to the
Voice Play mode. Pressing D returns operation to
the Store page.
◆ ◆ ◆ ◆ ◆ ◆ ◆ ◆ ◆ ◆ ◆ ◆ ◆ ◆ ◆ ◆ ◆ ◆ ◆ ◆ ◆ ◆ ◆ ◆ ◆ ◆ ◆ ◆ ◆ ◆ ◆ ◆ ◆ ◆ ◆ ◆ ◆ ◆ ◆ ◆ ◆
63
Voice Edit Mode
F1
Voice
Compare
The Compare function allows you to hear the changes
you’ve made to a Voice and instantly compare them with
the sound of the original Voice. To use Compare, you must
be in the Edit mode and have made at least one change to a
parameter.
Normally, after editing, the letter “V” (Edit) appears at the
top left of the display, indicating the Edit condition:
MODE
SONG
VOICE
Lamp
flashes.
“C” indicates Compare condition.
“V” indicates Edit condition.
From this condition to use Compare, press the e
button. In Compare, the VOICE lamp flashes and the letter
“C” (Compare) appears at the top of the display, replacing
“V.” The original parameter values are also shown.
Voice
Pressing e again returns to the newly edited Voice (and
“C” changes to “V”). You can continue editing other
parameters, pressing the e button as needed to compare
the edited sound with the original. (Pressing e toggles
between the original Voice and edited Voice.)
NOTE: In the Compare condition, all parameters are “locked”
and cannot be changed.
Job — Edit Recall
The Edit Recall Job (the only Voice Job) allows you to
recall the last edited Voice. For example, if you have
edited a Voice and then switched to other Voices without
storing the one you were editing to internal memory, you
can still call the edited Voice back up again by using this
function.
To use Edit Recall: ................................................................
From the Voice Play mode, press the j button.
1.
2. Press E to recall the last edited Voice, or press
) to cancel.
64
◆ ◆ ◆ ◆ ◆ ◆ ◆ ◆ ◆ ◆ ◆ ◆ ◆ ◆ ◆ ◆ ◆ ◆ ◆ ◆ ◆ ◆ ◆ ◆ ◆ ◆ ◆ ◆ ◆ ◆ ◆ ◆ ◆ ◆ ◆ ◆ ◆ ◆ ◆ ◆ ◆
R E F E R E N C E
Song Mode
Song
Song Mode
Song Playback
Loop Playback ............................................ 67
Transport/Location Controls ....................... 67
Measure/Beat Parameter ........................... 68
Mark/Jump Function ................................... 68
Tempo ......................................................... 69
Mute ............................................................ 69
Play Effect Bypass ..................................... 70
Multi Controls
pages............................................... 73
pages .............................................. 76
pages ...................................... 82
Controller Edit
Portamento ................................................. 86
Real-time Controllers: ................................. 87
MODULATION Wheel / PITCH Wheel /
After Touch / Foot Controller
Song Playback Effects
Per Track .................................................... 89
Quantize ...................................................... 90
Swing .......................................................... 91
Transpose/Clock Shift................................. 92
Gate Time/Velocity ...................................... 93
Track Transmit Channel ............................. 94
Song Chain ................................................. 95
◆ ◆ ◆ ◆ ◆ ◆ ◆ ◆ ◆ ◆ ◆ ◆ ◆ ◆ ◆ ◆ ◆ ◆ ◆ ◆ ◆ ◆ ◆ ◆ ◆ ◆ ◆ ◆ ◆ ◆ ◆ ◆ ◆ ◆ ◆ ◆ ◆ ◆ ◆ ◆ ◆
65
Loading a Song
Song loading is done from the Disk mode (page 198).
However, Songs also be loaded directly from within the
Song mode, without having to enter the Disk mode.
● Operation ...........................................................................
1. Make sure a proper floppy disk (with Song data) is
in the disk drive. Then, from the main Song mode
page, press & (Load).
2. From the Load page, select the desired Song, then
press E.
After the operation is completed, the display returns to
the Load page. Press s or ) to return to the
main Song page.
If a Song is already in memory and the display below
appears, answer the prompt with the D (“No”) or
I (“Yes”) buttons.
Pressing I loads the Song and pressing D cancels
the operation. In either case, the display returns to the
Load page. Press s or ) to return to the main
Song page.
66
◆ ◆ ◆ ◆ ◆ ◆ ◆ ◆ ◆ ◆ ◆ ◆ ◆ ◆ ◆ ◆ ◆ ◆ ◆ ◆ ◆ ◆ ◆ ◆ ◆ ◆ ◆ ◆ ◆ ◆ ◆ ◆ ◆ ◆ ◆ ◆ ◆ ◆ ◆ ◆ ◆
Song Playback
○○○○○○○○○○○○○○○○○○○○○○○○○○○○○○○○○○○○○○○○○○○○○○○○
Song Playback involves much more than simply starting
and stopping the Song. The Song mode contains a wide
variety of parameters that give you extensive control over
playback, allowing you to dramatically change the final
sound.
To enter the Song mode, make sure a Song is loaded (see
page 198) or has been recorded, then press s.
Loop Playback
Song Mode
Loop playback allows you to continuously “loop” or repeat
playback of the Song. Playback repeats indefinitely until
the Song is stopped manually.
2. Stop playback by pressing the T button.
To Loop playback a Song: ...................................................
1. Simultaneously hold down the ( button and
press the R button.
Loop playback starts immediately, and is indicated by
the loop playback symbol ( ) at the right of the song
name.
Transport/Location Controls
Starts playback (or recording,
when RECORD lamp is lit).
Returns to the beginning of the Song.
Also recalls the User-stored Multi settings
(except when pressed during playback).
(See page 72.)
SEQUENCER
RECORD
TOP
Enables record stand-by.
(See pages 98 and 101 for
details on recording.)
STOP
RUN
Stops playback or
recording.
The r, T and R buttons are self-explanatory, and their use is covered elsewhere. The other transport controls are explained below.
● t button
Pressing this instantly returns to the beginning (or “top”) of
the Song or phrase. This button can also be used for the
same purpose during playback. (If you press R too
soon after pressing t, the sequencer may not return to
the beginning of the Song.)
Rewind
Fast forward
● k / l buttons
Pressing either of these once reverses or advances one
measure (when playback is stopped). Holding either down
rewinds or fast-forwards continuously through the song.
These can also be used during playback.
◆ ◆ ◆ ◆ ◆ ◆ ◆ ◆ ◆ ◆ ◆ ◆ ◆ ◆ ◆ ◆ ◆ ◆ ◆ ◆ ◆ ◆ ◆ ◆ ◆ ◆ ◆ ◆ ◆ ◆ ◆ ◆ ◆ ◆ ◆ ◆ ◆ ◆ ◆ ◆ ◆
67
Measure/Beat Parameter
Measure number
To use the Measure/Beat parameter for location: ............
Highlight the measure number (in the main Song Play
display shown above), and use the following controls:
• D/I buttons — to step through the measures.
• Rotary dial — to quickly move through the measures.
• Numeric keypad (then E) — to directly go to
a specific measure number.
Beat number
The beat number always resets to 1 when locating a new
measure.
Mark/Jump Function
The mark/jump function lets you “mark” (memorize) up to
10 locations within the current song and “jump” to any one
of the marked locations in one easy step.
To mark a location: ...............................................................
1. Press # (Mark) from the main Song Play display.
This calls up the Mark/Jump display.
Measure/Beat of
Mark/Jump number 1.
To jump to a marked location: ............................................
1. Press # (Mark).
2. Move the highlight to the appropriate Mark/Jump
number (or enter the number via the numeric
keypad), and press E.
The display immediately returns to Song Play at the
specified location.
Currently selected
Mark/Jump number.
To clear a marked location: .................................................
Press # (Mark).
1.
2. Move the highlight to the desired Mark/Jump
number (or enter the number via the numeric
keypad), and press ! (Clear).
2. From the above display, move the highlight to an
empty number (for example, “2” above) and press
E.
This records the current measure/beat location to the
specified Mark/Jump number, and returns you to the
Song mode.
68
◆ ◆ ◆ ◆ ◆ ◆ ◆ ◆ ◆ ◆ ◆ ◆ ◆ ◆ ◆ ◆ ◆ ◆ ◆ ◆ ◆ ◆ ◆ ◆ ◆ ◆ ◆ ◆ ◆ ◆ ◆ ◆ ◆ ◆ ◆ ◆ ◆ ◆ ◆ ◆ ◆
Song Playback
○ ○ ○ ○ ○ ○ ○ ○ ○ ○ ○ ○ ○
Tempo
The QS300 allows precise tempo settings from 25 to 300
beats per minute in fine one-tenth of a quarter-note increments.
Tenths of a beat/minute.
Tempo (in beats/minute)
The number to the left of the period in the tempo parameter
is the number of quarter-note beats per minute, and the
number to the right of the period represents tenths of a
quarter note. Move the highlight to the desired part of the
tempo (the ones or tenths section) and change the tempo as
required.
Song Mode
Mute
Recorded tracks can be muted (turned off) during playback
or recording, allowing you to selectively hear individual
tracks. This lets you single out important tracks you want
to hear, or temporarily silence tracks that you don’t want to
hear.
Mute dots. (Tracks 1 and 2 are currently muted.)
Pattern (Pat) contain data and are on, while the rest
contain no data.
NOTE: The Chord (Chd) and Tempo (Tmp) tracks cannot
be muted.
To simultaneously mute/un-mute all tracks: .....................
Move the highlight to any mute dot in the display.
1.
2. Simultaneously hold down the ( button and
press the D or I button — I to mute and
D to un-mute.
HINT: This function can be very handy when you want to
“solo” monitor a track: First mute all tracks, then turn on
only the track you want to hear.
To mute/un-mute a recorded track: ...................................
1. Move the highlight to the desired mute dot in the
display.
2. Press the I button (once or twice) until the letter
“M” appears in the mute dot.
To un-mute the track (or turn it on), press the D
button. The letter “M” disappears and the mute dot is
solid, indicating the track can be heard.
The mute dots appear as white blocks with a dotted
outline rather than solid dark dots. In the display above,
for example, tracks 1 and 2 are muted, tracks 3, 4 and
◆ ◆ ◆ ◆ ◆ ◆ ◆ ◆ ◆ ◆ ◆ ◆ ◆ ◆ ◆ ◆ ◆ ◆ ◆ ◆ ◆ ◆ ◆ ◆ ◆ ◆ ◆ ◆ ◆ ◆ ◆ ◆ ◆ ◆ ◆ ◆ ◆ ◆ ◆ ◆ ◆
69
Play Effect Bypass
Play Effect Bypass allows you to turn play effects on and
off for indivdual recorded tracks during playback or recording.
To use Play Effect Bypass on all tracks at once: ..............
Move the highlight to any mute dot in the display.
1.
2. Simultaneously hold down the ( button and
Minus sign (_) in mute dots indicates Play
Effect Bypass is on for the track.
press the D or I button — D to effectbypass all tracks or I to set the track for normal
playback.
To use Play Effect Bypass on a recorded track: ...............
1. Move the highlight to the desired mute dot in the
display.
2. Press the D button (once or twice) until a minus
sign (_) appears in the mute dot.to turn off the
effects for the selected track.
A minus sign (_) appears in the mute dot in the
display, indicating that the play effects for the selected
track are turned off. To turn the effects back on, press
the I button.
70
◆ ◆ ◆ ◆ ◆ ◆ ◆ ◆ ◆ ◆ ◆ ◆ ◆ ◆ ◆ ◆ ◆ ◆ ◆ ◆ ◆ ◆ ◆ ◆ ◆ ◆ ◆ ◆ ◆ ◆ ◆ ◆ ◆ ◆ ◆ ◆ ◆ ◆ ◆ ◆ ◆
Multi Controls
○○○○○○○○○○○○○○○○○○○○○○○○○○○○○○○○○○○○○○○○○○○○○○○○
The Multi controls give you extensive control over a wide
variety of parameters for the Voices of all of the individual
tracks. These parameters include Voice Bank and Voice,
volume, panning, tuning, filter, velocity, EG (for Amplitude), and vibrato — plus all effect settings, including
Send, Type and all effect parameters. The Multi pages also
feature an easy-to-use “mixing console” layout that shows
you all relevant parameters at a glance.
F2
F3
F4
F5
F6
F7
F8
The tree chart below shows all parameter pages for the
Multi controls. The three main paths are the Mixer pages
(which include Voice and volume settings), the Effect
pages, and the Instrument pages (which include tuning,
filter, velocity, EG and vibrato settings).
Multi Controls
pages
Volume ........................................................ 73
Voice ........................................................... 74
Search ......................................................... 75
pages
Send ............................................................ 76
Type ............................................................ 77
Effect Parameters
Reverb ......................................... 79
Chorus ......................................... 79
Variation ...................................... 80
pages
Tuning/Filter ................................................ 82
Mode/Velocity.............................................. 83
EG Time ...................................................... 84
Vibrato ......................................................... 85
◆ ◆ ◆ ◆ ◆ ◆ ◆ ◆ ◆ ◆ ◆ ◆ ◆ ◆ ◆ ◆ ◆ ◆ ◆ ◆ ◆ ◆ ◆ ◆ ◆ ◆ ◆ ◆ ◆ ◆ ◆ ◆ ◆ ◆ ◆ ◆ ◆ ◆ ◆ ◆ ◆
71
Song Mode
To call up the Multi controls: ..............................................
Press s to enter the Song mode. Then, from the main
Song Play display (shown below), press $ (Multi).
F1
Storing the Multi Control Parameter Values
The settings for all Multi control parameters (listed in the
chart on the previous page) are automatically saved as you
make changes to them. However, many of these settings
may change during playback of a Song, such as when the
Song contains different Program Change or Control Change
settings. For this reason, you may want to have an “initial”
or “reset” set of Multi values that can be recalled (particularly at the start of a Song), or you may want to assign a
particular set of Multi values for instant recall. The function below lets you store all current Multi values to a single
User set, which can be instantly recalled each time the
t button is pressed.
To store a User set of Multi parameter values: ................
1. After changing any of the Multi parameters, return
to the main Song display (by pressing s or
)).
2. To call up the function, simultaneously hold down
the ( button and press S.
3. Press I (“Yes”) to store the Multi settings, or
press D (“No”) to cancel.
To recall the settings (if you’ve made changes in the
course of Song playback or recording), simply press the
t button (when playback is stopped). This not only
returns to the beginning of the Song, but resets all Multi
parameter values to the settings you stored in the
operation above.
72
◆ ◆ ◆ ◆ ◆ ◆ ◆ ◆ ◆ ◆ ◆ ◆ ◆ ◆ ◆ ◆ ◆ ◆ ◆ ◆ ◆ ◆ ◆ ◆ ◆ ◆ ◆ ◆ ◆ ◆ ◆ ◆ ◆ ◆ ◆ ◆ ◆ ◆ ◆ ◆ ◆
Multi Controls
○ ○ ○ ○ ○ ○ ○ ○ ○ ○ ○ ○
Song Multi
Path:
Volume
s ➞ $ (Multi) ➞ *! (Mixer) ➞ *^ (Volume)
* Pressing this may not be necessary if the appropriate page has already been called up.
Voice category (Voice number and name
appear at top right when this is highlighted).
Master (all channels/tracks).
Channel/Track numbers.
Pan (for each
channel/track).
Song Mode
Master Volume
Volume (for each
channel/track).
● Voice
Range: 1 — 128, D1 — D12 (129 — 140), off (141)
This determines the Voice for the individual channel/track.
(To set the bank, use the Mixer Voice page below.) Only
the Voice category is displayed at the channel number; the
Voice number and name are shown at the top right of the
display.
● Pan
Range: random (-64), left 63 (-63) — right 63 (+63)
This determines the stereo position for the individual
channel/track. The random setting randomly assigns the
pan position. This is useful when you want to quickly
assign different instrument tracks to be heard from different
random parts of the stereo image.
● Volume
Range: 0 — 127
This determines the volume setting for the individual
channel/track.
● Master Volume
Range: 0 — 127
This determines the overall volume setting of all channels/
tracks.
◆ ◆ ◆ ◆ ◆ ◆ ◆ ◆ ◆ ◆ ◆ ◆ ◆ ◆ ◆ ◆ ◆ ◆ ◆ ◆ ◆ ◆ ◆ ◆ ◆ ◆ ◆ ◆ ◆ ◆ ◆ ◆ ◆ ◆ ◆ ◆ ◆ ◆ ◆ ◆ ◆
73
Song Multi
Path:
Voice
s ➞ $ (Multi) ➞ *! (Mixer) ➞ *& (Voice)
* Pressing this may not be necessary if the appropriate page has already been called up.
Voice category (Voice number/
name appear at top right).
Channel/Track numbers.
Voice bank
● Voice
Range: 1 — 128, D1 — D12 (129 — 140), off (141)
This determines the Voice for the individual channel/track.
● Bank
Range: Normal (XG) mode: XG 0 — 101, Fx (SFX), Pr
(Preset), Us (User)
TG300B mode: TB 0 — 60
This determines the Voice bank for the individual channel/
track.
74
◆ ◆ ◆ ◆ ◆ ◆ ◆ ◆ ◆ ◆ ◆ ◆ ◆ ◆ ◆ ◆ ◆ ◆ ◆ ◆ ◆ ◆ ◆ ◆ ◆ ◆ ◆ ◆ ◆ ◆ ◆ ◆ ◆ ◆ ◆ ◆ ◆ ◆ ◆ ◆ ◆
Multi Controls
○ ○ ○ ○ ○ ○ ○ ○ ○ ○ ○ ○
Search
Song Multi
Path:
s ➞ $ (Multi) ➞ *! (Mixer) ➞ ** (Srch)
* Pressing this may not be necessary if the appropriate page has already been called up.
Voice Bank
F2
F3
F4
F5
The Search pages provide an easy and quick way to browse
through and select different Voice banks and Voices.
F6
•
•
From the page shown above, you can:
• Use !, @ and # to directly select the XG,
Preset and User banks, respectively.
• Use ^ and & (Bank </>) to select the bank.
• Hold down the ( button and simultaneously
press either ^ or & (Bank </>) to quickly
select the XG, SFX, Preset and User Banks.
SHIFT
F1
F2
F3
F4
F5
F7
Song Mode
F1
Channel/Track
F8
Use the rotary dial or D/I buttons to select
Voices within the current bank.
Press * (Catg) to call up the Category page
(below), then use $ and % to browse through
the Voices according to their general categories.
F6
F7
F8
Press one of these to directly
Use these to change
select the corresponding Bank:
to different Banks.
• !: XG
• @: Preset
Use these to select
• #: User
Press this to return to previous
the Voice category.
Search page.
Hold this down and press ^
or & to quickly select the XG,
SFX, Preset and User Banks.
To return to the previous Mixer page press ).
◆ ◆ ◆ ◆ ◆ ◆ ◆ ◆ ◆ ◆ ◆ ◆ ◆ ◆ ◆ ◆ ◆ ◆ ◆ ◆ ◆ ◆ ◆ ◆ ◆ ◆ ◆ ◆ ◆ ◆ ◆ ◆ ◆ ◆ ◆ ◆ ◆ ◆ ◆ ◆ ◆
75
Song Multi
Path:
Send
s ➞ $ (Multi) ➞ *@ (Effect) ➞ *^ (Send)
* Pressing this may not be necessary if the appropriate page has already been called up.
● When Variation Mode is set to Insertion:
Dry Level
● When Variation Mode is set to System:
Channel/Track
Reverb Send
Chorus Send
Variation Send
Variation Mode
● Dry Level
Range: 0 — 127
This determines the level of the direct or unprocessed
sound for the individual channel/track. Use this to adjust
the “dry/wet” balance of the direct signal and the effectprocessed signal. The Dry Level parameter can be set only
when Variation Mode (below) is set to System. When
Variation Mode is set to Insertion, this value is fixed for all
channels at 127.
● Variation Mode
Settings: Insertion (Ins), System (Sys)
This determines how the Variation effect is connected in the
signal chain. When set to Ins (Insertion), the Variation
effect is applied to only one of the channels. When set to
Sys (System), the Variation effect is applied to all channels,
according to the amount of Variation Send (below) set for
each channel.
● Variation Send
● Reverb Send
Range: 0 — 127
This determines the level of the Voice (for the individual
channel/track) that is sent to the Reverb effect.
● Chorus Send
Range: 0 — 127
This determines the level of the Voice (for the individual
channel/track) that is sent to the Chorus effect.
76
Range: Insertion mode: off, on
System mode: 0 — 127
This determines the level of the Voice (for the individual
channel/track) that is sent to the Variation effect. When
Variation Mode (above) is set to Insertion, this can only be
turned off or on (the dials do not appear in the display).
Also, it can only be applied to a single channel/track.
When Variation Mode is set to System, the dials appear in
the display and the Send amount can be set from 0 — 127.
◆ ◆ ◆ ◆ ◆ ◆ ◆ ◆ ◆ ◆ ◆ ◆ ◆ ◆ ◆ ◆ ◆ ◆ ◆ ◆ ◆ ◆ ◆ ◆ ◆ ◆ ◆ ◆ ◆ ◆ ◆ ◆ ◆ ◆ ◆ ◆ ◆ ◆ ◆ ◆ ◆
Multi Controls
○ ○ ○ ○ ○ ○ ○ ○ ○ ○ ○ ○
Type
Song Multi
Path:
s ➞ $ (Multi) ➞ *@ (Effect) ➞ *& (Type)
* Pressing this may not be necessary if the appropriate page has already been called up.
Reverb Type
Chorus Type
Variation Type
Song Mode
Send Variation to
Chorus*
Reverb Pan
Reverb Return
Chorus Pan
Variation Pan*
Send Variation to Reverb*
Chorus Return
Send Chorus to
Reverb
Variation Return*
* These parameters are availabe only when Variation
Mode is set to System.
● Reverb Type
Settings:
No Effect,
Rev Hall 1 & 2,
Rev Room 1 - 3,
Rev Stage 1 & 2,
Rev Plate,
Rev White Room (WhiteRm), Rev Tunnel,
Rev Basement (Basemnt)
This determines the effect type used for the Reverb effect.
The Reverb Type can also be selected from the Effect
Parameters pages (page 79). (For more details on the
Reverb effects, refer to the separate “Sound Lists and MIDI
Data” supplement.)
● Reverb Pan
Range: left 63 (-63) — center (0) — right 63 (+63)
This determines the stereo position for the Reverb effect
sound of the individual channel/track.
● Reverb Return
Range: 0 — 127
This determines the level of the Reverb sound (for the
individual channel/track) in the overall mix.
● Chorus Type
Settings:
No Effect,
Chorus 1 — 4,
Flanger 1 — 3
Celeste 1 — 4,
This determines the effect type used for the Chorus effect.
The Chorus Type can also be selected from the Effect
Parameters pages (page 79). (For more details on the
Chorus effects, refer to the separate “Sound Lists and MIDI
Data” supplement.)
● Chorus Pan
Range: left 63 (-63) — center (0) — right 63 (+63)
This determines the stereo position for the Chorus effect
sound of the individual channel/track.
● Chorus Return
Range: 0 — 127
This determines the level of the Chorus sound (for the
individual channel/track) in the overall mix.
● Send Chorus to Reverb
Range: 0 — 127
This determines the level of the Chorus signal that is sent
to and processed by the Reverb effect.
◆ ◆ ◆ ◆ ◆ ◆ ◆ ◆ ◆ ◆ ◆ ◆ ◆ ◆ ◆ ◆ ◆ ◆ ◆ ◆ ◆ ◆ ◆ ◆ ◆ ◆ ◆ ◆ ◆ ◆ ◆ ◆ ◆ ◆ ◆ ◆ ◆ ◆ ◆ ◆ ◆
77
● Variation Type
Settings:
No Effect;
Reverb (Rev) Hall 1 & 2;
Reverb (Rev) Stage 1 & 2;
Delay L-C-R;
Echo;
Early Reflection (Ref.) 1 & 2;
Reverse Gate (ReversGate);
Chorus 1 - 4;
Flanger 1 - 3;
Rotary Speaker (Sp.);
Auto Pan;
Distortion;
Guitar Amp Simulator (G-Amp.Sim.);
2-Band EQ;
THRU
Reverb (Rev) Room 1 - 3;
Reverb (Rev) Plate;
Delay L,R;
Cross Delay;
Gate Reverb;
Reverb Karaoke (RevKaraok) 1 - 3;
Celeste 1 - 4;
Symphonic;
Tremolo;
Phaser 1 & 2;
Overdrive;
3-Band EQ;
Auto Wah;
This determines the Variation effect type for the Voice. The
Variation Type can also be selected from the Effect Parameters pages (page 79). For details on specific effect types
and parameters, refer to the separate “Sound Lists and
MIDI Data” supplement.
NOTE: When No Effect or THRU is selected for the Type, no
Variation effect is applied. The No Effect setting cancels the
Variation effect. When set to THRU, the sound of the Voice is
output without any Variation effect.
● Variation Pan
Range: left 63 (-63) — center (0) — right 63 (+63)
This determines the stereo position for the Variation effect
sound of the individual channel/track. This parameter is
available only when Variation Mode (in the Effect Send
page) is set to System.
● Variation Return
Range: 0 — 127
This determines the level of the Variation effect sound (for
the individual channel/track) in the overall mix. This
parameter is available only when Variation Mode (in the
Effect Send page) is set to System.
● Send Variation to Reverb
Range: 0 — 127
This parameter is available only when Variation Mode (in
the Effect Send page) is set to System.
● Send Variation to Chorus
Range: 0 — 127
This parameter is available only when Variation Mode (in
the Effect Send page) is set to System.
78
◆ ◆ ◆ ◆ ◆ ◆ ◆ ◆ ◆ ◆ ◆ ◆ ◆ ◆ ◆ ◆ ◆ ◆ ◆ ◆ ◆ ◆ ◆ ◆ ◆ ◆ ◆ ◆ ◆ ◆ ◆ ◆ ◆ ◆ ◆ ◆ ◆ ◆ ◆ ◆ ◆
Multi Controls
○ ○ ○ ○ ○ ○ ○ ○ ○ ○ ○ ○
Song Multi
Path:
Effect Parameters
s ➞ $ (Multi) ➞ *@ (Effect) ➞ ** (Parm) ➞ *! (Rev) / *@ (Chors) / *# (Vari)
* Pressing this may not be necessary if the appropriate page has already been called up.
! — Reverb (Rev)
Reverb Type
Reverb Parameters
Song Mode
● Reverb Type
● Reverb Parameters
This parameter is the same as that in the Effect Type page
above (page 77).
These various parameters let you adjust and change the
sound of the Reverb effect. (For more details on the
Reverb effects and descriptions of these parameters, refer to
the separate “Sound Lists and MIDI Data” supplement.)
@ — Chorus (Chors)
Chorus Type
Chorus Parameters
● Chorus Type
● Chorus Parameters
This parameter is the same as that in the Effect Type page
above (page 77).
These various parameters let you adjust and change the
sound of the Chorus effect. (For more details on the
Chorus effects and descriptions of these parameters, refer to
the separate “Sound Lists and MIDI Data” supplement.)
◆ ◆ ◆ ◆ ◆ ◆ ◆ ◆ ◆ ◆ ◆ ◆ ◆ ◆ ◆ ◆ ◆ ◆ ◆ ◆ ◆ ◆ ◆ ◆ ◆ ◆ ◆ ◆ ◆ ◆ ◆ ◆ ◆ ◆ ◆ ◆ ◆ ◆ ◆ ◆ ◆
79
# — Variation (Vari)
Variation Type
Variation Parameters
Wet/Dry
MODULATION
Wheel Depth
F1
F2
F3
F4
F5
F6
F7
Foot Controller Depth
● Variation Type
This parameter is the same as that in the Effect Type page
above (page 77).
● Wet/Dry
Range: W<D63 (0)* — W=D (64) — W63>D (127)
* Values in parentheses can be entered from the numeric keypad.
This determines the balance between the original sound
(dry, or D) and the processed sound (wet, or W). A setting
of W=D results in an equal balance of dry and wet sound.
The Wet/Dry parameter is not available when Variation
Mode is set to System (the Dry level is set for each channel
in the Effect Send page; see page 76). It is also not available for some of the effect types when Variation Mode is
set to Insertion.
● MODULATION Wheel Depth (Mod.Whl)
Range: -63 — +63
F8
Press this to copy
Voice’s Variation
effect data.
● Foot Controller Depth (Foot Ctr)
Range: -63 — +63
This determines the depth of the effect that is controlled by
the Foot Controller. This allows you to use the Foot
Controller as a kind of effect level control for the Variation
effect. A setting of 0 results in no Foot Controller control.
This parameter is not available when Variation Mode is set
to System. It is also not available for the 3-band EQ and 2band EQ effect types when Variation Mode is set to Insertion.
● Variation Parameters
These various parameters let you adjust and change the
sound of the Variation effect. (For more details on the
Variation effects and descriptions of these parameters, refer
to the separate “Sound Lists and MIDI Data” supplement.)
All the above parameters in the display are the same as
those in the Voice mode. (See page 47 for details.)
This determines the depth of the effect that is controlled by
the MODULATION Wheel. This allows you to use the
MODULATION Wheel as a kind of effect level control for
the Variation effect. A setting of 0 results in no MODULATION Wheel control. This parameter is not available when
Variation Mode is set to System. It is also not available for
the 3-band EQ and 2-band EQ effect types when Variation
Mode is set to Insertion.
80
◆ ◆ ◆ ◆ ◆ ◆ ◆ ◆ ◆ ◆ ◆ ◆ ◆ ◆ ◆ ◆ ◆ ◆ ◆ ◆ ◆ ◆ ◆ ◆ ◆ ◆ ◆ ◆ ◆ ◆ ◆ ◆ ◆ ◆ ◆ ◆ ◆ ◆ ◆ ◆ ◆
Multi Controls
○ ○ ○ ○ ○ ○ ○ ○ ○ ○ ○ ○
* — Copy (Variation Effect Data) From Voice (CpyVc)
Song Mode
This copies the Variation effect type and parameters from
the Voice to the channels for which Variation Send is set to
on. This function is only available when:
• The Variation Mode is set to Insertion. (See page
76.)
• The Variation Send for a channel is set to on. (See
page 76.)
Pressing * calls up the Copy From Voice function. Use
the D/I buttons to execute or cancel the operation.
◆ ◆ ◆ ◆ ◆ ◆ ◆ ◆ ◆ ◆ ◆ ◆ ◆ ◆ ◆ ◆ ◆ ◆ ◆ ◆ ◆ ◆ ◆ ◆ ◆ ◆ ◆ ◆ ◆ ◆ ◆ ◆ ◆ ◆ ◆ ◆ ◆ ◆ ◆ ◆ ◆
81
Tuning/Filter
Song Multi
Path:
s ➞ $ (Multi) ➞ *@ (Inst) ➞ *% (Tun/Fl)
* Pressing this may not be necessary if the appropriate page has already been called up.
Note Shift
Channel/Track
Detune
Filter Cutoff Frequency
Resonance
● Note Shift (Shift)
● Filter Resonance (Resonance)
Range: -24 — +24 semitones (+/- 2 octaves)
This determines the coarse pitch setting for the selected
channel’s Voice in semitones. (Fine pitch adjustments can
be made in Detune below.)
● Detune
Range: -64 — +63
This determines the amount of filter resonance or emphasis
of the Filter Cutoff Frequency parameter above. Higher
values increase the emphasis of the Cutoff Frequency,
producing a higher resonant peak, while lower values
produce a relatively flat response.
Range: -100 — +99 (at 440 Hz: -10 — +9.9 Hz)
This determines the fine pitch setting for the selected
channel’s Voice. (Coarse pitch adjustments can be made in
Note Shift above.)
● Filter Cutoff Frequency (Cutoff)
Range: -64 — +63
Level
This determines the cutoff frequency of the low pass filter,
or the frequency point above which other frequencies are
filtered out. Lower cutoff values create a deeper, more
rounded tone, while higher values create a thinner, brighter
tone.
Low (-64)
82
Cutoff
Frequency
High (+63)
◆ ◆ ◆ ◆ ◆ ◆ ◆ ◆ ◆ ◆ ◆ ◆ ◆ ◆ ◆ ◆ ◆ ◆ ◆ ◆ ◆ ◆ ◆ ◆ ◆ ◆ ◆ ◆ ◆ ◆ ◆ ◆ ◆ ◆ ◆ ◆ ◆ ◆ ◆ ◆ ◆
Multi Controls
○ ○ ○ ○ ○ ○ ○ ○ ○ ○ ○ ○
Song Multi
Path:
Mode/Velocity
s ➞ $ (Multi) ➞ *@ (Inst) ➞ *^ (Md/Vel)
* Pressing this may not be necessary if the appropriate page has already been called up.
Mono Mode
Assign Mode
Song Mode
Velocity Sensitivity Offset
Velocity Sensitivity Depth
● Mono Mode
Settings: off, on
This determines whether the selected channel’s Voice is
played monophonically (only one note at a time) or polyphonically (up to 32 notes at a time).
● Velocity Sensitivity Offset (Offset)
Range: 0 — 127
This determines the volume range over which velocity
affects. For lower values, the velocity affects a volume
range from minimum to medium-loud. For higher values,
velocity affects a range from medium-soft to maximum.
● Assign Mode
Settings: single, multi, inst
127
at
Level
This determines how the Voices are sounded when two or
more notes are played from the same key. When this is set
to single and the same key is played twice, the first note is
cut off as soon as the second note is played. When set to
multi and the same key is played twice, the first note
continues to sound and is overlapped by the second note.
When set to inst (instrument) and a drum kit is selected,
each instrument sounds according to its own settings. For
normal Voices, the inst setting is the same as multi.
96
at
96
64
at
32
64
0
Velocity
127
32
HINT: For best results, set this parameter after setting Velocity
Sensitivity Depth (below).
NOTE: Depending on the Voice used, if Velocity Sensitivity
Offset is set to too low of a value, the Voice may not sound, no
matter how strong the velocity.
● Velocity Sensitivity Depth (Depth)
Range: 0 — 127
This determines the degree to which velocity affects the
selected channel’s Voice. Higher values make the Voice
more sensitive to changes in velocity.
◆ ◆ ◆ ◆ ◆ ◆ ◆ ◆ ◆ ◆ ◆ ◆ ◆ ◆ ◆ ◆ ◆ ◆ ◆ ◆ ◆ ◆ ◆ ◆ ◆ ◆ ◆ ◆ ◆ ◆ ◆ ◆ ◆ ◆ ◆ ◆ ◆ ◆ ◆ ◆ ◆
83
Song Multi
Path:
EG Time
s ➞ $ (Multi) ➞ *@ (Inst) ➞ *& (EgTim)
* Pressing this may not be necessary if the appropriate page has already been called up.
EG Attack Time
Channel/Track
EG Decay Time
EG Release Time
● Amplitude EG Attack Time (Attack)
Range: -64 — +63
This determines the Attack Time of the level EG, or how
long it takes for the Voice of the selected channel to reach
full volume when a note is played. (For more information
about EG parameters, see page 55.)
● Amplitude EG Decay Time (Decay)
Range: -64 — +63
This determines the Decay Time of the level EG, or how
rapidly the sound of the selected channel’s Voice dies down
as the note is held. Higher values result in a longer Decay
rate. (For more information about EG parameters, see page
55.)
● Amplitude EG Release Time (Release)
Range: -64 — +63
This determines the Release Time of the level EG, or how
rapidly the sound of the selected channel’s Voice dies out
after the note is released. (For more information about EG
parameters, see page 55.)
84
◆ ◆ ◆ ◆ ◆ ◆ ◆ ◆ ◆ ◆ ◆ ◆ ◆ ◆ ◆ ◆ ◆ ◆ ◆ ◆ ◆ ◆ ◆ ◆ ◆ ◆ ◆ ◆ ◆ ◆ ◆ ◆ ◆ ◆ ◆ ◆ ◆ ◆ ◆ ◆ ◆
Multi Controls
○ ○ ○ ○ ○ ○ ○ ○ ○ ○ ○ ○
Song Multi
Path:
Vibrato
s ➞ $ (Multi) ➞ *@ (Inst) ➞ ** (Vibrat)
* Pressing this may not be necessary if the appropriate page has already been called up.
Vibrato Rate
Vibrato Delay
Song Mode
Vibrato Depth
● Vibrato Rate
Range: -64 — +63
This determines the speed of the Vibrato effect. Higher
values result in a faster Vibrato sound.
● Vibrato Delay
Range: -64 — +63
This determines the delay in the onset of the Vibrato effect.
Delay is effective especially on stringed instrument Voices.
For example, violin players often use delayed vibrato,
especially while playing long notes. The Delay parameter
is useful in recreating this effect, producing a more natural,
lifelike sound. Higher values result in a longer Delay time.
● Vibrato Depth
Range: -64 — +63
This determines the depth of the Vibrato effect. Higher
values result in a stronger, more pronounced Vibrato sound.
◆ ◆ ◆ ◆ ◆ ◆ ◆ ◆ ◆ ◆ ◆ ◆ ◆ ◆ ◆ ◆ ◆ ◆ ◆ ◆ ◆ ◆ ◆ ◆ ◆ ◆ ◆ ◆ ◆ ◆ ◆ ◆ ◆ ◆ ◆ ◆ ◆ ◆ ◆ ◆ ◆
85
Controller Edit
○○○○○○○○○○○○○○○○○○○○○○○○○○○○○○○○○○○○○○○○○○○○○○○○
The Controller Edit pages allow you to independently set
various controller parameters for each channel/track.
Settings can be made for Portamento and the four real-time
performance controllers: MODULATION wheel, PITCH
wheel, after touch, and Foot Controller.
Song Controller
Path:
Portamento
s ➞ % (Contrl) ➞ *! (Porta)
* Pressing this may not be necessary if the appropriate page has already been called up.
Portamento Switch
Channel/Track
Portamento Time
Portamento is a function that creates a smooth pitch glide
from one note to another.
NOTE: Portamento has no effect on Drum Voices.
● Portamento Switch
Settings: off, on
This determines whether Portamento is on or off for the
selected channel’s Voice.
● Portamento Time
Range: 0 — 127
This determines the time of the Portamento effect, or how
long it takes to glide the pitch from one note to the next.
Higher values result in a longer pitch glide time.
86
◆ ◆ ◆ ◆ ◆ ◆ ◆ ◆ ◆ ◆ ◆ ◆ ◆ ◆ ◆ ◆ ◆ ◆ ◆ ◆ ◆ ◆ ◆ ◆ ◆ ◆ ◆ ◆ ◆ ◆ ◆ ◆ ◆ ◆ ◆ ◆ ◆ ◆ ◆ ◆ ◆
Controller Edit
○ ○ ○ ○ ○ ○ ○ ○ ○ ○ ○ ○ ○
Song Controller
Real-time Controllers:
MODULATION Wheel / PITCH Wheel / After Touch / Foot Controller
Path:
s ➞ % (Contrl) ➞ *@ (ModWhl) / *# (PchBnd) / *$ (AftTch) / *% (FotCnt)
➞ *& (Bias) / ** (Mod)
* Pressing this may not be necessary if the appropriate page has already been called up.
Naturally, all these real-time changes can be recorded to a
song and played back exactly as you performed them.
From the pages shown below, you can:
• Use @ (ModWhl), # (PchBnd), $
(AftTch), or % (FotCnt) to select the desired
controller.
• Use & (Bias) and * (Mod) to select the Bias
or Modulation parameter pages.
& — Bias Parameters
Amplitude EG Bias Depth
Pitch Bias Depth
Filter Cutoff Bias
Depth
F1
F2
F3
F4
F5
Use these to select the desired
controller.
● Amplitude EG Bias Depth (AmpBias)
Range: -64 (-100%) — +63 (+100%)
This determines how the controller affects the Amplitude or
volume of the sound. For positive values, the volume level
increases as the controller is moved toward the maximum.
For negative values, the effect is reversed: moving the
controller to the maximum results in a decrease in volume.
F6
F7
F8
Use this to call up the Modulation
parameter page.
● Filter Cutoff Bias Depth (Flt Bias)
Range: -64 (-100%) — +63 (+100%)
This determines how the controller changes the filter
setting, which affects the timbre or tonal quality of the
sound. For positive values, the tone becomes brighter as
the controller is moved toward the maximum. For negative
values, the effect is reversed: moving the controller to the
maximum results in a warmer, more round sound.
● Pitch Bias Depth (Pch Bias)
Range: -24 — +24 semitones
This determines how the controller affects the pitch of the
sound. For positive values, the pitch is raised as the
controller is moved toward the maximum. For negative
values, the effect is reversed: moving the controller to the
maximum results in a lowering of the pitch.
◆ ◆ ◆ ◆ ◆ ◆ ◆ ◆ ◆ ◆ ◆ ◆ ◆ ◆ ◆ ◆ ◆ ◆ ◆ ◆ ◆ ◆ ◆ ◆ ◆ ◆ ◆ ◆ ◆ ◆ ◆ ◆ ◆ ◆ ◆ ◆ ◆ ◆ ◆ ◆ ◆
87
Song Mode
The four real-time controllers of the QS300 let you dynamically change virtually any aspect of the sound as you play.
These pages let you determine:
• `Which controller is used for real-time control.
• Which aspects of the sound are controlled: level
(Amp), pitch (Pch) or timbre (Flt).
• The amount or depth of control (Bias).
• The amount of modulation (Mod) — creating a
wavering vibrato/wahwah type of effect.
* — Modulation Parameters
Pitch Modulation Depth
Filter Cutoff Modulation
Depth
F1
F2
F3
F4
F5
Use these to select the desired
controller.
F6
F7
F8
Use this to call up the Bias
parameter page.
● Pitch Modulation Depth (Pch Mod)
Range: 0 — 127
This determines how widely the pitch is modulated by the
LFO (low frequency oscillator), producing a vibrato effect.
The higher the value, the deeper the pitch modulation, and
hence, the more pronounced the vibrato effect.
● Filter Cutoff Modulation Depth (Flt Mod)
Range: 0 — 127
This determines how widely the filter is modulated by the
LFO (low frequency oscillator), producing a regular “wahwah” filter sweep effect. The higher the value, the deeper
the filter modulation, and hence, the more pronounced the
filter sweep effect.
NOTE: The default settings for the above controller parameters
are as follows:
• MODULATION wheel Pitch Modulation Depth: +10
• PITCH wheel Pitch Bias Depth: +2
All other parameters are set to a default value of 0.
88
◆ ◆ ◆ ◆ ◆ ◆ ◆ ◆ ◆ ◆ ◆ ◆ ◆ ◆ ◆ ◆ ◆ ◆ ◆ ◆ ◆ ◆ ◆ ◆ ◆ ◆ ◆ ◆ ◆ ◆ ◆ ◆ ◆ ◆ ◆ ◆ ◆ ◆ ◆ ◆ ◆
Song Playback Effects
○○○○○○○○○○○○○○○○○○○○○○○○○○○○○○○○○○○○○○○○○○○○○○○○
The QS300 provides a number of playback-only effects
which allow the playback data to be modified in a number
of ways. The actual data in memory is not changed — the
only thing modified is the way the data is played back.
Path:
Per Track
s ➞ ! (P.Efct) ➞ *! (perTR)
* Pressing this may not be necessary if the appropriate page has already been called up.
Channel/Track
Quantize window:
• Quantize Value
• Strength
Swing window:
• Swing Velocity
• Swing Gate Time
• Swing Rate
The Per Track page shows and allows you to modify all
Playback Effect parameters for a single track at a time. The
Per Track page contains all the same Playback Effect
parameters that are in the other four pages. The reason for
this duplication is that in the Per Track page you can see at
a glance all settings for a single particular track; in the
other pages (described below) you can see at a glance how
two or three settings are for all tracks.
Transpose/Clock
Shift window:
• Transpose
• Clock Shift
Gate Time/Velocity window:
• Gate Time Rate
• Velocity Rate
• Velocity Offset
To use the Per Track page: ..................................................
1. Select the desired channel/track from the bar at the
top of the display.
2. Select and edit the desired parameters.
3. Play back the song to hear how the changes have
affected the track.
NOTE: Only the sound of the selected track will be monitored
when this display is selected. To hear how the modified track
sounds in context with the other tracks of the song, use the
other Playback Effect pages described below.
For descriptions and other details on the Per Track parameters, refer to the specific Playback Effect pages below.
◆ ◆ ◆ ◆ ◆ ◆ ◆ ◆ ◆ ◆ ◆ ◆ ◆ ◆ ◆ ◆ ◆ ◆ ◆ ◆ ◆ ◆ ◆ ◆ ◆ ◆ ◆ ◆ ◆ ◆ ◆ ◆ ◆ ◆ ◆ ◆ ◆ ◆ ◆ ◆ ◆
89
Song Mode
Song Playback Effect
The Playback Effects include:
• Quantization — for cleaning up the timing of
recorded tracks.
• Swing — for introducing a “swing” feel to the
tracks.
• Transpose — for changing the key of a track.
• Clock Shift — for advancing or delaying the notes
of a recorded track in time.
• Gate Time — for adjusting all the note durations in
a track.
• Velocity — for adjusting all the note velocities in a
track.
Song Playback Effect
Path:
Quantize
s ➞ ! (P.Efct) ➞ *@ (Quant)
* Pressing this may not be necessary if the appropriate page has already been called up.
Quantize Value
Strength
The Quantize function aligns notes in the specified track to
the nearest specified beat — usually to tighten up sloppy
timing. Use this judiciously, however, because timing that
is too perfect can sound cold and mechanical — unless, of
course, you’re specifically aiming for a cold, mechanical
feel.
● Quantize Value (Val)
Settings:
Setting Effect
Off
No quantization. Swing settings also ignored.
Aligns to the nearest 32nd note.
Aligns to the nearest 16th note triplet.
● Strength (Str)
Range: 0 — 100%
This determines how “strongly” the notes are attracted to
the specified quantize value. At a setting of 0%, no quantization will occur, while a setting of 100% will cause all
notes to be aligned precisely to the nearest specified beat
value. Intermediate settings produce a corresponding shift
in the position of all off-beat notes to the nearest specified
beat value. With a value setting of “ ” and a strength
setting of 50%, for example, a note that does not fall
precisely on an 8th-note beat will be shifted about halfway
to the nearest 8th-note beat. To set all tracks to the same
value, simultaneously hold down ( and change the
value.
Aligns to the nearest 16th note.
Aligns to the nearest 8th note triplet.
Aligns to the nearest 8th note.
Aligns to the nearest quarter note triplet.
Aligns to the nearest quarter note.
Aligns to the nearest 16th note + 16th note triplet.
Aligns to the nearest 8th note + 8th note triplet.
This determines to what beats the note data in the corresponding track will be aligned. If you select “ ,” for
example, all notes in the track will be aligned to the nearest
16th-note beat, to a degree determined by the Strength
parameter below.
Numeric keypad buttons 3 - 9 can also be used to directly
enter quantize values (corresponding to the note symbol
above each button). To set all tracks to the same value,
simultaneously hold down ( and change the value.
90
◆ ◆ ◆ ◆ ◆ ◆ ◆ ◆ ◆ ◆ ◆ ◆ ◆ ◆ ◆ ◆ ◆ ◆ ◆ ◆ ◆ ◆ ◆ ◆ ◆ ◆ ◆ ◆ ◆ ◆ ◆ ◆ ◆ ◆ ◆ ◆ ◆ ◆ ◆ ◆ ◆
Song Playback Effects
○ ○ ○ ○ ○ ○ ○ ○ ○ ○ ○ ○ ○ ○ ○ ○ ○ ○ ○
Song Playback Effect
Path:
Swing
s ➞ ! (P.Efct) ➞ *# (Swing)
* Pressing this may not be necessary if the appropriate page has already been called up.
Swing Velocity
Swing Gate Time
The Swing effect can only be used when Quantize (above)
is set to a value other than off. This effect produces a
“swing” feel by shifting the timing of “back beats,” as
specified by the Quantize setting. For example, if the
specified Quantize value is 8th notes, then the Swing effect
will shift the 2nd, 4th, 6th, and 8th beats of each measure
forward to create a swing feel. If the Quantize value is set
to a triplet note length, the last note in each triplet group
will be shifted. If the Quantize value is set to a compound
note length (e.g. 8th note + 8th note triplet), then the evennumbered back beats will be shifted. To set all tracks to
the same value, simultaneously hold down SHIFT and
change the value.
Song Mode
Swing Rate
● Swing Rate (Rat)
Range:
• 50% (no swing) to 75% (maximum swing) for even
note lengths
• 66% to 83% for triplet note lengths
• 50% to 66% for even-plus-triplet note lengths (e.g.,
8th note + 8th note triplet)
This determines the strength of the swing feel, or how
much the timing of the affected notes will be shifted. To
set all tracks to the same value, simultaneously hold down
( and change the value.
● Swing Velocity (Vlc)
Range: 0 — 200%
This determines how much the note velocities are affected
by the Swing effect. This parameter sets the ratio between
the lower and higher velocity values. A setting of 100%
maintains the original relationship between the notes, while
lower values produce a narrower dynamic range, and higher
values produce a broader dynamic range. To set all tracks
to the same value, simultaneously hold down ( and
change the value.
● Swing Gate Time (Gat)
Range: 0 — 200%
This determines how much the note durations are affected
by the Swing effect. This parameter sets the ratio between
the shorter and longer gate time values. A setting of
“100%” maintains the original relationship between the
notes, lower values produce a narrower gate time range,
and higher values produce a broader gate time range. To
set all tracks to the same value, simultaneously hold down
( and change the value.
◆ ◆ ◆ ◆ ◆ ◆ ◆ ◆ ◆ ◆ ◆ ◆ ◆ ◆ ◆ ◆ ◆ ◆ ◆ ◆ ◆ ◆ ◆ ◆ ◆ ◆ ◆ ◆ ◆ ◆ ◆ ◆ ◆ ◆ ◆ ◆ ◆ ◆ ◆ ◆ ◆
91
Song Playback Effect
Path:
Transpose/Clock Shift
s ➞ ! (P.Efct) ➞ *$ (Trn/Sft)
* Pressing this may not be necessary if the appropriate page has already been called up.
Transpose
Clock Shift
● Transpose (Trans)
Range: -99 — +99 semitones
This determines the pitch transposition of the track’s Voice,
up or down in semitone increments. To set all tracks to the
same value, simultaneously hold down ( and change
the value.
● Clock Shift (Shift)
Range: -999 — 0 — +999
This determines the amount by which the all notes in a
track are shifted in time, forward or backward, by the
specified number of clocks (96 clocks per 1/4 note). To set
all tracks to the same value, simultaneously hold down
( and change the value.
HINT: Since the Clock Shift parameters shift the timing of all
notes and other events in the specified track forward or
backward, they can significantly alter the “feel” of the song.
You could move the notes forward (“+” settings) to create a
more “laid back” feel, or backward (“-” settings) to produce a
more “driving” feel. Of course, you can also use Clock Shift to
correct timing that is consistently off in the first place.
92
◆ ◆ ◆ ◆ ◆ ◆ ◆ ◆ ◆ ◆ ◆ ◆ ◆ ◆ ◆ ◆ ◆ ◆ ◆ ◆ ◆ ◆ ◆ ◆ ◆ ◆ ◆ ◆ ◆ ◆ ◆ ◆ ◆ ◆ ◆ ◆ ◆ ◆ ◆ ◆ ◆
Song Playback Effects
○ ○ ○ ○ ○ ○ ○ ○ ○ ○ ○ ○ ○ ○ ○ ○ ○ ○ ○
Song Playback Effect
Path:
Gate Time/Velocity
s ➞ ! (P.Efct) ➞ *% (GT/Vel)
* Pressing this may not be necessary if the appropriate page has already been called up.
Gate Time Rate
Velocity Rate
Song Mode
Velocity Offset
● Gate Time Rate (G. Rat)
Range: 0 — 200%
This determines the ratio between the shorter and longer
gate time values. A setting of “100%” maintains the original relationship between the notes, lower values produce a
narrower gate time range (minimum 1%), and higher values
produce a broader gate time range (maximum 200%). To
set all tracks to the same value, simultaneously hold down
( and change the value.
HINT: Use Gate Time to give the entire pattern a more
staccato or legato feel as required.
● Velocity Rate (V. Rat)
Range: 0 — 200%
This determines the ratio between the lower and higher
velocity values. A setting of “100%” maintains the original
relationship between the notes, lower values produce a
narrower dynamic range (minimum 1%), and higher values
produce a broader dynamic range (maximum 200%). To set
all tracks to the same value, simultaneously hold down
( and change the value.
● Velocity Offset (V. Ofs)
Range: -99 — +99
This determines the amount of velocity change. Negative
settings reduce the velocity while positive settings increase
the velocity. To set all tracks to the same value, simultaneously hold down ( and change the value.
HINT: Modifying the velocity is a great way to “soften” the
sound of a track that has too great a variation between the
softest and loudest notes, or, conversely, to add extra punch to
a dull-sounding track. Experiment with the parameters to get a
feel for what they do and how you can use them.
◆ ◆ ◆ ◆ ◆ ◆ ◆ ◆ ◆ ◆ ◆ ◆ ◆ ◆ ◆ ◆ ◆ ◆ ◆ ◆ ◆ ◆ ◆ ◆ ◆ ◆ ◆ ◆ ◆ ◆ ◆ ◆ ◆ ◆ ◆ ◆ ◆ ◆ ◆ ◆ ◆
93
Other Song Functions
○○○○○○○○○○○○○○○○○○○○○○○○○○○○○○○○○○○○○○○○○○○○○○○○
Song
Track Transmit Channel
Path:
s ➞ @ (TxCh)
Tone Generator Channel
MIDI Channel
The Track Transmit Channel page allows you to set the
track-to-channel assignments for a recorded song.
● Tone Generator Channel
Range: off, 1 — 16
This determines which internal tone generator channel (this
is unrelated to the MIDI channel) will be controlled by the
corresponding sequencer track. This setting is provided
because in some cases it may be necessary to control a
single channel of the internal tone generator from two or
more sequencer tracks.
● MIDI Channel
Range: off, 1 — 16
This determines which MIDI channels are assigned to the
corresponding tracks for both reception and transmission.
94
◆ ◆ ◆ ◆ ◆ ◆ ◆ ◆ ◆ ◆ ◆ ◆ ◆ ◆ ◆ ◆ ◆ ◆ ◆ ◆ ◆ ◆ ◆ ◆ ◆ ◆ ◆ ◆ ◆ ◆ ◆ ◆ ◆ ◆ ◆ ◆ ◆ ◆ ◆ ◆ ◆
Other Song Functions
○ ○ ○ ○ ○ ○ ○ ○ ○ ○ ○ ○ ○ ○ ○ ○ ○ ○
Song
Song Chain
Path:
s ➞ ^ (Chain)
By using the Song Chain function, you can specify a
sequence of up to 10 songs to play back automatically.
Each song within the chain can be repeated up to 99 times.
Deleting Songs From the Chain
To delete a song from the chain and move all subsequent
songs up to fill the gap, place the cursor at the song to be
deleted and press @ (Delete).
Inserting New Songs In the Chain
2. Program the Chain.
To program a sequence of songs for playback, place the
cursor at the appropriate chain numbers and use any
data entry method to enter the required song numbers.
The number following the song name is the number of
times that song is to be repeated. Place the cursor at the
repeat number and use any data entry method to set the
number of repeats for each song.
Song number/name
To insert a new song in the middle of a chain and move all
subsequent songs down to make room, place the cursor at
the poing at which the song is to be inserted and press !
(Insert). You can then enter a new song number at the
insert point.
Number of repeats
In the example chain shown here, the first two songs in
the chain will play through in sequence, then the third
song will be repeated twice.
3. Play the Chain.
While still in the Chain page above, press the R
button to play back the programmed chain. Playback
will stop after the last song. You can also press T
to stop playback at any time.
◆ ◆ ◆ ◆ ◆ ◆ ◆ ◆ ◆ ◆ ◆ ◆ ◆ ◆ ◆ ◆ ◆ ◆ ◆ ◆ ◆ ◆ ◆ ◆ ◆ ◆ ◆ ◆ ◆ ◆ ◆ ◆ ◆ ◆ ◆ ◆ ◆ ◆ ◆ ◆ ◆
95
Song Mode
● Operation ...........................................................................
1. From the main Song display, press ^ (Chain) to
call up the Chain function.
The display shows the chain numbers from 1 to 10.
You can also use loop playback to continuously “loop” or
repeat playback of the entire Song Chain. To do this,
simultaneously hold down the ( button and press the
R button (instead of step 3 above). Playback repeats
indefinitely until the playback is stopped manually by
pressing the T button.
96
◆ ◆ ◆ ◆ ◆ ◆ ◆ ◆ ◆ ◆ ◆ ◆ ◆ ◆ ◆ ◆ ◆ ◆ ◆ ◆ ◆ ◆ ◆ ◆ ◆ ◆ ◆ ◆ ◆ ◆ ◆ ◆ ◆ ◆ ◆ ◆ ◆ ◆ ◆ ◆ ◆
R E F E R E N C E
Song Mode: Recording Operations
The sequencer of the QS300 features two record
modes: Realtime and Step Recording.
Step Recording allows you to enter notes individually. As such, it is very similar to writing down the
notes on a sheet of music paper; each note is entered
one at a time, and although you can hear each individual note entered, you cannot hear the entire part as
you create it.
Each method has its own advantages and uses. Step
Recording is good for precision and for entering notes
whose placement, rhythmic value, and velocity are
fixed or consistent — for example, rhythm patterns,
such as a bass drum that plays every beat in a measure. It also lets you record extremely fast or com-
Which method you use depends partly on the type of
music you wish to create and partly on your own
personal preference. You can even use both methods
in tandem. For example, you could first record a
basic track with Realtime, then use Step to edit the
track and add finishing touches. Or you could
program basic rhythms and riffs with Step first, then
use Realtime to add melodies and embellishments.
Song Mode: Recording Operations
Realtime Recording is similar to using a multitrack
tape recorder; whatever you play on the keyboard is
recorded in real time as you play it. Also, when you
record subsequent parts to other tracks, you can hear
the previously recorded parts as you record new ones.
Keep in mind that Realtime recording is “replace”
recording, meaning that any previous data in the track
will be erased and replaced when new data is recorded
to that track.
plex passages that would be difficult or impossible to
play in real time. Realtime Recording, on the other
hand, is best for capturing the natural “feel” of a
performance, since it allows you to record as you are
playing and simultaneously hear what you are recording.
The sequencer also has a “All Track” real-time record
mode in which all sixteen tracks can be recorded
simultaneously, and a Punch-in real-time record mode
in which you can re-record any specified section of an
already-recorded track.
In addition to the sixteen conventional tracks, the
sequencer features special Pattern, Chord and Tempo
tracks that let you record those corresponding data
types to a Song. (See page 119 for details.)
Song Mode: Recording Operations
Realtime Recording .............................................. 98
Punch-in Recording .............................................. 99
All-track Recording (Realtime and Punch-in) .... 100
Step Recording ................................................... 101
◆ ◆ ◆ ◆ ◆ ◆ ◆ ◆ ◆ ◆ ◆ ◆ ◆ ◆ ◆ ◆ ◆ ◆ ◆ ◆ ◆ ◆ ◆ ◆ ◆ ◆ ◆ ◆ ◆ ◆ ◆ ◆ ◆ ◆ ◆ ◆ ◆ ◆ ◆ ◆ ◆
97
Realtime Recording
In the Realtime record mode you select the track you want
to record, then play the part on the keyboard in real time.
5. Press r to set record to standby.
RECORD lamp lights.
To use Realtime Recording: .................................................
1. Select a Song for recording.
A series of asterisks (“
”) at the Song
name indicates the selected Song is empty (has no
recorded data).
2. Set the desired Tempo and Time Signature for the
RECORD
STOP
TOP
RUN
6. Select Realtime Recording by pressing ^ (Real).
Song.
NOTE: The time signature cannot be changed if the song
already contains data.
3. Select a track for recording.
F1
4.
F2
F3
F4
F5
F6
F7
F8
Select a Voice for the current track.
1. Select a Song.
Highlight the
Song parameter,
and change the
value.
Press ^ for
Realtime Recording.
2. Set the Tempo and Time
Signature.
Highlight the parameter (Tempo or
Time Signature) and change the
values.
• Tempo:
25.0 - 300.0
• Time Signature:
1/16 - 16/16, 1/8 - 16/8, 1/4 - 8/4
Measure/Beat parameter
Change this when recording
subesquent tracks at different points
in the Song. (See HINT below.)
7. Press R to begin recording.
The metronome will sound (if set properly; see page
192), and you’ll be given a two-measure lead-in prior to
the first measure actually recorded. The lead-in is also
indicated by negative numbers in the Measure parameter
(at the top, next to Tempo/Time Signature). If the time
signature is 4/4, for example, the lead-in will run from
measure -08 to -01, then recording will begin from
measure 001.
8. To stop recording, press T.
Normal Song playback (standby) is automatically reselected when you stop recording, and you’ll automatically be returned to the top (first measure) of the song.
4. Select a Voice.
3. Select a track.
Highlight the desired track.
You can also assign a name to
the track, with Track Name in the
Song Edit mode (see page 183).
The track name appears at the
top of the display, below the
Song number/name.
98
Highlight the Voice
parameter and change
the value.
NOTE: If for some reason all 10 songs contain data and
you want to start recording with an empty song, use the
Clear Song Job described on page 22 to clear a song for
recording. If you want to save the existing song data to
floppy disk before clearing, see Disk Operations on page
135.
IMPORTANT: Realtime recording is “replace” recording,
meaning that any previous data in a track will be erased
and replaced when new data is recorded to that track.
This is in contrast to “overdub” recording, in which new
data is recorded over the existing data and the existing
data remains intact. Step recording, on the other hand,
allows new material to be added to a track without erasing
the previous data. You can also use the Mix Track Job
(see page 16) to mix data from two tracks and place the
result on a single track.
◆ ◆ ◆ ◆ ◆ ◆ ◆ ◆ ◆ ◆ ◆ ◆ ◆ ◆ ◆ ◆ ◆ ◆ ◆ ◆ ◆ ◆ ◆ ◆ ◆ ◆ ◆ ◆ ◆ ◆ ◆ ◆ ◆ ◆ ◆ ◆ ◆ ◆ ◆ ◆ ◆
9. Record other tracks as desired, repeating steps 3, 4, 5
and 7.
NOTE: Selecting the Realtime Recording (in step 6) will not be
necessary here, as long as you haven’t changed to a different
method.
HINT — Recording at other measures in a Song
Once you’ve recorded an initial track, you don’t have to start
recording from the beginning of the Song. You can actually
start recording at any other point in the Song. The operation is
exactly the same, except that you must change the Measure/
Beat parameter. To do this, highlight the parameter (Measure
or Beat), then change the value. A two-measure lead-in will
play prior to the first measure actually recorded.
NOTE: If you wish to change the data you’ve recorded, refer to
the section Editing Songs & Phrases on page 179 for
information on how to edit recorded song data.
Punch-in recording is a special type of realtime recording in
which you specify a range of measures you want to record,
leaving all other material on the track intact. This is
particularly useful for re-recording a short segment of an
otherwise perfect track — so you don’t have to re-record
the entire track.
To use Punch-in Recording: ................................................
1. Make sure that record standby is on (RECORD lamp
should be lit; see step 5 in Realtime Recording
above).
2. From record standby, select the Punch-in Record
mode by pressing * (Punch).
3. Select a track for recording.
2. Press * to select Punch-in Recording.
NOTE: Selecting a different Voice from the one used in the
originally recorded track automatically changes the Voice
assignment for the entire track — not just the Punch-in
measures.
3. Select a track.
Highlight the desired track.
4. Specify the Punch-in and Punch-out points.
4. Set the Punch-in and Punch-out points
The Punch-in point is the measure and beat at which
recording will begin, and the Punch-out point is the
measure and beat at which recording will end.
(beginning and end of recording).
Highlight the parameters and change the
values.
• Punch-in
Measure/Beat
• Punch-out
Measure/Beat
5. Create a playback-only lead-in by setting the main
Measure/Beat parameter to a few measures before
the Punch-in point.
Doing this gives you a specified amount of measures
before recording actually begins, so you can be ready to
record when the Punch-in point is reached.
F1
F2
F3
F4
F5
F6
F7
F8
6. Press R to begin recording.
Recording begins automatically at the specified Punchin point, and ends at the Punch-out point. Playback
continues, however, even after the Punch-out point is
reached.
5. Create a lead-in with the Measure/Beat parameters.
7. To stop the operation, press T.
In the example display above, playback will begin at
measure 15, recording will begin on the first beat of
measure 17 and stop on the fourth beat of measure 32.
◆ ◆ ◆ ◆ ◆ ◆ ◆ ◆ ◆ ◆ ◆ ◆ ◆ ◆ ◆ ◆ ◆ ◆ ◆ ◆ ◆ ◆ ◆ ◆ ◆ ◆ ◆ ◆ ◆ ◆ ◆ ◆ ◆ ◆ ◆ ◆ ◆ ◆ ◆ ◆ ◆
99
Song Mode: Recording Operations
Punch-in Recording
All-track Recording (Realtime and Punch-in)
The All-track Recording mode allows simultaneous realtime
(or punch-in) recording of all 16 sequencer tracks. This can
be useful when you want to record complete sequences
from another sequencer or music computer which is not
data-compatible with the QS300.
To use All-track Recording: .................................................
Select a Song for recording.
1.
2. Press RECORD to set record to standby and select
Realtime Recording (^) or Punch-in Recording
(&).
3. Press ! (AllTr) to enable All-track Recording.
Channel/Track bar appears in reverse
display, indicating All-track Recording
is active.
F1
F2
F3
F4
F5
F6
F7
F8
Press ! to enable All-track
Recording.
4. To record, follow the steps described in Realtime
Recording (steps 4 and 7 - 9) or Punch-in Recording
(steps 4 - 7) above.
The record procedure is exactly the same as that described
for realtime or punch-in recording, except that all 16
sequencer tracks are recorded simultaneously (assuming, of
course, that appropriate MIDI data is received on the
corresponding MIDI channels — see the MIDI Channel
parameter, page 94).
100
◆ ◆ ◆ ◆ ◆ ◆ ◆ ◆ ◆ ◆ ◆ ◆ ◆ ◆ ◆ ◆ ◆ ◆ ◆ ◆ ◆ ◆ ◆ ◆ ◆ ◆ ◆ ◆ ◆ ◆ ◆ ◆ ◆ ◆ ◆ ◆ ◆ ◆ ◆ ◆ ◆
Step Recording
The Step Recording mode lets you enter data note-by-note,
with precise control over the timing, length, and loudness
of each note. You can record complete tracks using Step
Recording, or use it to brush-up and add data to existing
tracks.
To use Step Recording: .........................................................
1. Select a Song.
A series of asterisks (“
”) at the Song
name indicates the selected Song is empty (has no
recorded data).
5. Press r to set record to standby.
RECORD lamp lights.
RECORD
RUN
STOP
TOP
6. Select Step Recording by pressing & (Step).
Song.
NOTE: The time signature cannot be changed if the song
already contains data.
F1
3.
F2
F3
F4
F5
F6
F7
F8
Select a track for recording.
4. Select a Voice for the current track.
1. Select a Song.
Highlight the
Song parameter,
and change the
value.
Press & to select
Step Recording.
2. Set the Tempo and Time
Signature.
Highlight the parameter (Tempo or
Time Signature) and change the
values.
• Tempo:
25.0 - 300.0
• Time Signature:
1/16 - 16/16, 1/8 - 16/8, 1/4 - 8/4
7. Press R to enter the Step Recording mode.
Keyboard display.
Note Entry line
(one measure).
Measure/Beat/Clock.
Time Signature.
Current note
pointer.
Measure/Beat parameter
Change this when recording
subesquent tracks at different points
in the Song. (See HINT on page 99.)
F1
4. Select a Voice.
3. Select a track.
Highlight the desired track.
Highlight the Voice
parameter and change
the value.
F2
F3
Note Length: 1 - 999
Graphic symbols
indicate note values in
notation.
F4
F5
F6
F7
F8
Use these to change
the keyboard octave
range.
Velocity: 0 - 127, kbd
(velocity taken from keyboard)
Graphic symbols indicate
dynamic values.
Octave:
-3 - +3
Gate Time:
stac (staccato),
norm (normal),
slur
◆ ◆ ◆ ◆ ◆ ◆ ◆ ◆ ◆ ◆ ◆ ◆ ◆ ◆ ◆ ◆ ◆ ◆ ◆ ◆ ◆ ◆ ◆ ◆ ◆ ◆ ◆ ◆ ◆ ◆ ◆ ◆ ◆ ◆ ◆ ◆ ◆ ◆ ◆ ◆ ◆
101
Song Mode: Recording Operations
2. Set the desired Tempo and Time Signature for the
8. Set the desired note parameters: Note Length,
Velocity, and Gate Time.
Highlight the desired parameter and change the value.
For Note Length and Velocity, you can use the numeric
keypad to quickly and easily enter the desired values.
The note values and dynamic indications are printed
directly above the buttons:
Note Length
9. Enter a note by playing it from the keyboard.
Once you’ve defined the note parameters above, you
can enter the note simply by playing the appropriate key
on the keyboard. A note symbol appears on the note
entry line and the note pointer advances to the next note
position. The note symbol always appears as a 1/4 note,
regardless of the actual note entered (chords are also
indicated by the 1/4-note symbol).
Velocity
3
3
You can change the octave setting for keyboard entry by
using % and ^ (Oct ▼/▲).
3
7
8
INTRO
ENDING
4
5
MAIN A
MAIN B
1
2
FILL AA
FILL BB
0
—
FILL AB
FILL BA
9
6
3
You can enter chords simply by moving the note pointer
back to a note and entering a note of a different pitch at
the same location (this can be repeated as many times as
necessary). For details on moving the note pointer, see
“Moving Around In the Note Display,” below.
ENTER
Simply highlight the Note Length or Velocity parameter,
and press the appropriate button. The dot key (0)
can be used to add one or more dots to the currently
selected note length.
To enter intermediate values, use the D/I buttons, rotary dial, or enter the value directly by simultaneously holding down ( and using the numeric
keypad.
10. Complete recording on the rest of the track.
Repeat steps 8 and 9 until the current track is complete,
then press T to stop recording.
NOTE:
• You can only hear the results of Step Recording by pressing
T (to return to the main Song display), then pressing
R. Also, if you need to use any of the Song jobs, you
must first press T.
• See the section Editing Songs & Phrases, page 179, for
information on how to edit recorded song data.
■ Measure/Beat/Clock Display
The Meas area of the step record display shows the
current position of the note pointer in measures, 1/4note beats, and clocks (there are 96 clocks per 1/4 note).
If you’re not sure what measure you’re seeing on the
note display while recording, check the measure/beat/
clock display.
Measure number.
Clock:
96 clocks per 1/4 note.
Beat:
1 - 4 (if in 4/4 time).
102
◆ ◆ ◆ ◆ ◆ ◆ ◆ ◆ ◆ ◆ ◆ ◆ ◆ ◆ ◆ ◆ ◆ ◆ ◆ ◆ ◆ ◆ ◆ ◆ ◆ ◆ ◆ ◆ ◆ ◆ ◆ ◆ ◆ ◆ ◆ ◆ ◆ ◆ ◆ ◆ ◆
■ The Note & Keyboard Displays
The note display shows up to four 1/4 notes worth of
data at once (a single measure in 4/4 time). If the
selected time signature results in more than four 1/4
notes per measure, then the display will scroll to show
the extra notes.
Note pointer.
Moving Around In the Note Display
To move the note pointer forward or backward on
the note entry line: ..........................................................
1. Highlight the note pointer.
2. Use the cursor ,/. buttons.
Each dash represents a
32nd note (12 clocks).
Or:
With any other parameter highlighted, use the k/
l buttons.
1st beat.
2nd beat.
3rd beat.
4th beat.
1.
2. Use the D/I buttons, rotary dial, or enter the
The keyboard display shows the pitch(es) of the note(s)
at the current note pointer position. In the example
below, the keyboard displays that a chord (C major)
consisting of three notes exists at the current note
pointer location.
measure number directly by using the numeric
keypad.
You will actually hear the appropriate note or chord
when the note pointer is moved to an existing note
symbol. When you move the note pointer past the end
of the note display, the next measure will appear. If you
move past the last measure in the phrase, the first
measure of the phrase will appear.
These dots indicate the note
pitches that have been recorded
(at the current position).
■ Step Mode Function Keys
The function keys immediately below the display
provide access to a number of handy functions in the
Step Record mode.
Rest
Enters a rest of the current
note length.
Tie
Lengthens the
selected note by
“tying” another note
of same length and
pitch.
Delete
Deletes the
note or chord
at pointer.
F1
F2
F3
F4
Back Delete (BkDlt)
Moves backward (by
current note length) and
deletes corresponding
note or chord.
F5
F6
F7
F8
Octave (Oct) ▼/▲
Raises or lowers pitch in
octaves (± 3 octaves).
High Key (HKey)
Displays the highest
keyboard range.
Press again to restore
normal “centered” display.
Low Key (LKey)
Displays the lowest
keyboard range.
Press again to restore
normal “centered” display.
◆ ◆ ◆ ◆ ◆ ◆ ◆ ◆ ◆ ◆ ◆ ◆ ◆ ◆ ◆ ◆ ◆ ◆ ◆ ◆ ◆ ◆ ◆ ◆ ◆ ◆ ◆ ◆ ◆ ◆ ◆ ◆ ◆ ◆ ◆ ◆ ◆ ◆ ◆ ◆ ◆
103
Song Mode: Recording Operations
To move to a different measure: ...................................
Highlight the Measure/Beat parameter.
104
◆ ◆ ◆ ◆ ◆ ◆ ◆ ◆ ◆ ◆ ◆ ◆ ◆ ◆ ◆ ◆ ◆ ◆ ◆ ◆ ◆ ◆ ◆ ◆ ◆ ◆ ◆ ◆ ◆ ◆ ◆ ◆ ◆ ◆ ◆ ◆ ◆ ◆ ◆ ◆ ◆
R E F E R E N C E
Pattern Mode
The QS300 features 100 Preset Patterns in a wide
variety of musical styles. You can also create your
own Patterns by combining individual Phrases — each
of which is a single part of a Pattern (such as the
drum or bass part). For this you can use the 3,093
Preset Phrases of the QS300, or record your own
Phrases.
Using the sophisticated pre-programmed style data of
the QS300, you can quickly and easily create complete accompaniment to play/sing along with, or to
use as the basis for complete compositions. The
Pattern mode lets you work with accompaniment
patterns, which contain up to eight tracks of drum/
percussion parts, bass, chordal and other backing parts
— all in specific music styles. These patterns can be
used with the ABC (Auto Bass Chord) system to
automatically re-harmonize the patterns to match the
chords you specify.
Remember that the Preset and User Patterns can be
used freely in song recording, letting you quickly and
easily create compositions with complete and fully
automatic instrumental backing.
Pattern Mode
Pattern
Multi Controls
pages
Volume ..................................... 110
Voice ........................................ 111
Search ...................................... 111
pages
Send ......................................... 112
Pattern Playback Effects
Per Track ................................................... 113
Quantize ..................................................... 114
Swing ......................................................... 115
Transpose/Clock Shift................................ 116
Gate Time/Velocity ..................................... 116
Track Transmit Channel ............................ 117
Track Mute ................................................. 118
◆ ◆ ◆ ◆ ◆ ◆ ◆ ◆ ◆ ◆ ◆ ◆ ◆ ◆ ◆ ◆ ◆ ◆ ◆ ◆ ◆ ◆ ◆ ◆ ◆ ◆ ◆ ◆ ◆ ◆ ◆ ◆ ◆ ◆ ◆ ◆ ◆ ◆ ◆ ◆ ◆
105
About Phrases, Sections, Patterns and Styles
Before delving deeper into the Pattern mode, let’s take a
look at how Patterns and other aspects of the accompaniment fit into the general scheme of the QS300.
At the top of the accompaniment hierarchy are musical
“Styles.” When you select one of the Preset Styles, you are
actually selecting a Style (for example: Ska, Slow Blues or
Country Ballad).
Style
Preset: 1 - 100
User: 1 - 100
Preset 1
User 1
Each of these instrument parts is called a “Phrase.” The
QS300 contains 3,093 different Phrases, and has memory
space for 100 original User Phrases. (For more details on
Phrases, see page 125.)
The individual Patterns do not stop there, however. Just as
a piece of music is made up of different sections, so are the
Patterns of the QS300. Each Style actually contains several
“Section” Patterns — an introduction, two main themes,
fill-ins, and an ending. Naturally, each of these sections is
made up of up to eight tracks of instruments. These
Sections are typically “strung” together to create a song or
musical passage, like this:
Intro
Main A
Main A
Fill AB
Main B
Ending
* Each Style represents a different musical section (Pattern).
Each Style features one or more measures of complete
instrumental backing or accompaniment suited to the
corresponding Style. (Most Preset Patterns are two or four
measures, although some Patterns are up to eight measures
long.) For example, Preset Style #51 (Slow Blues) features
drums, bass, two guitars and organ.
These instrument parts are divided into separate tracks —
and each Style has up to eight different tracks, each with a
different instrument. Our Slow Blues Pattern, for example,
features seven instrument tracks: three tracks of drums
(kick, hi hat, and snare), bass, high rhythm guitar, low
muted guitar riff, and organ.
The rest of this section on the Pattern mode covers selecting and playing Styles, changing chords, changing the
playback parameters, and so on. The Pattern mode is very
similar to the Song mode and has many of the same functions and operations. For example, Playback Effects and
some of the Multi controls are the same. The main difference is that whereas the Song mode has sixteen tracks, the
Pattern mode has eight.
NOTE: The Pattern mode is not available when the System
Mode parameter (in Utility mode) is set to TG-B. (See page
189.)
(Preset Style 051 Slow Blues)
106
Track 1
Track 2
Track 3
Track 4
Kick drum
Hihat
Snare
Bass
Track 5
Track 6
Track 7
Track 8
Hi Guitar
Lo Guitar
Organ
Empty
◆ ◆ ◆ ◆ ◆ ◆ ◆ ◆ ◆ ◆ ◆ ◆ ◆ ◆ ◆ ◆ ◆ ◆ ◆ ◆ ◆ ◆ ◆ ◆ ◆ ◆ ◆ ◆ ◆ ◆ ◆ ◆ ◆ ◆ ◆ ◆ ◆ ◆ ◆ ◆ ◆
Selecting and Playing Patterns
Although you’ll normally use the Pattern mode when
creating new patterns, the Pattern mode is also useful when
you want to listen to individual phrases and experiment
with chord changes using the QS300’s advanced ABC
capability.
To select and play Patterns in the Pattern mode:.............
Select the Pattern mode by pressing p.
1.
2. Select the User or Preset Bank (with the D/I
buttons), then select a Pattern number.
4. Change the Tempo and Time Signature, if desired.
Highlight the desired parameter and use the D/I
buttons or the rotary dial. (The Tempo value can also
be set from the numeric keypad.)
2. Select a bank and Pattern number.
Highlight each parameter, and
change the value.
3. Select a Section
Highlight the parameter,
and change the value.
Measure number
(see note below).
3. Select a Section.
3
3
3
7
8
INTRO
ENDING
4
5
MAIN A
MAIN B
1
2
FILL AA
FILL BB
0
—
FILL AB
FILL BA
9
6
Voice number
and name
4. Change the Tempo and Time
Signature, if desired.
Highlight each parameter, and
change the value.
3
ENTER
Use these buttons
to change sections.
Intro
Pattern Mode
Select the section by using the numeric keypad (as
shown below), the D/I buttons or the rotary dial.
Each Pattern can have eight sections: Intro, Main A,
Main B, Fill AA, Fill BB, Fill AB, Fill BA, and Ending.
Introduction. When used in a song the
introduction will automatically be followed by
the Main A section unless another section is
specified.
Main A
The main section, generally used for the
verse of a song.
Main B
A variation on the main section which can
be used as a chorus or bridge.
Fill AA
Fill-in for the Main A section.
Fill BB
Fill-in for the Main B section.
Fill AB
Fill-in transition from Main A to Main B.
Main B will automatically be selected after
the fill-in.
Fill BA
Fill-in transition from Main B to Main A.
Main A will automatically be selected after
the fill-in.
Ending
Ending section. When used in a song,
playback will stop when the ending section
finishes.
5. Start Pattern playback by pressing R.
Remember that you can also select different Patterns
and Sections during playback. Whenever a new Pattern
or Section is selected, the word “next” appears to the
right of the Pattern name, and the newly selected
Pattern/Section will begin playing from the top of the
next measure.
Note that the Meas (measure) parameter in the display
includes two numbers: e.g., “1 of 4.” The first number
is the current measure number and the second is the
total number of measures in the pattern (patterns can be
up to 8 measures long). “2 of 4,” therefore, means that
the second measure of a 4-measure pattern is currently
playing.
6. Stop playback by pressing T.
◆ ◆ ◆ ◆ ◆ ◆ ◆ ◆ ◆ ◆ ◆ ◆ ◆ ◆ ◆ ◆ ◆ ◆ ◆ ◆ ◆ ◆ ◆ ◆ ◆ ◆ ◆ ◆ ◆ ◆ ◆ ◆ ◆ ◆ ◆ ◆ ◆ ◆ ◆ ◆ ◆
107
Changing Chords
The QS300 features a sophisticated ABC (Auto Bass
Chord) system that automatically re-harmonizes the patterns
to match chords you specify. This makes creating complete
accompaniment tracks exceptionally fast and easy — just
select a pattern, then specify the required chord changes.
The ABC system is also extremely flexible; it allows you to
specify a different bass note for the chord, or completely
reharmonize the bass Phrase by specifying a different root/
chord type.
To change chords in a Pattern: ...........................................
1. Select and play a Pattern.
Follow the instructions in the preceding section.
2. Highlight the Chord window in the display.
3. Turn the Fingered Chord parameter on or off, as
desired.
When Fingered Chord is set to on, you can control the
ABC system simply by playing the entire chord with
your hand (in the specified Fingered Chord zone; see
page 193 for details).
When set to off, chords changed by pressing specific
keys on the keyboard (as explained in step 4 below).
2. Highlight the Chord window.
3. Set Fingered Chord to off or on.
4. Enter a chord.
If Fingered Chord is on, simply play the entire chord
yourself (in the specified Fingered Chord zone). If it is
off, follow these steps:
•
•
108
Select a root note — by pressing the appropriate
key in the lowest octave (C1 to B1).
Select a chord type — by pressing the appropriately
marked key (from C2 to Eb4). (Refer to the chart
below.)
•
After selecting the root and chord type, press
E — to actually enter the newly selected
chord.
Before pressing E, the chord name flashes on the
display. The chord is not actually entered until E
is pressed.
● Chord Types
M
major
M7
major seventh
6
sixth
7
seventh
m
minor
m7
minor seventh
m6
minor sixth
mM7
minor major seventh
m7(b5)
minor seventh flatted fifth
dim
diminished
aug
augmented
sus4
suspended fourth
Madd9
major added ninth
M7(9)
major seventh ninth
6(9)
sixth ninth
7(9)
seventh ninth
madd9
minor added ninth
m7(9)
minor seventh ninth
m7(11)
minor seventh added eleventh
7(b5)
seventh flatted fifth
7(#5)
seventh sharp fifth
7(b9)
seventh flatted ninth
7(#9)
seventh sharp ninth
7(13)
seventh added thirteen
7(b13)
seventh added flatted thirteenth
7sus4
seventh suspended fourth
7(#11)
seventh added sharp eleventh
---
THRU (See NOTE below.)
NOTE: The “- - -” chord type marking is a special “THRU” or
non-ABC type that can be used to create accompaniment
patterns without the harmonic limitations of the ABC system.
◆ ◆ ◆ ◆ ◆ ◆ ◆ ◆ ◆ ◆ ◆ ◆ ◆ ◆ ◆ ◆ ◆ ◆ ◆ ◆ ◆ ◆ ◆ ◆ ◆ ◆ ◆ ◆ ◆ ◆ ◆ ◆ ◆ ◆ ◆ ◆ ◆ ◆ ◆ ◆ ◆
■ Specifying the Bass Note For a Chord
This function allows you to specify the bass note (other
than the normal root) to be used with the current chord.
For example, you could have a Bb bass play under a
Cm7 chord.
4. Press E to actually enter the new setting.
To specify the bass note: ................................................
Highlight the Chord window in the display.
1.
2. Enter a
chord type.
For this example, enter Cm7.
In the example display above, a Cm7 chord will be
played on a Bb bass note.
3. Simultaneously hold down ( and press the
desired note on the lowest octave of the keyboard
(C1 - B1).
For this example, enter Bb.
Pattern Mode
■ Specifying the Bass Phrase Chord Type (Harmonization)
This function takes the Bass Note function above one
step further by allowing you to specify the chord type
on which the bass pattern will be based. For example,
you could have the bass play a pattern based on Ab6
under a Cm7 chord.
4. Continue to hold down ( and select a chord
To specify the bass phrase chord: .................................
Highlight the Chord window in the display.
5. Press E to actually enter the new setting.
1.
type, by pressing the appropriately marked key
(from C2 to Eb4).
Refer to the Chord Types chart above. For this
example, enter a sixth chord by pressing the D2 key.
2. Enter a
chord type.
For this example, enter Cm7.
3. Simultaneously hold down ( and press the
desired note on the lowest octave of the keyboard
(C1 - B1).
For this example, enter Ab.
In the example display above, a Cm7 chord will be
played over a Ab6 bass phrase.
NOTE: If you enter only the chord root the major chord type
will automatically be selected. If you enter only the chord type
the root will be set to C automatically.
During playback you can move the cursor up to the style
number, select a different style, then move the cursor back
to the chord symbol and try different chords with the new
style.
To stop playback, press the T button.
◆ ◆ ◆ ◆ ◆ ◆ ◆ ◆ ◆ ◆ ◆ ◆ ◆ ◆ ◆ ◆ ◆ ◆ ◆ ◆ ◆ ◆ ◆ ◆ ◆ ◆ ◆ ◆ ◆ ◆ ◆ ◆ ◆ ◆ ◆ ◆ ◆ ◆ ◆ ◆ ◆
109
Multi Controls
○○○○○○○○○○○○○○○○○○○○○○○○○○○○○○○○○○○○○○○○○○○○○○○○
As with the Multi controls of the Song mode, the Multi
controls in the Pattern mode give you extensive and easyto-use control over a wide variety of parameters for the
Voices of all Pattern tracks. These parameters include
Voice Bank and Voice, volume, panning, and effect sends.
To call up the Multi controls: ..............................................
Press p to enter the Pattern mode. Then, from the
main Pattern Play display (shown below), press $
(Multi).
F1
F2
F3
F4
F5
F6
F7
F8
The tree chart below shows all parameter pages for the
Multi controls. The main paths are the Mixer pages (which
include Voice and volume settings), and the Effect pages.
Pattern Multi
Path:
Volume
p ➞ $ (Multi) ➞ *! (Mixer) ➞ *^ (Volume)
* Pressing this may not be necessary if the appropriate page has already been called up.
Voice category (Voice number and name
appear at top right when this is highlighted).
Channel/Track numbers.
Voice Mode
Pan (for each
channel).
Volume (for each
channel).
● Voice Mode
Settings: Phrase (Phr), Pattern (Pat)
● Pan
Range: random (-64)*, left 63 (-63) — center (0) — right
63 (+63)
This allows you to switch between the Pattern and Phrase
Voice assignments.
* Values in parentheses can be entered from the numeric keypad.
● Voice
Same as the corresponding parameter in the Song mode.
(See page 73.)
Range: 1 — 128, D1 — D12 (129 — 140)*, off (141)
* Values in parentheses can be entered from the numeric keypad.
Same as the corresponding parameter in the Song mode.
(See page 73.)
110
● Volume (Vol)
Range: 0 — 127
Same as the corresponding parameter in the Song mode.
(See page 73.)
◆ ◆ ◆ ◆ ◆ ◆ ◆ ◆ ◆ ◆ ◆ ◆ ◆ ◆ ◆ ◆ ◆ ◆ ◆ ◆ ◆ ◆ ◆ ◆ ◆ ◆ ◆ ◆ ◆ ◆ ◆ ◆ ◆ ◆ ◆ ◆ ◆ ◆ ◆ ◆ ◆
Multi
Controls
○ ○ ○ ○ ○ ○ ○ ○ ○ ○ ○
Pattern Multi
Path:
○
Voice
p ➞ $ (Multi) ➞ *! (Mixer) ➞ *& (Voice)
* Pressing this may not be necessary if the appropriate page has already been called up.
Voice category (Voice number
and name appear at top right).
Channel/Track numbers.
Voice bank
● Voice
● Bank
* Values in parentheses can be entered from the numeric keypad.
Same as the corresponding parameter in the Song mode.
(See page 74.)
Pattern Multi
Path:
Range: Normal (XG) mode: XG 0 — 101, Fx (SFX),
Pr (Preset), Us (User)
Same as the corresponding parameter in the Song mode.
(See page 74.)
Search
p ➞ $ (Multi) ➞ *! (Mixer) ➞ ** (Srch)
* Pressing this may not be necessary if the appropriate page has already been called up.
Voice bank
Channel/Track
The Search pages provide an easy and quick way to browse
through and select different Voice banks and Voices. These
are the same as the corresponding pages in the Song mode.
(See page 75.)
To return to the previous Mixer page press ).
◆ ◆ ◆ ◆ ◆ ◆ ◆ ◆ ◆ ◆ ◆ ◆ ◆ ◆ ◆ ◆ ◆ ◆ ◆ ◆ ◆ ◆ ◆ ◆ ◆ ◆ ◆ ◆ ◆ ◆ ◆ ◆ ◆ ◆ ◆ ◆ ◆ ◆ ◆ ◆ ◆
111
Pattern Mode
Range: 1 — 128, D1 — D12 (129 — 140)*, off (141)
Pattern Multi
Path:
Send
p ➞ $ (Multi) ➞ *@ (Effect)
* Pressing this may not be necessary if the appropriate page has already been called up.
Channel/Track
*Dry Level
Reverb Send
Chorus Send
* This parameter is only available when Variation Mode
is set to System.
The Effect Send page in the Pattern mode provides effect
level controls for the Patterns. These are the same as the
corresponding pages in the Song mode. (See page 76.)
● Dry Level
Range: 0 — 127
Same as the corresponding parameter in the Song mode.
(See page 76.)
● Reverb Send
Range: 0 — 127
Same as the corresponding parameter in the Song mode.
(See page 76.)
● Chorus Send
Range: 0 — 127
Same as the corresponding parameter in the Song mode.
(See page 76.)
112
◆ ◆ ◆ ◆ ◆ ◆ ◆ ◆ ◆ ◆ ◆ ◆ ◆ ◆ ◆ ◆ ◆ ◆ ◆ ◆ ◆ ◆ ◆ ◆ ◆ ◆ ◆ ◆ ◆ ◆ ◆ ◆ ◆ ◆ ◆ ◆ ◆ ◆ ◆ ◆ ◆
Pattern Playback Effects
○○○○○○○○○○○○○○○○○○○○○○○○○○○○○○○○○○○○○○○○○○○○○○○○
As with the Song Playback Effects (page 89), the Pattern
Playback Effects allow you to modify the playback data in
a number of ways, without changing the actual data in
memory.
•
•
The Playback Effects include:
• Quantization — for cleaning up the timing of
recorded tracks.
• Swing — for introducing a “swing” feel to the
tracks.
•
Pattern Playback Effect
Per Track
Pattern Mode
Path:
•
Transpose — for changing the key of a track.
Clock Shift — for advancing or delaying the notes
of a recorded track in time.
Gate Time — for adjusting all the note durations in
a track.
Velocity — for adjusting all the note velocities in a
track.
p ➞ ! (P.Efct) ➞ *! (perTR)
* Pressing this may not be necessary if the appropriate page has already been called up.
Channel/Track
Quantize window:
• Quantize Value
• Strength
Swing window:
• Swing Velocity
• Swing Gate Time
• Swing Rate
Transpose/Clock
Shift window:
• Transpose
• Clock Shift
Gate Time/Velocity window:
• Gate Time Rate
• Velocity Rate
• Velocity Offset
The Per Track page shows and allows you to modify all
Playback Effect parameters for a single track at a time. The
Per Track page contains all the same Playback Effect
parameters that are in the other four pages. For more
details on the Per Track page, see the corresponding section
in the Song mode (page 89).
◆ ◆ ◆ ◆ ◆ ◆ ◆ ◆ ◆ ◆ ◆ ◆ ◆ ◆ ◆ ◆ ◆ ◆ ◆ ◆ ◆ ◆ ◆ ◆ ◆ ◆ ◆ ◆ ◆ ◆ ◆ ◆ ◆ ◆ ◆ ◆ ◆ ◆ ◆ ◆ ◆
113
Pattern Playback Effect
Path:
Quantize
p ➞ ! (P.Efct) ➞ *@ (Quant)
* Pressing this may not be necessary if the appropriate page has already been called up.
Quantize Value
Strength
The Quantize function aligns notes in the specified track to
the nearest specified beat. For more details on the Quantize
page, see the corresponding section in the Song mode (page
90).
● Quantize Value (Val)
Settings: off,
,
,
,
,
,
,
,
,
Same as the corresponding parameter in the Song mode.
(See page 90.)
● Strength (Str)
Range: 0 — 100%
Same as the corresponding parameter in the Song mode.
(See page 90.)
114
◆ ◆ ◆ ◆ ◆ ◆ ◆ ◆ ◆ ◆ ◆ ◆ ◆ ◆ ◆ ◆ ◆ ◆ ◆ ◆ ◆ ◆ ◆ ◆ ◆ ◆ ◆ ◆ ◆ ◆ ◆ ◆ ◆ ◆ ◆ ◆ ◆ ◆ ◆ ◆ ◆
Pattern Playback Effects
○ ○ ○ ○ ○ ○ ○ ○ ○ ○ ○ ○ ○ ○ ○ ○ ○ ○ ○ ○ ○
Pattern Playback Effect
Path:
Swing
p ➞ ! (P.Efct) ➞ *# (Swing)
* Pressing this may not be necessary if the appropriate page has already been called up.
Swing Velocity
Swing Gate Time
Swing Rate
Pattern Mode
The Swing effect can only be used when Quantize (above)
is set to a value other than off. This effect produces a
“swing” feel by shifting the timing of “back beats,” as
specified by the Quantize setting. For more details on the
Swing page, see the corresponding section in the Song
mode (page 91).
● Swing Velocity (Vel)
Range: 0 — 200%
Same as the corresponding parameter in the Song mode.
(See page 91.)
● Swing Gate Time (Gat)
Range: 0 — 200%
Same as the corresponding parameter in the Song mode.
(See page 91.)
● Swing Rate (Rat)
Range:
• 50% (no swing) to 75% (maximum swing) for even
note lengths
• 66% to 83% for triplet note lengths
• 50% to 66% for even-plus-triplet note lengths (e.g.,
8th note + 8th note triplet)
Same as the corresponding parameter in the Song mode.
(See page 91.)
◆ ◆ ◆ ◆ ◆ ◆ ◆ ◆ ◆ ◆ ◆ ◆ ◆ ◆ ◆ ◆ ◆ ◆ ◆ ◆ ◆ ◆ ◆ ◆ ◆ ◆ ◆ ◆ ◆ ◆ ◆ ◆ ◆ ◆ ◆ ◆ ◆ ◆ ◆ ◆ ◆
115
Pattern Playback Effect
Path:
Transpose/Clock Shift
p ➞ ! (P.Efct) ➞ *$ (Trn/Sft)
* Pressing this may not be necessary if the appropriate page has already been called up.
Transpose
Clock Shift
● Transpose (Trans)
● Clock Shift (Shift)
Range: -99 — +99 semitones
Same as the corresponding parameter in the Song mode.
(See page 92.)
Pattern Playback Effect
Path:
Range: -999 — 0 — +999
Same as the corresponding parameter in the Song mode.
(See page 92.)
Gate Time/Velocity
p ➞ ! (P.Efct) ➞ *% (GT/Vel)
* Pressing this may not be necessary if the appropriate page has already been called up.
Gate Time Rate
Velocity Rate
Velocity Offset
● Gate Time Rate (G.Rat)
Range: 0 — 200%
Same as the corresponding parameter in the Song mode.
(See page 93.)
● Velocity Offset (V.Ofs)
Range: -99 — +99
Same as the corresponding parameter in the Song mode.
(See page 93.)
● Velocity Rate (V.Rat)
Range: 0 — 200%
Same as the corresponding parameter in the Song mode.
(See page 93.)
116
◆ ◆ ◆ ◆ ◆ ◆ ◆ ◆ ◆ ◆ ◆ ◆ ◆ ◆ ◆ ◆ ◆ ◆ ◆ ◆ ◆ ◆ ◆ ◆ ◆ ◆ ◆ ◆ ◆ ◆ ◆ ◆ ◆ ◆ ◆ ◆ ◆ ◆ ◆ ◆ ◆
Other Pattern Functions
○○○○○○○○○○○○○○○○○○○○○○○○○○○○○○○○○○○○○○○○○○○○○○○○
Pattern
Path:
Track Transmit Channel
p ➞ @ (TxCh)
Pattern Mode
MIDI Channel
The Track Transmit Channel page allows you to set the
MIDI channel output assignments for the selected Pattern’s
tracks. This makes it possible to play the accompaniment
sounds on external MIDI tone generators. Simply match
the channel settings here to the appropriate receive channels
on the tone generators.
● MIDI Channel
Range: off, 1 — 16
This determines which MIDI channels are assigned to the
corresponding Pattern tracks for transmission.
◆ ◆ ◆ ◆ ◆ ◆ ◆ ◆ ◆ ◆ ◆ ◆ ◆ ◆ ◆ ◆ ◆ ◆ ◆ ◆ ◆ ◆ ◆ ◆ ◆ ◆ ◆ ◆ ◆ ◆ ◆ ◆ ◆ ◆ ◆ ◆ ◆ ◆ ◆ ◆ ◆
117
Pattern
Path:
Track Mute
p ➞ % (TrMut)
F1
F2
F3
F4
F5
F6
F7
F8
Pressing one of these mutes (or un-mutes) the
corresponding track.
The Track Mute page allows you to quickly and easily
mute/un-mute the Pattern tracks by using the function
buttons (! - *). Press the appropriate button to
alternately mute or un-mute the corresponding Pattern track.
118
◆ ◆ ◆ ◆ ◆ ◆ ◆ ◆ ◆ ◆ ◆ ◆ ◆ ◆ ◆ ◆ ◆ ◆ ◆ ◆ ◆ ◆ ◆ ◆ ◆ ◆ ◆ ◆ ◆ ◆ ◆ ◆ ◆ ◆ ◆ ◆ ◆ ◆ ◆ ◆ ◆
R E F E R E N C E
Accompaniment Recording
The sequencer of the QS300 not only gives you
sixteen tracks for recording Songs, but also allows
you to record accompaniment, using the Patterns and
automatic accompaniment features. This is done with
the special Pattern and Chord tracks. Accompaniment
Recording lets you quickly and easily record full
instrumental backing with appropriate chord changes,
and take up only two sequencer tracks in doing so.
This also conserves song memory for recording
additional data to the other sixteen tracks. A Tempo
track is also available for recording tempo changes to
a Song.
As with normal recording (page 97), accompaniment
recording has two different record modes: Realtime
and Step Recording. The realtime method is the
fastest and easiest, letting you record pattern and
chord changes “on the fly.” The step method gives
you more detailed control, and is an excellent way to
add the finishing touches to an accompaniment
recorded in real time. (For more information on
Realtime and Step Recording, see page 120.)
Accompaniment Recording
Accompaniment Recording
Realtime Accompaniment Recording ................. 120
Step Accompaniment Recording ........................ 122
◆ ◆ ◆ ◆ ◆ ◆ ◆ ◆ ◆ ◆ ◆ ◆ ◆ ◆ ◆ ◆ ◆ ◆ ◆ ◆ ◆ ◆ ◆ ◆ ◆ ◆ ◆ ◆ ◆ ◆ ◆ ◆ ◆ ◆ ◆ ◆ ◆ ◆ ◆ ◆ ◆
119
Realtime Accompaniment Recording
In Realtime Accompaniment Recording, you select the
appropriate track for recording (first Pattern, then Chord),
then enter the Pattern/Chord changes in real time.
Once you know how to select styles, sections, and enter
chords in the Pattern mode (page 108), recording a basic
accompaniment in real time is easy. Tempo changes can be
added later using the Edit mode (page 186).
To use Realtime Accompaniment Recording: ...................
1. Call up the Song mode and select an empty Song.
Accompaniment Recording can only be used with an
empty song (indicated by a row of asterisks at the Song
name). If for some reason all 10 songs contain data, use
the Clear Song Job (page 160) to clear a song for
recording. (Be sure to save any important song data
first!)
2. Select the Pattern track (Pat) for recording Pattern
and Section changes.
4. Select a Pattern.
To do this:
● Turn Pattern selection on — by highlighting the
Pattern number and setting it to a value other than
000 (off).
● Select the Pattern bank (User or Preset) — by
highlighting the bank parameter, below the Pattern
number, and selecting Usr (User) or Pre (Preset).
● Select the Pattern number — by highlighting the
Pattern number and changing the value.
Since Pattern selection is automatically off by default
when you call up an empty Song, you must first turn it
on. Then, you can select the Pattern bank and Pattern
number.
5. Select a Section.
6. Press r to set record to standby.
RECORD lamp lights.
3.
Set the desired Tempo for the Song.
RECORD
1. Select an empty
Song.
Highlight the Song
parameter, and
change the value.
STOP
TOP
RUN
2. Select the Pattern track.
Highlight the Pattern track (Pat).
3. Set the Tempo.
Highlight the Tempo
parameter, and change
the value.
7. Select Realtime Recording by pressing ^ (Real).
F1
F2
F3
F4
F5
F6
F7
F8
Press ^ to enable
Realtime Recording.
4. Select a Pattern.
First, highlight the Pattern
number, and set it to a value
other than 000.
Then, select User or Preset, and
finally, select the desired Pattern
number.
120
5. Select a Section.
Highlight the Section
parameter, and change
the value.
8. Press R to begin recording.
The metronome will sound (if set properly; see page
192), and you’ll be given a two-measure lead-in prior to
the first measure actually recorded. The lead-in is also
indicated by negative numbers in the Measure parameter
(at the top, next to Tempo/Time Signature). If the time
signature of the Pattern is 4/4, for example, the lead-in
will run from measure -08 to -01, then recording will
begin from measure 001.
◆ ◆ ◆ ◆ ◆ ◆ ◆ ◆ ◆ ◆ ◆ ◆ ◆ ◆ ◆ ◆ ◆ ◆ ◆ ◆ ◆ ◆ ◆ ◆ ◆ ◆ ◆ ◆ ◆ ◆ ◆ ◆ ◆ ◆ ◆ ◆ ◆ ◆ ◆ ◆ ◆
Since you selected Pattern recording (with the “Pat”
track), the cursor will automatically move to the Pattern
number when you start recording. All you have to do to
record Pattern and Section changes is to select the
desired Pattern or Section. Remember that all changes
occur from the top of the next measure after the change
is entered. Also keep in mind that when changing
Sections, Intro automatically switches to Main A, Fill
AB switches to Main B, and Fill BA switches to Main
A.
13. Press R to playback the Song and listen to the
results.
NOTE: See the section Editing Songs & Phrases, page 179,
for information on how to edit recorded song data.
HINT: Don’t worry if you’ve made a few mistakes. Simple slipups made in the realtime record mode can usually be corrected
in the Step Record mode — described next.
9. To stop recording, press T.
Normal Song playback (standby) is automatically reselected when you stop recording, and you’ll automatically be returned to the top (first measure) of the song.
10. Press r again (to set record to standby) and
select the Chord track (Chd) for recording Chord
changes.
Accompaniment Recording
NOTE: Selecting Realtime Recording (in step 7) will not be
necessary here, as long as you haven’t changed to a
different method.
11. Press R to begin recording.
The metronome will sound, and you’ll be given a twomeasure lead-in.
Since you selected Chord recording (with the “Chd”
track), the cursor will automatically move to the Chord
window when you start recording. All you have to do
to record chord changes is to enter the desired chords
(see page 124).
HINT: Chord changes normally occur on quarter-note
divisions, so try to press the E button to enter each
chord either exactly on the beat or a fraction of a section
before the beat on which you want the chord change to
occur. Syncopated chord changes can be recorded by
entering the chord an eighth or sixteenth note before the
beat. (Syncopated changes can also be programmed in
the Step Record mode; see page 124.)
12. To stop recording, press T.
Normal Song playback (standby) is automatically reselected when you stop recording, and you’ll automatically be returned to the top (first measure) of the song.
◆ ◆ ◆ ◆ ◆ ◆ ◆ ◆ ◆ ◆ ◆ ◆ ◆ ◆ ◆ ◆ ◆ ◆ ◆ ◆ ◆ ◆ ◆ ◆ ◆ ◆ ◆ ◆ ◆ ◆ ◆ ◆ ◆ ◆ ◆ ◆ ◆ ◆ ◆ ◆ ◆
121
Step Accompaniment Recording
In Step Accompaniment Recording, there are two separate
displays for recording, depending on the track you select:
Pattern or Chord. In each of these you can individually
enter or delete Pattern and chord changes at precisely the
desired locations.
To use Step Accompaniment Recording: ...........................
1. Call up the Song mode and select a Song.
Select an empty song if you want to record a new song
in the step record mode, or select a song that already
contains data if you want to make changes or additions.
2. Press r to set record to standby.
3. Select Step Recording by pressing & (Step).
4. Select the Pattern track or Chord track.
F1
F2
F3
F4
F5
F6
F7
F8
3. Press & to select
Step Recording
4. Select the Pattern or
Chord track.
5. Press R to call up the Pattern Entry or Chord
Entry display, and begin recording the data.
Refer to the corresponding section below (Pattern
Entry or Chord Entry) for details on how to enter the
desired data.
6. To stop recording and leave the Pattern Entry or
Chord Entry display, press T.
Repeat steps 2, 4, 5 and 6 above when changing between
Pattern Entry and Chord Entry.
122
◆ ◆ ◆ ◆ ◆ ◆ ◆ ◆ ◆ ◆ ◆ ◆ ◆ ◆ ◆ ◆ ◆ ◆ ◆ ◆ ◆ ◆ ◆ ◆ ◆ ◆ ◆ ◆ ◆ ◆ ◆ ◆ ◆ ◆ ◆ ◆ ◆ ◆ ◆ ◆ ◆
■ Pattern Entry
Select a measure.
Use the k/l
buttons or the cursor
,/. buttons to
move through the
measures.
Enter an End-of-Song
marker, if desired.
Highlight the End-of-Song
block, and press the I
button to enter a marker.
Press the D button to
delete a marker.
Select a Pattern.
Highlight the Bank or
Number parameter, and
change the value.
F1
F2
F3
F4
F7
● Select the Pattern number: 001 - 100.
F8
Press * to clear
the highlighted data.
To move the highlight to different blocks and measures: .................................................................................
• Use the cursor buttons.
NOTE: If the selected time signature results in shorter
measures than the pattern default, the pattern will be
truncated (cut short) accordingly. If the selected time
signature results in longer measures than the pattern
default, the pattern will be repeated to fill the specified
measure length.
● Enter an End-of-Song marker.
An End-of-Song marker causes playback to stop at the
end of the corresponding measure. This allows you to
stop playback at any point without having to use an
Ending section. To erase an End-of-Song marker,
highlight it and press * (Clear) or the D button.
Accompaniment Recording
Change the Time Signature,
if desired.
Highlight the Time Signature
parameter, and change the
value. (Though each Pattern
has a default Time Signature,
this can be changed.)
F6
● Select the Pattern Bank: User (Usr) or Preset
(Pre).
● Change the Time Signature: 1/16 - 16/16, 1/8 - 16/
8, 1/4 - 8/4.
Each Pattern has a default Time Signature, but this can
be changed as desired. Each measure can also be
assigned a different Time Signature.
Select a Section.
Highlight the Section
parameter, and
change the value.
F5
In the Pattern Entry page, you can:
● Erase any entered data at the highlight by pressing * (Clear).
NOTE: Tempo (Tmp) track data is entered in the Edit
mode (see page 186).
To scroll up or down through the measures: ..............
• Use the k/l buttons.
To return to the first measure of the Song: .................
• Press the t button.
◆ ◆ ◆ ◆ ◆ ◆ ◆ ◆ ◆ ◆ ◆ ◆ ◆ ◆ ◆ ◆ ◆ ◆ ◆ ◆ ◆ ◆ ◆ ◆ ◆ ◆ ◆ ◆ ◆ ◆ ◆ ◆ ◆ ◆ ◆ ◆ ◆ ◆ ◆ ◆ ◆
123
■ Chord Entry
Select a chord block and enter a chord.
Use the designated keys on the keyboard
to enter the root note and chord type.
(See page 108.)
You can also specify a bass note and a
bass phrase chord (see below).
In Step Recording, there is no need to
press E after specifying a chord.
Select a
measure.
2. Simultaneously hold down ( and press the
desired note on the lowest octave of the keyboard
(C1 - B1).
Specifying the Bass Phrase
Chord Type (Harmonization)
This function takes the Bass Note function above one
step further by allowing you to specify the chord type
on which the bass pattern will be based.
F1
F2
F3
F4
Change the Time Signature,
if desired.
F5
F6
F7
F8
Press * to clear
the highlighted data.
The basic operations (moving around, selecting measures, changing time signatures, clearing data at the
highlight, etc.) are exactly the same as in Pattern Entry
above.
To selecting chords in the Chord Entry page: ............
1. Highlight the desired chord “block.”
Each measure row in the Chord Entry page is
divided into quarter-note blocks. One chord can be
entered in each quarter-note block. Highlight the
block corresponding to the beat at which you want
the chord change to occur. Syncopated chords
(chords playing slightly ahead of the beat) can also
be entered. (See “Syncopated Chords” below for
details.)
2. Specify the chord root note and chord type by
To specify the bass phrase chord: .................................
Highlight the chord block in the display.
1.
2. Simultaneously hold down ( and press the
desired note on the lowest octave of the keyboard
(C1 - B1).
3. Continue to hold down ( and select a chord
type, by pressing the appropriately marked key
(from C2 to Eb4).
Refer to the Chord Types chart on page 108.
Syncopated Chords
Entered chords can be syncopated, allowing you to have
a chord “anticipate” a downbeat by beginning an eighthnote or sixteenth-note before the beat.
To enter a syncopated chord: ........................................
1. Highlight the chord block in the display and enter
a chord in the normal way.
2. Press numeric keypad button 4 (eighth-note
syncopation) or 5 (sixteenth-note syncopation).
Eighth-note syncopation.
pressing the designated keys on the keyboard.
Specifying the chord is done in the normal manner.
The chord root and type are automatically entered; it
is not necessary to press E in Step Recording
here.
Specifying the Bass Note For a Chord
This function allows you to specify the bass note (other
than the normal root) to be used with the current chord.
To specify the bass note: ................................................
1. Highlight the chord block in the display.
124
A note with a tie marking appears just before the chord
name, crossing the beat line. In the example above, the
chord is syncopated by an eighth-note, so that it begins
sounding an eighth-note before the third beat of the
fourth measure.
To cancel the syncopation, make sure the chord is
highlighted, and press the same button (4 or 5) a
second time.
◆ ◆ ◆ ◆ ◆ ◆ ◆ ◆ ◆ ◆ ◆ ◆ ◆ ◆ ◆ ◆ ◆ ◆ ◆ ◆ ◆ ◆ ◆ ◆ ◆ ◆ ◆ ◆ ◆ ◆ ◆ ◆ ◆ ◆ ◆ ◆ ◆ ◆ ◆ ◆ ◆
R E F E R E N C E
Phrase Mode
In the Phrase mode, you can create accompaniment by
combining “Phrases.” A Phrase is simply an individual “part” of a pattern — for example, a drum
Phrase, a bass Phrase, a keyboard Phrase, etc. —
using a single Voice. The QS300 has 3,093 Preset
Phrases, and 100 User memory locations for your
original Phrases. In the Phrase mode, you can listen
to the Preset Phrases as well as record User Phrases of
your own. These can then be combined to create
complete Patterns in the Pattern mode.
Phrase
Selecting and Playing Phrases .......................... 126
Phrase Mode
Combining Phrases (in the Pattern Mode) ........ 127
Recording Original Phrases ............................... 129
Realtime Phrase Recording ............. 129
Step Phrase Recording .................... 132
◆ ◆ ◆ ◆ ◆ ◆ ◆ ◆ ◆ ◆ ◆ ◆ ◆ ◆ ◆ ◆ ◆ ◆ ◆ ◆ ◆ ◆ ◆ ◆ ◆ ◆ ◆ ◆ ◆ ◆ ◆ ◆ ◆ ◆ ◆ ◆ ◆ ◆ ◆ ◆ ◆
125
Selecting and Playing Phrases
Although you’ll normally use the Phrase mode when
creating new Phrases (see below), you can also simply
listen to or audition the Preset Phrases (as well as any User
Phrases you’ve created) in the Phrase mode.
The Category, Beat, and Type are abbreviated in the
parameter itself, but are also listed in full in the display
just below the parameter.
Category
To select and play Phrases in the Phrase mode: ...............
1. Select the Phrase mode by pressing P.
The display below (or similar) appears.
Category
Beat
Type Number
Current Phrase’s
Voice and Bank
Phrase name
Full indication of Category,
Beat and Type
2. Select the Preset or User bank, then select the
desired Phrase.
Beat
Type
DR
Drums
08
8 Beat
M
Main
PC
Percussion
16
16 Beat
O
Fill Loop
BA
Bass
34
3/4 Beat
X
Fill Cross
GC
Guitar Chord
I
Intro
GR
Guitar Riff
E
Ending
KC
Keyboard Chord
S
Specific*
KR
Keyboard Riff
G
General*
US
User Phrase
* The difference between the “General” and “Specific” types
is that while the General Phrases are, as their name
implies, for general use, the Specific Phrases are actually
parts of specific Patterns. In other words, if you combine
specific Phrases of the same beat and number from
different categories, you will end up with a specific
Pattern.
NOTE: The Beat and Type parameters are not available when
User Phrase (US) is selected.
To do this:
• First, highlight the Category parameter and use the
D/I buttons or rotary dial to select the User
(US) Phrases or Preset Phrases (any other Category).
• Then, highlight and change the desired section of the
Phrase: Category, Beat, Type, or Number (see chart
below).
126
◆ ◆ ◆ ◆ ◆ ◆ ◆ ◆ ◆ ◆ ◆ ◆ ◆ ◆ ◆ ◆ ◆ ◆ ◆ ◆ ◆ ◆ ◆ ◆ ◆ ◆ ◆ ◆ ◆ ◆ ◆ ◆ ◆ ◆ ◆ ◆ ◆ ◆ ◆ ◆ ◆
Combining Phrases (in the Pattern Mode)
In the Pattern mode, you can combine Phrases to create
Patterns, which can then be used in Song recording with the
automatic accompaniment features.
1.
Call up the Pattern mode by pressing p.
5. Change the Tempo and Time Signature, if desired.
6. Press # (Patch) to call up the Patch page.
In the Patch page, you can “patch” together Phrases to
create custom Patterns.
7. Enter the desired Phrase numbers.
When empty, the Patch page appears as shown below:
4. Change the
2. Select a User Pattern.
First, select the User bank,
then select a Pattern number.
Pattern Length,
if desired.
Highlight the
second number
in the parameter,
and change the
value.
3. Select a Section.
Highlight the
parameter, and
change the value.
Highlight is at top of first
measure in the first track.
F2
F3
F4
F5
F6
F7
F8
If no other data is entered, a Phrase entered on the first
measure of a track will repeat for the entire track.
Phrases which are longer than one measure are indicated
by a wavy line extending for the length of the Phrase.
5. Change the Tempo and
Time Signature, if desired.
Highlight each parameter,
and change the value.
When the Pattern contains Phrase data, the resulting
display will look like this:
6. Press # to call up
the Patch page.
Currently highlighted
Phrase number/name.
2. Select a User Pattern.
Measure number.
Use cursor ,/. buttons
to scroll through available
measures (if Phrase has more
than four measures).
Number of measures
in Phrase.
Empty patterns are indicated by a row of asterisks
(
). Note that only User Patterns can be
selected for combining Phrases in the Pattern mode.
3. Select the desired Section for the Pattern: Intro,
Main A, Main B, Fill AA, Fill BB, Fill AB, Fill BA,
or Ending.
4.
Change the Pattern length, if desired.
NOTE: Although the Pattern length parameter can be set
from 1 to 8 measures for the Intro, Main A, Main B, and
Ending sections, the Fill sections can only have a length of
1 measure.
Track number.
Use cursor >/<
buttons to scroll through all
eight tracks.
(Only four tracks can be
shown at once.)
End-of-Phrase
marker.
◆ ◆ ◆ ◆ ◆ ◆ ◆ ◆ ◆ ◆ ◆ ◆ ◆ ◆ ◆ ◆ ◆ ◆ ◆ ◆ ◆ ◆ ◆ ◆ ◆ ◆ ◆ ◆ ◆ ◆ ◆ ◆ ◆ ◆ ◆ ◆ ◆ ◆ ◆ ◆ ◆
127
Phrase Mode
F1
Use the cursor buttons to move the highlight around in
the display, selecting different measures and tracks as
desired. Use normal data entry methods to enter
different Phrases at the highlight.
In the example display shown above, six different
Phrases are used in four tracks:
• Track 1 — A drum Phrase (DR08M007) plays for
four measures.
• Track 2 — A bass Phrase (BA08M006) plays for
three measures.
• Track 3 — Three different percussion Phrases
(PC08M005, PC08M015, and PC16M005) fill out
the four measures.
• Track 4 — A guitar chord Phrase (GC08M008)
plays for three measures.
8. Press R to hear the Phrase(s).
Pressing R plays back the newly edited Pattern. You
can leave playback on and continue editing the Pattern,
and hear how the Pattern sounds as you make changes
to it. Also, you can use the Solo function (see below)
during playback to hear only the highlighted Phrase.
10. Give your new Pattern a name and save it to disk.
Use the Style Name Job (see page 168) to name the
newly created Pattern. You can press * (Save) from
the Pattern play display to directly call up the Save
operation (see page 137), or do the same operation from
the Disk mode (see page 197).
11. Repeat the above steps for other Sections, as
desired.
HINT: Keep in mind that if you have User Patterns in memory,
you don’t have to start from scratch in creating new Patterns.
You can call up a previous User Pattern and use that as the
basis for a new Pattern. This is especially helpful in maintaining musical consistency if you’re creating several Sections in a
specific Style.
NOTE: Refer to the Pattern Jobs section on page 163 for
details on the Pattern jobs, which provide considerable
versatility in creating and modifying Patterns.
To stop playback, press T.
9. Press ) to leave the Patch page.
When completed with your newly created Pattern, press
).
■ Other Functions
● ! — Solo
This turns the Solo function on and off. Solo lets you
isolate (or “solo”) a specific Phrase during playback.
● & — Rest
This inserts a one-measure rest at the highlighted
measure. The rest stops Phrase playback until the end
of the Pattern, or until the next Phrase number in the
track.
● * — Clear
This clears the entered data (Phrase number or rest) at
the highlight position.
128
Rest symbol
F1
F2
F3
Press ! to solo
currently highlighted
Phrase.
F4
F5
F6
F7
F8
Press & to enter a
rest at the highlight.
Press * to clear
the entered data at
the highlight.
◆ ◆ ◆ ◆ ◆ ◆ ◆ ◆ ◆ ◆ ◆ ◆ ◆ ◆ ◆ ◆ ◆ ◆ ◆ ◆ ◆ ◆ ◆ ◆ ◆ ◆ ◆ ◆ ◆ ◆ ◆ ◆ ◆ ◆ ◆ ◆ ◆ ◆ ◆ ◆ ◆
Recording Original Phrases
From the Phrase mode, you can quickly and easily record
your own original accompaniment Phrases. In addition to
the preset Phrases, the QS300 has 100 User Phrase memory
locations (US---001 through US---100) which can be used
to store your original Phrases. The Phrases you record can
then be combined to make Patterns, which can then be used
with the automatic accompaniment features.
The Phrase mode provides two ways to create original
Phrases: Realtime and Step Recording.
Realtime Phrase Recording
In the Realtime record mode you select the Phrase you
want to record, then play the part on the keyboard in real
time.
F5
F6
F7
F8
Phrase Mode
Unlike Realtime recording in the Song mode, Realtime
Phrase recording does not replace previous data, but adds to
it. This means that you can do “loop” recording, a convenient function often found on rhythm machines which lets
you build up a Phrase, note-by-note, as it loops. You can
easily delete any mistakes as the Phrase loops, as well.
4
3. Press ^ to enable
Realtime Recording.
4. Set the desired Phrase Length,
To use Realtime Phrase Recording: ....................................
1. Select a User Phrase.
You can select either an empty Phrase (to start from
scratch), or an existing Phrase that you want to add to or
modify. Note that only User Phrases can be selected for
recording.
Tempo and Time Signature.
• Phrase Length:
1-8
• Tempo:
25.0 - 300.0
• Time Signature:
1/16 - 16/16, 1/8 - 16/8, 1/4 - 8/4
2. Press r to set record to standby.
RECORD lamp lights.
RECORD
TOP
STOP
RUN
5. Select a Voice Bank and
Voice number.
6. Select the Source
Chord.
3. Select Realtime Recording by pressing ^ (Real).
◆ ◆ ◆ ◆ ◆ ◆ ◆ ◆ ◆ ◆ ◆ ◆ ◆ ◆ ◆ ◆ ◆ ◆ ◆ ◆ ◆ ◆ ◆ ◆ ◆ ◆ ◆ ◆ ◆ ◆ ◆ ◆ ◆ ◆ ◆ ◆ ◆ ◆ ◆ ◆ ◆
129
4. Set the desired Phrase Length, Tempo and Time
Signature.
The Time Signature and Phrase Length cannot be
changed if the Phrase already contains data.
5. Select a Voice.
Select both the desired Voice Bank and Voice number.
6. Select the Source Chord (Src Chord).
Use the designated keys on the keyboard to specify the
chord root and type. (See page 108.) You can also use
the Bass Note and Bass Phrase Chord Type functions
(on page 124). The Source Chord parameter is very
important, since it determines how the Phrase will be reharmonized when used later in a Pattern with the
automatic accompaniment features.
NOTE: The “---” (Thru) chord type cannot be specified as
the Source Chord.
You may also want to make changes to the Retrigger
and Type parameters. For details, see the section
following step 10 below.
7. Press R to begin recording.
The metronome will sound (if set properly; see page
192), and you’ll be given a two-measure lead-in prior to
the first measure actually recorded. The lead-in is also
indicated by negative numbers in the Measure parameter
(at the top, next to Tempo/Time Signature). If the time
signature is 4/4, for example, the lead-in will run from
measure -08 to -01, then recording will begin from
measure 1.
8. Delete mistakes if necessary, by using the (
button.
To delete any mistakes or unwanted notes in the Phrase,
simply hold down the ( button and simultaneously
play the note to be deleted. All corresponding notes in
the Phrase that occur while ( and the note are
being held will be deleted.
HINT: Keep in mind that more detailed controls for editing
Phrases are available in the Phrase Edit mode. (See page
179.)
This function can also be used while the Phrase is
looping; in fact, you can alternate between entering new
notes and deleting old ones while the Phrase plays back.
9. To stop recording, press T.
The normal Phrase play mode is automatically reselected when you stop recording.
10. Give your new Phrase a name and save it to disk.
Use the Phrase Name Job (see page 177) to name the
newly created Phrase. You can press * (Save) from
the Phrase play display to directly call up the Save
operation (see page 137), or do the same operation from
the Disk mode (see page 195).
Play the desired part on the keyboard. The Phrase
automatically loops or repeats indefinitely and records
as it loops, allowing you to build up the recording noteby-note. Other controller data — such as that of the
PITCH wheel, Sustain pedal, MODULATION wheel,
and so on —can also be recorded as to the Phrase.
HINT: Since the recorded Phrase will be re-harmonized
with the automatic accompaniment, there are a few simple
rules of thumb you should follow when recording to ensure
the best results:
• Keep it simple. Complex passages may not be
musically appropriate when re-harmonized. In general,
use primarily the root, 3rd, 5th, and major 7th.
• Keep it rhythmic. In general, avoid melodic lines (for
the same reason as above).
• Keep within the harmonic structure of the Source
Chord. For example, don’t play a minor third when
you’ve specified a major chord for the Source Chord.
130
◆ ◆ ◆ ◆ ◆ ◆ ◆ ◆ ◆ ◆ ◆ ◆ ◆ ◆ ◆ ◆ ◆ ◆ ◆ ◆ ◆ ◆ ◆ ◆ ◆ ◆ ◆ ◆ ◆ ◆ ◆ ◆ ◆ ◆ ◆ ◆ ◆ ◆ ◆ ◆ ◆
■ Retrigger and Type Parameters
These two parameter settings are recorded as part of the
Phrase data, and they determine how the Phrase responds to chord changes when used with the automatic
accompaniment.
Retrigger
Type
● Retrigger (Rtg)
Settings: On, Off
When this is set to Off, any notes playing when a chord
change occurs will be immediately muted. When set to
On, notes playing when a chord change occurs will
continue playing for their specified length, re-harmonized to match the new chord. [Retrigger is not available when Drums (Dr) is selected in the Type parameter
below.]
● Type
Settings: Melody (Mel), Chord (Chd), Bass (Bas),
Drums (Dr)
This determines how the Phrase will be harmonized to
the specified chords: Mel produces harmonization
appropriate for melody or single-line Phrases, Chd
produces harmonization ideally suited to chords, Bas
produces bass-line type harmonization, and Dr produces
no harmonization to prevent the instruments in a drum
track from changing unexpectedly when a chord change
occurs.
Phrase Mode
◆ ◆ ◆ ◆ ◆ ◆ ◆ ◆ ◆ ◆ ◆ ◆ ◆ ◆ ◆ ◆ ◆ ◆ ◆ ◆ ◆ ◆ ◆ ◆ ◆ ◆ ◆ ◆ ◆ ◆ ◆ ◆ ◆ ◆ ◆ ◆ ◆ ◆ ◆ ◆ ◆
131
Step Phrase Recording
Step Phrase Recording lets you enter data note-by-note,
with precise control over the timing, length, and loudness
of each note. You can record complete Phrases using Step
Recording, or use it to brush-up and add data to existing
Phrases.
3. Select Step Recording by pressing & (Step).
To use Step Phrase Recording: ...........................................
1. Select a User Phrase.
You can select either an empty Phrase (to start from
scratch), or an existing Phrase that you want to add to or
modify. Note that only User Phrases can be selected for
recording.
5. Select a Voice.
2. Press r to set record to standby.
RECORD lamp lights.
RECORD
STOP
TOP
4. Set the desired Phrase Length and Time Signature.
These cannot be changed if the Phrase already contains
data.
Select both the desired Voice Bank and Voice number.
6. Select the Source Chord.
Use the designated keys on the keyboard to specify the
chord root and type. (See page 108.) You can also use
the Bass Note and Bass Phrase Chord Type functions
(on page 124). The Source Chord parameter is very
important, since it determines how the Phrase will be reharmonized when used later in a Pattern with the
automatic accompaniment features.
NOTE: The “---” (Thru) chord type cannot be specified as
the Source Chord.
RUN
7. Press R to begin recording.
Measure/Beat/Clock.
The display below (or similar) appears.
Keyboard display.
F6
F7
Time Signature:
1/16 - 16/16,
1/8 - 16/8,
1/4 - 8/4
Note Entry line
(one measure).
F8
Current note
pointer.
3. Press & to enable
Step Recording.
4. Set the desired Phrase Length,
Tempo and Time Signature.
• Phrase Length:
1-8
• Tempo:
25.0 - 300.0
• Time Signature:
1/16 - 16/16, 1/8 - 16/8, 1/4 - 8/4
5. Select a Voice Bank and
Voice number.
132
F1
F2
F3
F4
F5
F6
F7
F8
Use % and ^ to
Note Length:
change the display
1 - 999 clocks
keyboard octave
Graphic symbols
range.
indicate note values in
Octave:
notation.
-3 - +3
Velocity: 0 - 127, kbd (velocity
taken from keyboard).
Graphic symbols indicate
Gate Time:
dynamic values.
stac (staccato),
norm (normal),
slur
6. Select the Source
Chord.
◆ ◆ ◆ ◆ ◆ ◆ ◆ ◆ ◆ ◆ ◆ ◆ ◆ ◆ ◆ ◆ ◆ ◆ ◆ ◆ ◆ ◆ ◆ ◆ ◆ ◆ ◆ ◆ ◆ ◆ ◆ ◆ ◆ ◆ ◆ ◆ ◆ ◆ ◆ ◆ ◆
8. Set the desired note parameters: Note Length,
Velocity, and Gate Time.
Highlight the desired parameter and change the value.
For Note Length and Velocity, you can use the numeric
keypad to quickly and easily enter the desired values.
The note values and dynamic indications are printed
directly above the buttons:
Note Length
3
Once you’ve defined the note parameters above, you
can enter the note simply by playing the appropriate key
on the keyboard. A note symbol appears on the note
entry line and the note pointer advances to the next note
position. The note symbol always appears as a 1/4 note,
regardless of the actual note entered (chords are also
indicated by the 1/4-note symbol).
You can change the octave setting for keyboard entry by
using % and ^ (Oct ▼/▲).
Velocity
3
9. Enter a note by playing it from the keyboard.
3
7
8
INTRO
ENDING
4
5
MAIN A
MAIN B
1
2
FILL AA
FILL BB
0
—
FILL AB
FILL BA
9
6
You can enter chords simply by moving the note pointer
back to a note and entering a note of a different pitch at
the same location (this can be repeated as many times as
necessary). For details on moving the note pointer, see
“Moving Around In the Note Display,” below.
3
ENTER
10. Complete recording on the rest of the Phrase.
Repeat steps 8 and 9 until the current Phrase is complete, then press T to stop recording.
NOTE:
• You can only hear the results of Step Recording by
pressing T (to return to the main Phrase display),
then pressing R. Also, if you need to use any of the
Phrase jobs, you must first press T.
To enter intermediate values, use the D/I buttons, rotary dial, or enter the value directly by simultaneously holding down ( and using the numeric
keypad.
• See the section Editing Songs & Phrases, page 179,
for information on how to edit recorded song data.
■ Measure/Beat/Clock Display
The Meas area of the step record display shows the
current position of the note pointer in measures, 1/4note beats, and clocks (there are 96 clocks per 1/4 note).
If you’re not sure what measure you’re seeing on the
note display while recording, check the measure/beat/
clock display.
Measure number.
Clock:
96 clocks per 1/4 note.
Beat:
1 - 4 (if in 4/4 time).
◆ ◆ ◆ ◆ ◆ ◆ ◆ ◆ ◆ ◆ ◆ ◆ ◆ ◆ ◆ ◆ ◆ ◆ ◆ ◆ ◆ ◆ ◆ ◆ ◆ ◆ ◆ ◆ ◆ ◆ ◆ ◆ ◆ ◆ ◆ ◆ ◆ ◆ ◆ ◆ ◆
133
Phrase Mode
Simply highlight the Note Length or Velocity parameter,
and press the appropriate button. The dot key (0) can
be used to add one or more dots to the currently selected note length.
■ The Note & Keyboard Displays
The note display shows up to four 1/4 notes worth of
data at once (a single measure in 4/4 time). If the
selected time signature results in more than four 1/4
notes per measure, then the display will scroll to show
the extra notes.
Note pointer.
Moving Around In the Note Display
To move the note pointer forward or backward on
the note entry line: ..........................................................
1. Highlight the note pointer.
2. Use the cursor ,/. buttons.
Each dash represents a
32nd note (12 clocks).
Or:
With any other parameter highlighted, use the k/
l buttons.
1st beat.
2nd beat.
3rd beat.
4th beat.
To move to a different measure: ...................................
Highlight the Measure/Beat parameter.
1.
2. Use the D/I buttons, rotary dial, or enter the
The keyboard display shows the pitch(es) of the note(s)
at the current note pointer position. In the example
below, the keyboard displays that a chord (C major)
consisting of three notes exists at the current note
pointer location.
measure number directly by using the numeric
keypad.
You will actually hear the appropriate note or chord
when the note pointer is moved to an existing note
symbol. When you move the note pointer past the end
of the note display, the next measure will appear. If you
move past the last measure in the phrase, the first
measure of the phrase will appear.
These dots indicate the note
pitches that have been recorded
(at the current position).
■ Step Mode Function Keys
The function keys immediately below the display
provide access to a number of handy functions in the
Step Record mode.
Rest
Enters a rest of the current
note length.
Tie
Lengthens the
selected note by
“tying” another note
of same length and
pitch.
134
Delete
Deletes the
note or chord
at pointer.
F1
F2
F3
F4
Back Delete (BkDlt)
Moves backward (by
current note length) and
deletes corresponding
note or chord.
F5
F6
F7
F8
Octave (Oct) ▼/▲
Raises or lowers pitch in
octaves (± 3 octaves).
High Key (HKey)
Displays the highest
keyboard range.
Press again to restore
normal “centered” display.
Low Key (LKey)
Displays the lowest
keyboard range.
Press again to restore
normal “centered” display.
◆ ◆ ◆ ◆ ◆ ◆ ◆ ◆ ◆ ◆ ◆ ◆ ◆ ◆ ◆ ◆ ◆ ◆ ◆ ◆ ◆ ◆ ◆ ◆ ◆ ◆ ◆ ◆ ◆ ◆ ◆ ◆ ◆ ◆ ◆ ◆ ◆ ◆ ◆ ◆ ◆
R E F E R E N C E
Disk Operations
The QS300’s built-in floppy disk drive makes highvolume data storage and retrieval easy. It also facilitates data management, allowing you to create a wellorganized personal floppy disk data library.
IMPORTANT!
• The QS300 uses 2DD (double density) or 2HD (high
density) 3.5-inch floppy disks. When formatted, a
single disk provides a total data capacity of about 713
kilobytes.
• Any new disk you intend to use with the QS300 must
be formatted first. The format operation is described
on page 202.
Disk Operation
Disk
Load Operation ...... 136
Disk Operations
Save Operation ...... 137
◆ ◆ ◆ ◆ ◆ ◆ ◆ ◆ ◆ ◆ ◆ ◆ ◆ ◆ ◆ ◆ ◆ ◆ ◆ ◆ ◆ ◆ ◆ ◆ ◆ ◆ ◆ ◆ ◆ ◆ ◆ ◆ ◆ ◆ ◆ ◆ ◆ ◆ ◆ ◆ ◆
135
Direct Load and Save Operations
○○○○○○○○○○○○○○○○○○○○○○○○○○○○○○○○○○○○○○○○○○○○○○○○○○○○○
Loading and saving of songs can also be done directly from
within the Song, Pattern, or Phrase mode, without having to
enter the Disk mode. The Load and Save operations are
contained in the main display of each mode, and are called
up by pressing & and *, respectively. The type of
data loaded or saved corresponds to the current mode.
Mode
Data Saved or Loaded
SONG
Single songs (01 — 10). When saving you
can specify the song number to be saved and
the file name under which it will be saved on
disk. When loading you specify the song file
to be loaded and the song number to which it
is to be loaded.
Disk
Load Operation
Path:
s / p / P ➞ & (Load)
PATTERN
Single style (001 — 100). When saving you
can specify the number of the style to be
saved and the file name under which it will be
saved to disk. When loading you specify the
style file to be loaded and the style number to
which it is to be loaded.
PHRASE
Single user phrases (001 — 100). When
saving you can specify the number of the
phrase to be saved and the file name under
which it will be saved to disk. When loading
you specify the phrase file to be loaded and
the phrase number to which it is to be loaded.
Number of files
(on disk)
Source data
To load the desired data: ......................................................
1. Enter the appropriate mode — Song, Pattern or
Phrase — by pressing the corresponding MODE
button.
2. Press & to call up the Load operation.
3. Select the specific data you wish to load.
Do this by highlighting the desired number/title in the
left (source data) box, or select the number of the data
directly.
4. Select the destination location (right box).
Size of selected file
(in kilobytes)
Destination location
5. Press E.
If the destination location already contains data, a
“Delete Old Data?” prompt appears in the display.
Answer the prompt by pressing the I button to go
ahead with the Load operation, or pressing D to
cancel.
After the operation is completed, press ) to return
to the previous mode display, or press any of the
MODE buttons.
NOTE: You can use the ) button to leave the Load
display at any time except while the operation is actually in
progress.
Highlight the destination location, and use the data entry
controls to change the destination number.
136
◆ ◆ ◆ ◆ ◆ ◆ ◆ ◆ ◆ ◆ ◆ ◆ ◆ ◆ ◆ ◆ ◆ ◆ ◆ ◆ ◆ ◆ ◆ ◆ ◆ ◆ ◆ ◆ ◆ ◆ ◆ ◆ ◆ ◆ ◆ ◆ ◆ ◆ ◆ ◆ ◆
— From Song, Pattern, and Phrase Modes
○○○○○○○○○○○○○○○○○○○○○○○○○○○○○○○○○○○○○○○○○○○○○○○○○○○○○○○○○
Disk
Save Operation
Path:
s / p / P ➞ * (Save)
Number of files
(on disk).
Source data
To save the desired data: ......................................................
1. Enter the appropriate mode — Song, Pattern or
Phrase — by pressing the corresponding MODE
button.
3. Select the specific data you wish to save.
Do this by highlighting the desired number/title in the
left (source data) box, or select the number of the data
directly.
4. Enter a file name if necessary.
Destination location
5. Press E.
If the destination location already contains data, a
“Delete Old Data?” prompt appears in the display.
Answer the prompt by pressing the I button to go
ahead with the Save operation, or pressing D to
cancel.
After the operation is completed, press ) to return
to the previous mode display, or press any of the
MODE buttons.
NOTE: You can use the ) button to leave the Save
display at any time except while the operation is actually in
progress.
When the destination location is highlighted, the name
operation popup page (below) is automatically called
up. (See page 197 for instructions on entering names.)
◆ ◆ ◆ ◆ ◆ ◆ ◆ ◆ ◆ ◆ ◆ ◆ ◆ ◆ ◆ ◆ ◆ ◆ ◆ ◆ ◆ ◆ ◆ ◆ ◆ ◆ ◆ ◆ ◆ ◆ ◆ ◆ ◆ ◆ ◆ ◆ ◆ ◆ ◆ ◆ ◆
137
Disk Operations
2. Press * to call up the Save operation.
Size of selected file
(in kilobytes).
138
◆ ◆ ◆ ◆ ◆ ◆ ◆ ◆ ◆ ◆ ◆ ◆ ◆ ◆ ◆ ◆ ◆ ◆ ◆ ◆ ◆ ◆ ◆ ◆ ◆ ◆ ◆ ◆ ◆ ◆ ◆ ◆ ◆ ◆ ◆ ◆ ◆ ◆ ◆ ◆ ◆
R E F E R E N C E
Song Jobs
The Song mode includes 24 different “jobs” (or
operations) that perform a variety of important and
useful functions.
CAUTION: Keep in mind that the Song Jobs permanently alter the data of the Song, unlike the playback
effects (covered on page 89). For example, the
Quantize playback effect simpy changes the quantization during playback and does not affect the actual
data, whereas the Quantize Song Job changes the
actual data permanently.
Song Jobs
12: Thin Out ............................... 153
01: Quantize .................. 141
13: Create Measure ................... 154
02: Modify Velocity ........143
14: Delete Measure ................... 155
03: Modify Gate Time ....144
15: Copy Track .......................... 156
04: Crescendo ...............145
16: Mix Track ............................. 157
05: Transpose ................ 146
17: Clear Track .......................... 158
06: Shift Note .................147
18: Expand Backing .................. 158
07: Shift Clock ...............148
19: Init (Initialize) Play Effect .... 159
08: Chord Sort ...............149
20: Normalize Effect .................. 159
09: Copy Event .............. 150
21: Copy Song ........................... 160
10: Erase Event .............151
22: Clear Song ........................... 160
11: Extract Event ...........152
23: Song Name .......................... 161
◆ ◆ ◆ ◆ ◆ ◆ ◆ ◆ ◆ ◆ ◆ ◆ ◆ ◆ ◆ ◆ ◆ ◆ ◆ ◆ ◆ ◆ ◆ ◆ ◆ ◆ ◆ ◆ ◆ ◆ ◆ ◆ ◆ ◆ ◆ ◆ ◆ ◆ ◆ ◆ ◆
Song Jobs
00: Undo/Redo ...............140
139
To use the Song Jobs: ...........................................................
Enter the Song mode by pressing s.
1.
( button and pressing the appropriate cursor
button (< or >).
2. Press j to call up the Song Jobs page.
4. Press E to call up the desired Job.
3. Select the desired Job number/title.
5. For help in using a specific Job, refer to the appro-
Enter the Job number directly from the numeric keypad,
or select the Job by moving the highlight in the normal
manner. You can also scroll up and down through the
list in “pages” by simultaneously holding down the
priate explanation in this section.
To exit from the Song Jobs, press the ) button or any
of the MODE buttons.
00: Undo/Redo
Last executed operation (corresponding
mode appears above in reverse display).
This Job will “undo” any other song Job, edit, or record
function if it is executed before any other operation is
performed. In all cases, the affected data is restored to the
previous state before performing the Job, edit, or record
operation. This Job will also undo the last Undo operation
(Redo).
The name of the last operation performed appears in the
display (i.e., the operation which will be “undone”). In the
example display above, a Realtime Record operation will
be undone.
140
Press E to execute the Undo/Redo Job. A “Completed” message appears briefly when the Job is done.
NOTE:
• The last operation performed is “forgotten” by the Undo Job
whenever the Song or Phrase step record mode is engaged,
even if the step record mode is exited without actually
recording any data.
• The Undo operation cannot be used with the following jobs:
Song Name (page 23), Style Name (in Pattern Jobs, page
168), and Phrase Name (in Phrase Jobs, page 177).
◆ ◆ ◆ ◆ ◆ ◆ ◆ ◆ ◆ ◆ ◆ ◆ ◆ ◆ ◆ ◆ ◆ ◆ ◆ ◆ ◆ ◆ ◆ ◆ ◆ ◆ ◆ ◆ ◆ ◆ ◆ ◆ ◆ ◆ ◆ ◆ ◆ ◆ ◆ ◆ ◆
01: Quantize
Track
Quantize Range: First measure/
beat — last measure/beat.
Quantize Value
Swing Rate
Strength
Gate Time
Sensitivity
Velocity
Aligns notes in the specified track to or close to the nearest
specified beat.
Setting Effect
Aligns to the nearest 32nd note.
● Track
Aligns to the nearest 16th note triplet.
Range: 01 — 16, All
Aligns to the nearest 16th note.
This determines the track to be affected by the Quantize
Job. A setting of All quantizes all 16 tracks simultaneously.
Aligns to the nearest 8th note triplet.
Aligns to the nearest 8th note.
● Quantize Range
Aligns to the nearest quarter note triplet.
Quantize Range is actually four separate settings (as shown
below). These determine the range of the play data that is
to be quantized.
Aligns to the nearest quarter note.
Aligns to the nearest 16th note + 16th note triplet.
Aligns to the nearest 8th note + 8th note triplet.
First beat.
This determines to what beats the note data in the corresponding track will be aligned. If you select “ ,” for
example, all notes in the track will be aligned to the nearest
16th-note beat, to a degree determined by the Strength
parameter below.
Last beat.
● Strength
● Quantize Value
Settings: off,
,
Range: 0 — 100%
,
,
,
,
,
,
,
This determines to what beats the note data in the specified
track will be aligned. If you select “ ,” for example, all
notes in the track will be aligned to the nearest 16th-note
beat, to a degree determined by the “Strength” parameter.
This determines how “strongly” the notes are attracted to
the specified quantize value. At a setting of 0%, no
quantization will occur, while a setting of 100% will cause
all notes to be aligned precisely to the nearest specified beat
value. Intermediate settings produce a corresponding shift
in the position of all off-beat notes to the nearest specified
beat value. With a value setting of and a strength setting
of 50%, for example, a note that does not fall precisely on
an 8th-note beat will be shifted about halfway to the nearest
8th-note beat.
◆ ◆ ◆ ◆ ◆ ◆ ◆ ◆ ◆ ◆ ◆ ◆ ◆ ◆ ◆ ◆ ◆ ◆ ◆ ◆ ◆ ◆ ◆ ◆ ◆ ◆ ◆ ◆ ◆ ◆ ◆ ◆ ◆ ◆ ◆ ◆ ◆ ◆ ◆ ◆ ◆
141
Song Jobs
Last measure.
First measure.
● Sensitivity
● Gate Time
Range: -100 — 0 — +100%
This determines the range over which notes will be quantized. At 0% no quantization will occur. A setting of either
-100% or +100% will cause all notes to be quantized.
Refer to the graph below for an idea of how the quantize
range is determined by other settings. The heavy solid lines
in the sensitivity graph represent the range over which
notes will be quantized. At a setting of +50%, for example, only notes that fall within the range that is less than
halfway to the quantize range of the adjacent note will be
quantized. Notes outside this range and those of adjacent
notes will be left un-quantized.
Nearest specified beat.
Range: 0 — 200%
This determines how much the note durations are affected
by the Swing effect. This parameter sets the ratio between
the shorter and longer gate time values. A setting of
“100%” maintains the original relationship between the
notes, lower values produce a narrower gate time range,
and higher values produce a broader gate time range.
● Velocity
Range: 0 — 200%
This determines how much the note velocities are affected
by the Swing effect. This parameter sets the ratio between
the lower and higher velocity values. A setting of 100%
maintains the original relationship between the notes, while
lower values produce a narrower dynamic range, and higher
values produce a broader dynamic range.
+100%
Press E to execute the Quantize Job. A “Completed”
message appears briefly when the Job is done.
+50%
Sensitivity
0%
-50%
-100%
Quantize value
(note length)
● Swing Rate
Range:
• 50% (no swing) to 75% (maximum swing) for even
note lengths
• 66% to 83% for triplet note lengths
• 50% to 66% for even-plus-triplet note lengths (e.g.,
8th note + 8th note triplet)
This determines the strength of the swing feel, or how
much the timing of the affected notes will be shifted. This
effect produces a “swing” feel by shifting the timing of
“back beats,” as specified by the Quantize setting. For
example, if the specified Quantize value is 8th notes, then
the Swing effect will shift the 2nd, 4th, 6th, and 8th beats
of each measure forward to create a swing feel. If the
Quantize value is set to a triplet note length, the last note in
each triplet group will be shifted. If the Quantize value is
set to a compound note length (e.g. 8th note + 8th note
triplet), then the even-numbered back beats will be shifted.
142
◆ ◆ ◆ ◆ ◆ ◆ ◆ ◆ ◆ ◆ ◆ ◆ ◆ ◆ ◆ ◆ ◆ ◆ ◆ ◆ ◆ ◆ ◆ ◆ ◆ ◆ ◆ ◆ ◆ ◆ ◆ ◆ ◆ ◆ ◆ ◆ ◆ ◆ ◆ ◆ ◆
02: Modify Velocity
Track
Measure Range
Rate (Ratio)
Velocity Offset
This operation increases or decreases the velocity values of
all notes in the specified track and range of measures.
● Velocity Offset
Range: -99 — 0 — +99
This determines the amount of velocity change. Negative
settings reduce the velocity while positive settings increase
the velocity.
● Track
Range: 01 — 16
This determines the track to be affected by the Modify
Velocity Job.
● Measure Range
Measure Range is actually four separate settings (as shown
below). These determine the range of the play data that is
to be affected.
First beat.
Last measure.
Last beat.
New Velocity = Original Velocity x Rate/100 + Offset
(If the right side of the equation is less than 0, the new
Velocity becomes 1)
Press E to execute the Modify Velocity Job. A
“Completed” message appears briefly when the Job is done.
HINT: The Modify Velocity Job is a great way to “soften” the
sound of material that has too great a variation between the
softest and loudest notes, or, conversely, to add extra punch to
dull-sounding material. Experiment with the parameters to get
a feel for what they do and how you can use them.
● Rate
Range: 0 — 200%
This determines the ratio between the lower and higher
velocity values. A setting of 100% maintains the original
relationship between the notes, lower values produce a
narrower dynamic range, and higher values produce a
broader dynamic range.
◆ ◆ ◆ ◆ ◆ ◆ ◆ ◆ ◆ ◆ ◆ ◆ ◆ ◆ ◆ ◆ ◆ ◆ ◆ ◆ ◆ ◆ ◆ ◆ ◆ ◆ ◆ ◆ ◆ ◆ ◆ ◆ ◆ ◆ ◆ ◆ ◆ ◆ ◆ ◆ ◆
143
Song Jobs
First measure.
NOTE: The Rate and Velocity Offset parameters change the
velocity according to the following formula:
03: Modify Gate Time
Track
Measure Range
Rate
Offset
This operation increases or decreases the gate times (duration) of all notes in the specified track and range of measures.
● Track
● Offset
Range: -99 — 0 — +99
This determines the amount of gate time modification.
Negative settings shorten the gate time while positive
settings increase the gate time.
Range: 01 — 16
This determines the track to be affected by the Modify Gate
Time Job.
NOTE: The Rate and Offset parameters change the Gate Time
(note duration) according to the following formula:
New Gate Time = Original Gate Time x Rate/100 + Offset
(If the right side of the equation is less than 0, the new Gate
Time becomes 1)
● Measure Range
Measure Range is actually four separate settings (as shown
below). These determine the range of the play data that is
to be affected.
First measure.
First beat.
Last measure.
Press E to execute the Modify Gate Time Job. A
“Completed” message appears briefly when the Job is done.
HINT: The Modify Gate Time Job can be used to produce a
more staccato or legato feel, as required. Experiment with the
parameters to get a feel for what they do and how you can use
them.
Last beat.
● Rate
Range: 0 — 200%
This determines the ratio between the shorter and longer
gate time values. A setting of 100% maintains the original
relationship between the notes, lower values produce a
narrower gate time range, and higher values produce a
broader gate time range.
144
◆ ◆ ◆ ◆ ◆ ◆ ◆ ◆ ◆ ◆ ◆ ◆ ◆ ◆ ◆ ◆ ◆ ◆ ◆ ◆ ◆ ◆ ◆ ◆ ◆ ◆ ◆ ◆ ◆ ◆ ◆ ◆ ◆ ◆ ◆ ◆ ◆ ◆ ◆ ◆ ◆
04: Crescendo
Track
Measure Range
Crescendo Range
This operation produces a gradual crescendo (increase in
note velocity) or decrescendo (decrease in note velocity) in
the specified track over the specified range of measures.
● Track
Range: 01 — 16
This determines the track to be affected by the Crescendo
Job.
● Crescendo Range
Range: -99 — +99
This determines the range of velocity values over which the
crescendo will occur. A setting of +24, for example, will
cause the MIDI velocity values to increase by 24 over the
specified measure range. Negative values will produce a
decrescendo, or cause velocity values to decrease. (The
MIDI velocity value range is from 1 to 127.)
● Measure Range
Crescendo
Measure Range is actually four separate settings (as shown
below). These determine the range of the play data that is
to be affected.
Range
+24
Original
velocity
Specified measure (“M”) range.
Song Jobs
First measure.
Last measure.
Press E to execute the Crescendo Job. A “Completed” message appears briefly when the Job is done.
First beat.
Last beat.
◆ ◆ ◆ ◆ ◆ ◆ ◆ ◆ ◆ ◆ ◆ ◆ ◆ ◆ ◆ ◆ ◆ ◆ ◆ ◆ ◆ ◆ ◆ ◆ ◆ ◆ ◆ ◆ ◆ ◆ ◆ ◆ ◆ ◆ ◆ ◆ ◆ ◆ ◆ ◆ ◆
145
05: Transpose
Track
Measure Range
Transpose
This operation transposes all notes in the specified part up
or down by the specified number of semitones.
● Track
Range: 01 — 16, Chd (Chord track)
This determines the track to be affected by the Transpose
Job: sequencer tracks 1 - 16, or the accompaniment Chord
track (Chd).
● Measure Range
Measure Range is actually four separate settings (as shown
below). These determine the range of the play data that is
to be affected.
First measure.
Last measure.
First beat.
Last beat.
● Transpose
Range: -99 — +99 semitones
This determines the pitch transposition of the specified
data, up or down in semitone increments.
Press E to execute the Transpose Job. A “Completed” message appears briefly when the Job is done.
HINT: Of course, you can transpose all parts as required to
shift the entire song to a different key, but the Transpose Job is
actually more suited to changing the pitch of a section of a
single track. This can be done to produce key modulations
within a song, or to create harmony with another track.
146
◆ ◆ ◆ ◆ ◆ ◆ ◆ ◆ ◆ ◆ ◆ ◆ ◆ ◆ ◆ ◆ ◆ ◆ ◆ ◆ ◆ ◆ ◆ ◆ ◆ ◆ ◆ ◆ ◆ ◆ ◆ ◆ ◆ ◆ ◆ ◆ ◆ ◆ ◆ ◆ ◆
06: Shift Note
Track
Source note
Measure Range
Destination note
This operation changes the pitch of all specified notes
within the specified range of measures in the specified
track.
● Track
Range: 01 — 16
This determines the track to be affected by the Shift Note
Job.
● Measure Range
Measure Range is actually four separate settings (as shown
below). These determine the range of the play data that is
to be affected.
First beat.
Song Jobs
First measure.
Last measure.
Last beat.
● Source Note / Destination Note
Range: C-2 — G8
The source note parameter determines which notes in the
specified measure range will be shifted, and the destination
note parameter determines to what note they will be shifted
to. The notes can be entered directly from the keyboard
(when the parameter is highlighted) as well as from the
panel controls.
Press E to execute the Shift Note Job. A “Completed” message appears briefly when the Job is done.
◆ ◆ ◆ ◆ ◆ ◆ ◆ ◆ ◆ ◆ ◆ ◆ ◆ ◆ ◆ ◆ ◆ ◆ ◆ ◆ ◆ ◆ ◆ ◆ ◆ ◆ ◆ ◆ ◆ ◆ ◆ ◆ ◆ ◆ ◆ ◆ ◆ ◆ ◆ ◆ ◆
147
07: Shift Clock
Track
Measure Range
Clock
This operation moves all notes and events in the specified
track and range of measures forward or backward by the
specified number of clocks (96 clocks = 1/4 note).
● Track
Range: 01 — 16, Tmp (Tempo track)
This determines the track to be affected by the Shift Clock
Job: sequencer tracks 1 - 16, or the Tempo track (Tmp).
Range: -999 — +999
This determines the direction and number of clocks by
which the notes in the specified measure range will be
shifted. Positive settings shift the notes forward (toward
the end of the song) and negative settings shift the notes
backward (toward the beginning of the song).
Press E to execute the Clock Shift Job. A “Completed” message appears briefly when the Job is done.
● Measure Range
Measure Range is actually four separate settings (as shown
below). These determine the range of the play data that is
to be affected.
First measure.
First beat.
148
● Clock
Last measure.
Last beat.
NOTE: The Shift Clock Job will not shift data beyond the
specified measure range. Events near the beginning and end
of the specified range may therefore sound “bunched” together
in some cases.
HINT: Since the Shift Clock Job actually shifts the timing of all
notes and other events in the specified measures forward or
backward, it can significantly alter the “feel” of the song. You
could move the notes forward (positive values) to create a
more “laid back” feel, or backward (negative values) to produce
a more “driving” feel. Of course, you can also use this
parameter to correct timing that is consistently off in the first
place.
◆ ◆ ◆ ◆ ◆ ◆ ◆ ◆ ◆ ◆ ◆ ◆ ◆ ◆ ◆ ◆ ◆ ◆ ◆ ◆ ◆ ◆ ◆ ◆ ◆ ◆ ◆ ◆ ◆ ◆ ◆ ◆ ◆ ◆ ◆ ◆ ◆ ◆ ◆ ◆ ◆
08: Chord Sort
Track
Measure Range
Type
This operation sorts all notes in the specified measure range
which fall on the same beat (i.e., chords) so that the notes
are arranged in order from lowest to highest or from highest
to lowest.
● Track
Range: 01 — 16
This determines the track to be affected by the Chord Sort
Job.
● Measure Range
First measure.
First beat.
Song Jobs
Measure Range is actually four separate settings (as shown
below). These determine the range of the play data that is
to be affected.
Last measure.
Last beat.
● Type
Settings: Normal (Norm), Reverse (Rev)
This determines whether the chords in the specified range
are arranged from lowest to highest note (Norm) or from
highest to lowest note (Rev).
Press E to execute the Chord Sort Job. A “Completed” message appears briefly when the Job is done.
◆ ◆ ◆ ◆ ◆ ◆ ◆ ◆ ◆ ◆ ◆ ◆ ◆ ◆ ◆ ◆ ◆ ◆ ◆ ◆ ◆ ◆ ◆ ◆ ◆ ◆ ◆ ◆ ◆ ◆ ◆ ◆ ◆ ◆ ◆ ◆ ◆ ◆ ◆ ◆ ◆
149
09: Copy Event
Source Range
Source Song and Track
Destination Song and
Track
Destination Location
This operation copies all data from a specified range of
measures from one track of a specified song to the specified
measure in the specified track of the specified song. Be
careful when using this operation, since it overwrites the
data from the beginning of the specified destination measure with the data from the source measures, erasing all
previous data in the overwritten measures.
Number of Repeats
● Source Range
Range is actually four separate settings (as shown below).
These determine the range of the play data that is to be
affected.
First measure.
Last measure.
● Source Song/Track
Settings:
Song: 01 — 10
Track: 01 — 16, Pattern (Pat), Chord (Chd),
Tempo (Tmp), All
First beat.
Last beat.
● Destination Location
This determines the song and track (or tracks) from which
the data is to be copied. In the Track parameter, Pat is for
the accompaniment pattern track, Chd is for the accompaniment chord track, Tmp is for the tempo track, and All is
for all tracks in the selected song. When any of the latter
four are selected, the Destination Track parameter is
automatically set to the same setting.
This determines the position in the song to which the
source data is to be copied. The data is copied starting at
the specified measure and beat.
● Destination Song/Track
Press E to execute the Copy Event Job. A “Completed” message appears briefly when the Job is done.
Settings:
Song: 01 — 10
Track: 01 — 16, Pattern (Pat), Chord (Chd),
Tempo (Tmp), All
This determines the song and track (or tracks) to which the
source data (selected above) is to be copied. In the Track
parameter, Pat is for the accompaniment pattern track, Chd
is for the accompaniment chord track, Tmp is for the tempo
track, and All is for all tracks in the selected song. When
any of the latter four are selected, the Source Track parameter is automatically set to the same setting.
150
● Number of Repeats
This determines the number of times the data is to be
copied.
NOTE:
• Previous data in measures overwritten by the Copy Event
Job will be completely erased and replaced by the copied
data.
• The time signature is copied by the Copy Event Job, but
Voice and Play Effect data is not copied.
HINT: The Copy Event Job makes it easy to use phrases or
even complete sections (an entire chorus, for example) in more
that one place in a song. You can copy a phrase played by
one voice, and have it repeated by a different voice later in the
song. You can always edit the copied sections to create
variations.
◆ ◆ ◆ ◆ ◆ ◆ ◆ ◆ ◆ ◆ ◆ ◆ ◆ ◆ ◆ ◆ ◆ ◆ ◆ ◆ ◆ ◆ ◆ ◆ ◆ ◆ ◆ ◆ ◆ ◆ ◆ ◆ ◆ ◆ ◆ ◆ ◆ ◆ ◆ ◆ ◆
10: Erase Event
Track
Measure Range
This operation erases all note and event data from the
specified measure or range of measures in the specified
track. Erase Event creates a space of blank measures in the
track, leaving all subsequent measures intact; in other
words, the subsequent measures are not moved back to fill
the blank space.
● Track
Range: 01 — 16
This determines the track to be affected by the Erase Event
Job.
● Measure Range
First measure.
First beat.
Song Jobs
Measure Range is actually four separate settings (as shown
below). These determine the range of the play data that is
to be affected.
Last measure.
Last beat.
Press E to execute the Erase Event Job. A “Completed” message appears briefly when the Job is done.
◆ ◆ ◆ ◆ ◆ ◆ ◆ ◆ ◆ ◆ ◆ ◆ ◆ ◆ ◆ ◆ ◆ ◆ ◆ ◆ ◆ ◆ ◆ ◆ ◆ ◆ ◆ ◆ ◆ ◆ ◆ ◆ ◆ ◆ ◆ ◆ ◆ ◆ ◆ ◆ ◆
151
11: Extract Event
Measure Range
Source Track
Event Type and Value
Destination Track
This operation removes (or extracts) a specified type of
event — note, program change, pitch bend, control change,
channel aftertouch, polyphonic aftertouch, or exclusive
message — from a specified range of measures in a specified track. The extracted data can be moved to the same
range of measures in any other specified track.
● Event Type and Value
This determines the event type to be extracted, and (where
applicable) the value.
NOTE
Range: C-2 — G8, all notes (All)
Note events. When this event type is selected,
the Value parameter appears, determining the
specific note name to be extracted.
PRGM
Program change events.
P.BEND
Pitch bend events.
CTRL
Range: 000 — 127, all control numbers (All)
Control change events. When this event type
is selected, the Value parameter appears,
determining the specific control change number
to be extracted.
CH A.T
Channel aftertouch events.
POLY A.T
Polyphonic aftertouch events.
EXCL
Exclusive events.
● Source Track
Range: 01 — 16
This determines the track from which the data is to be
extracted.
● Destination Track
Range: 01 — 16, off
This determines the track to which the source data (selected
above) is to be copied. Use the off setting to delete the
selected event.
● Measure Range
Measure Range is actually four separate settings (as shown
below). These determine the range of the play data that is
to be affected.
First measure.
First beat.
152
Last measure.
Last beat.
Press E to execute the Extract Event Job. A “Completed” message appears briefly when the Job is done.
HINT: Although you can remove events individually in the edit
mode (page 183), the Extract Event Job makes it simple to
remove all occurrences of the specified event within the
specified measure range in a single operation. This is
particularly convenient when removing slow pitch bends or
volume changes that may employ many individual events to
create a single effect.
◆ ◆ ◆ ◆ ◆ ◆ ◆ ◆ ◆ ◆ ◆ ◆ ◆ ◆ ◆ ◆ ◆ ◆ ◆ ◆ ◆ ◆ ◆ ◆ ◆ ◆ ◆ ◆ ◆ ◆ ◆ ◆ ◆ ◆ ◆ ◆ ◆ ◆ ◆ ◆ ◆
12: Thin Out
Track
Measure Range
Event Type and Value
This operation “thins out” data on a track by removing
every other recorded event of the specified type. This is
particularly useful for reducing the volume of data required
for pitch bends, aftertouch and other control change operations, thus making more efficient use of the available
memory.
● Event Type and Value
This determines the event type to be extracted, and (where
applicable) the value.
P.BEND
Pitch bend events.
CTRL
Range: 000 — 127, all control numbers (All)
Control change events. When this event type is
selected, the Value parameter appears, determining the specific control change number to be
extracted.
CH A.T
Channel aftertouch events.
POLY A.T
Polyphonic aftertouch events.
● Track
Range: 01 — 16, Tempo (Tmp)
This determines the track to be affected by the Thin Out
Job. The Tmp setting is for the Tempo track.
● Measure Range
First measure.
First beat.
Press E to execute the Thin Out Job. A “Completed”
message appears briefly when the Job is done.
Last measure.
Last beat.
◆ ◆ ◆ ◆ ◆ ◆ ◆ ◆ ◆ ◆ ◆ ◆ ◆ ◆ ◆ ◆ ◆ ◆ ◆ ◆ ◆ ◆ ◆ ◆ ◆ ◆ ◆ ◆ ◆ ◆ ◆ ◆ ◆ ◆ ◆ ◆ ◆ ◆ ◆ ◆ ◆
153
Song Jobs
Measure Range is actually four separate settings (as shown
below). These determine the range of the play data that is
to be affected.
13: Create Measure
Location (for inserting measure/measures)
Time Signature
Number of Measures
This operation creates a specified number of blank measures having the specified time signature for all tracks. The
created measures are inserted at a specified measure
number, and all subsequent measures are moved forward to
make room.
● Location
This determines the measure at which the newly created
measures will be inserted.
● Time Signature
Settings: 1/16 — 16/16; 1/8 — 16/8; 1/4 — 8/4
This determines the time signature of the measures to be
created.
● Number of Measures
This determines the number of measures to be created.
Press E to execute the Create Measure Job. A
“Completed” message appears briefly when the Job is done.
NOTE:
• All existing measures after the point at which the new
measures are created will be moved forward to make room
for the new measures.
• If you use the Create Measure Job with an empty song, the
specified new measures will be placed in track 1 only.
HINT: Use Create Measure when you want to add new
material somewhere in the middle of data you’ve already
recorded, without erasing the existing data. First create the
required measures, then either copy the data from existing
measures using the Copy Event Job (9), or record new data as
required.
154
◆ ◆ ◆ ◆ ◆ ◆ ◆ ◆ ◆ ◆ ◆ ◆ ◆ ◆ ◆ ◆ ◆ ◆ ◆ ◆ ◆ ◆ ◆ ◆ ◆ ◆ ◆ ◆ ◆ ◆ ◆ ◆ ◆ ◆ ◆ ◆ ◆ ◆ ◆ ◆ ◆
14: Delete Measure
Measure Range
This operation deletes the specified range of measures from
all tracks of a song simultaneously.
● Measure Range
Measure Range is actually two separate settings (as shown
below). These determine the range of the play data that is
to be affected.
First measure.
Last measure.
Song Jobs
Press E to execute the Delete Measure Job. A
“Completed” message appears briefly when the Job is done.
HINT: Delete Measure is a great way to completely cut out
unwanted data from the song. It’s important to remember,
however, that a delete operation affects all tracks simultaneously, and that measures following the deleted range are
moved back to take the place of the deleted measures.
◆ ◆ ◆ ◆ ◆ ◆ ◆ ◆ ◆ ◆ ◆ ◆ ◆ ◆ ◆ ◆ ◆ ◆ ◆ ◆ ◆ ◆ ◆ ◆ ◆ ◆ ◆ ◆ ◆ ◆ ◆ ◆ ◆ ◆ ◆ ◆ ◆ ◆ ◆ ◆ ◆
155
15: Copy Track
Source Song and Track
Destination Song and
Track
This operation copies all data from the specified track of a
specified song to any other specified track of a specified
song. Use this operation (instead of Copy Event above)
when you want to copy an entire track or tracks.
● Source Song/Track
Settings:
Song: 01 — 10
Track: 01 — 16, Pattern (Pat), Chord (Chd),
Tempo (Tmp), All
This determines the song and track (or tracks) from which
the data is to be copied. In the Track parameter, Pat is for
the accompaniment pattern track, Chd is for the accompaniment chord track, Tmp is for the tempo track, and All is
for all tracks in the selected song. When any of the latter
four are selected, the Destination Track parameter is
automatically set to the same setting.
● Destination Song/Track
Settings:
Song: 01 — 10
Track: 01 — 16, Pattern (Pat), Chord (Chd),
Tempo (Tmp), All
This determines the song and track (or tracks) to which the
source data (selected above) is to be copied. In the Track
parameter, Pat is for the accompaniment pattern track, Chd
is for the accompaniment chord track, Tmp is for the tempo
track, and All is for all tracks in the selected song. When
any of the latter four are selected, the Source Track parameter is automatically set to the same setting.
Press E to execute the Copy Track Job. A “Completed” message appears briefly when the Job is done.
156
◆ ◆ ◆ ◆ ◆ ◆ ◆ ◆ ◆ ◆ ◆ ◆ ◆ ◆ ◆ ◆ ◆ ◆ ◆ ◆ ◆ ◆ ◆ ◆ ◆ ◆ ◆ ◆ ◆ ◆ ◆ ◆ ◆ ◆ ◆ ◆ ◆ ◆ ◆ ◆ ◆
16: Mix Track
Source (First) Song and
Track
Destination (Second)
Song and Track
This operation combines the data contained in two specified
tracks and places the result in the second track. Be careful
when using this Job, since it permanently alters the data of
the second (destination) track.
● Source (First) Song/Track
Settings:
Song: 01 — 10
Track: 01 — 16
This determines the first song and track data which is to be
mixed.
HINT: In many situations you may want to “overdub,” or add
new material to a single track without deleting the previous
material. This is dangerous, however, since you can ruin one
or more layers of good material by making a mistake during a
later overdub. The QS300 eliminates this possibility by
allowing only “replace” recording (i.e.. all material recorded to a
track erases and replaces any previous material on that track).
In order to record more than one layer of material to a single
track (using the same voice, of course), first record the layers
on separate tracks, then after ensuring that there are no
mistakes, use the Mix Track Job to combine these separate
tracks onto a single track.
● Destination (Second) Song/Track
Song Jobs
Settings:
Song: 01 — 10
Track: 01 — 16
This determines the second song and track data which is to
be mixed. The mixed data replaces original data of this
song/track.
NOTE:
• Both the Source and Destination song parameters should be
set to the same song number if you’re mixing tracks from a
single song.
• If there is no data in the second track, the data from the first
is simply copied to the second (minus the time signature).
Press E to execute the Mix Track Job. A “Completed” message appears briefly when the Job is done.
◆ ◆ ◆ ◆ ◆ ◆ ◆ ◆ ◆ ◆ ◆ ◆ ◆ ◆ ◆ ◆ ◆ ◆ ◆ ◆ ◆ ◆ ◆ ◆ ◆ ◆ ◆ ◆ ◆ ◆ ◆ ◆ ◆ ◆ ◆ ◆ ◆ ◆ ◆ ◆ ◆
157
17: Clear Track
Track
This operation completely clears the specifed track from the
currently selected song (including all Play Effect parameters).
pattern track, Chd is for the accompaniment chord track,
Tmp is for the tempo track, and All is for all tracks in the
selected song.
● Track
Press E to execute the Clear Track Job. A “Completed” message appears briefly when the Job is done.
Settings: Track: 01 — 16, Pattern (Pat), Chord (Chd),
Tempo (Tmp), All
This determines the track (or tracks) which is to be cleared.
In the Track parameter, Pat is for the accompaniment
18: Expand Backing
This operation converts or “expands” the accompaniment
Pattern and Chord track data (which cannot be edited) to
that of standard MIDI format (which can be edited). The
resulting expanded data is placed in the normal sequencer
tracks 8, 9, 11, 12, 13, 14, 15, and 16 (see chart below).
Two cautions:
• Be careful when using this, since any previous data in
tracks 8 - 16 will be erased!
• Be judicious in expanding accompaniment tracks, since
they will take up more memory space after being
expanded.
Press E to execute the Expand Backing Job. A
“Completed” message appears briefly when the Job is done.
158
Pattern Track
Sequencer Track
1
8
2
9
3
11
4
12
5
13
6
14
7
15
8
16
HINT: The main use for Expand Backing is when you want to
make small changes in the accompaniment that cannot be
made otherwise. For example, you may wish to change a few
notes in a bass part, or change some individual drum sounds
in the rhythm track.
◆ ◆ ◆ ◆ ◆ ◆ ◆ ◆ ◆ ◆ ◆ ◆ ◆ ◆ ◆ ◆ ◆ ◆ ◆ ◆ ◆ ◆ ◆ ◆ ◆ ◆ ◆ ◆ ◆ ◆ ◆ ◆ ◆ ◆ ◆ ◆ ◆ ◆ ◆ ◆ ◆
19: Init (Initialize) Play Effect
Track
This operation resets all playback effect settings for the
specified track to their default (or initial) values.
Press E to execute the Init Play Effect Job. A
“Completed” message appears briefly when the Job is done.
● Track
Range: 01 — 16, All
This determines the track (or tracks) for which the settings
are to be initialized. The setting of All selects all tracks in
the selected song for initializing.
20: Normalize Effect
Song Jobs
Track
This operation actually applies the Play Effect settings to
the sequence data, modifying the sequence data accordingly. The Play Effect settings are initialized after execution.
● Track
Range: 01 — 16, All
This determines the track (or tracks) for which the Play
Effect settings are to be modified. The setting of All
selects all tracks in the selected song.
Press E to execute the Normalize Effect Job. A
“Completed” message appears briefly when the Job is done.
◆ ◆ ◆ ◆ ◆ ◆ ◆ ◆ ◆ ◆ ◆ ◆ ◆ ◆ ◆ ◆ ◆ ◆ ◆ ◆ ◆ ◆ ◆ ◆ ◆ ◆ ◆ ◆ ◆ ◆ ◆ ◆ ◆ ◆ ◆ ◆ ◆ ◆ ◆ ◆ ◆
159
21: Copy Song
Source Song
Destination Song
This operation copies all data from all tracks of the specified song to any other specified song (including song name,
play effect, voice assignment, and output assignment
settings).
● Destination Song
● Source Song
Press E to execute the Copy Song Job. A “Completed” message appears briefly when the Job is done.
Range: 01 — 10
Range: 01 — 10
This determines the song to which the source data (selected
above) is to be copied.
This determines the song from which the data is to be
copied.
22: Clear Song
Song
This operation completely clears all data from all tracks of
the currently selected song. It also initializes the play
effect, voice, and output settings.
● Song
Range: 01 — 10
This determines the song whose data is to be cleared.
Press E to execute the Clear Song Job. A “Completed” message appears briefly when the Job is done.
160
◆ ◆ ◆ ◆ ◆ ◆ ◆ ◆ ◆ ◆ ◆ ◆ ◆ ◆ ◆ ◆ ◆ ◆ ◆ ◆ ◆ ◆ ◆ ◆ ◆ ◆ ◆ ◆ ◆ ◆ ◆ ◆ ◆ ◆ ◆ ◆ ◆ ◆ ◆ ◆ ◆
23: Song Name
Song Number
F1
F2
F3
F4
Song Name
F5
F6
F7
Press & to insert a
space at the highlight.
This operation allows an original name of up to eight
characters to be assigned to the current song. You should
always use this operation after recording a song, then use
the Save operation (page 137) to save the song to memory.
● Song Number
Range: 01 — 10
This determines the song number for which a name is to be
assigned.
This determines the song name (up to eight characters).
Press * to delete the
character at the highlight.
Operation ...............................................................................
1. Move the highlight in the name to the desired position with the left/right cursor buttons (,/.).
2. Change the character at the highlight by using the
rotary dial or the D/I buttons.
& — Insert
This inserts a blank space at the highlight position.
* — Delete
This deletes the character at the highlight position.
After entering the name, press the ) button to return to
the job list, or press one of the MODE buttons to go
directly to the desired mode. (It is not necessary to press
E to enter the specified name.)
NOTE: If a series of asterisks appears in the song name area,
the selected song contains no data and a song name cannot
be assigned.
◆ ◆ ◆ ◆ ◆ ◆ ◆ ◆ ◆ ◆ ◆ ◆ ◆ ◆ ◆ ◆ ◆ ◆ ◆ ◆ ◆ ◆ ◆ ◆ ◆ ◆ ◆ ◆ ◆ ◆ ◆ ◆ ◆ ◆ ◆ ◆ ◆ ◆ ◆ ◆ ◆
161
Song Jobs
● Song Name
F8
162
◆ ◆ ◆ ◆ ◆ ◆ ◆ ◆ ◆ ◆ ◆ ◆ ◆ ◆ ◆ ◆ ◆ ◆ ◆ ◆ ◆ ◆ ◆ ◆ ◆ ◆ ◆ ◆ ◆ ◆ ◆ ◆ ◆ ◆ ◆ ◆ ◆ ◆ ◆ ◆ ◆
R E F E R E N C E
Pattern Jobs
The Pattern mode includes seven different “jobs” (or
operations) that perform a variety of important and
useful functions.
CAUTION: Keep in mind that the Pattern Jobs
permanently alter the data of the selected Patterns.
Pattern Jobs
00: Undo/Redo........................... 164
01: Copy Pattern ....................... 165
02: Append Pattern .................... 166
03: Split Pattern ......................... 167
04: Init (Initialize) Play Effect .... 168
05: Clear Pattern ....................... 168
Pattern Jobs
06: Style Name .......................... 168
◆ ◆ ◆ ◆ ◆ ◆ ◆ ◆ ◆ ◆ ◆ ◆ ◆ ◆ ◆ ◆ ◆ ◆ ◆ ◆ ◆ ◆ ◆ ◆ ◆ ◆ ◆ ◆ ◆ ◆ ◆ ◆ ◆ ◆ ◆ ◆ ◆ ◆ ◆ ◆ ◆
163
To use the Pattern Jobs: .......................................................
Enter the Pattern mode by pressing p.
1.
2. Press j to call up the Pattern Jobs page.
3. Select the desired Job number/title.
Enter the Job number directly from the numeric keypad,
or select the Job by moving the highlight in the normal
manner.
4. Press E to call up the desired Job.
5. For help in using a specific Job, refer to the appropriate explanation in this section.
To exit from the Pattern Jobs, press the ) button or any
of the MODE buttons.
00: Undo/Redo
Same as the corresponding Job in the Song Jobs. (See page
140.)
164
◆ ◆ ◆ ◆ ◆ ◆ ◆ ◆ ◆ ◆ ◆ ◆ ◆ ◆ ◆ ◆ ◆ ◆ ◆ ◆ ◆ ◆ ◆ ◆ ◆ ◆ ◆ ◆ ◆ ◆ ◆ ◆ ◆ ◆ ◆ ◆ ◆ ◆ ◆ ◆ ◆
01: Copy Pattern
Source Pattern
parameters:
• Style
• Section
• Track
Destination Pattern
parameters:
• Style
• Section
• Track
This operation copies all data from a specified track from
one section of a specified style to the specified track of the
specified section of any other specified style. This operation
overwrites the data in the specified destination track with
the data from the source track. Previous data in the overwritten track is therefore lost.
● Destination Section
Settings: Intro, Main A, Main B, Fill AA, Fill BB, Fill AB,
Fill BA, Ending, All
This determines the style section(s) to which the source
data (selected above) is to be copied. A setting of All
selects all sections for copying. (The Source Section
parameter is automatically set to All if All is selected here).
● Source Style
Range:
User bank (Usr): 001 — 100
Preset bank (Pre): 001 — 100
This determines the style from which the data is to be
copied. This is actually two parameters: the bank (User,
Preset) and the style number.
● Source Section
This determines the section(s) of the style from which the
data is to be copied. A setting of All selects all sections for
copying. (The Destination Section parameter is automatically set to All if All is selected here).
Range: 1 — 8, All
This determines the style track(s) to which the source data
(selected above) is to be copied. A setting of All selects all
tracks for copying. (The Source Track parameter is automatically set to All if All is selected here).
Press E to execute the Copy Pattern Job. A “Completed” message appears briefly when the Job is done.
Pattern Jobs
Settings: Intro, Main A, Main B, Fill AA, Fill BB, Fill AB,
Fill BA, Ending, All
● Destination Track
NOTE: When All is selected for the Destination Section or
Destination Track, the Multi parameter data is copied as well.
● Source Track
Range: 1 — 8, All
This determines the track(s) of the style from which the
data is to be copied. A setting of All selects all tracks for
copying. (The Destination Track parameter is automatically
set to All if All is selected here).
● Destination Style
Range: 001 — 100
This determines the style number to which the source data
(selected above) is to be copied.
◆ ◆ ◆ ◆ ◆ ◆ ◆ ◆ ◆ ◆ ◆ ◆ ◆ ◆ ◆ ◆ ◆ ◆ ◆ ◆ ◆ ◆ ◆ ◆ ◆ ◆ ◆ ◆ ◆ ◆ ◆ ◆ ◆ ◆ ◆ ◆ ◆ ◆ ◆ ◆ ◆
165
02: Append Pattern
Source Pattern
parameters:
• Style
• Section
Destination Pattern
parameters:
• Style
• Section
This operation appends the specified section of one style to
the end of the specified section of a second style.
● Source Style
Range: 001 — 100
This determines the style from which the data is to be
copied.
● Source Section
Settings: Intro, Main A, Main B, Fill AA, Fill BB, Fill AB,
Fill BA, Ending
This determines the section of the style from which the data
is to be copied.
● Destination Style
Range: 001 — 100
This determines the style number to which the source data
(selected above) is to be appended.
● Destination Section
Settings: Intro, Main A, Main B, Ending
This determines the style section to which the source data
(selected above) is to be appended. Fills cannot be selected
as the destination since they can be only one measure in
length.
Press E to execute the Append Pattern Job. A
“Completed” message appears briefly when the Job is done.
166
◆ ◆ ◆ ◆ ◆ ◆ ◆ ◆ ◆ ◆ ◆ ◆ ◆ ◆ ◆ ◆ ◆ ◆ ◆ ◆ ◆ ◆ ◆ ◆ ◆ ◆ ◆ ◆ ◆ ◆ ◆ ◆ ◆ ◆ ◆ ◆ ◆ ◆ ◆ ◆ ◆
03: Split Pattern
Starting Measure (for split).
Source Pattern
parameters:
• Style
• Section
Destination Pattern
parameters:
• Style
• Section
This operation splits a specified section of a specified style
into two parts at the specified measure, and moves the latter
half to the specified section of a specified style.
● Source Style
Range: 001 — 100
This determines the style which is to be split.
● Source Section
Settings: Intro, Main A, Main B, Fill AA, Fill BB, Fill AB,
Fill BA, Ending
This determines the section of the style which is to be split.
● Destination Section
Settings: Intro, Main A, Main B, Ending
This determines the style section to which the source data
(selected above) is to be moved.
Press E to execute the Split Pattern Job. A “Completed” message appears briefly when the Job is done.
NOTE:
• If more than 1 measure is split and a Fill is specified as the
destination section, an “Illegal Input” error will occur since
fills can only be one measure long.
• This Job does not copy Voice or play effect data from the
source pattern.
● Starting Measure
Range: 1 — 8 (depending on length of source style)
Pattern Jobs
This determines the starting measure for the split. The
selected measure and all that follow will be split. If a value
of 1 is selected, the entire section will be moved to the
specified destination.
● Destination Style
Range: 001 — 100
This determines the style number to which the source data
(selected above) is to be moved.
◆ ◆ ◆ ◆ ◆ ◆ ◆ ◆ ◆ ◆ ◆ ◆ ◆ ◆ ◆ ◆ ◆ ◆ ◆ ◆ ◆ ◆ ◆ ◆ ◆ ◆ ◆ ◆ ◆ ◆ ◆ ◆ ◆ ◆ ◆ ◆ ◆ ◆ ◆ ◆ ◆
167
04: Init (Initialize) Play Effect
Same as the corresponding Job in the Song Jobs. (See page
159.)
05: Clear Pattern
This operation clears all data from the specified section of
the specified style.
● Section
● Style
This determines the section to be cleared. A setting of All
selects all sections for clearing.
Range: 001 — 100
This determines the style in which the specified section is
to be cleared.
Settings: Intro, Main A, Main B, Fill AA, Fill BB, Fill AB,
Fill BA, Ending, All
Press E to execute the Clear Pattern Job. A “Completed” message appears briefly when the Job is done.
NOTE: When All is selected, the Multi parameter data is
cleared as well.
06: Style Name
This operation allows an original name of up to eight
characters to be assigned to the current Style. The method
168
of entering the name is the same as the corresponding Job
in the Song mode; see page 23 for details.
◆ ◆ ◆ ◆ ◆ ◆ ◆ ◆ ◆ ◆ ◆ ◆ ◆ ◆ ◆ ◆ ◆ ◆ ◆ ◆ ◆ ◆ ◆ ◆ ◆ ◆ ◆ ◆ ◆ ◆ ◆ ◆ ◆ ◆ ◆ ◆ ◆ ◆ ◆ ◆ ◆
R E F E R E N C E
Phrase Jobs
The Phrase mode includes fifteen different “jobs” (or
operations) that perform a variety of important and
useful functions.
CAUTION: Keep in mind that the Phrase Jobs
permanently alter the data of the Phrase.
Phrase Jobs
00: Undo/Redo ........................ 170
01: Quantize .......................... 171
02: Modify Velocity ................ 171
03: Modify Gate Time ............ 171
04: Crescendo ....................... 172
05: Transpose ........................ 172
06: Shift Note ........................ 172
07: Shift Clock ....................... 173
08: Copy Phrase ................... 173
Phrase Jobs
09: Append Phrase ................ 174
10: Split Phrase ..................... 174
11: Get Phrase ...................... 175
12: Put Phrase ...................... 176
13: Clear Phrase ................... 177
14: Phrase Name .................. 177
◆ ◆ ◆ ◆ ◆ ◆ ◆ ◆ ◆ ◆ ◆ ◆ ◆ ◆ ◆ ◆ ◆ ◆ ◆ ◆ ◆ ◆ ◆ ◆ ◆ ◆ ◆ ◆ ◆ ◆ ◆ ◆ ◆ ◆ ◆ ◆ ◆ ◆ ◆ ◆ ◆
169
To use the Phrase Jobs: ........................................................
Enter the Phrase mode by pressing P.
1.
2. Press j to call up the Phrase Jobs page.
3. Select the desired Job number/title.
Enter the Job number directly from the numeric keypad,
or select the Job by moving the highlight in the normal
manner. You can also scroll up and down through the
list in “pages” by simultaneously holding down the
( button and pressing the appropriate cursor
button (< or >).
4. Press E to call up the desired Job.
5. For help in using a specific Job, refer to the appropriate explanation in this section.
To exit from the Phrase Jobs, press the ) button or any
of the MODE buttons.
00: Undo/Redo
Same as the corresponding Job in the Song Jobs. (See page
140.)
170
◆ ◆ ◆ ◆ ◆ ◆ ◆ ◆ ◆ ◆ ◆ ◆ ◆ ◆ ◆ ◆ ◆ ◆ ◆ ◆ ◆ ◆ ◆ ◆ ◆ ◆ ◆ ◆ ◆ ◆ ◆ ◆ ◆ ◆ ◆ ◆ ◆ ◆ ◆ ◆ ◆
01: Quantize
This operation aligns notes in the specified user phrase to
or close to the nearest specified beat. The basic parameters,
functions and operations are the same as for the corresponding Job in the Song mode; see page 141 for details.
02: Modify Velocity
This operation increases or decreases the velocity values of
all notes in the specified user phrase. The basic parameters,
functions and operations are the same as for the corresponding Job in the Song mode; see page 143 for details.
This operation increases or decreases the gate times (duration) of all notes in the specified user phrase. The basic
parameters, functions and operations are the same as for the
Phrase Jobs
03: Modify Gate Time
corresponding Job in the Song mode; see page 141 for
details.
◆ ◆ ◆ ◆ ◆ ◆ ◆ ◆ ◆ ◆ ◆ ◆ ◆ ◆ ◆ ◆ ◆ ◆ ◆ ◆ ◆ ◆ ◆ ◆ ◆ ◆ ◆ ◆ ◆ ◆ ◆ ◆ ◆ ◆ ◆ ◆ ◆ ◆ ◆ ◆ ◆
171
04: Crescendo
This operation produces a gradual crescendo (increase in
note velocity) or decrescendo (decrease in note velocity) in
the specified user phrase over the specified range of
measures. The basic parameters, functions and operations
are the same as for the corresponding Job in the Song
mode; see page 145 for details.
05: Transpose
This operation transposes all notes in the specified user
phrase up or down by the specified number of semitones.
The basic parameters, functions and operations are the same
as for the corresponding Job in the Song mode; see page
146 for details.
06: Shift Note
This operation changes the pitch of all specified notes
within the specified user phrase. The basic parameters,
172
functions and operations are the same as for the corresponding Job in the Song mode; see page 147 for details.
◆ ◆ ◆ ◆ ◆ ◆ ◆ ◆ ◆ ◆ ◆ ◆ ◆ ◆ ◆ ◆ ◆ ◆ ◆ ◆ ◆ ◆ ◆ ◆ ◆ ◆ ◆ ◆ ◆ ◆ ◆ ◆ ◆ ◆ ◆ ◆ ◆ ◆ ◆ ◆ ◆
07: Shift Clock
This operation moves all notes and events in the specified
track and range of measures forward or backward by the
specified number of clocks (96 clocks = 1/4 note). The
basic parameters, functions and operations are the same as
for the corresponding Job in the Song mode; see page 148
for details.
08: Copy Phrase
Source Phrase:
• Instrument Category
• Beat
• Type
• Number/Name
Source Chord
Destination Phrase
This operation copies the specified preset or user phrase to
a specified user phrase number, using the specified source
chord.
L Number/Name
Range: 001 — 100
● Source Chord
● Source Phrase
L Instrument Category
Settings: User (US); Preset: Drums (DR), Percussion
(PC), Bass (BA), Guitar Chord (GC), Guitar Riff
(GR), Keyboard Chord (KC), Keyboard Riff (KR)
Select US for the User Phrases; any other for Preset
Phrases.
This determines the source chord with which the phrase
will be copied. Enter the chord root and type by using the
standard chord entry procedure (see page 124).
● Destination Phrase
Range: 001 — 100
This determines the user phrase to which the source phrase
will be copied.
Press E to execute the Copy Phrase Job. A “Completed” message appears briefly when the Job is done.
L Beat
Settings: 8 beat (08), 16 beat (16), 3/4 time (34)
L Type
Settings: Main (M), Fill Loop (O), Fill Cross (X), Intro (I),
Ending (E), Specific (S), General (G)
◆ ◆ ◆ ◆ ◆ ◆ ◆ ◆ ◆ ◆ ◆ ◆ ◆ ◆ ◆ ◆ ◆ ◆ ◆ ◆ ◆ ◆ ◆ ◆ ◆ ◆ ◆ ◆ ◆ ◆ ◆ ◆ ◆ ◆ ◆ ◆ ◆ ◆ ◆ ◆ ◆
173
Phrase Jobs
This determines the preset or user phrase to be copied.
This is actually divided into four separate parameters:
Instrument Category, Beat, Type, and Number/Name.
09: Append Phrase
This operation appends the specified user phrase to the end
of a second specified user phrase.
● Destination Phrase
Range: 001 — 100
This determines the user phrase to which the data is to be
appended.
● Source Phrase
Range: 001 — 100
This determines the user phrase from which the data is to
be copied.
Press E to execute the Append Phrase Job. A “Completed” message appears briefly when the Job is done.
10: Split Phrase
Starting Measure (for split).
Source Phrase
Destination Phrase
This operation splits a specified user phrase into two parts
at the specified measure, and moves the latter half to
another specified user phrase.
● Source Phrase
Range: 001 — 100
This determines the user phrase which is to be split.
● Destination Phrase
Range: 001 — 100
This determines the user phrase to which the source data
(selected above) is to be moved.
Press E to execute the Split Phrase Job. A “Completed” message appears briefly when the Job is done.
● Starting Measure
Range: 1 — 8 (depending on length of source phrase)
This determines the starting measure for the split. The
selected measure and all that follow will be split. If a value
of 1 is selected, the entire phrase will be moved to the
specified destination.
174
◆ ◆ ◆ ◆ ◆ ◆ ◆ ◆ ◆ ◆ ◆ ◆ ◆ ◆ ◆ ◆ ◆ ◆ ◆ ◆ ◆ ◆ ◆ ◆ ◆ ◆ ◆ ◆ ◆ ◆ ◆ ◆ ◆ ◆ ◆ ◆ ◆ ◆ ◆ ◆ ◆
11: Get Phrase
Measure Range
Source Song
Source Track
Destination Phrase
This operation copies the data from a specified range of
measures in a certain track of a certain song to the specified
user phrase. Get Phrase is the reverse operation of Put
Phrase (Job 12): It allows you to take recorded data from a
song and make a phrase from it, which you can then use
with the automatic accompaniment features.
● Source Song
Range: 01 — 10
This determines the song from which the data is to be
copied.
● Destination Phrase
This determines the user phrase to which the data is to be
copied.
Press E to execute the Get Phrase Job. A “Completed” message appears briefly when the Job is done.
HINT: The Get Phrase Job is a convenient way to create new
phrases by copying a few appropriate measures from songs.
In fact, it’s sometimes easier to create phrases in the Song
mode and then copy them to the Phrase mode using the Get
Phrase Job, simply because the Song mode lets you hear what
you’re recording as you’re recording.
● Source Track
Range: 01 — 16
This determines the track from which the data is to be
copied
● Measure Range
Measure Range is actually two separate settings (as shown
below). These determine the range of the play data that is
to be copied.
Phrase Jobs
First measure.
Last measure.
◆ ◆ ◆ ◆ ◆ ◆ ◆ ◆ ◆ ◆ ◆ ◆ ◆ ◆ ◆ ◆ ◆ ◆ ◆ ◆ ◆ ◆ ◆ ◆ ◆ ◆ ◆ ◆ ◆ ◆ ◆ ◆ ◆ ◆ ◆ ◆ ◆ ◆ ◆ ◆ ◆
175
12: Put Phrase
Source Phrase
Measure Range
Destination Song
Destination Track
This operation copies the data from a specified user phrase
to the specified range of measures in the specified track of
a specified song. Put Phrase is the reverse operation of Get
Phrase (Job 11): It allows you to take a user phrase and put
it into a song as normal recorded data.
● Source Phrase
This determines the user phrase from which the data is to
be copied.
● Measure Range
Measure Range is actually two separate settings (as shown
below). These determine the range of the play data that is
to be copied.
First measure.
Last measure.
● Destination Song
Range: 01 — 10
This determines the song to which the data is to be copied.
● Destination Track
Range: 01 — 16
This determines the track to which the data is to be copied.
Press E to execute the Put Phrase Job. A “Completed” message appears briefly when the Job is done.
NOTE: The time signature of the phrase will not affect the time
signature of the song.
176
◆ ◆ ◆ ◆ ◆ ◆ ◆ ◆ ◆ ◆ ◆ ◆ ◆ ◆ ◆ ◆ ◆ ◆ ◆ ◆ ◆ ◆ ◆ ◆ ◆ ◆ ◆ ◆ ◆ ◆ ◆ ◆ ◆ ◆ ◆ ◆ ◆ ◆ ◆ ◆ ◆
13: Clear Phrase
This operation completely clears all data from the specified
user phrase. The basic parameters, functions and operations
are the same as for the corresponding Job in the Song
mode; see page 160 for details.
14: Phrase Name
Phrase Jobs
This operation allows an original name of up to eight
characters to be assigned to the specified user phrase. The
method of entering the name is the same as the corresponding Job in the Song mode; see page 161 for details.
◆ ◆ ◆ ◆ ◆ ◆ ◆ ◆ ◆ ◆ ◆ ◆ ◆ ◆ ◆ ◆ ◆ ◆ ◆ ◆ ◆ ◆ ◆ ◆ ◆ ◆ ◆ ◆ ◆ ◆ ◆ ◆ ◆ ◆ ◆ ◆ ◆ ◆ ◆ ◆ ◆
177
178
◆ ◆ ◆ ◆ ◆ ◆ ◆ ◆ ◆ ◆ ◆ ◆ ◆ ◆ ◆ ◆ ◆ ◆ ◆ ◆ ◆ ◆ ◆ ◆ ◆ ◆ ◆ ◆ ◆ ◆ ◆ ◆ ◆ ◆ ◆ ◆ ◆ ◆ ◆ ◆ ◆
R E F E R E N C E
Editing Songs and Phrases
The QS300 features comprehensive and flexible
editing controls that make it easy to correct mistakes
or unwanted Song or Phrase data, and generally help
you to refine your sound.
The Edit functions for both Song and Phrase are
actually divided into two different modes: Edit
Change and Edit Insert. The Edit Change mode lets
you individually modify the timing, pitch (note), gate
time (length) and velocity (loudness) of each recorded
note. It also allows you to change the data values of
other recorded events, such as pitch bend, program
change and after touch. The Edit Insert mode, on the
other hand, allows insertion of note, pitch bend,
program change, control change, after touch, or
exclusive events at any point in the Song or Phrase.
Editing Songs and Phrases
Edit Change Mode .........180
Edit Insert Mode ............184
Editing Songs and Phrases
◆ ◆ ◆ ◆ ◆ ◆ ◆ ◆ ◆ ◆ ◆ ◆ ◆ ◆ ◆ ◆ ◆ ◆ ◆ ◆ ◆ ◆ ◆ ◆ ◆ ◆ ◆ ◆ ◆ ◆ ◆ ◆ ◆ ◆ ◆ ◆ ◆ ◆ ◆ ◆ ◆
179
Edit Change Mode
In the Edit Change mode, you can modify various parameters for each individual note or event.
1. From the Song or Phrase mode, press e to enter
the corresponding Edit mode.
● Song Edit Mode Display (Edit Change):
Measure
number
Top (beginning)
of song.
Event line
Track Number/Name
● Phrase Edit Mode Display (Edit Change):
The timing, note, gate time, and velocity values for each
note are shown on a single line of the display. These
are called Event lines and are arranged in order from top
to bottom. Each time you select an Event line (that
contains a note), the corresponding note plays automatically, letting you hear the notes to be edited.
In addition to the Event lines, there are markers for the
top of the song, measure lines, and the end of the song.
3. With an Event line highlighted, change the note
location, pitch, gate time, or velocity as desired.
Then, press E to actually change the value, or
highlight another Event line to cancel the change.
The Phrase Edit display is virtually the same as the
Song Edit, the only difference being that the Phrase Edit
display has no track-related functions. [The track
number and name does not appear, and the Change
Track (ChngTr) and Track Name (TrNam) functions are
not available.]
When you make a change in any value, the entire Event
line flashes. You can then press E to actually
enter the change, or move to another Event line to avoid
changing the value.
Velocity (dynamic
indication)
Measure/Beat/Clock
In the Song mode, select the Song and track you wish to
edit. In the Phrase mode, select the User Phrase you
wish to edit. When you call up the Edit mode, the Edit
Change mode is automatically selected.
Measure number
Velocity
NOTE:
• Only User Phrases can be edited; the Edit mode cannot
be called up when a Preset Phrase is selected.
• The Edit mode is available only in the Song and Phrase
modes.
Note
2.
Move the highlight to the desired Event line.
To do this:
• Use the cursor </> buttons to select individual Event lines and scroll through the notes and
measures.
• Highlight the Measure parameter, and use any data
entry control to change the current measure.
• Use the k/l buttons to scroll through the
measures; hold either button down to scroll continuously.
180
Gate Time
Note Value (notation
symbol)
• To enter a new location for the note: ...............................
Highlight the Measure, Beat or Clock parameter (the
hyphenated values at the left of the Event line), and change
as desired.
The parameters from left to right are: Measure-Beat-Clock.
Beat is the 1/4-note beat within the current measure (1
through 4 in a 4/4 measure). Clock is the clock within that
beat (0 through 95). The Measure parameter appears only
when the Event line is selected.
◆ ◆ ◆ ◆ ◆ ◆ ◆ ◆ ◆ ◆ ◆ ◆ ◆ ◆ ◆ ◆ ◆ ◆ ◆ ◆ ◆ ◆ ◆ ◆ ◆ ◆ ◆ ◆ ◆ ◆ ◆ ◆ ◆ ◆ ◆ ◆ ◆ ◆ ◆ ◆ ◆
• To enter a new pitch for the note: ....................................
Highlight the Note parameter and play the desired note on
the keyboard, or use the D/I buttons or rotary dial.
● For controllers such as pitch bend and after touch:
Highlight the Data parameter and change as desired.
Pitch Bend.
Data Value.
The note range is from C-2 to G8.
Graphic indication
of value.
• To enter a new note duration: ..........................................
Highlight the Gate Time (Gate) parameter value, and
change as desired; or highlight the note symbol and use the
numeric keypad.
Gate Time is the length of the note in clocks. A normal 1/4
note, for example, is 86 clocks long. This is about 90% of
the actual length of a 1/4-note division, which is 96 clocks.
The “normal” length of the note is slightly shortened to
prevent notes from running into each other and sounding
slurred (a slur is produced by setting the full note length).
The left number is 1/4-note beats (96-clock units) and the
right number is clocks. The range is from 00-00 to 99-95.
The simplest and most efficient way to enter note lengths is
by using the numeric keypad, pressing the button corresponding to the desired note value. (The note values are
printed directly above the buttons.)
● For bank select/program change data:
Highlight the appropriate parameter and change as desired.
This contains three parameters, from left to right: Bank
High, Bank Low, and Program Number (No.).
Program Change
Bank High-Bank
Low-Program Number
Voice name
• To enter a new note volume: .............................................
Highlight the Velocity (Vel) parameter value, and change as
desired; or highlight the dynamic indication and use the
numeric keypad.
This parameter controls the velocity (loudness) of the note.
The range is from 001 to 127.
A simple and efficient way to enter note velocities is by
using the numeric keypad, pressing the button corresponding to the desired dynamic value. (The dynamic values are
printed directly above the buttons.)
● For controller numbers (0 - 127):
Highlight and change the controller number (Ctl), then
highlight and change the Data value as desired. (See
Controller List below.)
Controller name
(in this example,
Modulation).
Controller
Number (Ctl),
Data value.
Graphic indication
of data value.
To Change Controller Data
Editing Songs and Phrases
You can also change controller data values from the Edit
Change mode. Controllers include pitch bend, after touch,
modulation, sustain (damper switch), MIDI volume,
portamento, and many others.
1. Highlight the desired Event line containing controller
data.
2. Highlight the appropriate parameter and change the
value. Press E to actually change the value, or
highlight another Event line to cancel the change.
◆ ◆ ◆ ◆ ◆ ◆ ◆ ◆ ◆ ◆ ◆ ◆ ◆ ◆ ◆ ◆ ◆ ◆ ◆ ◆ ◆ ◆ ◆ ◆ ◆ ◆ ◆ ◆ ◆ ◆ ◆ ◆ ◆ ◆ ◆ ◆ ◆ ◆ ◆ ◆ ◆
181
Controller List
Number
(Ctl)
Display
Indication
Controller Name
000, 002, 003,
008, 009,
012-037, etc.
CC
Control change. (This is shown
for all controller numbers that do
not have commonly recognized
names.)
001
Mod
Modulation.
004
FC1
Foot Controller 1.
005
PrtT
Portamento time.
006
DatM
Data entry MSB.
007
Vol
Volume.
010
Pan
Panpot.
011
Exp
Expression.
038
DatL
Data entry LSB.
064
Sus
Sustain (damper pedal).
065
Prt
Portamento.
066
Sos
Sostenuto.
067
Soft
Soft pedal.
071
Harm
Harmonic content.
072
RlsT
Release time (of EG).
073
AtkT
Attack time (of EG).
074
Brgt
Brightness.
084
PrtC
Portamento control.
091
Rev
Reverb send level.
093
Cho
Chorus send level.
094
Vari
Variation send level.
096
DatI
Data entry increment.
097
DatD
Data entry decrement.
098
NRPL
NRPN LSB.
099
NRPM
NRPN MSB.
100
RPNL
RPN LSB.
101
RPNM
RPN MSB.
120
SnOf
All sound off.
121
RstC
Reset all controllers.
124
OmOf
Omni off.
125
OmOn
Omni on.
126
Mono
Mono.
127
Poly
Poly.
182
● For System Exclusive data:
Highlight the Data parameter.
System Exclusive Data
When the Data parameter is highlighted, the following
popup window appears:
F1
F2
F3
F4
F5
F6
F7
F8
Pressing these enters the corresponding letter for the hexadecimal
value.
Select the desired hexadecimal byte (numbers separated by
dots) and change as needed. Use # - * to enter the
letters A - F, and use the numeric keypad to enter numbers.
The D/I buttons and rotary dial can also be used.
Press E to actually enter the new value.
◆ ◆ ◆ ◆ ◆ ◆ ◆ ◆ ◆ ◆ ◆ ◆ ◆ ◆ ◆ ◆ ◆ ◆ ◆ ◆ ◆ ◆ ◆ ◆ ◆ ◆ ◆ ◆ ◆ ◆ ◆ ◆ ◆ ◆ ◆ ◆ ◆ ◆ ◆ ◆ ◆
■ Other Functions
● ! — Delete
This deletes the event (note or controller data) at the
highlight position.
● @ — Insert (Insrt)
This calls up the Edit Insert mode for inserting an event
(note or controller data) at the highlight position. (See
Edit Insert Mode below.)
● # — Change Track (ChngTr)
Pressing this lets you select a different track for editing.
To use Change Track: ...............................................
1. Press #. The Track Number parameter is
automatically highlighted.
2. Use any data entry method to select a track: 1
- 16, or the Tempo track. (For details on
editing the Tempo track, see page 186.)
3. Press E (or # again, or )) to
change to the newly selected track.
F1
F2
F3
F4
F5
F6
F7
F8
Track Name
For naming the current track.
(Song mode only.)
Change Track
For changing to another track.
(Song mode only.)
Insert
For calling up the Edit Insert mode.
(See below.)
Delete
For deleting highlighted event.
● $ — Track Name (TrNam)
This lets you specify a name for the track. (For instructions on entering names, see page 161.) When done
entering the name, press ).
Editing Songs and Phrases
◆ ◆ ◆ ◆ ◆ ◆ ◆ ◆ ◆ ◆ ◆ ◆ ◆ ◆ ◆ ◆ ◆ ◆ ◆ ◆ ◆ ◆ ◆ ◆ ◆ ◆ ◆ ◆ ◆ ◆ ◆ ◆ ◆ ◆ ◆ ◆ ◆ ◆ ◆ ◆ ◆
183
Edit Insert Mode
The Edit Insert mode allows you to insert new notes and
other events at any specified point in the Song or Phrase.
1. Within the Edit Change mode (above), highlight the
Event line at which the desired data is to be inserted.
NOTE: You can specify the location later in step 3, if you
want. However, it is usually easier to find the location in
the Edit Change mode, then insert an event at that point.
2. Press @ to enter the Edit Insert mode.
3. Highlight and change the Insert Location, if desired.
4. Highlight the Event Type parameter and select the
Pitch Bend (Bend)
Pitch bend events can be used to produce pitch bend
effects. The amount of pitch bend produced by each event
can be set from -8192 through +00 to +8191. Each increment corresponds to a fraction of a semitone. To produce
smooth pitch bends you’ll need to insert several small pitch
bend events, appropriately spaced, to create smooth pitch
bend effects. Remember to use more pitch bend effects to
return the pitch to normal (+00) after a bend. A graphic bar
in the display indicates the amount of pitch bend applied —
positive bends move the bar to the right and negative bends
move the bar to the left.
desired type of event.
3. Highlight and change Insert Location, if desired.
Insert Location is displayed as Measure-Beat-Clock.
Previous Event line.
Pitch bend value
Graphic indication
of value
Program Change (PC)
Event parameters
4. Highlight Event Type and select desired type of
event.
5. Set the Event parameters as desired.
Refer to the explanations below for each event type and
its parameters: Note, Pitch Bend, Program Change,
Control Change, Channel After Touch, Key After Touch,
and System Exclusive.
Note
New notes can be inserted at any specified location. The
note parameters are the same as those available in the Edit
Change mode and the values can be edited in the same way.
(See page 180.)
Program change events can be used to switch voices at any
point in the track. The program change parameter has three
sections: The MSB (most significant byte) of the bank
select number, the LSB (least significant byte) of the bank
select number, and the program change number itself. The
range of the bank select parameters is 0 to 127, while the
program change range is 001 to 128.
The bank select parameters make it possible to select any
Voice in any of the banks of the QS300 (or any other MIDI
instrument that has more than 128 programs). Generally,
the MSB should be set to 000, and the LSB to the corresponding bank number. For example, if you want to select
the User bank, set the LSB to 000 and the MSB to 063.
The name of the selected Voice is shown at the right.
Bank Select MSB
Pitch
184
Note length
Velocity
Program Change
number
Voice
name
Bank Select LSB
◆ ◆ ◆ ◆ ◆ ◆ ◆ ◆ ◆ ◆ ◆ ◆ ◆ ◆ ◆ ◆ ◆ ◆ ◆ ◆ ◆ ◆ ◆ ◆ ◆ ◆ ◆ ◆ ◆ ◆ ◆ ◆ ◆ ◆ ◆ ◆ ◆ ◆ ◆ ◆ ◆
Control Change (CC)
Control change events can be used to apply modulation,
sustain, volume, and other types of control according to the
standard MIDI control change controller assignments.
(Refer to the list on page 182.) The left parameter is the
control change number (the type of control), and the right
parameter is the control change value (the amount of
control). The control change value is also represented
graphically by a bar in the display. The range of both
parameters is 000 to 127.
K ey After Touch (KeyAT)
Key aftertouch allows independent aftertouch values to be
applied to each note played. This event has two parameters: a note number and a value. The note number corresponds to standard MIDI note number assignments and can
be entered from the keyboard (C-2 - G8). The range of
both parameters is 000 to 127. The amount of after touch
“pressure” is also represented graphically by a bar in the
display.
Note number
Control Change
number
Graphic indication
of value
Graphic indication
of value
After touch value
Control Change
value
System Exclusive (Excl)
Channel After Touch (ChAT)
This event can be used to apply channel (monophonic)
aftertouch, in which pressure on any key controls all notes
being played by the same amount. The range is 0 to 127.
The amount of after touch “pressure” is also represented
graphically by a bar in the display.
This event allows you to insert 16-byte system exclusive
data blocks (first byte is fixed at F0) in the sequence data to
control external MIDI devices as required. Move the cursor
to any of the data byte locations following the initial F0
byte and enter the hexadecimal number directly using the
function buttons F3 - F8 (to enter A - F) and the numeric
keypad (to enter 0 - 9). The D/I buttons and rotary
dial can also be used.
Spaces between the dots are
data entry locations.
Graphic indication
of value
F1
F2
F3
F4
F5
F6
F7
Editing Songs and Phrases
Channel after touch
value
F8
Use function buttons # - * to
enter hexadecimal numbers A - F.
NOTE: In the Edit Change mode, system exclusive events can
be displayed in the Event line only up to the first eight bytes.
◆ ◆ ◆ ◆ ◆ ◆ ◆ ◆ ◆ ◆ ◆ ◆ ◆ ◆ ◆ ◆ ◆ ◆ ◆ ◆ ◆ ◆ ◆ ◆ ◆ ◆ ◆ ◆ ◆ ◆ ◆ ◆ ◆ ◆ ◆ ◆ ◆ ◆ ◆ ◆ ◆
185
■ Editing the Tempo Track
The Edit Insert mode can also be used for the Tempo
track.
3. Highlight and change the Insert Location parameter,
1. From the Edit Change mode display, press #
4. Highlight either part of the Tempo parameter and
(ChngTr) and select the Tempo track.
if desired.
change the value.
Tempo (Tmp) is the only parameter here, and the
range is 25.0 to 300.0.
To actually insert the new Tempo event, go on to
step 6 in the main instructions below.
2. Press @ (Insrt) to call up the Edit Insert mode for
the Tempo track.
Insert Location
Tempo
6. Enter the event by pressing E.
A click sounds as the event is entered. (When a note is
entered, the actual note sounds.)
7. Press ) to return to the Edit Change mode, and
continue editing as desired.
Events that you’ve inserted (with the exception of
system exclusive) can be edited in the Edit Change
mode. If you want to delete the event you’ve just
inserted, select the appropriate Event line in Edit
Change, then press ! (Delete).
To return to the Song or Phrase mode, press the corresponding mode button or press ).
186
◆ ◆ ◆ ◆ ◆ ◆ ◆ ◆ ◆ ◆ ◆ ◆ ◆ ◆ ◆ ◆ ◆ ◆ ◆ ◆ ◆ ◆ ◆ ◆ ◆ ◆ ◆ ◆ ◆ ◆ ◆ ◆ ◆ ◆ ◆ ◆ ◆ ◆ ◆ ◆ ◆
R E F E R E N C E
Utility Mode
The Utility mode includes a number of functions that
are important for general operation. These functions
include MIDI data handling, interfacing with external
equipment, global sequencer settings and controls,
ABC system operation, and more.
Utility
Synthesizer Setup .................. 188
MIDI Setup .............................. 190
MIDI Input Filter ...................... 191
Sequencer Setup .................... 192
Fingered Chord Zone ............. 193
Others Setup ........................... 194
Utility Mode
◆ ◆ ◆ ◆ ◆ ◆ ◆ ◆ ◆ ◆ ◆ ◆ ◆ ◆ ◆ ◆ ◆ ◆ ◆ ◆ ◆ ◆ ◆ ◆ ◆ ◆ ◆ ◆ ◆ ◆ ◆ ◆ ◆ ◆ ◆ ◆ ◆ ◆ ◆ ◆ ◆
187
To use the Utility mode: .......................................................
Enter the Utility mode by pressing u.
1.
2. Press the appropriate function button (! - ^) to
call up the desired page of functions.
Refer to the explanations below for help in using
specific pages and their functions.
To exit from the Utility mode, press the ) button or
any of the other MODE buttons.
Utility
Path:
Synthesizer Setup
u ➞ ! (Synth)
Keyboard
Transpose
In the
•
•
•
•
Master
Tuning
Synthesizer Setup page, you can set:
Overall transpose and tuning
Velocity Curve
FOOT VOLUME controller assignment
Tone generation System mode
● Keyboard Transpose
Range: -36 — +36 semitones
This determines the amount by which the keyboard note
data is transposed. This is a global setting that affects the
Voice played in the Voice mode, data recorded to the
sequencer, and the data transmitted via the MIDI OUT
terminal.
188
Velocity
Curve
Foot Volume
Control
System
Mode
● Master Tuning
Range: -99 — +99 cents (+/- 1 semitone)
This determines the overall tuning of the instrument. (At a
pitch of 440 Hz, 4 cents equals approximately 1 Hz.)
● Velocity Curve
Settings: normal, soft 1, soft 2, easy, wide, hard, cross 1,
cross 2
This determines how the strength of your playing affects
the overall volume of the instrument. The various curves
let you tailor the velocity response to your particular needs
or technique. This is a global setting that affects the Voice
played in the Voice mode, data recorded to the sequencer,
and the data transmitted via the MIDI OUT terminal.
◆ ◆ ◆ ◆ ◆ ◆ ◆ ◆ ◆ ◆ ◆ ◆ ◆ ◆ ◆ ◆ ◆ ◆ ◆ ◆ ◆ ◆ ◆ ◆ ◆ ◆ ◆ ◆ ◆ ◆ ◆ ◆ ◆ ◆ ◆ ◆ ◆ ◆ ◆ ◆ ◆
● Foot Volume Control
Settings: volume (MIDI Volume, controller #7), expres
(MIDI Expression, controller #11)
This determines the MIDI controller assignment for the foot
controller connected to the FOOT VOLUME jack. When
this is set to volume, foot controller movements are transmitted as controller number 7 (Volume); when set to
expres, they are transmitted as controller number (Expression).
● System Mode
Settings: norm (normal), TG-B (TG300B)
This determines the basic tone generation mode of the
QS300. The norm setting provides compatibility with GM
and XG song data, while the TG-B setting provides semicompatibility with popular computer music software. The
TG-B setting is indicated in the display by a “B” in the
mode bar at the top left (as shown below).
Indicates TG300B mode.
NOTE: When the System Mode is set to TG-B:
• Voice Edit mode and Voice Job setting cannot be made.
• Pattern mode and Phrase mode settings cannot be made.
• Pattern Track (in Song mode) is not available.
Utility Mode
◆ ◆ ◆ ◆ ◆ ◆ ◆ ◆ ◆ ◆ ◆ ◆ ◆ ◆ ◆ ◆ ◆ ◆ ◆ ◆ ◆ ◆ ◆ ◆ ◆ ◆ ◆ ◆ ◆ ◆ ◆ ◆ ◆ ◆ ◆ ◆ ◆ ◆ ◆ ◆ ◆
189
Utility
Path:
MIDI Setup
u ➞ @ (MIDI)
Local Control
In the
•
•
•
Device
Number
MIDI Setup page, you can set:
Local control
Device Number
MIDI Transmit/Receive channels for the Voice mode
● Local Control
Settings: off, on
This determines whether the keyboard is “connected” to the
internal tone generator of the QS300. When this is set to
on (normal condition), the Voices respond to notes played
from the keyboard of the QS300. When this is set to off,
the Voices respond only to incoming MIDI data or the
recorded data of the sequencer.
Voice Mode
Receive Channel
Voice Mode
Keyboard Transmit Channel
● Voice Mode Keyboard Transmit Channel
(TrnsCh)
Range: 1 — 16
This determines which MIDI channel the QS300 transmits
over when in the Voice mode.
● Voice Mode Receive Channel (RcvCh)
Range: 1 — 16, omni
This determines which MIDI channel the QS300 responds
to when in the Voice mode. A setting of omni will enable
the QS300 to receive over all MIDI channels simultaneously.
● Device Number
Settings: off, 1 — 16, all
This determines the Device Number for the QS300, a kind
of MIDI “identification” number used to distinguish
between multiple units. For example, if you are using more
than one QS300 in a MIDI chain, set a different Device
Number for each unit.
When all is selected here, MIDI data is received over
channel 1.
190
◆ ◆ ◆ ◆ ◆ ◆ ◆ ◆ ◆ ◆ ◆ ◆ ◆ ◆ ◆ ◆ ◆ ◆ ◆ ◆ ◆ ◆ ◆ ◆ ◆ ◆ ◆ ◆ ◆ ◆ ◆ ◆ ◆ ◆ ◆ ◆ ◆ ◆ ◆ ◆ ◆
Utility
Path:
MIDI Input Filter
u ➞ # (MIDIFlt)
The MIDI Filter page has one function: MIDI Filter. The
MIDI Filter allows you to set whether or not the tone
generator and sequencer of the QS300 respond to certain
types of MIDI data. This can be useful especially in
recording, since you can filter out data types that you don’t
need, and thus save memory for additional recording.
Control
Change
This filter can be used to block reception of
all control change events: modulation, breath
controller, volume, sustain pedal, etc. Control
change bank select numbers 0 and 32 are
affected by the Bank Change filter (below),
not this filter.
To use the MIDI Filter: ........................................................
1. Select the desired data type in the display with the
cursor buttons.
Program
Change
The program change filter can be turned on if
you want to switch voices on an external
keyboard or other controller without switching
the QS300 voices at the same time.
2. Use the D/I buttons to turn the filter off or
NRPN
This filter blocks NRPN (non-registered
parameter number) data. NRPNs are
controllers that have been created by one or
more manufacturers, but have not been
added to the MIDI specification, and thus
may be found on some instruments and not
others.
Pitch Bend
Turn this filter on if you do not want to record
pitch bend data, or if you simply don’t want
received pitch bend data to affect the sound.
Bank
Change
This filter can be used to block incoming
bank select messages.
System
Exclusive
(Sys Excl)
This filter can be used to block reception of
all system exclusive data.
on, respectively.
The small square next to the data type indicates the status:
— The filter is on and the selected data will not be
received.
— The filter is off and the data can be received.
Note data filter. This filter should normally be
turned off to allow reception of all note data.
Key After
Touch
(Key AT)
After touch generates a lot of data that can
rapidly fill the available memory if used
indiscriminately. When on, this filter blocks
reception of polyphonic aftertouch data.
Channel
After Touch
(Ch AT)
Similar to Key After Touch, however this filter
blocks reception of monophonic (channel)
after touch data.
◆ ◆ ◆ ◆ ◆ ◆ ◆ ◆ ◆ ◆ ◆ ◆ ◆ ◆ ◆ ◆ ◆ ◆ ◆ ◆ ◆ ◆ ◆ ◆ ◆ ◆ ◆ ◆ ◆ ◆ ◆ ◆ ◆ ◆ ◆ ◆ ◆ ◆ ◆ ◆ ◆
Utility Mode
Note
191
Utility
Path:
Sequencer Setup
u ➞ $ (Seq)
Click (metronome) parameters:
• Beat
• Mode
• Volume
Transpose
In the Sequencer Setup page, you can set global controls
affecting the built-in sequencer. These controls include:
• Click (metronome) settings
• Transposition of sequencer data
• MIDI Sync
• MIDI Control
• Interval Time (for data transmission)
,
MIDI Control
Interval Time
● Transpose (Trans)
Range: -12 — +12 semitones
This determines the key transposition of the sequencer
tracks. This setting does not affect tracks that are set to
drum Voices, nor Phrases for which the Phrase Type is set
to “Drums” (see page 131).
● MIDI Sync
● Click Beat
Settings:
MIDI Sync
Settings: int (internal), MIDI
,
,
,
This determines on what beat the metronome will sound.
The metronome sounds on every sixteenth note.
The metronome sounds on every eighth note.
The metronome sounds on every quarter note.
The metronome sounds on every half note.
The metronome sounds on every whole note beat.
This determines whether the sequencer tempo is controlled
by the QS300’s internal clock (int) or by MIDI clock data
from an external sequencer or computer (MIDI). You
should set this to MIDI when you want to “slave” the
QS300 to an external sequencer; otherwise, set it to int.
Note that the sequencer will not run on its own when this is
set to MIDI.
● MIDI Control (MIDI Ctrl)
Settings: off, on
● Click Mode
Settings: off, rec, play, all
This determines when (during which operations) the
metronome sounds.
off
Metronome off.
rec
Metronome sounds during realtime recording only.
play
Metronome sounds during realtime recording and
playback.
all
Metronome sounds at all times.
● Click Volume (Vol)
This determines whether MIDI control of the sequencer is
on or off. Normally, this should be set to on. When set to
off, the sequencer will not respond to or transmit the
following MIDI messages: Song Position (F2h), Song
Select (F3h), Timing Clock (F8h), Start (FAh), Continue
(FBh), and Stop (FCh).
● Interval Time (Intrvl Time)
Range: 0 — 9 (x 100) milliseconds
This determines the delay time between exclusive data
blocks between 0 and 900 milliseconds in 100-millisecond
increments. This type of delay is sometimes necessary to
allow an external device to receive the data without errors.
Range: 0 — 127
This determines the level of the metronome sound.
192
◆ ◆ ◆ ◆ ◆ ◆ ◆ ◆ ◆ ◆ ◆ ◆ ◆ ◆ ◆ ◆ ◆ ◆ ◆ ◆ ◆ ◆ ◆ ◆ ◆ ◆ ◆ ◆ ◆ ◆ ◆ ◆ ◆ ◆ ◆ ◆ ◆ ◆ ◆ ◆ ◆
Utility
Path:
Fingered Chord Zone
u ➞ % (FngZon)
Fingered Chord
Switch
Range parameters:
• Low Key
Range parameters:
• High Key
In the Fingered Zone page, you can turn the ABC (Auto
Bass Chord) automatic accompaniment system on or off,
and set the range (or “zone”) over which ABC chords will
be recognized.
● Range Parameters
● Fingered Chord Switch
These two parameters determine the range over which ABC
chords are recognized. These can be set with the panel
controls, or directly from the keyboard itself. Keep in mind
that the Low Key setting cannot be higher than the High
Key. The specified range is indicated in reverse display
(i.e., white keys appear as black) on the keyboard graphic
in the display. Also keep in mind that any keys played in
this range will not sound normally, but will be used to
determine the accompaniment chords when a Pattern is
playing.
Settings: off, on
This determines whether the ABC automatic accompaniment feature is off or on.
When the Fingered Chord Switch and the Fng parameter in
the Song or Pattern mode display are set to on, chords
played within the specified ABC range (set below) will be
recognized by the ABC system and the accompaniment
chord will change accordingly during song playback or
chord-track recording (see note below). For a list of the
recognized chords, see the separate “Sound Lists and MIDI
Data” supplement.
• Low Key
Range: C-2 — G8
• High Key
Range: C-2 — G8
NOTE: ABC chord changes will be ignored during step or
realtime recording of any track other than the chord track, and
in the Edit or Job modes.
Utility Mode
◆ ◆ ◆ ◆ ◆ ◆ ◆ ◆ ◆ ◆ ◆ ◆ ◆ ◆ ◆ ◆ ◆ ◆ ◆ ◆ ◆ ◆ ◆ ◆ ◆ ◆ ◆ ◆ ◆ ◆ ◆ ◆ ◆ ◆ ◆ ◆ ◆ ◆ ◆ ◆ ◆
193
Utility
Others Setup
u ➞ ^ (Others)
Path:
LCD Contrast
F1
F2
F3
F4
F5
F6
F7
F8
Press * to call up the
Greeting Message page.
After entering the new message, press ) to leave the
Greeting Message page.
In the Others Setup page, you can:
• Enter a custom “greeting” message.
• Set the LCD (display) contrast.
& — Insert
This inserts a blank space at the highlight position.
● Greeting Message
* — Delete
This deletes the character at the highlight position.
● LCD Contrast
Range: -15 — +15
F1
F2
F3
F4
F5
F6
F7
F8
Press & to insert a blank
space at the highlight position.
This adjusts the contrast of the display (LCD). If the
contrast setting makes the display unreadable, you can reset
the contrast to 0 (from any mode) by simultaneously
pressing the ( and u buttons.
Press * to delete the character
at the highlight position.
From the Others Setup page (shown above), press * to
call up the following Greeting Message page.
To enter a new Greeting Message: ......................................
1. Move the highlight in the message box to the desired
position.
2. Change the character at the highlight by using the
panel controls.
The available characters (40 ASCII characters) are
shown in the display.
194
◆ ◆ ◆ ◆ ◆ ◆ ◆ ◆ ◆ ◆ ◆ ◆ ◆ ◆ ◆ ◆ ◆ ◆ ◆ ◆ ◆ ◆ ◆ ◆ ◆ ◆ ◆ ◆ ◆ ◆ ◆ ◆ ◆ ◆ ◆ ◆ ◆ ◆ ◆ ◆ ◆
R E F E R E N C E
Disk Mode
In addition to save and load operations, the Disk
mode allows you to format new disks as well as delete
and rename existing files.
Disk
Save Operation ..............197
Load Operation ..............198
Delete Operation ...........200
Rename Operation ........201
Format Operation ..........202
Disk Mode
◆ ◆ ◆ ◆ ◆ ◆ ◆ ◆ ◆ ◆ ◆ ◆ ◆ ◆ ◆ ◆ ◆ ◆ ◆ ◆ ◆ ◆ ◆ ◆ ◆ ◆ ◆ ◆ ◆ ◆ ◆ ◆ ◆ ◆ ◆ ◆ ◆ ◆ ◆ ◆ ◆
195
To use the Disk mode: ..........................................................
1. Enter the Disk mode by pressing d.
Song SMF
Range: 01 — 10
File Extension: .MID
This comprises a single specified song in the
Standard MIDI File format. The Standard MIDI
File format is widely used by computer music
software, sequencers, and synthesizers with
built-in sequencers. This option provides data
compatibility with such devices. Voice, output
select, and play effect data is not saved with an
SMF file. The tempo data is saved.
Song SMF
+ Multi
(Save only)
Range: 01 — 10
File Extension: .MID
This comprises a single specified song in the
Standard MIDI File format, and includes the
data of the Multi parameters. The track
settings memorized as part of the Multi data
are automatically converted into control change
or system exclusive data (according to the XG
format), then inserted with an appropriate
number of measures at the beginning of the
Song, before saving. Also, when MIDI data is
inserted, the necessary number of measures
are added to the beginning of the Song.
2. Press the appropriate function button (! - %) to
call up the desired operation: Save (!), Load
(@), Delete (#), Rename ($), or Format
(%).
3. Select the type of data you wish to save, load, delete
or rename.
Do this by highlighting the data type, or entering the
corresponding number directly. (This is unnecessary for
the Format operation, which simply formats a blank
disk.) The following chart describes the data types.
All Data
File Extension: .Q3A
This comprises all song, phrase, user pattern,
user Voice, and chain data.
All User
Voice
File Extension: .Q3V
This comprises all user Voice data.
Phrase
Range: 001 — 100
File Extension: .Q3H
This comprises a single specified user
Phrase.
Style
Range: 001 — 100
File Extension: .Q3P
This comprises a single specified Style.
Song
Range: 01 — 10
File Extension: .Q3S
This comprises a single specified Song. The
Voice, output select, play effect, and pattern/
chord/tempo track data is also saved.
Voice
(Load only)
Range: 001 — 128 (Max 280 elements)
File Extension: .Q3V
This comprises a single specified User Voice.
Song ESEQ
Range: 01 — 10
File Extension: .ESQ
This comprises a single specified Song in the
ESEQ format. The ESEQ format is used by
some sequencers and synthesizers with builtin sequencers. This option provides data
compatibility with such devices. Voice, output
select, and play effect data is not saved with
an ESEQ file. The tempo data is saved.
196
The available data types depend on the selected operation,
as listed below.
● Save — All Data, All User Voice, Phrase, Style, Song,
Song ESEQ, Song SMF, Song SMF + Multi
● Load — All Data, All User Voice, Phrase, Style, Song,
Song ESEQ/SMF, Voice
● Delete and Rename — All Data, All User Voice, Phrase,
Style, Song, Song ESEQ/SMF
4. Press E to call up the selected operation.
Refer to the specific explanations below for help in
using/executing each of the specific operations.
To exit from the Disk mode — or to cancel an operation
before actually executing it — press the ) button or
any of the other MODE buttons.
NOTE: The file extensions listed in the chart are used by the
QS300 operating system to identify and organize the different
types of data. When a file of each type is saved, the QS300
automatically assigns an appropriate file extension to the end
of the file name. (When saving Songs in the Song ESEQ,
Song SMF, and Song SMF + Multi, the file extension can be
changed.)
◆ ◆ ◆ ◆ ◆ ◆ ◆ ◆ ◆ ◆ ◆ ◆ ◆ ◆ ◆ ◆ ◆ ◆ ◆ ◆ ◆ ◆ ◆ ◆ ◆ ◆ ◆ ◆ ◆ ◆ ◆ ◆ ◆ ◆ ◆ ◆ ◆ ◆ ◆ ◆ ◆
Disk
Save Operation
Path:
d ➞ ! (Save)
The Save operation allows you to store files to floppy disk
for future recall. Select the desired data type from the
above display (by any data entry method), and press
E.
4. Press E.
If the destination location already contains data under
the same file name, a “Overwrite?” prompt appears in
the display.
IMPORTANT: The disk write-protect slide must be in the writeenable position to perform a Save operation. If it is not, the
“Write Protected!” error message will appear when you attempt
to execute the Save operation.
Amount of remaining memory
space on disk (in kilobytes).
Number of files
(on disk).
Size of selected
file (in kilobytes).
Answer the prompt by pressing the I button to go ahead
with the Save operation, or pressing D to cancel.
After the operation is completed, press ) to return to
the previous mode display, or press any of the MODE
buttons.
Source data.
Destination location.
NOTE: You can use the ) button to leave the Save display
at any time except while the operation is actually in progress.
To use the Save operation: ...................................................
1. From the above display, select the specific data file
you wish to save.
Do this by highlighting the desired number/title in the
left (source data) box, or select the number of the data
directly. (Note: This step is unnecessary for the All
Data and All User Voice types.)
NOTE:
• When saving All Data, if no Song data has been recorded,
the Multi data is not saved. If you wish to save Multi data
as well, simply record a few “empty” measures to a Song.
2. Select the destination location (right box).
NOTE:
• File names can be up to 8 characters in length. Spaces will
be converted to hyphens when the file is saved. Entering all
spaces for a name will result in an “Illegal File Name”
message.
3. Enter a file name if necessary.
• The last-entered file name is automatically shown by default.
• If you use characters not recognized by the MS-DOS
operating system, the file name may not be recognized when
attempting to read the disk on different equipment.
◆ ◆ ◆ ◆ ◆ ◆ ◆ ◆ ◆ ◆ ◆ ◆ ◆ ◆ ◆ ◆ ◆ ◆ ◆ ◆ ◆ ◆ ◆ ◆ ◆ ◆ ◆ ◆ ◆ ◆ ◆ ◆ ◆ ◆ ◆ ◆ ◆ ◆ ◆ ◆ ◆
197
Disk Mode
When the destination location is highlighted, the name
operation popup page (below) is automatically called
up. (See page 161 for instructions on entering names.)
• For Song data, only data from tracks 1 - 16 is saved
(Pattern, Chord and Tempo track data is not saved). When
saving the Song data type (number 5), User Patterns and
User Phrases in the Song data are not saved.
Disk
Load Operation
Path:
d ➞ @ (Load)
The Load operation allows you to retrieve files on floppy
disk and load them to the QS300 so that you can play/use
them. Select the desired data type from the above display
(by any data entry method), and press E.
The Voice data type (number 7) has a different loading
procedure than the other data types (covered in the instructions that follow). See Loading a Voice below for details.
There is also an Auto Load function which automatically
loads the contents of a floppy disk to internal memory
when the power is turned on. (For details, see page 19.)
To use the Load operation: ..................................................
1. From the above display, select the specific data file
you wish to load.
Do this by highlighting the desired number/title in the
left (source data) box, or select the number of the data
directly.
2. Select the destination location (right box).
(Note: This step is unnecessary for the All Data and All
User Voice types.)
3. Press E.
If the destination location already contains data, a “Are
you sure?” prompt appears in the display.
Number of files
(on disk).
Source data.
Size of selected
file (in kilobytes).
Destination location.
Answer the prompt by pressing the I button to go ahead
with the Load operation, or pressing D to cancel.
After the operation is completed, press ) to return to
the previous mode display, or press any of the MODE
buttons.
NOTE: You can use the ) button to leave the Load display
at any time except while the operation is actually in progress.
198
◆ ◆ ◆ ◆ ◆ ◆ ◆ ◆ ◆ ◆ ◆ ◆ ◆ ◆ ◆ ◆ ◆ ◆ ◆ ◆ ◆ ◆ ◆ ◆ ◆ ◆ ◆ ◆ ◆ ◆ ◆ ◆ ◆ ◆ ◆ ◆ ◆ ◆ ◆ ◆ ◆
To load a Voice from disk: ...................................................
1. Select Voice as the data type from the initial Load
display, and press E.
Number of files
(on disk).
Size of selected
file (in kilobytes).
4. Select the User Voice destination for loading.
5. Press E to start loading the selected Voice to
the specified User Voice location.
Answer the “Are you sure?” prompt by pressing I to
execute the load operation, or pressing D to cancel.
Source data.
2. From the above display, select the desired set of
Voices, and press E.
After the Voice directory is loaded, the following
display appears.
3. From the display above, select a Voice and press
E.
You can also use the Category function to quickly
browse through the Voices by pressing * and then
using $ and % to jump among the categories.
Destination Voice (User
Bank).
Number of free elements in
the User Voice.
◆ ◆ ◆ ◆ ◆ ◆ ◆ ◆ ◆ ◆ ◆ ◆ ◆ ◆ ◆ ◆ ◆ ◆ ◆ ◆ ◆ ◆ ◆ ◆ ◆ ◆ ◆ ◆ ◆ ◆ ◆ ◆ ◆ ◆ ◆ ◆ ◆ ◆ ◆ ◆ ◆
Disk Mode
Source Voice
(from disk).
199
Disk
Delete Operation
Path:
d ➞ # (Delete)
The Delete operation completely erases the specified file
from the current disk. Select the desired data type from the
above display (by any data entry method), and press
E.
IMPORTANT: The disk write-protect slide must be in the writeenable position to perform a Delete operation. If it is not, the
“Write Protected!” error message will appear when you attempt
to execute the Delete operation.
Number of files
(on disk).
Answer the prompt by pressing the I button to go ahead
with the Delete operation, or pressing D to cancel.
After the operation is completed, press ) to return to
the previous mode display, or press any of the MODE
buttons.
NOTE: You can use the ) button to leave the Delete
display at any time except while the operation is actually in
progress.
Size of selected
file (in kilobytes).
Files (Selected file will be
deleted.)
To use the Delete operation: ................................................
1. From the above display, select the specific data file
you wish to delete.
Do this by highlighting the desired number/title in the
left (source data) box, or select the number of the data
directly.
2. Press E.
An “Are you sure?” prompt appears in the display.
200
◆ ◆ ◆ ◆ ◆ ◆ ◆ ◆ ◆ ◆ ◆ ◆ ◆ ◆ ◆ ◆ ◆ ◆ ◆ ◆ ◆ ◆ ◆ ◆ ◆ ◆ ◆ ◆ ◆ ◆ ◆ ◆ ◆ ◆ ◆ ◆ ◆ ◆ ◆ ◆ ◆
Disk
Rename Operation
Path:
d ➞ $ (Rename)
The Rename operation makes it easy to directly change the
name of a file on disk. Select the desired data type from
the above display (by any data entry method), and press
E.
IMPORTANT: The disk write-protect slide must be in the writeenable position to perform a Rename operation. If it is not, the
“Write Protected!” error message will appear when you attempt
to execute the Rename operation.
Number of files
(on disk).
If the same file name is specified, the following display
appears:
Size of selected
file (in kilobytes).
If this happens, press ) to return to the Rename
page and enter a new file name.
Files (Selected file will be
renamed.)
To use the Rename operation: .............................................
1. From the above display, select the specific data file
you wish to rename.
Do this by highlighting the desired number/title in the
left (source data) box, or select the number of the data
directly.
2. Select the destination location (right box).
3. Enter a new file name.
After the operation is completed, press ) to return to
the previous mode display, or press any of the MODE
buttons.
NOTE: You can use the ) button to leave the Rename
display at any time except while the operation is actually in
progress.
NOTE:
• File names can be up to 8 characters in length. Spaces will
be converted to hyphens when the file is renamed. Entering
all spaces for a name will result in an “Illegal File Name”
message.
• File extensions (3 characters following a period at the end of
the file name) are included on ESEQ and SMF song files.
• If you use characters not recognized by the MS-DOS
operating system, the file name may not be recognized when
attempting to read the disk on different equipment.
◆ ◆ ◆ ◆ ◆ ◆ ◆ ◆ ◆ ◆ ◆ ◆ ◆ ◆ ◆ ◆ ◆ ◆ ◆ ◆ ◆ ◆ ◆ ◆ ◆ ◆ ◆ ◆ ◆ ◆ ◆ ◆ ◆ ◆ ◆ ◆ ◆ ◆ ◆ ◆ ◆
201
Disk Mode
When the destination location is highlighted, the name
operation page (below) is automatically called up. (See
page 161 for instructions on entering names.)
4. Press E to execute the Rename operation.
Disk
Format Operation
Path:
d ➞ % (Format)
This operation formats new (blank) 2DD or 2HD 3.5-inch
floppy disks for use with the QS300. (2DD disks are
formatted to MS-DOS, 720 kBytes; 2HD disks to MS-DOS
1.44 MBytes.) It can also be used to format disks previously used with other equipment for use with the QS300.
The format operation is also a convenient way to clear all
data from a disk that contains unwanted material.
To format a disk: ...................................................................
Insert the disk to be formatted.
1.
2. Press E.
An “Are you sure?” prompt appears in the display.
CAUTION! The format operation erases all data from the
disk!
IMPORTANT:
• The disk write-protect slide must be in the write-enable
position to perform a Format operation. If it is not, the “Write
Protected!” error message will appear when you attempt to
execute the Format operation.
• 2HD disks having 2DD format cannot be used.
Answer the prompt by pressing the I button to go ahead
with the Format operation, or pressing D to cancel.
After the operation is completed, press ) to return to
the previous mode display, or press any of the MODE
buttons.
NOTE: You can use the ) button to leave the Format
display at any time except while the operation is actually in
progress.
202
◆ ◆ ◆ ◆ ◆ ◆ ◆ ◆ ◆ ◆ ◆ ◆ ◆ ◆ ◆ ◆ ◆ ◆ ◆ ◆ ◆ ◆ ◆ ◆ ◆ ◆ ◆ ◆ ◆ ◆ ◆ ◆ ◆ ◆ ◆ ◆ ◆ ◆ ◆ ◆ ◆
Q S 3 0 0
APPENDIX
Troubleshooting ............................. 204
Warning and Error Messages ...... 206
Specifications................................. 208
Index ................................................ 209
APPENDIX
◆ ◆ ◆ ◆ ◆ ◆ ◆ ◆ ◆ ◆ ◆ ◆ ◆ ◆ ◆ ◆ ◆ ◆ ◆ ◆ ◆ ◆ ◆ ◆ ◆ ◆ ◆ ◆ ◆ ◆ ◆ ◆ ◆ ◆ ◆ ◆ ◆ ◆ ◆ ◆ ◆
203
Troubleshooting
The following table provides troubleshooting hints and page references for some common problems. Since the QS300 is a complicated device with many function, most
problems are simply the result of incorrect settings. Before calling for professional
service, refer to the troubleshooting advice below to see if you can find and correct the
cause of the problem.
Problem
Possible Cause
No power.
Is the power cable fully inserted?
No sound.
•
•
•
•
•
•
Pressing R does not
start playback.
• Does the selected Song, Pattern, or Phrase actually contain data?
• Is MIDI Sync (Utility, page 192) set to MIDI?
Cannot record or
playback a Song. Also,
the tempo cannot be set.
If so, the word “MIDI” appears in place of the Tempo parameter at the top of the Song
display, and pressing R does not start recording or playback. Start playback from a
connected MIDI device, or set MIDI Sync to int.
Chord in Chord Window
(Song display) changes
unexpectedly.
• Is Fingered Chord (page 193) set to on?
• Is the Chord window currently highlighted (page108)? (Move the highlight elsewhere
to prevent inadvertent chord changes.)
Cannot enter Voice Edit
mode, Voice Job, Pattern
mode, or Phrase mode.
Is System Mode (Utility, page 189) set to TG-B?
No metronome sound.
Is Click Mode (Utility, page 192) set properly?
Panel buttons do not
work; cannot select
other modes, etc.
Is Record set to standby? (If RECORD lamp is on, you cannot enter other modes;
press STOP first to take record out of standby.)
The drum sounds in a
User Phrase are wrong
or unexpected.
Did you set the Type to drums (Dr) when recording the Phrase (page 131)?
Cannot enter Edit mode.
• Are you pressing EDIT in Pattern mode? (Pattern mode does not have an Edit mode.)
• In the Song mode, are you pressing EDIT while the Pattern or Chord track is highlighted? (In Song mode, Song Edit cannot be called up for the Pattern or Chord
tracks.)
Some notes on the
keyboard do not sound.
If the Fingered Chord Switch and the Fng parameter in the Song or Pattern mode
display are both set to on, the keys in the specified Fingered Chord zone will not sound
normally, but will be used to determine the accompaniment chords. (See page 36.)
204
Is the volume set appropriately?
Are the volume settings for each track (page 73) appropriate?
Are there enough free Elements?
Are the Note Limit settings (page 49) appropriate?
Is Local (Utility, page 190) set to off?
If you are using the Song mode, are any of the tracks being muted (page 69)?
◆ ◆ ◆ ◆ ◆ ◆ ◆ ◆ ◆ ◆ ◆ ◆ ◆ ◆ ◆ ◆ ◆ ◆ ◆ ◆ ◆ ◆ ◆ ◆ ◆ ◆ ◆ ◆ ◆ ◆ ◆ ◆ ◆ ◆ ◆ ◆ ◆ ◆ ◆ ◆ ◆
Trouble Shooting
Problem
Possible Cause
Cannot set the time
signature.
Does the Song or Phrase already contain data?
The pitch of the Voice
or Voices is off.
Are the tuning-related parameters set to 0? Check the Voice Element Tuning Parameters (page 58), Instrument Tuning/Filter (Multi controls, page 82), and Master Tuning
(Utility, page 188).
Cannot change the
Phrase length.
Does the Phrase already contain data? (See page 132.)
Song playback stops
midway.
• Has an end mark (page 123) been set somewhere within the Pattern track?
• Has an Ending Section (page 123) been set somewhere within the Pattern track?
Chord changes within a
measure fail to produce
new sound.
Is the Phrase Retrigger parameter (page 131) set to off?
The timing, rhythm,
pitch or other aspects of
recorded tracks are
unexpected or different
than at recording.
Have any of the Play Effects (page 89) been changed? Use the Play Effect Bypass
function (page 70) to temporarily “mute” the offending settings, or use the Initialize
Play Effects Job (pages 159 & 168) to reset the Play Effects.
Sound is choppy and
The maximum polyphony of 32 notes (the number of notes that can be played simultaneously) has been exceeded.
APPENDIX
◆ ◆ ◆ ◆ ◆ ◆ ◆ ◆ ◆ ◆ ◆ ◆ ◆ ◆ ◆ ◆ ◆ ◆ ◆ ◆ ◆ ◆ ◆ ◆ ◆ ◆ ◆ ◆ ◆ ◆ ◆ ◆ ◆ ◆ ◆ ◆ ◆ ◆ ◆ ◆ ◆
205
Warning and Error Messages
The following messages may appear during operation, indicating problems or incorrect
operation. Follow the instructions in the explanations below to remedy the problem.
Warning/Information Messages
Battery Low
The memory-backup battery is low; memory cannot be backed up. Have the battery
changed by your local Yamaha dealer or any other autorized Yamaha service personnel.
Now TG-B Mode Active
When the System Mode (in the Utility mode, page 189) is set to TG-B, the following
modes are not available: Voice Edit mode, Voice Job, Pattern mode, and Phrase mode.
Pressing any of the corresponding mode buttons results in the message above; press
) to return to normal operation.
Bulk
Currently receiving bulk data in a receivable format.
Error Messages
● Monitor
Illegal Input
Improper data was input.
Preset Pattern
Attempted to edit a Preset Pattern. Only User Patterns can be edited.
No Data
There is no data (in the specified track, measures, etc.), and the job/function cannot be
executed. Select a track or range of measures having data and attempt the operation
again.
Illegal Backup Data
The memory-backup battery may have been too low to back up the data properly,
resulting in corrupted backup data. Have the battery changed by your local Yamaha
dealer or any other autorized Yamaha service personnel.
● MIDI
MIDI Data Error
A data error resulted during reception of MIDI messages. Check that the MIDI cable
connections are secure or that the MIDI cable itself is not bad, and attempt the operation again.
Checksum Error
The checksum of the received System Exclusive message is incorrect. Check the
message and try transmitting again.
Buffer Full
Too much MIDI data is being received by the QS300 at one time. Reduce the amount
of data being transmitted.
DvNum
Cannot receive MIDI bulk data, due to improper Device Number setting (page 190).
(Bulk data operations only.)
206
◆ ◆ ◆ ◆ ◆ ◆ ◆ ◆ ◆ ◆ ◆ ◆ ◆ ◆ ◆ ◆ ◆ ◆ ◆ ◆ ◆ ◆ ◆ ◆ ◆ ◆ ◆ ◆ ◆ ◆ ◆ ◆ ◆ ◆ ◆ ◆ ◆ ◆ ◆ ◆ ◆
Warning and Error Messages
● Disk
No Disk
There is no disk in the disk drive. Insert a proper disk and attempt the operation again.
Illegal Format Disk
The inserted floppy disk is not of the proper format. Insert a disk of the appropriate
format, or format the disk (page 202).
Bad Disk
The floppy disk is damaged or dirty and cannot be read. Clean the disk surface if
possible, and try cleaning the disk drive itself, then attempt the operation again.
File Not Found
Unable to find the specified file. Try specifying a different file name, or insert a disk
containing the proper file name.
Write Protected
Cannot write to the disk because the write-protect tab is set to the “protect” position.
Set the tab to the “write” position and attempt the operation again.
Disk Full
Cannot write additional data to the disk, because the disk’s data capacity or director
capacity has been exceeded. Delete unnecessary files from the disk and attempt the
operation again, or use another blank disk.
Illegal File Type
Attempted to read a file type not supported by the QS300. (The QS300 supports SMF
and ESEQ files only.)
Can’t Change File Name
Attempted to change an existing file name.
● System
Memory Full
The sequencer’s memory is full and no more data can be recorded. Also, no related
jobs can be executed. If possible, delete unneeded data from the Song and try recording again.
Voice Memory Full
The User Voice memory is full and no more data can be stored. Save the desired User
Voice data to floppy disk (page 197), and delete that User Voice data from internal
memory, then attempt the operation again.
APPENDIX
◆ ◆ ◆ ◆ ◆ ◆ ◆ ◆ ◆ ◆ ◆ ◆ ◆ ◆ ◆ ◆ ◆ ◆ ◆ ◆ ◆ ◆ ◆ ◆ ◆ ◆ ◆ ◆ ◆ ◆ ◆ ◆ ◆ ◆ ◆ ◆ ◆ ◆ ◆ ◆ ◆
207
Specifications
Tone Generator
Type
Maximum Polyphony
System Module
Multi-timbral Capacity
Voices
AWM2 (Advanced Wave Memory 2)
32 notes
Normal (XG), TG-B (TG300B)
Song mode: 24 (16 for Sequencer tracks + 8 for Pattern tracks)
Pattern mode: 8
XG:
480, and 11 drum kits
TG300B: 579 and 10 drum kits
Preset: 128
User:
128, and 1 drum kit
Sequencer
Tracks
Data Capacity
Preset Phrases
Record Modes
Preset Chords
Note Resolution
Edit modes
Jobs
Song Chain
Sequence File Format
Song mode: 19 (Tracks 1 — 16, Pattern, Chord, Tempo)
Pattern mode: 8 (Tracks 1 — 8)
Phrase mode: 1
Approx. 86,000 notes
10 Songs
100 Styles x 8 Sections (800 Patterns)
100 User Phrases
3093
Preset Styles 100 Styles x 8 Sections(800 Patterns)
Realtime, Step, Punch-in, Edit Insert
28 (including “Thru”)
96 clocks/quarter note
Song Edit, Phrase Edit
Song: 24
Pattern: 7
Phrase: 15
10 Songs
SMF (Standard MIDI File), ESEQ, QY300
General
Keyboard
Display
External Memory
Connectors
Output Level
Power
Dimensions (W x D x H)
Weight
Included Accessories
61 keys, with initial touch and after touch
240 x 64 dot graphic liquid crystal display (backlit, with contrast control)
3.5" 2DD/2HD-type floppy disk drive
PHONES, OUTPUT (L/MONO, R), FOOT VOLUME, FOOT CONTROLLER,
SUSTAIN, MIDI IN/OUT/THRU, AC INLET
PHONES:
+7.0 dBm (33 ohm)
Main OUTPUT: +6.5 dBm (10 kohm)
Consumption: 20 W
Requirements: U;120V,OTHER;220~240V
1067 x 371 x 121 mm (42" x 14-5/8" x 4-3/4")
13.0 kg (28 lbs., 10 oz.)
Factory Set & Demonstration Disk, Owner’s Manual, power cord
* Specifications and appearance subject to change without notice.
208
◆ ◆ ◆ ◆ ◆ ◆ ◆ ◆ ◆ ◆ ◆ ◆ ◆ ◆ ◆ ◆ ◆ ◆ ◆ ◆ ◆ ◆ ◆ ◆ ◆ ◆ ◆ ◆ ◆ ◆ ◆ ◆ ◆ ◆ ◆ ◆ ◆ ◆ ◆ ◆ ◆
Specifications / Index
Index
k/l buttons . . . . . . . . . . . . . . . . . . . . . . . . . . . . . . 40
D
A
Delete (Disk) . . . . . . . . . . . . . . . . . . . . . . . . . . . . . . . . . . 195
Delete Measure (Song Job) . . . . . . . . . . . . . . . . . . . . . . . 155
Demo Song, playing . . . . . . . . . . . . . . . . . . . . . . . . . . . . . 18
Disk mode . . . . . . . . . . . . . . . . . . . . . . . . . . . . . . . . 195-202
Disk operations . . . . . . . . . . . . . . . . . . . . . . . . . . . . . . . . 135
Drum Set . . . . . . . . . . . . . . . . . . . . . . . . . . . . . . . . . . . . . . 60
Accompaniment recording, Realtime . . . . . . . . . . . 33, 120
Step . . . . . . . . . . . . . . . . . . . 122
All-track recording . . . . . . . . . . . . . . . . . . . . . . . . . . . . . . 100
Amplitude (Voice Edit) . . . . . . . . . . . . . . . . . . . . . . . . . . . 51
Append Pattern (Pattern Job) . . . . . . . . . . . . . . . . . . . . . 166
Append Phrase (Phrase Job) . . . . . . . . . . . . . . . . . . . . . . 174
B
bass note (Pattern) . . . . . . . . . . . . . . . . . . . . . . . . . . . . . .
(Song) . . . . . . . . . . . . . . . . . . . . . . . . . . . . . . . .
bass phrase chord type (Pattern) . . . . . . . . . . . . . . . . . . .
(Song) . . . . . . . . . . . . . . . . . . . .
109
124
109
124
C
Chord entry (Accompaniment recording) . . . . . . . . 36, 124
Chord Sort (Song Job) . . . . . . . . . . . . . . . . . . . . . . . . . . . 149
Chord track . . . . . . . . . . . . . . . . . . . . . . . . . . . . 36, 121, 122
Chord, bass note (Pattern) . . . . . . . . . . . . . . . . . . . . . . . 109
(Song) . . . . . . . . . . . . . . . . . . . . . . . . . 124
Chord, Fingered Zone . . . . . . . . . . . . . . . . . . . . . . . . . . . 193
Chord, type, bass phrase (Pattern) . . . . . . . . . . . . . . . . . 109
(Song) . . . . . . . . . . . . . . . . . . . 124
Chords, changing (Pattern) . . . . . . . . . . . . . . . . . . . 36, 108
chords, syncopated . . . . . . . . . . . . . . . . . . . . . . . . . . . . . . 124
Chorus . . . . . . . . . . . . . . . . . . . . . . . . . . . . . . . . . . . . 24, 79
Clear Pattern (Pattern Job) . . . . . . . . . . . . . . . . . . . . . . . 168
Clear Phrase (Phrase Job) . . . . . . . . . . . . . . . . . . . . . . . . 177
Clear Song (Song Job) . . . . . . . . . . . . . . . . . . . . . . . . . . . 160
Clear Track (Song Job) . . . . . . . . . . . . . . . . . . . . . . . . . . 158
Compare . . . . . . . . . . . . . . . . . . . . . . . . . . . . . . . . . . . 27, 64
connections, audio and MIDI . . . . . . . . . . . . . . . . . . . 16-17
Controller (Voice Edit) . . . . . . . . . . . . . . . . . . . . . . . . . . . 46
Controller data, changing . . . . . . . . . . . . . . . . . . . . . . . . 181
Controller Edit parameters . . . . . . . . . . . . . . . . . . . . . . 86-88
Copy Event (Song Job) . . . . . . . . . . . . . . . . . . . . . . . . . . 150
Copy Pattern (Pattern Job) . . . . . . . . . . . . . . . . . . . . . . . 165
Copy Phrase (Phrase Job) . . . . . . . . . . . . . . . . . . . . . . . . 173
Copy Song (Song Job) . . . . . . . . . . . . . . . . . . . . . . . . . . . 160
Copy Track (Song Job) . . . . . . . . . . . . . . . . . . . . . . . . . . 156
Create Measure (Song Job) . . . . . . . . . . . . . . . . . . . . . . . 154
Crescendo (Phrase Job) . . . . . . . . . . . . . . . . . . . . . . . . . . 172
(Song Job) . . . . . . . . . . . . . . . . . . . . . . . . . . . 145
E
Edit Change mode . . . . . . . . . . . . . . . . . . . . . . . . . . . . . . 180
Edit Insert mode . . . . . . . . . . . . . . . . . . . . . . . . . . . . . . . . 184
Edit Recall (Voice Job) . . . . . . . . . . . . . . . . . . . . . . . . . . . 64
editing, Songs and Phrases . . . . . . . . . . . . . . . . . . . 179-186
Voice . . . . . . . . . . . . . . . . . . . . . . . . . . . . . . . 23, 43
Effect Parameters (Song Multi) . . . . . . . . . . . . . . . . . . . . . 79
Effect Send (Pattern Multi) . . . . . . . . . . . . . . . . . . . . . . . 112
(Song Multi) . . . . . . . . . . . . . . . . . . . . . . . . . 76
(Voice Edit) . . . . . . . . . . . . . . . . . . . . . . . . . . 45
Effect Type (Song Multi) . . . . . . . . . . . . . . . . . . . . . . . . . . 77
EG (envelope generator) . . . . . . . . . . . . . . . . . . . . 28, 53-57
EG Template . . . . . . . . . . . . . . . . . . . . . . . . . . . . . . . . . . . . 57
EG Time (Song Multi) . . . . . . . . . . . . . . . . . . . . . . . . . . . . 84
Element Copy . . . . . . . . . . . . . . . . . . . . . . . . . . . . . . . . . . . 50
Elements, about . . . . . . . . . . . . . . . . . . . . . . . . . . . . . . . . . 48
Erase Event (Song Job) . . . . . . . . . . . . . . . . . . . . . . . . . . 151
Expand Backing (Song Job) . . . . . . . . . . . . . . . . . . . . . . 158
Extract Event (Song Job) . . . . . . . . . . . . . . . . . . . . . . . . . 152
F
Filter EG . . . . . . . . . . . . . . . . . . . . . . . . . . . . . . . . . . . . . . . 53
Fingered Chord Zone (Utility) . . . . . . . . . . . . . . . . . . . . 193
Format (Disk) . . . . . . . . . . . . . . . . . . . . . . . . . . . . . . . . . . 202
G
Gate Time/Velocity (Pattern Playback) . . . . . . . . . . . . . . 116
(Song Playback) . . . . . . . . . . . . . . . . 93
Get Phrase (Phrase Job) . . . . . . . . . . . . . . . . . . . . . . . . . . 175
Graphic EG Edit (Voice Edit) . . . . . . . . . . . . . . . . . . . . . . 55
Greeting Message . . . . . . . . . . . . . . . . . . . . . . . . . . . . . . . 194
I
Initialize Play Effect (Pattern Job) . . . . . . . . . . . . . . . . . 168
(Song Job) . . . . . . . . . . . . . . . . . . . 159
Instrument Mode/Velocity (Song Multi) . . . . . . . . . . . . . . 83
Instrument Tuning/Filter (Song Multi) . . . . . . . . . . . . . . . 82
APPENDIX
◆ ◆ ◆ ◆ ◆ ◆ ◆ ◆ ◆ ◆ ◆ ◆ ◆ ◆ ◆ ◆ ◆ ◆ ◆ ◆ ◆ ◆ ◆ ◆ ◆ ◆ ◆ ◆ ◆ ◆ ◆ ◆ ◆ ◆ ◆ ◆ ◆ ◆ ◆ ◆ ◆
209
L
LCD Contrast . . . . . . . . . . . . . . . . . . . . . . . . . . . . . . . . . . 194
LFO (Voice Edit) . . . . . . . . . . . . . . . . . . . . . . . . . . . . . . . . 59
Load (direct from Song/Pattern/Phrase modes) . . . . . . . 136
(Disk) . . . . . . . . . . . . . . . . . . . . . . . . . . . . . . . . . . . 198
Loop playback . . . . . . . . . . . . . . . . . . . . . . . . . . . . . . . . . . 65
M
Mark/Jump . . . . . . . . . . . . . . . . . . . . . . . . . . . . . . . . . 40, 68
Measure/Beat . . . . . . . . . . . . . . . . . . . . . . . . . . 68, 102, 133
MIDI Input Filter (Utility) . . . . . . . . . . . . . . . . . . . . . . . . 191
MIDI Setup (Utility) . . . . . . . . . . . . . . . . . . . . . . . . . . . . 190
Mix Track (Song Job) . . . . . . . . . . . . . . . . . . . . . . . . . . . 157
Mixer Search (Pattern Multi) . . . . . . . . . . . . . . . . . . . . . 111
(Song Multi) . . . . . . . . . . . . . . . . . . . . . . . . 75
Mixer Voice (Pattern Multi) . . . . . . . . . . . . . . . . . . . . . . 111
(Song Multi) . . . . . . . . . . . . . . . . . . . . . . . . . 74
Mixer Volume (Pattern Multi) . . . . . . . . . . . . . . . . . . . . . 110
(Song Multi) . . . . . . . . . . . . . . . . . . . . . . . 73
Mode/Velocity (Song Multi) . . . . . . . . . . . . . . . . . . . . . . . 83
Modify Gate Time (Phrase Job) . . . . . . . . . . . . . . . . . . . 171
(Song Job) . . . . . . . . . . . . . . . . . . . . . 144
Modify Velocity (Phrase Job) . . . . . . . . . . . . . . . . . . . . . 171
(Song Job) . . . . . . . . . . . . . . . . . . . . . . 143
Multi control parameter values, storing . . . . . . . . . . . . . . 72
Multi controls (Pattern) . . . . . . . . . . . . . . . . . . . . . . 110-112
(Song) . . . . . . . . . . . . . . . . . . . . . . . . . . 71-85
Mute . . . . . . . . . . . . . . . . . . . . . . . . . . . . . . . . . . . . . . . . . . 69
muting/unmuting tracks . . . . . . . . . . . . . . . . . . . . . . . 41, 69
N
naming a Voice . . . . . . . . . . . . . . . . . . . . . . . . . . . . . . 30, 63
Normalize Effect (Song Job) . . . . . . . . . . . . . . . . . . . . . . 159
note/keyboard display (Step recording) . . . . . . . . 103, 134
O
Overall (Voice Edit) . . . . . . . . . . . . . . . . . . . . . . . . . . . . . . 44
P
Pattern Entry . . . . . . . . . . . . . . . . . . . . . . . . . . . . . . . . . . 123
Pattern Jobs . . . . . . . . . . . . . . . . . . . . . . . . . . . . . . . 163-168
Pattern mode . . . . . . . . . . . . . . . . . . . . . . . . . . . . . . . . . . 105
Pattern Playback Effects . . . . . . . . . . . . . . . . . . . . . 113-116
Pattern track . . . . . . . . . . . . . . . . . . . . . . . . . . . 33,, 120, 122
Patterns . . . . . . . . . . . . . . . . . . . . . . . . . . . . . . . . . . . . . . . 106
Patterns, selecting and playing . . . . . . . . . . . . . . . . . . . . 107
Per Track (Pattern Playback) . . . . . . . . . . . . . . . . . . . . . . 113
(Song Playback) . . . . . . . . . . . . . . . . . . . . . . . . 89
210
Phrase edit . . . . . . . . . . . . . . . . . . . . . . . . . . . . . . . . 179-186
Phrase Jobs . . . . . . . . . . . . . . . . . . . . . . . . . . . . . . . . 169-177
Phrase mode . . . . . . . . . . . . . . . . . . . . . . . . . . . . . . . . . . . 125
Phrase Name (Phrase Job) . . . . . . . . . . . . . . . . . . . . . . . . 177
Phrase recording . . . . . . . . . . . . . . . . . . . . . . . . . . . . 129-134
Phrases . . . . . . . . . . . . . . . . . . . . . . . . . . . . . . . . . . . . . . . 106
Phrases, combining (Pattern) . . . . . . . . . . . . . . . . . . . . . . 127
Realtime recording . . . . . . . . . . . . . . . . . . . . . . 129
selecting and playing . . . . . . . . . . . . . . . . . . . . . 125
Step recording . . . . . . . . . . . . . . . . . . . . . . . . . . 132
Pitch Bend . . . . . . . . . . . . . . . . . . . . . . . . . . . . . . . . . . . . . 26
Pitch EG . . . . . . . . . . . . . . . . . . . . . . . . . . . . . . . . . . . . . . . 54
Play Effect Bypass . . . . . . . . . . . . . . . . . . . . . . . . . . . . . . . 70
Playback Effects, Pattern . . . . . . . . . . . . . . . . . . . . . 113-116
Song . . . . . . . . . . . . . . . . . . . . . . . . 89-93
Portamento (Song Edit) . . . . . . . . . . . . . . . . . . . . . . . . . . . 86
(Voice Edit) . . . . . . . . . . . . . . . . . . . . . . . . . . 45
Punch-in recording . . . . . . . . . . . . . . . . . . . . . . . . . . . 40, 99
Put Phrase (Phrase Job) . . . . . . . . . . . . . . . . . . . . . . . . . . 176
Q
Quantize (Pattern Playback) . . . . . . . . . . . . . . . . . . . . . . 114
(Phrase Job) . . . . . . . . . . . . . . . . . . . . . . . . . . . 171
(Song Job) . . . . . . . . . . . . . . . . . . . . . . . . . . . . 141
(Song Playback) . . . . . . . . . . . . . . . . . . . . . . . . . 90
Quick Program Change . . . . . . . . . . . . . . . . . . . . . . . . . . . 20
R
Real-time Controllers . . . . . . . . . . . . . . . . . . . . . . . . . . . . . 87
Realtime recording . . . . . . . . . . . . . . . . . . . . . . . . . . . 97, 98
recording a keyboard performance . . . . . . . . . . . . . . . . . . 38
recording Phrases, Realtime . . . . . . . . . . . . . . . . . . . . . . 129
Step . . . . . . . . . . . . . . . . . . . . . . . . . . 132
recording, accompaniment Patterns . . . . . . . . . . . . . 33, 119
All-track . . . . . . . . . . . . . . . . . . . . . . . . . . . . . 100
Phrase . . . . . . . . . . . . . . . . . . . . . . . . . . . 129-134
Punch-in . . . . . . . . . . . . . . . . . . . . . . . . . . 40, 99
Realtime . . . . . . . . . . . . . . . . . . . . . . . . . . 97, 98
Step . . . . . . . . . . . . . . . . . . . . . . . . . 97, 101, 102
Rename (Disk) . . . . . . . . . . . . . . . . . . . . . . . . . . . . . . . . . 201
Retrigger . . . . . . . . . . . . . . . . . . . . . . . . . . . . . . . . . . . . . . 131
Reverb . . . . . . . . . . . . . . . . . . . . . . . . . . . . . . . . . . . . 23, 79
S
Save (direct from Song/Pattern/Phrase modes) . . . . . . . 137
(Disk) . . . . . . . . . . . . . . . . . . . . . . . . . . . . . . . . . . . . 197
Sections . . . . . . . . . . . . . . . . . . . . . . . . . . . . . . . . . . 35, 106
Sequencer Setup (Utility) . . . . . . . . . . . . . . . . . . . . . . . . 192
setting up . . . . . . . . . . . . . . . . . . . . . . . . . . . . . . . . . . . . . . 16
◆ ◆ ◆ ◆ ◆ ◆ ◆ ◆ ◆ ◆ ◆ ◆ ◆ ◆ ◆ ◆ ◆ ◆ ◆ ◆ ◆ ◆ ◆ ◆ ◆ ◆ ◆ ◆ ◆ ◆ ◆ ◆ ◆ ◆ ◆ ◆ ◆ ◆ ◆ ◆ ◆
Index
V
Shift Clock (Phrase Job) . . . . . . . . . . . . . . . . . . . . . . . . . 173
(Song Job) . . . . . . . . . . . . . . . . . . . . . . . . . . 148
Shift Note (Phrase Job) . . . . . . . . . . . . . . . . . . . . . . . . . . 172
(Song Job) . . . . . . . . . . . . . . . . . . . . . . . . . . . 147
Song Chain . . . . . . . . . . . . . . . . . . . . . . . . . . . . . . . . . . . . . 95
Song edit . . . . . . . . . . . . . . . . . . . . . . . . . . . . . . . . . . 179-186
Song Jobs . . . . . . . . . . . . . . . . . . . . . . . . . . . . . . 41, 139-161
Song mode . . . . . . . . . . . . . . . . . . . . . . . . . . . . . . . . . . 65-95
Song Name (Song Job) . . . . . . . . . . . . . . . . . . . . . . . . . . 161
Song Playback Effects . . . . . . . . . . . . . . . . . . . . . . . . . 89-93
Song playback . . . . . . . . . . . . . . . . . . . . . . . . . 18-19, 67-70
Song recording . . . . . . . . . . . . . . . . . . . . . . . . . . . 32, 97-103
Split Pattern (Pattern Job) . . . . . . . . . . . . . . . . . . . . . . . . 167
Split Phrase (Phrase Job) . . . . . . . . . . . . . . . . . . . . . . . . . 174
Step Accompaniment recording. . . . . . . . . . . . . . . . . . . . 122
Step recording . . . . . . . . . . . . . . . . . . . . . . . . . 97, 101, 122
Step recording function keys . . . . . . . . . . . . . . . . . 103, 134
Store (Voice) . . . . . . . . . . . . . . . . . . . . . . . . . . . . . . . . 31, 63
Style Name (Pattern Job) . . . . . . . . . . . . . . . . . . . . . . . . . 168
Swing (Pattern Playback) . . . . . . . . . . . . . . . . . . . . . . . . 115
(Song Playback) . . . . . . . . . . . . . . . . . . . . . . . . . . . 91
syncopated chords . . . . . . . . . . . . . . . . . . . . . . . . . . . . . . 124
Synthesizer Setup (Utility) . . . . . . . . . . . . . . . . . . . . . . . 188
Variation Effect (Voice Edit) . . . . . . . . . . . . . . . . . . . . . . . 47
Variation effect . . . . . . . . . . . . . . . . . . . . . . . . . . . . . . 25, 80
Variation Voice Auto-Search . . . . . . . . . . . . . . . . . . . . . . . 22
Velocity (Voice Edit) . . . . . . . . . . . . . . . . . . . . . . . . . . . . . 45
Vibrato (Song Multi) . . . . . . . . . . . . . . . . . . . . . . . . . . . . . 85
Voice (Pattern Multi) . . . . . . . . . . . . . . . . . . . . . . . . . . . . 111
(Song Multi) . . . . . . . . . . . . . . . . . . . . . . . . . . . . . . 74
Voice Bank, changing . . . . . . . . . . . . . . . . . . . . . . . . . . . . 21
Voice Common parameters . . . . . . . . . . . . . . . . . . 44-47, 63
Voice Edit mode . . . . . . . . . . . . . . . . . . . . . . . . . . . . . 23, 43
Voice editing . . . . . . . . . . . . . . . . . . . . . . . . . . . . . . . . . . . . 43
Voice Element parameters . . . . . . . . . . . . . . . . . . . . . . 48-59
Voice Job . . . . . . . . . . . . . . . . . . . . . . . . . . . . . . . . . . . . . . 64
Voice Name . . . . . . . . . . . . . . . . . . . . . . . . . . . . . . . . 30, 63
Voice Search (Pattern Multi) . . . . . . . . . . . . . . . . . . . . . . 111
(Song Multi) . . . . . . . . . . . . . . . . . . . . . . . . 75
Voice Store . . . . . . . . . . . . . . . . . . . . . . . . . . . . . . . . . 31, 63
Voices, selecting and playing . . . . . . . . . . . . . . . . . . . . . . 20
Volume (Pattern Multi) . . . . . . . . . . . . . . . . . . . . . . . . . . 110
(Song Multi) . . . . . . . . . . . . . . . . . . . . . . . . . . . . . 73
T
Wave (Voice edit) . . . . . . . . . . . . . . . . . . . . . . . . . . . . . . . . 48
W
Template Copy . . . . . . . . . . . . . . . . . . . . . . . . . . . . . . . . . . 57
Tempo . . . . . . . . . . . . . . . . . . . . . . . . . . . . . . . . . . . . . . . . . 69
Tempo track, editing . . . . . . . . . . . . . . . . . . . . . . . . . . . . 186
Thin Out (Song Job) . . . . . . . . . . . . . . . . . . . . . . . . . . . . 153
t button . . . . . . . . . . . . . . . . . . . . . . . . . . . . . . . . . . . . 40
Track Mute (Pattern) . . . . . . . . . . . . . . . . . . . . . . . . . . . . 118
Track Transmit Channel (Pattern) . . . . . . . . . . . . . . . . . . 117
(Song) . . . . . . . . . . . . . . . . . . . . 94
tracks, muting/unmuting . . . . . . . . . . . . . . . . . . . . . . 41, 118
transport/location controls . . . . . . . . . . . . . . . . . . . . . . . . . 67
Transpose (Phrase Job) . . . . . . . . . . . . . . . . . . . . . . . . . . 172
(Song Job) . . . . . . . . . . . . . . . . . . . . . . . . . . . . 146
Transpose/Clock Shift (Pattern Playback) . . . . . . . . . . . 116
(Song Playback) . . . . . . . . . . . . . . 92
Tuning (Voice Edit) . . . . . . . . . . . . . . . . . . . . . . . . . . . . . . 58
Tuning/Filter (Song Multi) . . . . . . . . . . . . . . . . . . . . . . . . 82
Type (Phrase) . . . . . . . . . . . . . . . . . . . . . . . . . . . . . . . . . . 131
U
◆ ◆ ◆ ◆ ◆ ◆ ◆ ◆ ◆ ◆ ◆ ◆ ◆ ◆ ◆ ◆ ◆ ◆ ◆ ◆ ◆ ◆ ◆ ◆ ◆ ◆ ◆ ◆ ◆ ◆ ◆ ◆ ◆ ◆ ◆ ◆ ◆ ◆ ◆ ◆ ◆
APPENDIX
Undo/Redo (Pattern Job) . . . . . . . . . . . . . . . . . . . . . . . . . 164
(Phrase Job) . . . . . . . . . . . . . . . . . . . . . . . . . 170
(Song Job) . . . . . . . . . . . . . . . . . . . . . . . . . . 140
Utility mode . . . . . . . . . . . . . . . . . . . . . . . . . . . . . . . 187-194
211
For details of products, please contact your nearest Yamaha or the
authorized distributor listed below.
Pour plus de détails sur les produits, veuillez-vous adresser à Yamaha
ou au distributeur le plus proche de vous figurant dans la liste suivante.
NORTH AMERICA
CANADA
Yamaha Canada Music Ltd.
135 Milner Avenue, Scarborough, Ontario,
M1S 3R1, Canada
Tel: 416-298-1311
U.S.A.
Yamaha Corporation of America
6600 Orangethorpe Ave., Buena Park, Calif. 90620,
U.S.A.
Tel: 714-522-9011
MIDDLE & SOUTH AMERICA
MEXICO
Die Einzelheiten zu Produkten sind bei Ihrer unten aufgeführten Niederlassung und bei Yamaha Vertragshändlern in den jeweiligen
Bestimmungsländern erhältlich.
Para detalles sobre productos, contacte su tienda Yamaha más cercana
o el distribuidor autorizado que se lista debajo.
ASIA
ITALY
Yamaha Musica Italia S.P.A.,
Combo Division
Viale Italia 88, 20020 Lainate (Milano), Italy
Tel: 02-935-771
SPAIN
Yamaha-Hazen Electronica Musical, S.A.
Jorge Juan 30, 28001, Madrid, Spain
Tel: 91-577-7270
PORTUGAL
Valentim de Carvalho CI SA
Estrada de Porto Salvo, Paço de Arcos 2780 Oeiras,
Portugal
Tel: 01-443-3398/4030/1823
GREECE
Yamaha De Mexico S.A. De C.V.,
Departamento de ventas
Javier Rojo Gomez No.1149, Col. Gpe Del
Moral, Deleg. Iztapalapa, 09300 Mexico, D.F.
Tel: 686-00-33
BRASIL
Yamaha Musical Do Brasil LTDA.
Ave. Reboucas 2636, São Paulo, Brasil
Tel: 011-853-1377
PANAMA
Philippe Nakas S.A.
Navarinou Street 13, P.Code 10680, Athens, Greece
Tel: 01-364-7111
SWEDEN
OTHER LATIN AMERICAN COUNTRIES
AND CARIBBEAN COUNTRIES
Yamaha Music Latin America Corp.
6101 Blue Lagoon Drive, Miami, Florida 33126,
U.S.A.
Tel: 305-261-4111
EUROPE
THE UNITED KINGDOM
Yamaha-Kemble Music (U.K.) Ltd.
Sherbourne Drive, Tilbrook, Milton Keynes,
MK7 8BL, England
Tel: 01908-366700
IRELAND
Danfay Ltd.
61D, Sallynoggin Road, Dun Laoghaire, Co. Dublin
Tel: 01-2859177
GERMANY/SWITZERLAND
Yamaha Europa GmbH.
Siemensstraße 22-34, D-2084 Rellingen, F.R. of
Germany
Tel: 04101-3030
AUSTRIA/HUNGARY/SLOVENIA/
ROMANIA/BULGARIA
Yamaha Music Austria Ges m b H.
Schleiergasse 20, A-1100 Wien Austria
Tel: 0222-60203900
THE NETHERLANDS
Yamaha Music Benelux B.V.,
Verkoop Administratie
Kanaalweg 18G, 3526KL, Utrecht, The Netherlands
Tel: 030-828411
BELGIUM/LUXEMBOURG
Yamaha Music Benelux B.V.,
Brussels-office
Keiberg Imperiastraat 8, 1930 Zaventem, Belgium
Tel: 02-7258220
FRANCE
Yamaha Musique France,
Division Professionnelle
BP 70-77312 Marne-la-Valée Cedex 2, France
Tel: 01-64-61-4000
INDONESIA
PT. Yamaha Music Indonesia (Distributor)
PT. Nusantik
Gedung Yamaha Music Center, Jalan Jend. Gatot
Subroto Kav. 4, Jakarta 12930, Indonesia
Tel: 21-520-2577
KOREA
Cosmos Corporation
#131-31, Neung-Dong, Sungdong-Ku, Seoul
Korea
Tel: 02-466-0021~5
MALAYSIA
PHILIPPINES
Yupangco Music Corporation
339 Gil J. Puyat Avenue, P.O. Box 885 MCPO,
Makati, Metro Manila, Philippines
Tel: 819-7551
YS Copenhagen Liaison Office
Generatorvej 8B
DK-2730 Herlev, Denmark
Tel: 44 92 49 00
SINGAPORE
FINLAND
Warner Music Finland OY/Fazer Music
Aleksanterinkatu 11, P.O. Box 260
SF-00101 Helsinki, Finland
Tel: 0435 011
Yamaha Music Asia Pte., Ltd.
Blk 17A Toa Payoh #01-190 Lorong 7
Singapore 1231
Tel: 354-0133
TAIWAN
Kung Hsue She Trading Co., Ltd.
No. 322, Section 1, Fu Hsing S. Road,
Taipei 106, Taiwan. R.O.C.
Tel: 02-709-1266
NORWAY
Narud Yamaha AS
Grini Næringspark 17
N-1345 Østerås, Norway
Tel: 67 14 47 90
THAILAND
Siam Music Yamaha Co., Ltd.
865 Phornprapha Building, Rama I Road,
Patumwan, Bangkok 10330, Thailand
Tel: 2-215-3443
ICELAND
Skifan HF
Skeifan 17 P.O. Box 8120
IS-128 Reykjavik, Iceland
Tel: 525 5000
THE PEOPLE’S REPUBLIC OF CHINA
AND OTHER ASIAN COUNTRIES
EAST EUROPEAN COUNTRIES
(Except HUNGARY)
Yamaha Europa GmbH.
Siemensstraße 22-34, D-2084 Rellingen, F.R. of
Germany
Tel: 04101-3030
Yamaha Corporation,
International Marketing Division
Nakazawa-cho 10-1, Hamamatsu, Japan 430
Tel: 053-460-2317
OCEANIA
AFRICA
AUSTRALIA
Yamaha Corporation,
International Marketing Division
Nakazawa-cho 10-1, Hamamatsu, Japan 430
Tel: 053-460-2312
Yamaha Music Australia Pty. Ltd.
17-33 Market Street, South Melbourne, Vic. 3205,
Australia
Tel: 3-699-2388
NEW ZEALAND
Music Houses of N.Z. Ltd.
146/148 Captain Springs Road, Te Papapa,
Auckland, New Zealand
Tel: 9-634-0099
MIDDLE EAST
TURKEY/CYPRUS
Yamaha Musique France, Division Export
BP 70-77312 Marne-la-Valée Cedex 2, France
Tel: 01-64-61-4000
OTHER COUNTRIES
Yamaha Corporation,
International Marketing Division
Nakazawa-cho 10-1, Hamamatsu, Japan 430
Tel: 053-460-2312
HEAD OFFICE
SY08
Tom Lee Music Co., Ltd.
11/F., Silvercord Tower 1, 30 Canton Road,
Tsimshatsui, Kowloon, Hong Kong
Tel: 730-1098
Yamaha Music Malaysia, Sdn., Bhd.
16-28, Jalan SS 2/72, Petaling Jaya, Selangor,
Malaysia
Tel: 3-717-8977
Yamaha Scandinavia AB
J. A. Wettergrens Gata 1
Box 30053
S-400 43 Göteborg, Sweden
Tel: 031 89 34 00
DENMARK
Yamaha De Panama S.A.
Edificio Interseco, Calle Elvira Mendez no.10,
Piso 3, Oficina #105, Ciudad de Panama, Panama
Tel: 507-69-5311
HONG KONG
COUNTRIES AND TRUST
TERRITORIES IN PACIFIC OCEAN
Yamaha Corporation,
International Marketing Division
Nakazawa-cho 10-1, Hamamatsu, Japan 430
Tel: 053-460-2317
Yamaha Corporation, Electronic Musical Instrument Division
Nakazawa-cho 10-1, Hamamatsu, Japan 430
Tel: 053-460-2445