1
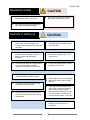
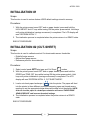
Accel-7450 24-Pin Dot Matrix Printer Calibration Guide © September 2012, AMT Datasouth Corp. Document # 130135 Copyright Declaration Information in this guide is subject to change without notice and does not represent a commitment on the part of AMT Datasouth Corporation. No part of this document may be reproduced or transmitted in any form by any means, for any purpose other than the purchaser’s personal use, without the expressed written permission of AMT Datasouth Corporation. For detail service and repair instructions the ACCEL 7450 Service Guide is available for purchase. Regulatory Statement: FCC Class B This device complies with Part 15 of the FCC Rules. Operation is subject to the following two conditions: (1) This device may not cause harmful interference, and (2) this device must accept any interference received, including interference that may cause undesired operation. The manufacturer is not responsible for any radio or TV interference caused by unauthorized modifications to this equipment. Such modifications could void the user’s authority to operate the equipment. LISTED 16PU NWGQ E247562 120VAC ~ 60Hz ~ 2.3A i Table of Contents Safety .............................................................................................................................. 2 Control Panel .................................................................................................................. 4 Calibration Key Functions ............................................................................................ 4 Initialization #1 ................................................................................................................ 5 Initialization #2 (Cut-sheet).............................................................................................. 5 Initialization #2 (Tractor) .................................................................................................. 6 ii ACCEL-7450 SAFETY This GUIDE is to help qualified service technicians repair or adjust your ACCEL-7450 printer. Please read the guide carefully before repairing and making adjustments to your printer. The warranty will not cover any trouble with or damage to the printer resulting from repair or modification by unqualified persons. 2 ACCEL-7450 Operational safety Do not touch the print head immediately after printing because it is too hot. Do not put your finger under the tractor cover while loading fanfold paper. CAUTION Cautions in setting up Do not put your finger on the tractor gear, when using the rear tractor. CAUTION Unpack the printer. Make sure that the printer body and all accessories are included in the package and no parts are damaged. Place the printer on a rigid, horizontal base in a location that is free of vibration. Do not use the printer in a location exposed to direct sunlight or close to a heater or other heat generating equipment. Before connecting or disconnecting the interface cable, be sure to turn off the printer. Do not use the printer in a dusty location or any location subject to sudden changes in temperature and humidity. Do not connect the printer to a nonstandard power source. Never try to print without a ribbon cassette installed and paper loaded. Rear Operating Clearance Take care not to twist the ribbon while installing the ribbon cassette. Fanfold Paper: 2” plus Paper Length Manual Cut Sheets: Paper Length Minus 9” If the case or cover becomes dirty, clean it with a soft cloth moistened with a small quantity of neutral detergent diluted with water. Never use a hard cloth or volatile solvent such as alcohol, thinner, or benzene. Do not turn off the printer during printing, as this may lead to a malfunction. Push the lock levers of both tractors to the LOCK positions firmly when loading fanfold paper. 3 ACCEL-7450 CONTROL PANEL The liquid crystal display (LCD) on the control panel displays the current printer status, user messages and menu functions. Calibration Key Functions INITIALIZATION Power-up while pressing HIGH IMPACT + LF keys together. LCD will display #1 (No Paper) INITIALIZING… EEPROM INITIAL 1. User settings are restored. Power-up while pressing SPEED + TEAR OFF keys together. LCD will INITIALIZATION display INITIALIZING… EEPROM INITIAL 2 / Cut Sheet. Sensor threshold #2 (Cut-sheet) settings are set. Power-up while pressing ONLINE + EJECT/LOAD keys together. LCD will INITIALIZATION display INITIALIZING… EEPROM INITIAL 2 / Tractor. Tractor sensor #2 (Tractor) threshold setting is set. 4 ACCEL-7450 INITIALIZATION #1 Scope: This function is used to restore feature USER default settings stored in memory. Procedure: 1. With the printer power turned OFF and no paper loaded, press and hold the HIGH IMPACT and LF keys while turning ON the printer power switch. Hold keys until printer initialization (carriage movement) is completed. The LCD display will read “EEPROM INITIAL 1“. 2. The inialization process is completed when the printer returns to a READY state. END OF PROCEDURE INITIALIZATION #2 (CUT-SHEET) Scope: This function is used to calibrate and set Cut-sheet media sensor thresholds. • Right/left edge sensors • Manual feed paper sensor • Reference pulse for skew detection Procedure: 1. Select control panel AUTO print gap, and Cut Sheet modes. 2. With the printer power turned OFF and no paper loaded, press and hold the SPEED and TEAR OFF keys while turning ON the printer power switch. Hold keys until printer initialization (carriage movement) is completed. The LCD display will read “EEPROM INITIAL 2, CUT SHEET MODE“. 3. Load a cut-sheet paper landscape ( ) into the printer. The paper will feed into the printer in three different positions comparing open and closed sensor readings to set the appropriate edge detect and media in/out thresholds. NOTE: failure to load the paper in a landscape orientation will cause “PAPER EDGE SENSOR ERROR” and incorrect threshold settings. 4. The initialization process is completed when the printer returns to a READY state. END OF PROCEDURE 5 ACCEL-7450 INITIALIZATION #2 (TRACTOR) Scope: This function is used to calibrate and set rear tractor media sensor thresholds. Procedure: 1. Select control panel AUTO print gap, and Tractor modes. 2. With the printer power turned OFF and no paper loaded, press and hold the ONLINE and EJECT/LOAD keys while turning ON the printer power switch. Hold keys until printer initialization (carriage movement) is completed. The LCD display will read “EEPROM INITIAL 2, TRACTOR MODE“. 3. The paper will feed into the printer comparing open and closed tractor sensor readings to set the appropriate media in/out thresholds. 4. The initialization process is completed when the printer returns to a READY state. END OF PROCEDURE 6 ACCEL-7450 AMT Datasouth Corporation www.amtdatasouth.com Corporate Headquarters 803 Camarillo Springs Rd. Suite D Camarillo, CA 93012 800-215-9192 PH (805) 389-3657 FX Charlotte Operations 5033 Sirona Dr., Suite 800 Charlotte, NC 28273 800-476-2120 PH (704) 525-6104 FX Service: extension #252 7