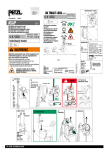
1
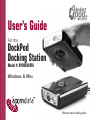
User’s Guide
For the
DockPod
Docking Station
Model #: RPDOCKU2FA
Windows & Mac
Please retain this guide.
CONTENTS
CONTACT INFORMATION . . . . . . . . . . . . . . . . . . . . . . . . . . . . . . . .3
WELCOME . . . . . . . . . . . . . . . . . . . . . . . . . . . . . . . . . . . . . . .4
PACKAGE CONTENTS. . . . . . . . . . . . . . . . . . . . . . . . . . . . . . . . . .5
PRODUCT REGISTRATION
FOR
WARRANTY COVERAGE . . . . . . . . . . . . . . . .6
PRECAUTIONS . . . . . . . . . . . . . . . . . . . . . . . . . . . . . . . . . . . . .7
ABOUT ROCKETPOD . . . . . . . . . . . . . . . . . . . . . . . . . . . . . . . . . .9
DOCKPOD
AT A
GLANCE . . . . . . . . . . . . . . . . . . . . . . . . . . . . . .12
DOCKPOD IN-DEPTH. . . . . . . . . . . . . . . . . . . . . . . . . . . . . . . . .14
TECHNICAL SPECIFICATIONS . . . . . . . . . . . . . . . . . . . . . . . . . . . . .19
SYSTEM REQUIREMENTS. . . . . . . . . . . . . . . . . . . . . . . . . . . . . . .20
SYSTEM REQUIREMENTS FOR PC . . . . . . . . . . . . . . . . . . . . . . . . . . 20
SYSTEM REQUIREMENTS FOR MAC . . . . . . . . . . . . . . . . . . . . . . . . . 21
3
CONNECTING DOCKPOD
TO
YOUR COMPUTER . . . . . . . . . . . . . . . . . . .22
HOW TO STACK&PLAY ROCKETPOD MODULES . . . . . . . . . . . . . . . . . .25
STACKING ROCKETPOD MODULES . . . . . . . . . . . . . . . . . . . . . . . . . . 25
REMOVING STACKED-ON MODULES . . . . . . . . . . . . . . . . . . . . . . . . . 28
TURNING OFF A ROCKETPOD STACK . . . . . . . . . . . . . . . . . . . . . . . . 29
CONNECTION OPTIONS . . . . . . . . . . . . . . . . . . . . . . . . . . . . . . . .30
CONNECTING DOCKPOD TO A USB HUB . . . . . . . . . . . . . . . . . . . . . 30
CONNECTING YOUR ROCKETPOD STACK TO A FIREWIRE DAISY-CHAIN . . . . . . 31
TROUBLESHOOTING/FREQUENTLY ASKED QUESTIONS (FAQ) . . . . . . . . . .33
SOLVING TECHNICAL PROBLEMS . . . . . . . . . . . . . . . . . . . . . . . . . .38
GLOSSARY . . . . . . . . . . . . . . . . . . . . . . . . . . . . . . . . . . . . . .39
ONE YEAR LIMITED WARRANTY . . . . . . . . . . . . . . . . . . . . . . . . . .43
NOTICES . . . . . . . . . . . . . . . . . . . . . . . . . . . . . . . . . . . . . . .47
CONTACT INFORMATION
Mailing Address:
P.O. BOX 5499
Diamond Bar, California
91765-7499
Telephone:
(909) 348-0680
Fax:
(909) 598-8663
Web:
www.acomdata.com
Customer Service:
[email protected]
Technical Support:
[email protected]
Pre-Sales Questions:
[email protected]
4
5
WELCOME
PACKAGE CONTENTS
Thank you and congratulations on your purchase of DockPod, the
Docking Station for RocketPod Hi-Performance Peripherals from
AcomData.
The package should contain the following items:
This guide contains instructions on how to connect your DockPod to
your computer and stack on RocketPod modules using the patented
Stack&Play™ system. For instructions pertaining to the usage of a
specific RocketPod product, please see the User's Guide for that
product.
Please read this guide carefully before using your DockPod, and
retain it for future reference.
•
•
•
•
•
•
DockPod Docking Station
FireWire cable (6-pin to 6-pin)
USB 2.0 cable (compatible with USB 1.x)
AC adapter and power cord
User’s Guide
Warranty Registration Card
If you are missing any of the items listed above, please contact
AcomData Customer Service at [email protected]
or call 1-800-470-4495 or (909) 348-0680.
6
7
PRODUCT REGISTRATION
FOR WARRANTY COVERAGE
Please take a few moments to register your AcomData product.
Registration is required in the event that your product needs warranty service. Also, please retain your sales receipt from the purchase
of this product; a copy of the sales receipt is also required to attain
warranty service.
Two ways to register:
1. Fill out and return the Warranty Registration Card included in the
package;
2. Register your AcomData product online at www.acomdata.com.
To register, click on the Customer Support button and follow the
instructions.
Online registration entitles you to free online support services,
including online tech support and customized software updates.
PRECAUTIONS
BE
S URE TO FO LLO W THE P RE CA UTIO NS LIS TE D B E LO W.
THE S E P RE CA UTIO NS M A Y CA US E DA M A G E TO YO UR
A ND VO ID THE WA RRA NTY.
FA ILURE TO
ACO M DA TA
FO LLO W
P RO DUCT
• Read this User’s Guide carefully and follow the correct procedures
for installing and using the device.
• Do not open the device or attempt to disassemble or modify it.
If it appears to be malfunctioning, contact AcomData Technical
Support.
• Never expose the device to rain or use it near water or in damp or
wet conditions.
• Never place containers on it containing liquids which may spill onto
the device. This can damage the device and increase the risk of
electric shock, short-circuiting, fire or personal injury.
• Make sure that the computer and the device are electrically
grounded. If the device has a three-prong (grounded) plug, never
plug the device into a two-prong (non-grounded outlet).
8
9
• Do not expose the device to temperatures outside the range of
5° C to 40° C (41° F to 104° F). Doing so may damage the device
or disfigure its casing.
ABOUT
ROCKETPOD™
• Do not use a third-party AC adapter or power cord. Doing so may
damage the device.
RocketPod is a revolutionary new line of
hi-performance computer peripherals from
AcomData––and they’re unlike anything
you’ve seen before.
• Do not bump, jar or drop the device as this may damage it or
result in loss of data.
• Do not try to set the device on its side; it is not designed to be
placed on its side.
• Do not disconnect any cables while the device is powered on.
• AcomData highly recommends that you regularly back-up the files
stored on your hard drive(s). AcomData is not responsible for any
data loss, nor will AcomData perform any recovery of lost data or
files.
If you want a computer peripherals solution
that is portable, expandable, compact, can
eliminate the ‘rat’s nest’ of wires on your
desktop––and is ready for the future––
you want RocketPod.
Patented
Stack & Play™ System
This revolutionary technology lets you stack
RocketPod peripherals
without additional data
cables or power cords. The
patented Stack&Play connectors
10
11
built into RocketPod devices safely and seamlessly relay power and
data signals between stacked RocketPod modules.
Modular Design
Connect a DockPod Docking Station to your computer and then stack
on the RocketPod modules that you need right now. Then, simply
add more modules as you need them––and as new
RocketPod products become available. You
can stack any combination of up to five
RocketPod modules onto your DockPod.
Portable
Super-compact size and grab-and-go
convenience make it a snap to take
RocketPod peripherals on the go:
• transfer large amounts of data to
another computer;
• bring your work to and from your home
and office;
• secure your daily backups off-site;
or whatever reason you may have to
make your data portable.
Hi-Speed USB 2.0 and FireWire
No matter what interface you choose, you get blazing performance.
You can even combine USB 2.0 and FireWire RocketPod modules in
the same stack with the DockPod Docking Station.
Hot Swappable
This is the way hot swapping was truly meant to be. Add or remove
RocketPod peripherals without turning off your computer––or fussing
with cables.
Mac or PC
All RocketPod modules are compatible with both Mac and PC.
Rugged and Stylish
With solid metal alloy tops, rugged construction and advanced
technology, RocketPod peripherals are designed to give you years
of reliable performance––and look great while doing it!
12
DOCKPOD
Stack&Play™ Connector
Relays electrical power and data
signals to stacked-on RocketPod
modules.
Stack Light
Lights up when a link between the
DockPod and stacked-on RocketPod
module(s) is established.
Voltage Meter
Measures the amount of
power used by stacked-on
RocketPod modules.
Power Button
Lights up blue when the DockPod
is powered on and ready.
AT A
GLANCE
13
ON
THE BACK PANEL
FireWire
(IEEE 1394a) port
USB 2.0 port
AC adapter power port
14
15
DOCKPOD IN-DEPTH
STACK&PLAY™ CONNECTOR
Your DockPod has two main functions: 1) to supply electrical power
for up to five stacked-on RocketPod modules, and; 2) to relay data
signals between those modules, your computer, and other devices
connected to the same USB and/or FireWire data buses.
The Stack&Play connector, located on the top-side of your DockPod,
is the power and data link to your stacked-on RocketPod modules.
The standard power and data connections located on the back of the
DockPod are used to connect DockPod to your computer.
STACK LIGHT
The Stack light, located on the fascia of your DockPod, tells you when
a proper link has been established between the DockPod and any
stacked-on RocketPod modules. The Stack light will be illuminated
when your DockPod is powered on and one or more RocketPod
peripherals are stacked onto the DockPod.
VOLTAGE METER
Your DockPod is equipped with a built-in, analog voltage meter. The
voltage meter measures the amount of power used by stacked-on
RocketPod modules. Whenever there is a sufficient power fluctuation
caused by some activity from a RocketPod module, the needle will
fluctuate until a rest state is reached.
POWER BUTTON
When the DockPod is turned on, the power button illuminates with
a stunning, deep blue color. DockPod’s power button is also used to
control power to stacked-on RocketPod modules.
FIREWIRE
AND USB 2.0 COMPATIBILITY
Your DockPod is equipped with both a Hi-Speed USB 2.0 interface
and a FireWire (IEEE 1394a) interface for the ultimate combination
of compatibility, convenience and flexibility.
You can use the USB 2.0 connection, or the FireWire connection,
or both at the same time. RocketPod Peripherals that are currently
available or coming soon are available in either USB 2.0, FireWire,
or both USB 2.0 and FireWire Combo configurations.
About FireWire
16
17
FireWire––also known as iLink and the High Performance Serial
Bus––is a cross-platform serial input/output technology for transferring data between computers and peripherals. Developed by Apple
Computer and Texas Instruments, FireWire was adopted as an official standard by the Institute of Electrical and Electronic Engineers;
the official name is IEEE 1394x.
Isochronous data transfer at a rate of 400 Mbps
FireWire is suitable for applications where delayed or out-of-order
data frames are unacceptable, such as digital video editing.
Supports up to 63 devices
FireWire devices can be linked in a daisy-chain configuration. With
the use of FireWire hubs, up to 63 devices can be linked on a single
FireWire bus.
Peer-to-peer architecture
FireWire devices are intelligent. Data transmission can take place
without the need for input from the computer.
Cable length up to 4.5 m
On-bus power up to 45 W
Some FireWire devices do not need to be plugged into an outlet; they
can get their power via the FireWire cable.
Plug & Play
You do not need to install drivers, assign unique ID numbers, or connect terminators.
Hot-swappable
Devices can be added and removed while the computer is running.
Also, you can turn off the device when not needed.
About USB 2.0
USB (Universal Serial Bus) quickly became the standard for low-bandwidth computer peripherals, such as printers, scanners, and digital
cameras. The second generation (USB 2.0) is up to 40 times faster,
making it suitable for devices––such as external hard drives––that
require large data throughput.
Data transfer rates up to 480 Mbps
Data transfer rates can vary depending on a number of factors,
including available CPU resources.
18
19
Supports up to 127 devices
Connecting more than one or two USB devices to a computer typically requires the use of one or more hubs; each hub can accommodate several USB devices.
Master-slave architecture
The computer (master) dictates data flow between attached devices
(slaves).
Cable length up to 5 m
On-bus power up to 2.5 W
Suitable for low-powered devices such as flash card readers.
Plug & Play
You do not need to assign unique ID numbers, or connect terminators. On most operating system you do not need to install drivers.
Hot-swappable
Devices can be added and removed while the computer is running.
Also, you can turn off a device when not needed.
Model #:
RPDOCKU2FA
TECHNICAL SPECIFICATIONS
Interfaces:
FireWire (IEEE 1394a) – 400 Mbps
USB 2.0 – up to 480 Mbps
Physical
Dimensions:
W 4.7" x H 1.85" x L 7.4"
Weight: ...........450g
Electrical
Input DC voltage: ....
Input current:.........
Input power: .........
Output voltage: .......
Output current: ....
6A peak (10 sec)
Efficiency: .............
19~25V
4A max
75W max
12V +/- 5%
5A average,
>90%
Environmental
Temperature:
- operating: ......+5 – +40 ºC;
- non-operating: .-40 – +70 ºC;
Humidity:
- operating : .....5 – 90 %
- non-operating: .5 – 95%
20
21
SYSTEM REQUIREMENTS
SYSTEM REQUIREMENTS
SYSTEM REQUIREMENT
• Power Macintosh (G5, G4, Blue & White G3, iBook or iMac)
• Mac OS 9 or Mac OS X
• Available USB port and/or FireWire port
FOR PC
• Minimum 233MHz Pentium or equivalent processor
• Windows 98SE, ME, 2000, or XP
• Available USB port and/or FireWire port
Windows 98 users:
• Windows 98 First Edition does not support USB 2.0. If you connect DockPod to a PC running Windows 98 First Edition, any
stacked-on USB 2.0 RocketPod modules will operate at USB 1.x
speeds.
• Windows 98 First Edition does not support FireWire.
Windows XP users:
In order to use the USB 2.0 connection, you must have at least
Service Pack 1 for Windows XP.
FOR
MAC
Mac OS 9 Users:
• We recommend using the latest version (OS 9.2.2). You can download the updates you need at http://docs.info.apple.com/article.
html?artnum=75288.
• Mac OS 9 does not support USB 2.0. If you connect DockPod to
a Mac running OS 9, any stacked-on USB 2.0 RocketPod modules will operate at USB 1.x speeds. Mac OS 9 requires USB
Mass Storage Support version 1.3.5 or later. You can download the latest update at http://docs.info.apple.com/article.
html?artnum=60394.
• Mac OS 9 requires FireWire Support and Enabler version 2.3.3 or
higher. You can download the latest update at: http://docs.info.
apple.com/article.html?artnum=86020.
22
23
CONNECTING DOCKPOD
TO YOUR COMPUTER
Important Notes:
• FireWire cables can only be properly
inserted one way. Be sure to insert
the plugs properly or you may damage the DockPod. Your DockPod came
with a 6-pin to 6-pin FireWire cable.
If you wish to connect your DockPod
to a laptop/notebook computer, you
may need to purchase a 6-pin to 4-pin
FireWire cable.
• Each end of the USB cable has different plugs, called 'A' and 'B'. The
'A' end plugs into your computer or
USB hub. The 'B' end plugs into the
DockPod. Be sure to correctly insert
the plugs, or you may damage the
DockPod.
FireWire cable
6-pin to 6-pin
USB cable
"A" Plug
"B" Plug
1. Plug the AC adapter cord into the power
port on the back of the DockPod.
Plug the power cord into the
socket on the AC adapter. Plug
the other end into a threeprong outlet.
2. Plug the USB 2.0 and/
DockPod
or FireWire cable into
the correct ports on
your computer and the
DockPod. You can plug in
either the USB 2.0 connection or the FireWire connection or both, depending on what
connections you have available with
your computer system and what type of
RocketPod modules you plan to stack onto
your DockPod.
USB cable
FireWire cable
AC adapter &
power cord
3. Press the power button on the DockPod; it will light up blue. The
voltage meter only becomes active when a RocketPod module is
stacked onto the DockPod.
24
25
Important Note:
DockPod is not a desktop device, meaning DockPod itself will not
appear in My Computer on PCs or on the Desktop on Macs. Only
stacked-on RocketPod devices, such as DrivePod hard drives, may
be recognized by your computer.
HOW TO STACK&PLAY
ROCKETPOD MODULES
Stacking RocketPod Modules
1. With the DockPod powered on, carefully place a RocketPod module onto it,
making sure the orientation is the same
and the devices are aligned. When placed
correctly, the DockPod connector will mate with
the connector at the bottom of the RocketPod
module you are stacking, and all four
feet of the module should sit firmly on
the DockPod. When the connectors
mate, you may hear a brief ‘scratching’ sound as the metal terminals in the
connectors make contact. This is normal.
2. Press down with only moderate force on the upper
device to make sure it is firmly seated. Do not use excessive force
or you may damage the devices.
26
27
There is no need to press the power button of the stacked-on module. It will power on automatically if the DockPod is turned on. If the
DockPod is not turned on, press the DockPod power button. After a
few seconds, the stacked on module should power on automatically.
After you add a RocketPod module to a stack and it powers on,
it may take
10 – 30 seconds for your RocketPod
computer to recognize it.
Stack
When at least one
RocketPod module is
stacked onto the DockPod
and the DockPod is powered on, the Stack light on
the DockPod will light up
indicating a link is established.
To stack additional modules,
simply follow the same stacking
procedure described above. Each
subsequent RocketPod module will
power on automatically. You can stack up to five RocketPod modules
onto your DockPod as shown in the illustration on page 26.
About Stacking USB 2.0
and FireWire RocketPod Modules
Part of the beauty and power of the RocketPod Stack&Play system is
you can stack USB 2.0 and FireWire RocketPod modules together,
and in any order. (There may be some exceptions. Refer to the individual User’s Guides of your RocketPod peripherals for more information.)
28
29
Removing Stacked-On Modules
There are several reasons why you may need to remove a RocketPod
module from a stack:
• You need to quickly transfer very large amounts of data between
two computers;
• You need to regularly access files stored on a DrivePod whether
you are at home, at work, or on the road;
• You may have more than five RocketPod peripherals and you need
to temporarily swap out one module for another;
• You use a DrivePod for data back-up, and you secure the DrivePod
off-site at the end of each day.
Whatever your reason, the RocketPod Stack&Play system makes
removing and replacing modules quick and easy.
1. Dismount the module you want to remove as well as any modules
that may be stacked above it (follow the proper dismounting procedure for each module).
What do 'mounting' and 'dismounting' mean? When a device is
mounted, that means the computer ‘sees’ the device and is able
to communicate with it. When you dismount a device, the computer no longer sees it. The device may still be running but the
computer cannot access it, as though the device no longer exists.
2. Once all necessary modules are dismounted, you can safely
remove them from the stack (even if they are still powered on).
Replace any modules you had to remove in order to access the
target module. They will power on automatically when stacked on.
Turning Off a RocketPod Stack
Important Note: With the exception of RocketPod devices with
push-button dismount, the power button of a RocketPod device is
rendered inactive when that device is used as a module in a stack;
the power can only be controlled via the DockPod.
1. Dismount all stacked-on RocketPod modules according to the
instructions in their respective User’s Guides.
2. Press the power button on the DockPod. The entire RocketPod
stack will power off.
30
31
CONNECTION
OPTIONS
To connect the DockPod to a USB hub, connect the USB cable to the
USB 2.0 port on the back of the DockPod and to an appropriate USB
port on the hub, as shown in the illustration on page 30. Follow the USB
hub manufacturer’s instructions for proper set-up and use of the hub.
Connecting
DockPod to a USB
Hub
Connecting your RocketPod Stack
to a FireWire Daisy-Chain
Important Notes:
USB hub
When daisy-chaining a RocketPod stack, you connect the FireWire
port on the DockPod to your computer or previous device in the
chain. If the RocketPod stack is not last in the chain, you must also
connect the right-hand FireWire port (when viewed from the back)
of a stacked-on RocketPod module to the next device in the chain. For
maximum performance, place this module first in the stack (closest
to the DockPod).
• Each USB hub that you
connect to your computer decreases by one
the number of USB 2.0 RocketPod modules you can stack. For
example: if you have one USB hub, you can stack up to four USB
2.0 RocketPod modules; if you have two USB hubs, you can
stack up to three USB 2.0 RocketPod modules. USB hubs do
not affect the number of FireWire RocketPod modules you can
stack; however, the total number of modules is still five.
For daisy-chaining FireWire devices from other manufacturers, check
the manufacturers’ instructions, though typically it does not matter
which FireWire port(s) you connect the FireWire cable(s) to.
• If the USB hub only supports USB 1.x, all stacked-on USB 2.0
RocketPod modules will operate at USB 1.x speeds.
Let’s consider a couple of options using the following illustrations as
reference. (Any USB cables and power cords are not shown.)
32
33
If your RocketPod stack is first in the
chain (starting from the computer):
As shown in the illustration
at right, connect the
FireWire
DockPod to your comdevices
puter; then connect
the right-hand FireWire
port of a stacked-on
RocketPod module to
the next FireWire device
open
in the chain.
FireWire
port
If your RocketPod
stack is NOT first in the chain:
Connect the DockPod to the previous device in the chain. If the
RocketPod stack is not last in
the chain, connect the righthand FireWire port of a
stacked-on RocketPod
module to the next
FireWire device in the
chain.
RocketPod
Stack
TROUBLESHOOTING/
FREQUENTLY ASKED QUESTIONS (FAQS)
Q: My DockPod won’t power on.
A: Check to make sure all connections are secure. When the
DockPod is powered on, the power button will light up blue.
FireWire cables
Q: My computer does not seem to recognize the DockPod.
A: DockPod is not a desktop device, meaning it will not appear on
your computer's desktop or in My Computer. Only RocketPod modules, such as the DrivePod, will appear on the desktop.
Q: How many RocketPod modules can you stack onto a DockPod?
A: You can stack up to five RocketPod modules onto a DockPod. If
you have any USB hubs connected to the same computer as the
DockPod, the number of USB 2.0 RocketPod modules you can
stack on the DockPod decreases by the number of hubs, whether
the DockPod is connected to a hub or not. The number of FireWire
modules you can stack is not affected by USB hubs, so you can still
stack up to five modules in total by combining USB 2.0 and FireWire
modules in the same stack. For example: if you have two USB hubs
connected to your computer, you can stack up to three USB 2.0
34
35
RocketPod modules rather than five. However, you can stack on two
FireWire RocketPod modules, for a total of five modules.
Q: Do I need to turn my RocketPod modules on when I stack them?
A: No. If your DockPod is turned on, stacked-on RocketPod modules
will power on automatically. If the DockPod is turned off, any stackedon modules will power on when you turn on the DockPod.
Q: Do I need to turn my RocketPod modules off before I remove
them from a stack?
A: No. Anyway, in most cases you simply can’t because the power
is controlled from the DockPod. If you want to remove a RocketPod
module from a stack, you only need to dismount the device before
removing it. After the device is dismounted, it will still be powered on
but it is perfectly safe to remove it. If the module you wish to remove
has one or more modules stacked above it, you must dismount and
remove these modules first.
Q: Can I select which RocketPod modules in a stack to turn on
and which to turn off?
A: No. Power to stacked-on modules is controlled via the DockPod.
When you turn on the DockPod, all stacked-on modules will power on.
If you turn off the DockPod, all stacked-on modules will power off.
Before you turn off the DockPod, be sure to dismount all modules.
Q: Do I need to use both the USB 2.0 and FireWire interfaces of
my DockPod in order for it to work?
A: No, you can use only one interface if you so choose. DockPod
comes with both interfaces to accommodate both USB 2.0 users
and FireWire users.
Q: Can I connect DockPod to a USB or FireWire expansion card?
A: Yes.
Q: Can I connect my DockPod to more than one computer at the
same time?
A: Yes, actually you can. It is possible to connect the USB 2.0 interface to one computer and the FireWire interface to another computer. Any USB 2.0 RocketPod modules in your stack will be recognized
by one computer and only that computer; the FireWire modules in
the same stack will be recognized by the other computer and only
that other computer. You cannot use a RocketPod module on two
computers simultaneously. (The up-coming NASPod will allow you to
make your DrivePod(s) accessible to multiple users over an Ethernet
network.) If you connect the DockPod to a computer or hub that only
supports USB 1.x, any stacked on USB 2.0 RocketPod modules will
36
37
operate at USB 1.x speeds. You will need to follow any necessary
set-up instructions for each RocketPod module, as described in their
respective User’s Guides.
Q: I stacked on a RocketPod module and it powered on but my
computer did not recognize it.
A: Make sure you properly followed the set-up instructions for that
device. Each RocketPod peripheral has it’s own set-up requirements
independent of the DockPod. Also, check to make sure that you are
using the correct interface and that it is properly connected. For
example, if the RocketPod module you stacked onto your DockPod
uses a USB 2.0 interface, make sure you properly connect the
DockPod’s USB 2.0 interface to your computer or USB hub.
Q: I have a RocketPod module stacked onto my DockPod, but the
Stack light is not on.
A: First, make sure your DockPod is turned on. If it is, the most likely
cause is the module is not properly seated on the DockPod. Remove
the module and re-connect it, following the connection procedure in
this guide. If your stacked-on modules are recognized by your computer and functioning fine but the Stack light is not illuminated, there
is a problem with the light itself.
Q: The voltage meter doesn’t seem to work properly.
A: Like the Stack light, the voltage meter is only active when one or
more RocketPod modules are stacked onto the DockPod and the
DockPod is turned on.
Q: Do I need to worry about the exposed Stack&Play connector
when my DockPod or RocketPod stack is powered on?
A: Since every RocketPod peripheral has a connector built into the
top, you will always have an exposed or free connector with the last
(top) module in a stack. Free connectors are inactive; they do not
have power, so it is perfectly safe to touch them. However, we do
recommend that you cover the free connector using the Connector
Cap that comes with every stack-on RocketPod peripheral in order to
protect the connector and prevent dust from collecting on it.
Q: When I leave my computer idle for a while and come back, my
RocketPod modules won’t work properly.
A: The most likely cause is that your computer is going into sleep
mode. The immediate solution is to restart your computer. To prevent this problem from recurring, set your computer to never go into
sleep mode. (See the documentation that came with your computer
for instructions.)
38
39
SOLVING TECHNICAL PROBLEMS
GLOSSARY
If you experience a problem with your AcomData product, you should
take the following actions in the order specified:
BIT - The smallest unit of digital data. In binary code, a bit is represented logically as a either a 1 or a 0.
1. Re-read this guide carefully to make sure that you followed all of
the instructions properly.
Buffer - RAM cache that temporarily stores data so it can be delivered to a device as it is needed.
2. Consult the Frequently Asked Questions (FAQs) section of this
guide. The FAQs will have answers to most questions.
Bus - An electronic link that allows the transmission of data between
digital devices, such as computers and computer peripherals.
3. If the issue you are having is still not resolved by using the FAQs,
please contact Technical Support using one of the following
options:
a) via the online Technical Support form at our web site, www.
acomdata.com;
b) via e-mail at [email protected];
c) by telephone at (909) 348-0680
Byte - A unit of digital information, usually made up of eight bits.
Daisy Chain - A type of connection whereby devices, such as computer peripherals, are linked together in series. When data is transmitted, it is passed from device to device in the chain en route to its
destination.
Data Stream - The flow of data between digital devices such as computers and hard drives.
Driver - Software that enables communication between a computer
and a peripheral.
40
41
FireWire (IEEE 1394x) - A serial bus interface standard offering
high-speed communications and real-time data services. Cable length
is limited to 4.5 m, but up to 16 cables can be daisy-chained, yielding a total length of 72 m. It allows the connection of up to 63
peripherals in a tree-like structure. It allows peer-to-peer device communication to take place without using system memory or the CPU.
It is designed to support plug-and-play and hot swapping.
Mb (Megabit) - One million bits.
Gigabyte - 1,024 megabytes (binary); 1,000 megabytes (decimal),
or approximately one billion bytes.
Operating System (OS) - Software that controls the assignment and
use of hardware and software resources.
Hardware - Physical components of a computer system (computer,
hard drives, printers, etc.)
Peripheral - A generic term for hard drives, printers, scanners and
other discrete devices that add functionality to a computer.
Hub - A device which links peripherals together onto the same data
bus.
Port - A connection which enables compatible peripherals to send
and receive data.
Interface - Junction between two items of hardware or software for
the exchange of data.
Software - A set of instructions that enable a computer to perform
pre-programmed functions in the order specified by the user.
Isochronous - A form of data transmission that guarantees a certain minimum data rate, as required for time-dependent data such as
video or audio.
Mbps (Megabits per second) - A data transmission speed of one
million bits per second. Data transmissions are measured in bits
(kilobits, megabits etc) per second.
MB (Megabyte) - 1,048,576 bytes (binary); 1,000,000 bytes (decimal).
Storage - Any equipment which stores data, such as hard drives,
CDs, and DVDs.
42
43
USB (Universal Serial Bus) - An interface technology for the serial
transmission of digital data. The original standard (USB 1) could
transmit data at speeds of up to 12 Mbps. USB 2.0 has a maximum
throughput of 480 Mbps – up to 40 times faster than USB 1. USB
is a host-based technology, meaning USB devices need to be connected to a computer––either directly or indirectly via a hub––in order
to communicate with each other. This is in contrast to a peer-to-peer
technology, such as FireWire (IEEE 1394), which does not need a
host computer for communication between devices.
ONE YEAR LIMITED WARRANTY
AcomData warrants this product (the "Product") against defects in material
or workmanship as follows:
1. LABOR: For a period of one (1) year from the original date of purchase from AcomData or its local representative supplier, AcomData
will repair defective Product (or, at its option, replace with a new or
recertified product) at no charge. After this 1 year period, you must
pay for all labor charges.
2. PARTS: For a period of one (1) year from the original date of purchase from AcomData or its local representative supplier, AcomData
will supply, at no charge, new or rebuilt replacement parts in
exchange for defective parts of this Product. Any replacement parts
will be warranted for the remainder of the original warranty period or
ninety(90) days from installation by AcomData. All exchanged parts
replaced under this warranty will become the property of AcomData.
This warranty only covers the hardware components packaged with
the Product. This warranty does not cover any software contained
in, or included with, the Product; any such software is provided "AS
IS". Please refer to any documentation included with the software for
44
45
your rights and obligations with respect to the software. This warranty extends only to you, the original purchaser. It is not transferable
to any one who subsequently purchases the Product from you. Proof
of purchase in the form of a bill of sale (which is evidence that the
Product is within the warranty period) must be presented to obtain
warranty service.
To obtain warranty service you must take the Product, or deliver the
Product freight prepaid, in either it's original packaging, or in a package that provides the Product with a degree of protection equivalent to that of the original packaging, to AcomData. Please contact
AcomData at the number listed on the reverse side for further information.
AcomData is not responsible for any damage to, or loss of, any programs, data, or other information stored on any media or any part
of any Product serviced hereunder. Be sure to remove all features,
parts, options, alterations, and attachments not under warranty
prior to returning the Product to AcomData. AcomData is not liable
for any loss or damage to these items.
This limited warranty does not cover: (1) any consumables (such as
batteries) supplied with this product; cosmetic damages; damage or
loss to any software programs, data or removable storage media;
or damage due to the Product such as but not limited to excessive
heat or humidity, or modifications of this Product; (2) improper installation, operation, testing or maintenance of this Product; (3) power
failure or connection to improper voltage supply; or; (4) attempted
repair by any party other than AcomData. This Warranty does not
apply when the malfunction results from the use of this Product in
conjunction with accessories, products or ancillary or peripheral
equipment, or where it is determined by AcomData that there is no
fault with this Product itself.
This Limited Warranty is invalid if the factory applied serial number
has been altered or removed from the Product.
REPAIR OR REPLACEMENT AS PROVIDED UNDER THIS WARRANTY
IS THE EXCLUSIVE REMEDY OF THE CONSUMER. ACOMDATA SHALL
NOT BE LIABLE FOR ANY INCIDENTAL OR CONSEQUENTIAL DAMAGES FOR BREACH OF ANY EXPRESS OR IMPLIED WARRANTY,
BREACH OF CONTRACT, NEGLIGENCE, STRICT LIABILITY OR ANY
OTHER LEGAL THEORY RELATED TO THIS PRODUCT. SUCH DAMAGE INCLUDE, BUT ARE NOT LIMITED TO, LOSS OF PROFITS, LOSS
OF DATA, LOSS OF USE OF THE PRODUCT OR ANY ASSOCIATED
EQUIPMENT, DOWN TIME AND PURCHASER’S TIME. EXCEPT TO
46
47
THE EXTEND PROHIBITED BY APPLICABLE LAW, ANY IMPLIED WARRANTY OF MERCHANTABILITY OR FITNESS FOR A PARTICULAR PURPOSE ON THIS PRODUCT IS LIMITED IN DURATION OF THIS WARRANTY.
Some states do not allow the exclusion or limitation of incidental or
consequential damages, or allow limitations on how long on implied
warranty lasts, so the above limitation or exclusions may not apply
to you. This warranty gives you specific rights; you may have other
rights which vary from state to state.
NOTICES
COPYRIGHTS
Copyright © 2004 AcomData. All rights reserved. No part of this publication
may be reproduced stored in a retrieval system, or transmitted in any form
or by any means, electronic, mechanical photocopying, recording or otherwise, without the prior written consent of AcomData.
PATENTS
This product is protected by one or more granted patents and pending
patent applications, including U.S. Pat. Nos. 6,379,191, D445,800 and
D448,031.
TRADEMARKS
The AcomData name and its logos are registered trademarks of AcomData.
RocketPod, DrivePod, NASPod, DVDPod, A/VPod, BluePod, Stack&Play and
the RocketPod logo are trademarks used under license by AcomData. Apple,
Mac, Macintosh and FireWire are registered trademarks of Apple Computer,
Inc. Microsoft, Windows 98, Windows 98SE, and Windows 2000 are registered trademarks of Microsoft Corporation. iLink is a registered trademark
of Sony Electronics. Other trademarks mentioned in this document are the
property of their respective owners.
48
CHANGES
The material in this document is for information only and subject to change
without notice. While reasonable efforts have been made in the preparation of this document to assure its accuracy, AcomData assumes no liability
resulting from errors or omissions in this document, or from the use of the
information contained herein. AcomData reserves the right to make changes
or revisions in the product design or the product manual without reservation
and without obligation to notify any person of such revisions and changes.
FEDERAL COMMUNICATIONS COMMISSION
RADIO FREQUENCY INTERFERENCE STATEMENT (FCC)
This equipment has been tested and found to comply with the limits for a
Class B digital device, pursuant to Part 15 of the FCC Rules.
CANADA COMPLIANCE STATEMENT
This Class A digital apparatus meets all requirements of the Canadian
Interference-Causing Equipment Regulations.
OTHER
INNOVATIVE ACOMDATA PRODUCTS
DESIGNED TO EMPOWER, INSPIRE AND ENTERTAIN!
External Hard Drives:
The easiest way to add hi-performance data storage to your
PC or Mac.
Flash Card Readers:
The quick, convenient way
to transfer digital media files
between your PC or Mac and
your digital camera, camcorder
and other devices.
Remote Laser Pointer Mouse:
Make more effective, more
powerful presentations with
ease.
MultiMedia Viewer:
View your JPEG photos and
MPEG video clips on your TV.
Listen to MP3s on your stereo,
or add headphones and take
your tunes on the go.
AWEGO
Portable Tablet DVD Player:
Enjoy your favorite movies,
music, and photos at home,
on the road, or just about anywhere else. Can be mounted
to a wall or in your car with
optional mounting kits.