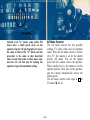
1
Not For Resale – Free Download at http://www.joe-chan.com/manuals
Not For Resale – Free Download at http://www.joe-chan.com/manuals
INTRODUCTION
the A-1's system accessories are integrated
into its pulse-controlled, digital computer
system so that you can enjoy AE flash and
motorized AE photography. In the A-1,
Canon finally offers you a multifunctional
AE camera that actually gives you more
creative freedom through more control.
You will find that your A-1 has many
unusual features. For the fullest understanding of and benefit from your A-1,
please read this instruction booklet carefully as you familiarize yourself with
the camera. For the convenience of nonexperts, we have included as many
photographic hints and facts as space
allowed. We at Canon hope your new A-1
will open to you a whole new world of
photography, whether as profession or
avocation.
Congratulations! You are now the owner of
the most exciting and advanced camera on
the market. Canon has good reason to have
unbounded confidence and pride in the A-1.
Embodied in this camera are the qualities of
the finest SLR cameras and into it went the
most sophisticated electronics technology
available in the world today. Incorporating
at least 20 novel technologies never before
used in a camera, your A-1 is capable of
operating in five distinct AE modes–all with
an incredibly high degree of precision,
reliability and ease of operation. A simple
flick of a single switch will put you in any
one of the AE modes. Simple manual
operation is also possible. With its many AE
functions, the A-1 is not only the perfect
tool in the hands of a professional but easy
enough to operate even for novices. Even
–2–
Not For Resale – Free Download at http://www.joe-chan.com/manuals
Focusing Index Mark with Depth-of-Field Scale
Mount Positioning Point
Exposure Preview
Switch
Exposure Memory
Switch
Stop-Down Lever
Focusing Ring
“A” Mark
AE Lock Pin
Aperture Ring
Battery Chamber Cover/Finger Grip
Viewfinder Display Lever
Positioning Pin For Action Grip
PC Socket
Mounting Socket
for Action Grip
Battery Check Button
AT Dial Guard
AT Dial
ASA Lock Button
Exposure Compensation
Scale
ASA Film Speed Scale
Frame Counter
Film Rewind Knob with Crank
Exposure Compensation
Lock Button
Film Plane Indicator
Accessory Shoe
Automatic Flash Contacts
Flash Synchronization Contact
Main Switch
Battery Check/
Self-timer LED
Multiple Exposure Lever
Shutter Release Button
(with Cable Release
Socket)
AE Mode Selector
AE Mode Window
Fold out both front and back nomenclature pages for easy reference while reading the instructions
Not For Resale – Free Download at http://www.joe-chan.com/manuals
TABLE OF CONTENTS
Main Features ............................................................ 5
Pictorial Outline for General Use of
the Camera ................................................................ 8
Setting the Camera for the Five AE
Modes and Manual Override ................................... 10
Preliminary Preparations ......................................... 12
Handling the Lens ................................................... 13
NORMAL PROCEDURES ................................... 18
Loading the Battery ................................................. 19
Checking the Battery ............................................... 20
Film Advance and Shutter Release .......................... 22
Holding the Camera ................................................. 25
Loading the Film ..................................................... 26
Setting the ASA Film Speed .................................... 28
The Basics of Exposure ........................................... 30
AE Photography ...................................................... 32
Setting the Lens for AE Photography ...................... 33
AE Mode Selector ................................................... 34
AT Dial ................................................................... 35
Shutter Speed Scale on the AT Dial ........................ 36
Aperture Scale on the AT Dial ................................ 37
Shutter Priority vs.
Aperture Priority ..................................................... 40
Programmed AE ...................................................... 45
Meter and AE Coupling Ranges .............................. 46
Metering at Low Light Levels ................................. 47
Viewfinder ............................................................... 49
Viewing and Focusing ............................................. 49
Optional Viewing Aids ............................................ 50
Previewing the Exposure ......................................... 52
Cancelling the Viewfinder Display .......................... 53
Numerals and Characters Composing
Digital Readout in Viewfinder .................................
Incorrect Exposure Warnings ...................................
Double-Check Before Shooting ...............................
Shutter Release ........................................................
Rewinding the Film ..................................................
Frame Counter .........................................................
SPECIALIZED PROCEDURES ..........................
Stopped-down AE Photography ...............................
Manual Override ......................................................
Self-Timer ................................................................
Exposure Compensation ..........................................
Multiple Exposures ..................................................
Film Plane Indicator .................................................
Distance Scale ..........................................................
Infrared Index Mark .................................................
Checking the Depth of Field ....................................
Lens Signal Coupling ...............................................
Unusable Lenses ......................................................
Automatic Diaphragm Control .................................
Manual Diaphragm Control .....................................
Flash Photography with the A-1 ...............................
Motorized Film Winding .........................................
Data Back A .............................................................
Various Accessories for Close-ups and
Photomacrography ...................................................
Proper Care of the Camera .......................................
Using the Camera in Extremely Cold
Conditions ................................................................
54
55
57
58
58
59
60
61
65
66
69
73
75
75
75
76
78
79
80
80
83
89
90
90
95
96
Specifications .......................................... 97
Not For Resale – Free Download at http://www.joe-chan.com/manuals
MAIN FEATURES
Quality from the Inside Out
Canon has extended its use of computers
and automation from automatic production
of the main parts to at least partial
automation in all facets of production
including processing, assembly and inspection. In this contribution to a new
system of camera manufacture, Canon is
able to offer greater precision at less
expense.
Other benefits deriving from the design
concept of the A-1 include greatly improved
stability against great temperature changes
and remarkably improved meter response.
The A-1 will set AE exposure only a split
second before shutter release.
Despite all of this electronic circuitry which
would reasonably require a great deal of
power, the A-1 requires only one small
battery which normally lasts about one year.
Every part of the A-1, from its sequence
circuitry, where the power is sequentially
switched on and off, to its Pure-I2 L and
combination magnet, is designed to
conserve power.
The extraordinary qualities of the A-1 start
with its design. It is the first camera in the
world in which all information, both input
and output, is in the form of pulse signals,
enabling it to be the first camera with a
digital, rather than an analog, computer. It is
the first camera to have a Pure-Integrated
Injection Logic (Pure-PL), the most
advanced type of logic circuitry yet
produced by the electronics industry, which
is so highly integrated that it is capable of
processing many times the information
possible with simple IC's. It is also the first
camera in the world to have a program unit
with programmable logic array (PLA)
which makes sure that the camera receives
all information and in correct order. In
practical terms, all of this complex
electronics circuitry boils down to the first
camera which is capable of extremely
precise and reliable automatic exposure in
five different modes but which remains
remarkably compact and easy to operate.
The use of such advanced technology is not
limited to design alone. Building on the
special 'production technology system it
established with the design of the AE-1,
Five AE Modes and Manual Override
Besides five AE modes which cover all forms
of photography, easy override of the A-1's
–5–
Not For Resale – Free Download at http://www.joe-chan.com/manuals
AE functions is also possible.
Shutter priority AE is especially useful
in action photography, aperture priority AE
in still photography. The programmed AE
mode, in which the camera controls both
aperture and shutter speed for correct
exposure, is good for general use and is the
easiest mode for beginners. These three AE
modes along with exclusive flash AE, are
performed with an FD lens set at “A” for all
the benefits of full aperture metering.
Stopped-down AE, in which the shutter
speed is automatically set, allows automatic
exposure with non-FD lenses and accessories
and is a big advantage in close-ups and photomicrography. And since all AE inputs have
been consolidated into the AE mode selector
and the AT dial, the operation of only these
two controls suffices to set the camera for
any one of the five AE modes.
For complete control for exposure correction or special effects, manual operation
is a simple matter of moving the FD lens
aperture ring from the “A” mark while the
shutter speed is set on the AT dial. The A-1
will even provide you with an exposure
readout as a basis for your exposure
adjustment.
Exposure Compensation
Along with the wide selection of AE modes,
the A-1 has two controls for wide-range
exposure compensation. These are the
exposure compensation dial for stepped
exposure correction between ±2 f/stops and
an exposure memory switch for temporary
correction. For special techniques such as
low- and high-key shots, contre-jour photography, multiple exposures and flash photography, you pros will find quick response in
the A-1. Even in AE, you have complete
control over the image results.
Field-of-view-only Viewfinder
This viewfinder is one of the A-1's most
unusual features. In the classic sense of the
word, this bright viewfinder shows only the
field of view for easiest focusing and composing.
Using any one of three ways to take an
exposure preview, you will activate a
compact LED digital readout which clearly
conveys shutter speed, aperture, flash and
manual operation signals, a bulb indication,
improper exposure warnings and a malfunction warning. The viewfinder readout is
below and out of the way of the field of
view, and the LED's are clearly legible with
no need for extra illumination even in very
bad light.
–6–
Not For Resale – Free Download at http://www.joe-chan.com/manuals
detachable action grip, its 120°-stroke film
advance lever with a 30 stand-off, its
eyepiece shutter and its shutter button lock
(main switch).
Wide Metering Range
With its extensive film sensitivity range
(ASA 6-12800) and 16 shutter speeds
(1/1000-30 sec.), the A-1 offers a wide AE
metering range from EV18 (f/16, 1/1000
sec.) all the way down to EV-2 (f/1.4, 8 sec.)
with ASA 100 film and an f/1.4 speed lens.
Provided that you can even focus your
subject in the viewfinder in a very dark
situation, it is most likely that you will be
able to meter it as well, even in an AE mode.
This is especially advantageous in such
dimly-lit situations as those in night scenes
and photomacrography.
The System
Beginning with accessories which are integral
parts of the A-1 system, Canon offers the
Speedlite 199A and the Motor Drive MA.
Either the specified Canon Speedlite 577G,
533G, 199A, 188A, 177A, 155A or 133A
can be mounted on the A-1 for AE flash
photography with automatic setting of
shutter speed and aperture. With the Motor
Drive MA, continuous shooting at up to five
frames per second is possible, and the A-1
also accepts the Power Winders A and A2.
Like the AE-1, the A-1 can also use the
Data Back A, a date imprinting mechanism
that will couple to both power winder and
Speedlite. Plus, you have your choice of
accessories from Canon's extensive SLR
system. From its famous, high resolution FD
lenses to its complete line of systemized
accessories for close-ups, photomacrography
and photomicrography, Canon offers highquality equipment for all photographic
fields.
Other Special Features
Add to these features the A-1's single-lever
multiple exposure operation and its twointerval self-timer with an LED warning.
Switching one small lever before winding the
film sets the A-1 for a multiple exposure.
The film and even the frame counter remain
stationary for unlimited multiple exposures.
You can set the self-timer for a time-lag of
either two or ten seconds during which an
easily visible LED flashes. Flashing frequency increases as a warning prior to shutter
release.
Finally, seemingly small features, but big
advantages in photography, include the A-1's
–7–
Not For Resale – Free Download at http://www.joe-chan.com/manuals
1
Load the battery.
2
Turn the main switch to the
“A” position and check the
power level.
3
Load the film and advance
it to the first frame.
PICTORIAL OUTLINE FOR GENERAL USE OF THE CAMERA
7
8
Look into the viewfinder.
Compose the picture and focus.
Check the exposure.
Flashes to indicate
overexposure
Out of Focus
In Focus
Flashes to indicate
underexposure
Not For Resale – Free Download at http://www.joe-chan.com/manuals
4
Set the ASA film speed.
9
Press the shutter
button gently.
5
Set the aperture ring of the
lens to the “A” mark (for
AE photography).
10
Advance the film to the next
frame.
6
Select the AE mode.
(Turn the AT dial).
11
Rewind the film after
all frames are exposed.
Not For Resale – Free Download at http://www.joe-chan.com/manuals
SETTING THE CAMERA FOR THE FIVE AE MODES AND MANUAL OVERRIDE
Shutter Priority AE
1. Make sure the lens aperture
ring is set to the “A” mark.
2. Switch the AE mode selector to TV.
3. Select a shutter speed by
turning the AT dial.
See pp. 34-36 for detailed
explanation.
Aperture Priority AE
1. Make sure the aperture ring
of the lens is set to the “A”
mark.
2. Switch the AE mode selector to Av.
3. Select an aperture by turning the AT dial.
See pp. 34-37 for detailed
explanation.
–10–
Programmed AE
1. Make sure the aperture ring
of the lens is set to the “A”
mark.
2. Switch the AE mode selector to TV.
3. Turn the AT dial to “P” at the
upper limit of the shut- ter
speed scale.
See p. 45 for detailed
explanation.
Not For Resale – Free Download at http://www.joe-chan.com/manuals
Stopped-down AE
1. Disengage the lens aperture
ring from the “A” mark
(necessary only on FD lens).
2. Fold and push in the stopdown lever.
3. Set the aperture by turning
the lens aperture ring.
See pp. 61-62 for detailed
explanation.
AE Flash
1. Insert
the
Speedlite
577G's or 533G's sensor
unit or the 199A, 188A,
177A, 155A or 133A into
the A-1's accessory shoe.
2. Set the ASA film speed on
the flash.
3. Make sure the lens aperture
ring is set to “A”.
4. Set the auto working aperture on the flash.
5. Switch the flash on.
6. Wait for the pilot lamp to
light up and “F” to appear
in the viewfinder. See pp.
83-85 and the Speedlite's
instruction
booklet
for
detailed explanation.
Manual Override
1. Disengage the lens aperture
ring from the “A” mark
(necessary only on FD lens).
2. Switch the AE mode selector to TV.
3. Select a shutter speed by
turning the AT dial.
4. Select an aperture by turning the lens aperture ring
(using the camera-selected
aperture in the digital readout as a basis if so desired).
See p. 65 for detailed
explanation.
Not For Resale – Free Download at http://www.joe-chan.com/manuals
Eyecup 4S
This is an accessory eyecup which snaps into
the eyepiece grooves. Its use is not
mandatory, but viewing with it may be more
comfortable, and it helps block extraneous
light from entering the viewfinder.
PRELIMINARY PREPARATIONS
Neckstrap
Thread the tips of the neckstrap through the
corresponding rings on the camera so that
the tips are on the inside. Then adjust the
neckstrap to the length most comfortable
for you.
Action Grip
The A-1 has a handy, built-in finger grip, but
to make camera holding all the easier, it
comes with a detachable action grip as well.
Before attaching the grip, load the battery
into the camera. Then, using a coin, screw
the grip into the action grip mounting socket
guided by the positioning pin on the front of
the camera body.
Plastic Insert
Pull up the film rewind knob to open the
camera's back cover. Remove the plastic
insert, which is attached to the pressure
plate, and snap the back cover shut. The
insert is no longer necessary and may be
thrown away.
–12–
Not For Resale – Free Download at http://www.joe-chan.com/manuals
Semi-hard Case
To protect the camera, particularly when
carrying, it, insert it into its semi-hard case
as indicated in the photo A. You can
easily shoot pictures even with the camera in
the semi-hard case by turning the top cover
down. If you wish to remove the top cover,
turn it down, slide it straight up in the
direction of the arrow and pull it out as
indicated in the photo B. To replace the
cover, insert its hook into the corresponding
hole on the case and pull it straight down.
For closing the top cover, the lens' focusing
ring should be turned to infinity (I).
HANDLING THE LENS
Lens Cap and Rear Dust Cap
The front and rear lens caps should always
be on the lens when the lens is not on the
camera. For protection when the lens is
mounted on the camera but not in use,
please see to it that the front lens cap is
attached.
Lens Cap
Most Canon lenses are provided with a clipon front lens cap which is easily attached
and removed from the front of the lens by
pressing in the tabs on both sides of the cap.
This type of cap may also be attached to a
Canon filter screwed into the lens.
–13–
Not For Resale – Free Download at http://www.joe-chan.com/manuals
Positioning Pin
Automatic Aperture Lever
Rear Dust Cap
The rear dust cap must be removed before
mounting the lens.
tight.
Operation with an FD lens which has
a chrome Breech-lock mount ring or
with an FL lens:
Operation with an FD lens which lacks
a chrome Breech-lock mount ring:
Removal from Lens
1. Turn the lens' mount ring clockwise until
it stops.
2. Pull the cap out.
The rear dust cap for this type of lens has
serrated edges. Do not mount a rear dust
cap which lacks the serrated edges.
Removal from lens
1. Turn the cap counterclockwise until it
stops.
2. Pull the cap out.
Once the rear cap is removed, the Breechlock mount ring is locked so that it cannot
be turned. (The diaphragm blades are also
locked and will not move even if the aperture ring is rotated.)
Reattachment
1. Align the arrow on the cap with the red
dot at the rear of the lens.
2. In that position, apply slight pressure to
the cap and turn it clockwise until it is
–14–
Not For Resale – Free Download at http://www.joe-chan.com/manuals
Lens Hood
When shooting into bright light, light rays
entering the lens may form defects on the
image called ghost and flare. Attaching a
hood onto the lens helps to prevent this.
Bayonet-mount hoods are available as optional accessories for most Canon lenses.
Please use only that hood which is specified
for the lens concerned. This type of hood
fits into the bayonet mount at the front of
the lens where it is fixed by turning until it
is tight. Some hoods for wide-angle lenses
require proper positioning before mounting.
Align the red dot on this type of hood with
the notch in the bayonet mount at the front
of the lens. Then lightly push the hood into
the mount and turn it until it is tight.
When not in use, the hood can be mounted
in reverse on a standard or some wide-angle
lenses, in which case even the hood will fit
perfectly into the camera's case.
Reattachment
1. Make sure the mount ring is locked so
that it cannot be turned.
2. Align the arrow on the cap with the
red dot on the mount ring.
3. In that position, push lightly down on the
cap and turn the mount ring counterclockwise until it is tight.
–15–
Not For Resale – Free Download at http://www.joe-chan.com/manuals
Mounting on the Camera and Dismounting
Pre-Mounting Checklist
1. Make sure the camera's stop-down lever
is not locked for stopped-down metering
(see p. 61). If it is, a red warning dot will
appear beside the coupling lever inside
the camera body.
2. Make sure the automatic aperture lever at
the rear of an FD lens is not set for
manual diaphragm control (see p. 80).
3. Before mounting an FD lens, make sure
the film advance lever has been completely advanced.
4. Remove the lens' rear dust cap.
5. Remove the camera's body cap.
In the case of an FD lens which lacks
a chrome Breech-lock mount ring:
Mounting
1. Align the projecting red mount positioning point on the lens with the red dot
–16–
above the camera mount.
2. In this position, apply slight pressure to
the lens, and simply rotate the whole lens
clockwise until it stops and the lens
release button pops out with a click.
Do not press the lens release button while
mounting the lens.
Only when this button pops out can you be
sure that the lens is properly mounted and
that it will function properly. It is also
possible to mount this type of lens when it
is not perfectly aligned with this camera.
To facilitate mounting when it is very dark
or when you are in a great hurry, the mount
positioning point is rounded. Simply find
this point with your finger and align it as
closely as possible with the red dot on the
camera. Turn the lens slightly back and
forth while applying slight pressure until it
drops into position and continue with step
2 above. Excessive sloppiness will make
mounting impossible; take care to be as
accurate as possible.
Dismounting
1. Turn the lens counterclockwise until it
stops while pressing the lens release
button.
2. Pull the lens out.
When the lens is dismounted, the diaphragm
blades are locked in a half-closed position
and will not move even if you turn the
lens
aperture
ring.
Not For Resale – Free Download at http://www.joe-chan.com/manuals
When removing a lens, take special care not
to damage the protruding pins and levers
on the rear. With the exception of the Fisheye 7.5mm lens, always put a lens down
with the rear facing up.
Whenever you mount an FD lens on the A-1,
its maximum aperture is automatically
transmitted to the camera's AE circuit. Even
if you switch to an FD lens of a different
maximum aperture, the mounting procedure
is the same as that described above and requires no adjustment.
All five AE modes are possible with an FD
lens. See SETTING THE LENS FOR AE
PHOTOGRAPHY. Of the five AE modes,
only stopped-down AE is possible with an
FL lens.
In the case of an FD lens which has a
chrome Breech-lock mount ring or of an
FL lens:
Mounting
1. Make sure the Breech-lock ring is locked
so that it cannot be turned. It will not
mount onto the camera otherwise.
2. Align the red dot of the Breech-lock ring
with the red dot on the camera body
above the camera mount.
3. In this position, fit the rear of the lens
into the camera body and turn the
Breech-lock ring clockwise until it is
tight.
Dismounting
1. Turn the Breech-lock ring counterclockwise until it stops.
2. Pull the lens out from the camera body.
–17–
Not For Resale – Free Download at http://www.joe-chan.com/manuals
Normal Procedures
Not For Resale – Free Download at http://www.joe-chan.com/manuals
Loading the Battery
This camera will not function unless a
battery is loaded. Use one brand-new silver
oxide or alkaline-manganese battery as specified in the table below or an equivalent battery of another brand.
Usable Batteries
Silver Oxide
Eveready (UCAR)
Battery (6V)
No. 544
JIS4G13
Mallory PX 28
Alkaline-manganese Eveready (UCAR)
Battery (6V)
No. 537
It can be loaded and unloaded more easily
before the lens is mounted, and, of course,
if the action grip is attached, it must be
removed while loading. You should always
wipe the battery poles with a clean, dry
cloth before insertion to prevent any cor–19–
rosion and damage to the camera due to
dirt or fingerprints.
To load the battery:
1. Apply either a fingernail or the eyepiece
protective cover, which is inserted into
the accessory shoe of the camera, into the
groove of the battery chamber cover and
lift lightly so that the cover flips up.
2. Following the diagram on the inside of
the battery chamber, load the battery
negative pole first, pushing it downwards
in the chamber. Make sure the poles are
facing in the correct directions. Incorrect
loading can lead to possible corrosion and
damage to the battery terminals besides
causing the battery to discharge very
quickly.
To unload the battery, simply tip the positive end forwards and pull it out from the top.
The battery should be removed if the
camera is not to be used for an excessively
long period of time.
Not For Resale – Free Download at http://www.joe-chan.com/manuals
Checking the Battery
Life of the battery in normal use is
approximately one year. Using the camera
frequently at low shutter speeds, at the “B”
setting or in extremely cold conditions takes
more battery power and requires replacing
the battery more often.
The battery requires checking under the
following circumstances:
1. When a new battery is loaded.
2. If the shutter will not function when the
main switch is at “A”.
3. When long exposures are frequently
made.
4. When the camera is used very frequently.
5. When the camera is used after it has been
stored for an excessively long period of
time.
6. When the camera is used in extremely cold
conditions.
To check the power level of the battery, first
set the main switch to the “A” position. It
cannot be checked in the “L” position. Then
press the battery check button on the top of
the camera for two to three seconds. If,
while pressing the battery check button,
the LED on the top of the camera blinks on
and off rapidly, battery power is sufficient.
If it blinks only slowly, twice per second, for
instance, or not at all, the power level is
insufficient and the battery should be
replaced. It should also be replaced if the
flashing frequency changes during the few
seconds the check button is depressed,
indicating the battery is near exhaustion.
It is a good idea to carry a spare battery
when you expect to use the camera
continuously for a long time, such as on a
vacation, when you plan to take a number of
time exposures on bulb, or when the camera
is to be used in very cold conditions.
–20–
Not For Resale – Free Download at http://www.joe-chan.com/manuals
Getting a Feel for Your A-1
Now that the battery is loaded, your
A-1 will function. Before loading the
film or doing anything else, play with
it a little. Operate the shutter button.
and the film advance lever until they
feel like natural extensions of your
fingers.
Shoot and develop at least one roll of
film with a new camera before using it
on a shooting expedition or on a trip to
make sure you know how to operate it
properly.
The battery check button also serves to
cancel the self-timer or to cancel the shutter
in long exposures. The circuit is cancelled
the moment you press the button, and the
second shutter curtain will close when your
finger is removed from the button. The
shutter will not be released if you press the
shutter button while pressing the battery
check button.
–21–
Not For Resale – Free Download at http://www.joe-chan.com/manuals
Film Advance and Shutter Release
At the base of the film advance lever is the
main switch of the camera. When it is at the
“L” (LOCK) setting, all active circuits are
turned off and the shutter button is locked
to prevent unintentional shutter release. This
switch should always be in the “L” position
to prevent battery consumption and film
wastage when the camera is not in use, such
as when it is in a camera case.
When the main switch is set at “A”, the
shutter button can be operated. The shutter
button serves to activate both the AE meter
and shutter operation. Since it is electromagnetic, it requires only gentle pressure for
both a very smooth shutter release as well as
immediate meter response when shooting in
quick succession. Pressing the shutter button
lightly only halfway gives a meter reading
preview inside the viewfinder. When you
press it gently all the way, the mirror flips
up, the diaphragm closes down and the
shutter releases. After shutter release, the
mirror and diaphragm automatically reset
and the film advance lever is ready to be
advanced.
With the tip of your thumb, lightly push the
film advance lever away from the camera
body to its 30 stand-off position. Now it
can be easily operated with the tip of your
thumb. Push it all the way to the right in a
single, short 120 throw to wind the film,
cock the shutter and prepare the diaphragm
and mirror for the next shutter release all in
one motion. Or you can advance the lever in
several short strokes. Each winding will also
advance the number in the frame counter,
indicating the number of pictures taken.
–22–
Not For Resale – Free Download at http://www.joe-chan.com/manuals
Attaching a Cable Release
A cable release is a device which, used in
conjunction with a tripod, allows the shutter
to be held open for long exposures without
your ever having to touch either camera or
shutter button directly. This is especially
useful for reducing the chances of blurred
images in copy work, photomacrography
and photomicrography.
The A-1 is provided with a socket for a cable
release in the center of the shutter button.
The cable release simply screws into this
socket. The main switch must also be at the
“A” setting.
–23–
Not For Resale – Free Download at http://www.joe-chan.com/manuals
–24–
Not For Resale – Free Download at http://www.joe-chan.com/manuals
Holding the Camera
The best precaution in preventing camera
shake is to press the shutter button gently.
Never punch it. It is also helpful to hold the
camera properly, not only for good image
results but also for comfort and ease in
handling.
We suggest first that you hold the camera
firmly in both hands, the tip of your right
thumb on the film advance lever, the right
index finger on the shutter button and the
other right fingers on the finger grip. For
best balance and easy focusing, the left
thumb and index finger should be under the
lens barrel. Press both elbows firmly against
your body when holding the camera in a
horizontal position, at least one elbow in a
vertical position. Press the camera firmly to
your cheek or forehead. Spread your feet
slightly apart with one a little ahead of the
other. Don't tense up. Now release the
shutter button gently as you exhale.
It is always advisable to lean against a steady
support, such as a wall or a tree, if any is
available. Use a tripod and a cable release
with a telephoto lens or when shooting at
a shutter speed of 1/30 sec. or slower.
If the tripod screw of your tripod is quite
long, be especially careful not to forcefully
screw it all the way in beyond the limit of
the camera's tripod socket.
Since this is a single-lens reflex camera, the
viewing lens and the camera lens are not separate. When you look into the camera's viewfinder, you are seeing your subject through the
lens exactly as the lens “sees” it and exactly
as it will be exposed. There is no need to be
concerned with parallax.
–25–
Not For Resale – Free Download at http://www.joe-chan.com/manuals
Film Loading
The Canon A-1 accepts color or black and
white film in standard 35mm cartridges.
When loading and unloading film, avoid
direct sunlight and take care not to touch
the shutter curtain, the film trails or the
pressure plate.
To load the film, first fold out the rewind
crank and sharply pull up the rewind knob.
The camera's back cover will pop open. Put
the cartridge into the film cartridge chamber
so that the protruding part of the spool is on
the bottom and push down and rotate the
rewind knob until it drops into its fullyseated position. Now pull the film leader
across the camera and insert the tip up to at
least the first perforation of the film into
any slot of the multi-slot take-up spool. Advance the film once, making sure the film
sprocket holes are engaged with the teeth of
the film transport sprocket.
Check to see that the cartridge is in a
fully-seated position and that the film is
taut. If there is film slack, gently turn the
rewind crank clockwise until it stops. Snap
the back cover shut. Gently turn the rewind
crank in the direction of the arrow to take
up film slack and then fold the rewind crank
back in.
Switch the AE mode selector to TV and turn
the AT dial to a fast shutter speed. Now
make two blank shots, turning the film
advance lever and releasing the shutter, so
that the frame counter advances from “S” to
“0”. While doing this, keep an eye on the
rewind knob. If it rotates, the film is
properly loaded. If it does not rotate,
chances are that the film is sagging or the
film perforations are not properly engaged in
the take-up spool and film transport
sprocket. If the rewind knob still does not
rotate once you have gently turned the
–26–
Not For Resale – Free Download at http://www.joe-chan.com/manuals
rewind crank clockwise to take up film
slack, open the back cover and reload the
film.
The A-1 can also be loaded with bulk film in
which case the tip of the film should be
trimmed as illustrated below before it is
loaded into the camera.
Before loading the film, remove the plastic
insert from the pressure plate, and throw
it away.
–27–
Not For Resale – Free Download at http://www.joe-chan.com/manuals
Setting the ASA Film Speed
The ASA is a numerical rating of a film's
sensitivity to light. The higher the ASA
rating, the faster the film and the more
sensitive it is to a given amount of light as
compared to a film of a lower ASA rating. In
other words, the higher the ASA rating, the
less light you need to expose the film. When
buying film, choose one with an ASA rating
appropriate for the lighting conditions. The
film manufacturer's recommended ASA
rating can be found on the film packaging or
data sheet.
Since the ASA film speed is one of the
essential factors in determining proper exposure, it is very important that it be
correctly set on the camera. The table on the
opposite page shows the ASA ratings which
can be set on the A-1. Figures in parentheses
are intermediate film speeds which are indicated by dots on the ASA dial. To set the
ASA, press in the ASA film speed dial lock
button with your fingernail and turn the
outer knurled edge of the dial until the
desired film speed rating is aligned with
the film speed index. The dial cannot be
turned lower than ASA 6 or higher than
ASA 12800.
There is an exposure compensation scale on
the ASA film speed setting dial. The function of this scale will be explained later, but
at this point, please note that this scale
should be set at “1” for normal AE photography.
–28–
Not For Resale – Free Download at http://www.joe-chan.com/manuals
The choice of film is an important part of
photography, and you have a wide variety to
choose from. Films differ in a number of
ways including ASA rating, exposure latitude, color rendition and color temperature
among other variables. Some, such as infrared film, require the use of certain filters.
Depending on the type of film, a color
temperature conversion filter may be necessary under certain lighting conditions. And,
of course, you have the basic choice between two types of color film: color
negative film (for prints) and color reversal
(slide) film. Film can be purchased either in
cartridge form with varying numbers of
frames or in bulk form. Either type can be
loaded in the A-1. Although bulk film is a
little more complicated to handle since it
must be cut to the desired number of frames
and handled in complete darkness, there are
simple devices for this purpose on the
market and it is cheaper than cartridge film.
For more information concerning film,
please refer to a book on photography or ask
your local film dealer, and please pay careful
attention to the film data sheet.
Aside from those instances when a specific
filter is required, filters can also be used to
emphasize certain colors for more clarity or
special effects. Canon offers a wide variety
of filters for both black and white and color
films. It also offers a gelatin filter holder
which can hold up to three filters at a time
and can be attached to various diameter
lenses by means of adapters. Since the A-1
has a through-the-lens meter, there is no
need to make any exposure correction with
filter factors when a filter is attached.
–29–
Not For Resale – Free Download at http://www.joe-chan.com/manuals
Memo Holder
The back cover of this camera is provided
with a memo holder. Once you have loaded
the film and set the ASA, it is very useful to
tear off the end of the film box and insert it
into this memo holder as a constant reminder of the type of film in use. Add other
information as you like.
The Basics of Exposure
This section contains some terms and
definitions which will be used throughout
this instruction booklet.
The amount of exposure is a matter not only
of the amount of light allowed to strike
the film but also of the amount of time
the light is allowed to strike the film. The
camera has two mechanisms to control
exposure, the diaphragm and the shutter.
The diaphragm consists of blades which
open and close to certain size openings
called apertures. The size of the aperture
determines the amount of light which will
fall on the film. The various size apertures
are indicated by a set series of numbers
called f/stops or f/numbers. Each f/stop
represents some amount of light that is
allowed to pass through the lens. The smaller
numbers are called large f/stops while the
larger numbers are called small f/stops.
This is because the larger numbers represent
–30– smaller apertures and allow less light to pass
Not For Resale – Free Download at http://www.joe-chan.com/manuals
through the lens. Each time you move from
one f/stop to the next smaller f/stop (larger
number), the amount of light allowed
through is exactly halved. In effect, the
amount of exposure itself is also halved.
Using f/2 as a standard, the amount of light
reaching the film will change according to
f/stop as indicated below.
On the A-1, aperture can be controlled
either by turning the AT dial or the lens
aperture ring to the desired f/stop. Otherwise the camera controls the aperture.
f/stop
Brightness ratio
The largest f/stop on the lens is called the
lens maximum aperture. The smallest f/stop
on the lens is called the lens minimum
aperture. The maximum and minimum
apertures differ according to the lens.
The maximum lens aperture is important
because it indicates the largest amount of
light that the lens will transmit.
1.2
1.4
1.8
2
2.8
3.5
4
5.6
3
2
1¼
1
½
P
¼
Q
–31–
8
11
16
/16
1
1
1
/32
/64
22
1
/128
Not For Resale – Free Download at http://www.joe-chan.com/manuals
AE Photography
AE photography means automatic exposure.
The camera is selecting either shutter speed
or aperture or both for you.
The most obvious, unusual feature of this
camera is the absence of the shutter speed
dial which has been replaced by the AT dial.
This dial allows you to set either shutter
speed or aperture for any of five different
AE modes.
The length of time that the light is allowed
to strike the film is determined by the
shutter speed. The relationship between
shutter speeds is like that between f/stops.
As you move from one shutter speed to the
next higher shutter speed, exposure is
halved. Your image is actually exposed by
the opening of the shutter. Shutter speed
can be controlled on the A-1 by turning the
AT dial. Otherwise the camera controls it.
Now suppose that you have the camera set
for a certain exposure value (EV), say the
exposure you get with f/4 at 1/60 sec. There
are certain other combinations of aperture
and shutter speed which will give you the
same amount of exposure as that above.
Some of these combinations in this example
include f/5.6 at 1/30 sec. and f/2.8 at 1/125
sec. You simply move up and down the
f/number and shutter speed scales. It is not
important to know this relationship when
you use the A-1 in an AE mode. The camera
will do the figuring for you. But it is an important photographic fact which you may
find useful when you use the camera
manually or in correcting exposure.
Through-the-lens full-aperture metering
Shutter priority AE
Aperture priority AE
Programmed AE
AE flash photography
Through-the-lens stopped-down metering
Stopped-down AE
In shutter-speed priority AE, you set the
shutter speed, and the camera automatically
selects the necessary aperture according to
lighting conditions for correct exposure.
Shutter-speed priority AE, is applicable to
most subjects but especially useful in action
photography.
In aperture priority AE, you set the aperture
while the camera automatically selects the
necessary shutter speed for correct exposure.
It is convenient for the various forms of still
photography in which depth of field is of
importance.
The camera automatically selects both
–32–
Not For Resale – Free Download at http://www.joe-chan.com/manuals
aperture and shutter speed in the programmed AE mode. This mode is helpful
when your only goal is correct exposure
and neither depth of field nor control of
movement are very important in the picture.
It is the easiest mode for the beginner.
In stopped-down AE, you set the aperture
manually on the lens aperture ring while the
camera automatically selects a shutter
speed for correct exposure. This is a big
advantage when using non-FD lenses and
in specialized areas of photography such
as photomacrography and photomicrography.
AE flash photography is possible with the
Canon Speedlite 133A, 155A, 177A, 188A,
199A, 533G or 577G. In this mode, the
camera sets both aperture and shutter speed
automatically, eliminating any worries about
guide number calculations and flash synchronizing shutter speeds.
The first three AE modes discussed above
are explained in more detail in the following
sections. For more information concerning
the stopped-down AE and AE flash modes,
please refer to the section entitled SPECIALIZED PROCEDURES.
Please note that shutter priority AE, aperture priority AE, programmed AE and AE
flash are possible only with an FD lens and
only when the lens aperture ring is set to the
“A” mark. See SETTING THE LENS FOR
AE PHOTOGRAPHY.
Setting the Lens for AE Photography
The first four AE modes described above,
i.e. shutter priority AE, aperture priority
AE, programmed AE and AE flash photography, are performed with full aperture
metering through the lens. This means
that the diaphragm is fully open during
metering for easiest viewing and operation.
For correct operation in these four fullaperture metering AE modes, only an
FD lens can be used and the lens aperture
ring must be set to the “A” mark. To do
this, simply hold in the AE lock pin on the
lens while turning the aperture ring from the
minimum aperture to the “A” mark. This
can be done either before or after the lens is
mounted on the camera. At the “A” mark,
the aperture ring is locked and cannot be
turned to any other setting. Reverse the
procedure to disengage the aperture ring
from the “A” mark.
–33–
Not For Resale – Free Download at http://www.joe-chan.com/manuals
AE Lock Pin
AE Mode Selector
The AE mode selector has two possible
settings, TV (time value) and Av (aperture
value). When the AE mode selector is switched to TV, the camera is set for the shutter
priority AE mode. You set the shutter
speed and the camera selects the aperture.
When switched to Av, the camera is set for
aperture priority. Here you set the aperture,
and the camera automatically selects the
shutter speed.
The AE mode selector click stops at
for
TV and at
for Av.
Instead of an “A” mark, some earlier FD
lenses have a small green circle on the
aperture ring for AE photography. Its use is
the same as that of the “A” mark, and the
procedure is the same as that described
above except that some of these lenses may
not have an AE lock pin for locking the
aperture ring at the automatic setting.
–34–
Not For Resale – Free Download at http://www.joe-chan.com/manuals
AT Dial
This dial works in conjunction with the AE
selector. When the AE selector is set at TV, it
shows the shutter speed scale. When the AE
selector is set to Av, it shows the aperture
scale.
To operate the AT dial, first slide down the
AT dial guard which is designed to prevent
accidental movement of the dial. Depending
on the setting of the AE selector, turn the
AT dial until it click stops at the exact
aperture or shutter speed desired so that the
setting is aligned with the index mark. The
AT dial will not turn past the highest and
lowest limits of each scale.
The figure set on the AT dial has priority in
determining the exposure. If, for example,
you have set a shutter speed on the dial, the
camera balances the aperture against the
shutter speed you have selected until exposure is correct.
If, on the other hand, you have set an
aperture on the dial, the camera selects the
necessary shutter speed for correct exposure.
–35–
Not For Resale – Free Download at http://www.joe-chan.com/manuals
button. AE photography is not possible at
the “B” setting. The aperture must be set
manually. Remember that it is very important to use a tripod and a cable release,
preferably with a lock, in long exposures to
reduce the chance of image blur. Also, since
long exposures present a real drain on the
battery, it may be wise to carry a spare.
The A-1 has a hot shoe and PC outlet for an
X-synch (flash synchronization) at 1/60 sec.
(the position). This shutter speed need not
be considered, however, when the A-1 is
used with specified Canon flash units (see
page 83).
Intermediate settings on the shutter speed
scale cannot be used. However, if you
accidentally set an intermediate shutter
speed, the camera will automatically select
the next lower or higher shutter speed as the
effective shutter speed, and that shutter
speed will be displayed when you take an
exposure preview.
If you mistakenly try a time exposure on
“bulb” while the lens is still at “A”, exposure will take place at the lens minimum
aperture.
Shutter Speed Scale on the AT Dial
There is a choice of 16 click-stop settings
ranging from 1/1000 (sec.) to 30 (sec.) on
the AT dial's shutter speed scale. The slow
shutter speeds from 2 (sec.) to 30 (sec.) are
marked in orange while shutter speeds from
1 (sec.) to 1/1000 (sec.) are in white. The
white numbers on the scale are the reciprocals of the true shutter speeds so that a
white 2 indicates a speed of 1/2 sec. while a
white 1000 indicates a speed of 1/1000 sec.
Be careful not to confuse the slower orange
range with the faster white range.
Above the highest speed of 1/1000 is the
“P” for programmed AE. Below the lowest
speed of 30 is the “B” setting. The dial will
not turn past the “P” or the “B”.
The “B” (Bulb) setting is intended for
exposures longer than 30 sec. When the
shutter speed is set at “B”, the shutter will
remain open as long as you press the shutter
–36–
Not For Resale – Free Download at http://www.joe-chan.com/manuals
f/1.8 as the aperture setting. In this case, the
maximum aperture of the lens will be
displayed in the viewfinder when you take
an exposure preview regardless of the setting
on the AT dial. On the other hand, if you
have set an aperture on the AT dial smaller
than the minimum aperture of the lens, the
image will be exposed at the lens minimum
aperture but the shutter speed will not be
adjusted accordingly, resulting in over-exposure. In this case, the aperture set on the
AT dial will be displayed in the digital readout.
Since the smallest aperture that can be set
on the AT dial is f/22, if you want to set an
aperture smaller than f/22, switch to
stopped-down AE and manually set the
aperture on the lens aperture ring.
Aperture Scale on the AT Dial
The aperture scale on the AT dial is calibrated in f/stops ranging from f/22 to f/1.2. The
f/1.2 setting is indicated by a dot. The dial
click-stops at both full and half f/stops. It
will not turn past the largest and smallest
f/stops. The maximum aperture indicated on
the AT dial is large enough for any Canon
lens.
Under certain conditions in the aperture
priority AE mode, the maximum and minimum apertures on the lens have priority over
the aperture set on the AT dial. For
instance, if the aperture you have set on the
AT dial is larger than the maximum aperture
of the lens in use, the camera will match the
shutter speed to the lens maximum aperture
rather than the aperture you have set on the
AT dial for correct exposure. Thus, if you
are using an FD 50mm f/1.8 lens with the
AT dial set to f/1.4, the camera will use
–37–
Not For Resale – Free Download at http://www.joe-chan.com/manuals
Shutter priority AE
FD 400mm f/4.5 S.S.C., 1/1000 sec., ASA 125
Not For Resale – Free Download at http://www.joe-chan.com/manuals
Shutter priority AE
FD 50mm f/1.4, 1/30 sec., ASA 125
Not For Resale – Free Download at http://www.joe-chan.com/manuals
Shutter Priority vs. Aperture Priority
Having now read how to control the camera
for shutter priority and aperture priority
AE photography, you might well wonder
when it is best to use which mode. Basically,
it depends upon what you want your photograph to portray.
Shutter speeds are most effectively used to
freeze or emphasize movement. The shutter
priority AE mode is applicable to most
photographic situations.
Aperture priority is most applicable to still
photography such as portraiture and landscape photography in which depth of field is
an important factor. Some of the best creative commercial and architectural photographs are taken in the aperture priority AE
mode. This, however, does not apply to such
fields of photography as close-ups and
photomicrography for which you should
refer to the section entitled STOPPEDDOWN AE.
Selecting a Shutter Speed
The table below can be used as a general
guide in selecting an appropriate shutter
speed according to lighting conditions when
using a standard 50mm lens and 100 ASA
film.
Brightness
Shutter Speed
(Seconds)
Indoors
1/30 to 1/60
Outdoors
1/125 to 1/250
Mid-summer Beach or
1/500 to 1/1000
Snow-covered Mountains
–40–
Not For Resale – Free Download at http://www.joe-chan.com/manuals
This table does not necessarily apply when
using a lens of a different focal length. If
you are using a telephoto lens, for instance,
any subject movement and the least bit of
camera shake can have a magnified effect on
image sharpness. For a telephoto it is necessary to use faster shutter speeds than with a
standard lens under the same lighting conditions. It is generally said that, for sharp
image results in hand-held shooting, the
minimum shutter speed should be equal to
or faster than 1 divided by the focal length
of the lens. This means that for a 100mm
lens, the shutter speed should be at least
1/125 sec.; for a 200mm lens, it should be at
least 1/250 sec.
There are other considerations in the selection of shutter speed. You can usually
freeze the action of relatively slowly moving
pedestrians or traffic at a shutter speed of
1/250 sec. The same is not necessarily true
of a rapidly moving bicycle. Instead of
freezing the action, you may want to emphasize it by blurring some part of the picture.
For instance, you could blur a moving
subject with a relatively slow shutter speed.
Or, using a panning technique, turning the
upper part of your body to follow the
subject's movement, at a relatively slow
shutter speed of perhaps 1/30 sec., you can
blur the background to stress the movement.
In this last technique, it is best to continue
panning as you release the shutter.
The direction of movement should also be
considered. A subject moving directly across
in front of the camera will be blurred to a
greater degree than a subject which is moving diagonally across or is heading straight
for or away from the camera and may
require faster shutter speeds than you would
use considering speed of movement alone.
In fashion photography, a rapid succession
of shots at fast shutter speeds, or using a
flash while the model continuously changes
the pose, helps to capture natural expression.
–41–
Not For Resale – Free Download at http://www.joe-chan.com/manuals
Not For Resale – Free Download at http://www.joe-chan.com/manuals
factors remaining the same).
For example, comparing a 28mm lens
with a 50mm lens at the same aperture
and shooting distance, depth of field is
deeper with the 28mm lens.
(3) The greater the shooting distance, the
deeper the depth of field (the other two
factors remaining the same).
For example, if the subject is photographed from three and then from seven
meters away, the zone of sharpness in
the foreground and background is greater at seven meters.
Selecting an Aperture
A discussion of how to select an appropriate
aperture boils down to an explanation of
depth of field. When your subject is in focus,
there is only a limited range in the foreground and background of the subject which
is also in focus. This zone of sharpness is
called depth of field.
Depth of field is governed by three factors:
aperture, lens focal length and shooting
distance. Remember the following relationships:
(1) The smaller the aperture, the deeper the
depth of field (the other two factors
remaining the same).
For example, if the lens focal length
and the shooting distance stay the same,
the depth of field is much deeper at f/16
than at f/1.4.
(2)The shorter the lens focal length, the
deeper the depth of field (the other two
S Aperture priority AE
FD 300mm f/2.8 S.S.C. FLUORITE, f/2.8 ASA 125
Another characteristic of depth of field
is that it is generally deeper in the background than in the foreground.
When depth of field is important in your
picture, it is best to control the aperture
directly using the aperture priority AE
mode. Using a small aperture is great for
getting sharp overall focus in a landscape or
any other type of subject, but shallow depth
of field also has its merits. Using a relatively
large aperture will make your subject stand
out against its surroundings by blurring the
background. This is an especially successful
technique in portraiture and special effects.
There are ways to check the extent of depth
of field. For this information, please refer
to page 76.
–43–
Not For Resale – Free Download at http://www.joe-chan.com/manuals
Programmed AE
FD 28-50mm f/3.5, ASA 125
Not For Resale – Free Download at http://www.joe-chan.com/manuals
the aperture for correct exposure. Of course,
if it shifts to a shutter speed lower than 1/60
sec., it is advisable to use a tripod and a
cable release or to switch to flash photography.
The advantage of this particular mode is that
it takes your mind completely off exposure
so that you can concentrate on your subject.
Programmed AE
Programmed Combinations of Shutter Speed and
When the AE mode selector is set to TV and Aperture in Programmed AE (with ASA 100 film)
the AT dial turned to “P” on the shutter
speed scale, the camera is set for programmed AE. Correct exposure, both aperture
and shutter speed, is automatically set by
the camera according to the brightness of
the subject and a programmed set of combinations of apertures and shutter speeds.
Metering control is done steplessly from a
combination of the highest shutter speed
and minimum aperture all the way to slower
shutter speeds and larger apertures.
Under some circumstances, the camera behaves as if it were set for aperture priority
AE. For example, if lighting conditions are
— - — - — indicates programmed combinaso low that an aperture larger than the
tions when a lens with a maximum aperture
maximum aperture of the lens would be
of f/2.8 is used.
necessary, the maximum aperture remains
- - - - - - indicates programmed combinations
fixed, and the camera's electronic control
when a lens with a maximum aperture
automatically shifts to slower shutter speeds
of f/1.4 is used.
until the shutter speed is balanced against
–45–
Not For Resale – Free Download at http://www.joe-chan.com/manuals
Meter Coupling Range
When using the FD 50mm f/1.4 lens and
ASA 100 film, the built-in exposure meter
couples within a range of EV -2 (f/1.4 at
8 sec.) to EV 18 (f/16 at 1/1000 sec.)
AE Range of Silicon Photocell at Various ASAs
FD 50mm f/1.4 Lens
AE Coupling Range
At given film speeds, the built-in exposure
meter couples with the aperture and shutter
speed as indicated in the chart below.
Outside the coupling range, the camera
warns you by flashing the photographic data
inside the viewfinder.
–46–
Not For Resale – Free Download at http://www.joe-chan.com/manuals
Metering at Low Light Levels
With AE coupling all the way down to EV -2
(with ASA 100 film), the A-1 is capable of
metering and producing a natural rendition
of the light in very dim lighting conditions.
Since EV -2 is practically the lowest light
level at which you can even perceive your
subject through the viewfinder, you can
basically perform AE photography with the
A-1 as long as you can see your subject in
the viewfinder when using a film with appropriate sensitivity. This means that the A-1
will usually give you a meter reading even in
the most adverse of lighting conditions when
performing photomacrography and photomicrography in the stopped-down AE mode.
level so that higher shutter speeds can be
used. Even when following the instructions
of the film data sheet, it is advisable to
slightly adjust the exposure over several
shots to get at least one perfectly exposed
image.
Be especially on the alert for reciprocity
failure when using color reversal (slide) film
which has a smaller exposure latitude than
black and white or color negative film.
Having a smaller exposure latitude means
that it is more touchy about exposure error.
Incorrect exposure by only 1/2 exposure
step may make a noticeable difference in the
image results. Reciprocity failure with color
film will result in color shifts as well as
underexposure and may require corrective
filtration as recommended by the film manufacturer.
What this also means is that you will be
using very slow shutter speeds and may be
subject to failure of the reciprocity law. The
reciprocity law is that relationship between
apertures and shutter speeds discussed earlier
in which several combinations of the two
will give the same exposure value. The
trouble with this law is that it may not hold
true at slow shutter speeds. More exposure
may be necessary. You will find information
concerning reciprocity law failure and how
to correct it in the data sheet that comes
with your film. Correction of reciprocity
failure may involve increasing the light
–47–
Not For Resale – Free Download at http://www.joe-chan.com/manuals
Microprism Ring
Split-Image Rangefinder
Not For Resale – Free Download at http://www.joe-chan.com/manuals
Out of Focus
Viewfinder
A less conspicuous, unusual feature of the
A-1 is the fact that, unless you are taking a
meter reading, the only thing you can see in
the bright viewfinder is the viewing area. All
other information is eliminated, leaving you
undistracted freedom to focus and compose
your picture.
The A-1 uses the Central Emphasis Metering
method of exposure measurement which
reads the entire viewing area with emphasis
on the central portion where the subject is
most likely to be placed. This metering
system ensures correct exposure even when
skylight is present in your picture.
This camera is equipped with a split-image/
microprism rangefinder focusing screen.
In Focus
Viewing and Focusing
To focus, rotate the focusing ring of the lens
as you view the subject through the viewfinder. Do not swing your upper body
backward and forward as you focus.
The focusing screen is composed of three
different focusing aids: a microprism ring
and a split-image rangefinder in the central
area, and a surrounding matte screen. The
split-image rangefinder tells you that the
image is “in focus” when the image, which is
divided horizontally when out of focus,
merges to become one complete image. The
microprism rangefinder presents a clear,
steady image when in focus but a broken,
shimmering image when not accurately in
focus. When your desired subject is sharp,
you know that the focus is correctly set.
You can focus with any of these three
focusing aids as you like depending on the
subject and your preference.
–49–
Not For Resale – Free Download at http://www.joe-chan.com/manuals
OPTIONAL VIEWING AIDS
through the viewfinder after placing the
dioptric lens over the eyepiece to be sure
you have the best one.
Dioptric Adjustment Lenses S
The dioptric adjustment lens S is an accessory which slides into the grooves of the
viewfinder eyepiece from above to correct
individual eyesight. With them, eyeglass
wearers can photograph without glasses.
The A-1's eyepiece has a standard dioptric
adjustment of -1 for normal eyesight.
The following 10 kinds of dioptric adjustment lenses are optional accessories: +3,
+2, +1.5, +1, +0.5, 0, -0.5, -2, -3 and -4
(diopters). The specified diopters of these
lenses are recorded as the real power when
attached to the camera, reflecting the -1
power of the camera's viewfinder.
You could select the appropriate dioptric
lens by choosing the one closest to the number of diopters in your glasses prescription.
But, we propose that you actually look
Angle Finders A2 and B
There are some types of photographic
subjects for which viewing them through the
eye-level viewfinder of the camera is uncomfortable. This is particularly true in the
fields of copying, close-ups, photomacrography and photomicrography. Then it
might be more convenient to mount one of
these angle finders over the camera's eyepiece. Both angle finders rotate 90° for
comfortable viewing from above or from the
side.
Angle Finder A2 gives a correct image
top-to-bottom but reversed left-to-right
while the more sophisticated Angle Finder B
gives a completely normal image. Both
show the entire field of view as well as
viewfinder information.
–50–
Not For Resale – Free Download at http://www.joe-chan.com/manuals
Magnifier S
The Magnifier S inserts into the grooves of
the viewfinder eyepiece with its adapter to
give a 2.5X magnification of the center of
the viewing area for precision focusing in
close-up work and wide-angle photography.
Its power is adjustable to your eyesight
within a range of +4 to -4 diopters. Its
adapter is hinged so that the magnifier can
be swung upward from the eyepiece after
focusing, leaving the entire screen image
visible.
–51–
Not For Resale – Free Download at http://www.joe-chan.com/manuals
Previewing the Exposure
When you take a meter reading, the viewfinder information will be displayed in a
digital readout directly below the viewing
area. With the viewfinder display lever
switched on, you can take a meter reading in
any one of three ways:
1. Depress the shutter button halfway.
2. Press in the exposure preview switch.
3. Press the exposure memory switch.
Full viewfinder information includes shutter
speed, aperture, manual aperture control
signal, flash signal, exposure warning flashing
and a flashing error signal for incorrect
operation. The digital display viewfinder
gives you the most information in a minimum amount of display capacity.
The camera employs LED circuits to eliminate the need for any extra illumination of
viewfinder information. Except when using a
flash or the exposure memory switch when
the LED maintains constant brightness, the
Not For Resale – Free Download at http://www.joe-chan.com/manuals
Cancelling the Viewfinder Display
With the A-1, you have the option of turning
off the viewfinder display altogether. This
can be done simply by turning the viewfinder display lever to the white dot. Metering is taking place and the shutter can be
released for a correctly exposed image even
when the display is switched off, but it saves
battery power and gives you absolute
freedom to focus and compose the image
undisturbed.
degree of LED illumination changes in four
stages depending on the brightness of the
subject seen in the viewfinder. When the
subject is brighter, the LED brightness is
slightly higher, and it is slightly lower with a
darker subject. As a result, the LED maintains an almost consistent degree of brightness to the human eye.
The viewfinder information signal is transmitted to the display every half second.
Accordingly, in rapidly varying light conditions, the changes in aperture or shutter
speed will be indicated slightly behind time.
This is a concession to the adjustment
limitations of the human eye which in no
way affects exposure timing.
–53–
Not For Resale – Free Download at http://www.joe-chan.com/manuals
Numerals and Characters Composing
Digital Readout in Viewfinder
Up to the first four digits from the left in
the digital readout show shutter speed data
ranging from 1/1000 sec. to 30 sec. All
speeds from 1/2 sec. and faster will be
displayed as a whole number as they are on
the AT dial so that an indicated shutter
speed of 500 in the digital readout stands for
a shutter speed of 1/500 sec. All speeds from
1 sec. and slower will be displayed as a
whole number followed by a second mark
( ") so that an indicated shutter speed of 8 "
in the digital readout stands for a real
shutter speed of 8 sec. When you are in
4 sec.W
The next two digits following the first four
from the left for shutter speed data are
reserved for aperture data. The possible
apertures to be displayed in the digital
readout range from f/1.2 to f/32 even
though the minimum aperture it is possible
to set on the AT dial is only f/22. The
aperture data in the digital readout is displayed in 1/2 f/stop increments, giving numerical values standing for the dots on the
aperture scale of the AT dial. An indicated
aperture of 9.5, for instance, in the viewfinder stands for the dot between f/8 and
f/11 on the AT dial aperture scale. These
half f/stops are approximations which are
not always exactly halfway between the full
f/stops.
1/4 sec.W
f/9.5W
aperture priority AE and the camera is
calculating the shutter speed, it is possible
for intermediate shutter speeds that are not
on the AT dial to show up in the viewfinder.
In this case, you may see such shutter speeds
as 750 (1/750 sec.) or 0" 7 (0.7 sec.)
displayed in the viewfinder. It is impossible
to set the AT dial to an intermediate shutter
speed.
1/750 sec.W
Although both shutter speed and aperture
are indicated in the viewfinder in each 1/2
step increment, they are actually controlled
by the camera steplessly for greatest possible
precision.
There are other possible displays, including
M, buLb, F, bu F, and a flashing EEEE EE.
“M” is the last digit on the right in the
digital readout. It appears when the camera
is not set for AE control. “F” or “bu F”
supplements or replaces the shutter speed
data in the digital readout when the camera
0.7 sec.W
–54–
Not For Resale – Free Download at http://www.joe-chan.com/manuals
is set for flash photography while “buLb”
replaces the shutter speed data when the AT
dial shutter speed scale is set to “B”. “M” is
also displayed at the “B” setting. The
flashing “EEEE EE” appears to warn of
error in the stopping-down process and will
be explained in more detail later in this
instruction booklet.
When switching from one priority to another
under the same exposure conditions, it is
possible that the new camera-selected variable will differ a half step from the corresponding previously manually-selected value.
For instance, a combination of 1/250 sec.
and f/5.6 in the shutter priority AE mode
may become 1/180 sec. at f/5.6 in the
aperture priority AE mode under the same
conditions. This is due to the fact that the
camera-selected value is rounded off to half
steps in the display. However, since the
camera actually controls its variable steplessly, this seeming discrepancy will have no
effect upon exposure.
flashes showing the lens maximum aperture
to indicate underexposure. At very low
shutter speeds, it is possible for a different
exposure, turn the AT dial to as lower shutter speed.
Overexposure
Whenever any aperture smaller than f/16
(that is, 19 to 32) appears in the readout, it
will always be flashing on and off. Whether
or not this indicates overexposure depends
on the lens minimum aperture. If the
minimum aperture of the lens is equal to or
smaller than the flashing aperture, exposure
will be correct. If the lens minimum
aperture is larger than the flashing aperture,
increase the shutter speed for correct exposure.
There is one exception to the above which
occurs when the minimum aperture of the
lens is f/32. Since f/32 is the smallest
aperture which can appear in the readout,
it is not immediately apparent whether exposure is correct or not. To find out,
increase the shutter speed until the readout
shows a flashing f/22. At that point, you
may reduce the shutter speed one step for
correct exposure at f/32.
There is a rare case where f/16 may flash on
and off in the viewfinder. If you are using a
lens with an f/16 minimum aperture, the
image may be overexposed, so increase the
Incorrect Exposure Warnings
The types of incorrect exposure warnings
depend on what AE mode you are using.
1. In shutter priority AE mode
When exposure is incorrect, the LED digital
readout for aperture flashes on and off.
Underexposure
Usually the digital readout for aperture
–55–
Not For Resale – Free Download at http://www.joe-chan.com/manuals
shutter speed. If your lens has a smaller
minimum aperture, exposure will be correct.
Outside the Meter Coupling Range
When the light level is so low that it would
be outside the meter coupling range regardless of the shutter speed you set, the set
shutter speed will flash on and off along
with the aperture in the viewfinder. When
the light level is too high, a small aperture
will flash on and off even when the AT dial
is set to the highest shutter speed. In these
cases, shooting in the shutter priority
When the highest shutter speed of 1000
flashes in the viewfinder to indicate overexposure, turn the AT dial to a smaller
aperture. When a shutter speed of the slow
range flashes in the viewfinder to indicate
underexposure, turn the AT dial to a larger
aperture. The shutter speed value that flashes to indicate underexposure depends on the
speed (maximum aperture) of the lens and
ASA film speed.
As in the shutter priority AE mode, when
the light level is too low, both shutter
speed and aperture data will flash on and off
to indicate that no matter what aperture you
set, the meter will not couple in an AE
mode. When the light level is too high, the
shutter speed will flash on and off even
when the AT dial is set to the minimum
aperture possible. Again, AE photography is
still possible if you change the light level
or switch to a more appropriate film.
AE mode is only possible if you can change
the light level accordingly or switch to a
more appropriate film.
2. In aperture priority AE mode
When exposure is incorrect, the LED digital
readout for shutter speed flashes on and off.
–56–
Not For Resale – Free Download at http://www.joe-chan.com/manuals
3. In programmed AE mode
Both the shutter speed LED and the aperture LED flash on and off simultaneously to
warn you of overexposure as well as underexposure. In taking exposure readings, the
shutter speed and aperture combination
changes as they are programmed in the
camera. However, if there should be too
little light to be exposed correctly even at
the maximum aperture, the maximum aperture of the lens in use will remain fixed, and
the camera will work in aperture priority
AE, controlling the shutter speed to produce
correct exposure. If the camera exceeds the
limit of the meter coupling range, the
shutter speed and aperture LED values that
flash depend on the lens used and the ASA
film speed. When the data flashes on and off
in programmed AE, photography is no longer possible in that mode unless you change
the light level or switch to a more appropriate film.
Double-Check Before Shooting
1. Is the aperture ring of the lens set
to the "A" mark?
2. Have you checked the battery
power level?
3. Have you properly set the AE mode
selector?
The TV setting (shutter priority AE)
is preferable for action photography.
The Av (aperture priority AE) is
preferable for still photography.)
4. Did you set the film speed properly?
This is essential to the proper
operation of the camera. See that the
memo holder tells the type of film
loaded in the camera.
5. Is the film properly loaded?
You can use the rewind knob as an
indicator that the film is properly
loaded. Every time you advance the
film, the rewind knob should rotate.
6. Is the main switch set to the "A"
mark?
At the "L" setting, the shutter button
is locked.
–57–
Not For Resale – Free Download at http://www.joe-chan.com/manuals
Shutter Release
Once you have focused, composed your
picture and confirmed correct exposure,
gently press the shutter button all the way
down to set the shutter in motion. When the
shutter is released, the exposure will be
stored, so there is no problem in removing
your finger from the shutter button even in
the slow speed range.
If you press the shutter button in one very
quick stroke, the viewfinder display will
become invisible and the camera's function
may be delayed for an instant, but exposure
metering will not be affected and your
picture will be accurately exposed. If you
press the shutter button with an extremely
quick punch, it is possible that the shutter
will not be released at all. For proper
function and the least camera shake, it is
best to press the shutter button gently.
To cancel shutter release, press the battery
check button or return the main switch to
“L”. Shutter release WILL NOT be
cancelled in the slow shutter speed range
simply by turning the AT dial to a higher
shutter
speed.
Pressing the shutter button will not make an
exposure if the film is only partially advanced or if battery power is too low.
Rewinding the Film
When you have reached the end of the film,
the film advance lever will stop suddenly
before the end of its stroke. DO NOT force
the film advance lever beyond this point or
the film may become detached from the
cartridge or tear, making rewinding impossible and necessitating handling the film in
total darkness or a changing bag. Also DO
NOT open the camera's back cover before
rewinding or your film will be totally exposed.
–58–
Not For Resale – Free Download at http://www.joe-chan.com/manuals
Frame Counter
The frame counter of the A-1 is an additive
type. It advances to the next number,
indicating the number of frames already
exposed, each time the film is wound. It will
not advance higher than 38. The numbers 0,
20 and 36 are marked in orange, the latter
two as a warning of the end or near-end of
films having those numbers of frames. This
frame counter is also coupled with the
rewinding operation so that it counts back
the frame numbers as the film is rewound. It
automatically returns to “S” upon opening
the camera's back cover.
The frame counter will conveniently stop
during multiple exposures so that several
exposures on the same frame will not be
counted as separately exposed frames.
To rewind the film, press in the film rewind
button on the bottom of the camera. Once
you have pressed it, you can remove your
finger. Unfold the film rewind crank and
turn it in the direction of the small arrow
until the frame counter reaches the “S”
mark. At this point only the film leader will
not be rewound into the cartridge. Stop
rewinding here if the film is only partially
exposed and you want to reload it at some
other time. Also, some developing labs prefer the leader to remain protruding, and the
leader may also prevent any stray light from
entering the cartridge. Otherwise you may
continue to rewind past “S” until you feel
no further pressure on the rewind crank.
Now pull the rewind knob up sharply to
open the back cover and remove the
cartridge. It is preferable to place the exposed cartridge back in the canister and to
have it developed as soon as possible.
–59–
Not For Resale – Free Download at http://www.joe-chan.com/manuals
Specialized Procedures
Not For Resale – Free Download at http://www.joe-chan.com/manuals
Stopped-down AE Photography
There are basically two cases which require
stopped-down AE photography (unless you
wish to operate in manual override). It is
necessary when you use any lens which is
not FD, such as FL or R lenses or the Reflex
Lens 500mm f/8. With the exceptions
of the FD-U extension tubes or Extenders,
it is also necessary whenever any accessory
is inserted between the camera and any lens
for increasing the lens' focal length or for
increasing lens extension for higher magnifications in close-ups or photomacrography.
It is, of course, also necessary in photomicrography. It is possible, but not necessary, to use the stopped-down AE mode
when an FD lens is mounted directly onto
the camera with no accessory in-between.
In the stopped-down AE mode, exposure
metering will be done not at full aperture as
usual but, rather, at the same aperture that
the picture will actually be taken.
To set the camera in the stopped-down AE
mode when using a non-FD lens, simply fold
and push in the A-1's stop-down lever.
When using an FD lens, first advance the
film and then disengage the lens aperture
ring from the “A” mark before you push
in the stop-down lever. If the film is not
advanced before turning the aperture ring
from the “A” mark, the lens will stop down
only as far as the aperture set for the
previous exposure. It is impossible to push in
the stop-down lever when an FD lens is set
at “A”.
When in the stopped-down AE mode, it does
not matter whether the AE mode selector is
set to TV or Av. The camera will behave as
if it was in the aperture priority AE mode.
You must select the aperture by turning the
lens aperture ring while the camera will automatically select a shutter speed. When you
preview the exposure, only the shutter speed
–61–
Not For Resale – Free Download at http://www.joe-chan.com/manuals
data will be displayed in the viewfinder.
Unless the shutter speed data is flashing on
and off, simply press the shutter button for
an accurately exposed image. Exposure
warnings are exactly like those in aperture
priority AE. Set the aperture ring to a larger
aperture if a shutter speed of the slow range
flashes on and off in the viewfinder. The
shutter speed value that flashes to indicate
underexposure depends on the ASA film
speed. Set it to a smaller aperture if the
highest shutter speed of “1000” flashes on
and off. When the shutter speed flashes on
and off even when the aperture ring is
turned to the extreme limits, you are outside
the meter coupling range. Change the light
level or switch to a more appropriate film.
Since you can determine correct exposure
simply by watching the shutter speed data in
the viewfinder, you need not keep an eye on
the lens aperture ring as you turn it. However, for good depth of field when using
accessories for close-up photography, it is
best to close the lens to a relatively small
aperture. More details are given in the
instruction booklets for the various accessories involved.
You will find that your A-1 is unusually
effective in photomacrography and photomicrography. Even though the amount of
light reaching the film plane is greatly
reduced due to attached accessories, the A-1
is capable of metering as low a light level as
EV-2 (with ASA 100 film) in the stoppeddown AE mode. Furthermore, since the A-1
employs a through-the-lens meter, no exposure correction is necessary when accessories are inserted between camera and lens.
When you are finished operating in the
stopped-down AE mode, unfold and press
down on the stop-down lever. It will pop out
and the camera will be reset for full aperture metering. With an FD lens, you can
now return the lens aperture ring to the “A”
mark if you wish to use the A-1 in a full
aperture metering AE mode.
If you return the aperture ring to “A” but
leave the stop-down lever pushed in, the
camera will remain in the stopped-down AE
mode and all subsequent exposures will be
made at the lens minimum aperture. Though
exposure will be correct, this situation severely strains camera mechanisms and is not
recommended.
When performing stopped-down metering,
you also have the advantage of being able to
confirm depth of field directly in the viewfinder. See Checking the Depth of Field.
–62–
It is not possible to shoot sequentially with the
Power Winder A or A2 or Motor Drive MA
when in the stopped-down AE mode using an
FD lens. In this situation, only single-frame
power winding is possible.
Not For Resale – Free Download at http://www.joe-chan.com/manuals
Stopped-down AE
Photomicrography (butterfly wing), ASA 32
Stopped-down AE
FD 50mm f/3.5 Macro with Extension
Tube FD 25, f/11, ASA 400 pushed to EI 800
Not For Resale – Free Download at http://www.joe-chan.com/manuals
Warnings of Incorrect Operation in
Stopped-down Photography
button, you will notice that neither it nor
the film advance lever will operate. What's
more, this is when the “EEEE EE” mark will
flash in the viewfinder whether the viewfinder display switch is turned off or not.
This appears to be a distressing situation, but
it is very easily corrected. Push the film
advance lever into its retracted position close
to the camera body. The multiple exposure
lever is underneath. Push it to the left. Now
turn the film advance lever. With this operation, the camera will work in the normal
way.
Two problems can arise if you use the
camera incorrectly in the stopped-down
mode. The first problem occurs if the stopdown lever of the camera is locked in
before you mount the lens. If you expose a
frame in this situation, it will be incorrectly
exposed due to incorrect coupling of the
aperture ring. To prevent this, before you
mount a lens, make sure there is no red dot
beside the stop-down coupling lever inside
the camera body. The red dot is very conspicuous and appears only when the stopdown lever is pushed in.
The second problem arises if you push in the
camera's stop-down lever and, before taking
a shot, release the stop-down lever and
return the lens aperture ring to the “A”
mark. If you then try to press the shutter
–64–
Not For Resale – Free Download at http://www.joe-chan.com/manuals
Manual Override
You may have occasion to wish to cancel the
A-1's AE capabilities to control exposure,
both aperture and shutter speed, by yourself. This will be the case if you are using a
separate exposure meter, if you wish to
correct exposure in unusual lighting conditions or in flash photography, or if you
want to control exposure for creative effects.
With the A-1, this is a simple process. Using
an FD lens, first disengage the aperture ring
from the “A” mark. Set the AE mode
selector to TV. The Av setting is useless.
Set the aperture by turning the lens aperture
ring, and set the shutter speed by turning the
AT dial. When you press the exposure
preview switch or the shutter button halfway to preview the exposure, the data displayed in the viewfinder will be the same as
if the camera was in shutter priority AE.
You will see the shutter speed you have
set on the AT dial. The aperture displayed is that that the camera would select
on Auto. Although the aperture you have
manually set on the aperture ring is not
displayed, it is at that aperture that your
picture will be exposed when you press
the shutter button. You will also see the red
“M” inside the viewfinder to indicate that
you are in the manual mode.
To operate the camera manually using an FL
lens or any other lens without a full aperture
signal pin, set the AE mode selector to TV.
With these lenses you must always set the
aperture by turning the lens aperture ring. In
the case of these lenses, the digital readout is
unreliable, and it is better to cut it out
altogether by switching off the viewfinder
display lever. You must rely on your own
experience for setting the exposure.
–65–
Not For Resale – Free Download at http://www.joe-chan.com/manuals
With an FD lens, if you set the AE selector
to Av instead of TV while the lens is away
from the “A ” mark, the digital readout will
show the aperture you have set on the AT
dial plus the corresponding camera-selected
shutter speed as in aperture priority AE
along with “M” for manual aperture setting.
Although you are no longer in manual
override, it is possible to make an exposure
correction by setting the lens aperture ring
to a different aperture than that on the AT
dial. Exposure will be made at the aperture
set on the lens aperture ring and the cameraselected shutter speed.
Self-Timer
The self-timer is usually used either so that
you can include yourself in a picture or as an
alternative to a cable release for the softest
possible shutter release in delicate photography, such as photomacrography and photomicrography, or on other occasions when
long exposures are necessary. This particular
self-timer allows a time-lag of either two or
ten seconds.
To use the self-timer, first make sure the
film is wound and that the shutter speed is
not at “B”. If the film is not wound, the
self-timer will act, but the shutter will not.
The self-timer will not function normally at
“B”. Now set the main switch to 2 or 10.
Focus and compose your picture. You may
press the exposure preview switch to check
the exposure. However, remember that,
since the A-1 is designed to reflect any lastsecond changes in exposure when in an
–66–
Not For Resale – Free Download at http://www.joe-chan.com/manuals
AE mode, it will not set the exposure until
a split second before the shutter itself is actually released. Once you have completed
these preparations, flick the eyepiece shutter
lever to close the eyepiece shutter so that no
light comes through the eyepiece to affect
the exposure. Now press the shutter button
and run into place if your purpose is to include yourself in the picture. The shutter
will be released automatically following the
time interval you have set.
The moment you press the shutter button,
the self-timer lamp starts to flash at the rate
of two flashes per second. At two seconds
before shutter release, it starts to flash eight
times per second to warn you of impending
shutter release.
If you wish to cancel the self-timer before
shutter release, either switch the main
switch to the “L” position or press the
battery check button.
You may repeat the self-timer process as
many times as you wish. After completing
self-timer photography, return the main
switch to either “A” or “L”.
Please note that the eyepiece shutter should
be closed whenever exposure is to be determined when your eye is not to the eyepiece.
This is applicable to self-timer photography,
remote control photography and often to
tripod or copy stand photography and is
especially important in night photography.
–67–
Not For Resale – Free Download at http://www.joe-chan.com/manuals
Not For Resale – Free Download at http://www.joe-chan.com/manuals
EXPOSURE COMPENSATION
ject is not located in the central part of the
You can, of course, make exposure corviewing screen.
Exposure Compensation Dial
rections by operating the camera manually,
but the A-1 is also equipped with other
One device for correcting exposure in the
devices which allow you to correct the
AE mode is the exposure compensation dial.
exposure while in an AE mode.
To make the correction, simply hold in the
Unusual lighting conditions which necessiexposure compensation lock button while
tate exposure correction include those inturning the outer knurled edge of the ASA
stances when light takes up the major part of
setting dial until the compensation dial
the viewing area, such as in beach or snow
index is aligned with the desired correction.
scenes, and contre-jour or backlit situations
The exposure compensation scale covers a
in which light is shining behind the subject,
full ±2 f/stop range in indications of 1/4
such as when your subject is in front of a
(underexposure by 2 f/stops), 1/2 (underwindow or when a lamp or the sun is shining
exposure by one f/stop), 1 (normal AE exbehind him/her. In such situations, the
posure), 2 (overexposure by one f/stop) and
camera might be fooled into giving a reading
4 (overexposure by two f/stops). The scale
which would underexpose your subject, so
is engraved in 1/3 f/stop increments so that
you must give it more exposure than the
intermediate settings may be used. The latter
camera shows in AE. This also applies to
may come in handy for bracketing the exhigh-key or intentionally overexposed shots.
posure.
On the other hand, it is necessary to reduce
Since the digital readout is in only 1/2 f/stop
the exposure for a low-key shot. Some corincrements, depending on the situation, the
rection may also be necessary if your sub- –69– readout will not necessarily change to indi-
Not For Resale – Free Download at http://www.joe-chan.com/manuals
cate an exposure adjustment of only 1/3
f/stop, but your picture will be exposed in
the 1/3 f/stop increment you set on the dial.
Generally, exposure should be corrected
whenever the high-key (light) or low-key
area occupies more than half of the total
viewing area. How much more or less exposure should be given depends on the lighting condition as roughly described below.
However, these are only general guidelines
meant to help you while experimenting.
Some situations require special measures.
For instance, when shooting a subject against the sun or some other exceptionally
strong light source, requiring drastic exposure correction, or when you shoot a
subject in an unvarying lighting condition
such as under photo lamps in a studio, it
Scale
1/4
:
1/2
:
1
:
2
:
4
Exposure Correction
2 f/stops underexposure
1 f/stop underexposure
Application
Black background
Spot lighting
Black background occupying half of viewing area
Normal
1 f/stop overexposure
2 f/stops overexposure
Overhead interior lighting
Subject by a window
Blue sky or sea backgrounds occupying half of viewing area
Contre-jour portrait, white background, snow scene or blue
sky background .
–70–
may be better to use the exposure memory
switch as explained on the next page or
manual override.
The exposure compensation dial can also be
used to correct exposure in multiple exposures as explained later.
Usable Range of Exposure Compensation
Dial According to ASA Rating
ASA6:
1/4••1/2••1
ASA12:
1/4••1/2••1••2
ASA25-3200:
1/4••1/2••1••2••4
ASA6400:
1/2••1••2••4
ASA12800:
1••2••4
Once you have made an exposure correction
on a specific frame using the exposure compensation dial, do not forget to reset the dial
to its original setting. Otherwise, all following frames will be incorrectly exposed.
Not For Resale – Free Download at http://www.joe-chan.com/manuals
Exposure Memory Switch
The A-1 also offers an exposure memory
switch for correcting the exposure in the AE
mode. Essentially, this switch assures correct
exposure by exposing the picture for your
subject no matter what the surroundings are.
When you press in the exposure memory
switch, it locks the exposure value (EV) for
whatever you are metering. You can then
compose the picture as you wish, and it will
come out correctly exposed for whatever
you metered. An extra advantage in this is
that, depending upon whether you are in the
shutter priority or aperture priority AE
mode, you can change either one and the
camera will automatically select the other to
arrive at the same locked-in exposure value.
the total viewing area. Push and hold in the
exposure memory switch to lock the exposure value metered for your subject. Now
step back and compose the picture as you
like. Change the aperture or shutter speed,
depending upon which priority you are in,
if necessary. Continuing to hold in the
exposure memory switch, press the shutter
button. Your subject will be correctly
exposed.
Of course, you have a problem if you cannot
approach your subject to meter it directly.
Then try to find an approachable subject
which you think would give the same exposure value as your subject. Meter it, push
in and hold the exposure memory switch.
Compose your subject and shoot for correct
exposure.
Please note that you must hold in the
exposure memory switch until after you
press the shutter button. It does not lock.
For instance, suppose you want to take a
portrait of a subject against the sun. First
move in closer to your subject until it is
centered in and taking up about one-third of
–71–
Not For Resale – Free Download at http://www.joe-chan.com/manuals
camera to a higher value. Usually this
is done by multiplying the normal ASA rating
by some multiple of two, say by two or four.
In this case, the whole roll of
film must be shot at the “pushed” ASA
or you will have to sacrifice one or the other
of a whole series of frames. Also, do not
forget to inform your developing lab of the
change or the whole film will be incorrectly
developed. This is only an introduction to
this technique. Not all films can be
“pushed” and not all developing labs will
handle them. Read more about “pushing”
the ASA in photographic literature and
know what you're doing before you try it.
This trick should not be confused with the
above which involves intentional exposure
correction for only one frame after which
the ASA dial should be reset to its original
value.
Changing the ASA Setting
There is another way to correct exposure
which can be used whether you are in the
manual or the AE mode. That is to change
the ASA film speed setting on the camera. A
film with an ASA rating twice that of
another film requires only half the amount
of light for correct exposure as compared
with the other film. For instance, if you
have an ASA 200 film loaded, you can make
an exposure correction equal to closing the
aperture one f/stop or raising the shutter
speed one step by changing the ASA setting
on the camera to ASA 400.
Other useful tricks can be performed by
changing the ASA setting. You may be stuck,
for instance, indoors without flash. Even
with ASA 400 film loaded in your camera,
you may be forced to use undesirably slow shutter speeds. You may solve this
by “pushing” the ASA setting on the
–72–
Not For Resale – Free Download at http://www.joe-chan.com/manuals
Multiple Exposures
Making two or more exposures on the same
frame is an exciting technique which is very
simple to perform with the A-1. After
making the first exposure, do not turn the
film advance lever but return it to its
retracted position close to the camera body.
Switch the multiple exposure lever underneath the film advance lever to the left. A
red dot will appear indicating that the
camera is set for a multiple exposure. Now
turn the film advance lever. The film will
remain stationary, holding its exact position.
At the same time the shutter will be recocked, and the multiple exposure lever will
automatically return to its original position
over the red dot. When you press the shutter
button, your second shot will be in exact
registration over the first. If you turn the
film advance lever, the camera will be set for
the next frame.
You can make any number of exposures on
the same frame simply by repeating the
above procedure before turning the film
advance lever. There is a possibility of a
slight movement of the frame if you make
an excessive number of exposures on the
same frame, if you turn the film advance
lever too forcefully or if there is film slack.
The frame counter is stopped until you
actually advance the film to the next frame.
Once you have set the camera for a multiple
exposure, there is no way to cancel the
process before actually making it. If you
suddenly decide you don't want a multiple
exposure but still want to preserve the one
or several shots you have already made on
the frame, you have the best chance of doing
that if you manually set the lens aperture
ring to the minimum aperture, the shutter
speed to 1/1000 sec., cover the lens with the
lens cap and then release the shutter.
–73–
Not For Resale – Free Download at http://www.joe-chan.com/manuals
Multiple exposures are not possible when the
Motor Drive MA or Power Winder A or A2 is
mounted on the A-1 and in operation. They
are possible even when these accessories are
mounted if you switch them off and advance
the film manually.
There are some situations which seem to call
for a multiple exposure but which are better
handled in another way. One of these is
recording multiple bursts of fireworks on the
same frame. Rather than using the multiple
exposure lever, mount the camera on a
tripod, set the shutter speed at “B”, and set
the aperture ring manually to the appropriate f/stop according to the following table.
Hold the shutter open with a cable release
until several bursts are registered on the frame.
ASA to a higher value as described earlier.
In this method, you must first decide how
many exposures you want to make on the
same frame. If a double exposure, make
both exposures at twice the normal ASA;
if a triple exposure, make all three exposures
at three times the normal ASA; if a quadruple exposure, make all four exposures at
four times the normal ASA, etc.
Another way to correct exposure is to use
the exposure compensation dial at the settings outlined in the table below.
Number of Multiple
Exposures
Exposure Compensation Scale
Double
1/2
ASA
25
50
100
200
400
Triple
Between 1/2 and 1/4
f/stop
5.6
8
11
16
22
Quadruple
¼
Exposure in Multiple Exposures
Generally, the first exposure of a multiple
exposure should be of a relatively dark
subject so that the image in the next exposure will show up clearly. For best results
in multiple exposures, it is also advisable to
decrease the exposure for each shot. Depending on the situation, there are several
ways to do this. One way is to change the
The method when using the exposure compensation dial for this purpose is the same as
that of changing the ASA. That is, for a
double exposure, the dial should be set to
1/2 for both exposures and so on.
Actually, both methods described above are
only general guidelines, and your technique
will benefit greatly from experience.
–74–
Not For Resale – Free Download at http://www.joe-chan.com/manuals
Film Plane Indicator
This mark is engraved on the top of the
camera beside the film rewind knob, just to
the left of the pentaprism, to indicate the
exact position of the film plane. It is not
used in general photography, but it is helpful
in close-up photography and photomacrography for obtaining the exact shooting
distance from film to subject.
Infrared Index Mark
Since infrared light rays have longer wavelengths which focus on a plane slightly
behind that of ordinary visible light rays, it
is necessary to slightly adjust the focus of
the lens when using black and white infrared
film. The infrared index mark engraved on
the lens barrel is used for this purpose. After
focusing the same as usual, note the tiny red
dot engraved on the lens barrel just to the
right of the distance index, and turn the
focusing ring to align the focused distance
with this red dot. For instance, if the focus
is at 5m on the distance scale, turn the
focusing ring to align the 5m mark with the
red dot. After that focusing correction, you
can release the shutter.
When using infrared black and white film,
visible light rays must be kept out by means
of a deep red filter (Rl) over the lens. When
using infrared color film, there is no need to
Distance Scale
The distances on the scale are calibrated
from the film plane to indicate the focused
distance from film plane to subject.
The scale is not generally used except
when confirming depth of field, performing guide number calculations in flash
photography, or using infrared film.
Read one-digit distances in the middle of the
number marked on the scale. Two-digit
distances should be read at the point between the two digits.
–75–
Not For Resale – Free Download at http://www.joe-chan.com/manuals
make a focusing correction. Follow the
detailed instructions of the film manufacturer.
The position of the infrared index mark has
been computed for the use of infrared film
with peak sensitivity at 800nm (such as
Kodak IR 135) and a red filter such as
Wratten 87.
Checking the Depth of Field
There are two ways to find out what the
depth of field is. One is by using the depth
of field scale which is a series of f/stops
repeated on each side of the distance index
mark on the lens barrel. The scale differs
according to the lens. First focus your
subject. Find the two f/stops on the depth
of field scale which correspond to the
aperture you or the camera have set for the
exposure. Draw imaginary lines from these
two f/stops to the distance scale. The
effective depth of field extends between
those two distances. For example, using a
standard 50mm lens focused at 3m with the
aperture set at f/8, depth of field extends
from 2.4m to 4.5m. Any subject from
2.4m to 4.5m away will be in reasonably
sharp focus in the image.
You can also visually check the depth of
–76–
Not For Resale – Free Download at http://www.joe-chan.com/manuals
field looking at the image through the
viewfinder by pushing in the stop-down lever
just as in stopped-down AE photography
and setting the lens to the working aperture.
This will probably be one of those occasions
when you will release the stop-down lever
and return the lens to “A” before taking a
shot. You will have to operate the multiple
exposure lever as explained earlier before the
camera will properly operate. See
WARNINGS OF INCORRECT OPERATION IN STOPPED-DOWN PHOTOGRAPHY, p. 64.
Small Aperture
Large Aperture
–77–
Not For Resale – Free Download at http://www.joe-chan.com/manuals
Aperture Signal
Lever
Full Aperture
Signal Pin
Lens Signal Coupling
There are several levers and pins at the rear
of an FD lens which transmit signals between the lens and the camera body. Usually
it is not necessary to know what they are,
but sometimes, when you must operate the
aperture manually for non-coupled accessories for instance, it is. Just for your
information, we include explanations of
them here.
1. Aperture Signal Lever
With an FD lens, exposure metering is
performed through the lens at full aperture.
This is nice for you since you have a bright
viewfinder to focus and compose, but to
determine correct exposure, the camera
must know the effective aperture. For most
cameras, such as the Canon F-1, this lever
transmits the preset aperture on the lens
aperture ring to the exposure meter. It is
coupled to the lens aperture ring and moves
in proportion to its rotation. In AE
photography, however, the exposure meter
receives a signal directly from the camera.
2. Automatic Aperture Lever
This lever couples to the camera body to
stop the diaphragm down to the preset
aperture just before the shutter releases. This
is the lever that must be locked for manual
diaphragm control with a non-coupled accessory.
AE Switch Pin
Automatic
Aperture Lever
Reserved Pin
–78–
Not For Resale – Free Download at http://www.joe-chan.com/manuals
Unusable Lenses
Out of the several series of Canon lenses,
there are a few older individual lenses which
cannot be used on the A-1. Do not attempt
to mount the following five lenses:
FL 19mm f/3.5
FL 58mm f/1.2
R 58mm f/1.2
R 100mm f/3.5
FLP 38mm f/2.8
3. Full Aperture Signal Pin
This pin transmits the maximum aperture of
the lens to the exposure meter to set the
meter coupling range automatically.
4. AE Switch Pin
When the “A” mark of the aperture ring is
set to the aperture index, the AE switch pin
comes out to insure that the lens, at this
setting, can be mounted only on cameras
designed for AE photography.
5. Reserved Pin
This pin is designed for use with additions to
Canon's camera system that may be developed in the future.
–79–
Not For Resale – Free Download at http://www.joe-chan.com/manuals
All FD lenses which lack a Breechlock mount ring, with the exception
of the Macro lenses, are set for manual
diaphragm control as follows:
Automatic Diaphragm Control
When the A-1 is directly coupled with an FD
lens, diaphragm control is totally automatic.
Exposure metering is performed at full
aperture whether the lens aperture ring is at
the “A” mark or set to a specific aperture.
At shutter release, the diaphragm automatically closes down to the aperture set by the
camera or by you with the AT dial or the
aperture ring. Following shutter release, the
lens automatically returns to maximum aperture.
1. Before mounting the lens, insert the hole
of the accessory manual diaphragm adapter over the tip of the automatic aperture
lever at the rear of the lens. Push the
lever to the right and lower the adapter
into the groove to lock the lever in that
position.
2. Mount the lens onto the accessory. The
diaphragm will now open and close as
the aperture ring is rotated.
Manual Diaphragm Control
The insertion of manual accessories or a
macrophoto coupler between the camera
and an FD lens requires setting the lens for
manual diaphragm control before stoppeddown metering is possible. The instructions
for the various accessories involved will tell
you whether or not this is necessary.
When the manual diaphragm adapter is
attached on the rear of one of these lenses,
never mount the lens directly on the camera
or directly on accessories designed for
automatic diaphragm control, such as the
Auto Bellows or Bellows FL.
–80–
Not For Resale – Free Download at http://www.joe-chan.com/manuals
All FD lenses with a chrome Breechlock mount ring and FD Macro lenses
are set for manual diaphragm control as
follows:
When using a macrophoto coupler, the
Macro Hood must also be mounted onto
the rear of the lens.
You may avoid setting the lens for manual
diaphragm control when using manual
accessories or a macrophoto coupler by
attaching the Canon Macro Auto Ring and/
or Double Cable Release.
1. Before mounting the lens, push the
automatic aperture lever at the rear of the
lens to the right where it automatically locks.
2. Mount the lens onto the accessory as
usual. The diaphragm will now open and
close as the aperture ring is rotated.
Some of these lenses have an additional lock
lever. With these lenses, the automatic
aperture lever must be pushed fully to the
right and the lock lever pushed to “L” to
hold the automatic aperture lever in that
position.
Be sure to reset the automatic aperture lever
to its normal position before using the lens
once more in direct contact with the camera.
In the case of a lens with a lock lever, switch
it back to the position of the white dot.
To meter when the lens is set for manual
diaphragm control, use the stopped-down
AE procedure.
–81–
Not For Resale – Free Download at http://www.joe-chan.com/manuals
Flash AE
FD 24mm f/2.8 with Speedlite 199A, 1/4 sec, ASA 100
Not For Resale – Free Download at http://www.joe-chan.com/manuals
FLASH PHOTOGRAPHY WITH THE
A-1
AE Flash Photography (Full Autoflash Photography)
There are seven special automatic flash units,
the Canon Speedlites 577G, 533G, 199A,
188A, 177A, 155A and 133A, which make
AE flash photography possible with the
A-1. Just slip the Speedlite 577G's or
533G's sensor unit or the 199A, 188A,
177A, 155A or 133A into the accessory
shoe, switch on the flash, focus and shoot.
It does not matter whether the AE mode
selector is set to Av or TV. Except for
“B”, whatever the shutter speed set, as soon
as the pilot lamp of the Speedlite comes
on, the A-1 switches to the X synchronization speed of 1/60 sec. – automatically.
The Speedlite's sensor controls the light
output for perfect automatic exposure
within auto working ranges. And just as
automatically will the camera switch back
to the shutter speed actually set on the dial
as soon as the pilot lamps goes out. The
viewfinder offers you full information
needed for flash photography. Moreover,
when the main switch of the Speedlite is
turned off, the flash circuitry is completely
cut off and the A-1 switches over to function
as an AE control camera without detaching
the Speedlite or sensor unit from the accessory shoe.
–83–
Not For Resale – Free Download at http://www.joe-chan.com/manuals
Of course, with the flash still on Auto
you can set the aperture manually should
you wish to use an FL lens. Even then,
however, the camera will automatically
switch to 1/60 sec. as soon as the Speedlite
is ready for firing.
These Speedlites employ a unique light
sensing system, separate in the case of the
577G and 533G, which reduces excessive
reflection from the central area to give
better overall exposure.
With the Speedlites 577G, 533G and 199A,
shutter speeds slower than 1/60 sec. can be
selected resulting in a lighter background.
To control depth of field, you can choose
among three working aperture that are
automatically preset by the camera. The
577G, 533G and 199A also allow bounce
flash. With their corresponding wide angle
adapter, flash coverage of a 24mm lens
field with the 199A and of a 20mm lens
field with the 577G and 533G is possible.
A thyristor circuit assures continuous flash
shooting at close distances.
General Flash Photography
When you use the A-1 with flash units other
than the Speedlites 577G, 533G 199A,
188A, 177A, 155A and 133A, set the AE
mode selector to TV and the shutter speed
to 1/60 sec. or slower. With this setting on
the camera, other types of electronic flash
units can be synchronized with your A-1
either through the hot shoe or via the PC
socket on the front of the camera body.
These allow two separate flash units to be
fired simultaneously.
Aperture should be manually set on the
aperture ring to the working apertures specified for an automatic electronic flash or be
determined through a guide number calculation using the following formula.
Aperture =
Guide Number
Shooting Distance
When doing the math, make sure that the
guide number and shooting distance are both
in the same unit, whether meters or feet.
The fastest shutter speed for use with
electronic flash is 1/60 sec., for use with M
or FP bulbs, 1/30 sec.
It is recommended to use a Canon flash unit
on this camera. Using a flash or flash accessory of another make may cause the camera
–84–
Not For Resale – Free Download at http://www.joe-chan.com/manuals
to work improperly or even possibly damage
the camera itself.
Exposure warnings are very similar to those
in shutter priority AE. If you have set
an auto working aperture larger than the
maximum aperture of the lens, the maximum aperture of the lens will flash on and
off to indicate underexposure. If you have
set an auto working aperture smaller than
f/16, the set auto working aperture will flash
on and off. If the minimum aperture of the
lens is equal to or smaller than the flashing
aperture, exposure will be correct. If larger,
the image will be overexposed.
If, with Speedlite 199A, you want to use a
shutter speed of 1/30 sec. or slower, set the
AE mode selector to TV and the AT dial to
the desired shutter speed and set the shutter
speed selector switch on the 199A to the
MANU position. In this case, the shutter
speed on the AT dial will be displayed in
the readout.
Digital Readout in Flash Photography
When you preview exposure in flash photography, the digital readout will differ depending on the type of flash photography.
1. AE flash with Canon Speedlite 133A,
155A, 177A, 188A, 199A, 533G or 577G
and an FD Lens
The flash is on Auto while the lens is set to
the “A” mark. The digital readout will
display a shutter speed of 1/60 sec., the flash
signal “F” and the auto working aperture set
on the flash as follows: 60 F 2.8. The A-1
automatically switches to 1/60 sec. when the
flash is charged regardless of the shutter
speed set as long as it is not set to “B”. The
“F” flash signal appears in the viewfinder
only when the flash pilot lamp lights up to
.indicate that the flash is charged. Thus,
you will know the flash is ready simply by
looking in the viewfinder. The aperture value
displayed is the auto working aperture
you have set on the flash depending on the
ASA film speed. (The aperture displayed
in the readout may be 1 /2 f/stop larger or
smaller than the auto working aperture set
on the flash though the auto working
aperture is the effective aperture). The auto
working aperture value is automatically set
on the camera.
2. Automatic Shutter Setting Autoflash
Control with Canon Speedlite 133A, 155A,
177A, 188A, 199A, 533G or 577G
The flash is on Auto but the aperture is
manually set by turning the lens aperture
ring. This type of automatic flash control is
necessary with an FL lens and other non-FD
lenses and possible with an FD lens when it
is not set to “A”.
–85–
Not For Resale – Free Download at http://www.joe-chan.com/manuals
The digital readout will be the same as in
AE flash control but will also include the
“M” signal for manual aperture control.
Though the set flash auto working aperture
value is displayed in the readout, it is not
automatically set as in AE flash control.
The same aperture value as set on the flash
must be manually set on the lens aperture
ring. As in AE flash control, the shutter
speed is automatically set at 1/60 sec. as
long as the AT dial is not at “B”.
When using an FD lens, exposure warnings
are the same as those for AE flash control.
Since FL lenses lack a full aperture signal pin,
you cannot always rely on the digital readout of apertures and exposure warnings. It
is, therefore, advisable to switch off the
viewfinder display lever.
3. Manual Flash Control with Canon Speedlite 155A, 177A, 188A 199A or 577G
The flash is on Manual and the aperture is
determined by a guide number calculation
and then set manually on the lens aperture
ring. The digital readout will include shutter
speed, “F” flash signal and the “M” signal
for manual aperture control. No aperture
data will be displayed. When the flash is set
to Manual, the viewfinder will display “M”
even if an FD lens is at the “A ” mark.
4. Long Exposures with Canon Speedlites
133A, 155A, 177A, 188A, 199A, 533G and
577G
When the shutter speed is at “B”, the shutter
speed data in the digital readout will be
replaced by “bu” for “bulb”. The remaining
information as well as exposure warnings
remain the same as in each of the above
three cases.
For example:
1) AE Flash
–86–
Not For Resale – Free Download at http://www.joe-chan.com/manuals
2) Automatic Shutter Setting Autoflash
3) Manual Flash
The “B” setting is useful in flash photography for lightening the subject's background. At this setting, the flash of the
Speedlite synchronizes with the opening of
the first shutter curtain.
5. General Flash Photography with Flashes
other than the Canon Speedlites
When flashes other than the six special
Canon Speedlites arc used with the A-1, the
digital readout will include the same information as in manual override. See p. 65.
However, since the aperture displayed has no
meaning in this case, it might cause less confusion to switch off the viewfinder display
lever.
–87–
Not For Resale – Free Download at http://www.joe-chan.com/manuals
–88–
Not For Resale – Free Download at http://www.joe-chan.com/manuals
MOTORIZED FILM WINDING
There remains one last mechanical operation
in the A-1 that could possibly distract your
attention from your subject: you have to
wind the film. Canon has solved that problem for you too. With the Canon Power
Winder A, the Power Winder A2, and the
Motor Drive MA automate ally wind the film
and recock the shutter without your ever
having to touch the film advance lever, all
even when you are using the A-1 in an AE
mode (except for stopped-down AE).
The Motor Drive MA is a compact, highperformance device, offering a selection of
three speed settings: H(max. 5fps), L(max.
3.5fps) and S(single frame). With the
Battery Pack MA, the unusually high speed
(H) is instantly accessible for those fastbreaking situations. For maximum ease of
operation, there is a selection of three shutter
buttons depending on how the camera is
hand-held.
Both the Motor Drive MA and the Power
Winder A2 feature remote control with the
Remote Switch (3 or 60) or the Wireless
Controller LC-1.
All three accessories stop automatically at
the end of the film at which time an LED
glows steadily to tell you that the roll is
completed. They mount onto the A-1 with
ease, and, even when mounted, can simply
be switched off to wind the film manually.
–89–
Not For Resale – Free Download at http://www.joe-chan.com/manuals
DATA BACK A
Within seconds, the A-1's back cover can be
exchanged for the Data Back A, which,
again, becomes an integral part of the
camera's electronic system. As you press the
shutter release, the day, month and year will
be recorded clearly but unobtrusively in the
lower right hand corner of every picture, i.e.,
unless you decide to leave it blank. Since
letters and Roman numerals are also available, the Data Back can serve as a convenient
coding system as well.
Various Accessories for Close-ups
and Photomacrography
Canon offers a whole gamut of accessories
which give you unlimited possibilities in
close-ups, photomacrography and photomicrography. At the center of the system
stands the elegant, versatile Auto Bellows
featuring a built-in focusing rail, immediate
lens reversal and automatic diaphragm
coupling with the Canon Double Cable
Release. For higher magnifications with
excellent image quality there are the specially aberration-corrected Macro and Macrophoto lenses. A Macro Stage and four
duplicators provide the maximum of ease in
shooting difficult subjects.
Of course, close-up lenses and reversing rings
are also offered along with three sets of extension tubes. The remarkable set of extension tubes FD-U permit full-aperture metering, automatic diaphragm coupling and AE
photography with the A-1. There is also a
Bellow FL. Even with manual accessories,
the Macro Auto Ring and Double Cable
Release preserve automatic diaphragm coupling. Canon's extra-large, ultra-stable Copy
Stand 5, the smaller Copy Stand 4, a small,
collapsible copy stand, camera supports, a
Focusing Rail, cable releases and microscope adaptors round out Canon's up-todate, integrated, comprehensive close-up
system.
–90–
Not For Resale – Free Download at http://www.joe-chan.com/manuals
Not For Resale – Free Download at http://www.joe-chan.com/manuals
ACCESSORIES
1. Angle Finder A2 and B
2. Eyecup 4S
3. Magnifier S
4. Camera Holder F3
5. Macrophoto Coupler FL 52 and
FL 58
6. Lens Hood BS-52
7. Microphoto Hood
8. Photomicro Unit F
9. Slide Duplicator
10. Handy Stand F
11. Canon Release 30
12. Canon Release 50
13. 52 mm filters
58 mm filters
14. 52-55 Step-up Ring
15. 58 mm Close-up Lenses
(240,450)
16. 52 mm Close-up Lenses
17. Macrophoto Lens 20 mm f/3.5
18. Macrophoto Lens 35 mm f/2.8
19. Duplicator 8
20. Duplicator 16
21. Duplicator 35
22. Focusing Rail
23. Macro Stage
24. Roll Film Stage
25. Double Cable Release
26. Copy Stand 5
Not For Resale – Free Download at http://www.joe-chan.com/manuals
27. Copy Stand 4
28. Auto Bellows
29. Macro Auto Ring
30. Bellows FL
31. Extension Tube M Set
32. Manual Diaphragm Adapter
33. Extension Tube FD 15-U,
FD 25-11 and FD 50-U
34. Extender FD 2x-A, Extender
FD 2x-B
35. Dioptric Adjustment Lens S
(10 kinds)
36. Speedlite 133A
37. Speedlite 155A
38. Speedlite 177A
39. Speedlite 188A
40. Speedlite 199A
41. Speedlite 533G
42. Speedlite 577G
43. Motor Drive MA
44. Battery Pack MA
45. Ni-Cd Pack MA
46. Power Winder A2
47. Power Winder A
48. Data Back A
49. Action Case A
50. Holder for Gelatin Filter with
Filter Holder Adapter and Hoods
51. Wireless Controller LC-1
52. Macrolite ML-1
Not For Resale – Free Download at http://www.joe-chan.com/manuals
1
2
3
4
5
6
7
8
9
10
11
12
13
14
15
Speedlite 133A
Speedlite 155A
Speedlite 177A
Speedlite 188A
Speedlite 199A
Speedlite 533G
Speedlite 57 7G
Data Back A
Ni-Cd Charger MA
Motor Drive MA
Power Winder A
Power Winder A2
Ni-Cd Pack MA
Battery Pack MA
Battery Magazine MA
Not For Resale – Free Download at http://www.joe-chan.com/manuals
Proper Care of the Camera
Your A-1 is a rugged, high-quality camera. It
will work properly if operated and cared for
properly. Never force anything. If you have
a problem that is not answered in the instructions below, follow the advice of your
nearest Canon serviceman. We recommend
taking the A-1 to an authorized Canon
service facility at least once every three years
for a complete checkup.
time, carefully check the operation of each
part.
Cleaning the Camera and Lens
Before doing anything else, clean the camera
with a blower brush. It is best to have two
blower brushes, one for the camera body
and the lens barrel, the other for the lens
surfaces, eyepiece and mirror. If the blower
brush is sufficient to get the camera clean,
stop there. By all means, avoid touching the
lens. Should you accidentally get fingerprints or smudges on the lens or eyepiece,
use lens tissue (not eyeglass tissue!) or a
clean, soft, untreated cloth, after breathing
on the lens surface, if necessary. Never use a
handkerchief, facial tissue or any other cloth
which might permanently scratch the lens,
and never use a cloth treated with a chemical
which might totally ruin the lens coating.
Put only one or two drops of lens cleaning
fluid on the tissue, not the lens, and, starting
at the center of the lens, lightly wipe it while
working towards the outer edges in a circular
motion. Use a silicon cloth, if necessary, to
wipe smudges off the camera body and lens
barrel only. The mirror is another part you
should never touch. A dirty mirror does not
affect the image though it may impair
viewing. If it is dusty, clean it very gently
with the lens blower brush. If more cleaning
Storage
The best thing you can do for your A-1 is to
use it regularly, but in the event that it
won't be used for quite a while, first remove
it from any camera bag or soft case. Then
remove the battery to prevent possible corrosion to the terminals. Recap the lens, and
if the body is stored separately from the
lens, put the body cap and the rear lens cap
on. Wrap it in a clean, soft cloth along with
silica gel or some other desiccant to keep it
dry, and store it in a cool, dry, dust-free
place. Avoid storing it in the rear window,
glove compartment or other “hot spots” of
an automobile, in a place such as a laboratory where chemicals could cause corrosion
and rust, or in a dusty, damp, or hot place.
Keep it out of direct sunlight. Before using
the A-1 after it has been stored for a long
–95–
Not For Resale – Free Download at http://www.joe-chan.com/manuals
is necessary, do not attempt to do it yourself
but take it to an authorized Canon service
facility. The film compartment also requires
occasional cleaning with a blower brush to
remove accumulated film dust particles
which might scratch the film. When doing
this, take special care NEVER to exert
pressure on the shutter, the rail surfaces or
the pressure plate.
Salt and sand are your camera's worst
enemies. After using it on a beach, clean it
thoroughly. If you accidentally drop it in
the water, it may be irreparable but take it
immediately to an authorized Canon service
facility.
Using the Camera in Extremely
Cold Conditions
In extremely cold conditions, always
protect the camera from outside air
and try to finish shooting as quickly
as possible.
In temperatures below 0º C (32º F),
the battery may be affected, so you
may want to carry a spare. Keep the
camera and spare battery close to your
body or in a pocket to keep them
warm until you are ready to take a
picture. Although the battery may not
function well in cold conditions, don't
throw it away. It may work perfectly
again when you use the camera in
warmer temperatures.
Avoid extreme temperature changes.
Condensation forming on a camera
and lens taken from subzero outside
temperatures into a warm room may
cause corrosion. Let the camera gradually adjust to the temperature change
by placing it in a completely sealed
plastic bag for a while.
–96–
Not For Resale – Free Download at http://www.joe-chan.com/manuals
SPECIFICATIONS
Type: 35mm SLR (Single-Lens Reflex)
camera with selective, electronically
controlled AE (Automatic Exposure) and
focal plane shutter.
Format: 24 x 36mm.
Photographic Modes: Six modes; including
five AE modes: shutter priority AE,
aperture priority AE, programmed AE,
full AE flash photography with specified
Canon electronic flashes, and stoppeddown AE; and manual override.
Interchangeable Lenses: Canon FD series
lenses (usable with four full - aperture
metering AE modes and stopped-down
AE); Canon FL series lenses (usable
with stopped-down AE).
Standard Lenses: Canon FD 55mm and
50mm lenses.
Lens Mount: Canon Breech-Lock mount.
Canon FD, FL and R lenses can be
mounted.
Viewfinder: Fixed eye-level pentaprism.
Field of View: 93.4% vertical and 95.3%
horizontal coverage of the actual picture
area.
Magnification: 0.83X at infinity with a
standard 50mm lens.
Focusing Screen: Standard split-image/
microprism rangefinder.
Viewfinder Information: Displayed in
form of LED digital readout below viewing area. Includes shutter speed (1/1000
sec.-30 sec.), aperture (f/1.2-f/32),
flashing warning of incorrect exposures
and settings, bulb indication, charge completion indicator for specified Canon
flash units, manual aperture, control
signal, error indication for incorrect
stopping-down operation. Shutter speed
and aperture data displayed in 1/2 step
increments. Viewfinder information can
be cancelled by turning off viewfinder
display switch.
Dioptric Adjustment: Built-in eyepiece is
adjusted to standard —1 diopter.
Eyepiece Attachments: Angle Finders A2
and B, Magnifier S, 10 different Dioptric
Adjustment Lenses S for eyesight correction and Eyecup 4S.
Eyepiece Shutter: Built-in. Keeps out extraneous light during self-timer or remote
control operation.
Mirror: Instant-return type with shockabsorbing mechanism. No image cut-off
in the viewfinder even with the FD
400mm telephoto lens.
–97–
Not For Resale – Free Download at http://www.joe-chan.com/manuals
AE Mechanism: Electronically controlled.
Information input by means of AE mode
selector and AT dial for full-aperture AE
metering (FD lens at “A”) and stoppeddown AE metering.
Employs three LSI's with I2L, one Linear
LSI and one Bi-MOS IC for light
metering.
AE Mode Selection: By means of AE mode
selector. Two settings: TV (Time value)
for shutter priority AE, Av (Aperture
value) for aperture priority AE.
Light Metering System: Through-the-lens
Central Emphasis Averaging metering by
silicon photocell located just above eyepiece lens. Light reaches silicon photocell
after passing through fresnel lens condenser.
ASA Film Speed Setting: ASA6 to ASA
12800 in 1/3 step increments. With lock.
Meter Coupling Range: EV-2 (8 sec. at
f/1.4) to EV 18 (1/1000 sec. at f/16) at
ASA 100 with FD 50mm f/1.4 lens.
Exposure Compensation: ±2 f/stop range in
1/3 f/stop increments: 1/4 •• 1/2 •• 1 ••
2 •• 4.
Exposure Memory: EV locked in when exposure memory switch is pressed. When
pressed, the shutter-speed/aperture combination can be changed for the same
locked-in EV.
Exposure Preview: Viewfinder digital readout activated by pressing shutter button
halfway or by pressing exposure preview
switch or exposure memory switch.
Stop-down Lever: Foldable. Stoppingdown an FD lens is possible only when
aperture ring is disengaged from “A”
mark.
Manual Override: Possible by disengaging
FD lens from “A” mark and setting AE
mode selector to Tv. Aperture manually
controlled with aperture ring, shutter
speed with AT dial.
Shutter: Cloth focal plane shutter with
four spindles. Electronically controlled,
steplessly, from 30 sec. to 1/1000 sec.
Shock and noise damper mechanisms are
incorporated.
Shutter Speed Scale: B, 30, 15, 8, 4, 2, 1,
2, 4, 8, 15, 30, 60,125, 250,500, 1000
plus P (with the AE mode selector at Tv).
“P” setting is for programmed AE mode.
Intermediate speeds not on the scale cannot be set.
Aperture Scale: • 1.4 • 2 • 2.8 • 4 • 5.6 • 8 •
11 • 16-22 (with the AE mode selector at
Av).
Shutter Release Button: Oversized, twostep button with electromagnetic shutter
–98–
Not For Resale – Free Download at http://www.joe-chan.com/manuals
release. Pressing it halfway activates
meter circuit, pressing it all the way sets
shutter in operation. Can be locked by
setting main switch to "L" to guard
against accidental shutter release. With
cable release socket.
Power Source: One 6V silver oxide battery
(Eveready No. 544, UCAR No. 544, JIS
4G13, Mallory PX28) or alkaline manganese battery (Eveready No. 537,
UCAR No. 537). The battery lasts approximately one year under normal use.
Battery is loaded in the battery chamber
on the front of the camera body.
Battery Check: A red LED on top of
camera flashes on and off to indicate
power level when battery check button is
pressed. Flashing frequency decreases
with power level.
Main Switch: Two positions: "A" and "L".
At "L" all active circuits are off and
shutter button is locked as safety feature.
Doubles as self-timer lever.
Cancellation of Camera Circuit: Shutter
and self-timer operation cancelled by setting main switch to "L" or by pressing
battery check button.
Multiple Exposure: Possible by setting
multiple exposure lever before winding
film advance lever to recock shutter.
Frame counter does not advance. Automatically resets. Unlimited.
–99–
Self-Timer: Electronically controlled. Activated by pressing shutter button. Timelag of 2 or 10 seconds possible. Red LED
flashes on and off to indicate its operation. Flashing frequency increases 2 sec.
before shutter release.
Flash Synchronization: X-synch at 1/60
sec.; FP- and M-synch at 1/30 sec. and
slower.
Flash Coupling: Accessory shoe has contacts for directly-coupled flash units and
automatic flash control contacts for automatic exposure. JIS-B (PC) type flash terminal with shock preventive rim on front
of body.
Automatic Flash: Full AE flash photography
with Canon Speedlites 133A, 155A,
177A, 188A, 199A, 533G and 577G.
Shutter speed automatically set. Aperture
automatically controlled according to
setting of flash when flash is sufficiently
charged.
Back Cover: Opened by pulling up rewind
knob. Removable for attaching Data Back
A. With memo holder.
Film Loading: Easy film loading with
multi-slot take-up spool.
Film Advance Lever: Single-stroke 120°
throw with 30 stand-off. Winding with
several short strokes possible. Automatic
winding possible by mounting Canon
Motor Drive MA, Power Winder A2, or
Power Winder A.
Not For Resale – Free Download at http://www.joe-chan.com/manuals
Frame Counter: Additive type. Counts
back frames as film rewound. Automatically resets to "S" upon opening back
cover. Does not advance during multiple
exposures.
Film Rewinding: By pressing rewind button and cranking rewind knob. Rewind
button automatically resets when film
advance lever turned.
Other Safety Devices: Camera will not
function when power level insufficient.
Film winding impossible while shutter is
in operation. Lockable controls.
Size: 141 x 91.5 x 47.5mm (5-9/16" x 35/8" x 1-7/8") body only.
Weight: 620 g (21-7/8 ozs.) body only, including battery.
With the 50mm f/1.8 lens. - 790 g
(27-7/8 ozs.)
With the 50mm f/1.4 lens. - 855 g
(30-3/16 ozs.)
Subject to change without notice.
–100–
Not For Resale – Free Download at http://www.joe-chan.com/manuals
For your own convenience you may want to use this form to fill in the serial numbers
of your A-1 equipment for quick reference in the event of loss or theft.
Name of the Camera: Canon A-1
Body Number:
Lens:
mm.
1:
No.
mm.
mm. 1: No.
Name:
Address:
Additional Accessories:
Telephone Number:
1:
No.
Not For Resale – Free Download at http://www.joe-chan.com/manuals
Film Advance Lever
Eyepiece Shutter Lever
Eyepiece
Winder and Motor Drive Terminals
Film Rewind Button
Winder and Motor Drive
Coupler Cover
Positioning Hole
for Motor Drive MA
Positioning Hole
for Motor Drive MA
Memo Holder
Lens Release Button
Tripod Socket
Not For Resale – Free Download at http://www.joe-chan.com/manuals
Aperture priority AE
FD 100mm f/2.8 with an orange filter, f/8, ASA 125
Not For Resale – Free Download at http://www.joe-chan.com/manuals