1
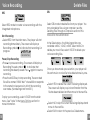
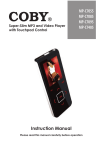
MP-C848
USER'S MANUAL
DIGITAL AUDIO PLAYER W/VOICE RECORDER
0 0 5/ 0 08 0 2 :2 9 /0 4 :1 6
The light of the w orld
Coby Ele ctronics Co rp.
56-65 Rust Street
Maspeth , NY 11378
www.co byusa.com
www.ec oby.com
Ple ase re ad m anua l befo re ope ratio n
Contents
Contents
O ther Functio ns
Getti ng Sta rted
Fea tures
3
Settings
17
Pa ckage Contents
4
A-B R epea t Mode
19
Safety In struct ions
5
Firmw are U pgrad e
20
Ba ttery Installa tion
6
C ustom er Support
Loc ation of Co ntrols
7
Troub lesho oting
22
LCD Scre en Di splay
8
Spec ificati ons
24
Conn ectin g to C ompu ter
USB Drive r Insta llatio n
9
Co nnecting/D iscon necting You r Play er
9
Tra nsferr ing Fil es
10
Basic Oper ation
1
Po wer O n/Off
11
Pla ying M usic
12
Me nu Ov ervie w
13
Vo ice Re cordi ng
15
De leting Files
16
2
Features
Package Contents
2 56 M B Integ rate d F lash Me mor y
P lays Dig ital Music fr om Mos t Online Sto res a nd
Subs crip tion Ser vice s
0 0 5/ 00 8
0 2 :2 9/ 0 4: 1 6
The l ight o f t he wor ld
Integ rat ed M icrophone for Voic e Reco rding
P orta ble Sto rage De vice (Music , Da ta, and Pic ture s)
M p3 play er
User's M anual
Integ rat ed U SB P lug (no cab le r equ ired)
P lug and Pla y (n o dr iver installation req uire d fo r
W indows 2000/M E/X P or Ma c OS X 10.2. 6 or gre ater )
7 -co lor L CD Bac klight
D igit al P rese t Eq ualizer
Earp hones w /neck strap
USB Exte nsion C able
Song Titl e Suppo rt
M ult i-Language Sup por t
U pgr ade abl e Fir mware
Insta llation C D
(for Win dows 9 8 SE)
3
4
Safety Instructions
1.Read these instructions carefully. Keep these instructions for future
reference.
2.Heed all warnings and follow all instructions.
3.Do not expose to wate r or moisture.
4.Clean only with a dry c loth.
5.Do not install near any apparatus that produc es heat such as stoves,
radiators, amplifiers, etc.
6.Remove the battery when the device will be u nused for long periods of
time.
7.Do not use headphone s/earphones while cyc ling, driving, or operat ing a
motorized vehicle.
8.Do not drop or otherwise subject the device to impact. Physical
impact may result in loss of data. Users are responsible for creating
backups of their data. Coby Electronics cannot be held liable or be
otherwise responsible for loss of data.
9.Do not disconnect the USB cable or turn off the device while transfer r ing
files to or from your dev ice. Data loss may occur as a result.
10 .Do not open or attem pt to repair this device. Refer all repairs to
authorized service pe rsonnel.
P rotect your ears:
Hearing experts advise a gainst the constant use of personal stereo
equipment played at hig h volumes. Constant h igh-volume use can lead to
hearing loss. If you exper ience ringing in your ears or hearing loss,
discontinue use and seek medical advice.
F or recycling or disposal information about this product, please contact
your local authorities or t he Electronics Industries Alliance: www.eiae.org
Battery Installation
1. Remove the U SB ca p.
2. Open the bat tery c over.
3. In sert th e AA A batt ery.
M ake su re to match the + and - ends of the batt ery wi th the
marking s insid e the batte ry compart ment.
N OTICE:
This product is protected by certain intellectual property rights of Micr osoft.
Use or distribution of such technology outside o f this product is prohibit ed
w ithout a license from M icrosoft.
WARNING: H andling the cord on the earphone s will expose you to lead, a chemical known to the
S tate of California to ca use [cance r, and] birth defects or other repro ductive har m.
W ash hands after handling.
5
6
Location o f Controls
M icrophone
LCD Sc reen Display
LCD Scree n
Play
Pause
Stop
Play mode indicator
005 /008
02: 29/0 4/1 6
File Type/
Bit rate
The light of the world
Current track
Play/P ause
N eck S trap H ook
Equalizer indicator
Battery level indicator
0 05/ 008 0 2:29/04: 16
The light of the world
Total time
Elapsed time
Number of tracks
Song Title/Filename
HOL D Swi tch
Volu me Co ntrol
PLAY MODE
Record
He adphone Jack
Pause
06:29:20 00: 00:40
Battery Cover
/VOICE/V007.WA
Recording Filename
Joysti ck Lef t
MODE (Pres s joystick)
Joysti ck Rig ht
7
USB Ca p
RECORD MODE
8
Connect to a Computer
USB Driver Installation (Windows 98 SE Only)
If you are using Windows 98 S E, you must install the USB driv er
and update utility.
1.Plac e the Installation CD in your c omputer's CD-ROM drive.
2.In My Computer, double-cl ick the disc drive (D:) icon
(where D: is your CD-ROM drive).
3.Find and d ouble-click "Win98Driver.exe " to start the
insta llatio n process. A setup dialo g window will ap pear o n
the screen .
4.Follo w the on-screen instructions. When setup is co mplete,
resta rt you r computer.
USB driver installation is not necessary if you are using
Windo ws Me/2K/XP or M ac O S X version 10.2.6 or ab ove.
Simply connect y our player to the computer; the op erating
system will then ta ke a moment to set up and a remo vable
disk icon will appear in "My Computer". (For Mac OS X users,
a removab le disk icon w ill appear on the "Desk top".)
Connecting/Disconnec ting Your Player
To connect your p layer to a compu ter:
1.Remove the USB cap to expose the inte grated USB plug.
2.Plug your player directly into the computer's USB port or use
the USB extension cab le (included).
To safely dis connect your player from a computer:
1.Double-click the gree n arrow in the tas kbar l ocated at the
bottom-rig ht of the co mputer's screen. A "Sa fely Remove
Hardware" window w ill appear.
2.In the list o f hard ware devices, double-click on "USB Mass
Storage Device ". A "S top a Hardw are D evice" window w ill
appear. Click the OK butto n.
You may now safely disconnect your player from the computer.
9
Transferring Files to Your Player
Transf erring Files
To transfer files between your p layer and a co mputer:
1.Conn ect you r player to the compute r.
2.Open Window s Explo rer on the computer.
3.Selec t the file s you w ant to tr ansfer f rom you r compu ter and
drag- and-dro p them to the removab le disk i con (ie, your pla yer).
You c an also transfer files from your p layer to a computer. D o
not di sconnec t your p layer w hile it is transfer ring file s. Doing so
may corrupt o r damage the f irmware and/o r files on your pl ayer.
If your player is accid entally d isconn ected w hile it is transfe rring
files and does not wo rk prope rly, rem ove and replac e the b attery,
and th en turn your pla yer on again.
Content owner s use Wi ndows M edia d igital rig hts manageme nt
techno logy (W MDRM) to prote ct their intellec tual pro perty,
including copy rights. T his device uses WMDRM softwa re to access
WMDRM -protected co ntent. If the WM DRM so ftware f ails to
protect the con tent, content o wners m ay ask Microso ft to rev oke
the soft ware's a bility to use WM DRM to play or copy p rotecte d
conten t. Revoc ation d oes not affect u nprotected co ntent. W hen
you dow nload licenses for protected c ontent , you ag ree tha t
Microso ft may include a revoc ation lis t with the licens es. Con tent
owners may req uire yo u to upg rade W MDRM t o access their
conten t. If you decline an upg rade, yo u will no t be ab le to ac cess
conten t that re quires the upgrade.
Deleting Fil es thro ugh a Com puter
With yo ur playe r conne cted to a comp uter:
1.Open Window s Explo rer on the computer.
2.Doub le-click on the r emovable disk icon (ie, your player).
3.Use th e mous e to sele ct the f iles you would like to delete. Pr ess
delete on you r keybo ard and click Ye s to co nfirm.
You can also delete file s direct ly from y our pla yer. See "DEL" in the
Menu O ptions s ection o f this m anual fo r more informa tion.
10
Power On/Off
Ho ld F unc tion
The Hold s witc h lo cks/unlock s the joy stic k an d b utto ns
on yo ur playe r to prevent the m fr om bein g p ress ed
ac cidentally.
Ho ld Off:S lide the HOLD switc h in the opp osite di rection
o f the arr ow mar king on your pla yer to u nlock
the p laye r.
Ho ld On:S lide the HO LD switc h in the dire ctio n of the
a rrow to lock your playe r. Th e sc ree n wi ll
display the "l ock " symbo l sho wn belo w.
Turning Power On and Off:
to turn your playe r on.
Power On: Press and hold
The screen will display the CO BY logo first, and then
the remaining sto rage c apacity of your player.
. The screen will display
Power Off: P ress a nd ho ld
"Contin u e Holding on To Pow er Off". Do not
release the button until the screen displays
"GOOD BYE " .
Playing Music
Play a Mus ic Tr ack
1.Enter the Mus ic m ode (se e "Musi c" in the Me nu
O ptio ns section o f th is m anu al fo r more infor ma tion ).
2.P ress
t o st art p lay bac k.
Pau se/ Stop Playba ck
1.To pa use pla yba ck, pres s
re sum e p layb ack.
onc e. P ress
aga in to
005/008 0 2:29/0 4: 16
The light of the wor ld
2.To sto p p layb ack , press a nd hold
for 2 se con ds
(i e, until t he scree n d isplays " Con tinu e H olding o n To
Powe r Of f"). P ress a gain to resume pla yba ck.
005 /0 08 0 2:29 /0 4: 16
0 0 5/ 00 8 02 :2 9/ 04:16
The light of the world
The light of the w orld
Forwar d/Rever se
1.P ress
t o se lect the next track.
2.P ress
to se lect the pre viou s tra ck.
Fas t Fo rwa rd/R eve rse
1.P ress and hol d
to fast forw ard thro ugh a t rack
durin g playback.
2.P ress and hol d
to reverse thro ugh a trac k during
p layb ack .
Vol ume Co ntro l
1.P ress Volume to de cre ase the volume .
2.P ress Volume to inc rea se the v olume.
11
12
MENU Overview
P ress and ho ld M ODE to acc ess the Main me nu.
Pre ss
an d
t o ch ang e the se lec tion left and
righ t wi thin the menu.
Pre ss M ODE to con firm a se lec tion .
Pre ss Vo lum e + to c anc el o r return to a pre viou s m enu.
MU SIC
VO ICE
REC
SET
PLAY MODE - Norm al, Re peat One,
Repe at All , Shuff le, Pre view
EQ - Norm al, Ro ck, Ja zz, Cl assic,
Pop, Bass
CONT RAST
BACK LIGHT
MENU
Main Menu Option
In the Ma in menu, the following options are ava ilab le:
MUSIC, VOIC E, REC, SET, DEL , INF , an d EX IT.
Music
Selec t MUSIC mo de to play y our digital a udio tr acks
(ie, Mp3 and WMA files). See the Playing Mu sic sect ion
of thi s ma nua l fo r mo re infor mation.
Voice
Selec t VO ICE mo de to play y our voice re cording file s.
Playb ack op erat ion is the sa me as in MU SIC mode.
See the R EC section of th is manual for inform ati on o n
how to re cor d fro m t he in tegrate d m icro phone.
LIGHT COLOR
POWE R (off) - D isable , 1 Mins, 2 M ins,
5 Mins, 10 Min s,
REC S ET - Normal, Middle, High
LANGUAGE S - Englis h, Spa nish, German,
French, Por tuguese
EXIT
DEL
INF
EXIT
13
Dele te Mu sic or Voice file
14
Voic e Rec ording
Delete Files
REC
DE L
Select REC mo de to cr eate vo ice recordings with the
integrated microphone.
Se lect DEL mo de t o de lete file s fro m y our player. You
ma y a lso dele te files u sing a c omp ute r; se e th e
De letin g F iles Thro ugh a C omp ute r se ctio n of this
ma nua l fo r mo re in format ion.
Start Recording
Select REC fr om the Main menu. The player will start
recording immediately. The screen will display a
Reco rding symbol
to indicate tha t recording is in
progr ess.
06:29:20 0 0:00:40
/VOICE/V007.WA
Pau se/Stop Recording
Press to pause reco rding. The screen will display a
Reco rding Pa used symb ol
to indicate that
recording has been paused. Press again to resume
recording.
Press the MODE key to sto p reco rding. The re corded
file will be named "VXXX.WAV" where XXX corresponds
to the numerical seq uence in which the recording
was made. (Numbering starts fro m 001.)
To p lay your recordings, select VO ICE from the Main
menu. See "Voice" in the Menu Options section for
more information.
15
In t he Dele te M en u, th e fo llow ing options are
av aila ble: MU SIC, VOICE, or E XIT. Sele ct M USI C to
de lete you r m usic files; select VOICE to delete yo ur
vo ice r eco rdin g files.
On ce y ou have m ade your se lection, you r pla yer will
list eac h m usic or v oic e file to be d ele ted one -by -one .
Selec t YES to delete the curr ent file being d ispla yed.
T he s cree n w ill d ispla y a quick c onfirma tion tha t the
file has b een deleted an d then mov e to the nex t file .
Selec t NO to skip the cur ren t file being displ aye d an d
move to the nex t file .
Selec t Ex it to retu rn t o the pr evio us Dele te menu.
16
Settings Menu
S ET
Selec t SE T mo de to a cce ss th e Settin gs m en u of your
p laye r. In the Set ting s me nu, the foll owin g o ptio ns a re
a vailable : M ODE, EQ , CO N, BL, C OL , PWR, R EC, LAN,
a nd EXIT.
MODE (Playm ode)
Selec t Pla ym ode to s et the P lay Mod e o ptio ns.
Normal: P lay trac ks in no rma l ord er.
Repe at O ne: Pla y the cu rren t tra ck r epe ate dly.
Repe at All: P lay a ll tr ack s rep eat edl y.
Sh uff le: P lay a ll tr ack s in random order.
P revi ew: Play the first few sec ond s o f ea ch track.
Note : Pla ymo de options ma y als o be se t by pressing
the M ODE ke y while play bac k has b een stop pe d.
E Q (E qualize r)
Selec t Eq ualizer to se t th e Eq ualizer opti ons. The op tion s
a re Normal, Rock, Ja zz, C lassic, Pop , or Bass .
C ON (Co ntrast)
Selec t Co ntr ast t o se t the co ntra st le vel of the L CD
sc ree n. A set ting of 0 is lighte st; a set ting of 1 0 is dar kest.
17
Settings Menu
BL (Backlight)
Select Backlight to set the dura tion of time (in seco nds)
that the backlight will remain o n. The o ptions a re 5, 10,
30, Alwa ys, or Off.
COL (Lightcolor)
Select Lightcolo r to set the color of the backlight:
Color 1, Color 2 , Co lor 3, Color 4, Co lor 5, Color 6,
Color 7 o r Auto. The Auto setting will change the
backlight co lor each time a button is pressed.
PWR (Powe r)
Select Pow er to set the amoun t of time (in min utes)
you r player can be idle be fore it tu rns off auto mat ica lly.
The opt ions are 1, 2, 5, 10, o r Disab le.
REC (Rec Set)
Select Reco rd Set to se t the recording quality opt ion o f
you r player .
Normal: L owe r qualit y, small file size.
M iddle: M edium qua lity, medium file size .
High: High qu ality , larges t file size.
LAN (Langu ages)
Select Languages to set th e la nguage tha t yo ur
pla yer' s me nus will be disp laye d in . Op tions ar e
English, Spanish, Ge rman, Frenc h and Portu guese .
18
A-B Repeat Mode (Loop)
A-B R epe at m od e allows you to defi ne a seg me nt o f an
a udio tra ck t o be pla yed rep eat edly on a lo op.
Start Poin t "A"
D uring music or v oice file pla yba ck, pre ss the M ODE
key b riefl y to set the start po int o f the au dio segment
lo op. The scre en will disp lay "A-".
En d P oint "B"
P ress the MO DE key b rief ly again to set the e nd point
o f the audio segmen t loo p. T he scre en will display
"A -B".
This a udio seg me nt w ill now play rep eatedly in a loo p.
P ress the MO DE key b rief ly again to r esu me norm al
p layb ack.
Firmware Upgrade
IMP ORTAN T: M ake sure yo ur playe r ha s a n ew battery
installe d b efor e up gra ding yo ur fi rmw are . Do not
disconnec t yo ur p laye r fro m the c ompute r or oth erw ise
inte rru pt th e u pgra de pro cess -do ing so c ould da mage
you r pl aye r and re nde r it inop erab le.
Firmwa re u pda tes ma y be fou nd a t w ww. cob yusa.co m .
Ch eck this site per iodi cally for new up dates. F irm war e
up date s m ay a dd new fun ctio nal ity to yo ur p laye r.
To upg rade yo ur p laye r's firmware :
1.Down loa d th e la test firm war e fo r yo ur p laye r fro m
w ww .cob yus a.c om. Save th is file to the com puter.
2.C onnect you r pla yer to the c omput er.
3.Doub le-c lick the dow nlo ade d fi le*. In th e w indo w
th at a pp ears, do uble -click the f ile "s tup date rap p.e xe".
This w ill la unc h the fir mw are upd ate app lica tion .
4.A dia log box will app ear . Click " OK".
5. T he updater will com me nce sea rch ing for your
c onnected p layer. W he n it has d ete cte d yo ur p layer,
y ou will see the s cree n b elow .
19
20
Firmware Upgrade
Troubl eshooting
This troubleshooting guide aims to save you time in
case you exper ience any inconvenience with this
digital audio player. If you are still having difficulty,
please contact Technical Supp ort.
My player does not work.
1.Ensure that the batter y is cha rged.
2.Ensure that the batter y ha s be en prop erly installed.
6 .Cli ck "Star t" to beg in the firmw are update .
Do NOT dis con nec t your playe r while it is updatin g.
7 .The up dat e is c om ple te w hen the gre en status ba r
ha s be en filled. Click " Close".
8 .Disconnec t yo ur p laye r fro m t he c omputer.
Y our pla yer will turn on a uto ma tica lly a nd update its
f irmw are .
F or more informatio n on how to safely c onn ect to a nd
disconn ect from a c ompute r, re fer to th e
C on nec t to a Co mp ute r sec tion of this man ual.
* You mu st h ave a fi le co mpress ion utili ty in stal led on
y our com pu ter.
21
File tran sfer failure.
1.Ensure that the USB driver has been installed
correctly on the P C.
2.Ensure that the USB cable is a ttached secure ly to
both the PC a nd your player.
3.Ensure that your player's memory capacity limit has
no t been reached.
4.Ensure that the batter y is cha rged.
Poor sound quality or no sound.
1.Ensure that the volume le vel is not set to "0".
2.Ensure that your headpho nes are attached securely
to the headphone jack.
3.Poor soun d qualit y may result from corrupt or poorly
encoded music files. Try downloading the music file
again or encoding the file at a highe r bitrate. The
recommended minimum bit rate for this player is 128
kb ps for Mp3 files and 64 kbps for WMA files.
22
Tro ubleshooting
There's something wrong with t he L CD screen.
1.Re move, and then replace the b atte ry.
2.Please ca ll Technica l Sup por t for a Hot-key r eboot.
Technical Support
Monda y to Friday: 8:30 AM - 8: 30 PM EST
Saturday and Sunday:9:00 AM - 5:30 PM EST
Telephone:800-681-2629 or 718-416-3197
You can also reac h us online at www. cobyusa.com or
by e-mail at [email protected] .
Specific ations
Pow er
Memory
Size
256MB Flash
3.7"x 1.2"x0.9"(WHD)
Inte rface
USB Rev. 2.0 Full S peed
Disp lay
128x32 dot-matri x LCD
Pro cesso r
65MIPS DSP
Aud io Pla ybac k
Mp3 : 96-320 kbps VBR
Voi ce Re cordin g
IMA-ADPCM encoding
W MA: 3 2-192 kbps
Sign al-to -Noise Ratio
90dB
Freq uenc y Res ponse
20-20,000 Hz
Out put
Tota l Harmonic Disto rtion:
23
1 "AAA" Battery
50mW
0.01%-0.1%
24