1
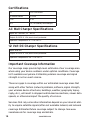
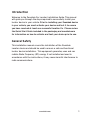
Car Locator User Guide
ZoombakServices
Car & Family A-GPS Locator
www.zoombak.com
COPYRIGHTS
© 2007 Zoombak. All rights reserved.
Zoombak is a trademark of Zoombak, LLC.
NOTICES
This document neither grants any license nor conveys any rights with
respect to the subject matter hereof or otherwise. Zoombak expressly
retains all intellectual and other property rights with respect to this
document and all matters set forth herein. This document is neither an
offer nor an acceptance. Neither party will be obligated with respect
to the subject matter hereof unless and until such party has entered
into a denitive agreement. Some technical assertions of capability
included herein are estimates based on limited information gathered
from past experience.
TRADEMARKS
Zoombak™ and the Zoombak logo are trademarks owned by Zoombak,
LLC and protected in the United States and other countries.
Zoombak Locator V. 1.0
Table of Contents
Introduction ....................................................................................................1
Getting Started .............................................................................................2
Key Functions ................................................................................................2
Zoombak Car Locator Package Contents ................................................3
Using the Car Locator ................................................................................. 4
Charging the Battery .................................................................................. 4
Battery Life ....................................................................................................5
Powering the Car Locator ON/OFF ...........................................................6
Monitoring the Car Locator Status ...........................................................6
Placing the Locator in Your Car .................................................................7
Safety and Warranty Information ............................................................. 8
Safety Information ...................................................................................... 8
FCC Regulations............................................................................................9
Zoombak Locator Disposal and Recycling ............................................. 10
Reduction of Hazardous Materials (RoHS) ............................................ 10
Specic Absorption Rate (SAR)............................................................... 10
Warranty Information.................................................................................. 11
Service After Expiration of Warranty ...................................................... 11
Warranty Limitations .................................................................................. 11
Water Resistance ......................................................................................... 11
Contacting Customer Care ....................................................................... 12
Specications and Certications ............................................................ 13
Car Locator Specications ....................................................................... 13
Certications ............................................................................................... 14
AC Wall Charger Specications ............................................................... 14
12 Vlt DC Car Charger Specications ..................................................... 14
Important Coverage Information ............................................................ 14
Introduction
Thank you for purchasing the Zoombak Car Locator. Zoombak is
focused on the development and marketing of breakthrough mobile
communications solutions that leverage the power of wireless
technology and location-based services to provide people with new
ways to connect to each other and their world.
This Guide will introduce you to all of the features of your Zoombak
Car Locator device. If you have any questions, please contact
Zoombak Customer Care at 1-866-951-0101 or visit our website at
www.zoombak.com.
Puede encontrar una version en espanol de esta guia en: www.
zoombak.com/spanish
In addition to this Zoombak Car Locator User Guide, included in your
package is a Zoombak Car Locator Quick Start Guide. The Quick Start
Guide will briey walk you through activating your service, using your
service, and setting up your safety zones and alerts. For more detailed
instructions on using your service, please visit www.zoombak.com.
Please read this Zoombak Car Locator User Guide and the
accompanying Quick Start Guide before setting up your account.
Activation and use of the Zoombak Locator are subject to Zoombak’s
customer agreement, plans, terms and conditions, which can be found
at www.zoombak.com/terms.
The Zoombak Car Locator User Guide is divided into ve main
sections:
•
•
•
•
•
Section 1. Getting Started
Section 2. Using the Car Locator
Section 3. Safety and Warranty Information
Section 4. Contacting Customer Care
Section 5. Specications and Certications
zoombak.com
1
Getting Started
This section addresses two primary areas:
• Zoombak Car Locator Features
• Zoombak Car Locator Package Contents
Front / Aerial View of Locator
Indicador LED
Enchufe del cargador USB
Botón de encendido/apagado
Key Functions
•
•
2
USB Charger Jack-Connects the Zoombak Car Locator to the AC
Wall Charger (included) or 12 Volt DC Car Charger (included for
installed option)
Locator Status LED indicator – Allows you to monitor (at a glance)
the power and battery status of your Zoombak Car Locator
zoombak.com
Zoombak Car Locator Package Contents
When you purchase the Zoombak Car Locator, the package should
contain the following:
• Zoombak Car Locator
• Zoombak Car Locator Installation Kit (bracket, screws, Velcro set,
zip ties and 2-sided tape)
• AC Wall Charger
• 12 Volt DC Car Charger- Installed Option
• Zoombak Car Location Quick Start Guide
• Zoombak Car Locator User Guide
Localizador de automóviles
Zoombak
Cargador de pared de CA
Cargador para automóvil
de 12 voltios CC
Soporte del localizador
de automóviles
If any of these items are missing from your package, please contact
Zoombak Customer Care at 1-866-951-0101.
zoombak.com
3
Using the Car Locator
This section addresses ve primary areas:
• Charging the Battery
• Battery Life
• Powering the Car Locator ON/ OFF
• Monitoring the Car Locator Status
• Placing the Locator In Your Car
Charging the Battery
Before using the Zoombak Car Locator for the rst time, you will
need to fully charge the battery. Follow these simple instructions to
charge the battery. The initial battery charge time will be 6 hours;
each subsequent battery charge will be approximately 4 hours.
1. Remove the Zoombak Car Locator and AC Wall Charger from the
Zoombak Car Locator package.
2. Plug the AC Wall Charger into a wall outlet.
3. Attach the Zoombak Car Locator to the AC Wall Charger via the
USB Charger Jack on the Zoombak Car Locator.
4. The Locator Status LED indicator will glow amber (yellow),
indicating that the Zoombak Car Locator is charging.
5. Once the Locator Status LED glows green this will signal that the
Zoombak Locator is fully charged.
4
zoombak.com
Battery Life
Mode
Battery Life
Standby
Up to 120 hours or 5 days
Active Locator Service
Up to 150 Location Requests
Battery life depends on several factors including temperature,
network, signal strength and Locator service features used. Location
requests include the following Zoombak Locator service features:
“Find Now,” “Safety Zones” mode and ‘Continuous Tracking” mode.
When your Zoombak Locator indicates low battery (blinking amber
LED), recharge your battery as dened in the section of this User
Guide titled Charging the Battery”
Rechargeable batteries have a limited number of charge cycles and
may eventually need to be replaced. The Zoombak Locator battery is
not user replaceable; It can only be replaced by an authorized service
provider. For more information, go to: www.zoombak.com.
zoombak.com
5
Powering the Car Locator ON/ OFF
In order to power the Zoombak Car Locator on or off, follow these
simple instructions:
1.
Power ON- Press and hold the Power Button until the Locator
Status LED Indicator begins to glow (approximately two seconds).
Blinking green indicates operation OK.
2. Power OFF-Press and hold the Power Button until the Locator
Status LED Indicator begins to ash quickly (approximately two
seconds). Locator Status LED Indicator will shut OFF when the
Locator has properly shut down. A key feature of your Zoombak
Car Locator during the power off process is that the Locator will
determine its current location and send a power off notication via
email and / or mobile text message with its current location and
time/date information (see the Zoombak Car Locator Quick Start
Guide for details on setting up your alerts). The Locator Status
LED Indicator will continue to blink during the power off process,
which may take up to 2 minutes to complete this important
notication feature.
Monitoring the Car Locator Status
Refer to the following list in order to determine the status of your
Zoombak Car Locator LED Indicator at any time.
6
BLINKING GREEN
Indicates Power ON
BLINKING AMBER (YELLOW-ORANGE)
Indicates Low Battery
GREEN
Indicates Fully Charged (when Charging)
AMBER (YELLOW-ORANGE)
Indicates Charging
NO COLOR
Indicates Power OFF or Battery Needs to
be Charged
zoombak.com
Placing the Locator In Your Car
The location of your Car Locator device is critical to the successful
operation of the locator service. To ensure proper operation, Zoombak
recommends the device to be placed in one of the following locations
for best performance:
•
•
In glove box
In center console
If you choose to install your Zoombak Car Locator using the included
12 Volt DC Car Charger and Zoombak Car Locator Installation Kit,
please review carefully the Zoombak Car Locator Installation Guide
before installing and using your Zoombak Car Locator.
The Zoombak Car Locator is also perfect for use in motorcycles, ATVs,
boats and bicycles.
The Zoombak Car Locator Installation Guide can be found at www.
zoombak.com/install
zoombak.com
7
Safety and Warranty Information
This section addresses six primary areas:
• Safety information
•
•
•
FCC Regulations
Reduction of Hazardous Materials (RoHS)
Specic Absorption Rate (SAR)
•
Warranty Information
•
Water Resistance
Safety Information
Your Zoombak Car Locator contains a Lithium Ion (LI) battery pack.
Leakage of ingredients contained within the battery pack or the
combustion of ingredients can cause personal injury to you or your
car, as well as damage to your Zoombak Car Locator. If battery
leakage occurs, avoid contact with skin. If contact occurs, immediately
wash thoroughly with soap and water. If liquid leaking from battery
pack comes in contact with your eyes, immediately ush your eyes
thoroughly with water and contact your doctor. In case of ingestion,
immediately contact your doctor and/or go to the emergency room.
To avoid battery leakage:
• Do not expose battery to excessive vibration, physical shock or
liquids.
• Do not disassemble, attempt to repair or deform the battery.
• Do not dispose of battery pack in re.
• Do not peel or damage the battery label.
8
zoombak.com
FCC Regulations
This Locator complies with part 15 of the FCC Rules. Operation is
subject to the following two conditions: (1) This Locator may not
cause harmful interference and (2) this Locator must accept any
interference received, including interference that may cause undesired
operation.
This Locator has been tested and found to comply with the limits for
a Class B digital Locator, pursuant to Part 15 of the FCC Rules. These
limits are designed to provide reasonable protection against harmful
interference in a residential installation. This equipment generates,
uses and can radiate radio frequency energy and, if not installed
and used in accordance with the instructions, may cause harmful
interference to radio communications. However, there is no guarantee
that interference will not occur in a particular installation.
If this equipment does cause harmful interference to radio or
television reception, which can be determined by turning the
equipment off and on, the user is encouraged to try and correct the
interference by one or more of the following measures:
•
•
•
•
•
Reorient or relocate the receiving antenna
Increase the separation between the equipment and the receiver
Connect the equipment into an outlet on a circuit different from
that to which the receiver is connected
Consult the dealer or an experienced radio/TV technician for help
Changes or modications not expressly approved by the party
responsible for compliance could void the user’s authority to
operate the equipment
zoombak.com
9
Zoombak Locator Disposal and Recycling
CAUTION:
RISK OF EXPLOSION IF BATTERY IS REPLACED BY AN INCORRECT
TYPE. DISPOSE OF USED BATTERIES ACCORDING TO THE
INSTRUCTIONS.
You must dispose of the Zoombak Locator properly according to
local laws and regulations. Because the Zoombak Locator contains
electronic components and a battery, the Zoombak Locator must be
disposed of separately from household waste. When the Zoombak
Locator reaches its end of life, contact local authorities to learn about
disposal and recycling options. See www.zoombak.com for more
information.
Reduction of Hazardous Materials (PoHS)
This Locator does not contain lead, cadmium, mercury, hexavalent
chromium, polybrominated biphenyl (PBB) or polybrominated diphenyl
ether (PBDE).
Specic Absorption Rate (SAR)
Your Zoombak Car Locator is a radio transmitter and receiver. It
does not exceed exposure limits set by the Federal Communications
Commission (FCC) and international guidelines established by the
independent scientic organization ICNIRP.
The exposure standard for wireless devices uses a unit of measure
called Specic Absorption Rate (SAR). The SAR limit set by the FCC
is 1.6 W/kg. The SAR limit set by ICNIRP is 2.0 W/kg averaged over 10
grams of tissue. Tests for SAR are conducted at standard operating
positions with the Locator transmitting at its highest power level over
all frequency bands. The actual SAR level of an operating Locator can
be below the maximum value because the Locator is designed to only
use the power level required to reach the network.
10
zoombak.com
Warranty Information
Zoombak, LLC warrants to the original purchaser that the Locator
shall be free from defects in material and workmanship for a period
of 12 months from date of activation. If a defect covered by this
warranty occurs during the warranty period, Zoombak will repair or
replace your Locator product or component free of charge. If your
Locator is replaced for a defect covered under warranty, you may
receive a refurbished Locator in exchange for your original Locator.
The replaced unit will carry the remaining warranty period from the
original Locator.
Service After Expiration of Warranty
Please visit our website at www.zoombak.com or call our Customer
Care Center at 1-866-951-0101 for troubleshooting information and
repair or replacement options. In most cases, it will be necessary to
ship the product to Zoombak. Please do not send any products to
Zoombak without rst contacting our Customer Care Center.
Warranty Limitations
THIS WARRANTY SHALL BE NULL AND VOID IF THIS PRODUCT: (a)
IS USED FOR COMMERCIAL PURPOSES; (b) IS MODIFIED, OPENED
OR TAMPERED WITH; (c) IS DAMAGED BY NEGLIGENCE, ACCIDENT,
UNRESONABLE USE OR OTHER CAUSES UNRELATED TO DEFECT IN
MATERIAL OR WORKMAPSHIP.
Water Resistance
The Zoombak Car Locator has a water resistance rating of IPX6. The
Locator will continue to function when subjected to splashes of water.
This locator is not waterproof and will not function when submerged
in water.
zoombak.com
11
Contacting Customer Care
Need help with operating your Zoombak Dog Locator? Contact
Zoombak Customer Care via the internet at www.zoombak.com, or
call toll free 1-866-951-0101, Monday – Sunday, 24 hours a day (times
subject to change) to speak to a Customer Care representative.
12
zoombak.com
Specications and Certications
The section provides the following detailed Specications and
Certications:
• Car Locator Specications
• Certications
• AC Wall Charger Specications
• 12 Volt DC Car Charger Specications
Car Locator Specications
Feature
Specication
Size
72.9 x 43.1 (19.07 – 20.07) mm
Weight
72.5 ounces
Frequency
Model Number ZB100
Model Number ZB101
GSM 850 = ZB-100
824 – 849 MHz (Tx)
925 – 960 MHz (Rx)
GSM 900 = ZB-101
880 – 915 MHz (Tx)
869 – 894 MHz (Rz)
GSM 1800
1710 – 1785 MHz (Tx)
1805 – 1865 MHz (Rx)
GSM 1800
1710 – 1785 MHz (Tx)
1805 – 1865 MHz (Rx)
GSM 1900
1850-1910 MHz (Tx)
1930 – 1990 MHz (Rx)
GSM 1800
1710 – 1785 MHz (Tx)
1805 – 1865 MHz (Rx)
GSM 1900
1850-1910 MHz (Tx)
1930-1990 MHz (Rx)
Transmit Power
Up to 2W
Battery Voltage
3.7 v
Operating Temp.
-20º C to +60 º C
Water Resistance
IPX6
zoombak.com
13
Certications
CE
FCC: U2I-ZB100
IC: 6950A-ZB100
PTCRB
CTIA
ETSI
GCF
UL, UK (battery and charger)
AC Wall Charger Specications
Input: 90 – 264 VAC, 47 – 63 Hz
Output: 5.4 VDC @ 1.2A, short-circuit protected
Operation Temperature: -5 º C to +45 º C
12 Volt DC Charger Specications
Input: 8-16 VDC
Output: 5.4 VDC @ 1.2A, short-circuit protected
Operation Temperature: -20 º C to +85 º C
Important Coverage Information
Our coverage maps provide high-level estimates of our coverage area
when using your device outdoors under optimal conditions. Coverage
isn’t available everywhere. Estimating wireless coverage and signal
strength is not an exact science.
These are gaps in coverage within our estimated coverage areas that
along with other factors (network problems, software, signal strength,
your wireless device structures, buildings, weather, geography topography, etc.), will result in dropped and blocked connections, slower data
speeds, or otherwise impact the quality of services.
Services that rely on location information depend on your device’s ability to acquire satellite signals (often not available indoors) and network
coverage. Estimated future coverage subject to change. See www.
zoombak.com for coverage map and details.
14
zoombak.com
Advanced GPS Car Locator
Installation Guide
Table of Contents
Introduction ....................................................................................................1
General Safety ................................................................................................1
Vehicles Equipped with Airbags.................................................................2
Basic Tools Needed for Installation...........................................................3
Equipment List ..............................................................................................3
Step 1 – Select Your Installation Location............................................... 4
Step 2 – Mount Device Bracket ..................................................................6
Step 3 – Mount Device Charger .................................................................7
Step 4 – Connect Power Harness ..............................................................7
Step 5 – Power the Zoombak Locator device..........................................9
Step 6 – Test Device .................................................................................... 11
Troubleshooting .......................................................................................... 12
Introduction
Welcome to the Zoombak Car Locator Installation Guide. This manual
will guide you through the steps required to successfully install your
locator device in your vehicle. Prior to installing your Zoombak device
in your vehicle, you must activate your device and test it to ensure
you have received at least one successful location fix. Please review
the Quick Start Guide included in the packaging and zoombak.com
for information on how to activate and test your device prior to use.
General Safety
This installation manual covers the installation of the Zoombak
Locator device and should be used to ensure a safe and functional
locator device installation. This equipment generates, uses and can
radiate Radio Frequency (RF) energy. If not installed and used in
accordance with the instructions, it may cause harmful interference to
radio communications.
zoombak.com
1
Vehicles Equipped with Airbags
2
•
DO NOT place objects, including communication equipment, in the
area of the airbag or in the airbag deployment area.
•
If the communication equipment is improperly installed and the
airbag inflates, this could cause serious injury.
•
Airbag wiring is generally marked by use of a yellow plug, yellow
wire loom, yellow tape and/or yellow tag. The installer must use
caution to identify any airbag wiring and avoid cutting, testing
or tapping into airbag wiring. Failure to comply may cause airbag
to inflate, this could cause serious injury.
•
Contact vehicle manufacturer’s corporate headquarters for
specific airbag information for the vehicle.
zoombak.com
Basic Tools Needed for Installation
•
•
•
•
•
•
•
•
Metric and standard socket set
Screwdriver set
Wire cutters
Wire strippers
Pliers
Flashlight
Cordless drill with assorted bit set
Digital Multimeter
Equipment List
•
•
•
•
•
•
Zoombak Locator device
Plastic Holster
12V DC Charger
4 zip ties
1 Velcro set
2 piece double sided tape
zoombak.com
3
Install your device
Step 1 - Select Your Installation Location
Prior to installing your Zoombak device in your vehicle, you must
activate your device and test it to ensure you have received at least
one successful location fix.
Find a location to mount your Zoombak 12VDC power supply module.
The module should be securely fastened using the supplied Velcro
and/or zip ties. When mounting the module:
• Make sure the positioning of the unit does not interfere with any of
the vehicle components or impede safe operation of the vehicle.
• Make sure that when the vehicle is reassembled that all of the unit’s
cables are secure and can not be pulled loose.
4
zoombak.com
Select a suitable location of your Zoombak device
Prior to installing your Zoombak device in your vehicle, you must
activate your device and test it to ensure you have received at least
one successful location fix. To ensure proper operation, Zoombak
recommends the device be installed in one of the two following
concealed locations.
Under rear package shelf
Behind the glove box
• Make sure the mini-USB cable will reach
the intended location of the power supply module
• Make sure that when the vehicle is reassembled
that all of the unit’s cables are secure and can not be pulled loose.
• DO NOT mount the Zoombak Locator under the hood of the vehicle
• DO NOT mount the Zoombak Locator where it will be
exposed to moisture
• DO NOT mount the Zoombak locator in a spot that
will impede safe vehicle operation
zoombak.com
5
Step 2 – Mount Device
Your installation kit includes a device mounting bracket to provide
for secure installation as well as the ability to remove the device for
portable use. Zoombak recommends the use of Velcro set or 2 sided
tape for installation of device bracket. Use of mounting bracket is
optional; the Zoombak locator can be mounted directly using supplied
Velcro, 2 sided tape and zip ties.
6
zoombak.com
Step 3 – Mount Device Charger
The device charger should be securely attached to the vehicle, close
to the device attachment, using the four mounting holes. The device
charger can be securely attached using the included Velcro or the
included zip ties.
Step 4 - Connect Power Harness
USE CAUTION WHEN PROBING WIRES IN THE VEHICLE.
AVOID HARNESS GOING INTO AND AROUND THE AIRBAG MODULES.
AVOID ANY HARNESS TAPED IN YELLOW OR BEARING YELLOW
“SRS” (SUPPLEMENTAL RESTRAINT SYSTEM) TAGS.
Use wire ties to secure wiring from being pulled out of the Zoombak
Locator and to insure that it does not interfere with any vehicle
components.
Black Wire (-) ground wire
Once the Zoombak Locator Power Supply module is mounted, connect
the black ground wire to an existing factory bolt using crimp-on ring
connector. Please note: the power wire is also black, however, it has
a dotted white line with the white plastic fuse holder attached to it.
This connection should be made first. Use a wire brush or rotary file
to remove the paint from around the bolt to allow for the best possible
connection to ground. A good location to find a suitable bolt is in
either the drivers or passengers kick panel. Do not select a bolt that
has an existing factory ground wires attached to it. Make sure the bolt
is retightened properly after you are finished. Make sure any paint
underneath the bolt has been removed to provide the best possible
ground connection. Once the vehicle is reassembled this connection
should not be immediately visible.
Red (12v+) positive supply wire
Once the ground connection has been completed, locate a source of
positive (+) 12 volts that remains constant regardless of whether the
zoombak.com
7
ignition switch is in the on or off position. Please note: the (12v+)
positive supply wire may not be red, please consult your vehicle
manufacturer’s handbook for determining the correct location of this
supply wire. A good location to find a constant 12v (+) source is at the
vehicles battery, main switch ignition harness or fuse box. Make sure
you install the fuse holder within 6 inches from the point you have
obtained power. The included fuse is designed to protect the power
supply itself. Use caution if you are using a fuse tap; severe and costly
damage may occur to fuse box if they are not used correctly. Make
certain the circuit you tap into does not fall “asleep” after the car
ignition has been turned off. Most new vehicles incorporate battery
saver circuits which switch off power to non-essential accessories
after the vehicle has been switched off. Consult the vehicle
manufacture shop manual for location and descriptions of these
circuits.
8
zoombak.com
Step 5 - Power the Zoombak Locator device
Turn on the Zoombak device, press and hold the power button until
device LED indicator begins to glow (about two seconds). Blinking
green LED indicates normal operation.
LED Indicator
9
Connect the Mini USB connector to the Zoombak device as shown
below.
The device LED will glow steady amber if device battery is charging
or steady green if fully charged. The steady glow indicates normal
operation with 12VDC charger.
The device is now ready to be placed in attachment accessory for
permanent operation. Slide the device in the attachment as shown
below.
10
zoombak.com
Step 6 – Test Device
The device has an LED status indicator as shown in picture below; the
device LED will display a solid amber light when device is charging and
a solid green indicator when device is fully charged.
Your Zoombak device is now operational and ready for use in your
vehicle. Please refer to the Quick Start Guide and zoombak.com for
usage tips and instructions on how to customize your service.
LED Indicator
zoombak.com
11
Troubleshooting
12
Issue
Action Required
No visible LED status
Power On Device per section 3.2.
Blinking LED
Connect Device to Constant power source
when ignition key is removed. Ensure the
red wire is connected to 12VDC power
source. With a meter verify there is 12 volts
on the red wire. Ensure the USB cable is
plugged into Zoombak device. Device LED
will have Solid Amber or Green light when
proper power source has been installed.
Unable to acquire
GPS fix through Web
Portal
Move the vehicle to new location that does
not have obstacles directly overhead.
Unable to acquire
GPS fix through Web
Portal
Aftermarket window tinting may affect
reception of GPS signals. Move the device
to new mounting location.
zoombak.com
Zoombak Services
A-GPS Car Locator Installation Guide
www.zoombak.com
COPYRIGHTS
© 2008 Zoombak. All rights reserved.
Zoombak is a trademark of Zoombak, LLC.
NOTICES
This document neither grants any license nor conveys any rights with
respect to the subject matter hereof or otherwise. Zoombak expressly
retains all intellectual and other property rights with respect to this
document and all matters set forth herein. This document is neither
an offer nor an acceptance. Neither party will be obligated with
respect to the subject matter hereof unless and until such party has
entered into a definitive agreement, and then only in accordance with
the terms of such agreement. Some technical assertions of capability
included herein are estimates based on limited information gathered
from past experience.
CONFIDENTIALITY
This document and the information contained herein are the
proprietary and confidential information of Zoombak. The information
is provided under nondisclosure agreement, or other agreement
containing disclosure restrictions, and may not be reproduced or used
for purposes outside the scope of such agreement(s).
WARRANTY
Zoombak provides this document “as is” without warranty of any kind,
express or implied, including but not limited to the implied warranties
of merchantability or fitness for a particular purpose. In no event shall
Zoombak, LLC be liable for any damages of any kind, arising out of or
related to the use or inability to use this document, even if Zoombak
has been advised of the possibility thereof.
Zoombak Car Locator Installation Guide V. 1.0
Account Activation
1 Getting Started
Advanced GPS Car & Family
Locator Quick Start Guide
• Power on your Zoombak
Locator and use the AC Wall
Charger to fully charge your locator
device (Note: the initial charging time
is about 6 hours)
• Locate the Device ID # on the bottom
of the package
• Have a major credit card available
• Place your Zoombak Locator outside
or near a window before starting the
activation process
2 Create Your Zoombak Account
• Go to zoombak.com and click on
“Activate” in the top navigation bar
• Log in to your account or, if you are a
new customer, create a login
prole for your account by entering a
username, password, PIN and secret
security question
• Enter your Zoombak Locator Device ID #
and give your Zoombak Locator a unique
name
3 Enter Your Billing Information
• Select a payment plan
• Enter your contact and
credit card information
• Account activation is complete
Activation and use of the Zoombak Advanced GPS Car & Family Locator are subject to
Zoombak’s customer agreement, plans, terms and conditions, which can be found at:
www.zoombak.com
Using Your Locator
Setting Up Your Safety Zones
1 Using Your Locator
1 Setting Up Your Safety Zones
• Go to zoombak.com and click on
“Locate” in the top navigation bar
• Enter your username and password to
log in to your account
• Under “My Zones” click on the
“create new” button
• Name your safety zone
• Click on the “device location” tab to set
up a zone around your locator’s current
or last known location, or manually enter
an address where you would like to base
your zone
2 Try Out Your Zoombak Car Locator
• Place your Zoombak Locator outside or near a
window to test for the rst time prior to using it in
your vehicle
• Click on the “connect” button to connect your
Zoombak Locator to the network for the rst time
• Once your Zoombak Locator is connected,
click on the “nd now” button to locate your
Zoombak Locator (Note: It may take up to
60 seconds to locate your Zoombak device)
• You can click on the help icons featured
throughout the application for additional details
and guidance on using each service feature
3 Monitoring Your Zoombak Car Locator Device
• Set up email and mobile phone alerts to notify
you when your locator device battery is low or
if your locator device has been turned off
• Select how you would like to be notied
(email, text message or both), making sure to
check the appropriate notication alert box
• Enter a name and mobile phone number or
email address and click on the “add” button for
each notication alert
• Click the “save” button at the bottom
right of the screen to save all of your alert
notications
Zoombak services are dependent on your Locator’s ability to acquire satellite signals
and network coverage. See www.zoombak.com for coverage map and details.
Please review the Zoombak Car Locator Installation Guide at www.zoombak.com
before placing or installing your locator device in your vehicle
2 Create Your Safety Zone Boundary
• Select a boundary or create a
customized boundary for your safety
zone
• A safety zone boundary can be set up
for a radius as small as 100 yards and
as large as a 1/2 mile
3 Create Your Safety Zone Schedules and Alerts
• Select your locator
• Create a daily or extended schedule for
your safety zone and click the “create
new” button
• Customize the alerts by selecting the
notications you want to receive (when
your car leaves a zone, enters a zone or
both)
• Select how you would like to be
notied (email, text message or both),
making sure to “add” each option by
clicking on the appropriate button
• Click the “save” button at the bottom right
of the screen to save all of your schedules
and alert notications
Zoombak Advanced GPS Car & Family Locator V.2.0 ©2007 Zoombak. All rights reserved. Zoombak is a trademark of Zoombak, LLC.