1
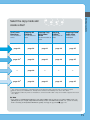
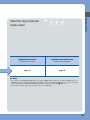
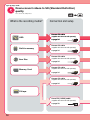
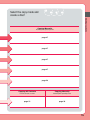
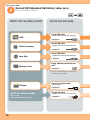
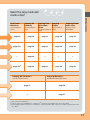
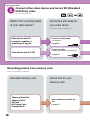
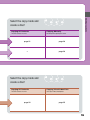
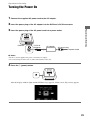
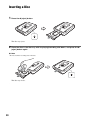
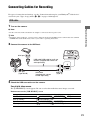
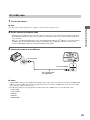
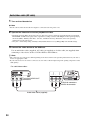
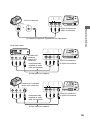
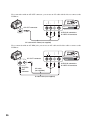
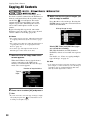
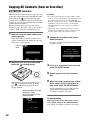
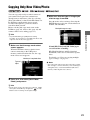
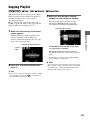
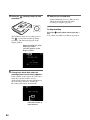
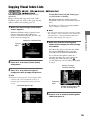
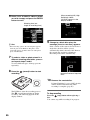
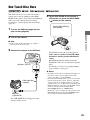
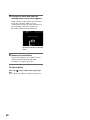
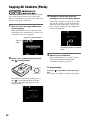
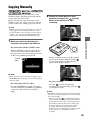
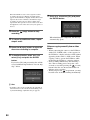
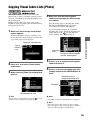
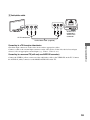
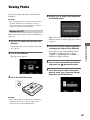
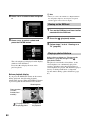
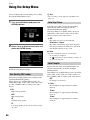
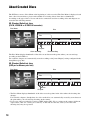
Copying Visual Index Lists
You can record images selected by viewing
thumbnails.
Before selecting this copy mode, turn on the
DVDirect (page 29), insert a disc (page 30) and
connect cables for recording (page 31).
1 Make sure that the copy mode select
If both [HD Video] and [SD Video] types
are selected for recording:
HD (High Definition) and SD (Standard
Definition) videos are recorded onto separate
discs.
For details, see “Notes on copying multiple
types of image” on page 23.
b Note
When the DVDirect detects signals from a
camera connecting to the USB port or
memory card inserted into the slot, the copy
mode select screen appears.
• You cannot select image types that cannot be recorded.
(For example, a camera or memory card containing no
video/photo data, or standard definition (SD) video
taken by another digital video camera.)
Number of required discs
Type of
input
Copying From a Camera
screen appears.
4 Make sure that the shooting date
folders of the images you wish to copy
are marked.
Press V or v to select a shooting date folder.
Pressing the ENTER button toggles the
selection between marked and unmarked.
2 Press V or v to select [Visual Index]
To record all videos/photos taken on a
particular shooting date, select (mark) the
shooting date folder and press the
(record) button to start recording. Go straight
to step 9.
and press b.
Quality of image
currently selected
3 Press V or v to select the type of
images you wish to copy and press b.
z Hint
• Unmark the contents type for easier navigation when:
– you have only a few videos/photos to select, or
– you have types of images that you do not wish to
record.
Marked image to copy
Shooting
date
Number of selected images
in same shooting date
5 Press V or v to select a shooting date
folder and press b.
45