1
PMOR3021S
PMOR3021B
PMOR3021R
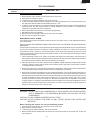
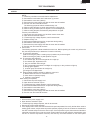
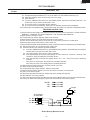
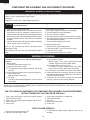
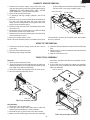
metal pieces may be produced.
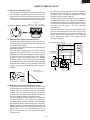
Do not touch the pliers to the coil of the fan motor
because the coil may be cut or damaged.
* Do not disfigure the bracket by touching with the
pliers.
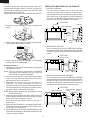
2. Remove the fan blade from the shaft of the fan motor by
pulling and rotating the fan blade with your hand.
3. Now, the fan blade will be free.
CAUTION:
* Do not reuse the removed fan blade because the
hole (for shaft) may be larger than normal.
ı
METHOD FOR INSTALLING FAN BALDE
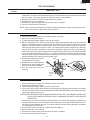
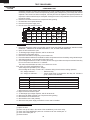
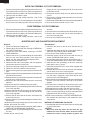
1. Hold the center of the bracket which supports the shaft
of the fan motor on the flat table.
2. Install the fan blade to the shaft of fan motor by pushing
the fan blade with a small, light weight, ball peen hammer
or rubber mallet.
CAUTION:
* Do not hit the fan blade with excesive force when
installing because the bracket may be disfigured.
* Make sure that the fan blade rotates smooth after
installation.
* Make sure that the axis of the shaft is not slanted.
*
Coil
Groove joint pliers
Shaft
Axis
Stator
Gap
Bracket
Shaft
These are the positions
that should be pinched
with pliers.
Stator
Rotor
Rear View
Table
Center of
bracket
Rotor
Side View
STIRRER
MOTORS
REPLACEMENT
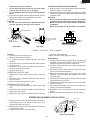
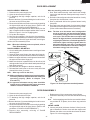
the motor mounting angle.
10.Now, the stirrer motor (right one) is free.
Removal
1. Disconnect the power supply cord.
2. Open the door and block it open.
3. To discharge the high voltage capacitor, wait for 60
seconds.
4. Remove the five (5) screws holding the bottom sash to
the base cover.
5. Remove the three (3) screws holding the base cover to
the oven cavity front face plate.
6. Open the base cover.
STIRRER MOTOR (LEFT ONE)
7. Disconnect the wire leads from the stirrer motor (left
one).
8. Remove the two (2) screws holding the stirrer motor to
the oven cavity.
9. Now, the stirrer motor (left one) is free.
STIRRER MOTOR (RIGHT ONE)
7. Disconnect the wire leads from the stirrer motor (right
one).
8. Remove the two (2) screws holding the motor mounting
angle to the oven cavity.
9. Remove the two (2) screws holding the stirrer motor to
Reinstallation
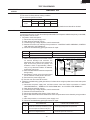
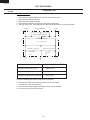
1. Insert a putty knife into the gap between the table tray
assembly and the oven cavity front plate. And remove
the table tray assembly from the oven cavity.
2. Install the stirrer motor (left one) to the oven cavity with
the two (2) screws.
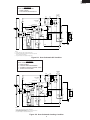
3. Reconnect the wire lead to the stirrer motor (left one),
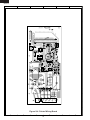
referring to the pictorial diagram.
4. Make sure that the stirrer motor gear, stirrer shaft
assembly and shield spring are installed to the motor
mounting angle.
5. Install the stirrer motor (right one) to the motor mounting
angle with the two (2) screws.
6. Install the motor mounting angle to the oven cavity with
the two (2) screws.
7. Reconnect the wire leads to the stirrer motor (right one),
referring to the pictorial diagram.
8. Reinstall the two (2) stirrer fans to the two (2) stirrer
shafts.
9. Reinstall the table tray assembly to the oven cavity.
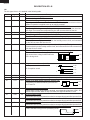
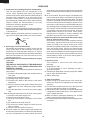
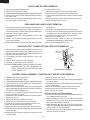
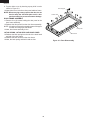
STIRRER FAN ASSEMBLY INSTALLATION
UPSIDE
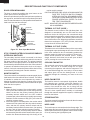
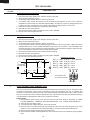
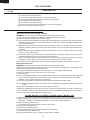
1. Make sure that the stirrer fan faces upside, as shown in
the following figure. The upside of the stirrer fan is
engraved with the part number.
2. Install the three stirrer spacers to the stirrer fan, as shown
in the following figure.
3. Install the stirrer fan to the stirrer shaft.
Parts number
B014
UPSIDE
Stirrer fan
Stirrer spacer
Stirrer fan assembly
33