1
If pairing to additional lights
1.2 How to install the remote
Up to seven lights can be paired to the
Transmitr Remote at any time, but this
must be done as a single process.
After pairing the lights, install the remote.
After pairing the first light, the center
button of the remote flashes red. If the
remote finds another light, the center
button on the remote will flash green again
and the next found light will also flash.
1. Repeat Step 4 and Step 5 for each
additional light to be paired.
NOTE: After pairing is finished, pairing
any additional lights will require
that you repeat the entire pairing
procedure.
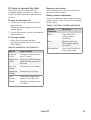
To exit pairing
1. When all lights are paired, quick-press
the center button on the remote. The
button will stop flashing and turn off.
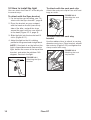
To verify pairing
1. Quick-press the center button to turn
on all paired lights.
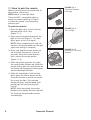
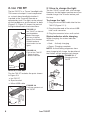
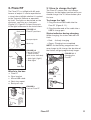
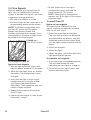
1. If it is not already installed, attach the
remote to the bracket with the included
screws (Figure 1.2.1).
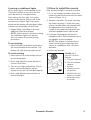
2. Choose a location. The most common
are shown on page 1. Make sure your
chosen location does not interfere with
the operation of the controls or get
caught in the cable housing when you
turn the handlebar from side to side.
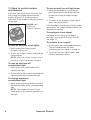
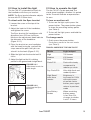
3. If you are installing the remote on a
handlebar with a 22mm diameter, place
the adapter on the handlebar.
NOTE: The adapter is not necessary
when attaching the remote near the
center of a handlebar with a 31.8mm
diameter.
4. Attach the bracket.
a
b
2. Press-and-hold the center button to
turn off all of them.
c
d
f
e
4. Press-and-hold the same button to
turn off the light.
Transmitr Remote
2
3. Turn on each light individually. Quickpress each paired button on the
remote to turn on the individual light(s).
CR2
03
FIGURE 1.2.1
Parts of Transmitr
Remote
a. Transmitr Remote
b. 22mm handlebar
adapter
c. Bracket
d. Mounting screw
for bracket
e. CR2032 coin cell
battery (installed)
f. Mounting screws
for remote
3