1
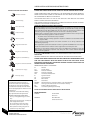
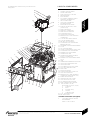
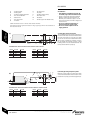
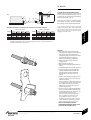
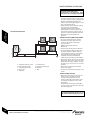
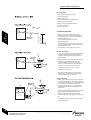
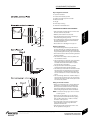
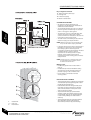
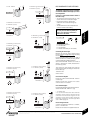
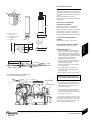
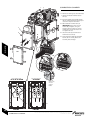
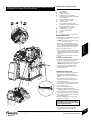
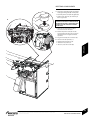
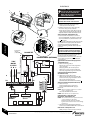
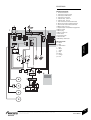
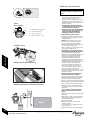
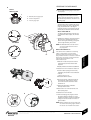
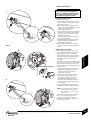
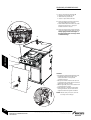
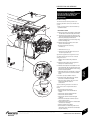
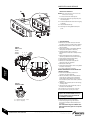
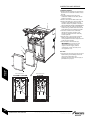
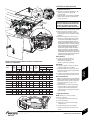
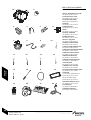
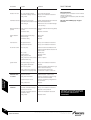
BOILER INSTALLATION
1
14 Lift the top panel (A) upwards to
disengage the ball stud connections (B)
and remove.
A
4 Remove the installation and literature
packs.
M
N
24 Carefully pull front panel (C) at base
slightly forwards to disengage the ball
stud connections (D).
F
4 Lift panel slightly to free it from the lip
(E) under the control box (F) and
remove.
3
G
L
4
34 Remove securing screws (G) from each
side.
B
4 Pull the control box (F) all the way
forward ( H ).
4 Swivel the box up ( J ).
E
K
5
M
H
K
3
44 Depress locking ears to unplug burner
lead ( L ) from control box (F).
7
54 Release the expansion vessel (M) from
the support bracket (N) and remove
taking care not to snag the thermostat
capillaries.
C
J
INSTALLATION
4 Lower the control box down to secure in
the service position ( K ).
J
4 Stand the expansion vessel (M) on the
floor taking care not to kink or strain the
flexible hose.
64 Loosen air duct pipe clip (O) and
disconnect the air duct pipe.
N
74 Unscrew burner retainers (P) and
remove fuel hoze(s).
4 Lift burner assembly up to release the
combustion head (R) from heat
exchanger and store safely away from
the boiler.
D
6
2
O
7
R
P
24
BOILER INSTALLATION
INSTALLATION & SERVICING INSTRUCTIONS FOR WORCESTER GREENSTAR HEATSLAVE 12/18-18/25-25/32
6 720 802 432 issue A 04/2012