1
.7
English
English
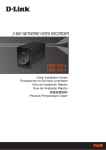
YES Box N2100 Setup Wizard
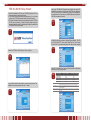
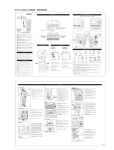
1.Insert the Iinstallation CD into your CD-ROM drive (host PC must
have connection to the above network).
2.The Setup Wizard should launch automatically. If not, please
browse your CD-ROM drive and double click on Setup.exe.
3.The Setup Wizard will start and automatically detect all YES Box
N2100s on your network. If none are found, please check your
connection and refer to the Troubleshooting Guide at the back of the
YES Box N2100 User’s Manual.
Name your YES Box N2100 system and configure the network IP
address. If your router in configured as a DHCP Server, configuring
the YES Box N2100 to automatically obtain an IP address is
recommended. You may also use a static IP address and enter the
DNS Server address manually
STEP
4
STEP
1
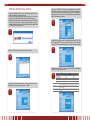
Enable the services you wish to make publicly accessible. The YES
Box N2100 offers FTP Server and iTunes® Server. Check “Local
System Time” to synchronize the system time with your local computer.
Select the YES Box N2100 that you like to configure.
STEP
5
STEP
2
Refer to the following chart and select the hard disk configuration
that best suits your usage model.
STEP
6
Login with the default administrator account and password.The
default account and password are both : “ admin”.
STEP
3
Setup Options
1 Disk JBOD
2 Disk RAID 0
2 Disk RAID 1
2 Disk JBOD
High Performance
Increased Reliability
No
Yes
Yes
No
No
No
Yes
No
RAID 0 Spanning: Combine 2 physical hard disks into one or more logical drives. Data
is separated into threads and stored across both physical drives.
RAID 1 Mirroring: Use the 2nd hard disk as a mirror image of the 1st hard disk for
ncreased reliability.
JBOD Expansion: Similar to RAID 0, but files are stored in whole on any available
hard disks.
8.