1
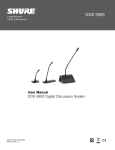
DCS 6000
User Manual
Digital Conference System
DCS 6000 Conference Units
Danish Interpretation Systems
DIS
Danish Interpretation Systems
Copyright © 2006 DIS
User Manual
DCS6000_CONFERENCE_UNITS-REV-D.DOC
04-12-2006
No part of this publication may be reproduced or utilised in any form or by any means without permission in writing from the
publisher.
Danish Interpretation Systems
User Manual
List of Contents
List of Contents..................................................... 3
Headphone connectors ...................................15
Important .............................................................. 4
Normal Operation ..........................................15
Compliancy........................................................ 4
Voting functionality.........................................16
User Controls & Indications ..........................16
Installation precautions .................................... 4
Cleaning ............................................................. 4
Repacking .......................................................... 4
Warranty ........................................................... 4
Normal operation ...........................................16
Chip Card functionality ..................................17
The use of Chip Cards....................................17
User Controls & Indications ..........................17
Description of the DCS 6000 system ................... 5
Connectors and interfaces...............................18
Features.............................................................. 5
Central equipment & Interpreter equipment ... 5
System Setup........................................................19
Operating instructions ......................................... 6
DCS 6000 Conference Units............................. 6
General description ......................................... 6
Features ........................................................... 6
Conference Units description .......................... 6
Microphone functionality............................... 11
User Controls & Indications.......................... 11
General guidelines ...........................................19
Settings..............................................................19
Electrical termination of DCS LAN Network
...........................................................................19
Typical schematics.........................................19
Adjusting LCD contrast on units with channel
selector ..............................................................19
Accessories........................................................22
Microphone connections ............................... 11
Appendix ..............................................................25
Operation modes ........................................... 12
Technical appendix..........................................25
Cabling...........................................................25
Language Selection functionality................... 15
User Controls & Indications.......................... 15
Copyright © 2006 DIS
Technical specifications.................................27
DCS6000_CONFERENCE_UNITS-REV-D.DOC
04-12-2006
No part of this publication may be reproduced or utilised in any form or by any means without permission in writing from the
publisher.
Danish Interpretation Systems
User Manual
Important
exposed to direct sunlight, excessive dust or
humidity, mechanical vibration or shock.
Compliancy
The equipment has been tested and found to comply
with the limits of the following norms and
approvals:
To avoid moisture condensations do not install the
unit where the temperature may rise rapidly.
• EN55013 of 2001 (emission)
• EN55020 of 2002 (immunity)
• EN60065 of 1998
These limits are designed to provide reasonable
protection against harmful interference when the
equipment is operated in a commercial
environment. The equipment generates, uses, and
can radiate radio frequency energy and if not
installed and used in accordance with the user
manual it may cause harmful interference to radio
communications.
Cleaning
To keep the cabinet in its original condition,
periodically clean it with a soft cloth. Stubborn
stains may be removed with a cloth lightly
dampened with a mild detergent solution. Never use
organic solvents such as thinners or abrasive
cleaners since these will damage the cabinet.
Repacking
You are cautioned that any changes or
modifications not expressly approved in this manual
could void your authority to operate this equipment.
Save the original shipping carton and packing
material; they will become handy if you ever have
to ship the unit. For maximum protection, re-pack
the unit as originally packed from the factory.
Installation precautions
Warranty
Allow adequate air circulation to prevent internal
heat built-up..
The individual units in the DCS 6000 system are
minimum covered by 12 months warranty against
defects in materials or workmanship.
Do not install the units in a location near heat
sources such as radiators or air ducts, or in a place
.
4
Manual 01 18 04467
Danish Interpretation Systems
User Manual
Description of the DCS 6000 system
•
The DCS 6000 system has the following main
features:
Firmware in Delegate units, Interpreter Units,
Central Units etc. upgradeable through RS232
on Central Unit
•
Can be operated with or without a PC.
•
Fully digital
•
•
Excellent sound quality
•
Added functionality and comprehensive
features provided by SW 6000 software
package running on PC
“State of the Art” fully digital integrated
interpretation, discussion and voting system
offering interpretation, language distribution,
and conference microphone and voting facilities
with attendance check with Chip Card ™.
•
New, unique digital DATA and AUDIO bus.
•
39 incoming channels (8 floor channels + 31
interpreted channels)
Features
•
•
33 distributed channel (2 x floor + 31
interpreted channels)
The Delegate and Interpreter units are powered
and controlled by the CU 6010 Central Unit,
which drives up to app. 200 units on 4 chains.
•
EX 6010 Extension Units or PS 6000 Power
Supplies available if more units are required
•
A total of 4000 units (delegate or interpreter
units) can be connected to the system.
•
Using screened CAT5 cabling (FTP or STP)
ensuring a very cost effective installation and
easy set-up of portable systems
RS232/RS422 connection on CU 6010 for
external operation of the system of a PC or
control system such as AMX or Crestron
System components
The DCS 6000 system consists of various units in
addition to the Conference Units.
Central equipment & Interpreter
equipment
CU 6010
EX 6010
PS 6000
RP 6004
AO 6008
JB 6002
JB 6004
IS 6132P
LS 6032P
CS 6032P
CS 6032F
Manual 01 18 04467
Central Unit with built-in DCS-LAN
and power supply
Extension Unit
Power Supply
Repeater for four chains
Audio Output box
Junction Box with 2 outputs
Junction Box with 4 outputs
Interpreter Set
Interpreter Loudspeaker
Channel selector (portable)
Channel Selector (flush mounted)
5
Danish Interpretation Systems
User Manual
Operating instructions
DCS 6000 Conference Units
General description
The DCS 6000 Conference Units are fully digital
microcomputer controlled conference units. All
units includes a DSP processor (Digital Signal
Processing).
The DCS 6000 Conference Units offers full
compatibility with the DCS 6000 Digital
Conference System with the CU 6010 & EX 6010
Central and Extension Units.
Features
The Conference Units offers i.e. the following
features (the features depends on the version):
CM/DM 6010P
•
Fixed or detachable microphone
•
ON/OFF button
•
Built-in loudspeaker
•
Language selector
•
Voting
•
Chip Card reader
Conference Units description
Most conference units are delivered in a Chairman
(CM) version and a Delegate (DM) version.
This manual describes the functionality of the
following units:
Portable Conference Unit
Facilities:
Fixed gooseneck and loudspeaker
6
Manual 01 18 04467
Danish Interpretation Systems
CM/DM 6020P
User Manual
Portable Conference Unit
Facilities:
XLR microphone connector and loudspeaker
The XLR connector is designed for use with GM
44xx series of microphones.
CM/DM 6070P
Portable Conference Unit
Facilities:
Fixed gooseneck, loudspeaker, two built-in
channel selectors and two headphone connectors.
If the two channel selectors are in use
(headphones inserted), the loudspeaker is
disabled.
CM/DM 6090P
Portable Conference Unit
Facilities:
XLR microphone connector, loudspeaker, two
built-in channel selectors and two headphone
connectors.
If the two channel selectors are in use
(headphones inserted), the loudspeaker is
disabled.
Manual 01 18 04467
7
Danish Interpretation Systems
CM/DM 6060F
User Manual
Flush Mounted Conference Unit
Facilities:
Fixed gooseneck, loudspeaker, one built-in
channel selector and one headphone connector.
Important: The CU 6000 does not support this
unit
CM/DM 6510F
Flush Mounted Conference Unit
Facilities:
Fixed gooseneck, loudspeaker, 3 voting buttons
and Chip-card reader,
Important: The CU 6000 does not support this
unit
8
Manual 01 18 04467
Danish Interpretation Systems
CM/DM 6560F
User Manual
Flush Mounted Conference Unit
Facilities:
Fixed gooseneck, loudspeaker, 3 voting buttons,
Chip-card reader, one built-in channel selector
and one headphone connector.
Important: The CU 6000 does not support this
unit
MU 6040C/D
Microphone Unit
Available in Delegate (D) and Chairman (C)
version
The MU 6040 Microphone Unit is designed for
hidden installation, e.g. in an armrest, under a
table or in a floor box for use with FD/FC series
of front plates with Loudspeaker, Microphone
and Buttons or for use with HD 4042 Hand
Microphone.
The MU 6040 is provided with a HD 15S
connector for connection of the FD/FC front
plate.
The MU 6040 may also be used to switch on and
off a loudspeaker in PA system with separate
amplification (e.g. a 100V system) via an
external relay.
The MU 6040 operates in the same modes as
described for the other units.
Manual 01 18 04467
9
Danish Interpretation Systems
AM 6040
User Manual
Ambient Noise Microphone
The AM 6040 Ambient Microphone Unit is
designed to detect ambient noise in a conference
room.
The purpose of an ambient noise microphone is
to
provide
sound
from
a
meeting
room/conference hall, when there is no
speaker/chairman
active
using
their
microphones.
The microphone should be placed in a central
position in the room, but not too close to anyone;
thereby the microphone is able to pick up sound
from activities in the room/hall (chairs being
moved, paper being picked up, low voices and so
on.
Transmission of ambient noise rather than
transmitting no sound at all is a desirable feature
from listeners attending the meeting via
headphones. The ambient noise indicates to the
listeners, that there is no speaking activity going
on, and this information is very nice to have,
when interpreters are doing interpretation, and
the speaker stops speaking.
The AM 6040 Ambient Microphone Unit is
designed for installation above a recessed ceiling
for connection to an external microphone like
DIS model HM 4042 or GM 44xx series of
gooseneck microphones..
The AM 6040 is delivered in a shielded metal
mounting box like the MU 6040.
•
Automatic activation of the microphone, if
no Chairman or delegate units are turned ON
and the LineIn Volume (LineIn>Loudspk) is
set to OFF.
•
Setting of the volume of the ambient noise
audio level on the CU 6010
One ambient noise microphone can be active in
the DCS6000 system at one time.
Important: The CU 6000 does not support this
unit
10
Manual 01 18 04467
Danish Interpretation Systems
User Manual
Microphone functionality
Microphone functionality is a feature where
participant in a conference can use a microphone in
a DCS 6000 Conference Unit to address an
audience. The sound from a conference microphone
is called the ‘Floor’ sound.
The ‘Floor’ sound can then be listened to in built-in
loudspeakers in the DCS 6000 Conference Units, in
Language selectors, in Interpreter Sets or the sound
can be feed to an external PA-system.
The number of allowed open microphones can be
set at the CU 6000 / CU 6010 however the sound
from all the open microphones is mixed together in
the ‘Floor’ sound.
User Controls & Indications
Speak button (delegate unit)
Pressing the Speak button turns on the microphone
or will place the microphone in the request queue
(see ‘Operation modes’).
The ‘Operation mode’ determines the functions of
this button.
Speak button (chairman unit)
Pressing the Speak button turns on the microphone
Speak LED
Lights up with a red colour when the Microphone is
ON
Request LED
Lights up with a green colour when the Microphone
is put in the request queue (see ‘Operation modes’).
Microphone light ring
Lights up with a red colour when the Microphone is
ON. If the microphone is muted, the light in the
light ring is turned off during the time the units is
muted.
Microphone connections
XLR microphone connector
The XLR microphone connector is used for
connection of GM 44xx series of gooseneck
microphones. The HM 4042/HM 4047 Hand
Microphone can also be connected. However the
button on the hand microphone will not work.
The following list shows the function of the
facilities for use the microphone in the units. Please
note, that not all facilities are available at all units:
Mini-DIN microphone connector (only “F”
models)
A Mini-DIN microphone connector is located at the
back for connection of GM 44xx series of
gooseneck microphones. The HM 4042/HM 4047
Hand Microphone can also be connected.
This connecter is intended for use, where the
connection to the microphone is remotely from the
front plate, which is only on customised units.
HD 15S connector (only MU 604x models)
The HD 15S is used for direct remote connection of
FD/FC series of front plates or Microphones (e.g.
HM 4042 or GM44xx in external outlet) or/and
microphone control buttons, LED indicators and
loudspeaker. Please refer to technical appendix for
pin layout
Important: The microphone input at the above
mentioned connectors do not support other types
of microphones i.e. third part microphones.
Delegate off button (chairman unit)
Pressing the Delegate off button turns off all
delegate microphones
Delegate off LED (chairman unit)
Lights up when the Delegate off button is pressed
Manual 01 18 04467
11
Danish Interpretation Systems
User Manual
The “System Operation Mode” also called ‘CU
mode’ determines the behaviour of the microphone
system. The mode is set on the CU 6000/CU 6010.
Operation modes
System modes
The 6000 series microphones work in different
modes - according to the settings of the system.
Automatic
The following modes are available, when the CU
6000 or CU 6010 runs standalone (PC with SW
6000 has never been connected):
Auto (or Automatic) mode allows for the microphone units to be switched on
immediately upon pressing the microphone ON/OFF button.
This is indicated by a red light in the ‘Speak’ lamp in the microphone unit. Pressing the
microphone ON/OFF button again will turn the microphone off.
If the ‘maximum speakers (delegates)’ is reached, the speak request will be rejected.
Microphones with Chairman priority will always be turned on (a Chairman Unit is
always in Auto mode).
FIFO
FIFO is an automated mode. The microphone unit functions in the same way as in
automatic mode as long as the number of turned on delegate units is less or equal to the
selected ‘maximum speakers’.
When the max. number is reached, the next delegate pressing the ON/OFF button will be
put in the top of the request queue. The green ‘Request’ lamp flashing slowly indicates
this.
More delegates will be put in the request queue when they press their ON/OFF buttons,
until the maximum of requests is reached. Their green ‘Request’ lamps will light up
steadily.
When one of the active microphone units is switched off, the first delegate unit in the
queue is automatically switched ON, and the next delegate unit in the queue will flash
with the green ‘Request’ lamp.
This mode will normally be used with only 1 as maximum speakers
Microphones with Chairman priority will always be turned on directly.
Manual
Manual mode features a request list, where ‘Delegates’ are inserted in a queue upon
pressing the microphone ON/OFF button. This is confirmed by green light in the
‘Request’ lamp in the delegate unit. It is possible to cancel the request by pressing the
button again.
The microphone can only be switched on from a PC running SW 6000 software of from
a control system like AMX or Crestron. This will be indicated by red light in the ‘Speak’
lamp in the microphone unit. At this point the delegate can switch off the microphone by
pressing the ON/OFF microphone button.
Microphones with Chairman priority will always be turned on directly.
12
Manual 01 18 04467
Danish Interpretation Systems
FIFO Interrupt
User Manual
First In First Out. The microphone unit functions in the same way as in automatic mode
as long as the number of turned on delegate units is less or equal to the selected
‘maximum speakers’.
When the max. number is reached, the next delegate pressing the ON/OFF button will be
turned ON and at the same time the first microphone turned ON will be turned OFF.
Microphones with Chairman priority will always be turned on directly.
This mode is only available when using SW 6000 Software
Individual modes (only with SW 6000)
When using SW 6000 it is possible to set individual
modes for the units.
The parameters can be set individual for each
conference unit:
Operation Mode
Use CU mode, Manual, Automatic or FIFO.
Speak Priority
Use CU mode, 5 (Chairman), 4, 3, 2 (VIP), 1(Delegate) or No
Speaking Rights
Chairman (5) is the highest priority and the microphone will
always be turned on regardless of operation mode.
In the Request list a unit with higher speak priority will be
placed before a unit with lower speak priority.
Interrupt Ability
The Interrupt setting determines the microphone’s ability to
interrupt another speaker if the maximum number of speakers is
reached. The key is as follows:
Use CU mode
<=: Can interrupt a speaker with the same speak priority or a
speak priority which is less than own speak priority.
< : Can interrupt a speaker with a speak priority less than own
speak priority.
Not allowed: Cannot interrupt another speaker.
For most installations, the ‘Operation Mode’ for all
units is set to use the system mode ‘Use CU mode’.
It means that the operation mode for the units is
following the system modes, i.e. if the system is
running in ‘Manual mode’, the Delegates Units will
run in Manual mode.
When assigning units to run ‘Use CU modes’ the
modes are found in the following table:
Manual 01 18 04467
13
Danish Interpretation Systems
User Manual
Unit
Operation mode
Delegate unit
Following ‘System mode’ 1
<
Chairman unit
Automatic
<
Speak priority
5
However for certain application, it is desirable to
assign ‘individual operations mode’, where the
units will always follow the individual mode
settings independently of the ‘System Setting’.
Interrupt ability
I.e. the following ‘Units’ can be created:
Unit
Operation mode
Speak priority
Interrupt ability
No Speaking Rights
Does not matter
0
Does not matter
VIP unit
Automatic
3
<
Secretary
Automatic
2
<
Delegate FIFO
Use CU Mode
<=
This unit will interrupts
other delegates if the
‘Maximum speaker’ are
reached
Speaker stand
Automatic
4
<=
This unit can always turn
on except if 8 units with
‘Speak priority”=5 is
open
Saving setting in CU 6010
If individual settings are to remain in the units after
the SW 6000 is closed, the settings can be stored in
the CU 6010 by saving the setting.
When saving the configuration the changes in the
settings, which have been done in the various
menus in CU 6010, at the IS 6132 Interpreter Sets,
at AO 6008 Audio Unit or in the Conference Units
(Individual settings) will be saved in the ‘Flash’
memory in the CU 6010.
14
Also the serial number and type of all units
connected to the CU 6010 at the time of saving the
configuration will be saved in the ‘Flash’ memory
in the CU 6010.
When ‘loading’ a configuration the last settings,
which has been saved in the ‘Flash’ memory in the
CU 6010 will be re-loaded to the CU 6010, to the
IS 6132 Interpreter Sets to the AO 6008 Audio Unit
and to the Delegate Units.
When switching the power to the CU 6010 OFF and
then ON, the last saved setting will also be loaded.
Manual 01 18 04467
Danish Interpretation Systems
User Manual
Language Selection functionality
Language selection is a feature, where the delegate
can listen to either the floor (spoken) language or an
interpreted language.
Headphone Connector (Molex) (only “F”
models)
User Controls & Indications
A 2 pin Molex jack is located at the back for
connecting a headphone for listening to the Floor
language or one of the interpreted languages.
The units featuring language selection will include
on or two sets of the following controls and
interfaces.
This connecter is intended for use, where the
connection to the headphone is remotely from the
front plate, which is only on customised units.
Display
Normal Operation
This display is used for information purposes. This
display has built in back light.
Channel buttons (two)
The buttons are used for changing the channel
setting.
Volume buttons (two)
The buttons are used for changing the volume
setting.
Headphone connectors
Headphone connector (mini-jack)
A mini jack located on the front plate for
connecting a headphone for listening to the floor
language or one of the interpreted languages.
Dual headphone connectors (mini-jack)
Some units are supplied with two mini jacks located
on the front plate for connecting a headphone for
listening to the floor language or one of the
interpreted languages.
Important:
For units, where the two channels are operated
separately the following has to be observed:
If the two channel selectors are in use
(headphones inserted), the loudspeaker is
disabled.
Channel Selection
Channel selection is done using the channel up and
channel down buttons. Channel numbers can be
from 0 to 31, however the indication in the display
is abbreviations of the language selected i.e. ENG
for English, SWE for Swedish.
The lowest channel (0=FLO) always carries floor
audio and all other channels carry interpreted
languages (or floor if no interpretation is currently
performed on this channel). If fewer than 32
channels are in use only available channels will be
selectable from the channel selector – the channels
are always numbered consecutively. Pressing the
down button when the lowest channel number is
displayed will cause the channel selection to wrap
around to the highest available channel if the
channel wrap parameter is set.
Holding the channel up or down button depressed
will cause the channel numbers to scroll with a
system defined start-up delay, and subsequent
smaller delay between each change in channel
position. These delays are set using system
parameters.
Volume Control
Volume control is done using the volume up and
volume down buttons. The number of volume levels
and the step size in dB between successive levels is
globally defined using system parameters –
however setting the volume level to 0 turns the
headphone/line output off.
Manual 01 18 04467
15
Danish Interpretation Systems
User Manual
When a volume button is depressed the channel
display will be overridden with the current volume
(this is indicated by the black dot in the upper left
corner of the display) if the show volume global
parameter is set. The display will continue to show
the current volume level for a preset time interval
before returning to displaying the channel
information – this time interval is also set globally
using a system parameter.
Voting functionality
Voting functionality is a feature where delegates
can cast their votes to various subjects using the
DCS 6000 Conference Units.
The voting functionality is only available when the
system if expanded with a PC running SW 6000
Conference Management software with the module
‘SW 6060 Parliamentary Voting and Agenda’.
The various voting modes and voting functionality
in general is explained in the SW 6000 CAA User
Manual. However the functionality directly related
to the ‘Control & Indications’ in the units is
explained here.
the LED flashes together with the two other voting
LED’s the user can press any of the voting buttons
to cast a vote.
Abstain (0) LED
When the LED flashes together with the two other
voting LED’s the user can press any of the voting
buttons to cast a vote.
No (-) LED
When the LED flashes together with the two other
voting LED’s the user can press any of the voting
buttons to cast a vote..
Important: The CU 6000 Central Unit does not
support voting functionality
Normal operation
User Controls & Indications
Attendance check
The units featuring voting functionality will include
the following controls and interfaces.
When the yellow ‘Yes/Present (+) LED’ flashes
alone, the user can to present him to the system as
‘Present’ by pressing the ‘Yes/Present (+) button’.
Cast a vote
Yes/Present (+) button
Pressing this button casts a ‘Yes’ vote or show the
user as ‘Present’ to the system.
Abstain (0) button
The user can cast his vote or change a vote as long
time as the voting session is on-going.
Pressing this button casts a ‘Abstain’ vote.
If the voting parameter is selected as ‘Secret’ (done
in the SW 6000) the LED’s stop flashing after the
vote is caste, however the user can still change his
vote if needed.
No (-) button
Pressing this button casts a ‘no’ vote.
When all the yellow voting LED’s flashes, the user
can cast his vote, by pressing any of the three
voting buttons.
Yes/Present (+) LED
This yellow LED flashes alone, when the user have
to present himself to the system as ‘Present’. When
16
Manual 01 18 04467
Danish Interpretation Systems
User Manual
Chip Card functionality
Chip Card functionality is a feature where delegates
identify themselves to the system by use of a DIS
chip-card. The Chip-Card contains information like
Delegate ID, Login Code and Location ID, which
the DCS 6000 system uses to identify the user of
the Conference Unit by getting the personal details
from the database in the SW 6000.
The Chip card functionality is only available when
the system if expanded with a PC running SW 6000
Conference Management software with the module
‘SW 6070 Chip Card Login’.
The functionality in general is explained in the SW
6000 CAA User Manual. However the functionality
directly related to the ‘Control & Indications’ in the
units is explained here.
Important: The CU 6000 Central Unit does not
support Chip Card functionality
The use of Chip Cards
Location ID
This is an ID related to the location of the
installation. The location ID prevents the card to be
used at other locations. All cards for one installation
shall have the same location ID.
When the cards are delivered from DIS, the location
ID is marked on the packages. The location ID has
to be entered in the ‘Setup/Equipment/Chipcard’
window in SW 6000 – CAA application.
When a card is inserted in a conference unit, the
software will identify the user by matching the
‘Delegate ID’ in the ‘Delegate’ database with the
‘Delegate ID’ on the card.
Delegate ID
Login code
This is the password used to log the user into the
system.
The ‘Login code’ on cards delivered from DIS will
have the same ‘Login code’ and ‘Delegate ID’.
User Controls & Indications
The units featuring chip card functionality will
include the following controls and interfaces.
This chip cards in use are delivered preprogrammed from DIS with the following
information:
The information for each delegate in ‘Delegate’ in
the SW 6000 – CAA application will also have a
unique ‘Delegate ID’ corresponding to the cards.
Chip Card reader
The chip card reader is used together with DIS chip
cards for identifying a used to the system. The chip
card reader (and chip cards) can only be used
together with the SW 6000 software.
When in use, the chip card is inserted in the chip
card reader.
The chip-cards are delivered pre-programmed from
DIS.
Chip Card LED
This LED lights yellow, if it is required to insert the
Chip Card.
When inserted the LED lights RED if the card is not
accepted and lights GREEN if the card is accepted.
This ID is used to identify the user in the Delegate
database in SW 6000. Each card will have a unique
ID (1, 2, 3 etc).
Manual 01 18 04467
17
Danish Interpretation Systems
User Manual
DCS LAN Connectors
In addition to the connectors mentioned in the
previous section the following connectors are
available on all units:
DCS-LAN connector
Two RJ45 sockets are located at the back of the
units for connecting to the previous unit (an IS
6032/IS 6132 Interpreter set, CS 6032 Channel
Selector, DM 6xxx Delegate Unit, the CU 6010
Central Unit or any other unit with a DCS LAN
connector) and to the next unit.
.
18
Manual 01 18 04467
Danish Interpretation Systems
Appendix
System Setup
General guidelines
Connect the DCS 6000 Conference Units at the
DIS-LAN connectors to the various units using Cat
5 FTP or STP screened cables. Please observe the
following guidelines:
•
Maximum cable length in one chain when
not using repeaters is 200 m.
•
Maximum cable length in one chain when
using repeaters is 650 m
For more details about cabling and maximum
number of units to connect to the DCS 6000 system
please consult the CU 6000 User Manual or CU
6010 User Manual
Settings
There are no settings to be done on the DCS 6000
conference units. The units are automatically
recognized and receive a unique address in the
system, when connected to the unique DIS digital
communication bus - the DCS-LAN.
Electrical termination of DCS LAN
Network
Before powering up your DCS6000 system, you
must ensure that the DCS LAN Network has been
properly terminated. The last unit in each chain
must have a DCS LAN Network Termination Plug
inserted in one of the two DCS LAN Network
connectors (RJ45 connectors).
resulting in malfunction or degradation of the
system performance.
4 pcs. of DCS LAN Network Termination Plug
have been shipped with your DCS 6000 Central
Unit.
Typical schematics
Please consult the CU 6000/CU 6010 User Manual
for typical schematics
Starting up the system
When the DCS 6000 Conference Units are
connected to a CU 6000/CU 6010 Central Unit and
the proper termination are made, the CU can be
switched ON.
After powering on the system, the light-ring in DCS
6000 Conference Units will flash until the CU
identifies the unit. As soon as this happens, the
light-ring stop to flash and the unit is operational.
If a unit ‘looses’ the connection to the CU, it will
start to flash until the connection is re-established.
Adjusting LCD contrast on units with
channel selector
The contrast on the channel selector LCD display
has been factory preset to a viewing angle of 45˚.
The contrast can be changed to a different viewing
angle through the procedure described below.
If the network is not terminated properly
communication errors on the network may occur
Manual 01 18 04467
19
Danish Interpretation Systems
1
Appendix
Get the contrast adjustment tool, which has been shipped with
your DCS 6000 Central Unit (see photo 1). A new adjustment tool
can be ordered through your authorized DIS dealer. Order DIS p/n
P0 45 00010.
Photo 1
2
Connect the CM/DM 6xxxF to the DCS 6000 Central Unit and
power up the system.
3
Wait until text appears in the LCD display and the backlight is
turned on.
4
Locate the contrast adjustment hole in the back box of the unit
(see photo 2). Units with two channel selectors have two
adjustment holes in the back box, one for each of the LCD
displays.
Contrast adjustment hole
5
Photo 2
Carefully insert the tip of adjustment tool into the adjustment hole
until the tip of the tool makes contact/lock with the potentiometer
located behind the hole (see photo 3 and 4).
Insert tip of tool
Photo 3
20
Manual 01 18 04467
Danish Interpretation Systems
Appendix
Potentiometer
Photo 4
6
Turn the adjustment tool until the required contrast setting is obtained.
Do not use excessive force when turning the tool, as this will cause the
potentiometer to be damaged.
7
Carefully extract the adjustment tool from the adjustment hole.
Manual 01 18 04467
21
Danish Interpretation Systems
Appendix
Accessories
The following accessories are available for use with the DCS 6000 Conference Units:
GM 44xx
Gooseneck Microphones with XLR plug
The gooseneck microphones are available
in various lengths.
To be connected to the XLR microphone
connector
Type
Art No
GM 4422 Gooseneck mic, 36 cm ........18 12 05661
GM 4424 Gooseneck mic, 50 cm ........18 12 05662
GM 4425 Gooseneck mic, 63 cm ........18 12 04888
HM 4042
Hand Microphone with light ring
The HM 4042 Hand Microphone is
designed for use with the MU 6040 unit.
The microphone is equipped with ON/OFF
button, light ring as well as an indicator.
With an extension cable the microphone
can be connected to the MU 6040 to the
HD15S connector or to the XLR connector
on portable units.
If connected to the XLR connector, the
ON/OFF button as well as the indicator is
not functioning.
This indicator lights red when the
microphone is ON and green when in
request
Type
Art No
HM 4042 Hand Microphone................18 11 04474
22
Manual 01 18 04467
Danish Interpretation Systems
DH 6001H
Appendix
Delegate Headphone
This headphone is used with the built in
channel selector.
To be connected
connector
to
the
headphone
Type
Art No
DH 6001H Delegate Headphone ......... 14 11 03054
FD/FC 4xxx
Delegate/Chairman Front plates
A extensive range of standard front plates
is available for use with MU 6040.
Customised versions are available too
The FD/FC Front Plates are connected to
the HD15 connector
Chip Card
Chip card to use with Chip Card reader
JB 6002
Junction Box
Type
Art No
JB 6002 Junction Box.......................... 15 09 05798
JB 6004
Junction Box
Type
Art No
JB 6002 Junction Box.......................... 15 09 05758
Manual 01 18 04467
23
Danish Interpretation Systems
CA 6000 cables
Appendix
Cat 5e Connection Cables (AWG24)
The CA 6000 cables are use to connect the
various units in the DCS 6000 system using
the DCS-LAN connector:
Type
Art No
EC 6000-..5 Connection Cable 0,5 m ..10 03 12500
EC 6000-01 Connection Cable 1 m .....10 03 13101
EC 6000-02 Connection Cable 2 m .....10 03 13201
EC 6000-05 Connection Cable 5 m .....10 03 13501
EC 6000-10 Connection Cable 10 m ...10 03 14102
EC 6000-20 Connection Cable 20 m ...10 03 14202
EC 6000-50 Connection Cable 50 m ...10 03 14502
CO 6000
terminator
RJ45 DCS-LAN Termination plug
Type
Art No
CO 6000 RJ45 terminator x 5 ..............15 52 04911
24
Manual 01 18 04467
Danish Interpretation Systems
Appendix
Appendix
Technical appendix
Cabling
CAT5
The DCS 6000 system uses CAT5, CAT5e or
CAT6 FTP or STP cables with screened RJ45
connectors.
Pin
Signal
1
2
3
4
5
- Loudspeaker output
Speak 1 LED
Request 1 LED
ON/OFF 1 button input
Delegate OFF button /
ON/OFF 2 button input
Optional input
+ Loudspeaker output
(8 ohm)
NC
Speak 2 LED
+ lamp
+5V
0V
MIC ground
+ MIC
Request 2 LED
EIA 568-B wiring shall be used.
It is important to use only FTP or STP
(screened) cables and screened RJ45 connectors
and not UTP cable, which is unscreened.
How to wire a CAT5 (EIA 568-B) Cable:
Pin Function
1
2
3
4
5
6
7
8
Note.
Connector #1 Connector #2
In-going +
In-going +48V
0V
0V
+48V
Outgoing Outgoing +
ORG/WHT
ORG
WHT/GRN
BLU
BLU/WHT
GRN
BRN/WHT
BRN
ORG/WHT
ORG
WHT/GRN
BLU
BLU/WHT
GRN
BRN/WHT
BRN
If other colour codes are used then the four
pairs are connected as follows:
Pair 1:
Pin 1 & 2
Pair 2:
Pin 3 & 6
Pair 3:
Pin 4 & 5
Pair 4:
Pin 7 & 8
6
7
8
9
10
11
12
13
14
15
Cable type
DIS type:
#2029
or according to
the specific
installation.
Connection of GM 4422 to AM/MU 6040
AM/MU 6040 – HD 15
GM 44xx – XLR 3P
Pin Comments
Pin
10
12
13
14
+ lamp
0V
MIC ground
+ MIC
4
3
1
2
Comments
House
The phase of the pairs must be correct and the
wiring specifications as stated in CAT5 (EIA 568B) have to be followed.
HD15 connector
The HD15 connector on the MU 6040 has the
following PIN layout:
Manual 01 18 04467
25
Danish Interpretation Systems
26
Appendix
Manual 01 18 04467
Danish Interpretation Systems
Appendix
Technical specifications
Digital Section
General
Microphone type.............................................. Electret Cardioid
Power requirement .................................................. 24-48 V DC
Microphone sensitivity ............................................ -22 DbV/Pa
Power consumption.................................................... 1W to 2W
Max. SPL.......................................................125 dB (3% THD)
Power supplied from CU 6000 / CU 6010 / EX 6010 / PS 6000
Equivalent noise ............................................... App. 20 dB SPL
Temperature to guarantee specified performance
Loudspeaker freq. Range ................................ 150 Hz – 15 kHz
............................. 5 Deg C. to 40 Deg C. (35 to 80% humidity)
Loudspeaker max. power............................................. 3W RMS
Storage temperature
Sound quality ......... 20 bit audio @ 32 kHz sampling frequency
.......................... -20 Deg C. to 60 Deg C. (10 to 80% humidity)
Frequency response .................................................. 100-15kHz
Connectors
Signal to noise ratio: .................................................. >85 dBA
DCS-LAN loop through
2 pieces RJ45
Total harmonic distortion: .............................................< 0.1%
Specifications are subject to change without notice.
Manual 01 18 04467
27