Download PT2100 8” Teleprompter
Transcript
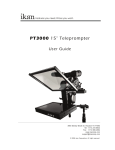
Features you need, Prices you want. PT2100 8” Teleprompter User Guide 3903 Stoney Brook Dr. Houston TX 77063 Tel: 1.713.272.8822 Fax: 1.713.995.4994 www.ikancorp.com [email protected] © 2009 ikan Corporation. All right reserved. PT2100 8” TELEPROMPTER INTRODUCTION Thank you for purchasing the ikan PT2100 8” Teleprompter. The PT2100 is extremely easy to use and will quickly become an integral part of your production kit. For more information on this and many other innovative ikan products, please visit our website: www.ikancorp.com. PACKAGE INCLUDES V8000 LCD Monitor Kit PrompterPro Software User Guide Teleprompter Parts: Checked by A B Monitor Attachment Assembly C 2 x 3/8-16 Receiving Nut D 2 x 1/4-20 Receiving Nut 8 x T-Plate (3-Arm Thumb Nut, Screw, T-Nut) F 8 x T-Slot Nut 2 x 3/8-16 Screw N 8” T-Slot 2 x 1/4-20 Screw L K L-Bracket H Coupler Bracket I 20 x Phillips Head Screw(L) M Velcro (Hook) 4 x Phillips Head Screw(S) velcro J G velcro E Hood P O 8” T-Slot with Metal Bracket 20” T-Slot with Metal Bracket (Optional Tripod Mount) Q R Additional Tool Needed: Metal Frame with 30/70 Prompter Glass 100mm Mounting Bracket ** Not all parts needed for this teleprompter assembly, depends on your camera and tripod (Optional Battery Mount) 3903 Stoney Brook Dr. Houston TX 77063 | +1.713.272.8822 | www.ikancorp.com | [email protected] | © 2009 ikan Corporation. All right reserved. PT2100 8” TELEPROMPTER ASSEMBLY INSTRUCTION 1 Remove T-Nut from Part-A. Insert T-Nut in the receiving channel of the V8000 Monitor. 2 Place the Part-L on both sides of the V8000 monitor. Attach V8000 monitor to Part-K. Secure the monitor with the remaining Part-A. Part-A k -Hoo o Velcr + + + + Part-K Part-A 3 4 Remove protective film from Part-Q. Attach Part-Q to Part-K. > Unscrew the two Phillips Head screws on the Part-K > Attach Part-Q to the Part-K and tighten with the screws Part-Q > Unscrew 4 x small Phillips Head screws > Remove glass holding tabs on both sides Part-Q Part-D Part-K > Peel the protective film > Re-install the Teleprompter glass back into metal frame Part-H > Install 4 x Part-D on Part-K and secure with 8 x Part-H (Place the Part-D on the inner sides of Part-K) 3903 Stoney Brook Dr. Houston TX 77063 | +1.713.272.8822 | www.ikancorp.com | [email protected] | © 2009 ikan Corporation. All right reserved. PT2100 8” TELEPROMPTER 5 Attach Part-J to Part-N. (2 x Part-D and 4 x Part-H are needed in this step) Part-J 6 Attach Part-P to the assembled parts. (2 x Part-D and 4 x Part-H are needed in this step) Part-P Part-N 7 Attaching assembled Part-K, assembled Part-P and your camera together. Washer (Not included) ikancorp.com ** Some cameras may require an extra spacer, such as a washer, in order to fit snugly. Part-F or Part-G (depends on your camera) > Secure your camera on Metal Bracket > Slide back in the Metal Bracket with your camera attached, and tighten all screws > Loosen the screws to allow them pass through the 8” T-Slot’s channels on both sides Metal Bracket ikancorp.com > Loosen the screws and slide out the Metal Bracket through the channels 3903 Stoney Brook Dr. Houston TX 77063 | +1.713.272.8822 | www.ikancorp.com | [email protected] | © 2009 ikan Corporation. All right reserved. PT2100 8” TELEPROMPTER 8a Attach your tripod skid plate directly to the teleprompter. > Slide in the Part-B or Part-C through the single channel of the bottom of the Part-P, and secure it with the screw on your tripod skid plate. See Figure 1. > Attach the assembled teleprompter to your tripod Part-B or Part-C (depends on your tripod skid plate) ikancorp.com Part-P Figure 1. Part-P (bottom view) 8b Attach your tripod skid plate to Part-O. For those who use a tripod that is rear loading (ie: your tripod skid plate slides into the tripod head from the rear), we have provided an optional piece , Part-O, will allow for more convenient attaching and detaching of the PT2100 Teleprompter on your tripod. > Loosen the screws and slide out the Metal Bracket through the channels > Install 2 x Part-B & Part-F or 2 x Part-C &Part-G > Slide in the Metal Bracket through the single channel of the bottom of the Part-P > Attach your tripod skid plate to the remaining Part-O (8” T-Slot) and secure them on your tripod head > Attach the assembled teleprompter to your tripod ikancorp.com your tripod 3903 Stoney Brook Dr. Houston TX 77063 | +1.713.272.8822 | www.ikancorp.com | [email protected] | © 2009 ikan Corporation. All right reserved. PT2100 8” TELEPROMPTER 9 Attach Part-M to the teleprompter. hood metal frame camera lens monitor CONDITIONS OF WARRANTY SERVICE • Free service for one year from the day of purchase if the problem is caused by manufacturing errors. • The components and maintenance service fee will be charged if the warranty period has expired. Free Service will not be Provided in the Following Situations: (* Even if the product is still within the warranty period.) • Damage caused by abuse or misuse, dismantling, or changes to the product not made by the company. • Damage caused by natural disaster, abnormal voltage, and environmental factors etc. 3903 Stoney Brook Dr. Houston TX 77063 | +1.713.272.8822 | www.ikancorp.com | [email protected] | © 2009 ikan Corporation. All right reserved. Quick Start Guide / PT2100 (How to set-up your computer for the PT2100) Introduction When using the PT2100 you should set up you computer to be in “Clone Mode” or “Mirror Mode”. We do this so the talent can see the exact same thing the teleprompter operator is viewing. In this guide we will go over some of the most common ways of achieving this. Before you start you should make sure you have the last drivers for your video card. You should visit the manufactures website the get these. We will go over the Nvidia , ATI, and Intel way of achieving this as they are what most computers are equipped with. 1)Fist thing to do is make sure that the monitor of the PT2100 is plugged in powered on and connected to the VGA port of you computer. (It’s the blue 15 pin connector on the back of your computer) NVIDIA (figure 1) b. 2)The easiest way to set up your computer if you are using a laptop is to use the hot keys. Most laptops have a set of keys you press at the same time to toggle between display modes. In this particular case the key combination is FN and the F4 key. (see illustation) You will press these keys until you get the same exact image on the PT2100 that you have on your laptop. The mode we are looking for is “Clone Mode”. Every laptop manufacturer seems to have a different key combination so you should check your user’s manual. fn + d. f4 Nvidia (see figure 1) 3)If the above step did not work or you are using a desktop computer then we can do it the longer method. (Nvidia) a. Right-Click on your desktop b. Choose properties c. Click on the Settings tab d. Change the resolution of your monitor to 800x600 or 1024x768 and press the apply button. e. Now press the advanced button f. Click on the tab labeled with the word GeForce or the Nvidia logo. (this may look different depending on your graphics card model.) g. Click on “Nview Display Settings” on the left side. h. On the right side choose Clone from the Nview Display Mode drop down box. i. Click on the apply button. j. You should be in clone mode now. Close all open windows. k. You are now ready to start Prompter Pro V2. h. ATI (figure 2) b. ATI (see figure 2) 4)If step number 2 did not work or you are using a desktop computer then we can do it the longer method. (ATI) a. Right-Click on your desktop b. Choose properties c. Click on the Settings tab d. Change the resolution of your monitor to 800x600 or 1024x768 and press the apply button. e. Now press the advanced button f. Click on the Tab labeled with an ATI logo and the word “Displays” g. Press the red button to the left of the word monitor. This will “turn on” your second ary monitor (which is the PT2100) h. Press the small blue button with two squares overlapping each other. This is the “Clone Mode” button. i. Now Press the apply button. j. Your are now ready to start Prompter Pro V.2 d. h. Quick Start Guide / PT2100 (How to set-up your computer for the PT2100) ATI (see figure 3) ATI (figure 3) 5)If step number 2 did not work and you do not recognize the steps in step 4 but still have an ATI card and are using a desktop computer then follow these steps: a. Right-Click on the desktop b. Click on the “ATI CATALYST Control Center” c. Click on the Displays Manager option on the left d. Right-Click on the small grey picture of a monitor under the “Attached displays currently disabled” section e. Choose Clone Main with monitor f. Now click apply b. INTEL (see figure 4) 6)If step number 2 did not work or you are using a desktop computer then we can do it the longer method. (Intel) a. Make sure you are running at 1024x768 resolution b. Right-Click on the desktop c. Roll your mouse over Graphics Options d. Roll your mouse over Output To e. Roll your mouse over Intel Dual Display Clone f. Click on Monitor + Notebook g. You are now ready to start Prompter Pro V.2 7)There is another way to do it on the Intel graphics card: a. Right-Click on your desktop b. Choose properties c. Click on the Settings tab d. Change the resolution of your monitor to 800x600 or 1024x768 and press the apply button. e. Now press the advanced button f. Click on the “Intel Graphics Media Accelerator Driver” button g. Click on the Intel Dual Display Clone button on the left. h. Click on apply. i. You are now ready to start Prompter Pro V.2 d. intel (figure 4) d. c. f. e. (For Step 7) d. f. For additional help please call the ikan support team at 713-272-8822 or email us at [email protected] Office Hours: 9am - 6pm Central Time g. Quick Start Guide Prompter Pro v2.0 Installing Prompter Pro v2.0 on a PC a. Insert the CD in your CD-ROM on your computer. b. Open “My Computer” from your desktop. c. Double-click on “Prompter Pro 2.0” CD icon. d. Open the “Prompter Pro v2.0” folder and double-click on the “PC” folder. e. Double-click on the “Setup” icon. f. Follow the easy installation instructions. Installing Prompter Pro v2.0 on a MAC a. Insert the CD in your CD-ROM on your computer. b. Double-click on the “Prompter Pro v2.0” icon. c. Open “Prompter Pro v2.0” folder and double click on the “MAC” folder. d. Drag the folder named “Prompter Pro” into your applications folder. e. You are ready to start Prompting! Setting up Prompter Pro v2.0 If this is the first time installing any version of Prompter Pro you will be prompted to enter a serial number which is provided in the back of the CD case. Keyboard shortcuts: Main Menu Options: F5 Stop / Start Scroll Up Open File Allows you to browse you computer for a file. F6 Stop / Start Scroll Down Show Prompt Displays the file you are currently working on. F7 Go to top of prompt New File Create a new file for prompting. F8 Go to end of prompt Save File Save the progress of your file. F9/ cmd shift+up Speed Down x10 Demonstration Puts the software in demonstration mode. Setup Allows you to toggle the font and BG color. F10/ cmd shift+dwn Speed Up x10 Exit It will exit from the program. F11/cmd+up Speed Down F12/cmd+dwn Speed Up Ctrl/cmd + O Open File Ctrl/cmd + S Save File Ctrl/cmd + H Show / Hide Tool bar ESC Close Prompt Window Up/Down Arrows Speed Up/Down * Scroll Up/Down Mouse shortcuts: Left Click/ cmd+click Stop / Start Scroll (Start when tool bar is hidden) Right Click/ ctrl+click Show / Hide Tool bar Mouse Wheel Speed Up/Down * Scroll Up/Down * (PC) To change the color of the font simple enter the file that you want to prompt. Then highlight the word or letter and right click on the mouse (ctrl+click on MAC) and a color palette will appear. * Prompter Pro v2.0 supports both RTF files and Text files. * For any additional questions about Prompter Pro v2.0 please call us at 713-272-8822. ikan www.ikancorp.com 713-272-8822 ikan PT2100 TELEPROMPTER IMAGE FLIP INSTRUCTION After installing Prompter Pro 2.0 on your PC / Mac computer, attach the VGA cable to the V8000 monitor. Change input to VGA mode. Press PC / AV 3 < MENU > AV + PC / - PO WE R PC / AV 1 2 Reverse image via the MENU. Press MENU Select MISCELLANEOUS by pressing ‘>’ button until MISCELLANEOUS is highlighted, then select it by pressing ‘+ ’ button. Select LR REV to flip image horizontally and select UV REV to flip image vertically. ** MUST do both horizontally and vertically image flips in order to view through teleprompter glass. 3903 Stoney Brook Dr. Houston TX 77063 | +1.713.272.8822 | www.ikancorp.com | [email protected] | © 2009 ikan Corporation. All right reserved. F.A.Q. ikan PT2100 TELEPROMPTER Q: I was told that the PT2100 monitor can be powered by a professional battery adaptor. What part do I need to order? A: The correct part designation for the Pro Battery Kit that you will need to order is the PBK2100-S (V-Mount) or the PBK2100-A (Gold Mount). These parts can be found by clicking on the Accessories tab above. ________________________________________________________________________ Q: I recently purchased a PT2100 and the User Guide does not match what I received in the box. A: Some early models of the PT2100 were shipped with the previous version’s User Guide. You can download the newly revised PT2100 User Guide at www.ikancorp.com. ________________________________________________________________________ Q: I have assembled my PT2100 and I have some parts left over. What do these belong to? A: First, you can double-check the assembly of the PT2100 to verify that each piece is in its correct placement. Then, you can refer to the parts listing. There are two (2) larger pieces included which are “Optional” bracketry and not necessary for the operation of the PT2100. These are Part O: 8” T-Slot with Metal Bracket and Part R: 100mm Mounting Bracket. These pieces are included as a convenience to the user (for Part O) and for usage with optional, separately purchased accessories, such as the Pro Battery Plates (for Part R). Section 8B of the User Guide can guide you through the assembly of Part O. Part R can be mounted once the entire assembly has been built. It will slide on to the end and serves as the bracket for a separately purchased Pro Battery Plate. When mounted with the Plate and a Pro Battery, this can also help serve as a counter-balance for the rear of the teleprompter. _______________________________________________________________________ Q: Will my PT2100 work with the Ikan Pro Battery Packs? A: Yes. The monitor used for the PT2100 is the V8000, which can take 12-24 volts. This will allow for compatibility with the V-Mount or Gold Mount Pro Batteries and most power systems. _______________________________________________________________________ Q: How do I flip the image on my PT2100 monitor? A: There is a detailed instruction sheet to flip the image on the PT2100 monitor which can be downloaded at www.ikancorp.com. _______________________________________________________________________ Q: How do I set-up my computer for the PT2100? A: There is a detailed Quick Start Guide which can be downloaded at www.ikancorp.com with instructions on setting up your computer for the PT2100. 3903 Stoney Brook Dr. Houston TX 77063 | +1.713.272.8822 | www.ikancorp.com | [email protected] | © 2009 ikan Corporation. All right reserved.


