Download AN4108 - STMicroelectronics
Transcript
AN4108
Application note
How to set up a HTTPS server for In-Home display with HTTPS
Introduction
This application note describes how to configure a simple SSL web server using the
EasyPHP free application to use the “In-Home display with HTTPS gateway” system.
The system is formed by an ST demonstration board connected to a network, and is
capable of publishing the home automation devices (i.e. smartplugs) energy data to a
remote web server. The user can consult the energy consumption data on the web server
from wherever they are. From their home, they can manage the entire system by means of a
touch panel.
The connection between the STM3221G-EVAL board and the web server is protected using
SSL secure protocol. The SSL handshake process is based on RSA encryption (used for
key exchange/signature implemented with a random number generator provided in the
STM32 MCU), while the messages, exchanged between the STM3221G-EVAL board and
the web server, are encrypted/decrypted using AES256.
■
Section 1 describes the document and library rules.
■
Section 2 shows the EasyPHP installation setup.
■
Section 3 explains how to get started with an Apache web server and how to configure a
MySQL database suitable for the In-Home display with HTTPS gateway system.
■
Section 4 illustrates how to set up an Apache web server and configure a MySQL
database to receive and store the energy consumption data report coming from the
STM3221G-EVAL board running the In-Home display with HTTPS gateway firmware.
September 2012
Doc ID 023170 Rev 1
1/17
www.st.com
Contents
AN4108
Contents
1
Document and library rules . . . . . . . . . . . . . . . . . . . . . . . . . . . . . . . . . . . 4
1.1
Acronyms . . . . . . . . . . . . . . . . . . . . . . . . . . . . . . . . . . . . . . . . . . . . . . . . . . 4
2
EasyPHP installation setup . . . . . . . . . . . . . . . . . . . . . . . . . . . . . . . . . . . 5
3
Set up Apache web server and configure a MySQL database . . . . . . . 8
3.1
Apache configuration . . . . . . . . . . . . . . . . . . . . . . . . . . . . . . . . . . . . . . . . . 8
3.2
Database structure definition and configuration . . . . . . . . . . . . . . . . . . . . 11
4
References . . . . . . . . . . . . . . . . . . . . . . . . . . . . . . . . . . . . . . . . . . . . . . . . 15
5
Revision history . . . . . . . . . . . . . . . . . . . . . . . . . . . . . . . . . . . . . . . . . . . 16
2/17
Doc ID 023170 Rev 1
AN4108
List of figures
List of figures
Figure 1.
Figure 2.
Figure 3.
Figure 4.
Figure 5.
Figure 6.
Figure 7.
Figure 8.
Figure 9.
Figure 10.
Figure 11.
Figure 12.
Figure 13.
Figure 14.
Figure 15.
Figure 16.
Figure 17.
Figure 18.
Select EasyPHP language . . . . . . . . . . . . . . . . . . . . . . . . . . . . . . . . . . . . . . . . . . . . . . . . . . 5
EasyPHP set-up welcome screen . . . . . . . . . . . . . . . . . . . . . . . . . . . . . . . . . . . . . . . . . . . . 5
EasyPHP license agreement . . . . . . . . . . . . . . . . . . . . . . . . . . . . . . . . . . . . . . . . . . . . . . . . 6
EasyPHP information collected . . . . . . . . . . . . . . . . . . . . . . . . . . . . . . . . . . . . . . . . . . . . . . 6
EasyPHP installation directory . . . . . . . . . . . . . . . . . . . . . . . . . . . . . . . . . . . . . . . . . . . . . . . 6
EasyPHP start menu shortcut name. . . . . . . . . . . . . . . . . . . . . . . . . . . . . . . . . . . . . . . . . . . 7
EasyPHP installation ready . . . . . . . . . . . . . . . . . . . . . . . . . . . . . . . . . . . . . . . . . . . . . . . . . 7
Apache configuration file "httpd.conf" . . . . . . . . . . . . . . . . . . . . . . . . . . . . . . . . . . . . . . . . . . 8
Apache configuration step 1 . . . . . . . . . . . . . . . . . . . . . . . . . . . . . . . . . . . . . . . . . . . . . . . . . 9
Apache configuration step 2 . . . . . . . . . . . . . . . . . . . . . . . . . . . . . . . . . . . . . . . . . . . . . . . . . 9
Apache configuration step 3 . . . . . . . . . . . . . . . . . . . . . . . . . . . . . . . . . . . . . . . . . . . . . . . . 10
Apache configuration step 4 . . . . . . . . . . . . . . . . . . . . . . . . . . . . . . . . . . . . . . . . . . . . . . . . 10
Apache configuration step 5 . . . . . . . . . . . . . . . . . . . . . . . . . . . . . . . . . . . . . . . . . . . . . . . . 11
EasyPHP administration access . . . . . . . . . . . . . . . . . . . . . . . . . . . . . . . . . . . . . . . . . . . . . 11
EasyPHP administration page . . . . . . . . . . . . . . . . . . . . . . . . . . . . . . . . . . . . . . . . . . . . . . 12
Managing MySQL server . . . . . . . . . . . . . . . . . . . . . . . . . . . . . . . . . . . . . . . . . . . . . . . . . . 12
Importing database scheme . . . . . . . . . . . . . . . . . . . . . . . . . . . . . . . . . . . . . . . . . . . . . . . . 13
Selecting database scheme file . . . . . . . . . . . . . . . . . . . . . . . . . . . . . . . . . . . . . . . . . . . . . 13
Doc ID 023170 Rev 1
3/17
Document and library rules
1
AN4108
Document and library rules
This document uses the conventions described below.
1.1
Acronyms
Table 1 lists the acronyms used in this document.
Table 1.
4/17
List of acronyms
Acronym
Meaning
SSL
Secure socket layer
HTTPS
HyperText transfer protocol over secure socket layer
Doc ID 023170 Rev 1
AN4108
2
EasyPHP installation setup
EasyPHP installation setup
For this reference design, EasyPHP 5.3.2i has been used. This release supports HTTPS
protocol through SSL connection and the MySQL database engine.
First of all, download EasyPHP 5.3.2i, and then double click to start the installation, as
shown in the following screen:
Figure 1.
Select EasyPHP language
Choose the installation language and click “OK”;
Figure 2.
EasyPHP setup welcome screen
Click “Next” on this screen;
Doc ID 023170 Rev 1
5/17
EasyPHP installation setup
Figure 3.
AN4108
EasyPHP license agreement
Select the option “I accept the agreement” and click “Next”;
Figure 4.
EasyPHP information collected
Click “Next” again on this screen;
Figure 5.
6/17
EasyPHP installation directory
Doc ID 023170 Rev 1
AN4108
EasyPHP installation setup
Choose the installation directory and click “Next”;
Figure 6.
EasyPHP start menu shortcut name
Choose the name of the program shortcut on the Start Menu folder and click “Next”;
Figure 7.
EasyPHP installation ready
Finally click on “Install” to complete the installation.
Doc ID 023170 Rev 1
7/17
Set up Apache web server and configure a MySQL database
AN4108
3
Set up Apache web server and configure a MySQL
database
3.1
Apache configuration
When EasyPHP has been installed, go through the Apache configuration on the web server
and the database structure.
Open Apache configuration file “httpd.conf” by right-clicking on the EasyPHP task icon, as
shown below:
Figure 8.
Apache configuration file “httpd.conf”
Follow the next screens in order to configure the Apache web server required for the
company IT infrastructure or home network router configuration.
Locate the corresponding row on the following screen. It is necessary to indicate the IP
address of the web server.
8/17
Doc ID 023170 Rev 1
AN4108
Set up Apache web server and configure a MySQL database
Figure 9.
Apache configuration step 1
Then, look at the following screen and locate the corresponding row. Here it is necessary to
delete the comment symbol “#” in order to enable the SSL module.
Figure 10. Apache configuration step 2
Now, locate the corresponding row on the following screen. This section aims to configure
the server parameters such as e-mail address, server name, listening port, and document
root (where the website is published and the respective access permission).
Doc ID 023170 Rev 1
9/17
Set up Apache web server and configure a MySQL database
AN4108
Figure 11. Apache configuration step 3
After that, it is possible to see, on the following screen, the highlighted code with respect to
the web server and the website directory configuration.
Figure 12. Apache configuration step 4
Finally, look at the following screen and the highlighted code with respect to the website
directory configuration in order to set the folder permission.
10/17
Doc ID 023170 Rev 1
AN4108
Set up Apache web server and configure a MySQL database
Figure 13. Apache configuration step 5
3.2
Database structure definition and configuration
Each time a smartplug node joins the network and its load type is configured through the
GUI interface, it starts reporting power and energy consumption measured values.
This data is received from the coordinator board and routed via Ethernet to the web server
using SSL connection.
The user can browse this data from another PC connecting to the web server and logging in
with a username and password. Then, the user can view the reporting table, export data to
an Excel file, or plot it to graphical charts.
In order to permit all these functions, it is necessary to properly configure a database on the
web server using the MySQL database engine embedded in EasyPHP. For simplicity, an
SQL file containing the database schema is available in the In-Home display with HTTPS
gateway set-up package, and so it just needs to be imported.
Open the EasyPHP administration page, as shown on the following screen:
Figure 14. EasyPHP administration access
Doc ID 023170 Rev 1
11/17
Set up Apache web server and configure a MySQL database
On the following screen click on “Manage MySQL”:
Figure 15. EasyPHP administration page
Then, the following screen is shown:
Figure 16. Managing MySQL server
12/17
Doc ID 023170 Rev 1
AN4108
AN4108
Set up Apache web server and configure a MySQL database
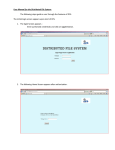
From this screen, first create a new database called “smartplug” by clicking on “Create”.
Then, click on the “Import” tab in order to visualize the following screen from which it is
possible to import the database schema file.
Figure 17. Importing database scheme
Click on “Browse” and select the database schema file, as shown on the following screen:
Figure 18. Selecting database scheme file
Finally, click on “Go” to import the database structure.
Doc ID 023170 Rev 1
13/17
Set up Apache web server and configure a MySQL database
AN4108
At this stage both the Apache web server and MySQL database have been configured. So,
the system is ready to receive and store data coming from the STM3221G-EVAL running
the In-Home display with HTTPS gateway firmware.
14/17
Doc ID 023170 Rev 1
AN4108
4
References
References
1.
AN4049 - application note
2.
UM1065 - user manual
3.
AN3365_Rev1 - application note
4.
UM1519 - user manual
Doc ID 023170 Rev 1
15/17
Revision history
5
AN4108
Revision history
Table 2.
16/17
Document revision history
Date
Revision
25-Sep-2012
1
Changes
Initial release.
Doc ID 023170 Rev 1
AN4108
Please Read Carefully:
Information in this document is provided solely in connection with ST products. STMicroelectronics NV and its subsidiaries (“ST”) reserve the
right to make changes, corrections, modifications or improvements, to this document, and the products and services described herein at any
time, without notice.
All ST products are sold pursuant to ST’s terms and conditions of sale.
Purchasers are solely responsible for the choice, selection and use of the ST products and services described herein, and ST assumes no
liability whatsoever relating to the choice, selection or use of the ST products and services described herein.
No license, express or implied, by estoppel or otherwise, to any intellectual property rights is granted under this document. If any part of this
document refers to any third party products or services it shall not be deemed a license grant by ST for the use of such third party products
or services, or any intellectual property contained therein or considered as a warranty covering the use in any manner whatsoever of such
third party products or services or any intellectual property contained therein.
UNLESS OTHERWISE SET FORTH IN ST’S TERMS AND CONDITIONS OF SALE ST DISCLAIMS ANY EXPRESS OR IMPLIED
WARRANTY WITH RESPECT TO THE USE AND/OR SALE OF ST PRODUCTS INCLUDING WITHOUT LIMITATION IMPLIED
WARRANTIES OF MERCHANTABILITY, FITNESS FOR A PARTICULAR PURPOSE (AND THEIR EQUIVALENTS UNDER THE LAWS
OF ANY JURISDICTION), OR INFRINGEMENT OF ANY PATENT, COPYRIGHT OR OTHER INTELLECTUAL PROPERTY RIGHT.
UNLESS EXPRESSLY APPROVED IN WRITING BY TWO AUTHORIZED ST REPRESENTATIVES, ST PRODUCTS ARE NOT
RECOMMENDED, AUTHORIZED OR WARRANTED FOR USE IN MILITARY, AIR CRAFT, SPACE, LIFE SAVING, OR LIFE SUSTAINING
APPLICATIONS, NOR IN PRODUCTS OR SYSTEMS WHERE FAILURE OR MALFUNCTION MAY RESULT IN PERSONAL INJURY,
DEATH, OR SEVERE PROPERTY OR ENVIRONMENTAL DAMAGE. ST PRODUCTS WHICH ARE NOT SPECIFIED AS "AUTOMOTIVE
GRADE" MAY ONLY BE USED IN AUTOMOTIVE APPLICATIONS AT USER’S OWN RISK.
Resale of ST products with provisions different from the statements and/or technical features set forth in this document shall immediately void
any warranty granted by ST for the ST product or service described herein and shall not create or extend in any manner whatsoever, any
liability of ST.
ST and the ST logo are trademarks or registered trademarks of ST in various countries.
Information in this document supersedes and replaces all information previously supplied.
The ST logo is a registered trademark of STMicroelectronics. All other names are the property of their respective owners.
© 2012 STMicroelectronics - All rights reserved
STMicroelectronics group of companies
Australia - Belgium - Brazil - Canada - China - Czech Republic - Finland - France - Germany - Hong Kong - India - Israel - Italy - Japan Malaysia - Malta - Morocco - Philippines - Singapore - Spain - Sweden - Switzerland - United Kingdom - United States of America
www.st.com
Doc ID 023170 Rev 1
17/17


