1
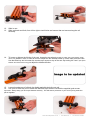
26.
Connect the cable to a 12V battery*.
27.
Now you’re ready to fire away! Just remember to connect your camera too ;-)
* item not included
CONNECTING THE EXTENSION PEICES
for SCYO DOLLY extension kit
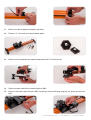
28.
29.
30.
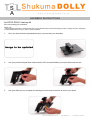
Carefully slide in the four extension connectors on the two outer grooves (top and bottom). Make sure
you align the rails perfectly to join it straight and smooth.
Ensure that the two grub-screws closest to each other on each extension connector, lines up in the
centre where the two rails are joined.
Use your Allen-key tool to tighten the grub-screws firmly.
Mobile:
Tel:
FAX:
E-mail:
Web:
Twitter:
Vimeo:
+27 (0)82 331 4438
+27 (0)12 807 6771
086 571 7734 (SA Only)
[email protected]
www.timelapsesa.co.za
Follow me
Join me
TIMELAPSE SA
Motion controlled dollies and timelapse photography
www.timelapsesa.co.za
|
[email protected]
|
+27 82 331 4438