1
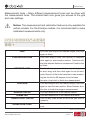
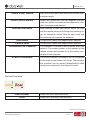
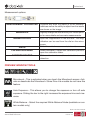
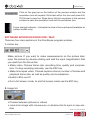
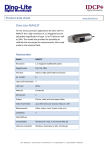
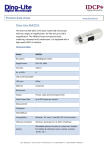
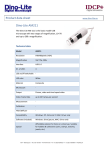
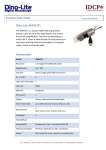
Switzerland
Dino-Lite
digital microscope
User Manual
EN - User Manual
www.ideal-tek.com
Switzerland
CONRAD ARTICLE CODE
MODEL
CONRAD ARTICLE CODE
MODEL
1284397
AD4113ZT
1284413
AM4116ZT
1284406
AM2111
1284414
AM4023X
1284407
AM3113T
1284415
AM4515ZT
1284408
AM4112PZT
1284416
AM4815ZT
1284409
AM4113T5
1284417
AM7013MZT
1284410
AM4113TL
1284418
AM7023
1284411
AM4113ZT
1284419
MS35B
1284412
AM4115ZT
www.ideal-tek.com
2
Switzerland
ENGLISH
Thank you for purchasing a Dino-Lite microscope. The DinoCapture software
is designed to give you the best possible digital microscopy experience by
the inventors of the handheld digital microscope.
The DinoCapture software runs on computers with a Windows XP, Windows
Vista or Windows 7/8 operating system.
The DinoXcope software is designed to work with Apple Macintosh OS.
IMPORTANT SAFETY INFORMATION
• Avoid touching the lens with finger to protect the product from electrostatic damage
• Do not drop
• Keep dry
INDEX
Software installation 4
Software interface DinoCapture / Windows 6
Software interface DinoXcope / Mac 12
Cleaning and maintenance, warranty, support 13
Dino-Lite User manual
www.ideal-tek.com
ENGLISH
3
Switzerland
SOFTWARE INSTALLATION
The DinoCapture and DinoXcope software is licensed from Anmo Electronics
Corporation and is subject to an End User License Agreement (EULA) that
users will have to accept during the installation process.
Important notice: DO NOT connect the USB cable of the Dino-Lite
to the PC before installing the software.
1. Use the CD delivered with your Dino-Lite to install the DinoCapture and
DinoXcope software and drivers. Alternatively, download and run the latest version of the software from the download section of the website:
www.dino-lite.com.
2. Click ‘Next’ and the Installshield wizard will start. (An ‘Open File-security
warning’ may appear on some systems. Select ‘Run’ or ‘YES’). Choose
the language you want for the DinoCapture 2.0 interface.
3. Read the User License Agreement. If you agree, press ‘Yes’ to continue or
press ‘No’ to stop the installation.
4. Select a destination folder for the DinoCapture software. When done,
press ‘Next’. Click ‘Install’ to start installing the software. If the Windows
security warning message appears, click ‘Install this driver software anyway’.
5. When the installation is complete, selecting ‘Finish’ completes the software installation.
6. The DinoCapture software has an auto-update feature that will check for
software updates when you start DinoCapture.
7. A full manual can be found in the help function of DinoCapture, as a pdf
on the CD.
HARDWARE INSTALLATION
1. After full installation of the DinoCapture software and driver package,
connect the Dino-Lite to one of the USB ports of your computer.
Dino-Lite User manual
www.ideal-tek.com
ENGLISH
4
Switzerland
2. Please use a USB 2.0 port that is fully powered. Some USB ports on portable computers do not supply sufficient power.
3. The driver will be automatically installed. Please WAIT until the notification appears: ‘Device driver software installed successfully’.
4. Now start DinoCapture 2.0 by double clicking on the desktop icon.
5. The LED lights should go on and an image should appear in DinoCapture.
HARDWARE FEATURES
1. At the center of the device, the adjustable dial is used to set the focus.
The focus of the image depends on the distance to the object. Once you
have focused on the object, you can read the magnification rate achieved
from the number next to the symbol.
2. The models in the AM/AD 411X series feature a magnification lock. The
magnification lock is particularly useful for repetitive inspection at a given
level of magnification.
3. Dino-Lite models with the letter T in their product name have a Microtouch function at the cable end of the device. Touching this sensor will
capture the current image or start/stop video recording (for usb-devices). On the Dino-Lite high speed real time models the Microtouch sensor
can be used to switch the LEDs on/off (all models) or freeze the image
(AM5116 models only).
4. Models with the letter Z in their product name have a polarization function, that can be controlled by turning the adjustable cap.
5. Models with the letter L operate at a longer working distance. These models only achieve focus at some distance from the object.
6. The AD and Edge models have exchangeable front covers/caps. Align the
red lines on cap and frontend of the Dino-Lite to remove or place the cap,
then turn the cap 180 degrees. Some caps are designed to be clicked
onto the microscope. In this case, there is no red line on the cap.
7. The DinoEye models are designed as a replacement of the existing ocular
of a traditional microscope. The U model is intended to be placed over
Dino-Lite User manual
www.ideal-tek.com
ENGLISH
5
Switzerland
an existing ocular and the C model is intended to be connected to a Cmount adapter on a suitable microscope or optical device.
8. Models with the letters TW have the macro zoom function.
SOFTWARE INTERFACE DINOCAPTURE / WINDOWS
There are five key sections in the DinoCapture software:
1. MENU BAR
2. IMAGE LIST TOOLS
3. PREVIEW WINDOW MANAGEMENT BAR
4. TOOL BAR
5. PREVIEW WINDOW TOOLS
MENU BAR
Folder – create folders or access existing folders.
Files – manage files, such as open, copy, save, print or delete as well as
send as e-mail or create slide show.
Settings – customize the way the software operates such as:
• Showing or hiding elements on the screen
• The properties for measurements
• The way the Microtouch or foot pedal (if attached) work
• Accessing the Motorized focus accessory settings
• Connecting over IP
• Bar code recognition function
• External GPS
• Auto update function
Help – access the full user guide on screen, or read DinoCapture 2.0 information or the license agreement.
Dino-Lite User manual
www.ideal-tek.com
ENGLISH
6
Switzerland
IMAGE LIST TOOLS
Open – open a picture selected from the image thumbnail gallery below the
image list tool bar.
Copy – copy a selected picture to the windows clipboard.
Save as – save selected picture(s) to the desired file format or folder.
E-mail – attach the selected picture(s) to a new message opened in your
default e-mail client.
Print – print the selected picture.
Slideshow – run a slideshow of the selected pictures.
Delete – clean up the image thumbnail gallery by deleting the selected
picture(s).
PREVIEW WINDOW MANAGEMENT BAR
This window enables you to switch between windows if two or more DinoLite’s are connected at the same time or multiple pictures are opened.
TOOL BAR
The tool bar is divided into four parts:
Draw tools – The draw tool set allows you to write text and draw on the images. The bar is located below the preview window management bar.
Dino-Lite User manual
www.ideal-tek.com
ENGLISH
7
Switzerland
Measurement tools – Many different measurement types can be done with
the measurement tools. The double flash icon gives you access to the grid
and ruler settings.
Notice: The measurement and calibration feature is only available for
certain models. For the DinoEye models, it is recommended to make
calibrated measurements only.
LINE
Left click and drag to the desired length, and click
again to finish.
CONTINUOUS LINE
Click and drag to form one section of distance,
click again to start another section. Continue until
the total desired distance is measured. Double click
to finish.
POINT TO LINE
Create a line to represent the base by clicking once
to start, drag, and then click again to set the endpoint. Branch off from the base line to start measuring the line that is 90 degrees from the base
line and a final click to finish the measurement.
POLYGON
Click and drag to form the desired length, and click
again to start the next section. When finished, double click to finish the polygon measurement.
RADIUS CIRCLE
DIAMETER
THREE POINT CIRCLE
Click and extend out to the desired radius.
Click and extend out to the desired dia-meter.
Click on any three points on the circle you wish to
measure.
THREE POINT ARC
Click on three consecutive points on an arc to measure.
Dino-Lite User manual
www.ideal-tek.com
ENGLISH
8
Switzerland
THREE POINT ANGLE
Start at the pivot point and extend out to start measuring an angle.
FOUR POINTS ANGLE
Select two points from one line segment and another two points from another line segment to complete the angle measurement.
CENTER DISTANCE
After drawing at least two circles, select the icon
and the mouse pointer will change to a pointing finger for selectable circles. Click on each circle and
the software will measure the distance.
GRIDLINES
The pitch will match the magnification inputted.
CIRCLE GRID
The pitch will match the magnification inputted.
CROSSHAIR ON CAMERA
The crosshair XY position can be moved when you
select it. The cursor position is the location of the
mouse pointer and location 0,0 is the center coordinates of the crosshair.
SCALE CROSSHAIR
The scale crosshair increments can be compared
to the scale on the bottom left corner. The centre of
the crosshair can be moved. (Magnification value
needs to be entered for this feature to work).
Text and line tools
LINE FORMAT
FONT
Select line color, style and width
Select font, font style, size and color
Dino-Lite User manual
www.ideal-tek.com
ENGLISH
9
Switzerland
Measurement options
MEASUREMENT PROPERTIES
Organize and show the status of all the measurements as well as the ability to adjust how the results
are shown on the image.
MAGNIFIER
Digitally enlarge the area around your mouse pointer for more details and accurate measurements.
MAGNIFICATION
Input the magnification in the blue box. The magnification can be read from the dial on the microscope.
UNITS
Select the unit of measurement, inch, mil, m or um.
CALIBRATION MENU
Select calibration, create new calibration profile or
open the calibration folder.
BARCODE READER
Click on the icon to enable and disable barcode
detection.
PREVIEW WINDOW TOOLS
Microtouch - This is activated when you touch the Microtouch sensor. Activate or deactivate the Microtouch. Some Dino-Lite models do not have this
feature.
Auto Exposure – This allows you to change the exposure or turn off auto
exposure. Sliding the bar to the right increases the exposure time and viceversa.
White Balance - Select the required White Balance Mode (available on certain models only)
Dino-Lite User manual
www.ideal-tek.com
ENGLISH
10
Switzerland
LED control - Lets you turn ON/OFF or switch LED’s on the Dino-Lite (most
models).
Setting - The setting window allows you to control the camera settings.
Maximize - Lets you see the live video or picture in full screen. To exit full
screen mode, click anywhere on the screen or press “ESC”.
Close window - Allows you to close the current window
Snapshot - Take a picture.
Video recorder - Start/stop recording of a video
Time-Lapsed Video - Create a series of images or videos taken at a regular
time interval.
EDR - Save a picture using Extended Dynamic Range (EDR)
EDOF - Save a picture using EDOF (Extended Depth of Field)
Choose the resolution for the image. Please note that an additional
Codec may be required to display 5 megapixel resolution.
Choose the folder where images/videos will be stored
Dino-Lite User manual
www.ideal-tek.com
ENGLISH
11
Switzerland
Click on the grey bar on the bottom of the preview window and the
annotation box will expand. Write text within this box and press ENTER to start a new line. When done, left click anywhere in the preview
window to save the annotation and exit the annotation box.
Focus strength indicator - Indicates the level of focus achieved (available on
certain models only)
SOFTWARE INTERFACE DINOXCOPE / MAC
There are four main sections in the DinoXcope program window:
1. Action bar
Make picture. If you want to make measurements on the picture later,
open the picture by double clicking and add the input magnification that
you read from the focus dial.
• Make video. Choose frame rate, recording time, quality and compression. To stop recording manually, use the ESC key
• Make time lapse video. Choose capture interval, number of frames and
playback frame rate, as well as quality and compression.
• Switch LED’s on/off
• Go to full screen mode, to end full screen mode use the ESC key
2. Image list
• Choose between pictures or videos
• Look at an image with mouse-over, or double-click to open in new window
Dino-Lite User manual
www.ideal-tek.com
ENGLISH
12
Switzerland
3. Live image
• Use the action bar for the action that you want to perform
• Use the Controls menu (the menu bar is on top of the screen) to change
settings, use (digital) zoom, freeze the image, change the resolution or
change the functioning of the Microtouch button.
• Use the Live measurement function (in the Tools menu) to open a special
selection window for drawing and measurement tools. After selection,
click okay and use the tool on the live image.
4. Open image
• If you open a stored image, you will see a menu bar above it, that allows
you to choose saving, drawing and measurement tools.
CLEANING AND MAINTENANCE
Avoid touching the lens with any substance. Clean the lens periodically with
compressed air. Clean the body of the microscope regularly with a soft cloth
dampened with disinfectant. Clean the detachable caps with a 50%-70%
alcohol solution, do not use diethyl ether, 100% alcohol or alcohol gel.
Dino-Lite User manual
www.ideal-tek.com
ENGLISH
13
Switzerland
WARRANTY
The DinoCapture software is provided for use with a Dino-Lite digital microscope supplied by AnMo Electronics or one of its distributors or resellers. The use of the DinoCapture software is guided by the End User License
Agreement. The Dino-Lite product is delivered with a two year warranty from
the date of purchase by the end customer. Please note that accessories (i.e.
detachable caps/extensions) are not covered under warranty. For warranty
issues please contact the reseller or store where you bought the product.
SUPPORT
If you have any problem or issue with your Dino-Lite or the DinoCapture software, please contact your reseller. An extensive user manual for DinoCapture
can be found within the software.
Dino-Lite User manual
www.ideal-tek.com
ENGLISH
14