Download Introduction to MicroObservatory
Transcript
B E YO N D T H E S O L A R SY ST E M
Expanding the Universe in the Classroom
INTRODUCTION TO ONLINE TELESCOPES TEACHER GUIDE
TELESCOPE ACTIVITY
O V ERV I E W
You and your students are about to control a powerful astronomical
telescope from the convenience of your classroom. This wonderful new
technology has made possible a revolution in astronomy education. No longer does astronomy
require shivering in the cold while standing in line for a ten-second glimpse through a telescope.
Now, students can be actively involved in posing questions, designing investigations, gathering
evidence, and interpreting their own results as they explore the universe.
A B O U T M I C R O O B S E R VATO RY
MicroObservatory is a network of automated telescopes that can be controlled over the
Internet. The telescopes were developed at the Harvard-Smithsonian Center for Astrophysics and
were designed to enable youth nationwide to investigate the wonders of the deep sky from their
classrooms or after-school centers. They are located and maintained at observatories affiliated
with the Center for Astrophysics, including locations in Cambridge, MA and Amado, AZ.
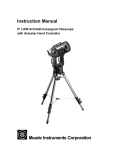
The network is composed of several 3-foot-tall reflecting telescopes, each of which has a
6-inch mirror to capture the light from distant objects in space. Instead of an eyepiece, the
MicroObservatory telescopes focus the collected light onto a CCD detector (an electronic chip
like that in a digital camera) that records the image as a picture file with 650 x 500 pixels.
Students and teachers control the MicroObservatory telescopes and download their images
themselves, with no human intervention in the loop. Students reserve telescope time, check
weather, choose targets, select exposure times, color filters and other parameters. Normally,
users access the telescope site anytime during the day and request that an image be taken that
night. Students thus control the instrument as needed, without dependence on a telescope
operator or other outside “experts.”
The MicroObservatory telescope activities included on the Beyond the Solar System DVD were
adapted from the From the Ground Up! curriculum. Composed of a modular series of seven
telescope investigations, From the Ground Up! was developed by the Harvard-Smithsonian
Center for Astrophysics, and was supported by the National Science Foundation under Grant
No. 9730351. Additional support was provided by the National Aeronautics and Space
Administration, Harvard University, and the Smithsonian Institution. You can find out more
about the entire From the Ground Up! project at this URL:
http://cfa-www.harvard.edu/webscope/
Introduction to Online Telescopes Teacher Guide
© Smithsonian Institution.
Page 01 of 11
B E YO N D T H E S O L A R SY ST E M
Expanding the Universe in the Classroom
F E AT U R E S O F O N L I N E T E L E S CO P E E X P L O R AT I O N S
The activities included on this DVD emphasize several important characteristics:
• Investigations are authentic and open-ended
Each investigation is motivated by an open-ended question that makes contact
with both the student’s curiosity and the cutting edge of science. Students are
able to see how the basic concepts of science can be applied to solving real
questions of interest.
• Qualitative and quantitative approach
The activities have both a qualitative and a quantitative part. This makes the
activities adaptable to classrooms where students may be relatively unprepared in
mathematics. The quantitative portions of the activities offer opportunities for
applying simple proportions, geometry, and graphing.
• Opportunities for reflection and interpretation
Science is not a collection of disconnected facts. It is a dynamic process that begins
in curiosity and continues with a search for meaning. The “Portrait of the Universe”
and “Measuring Galaxies” activities are designed to allow time for students to
reflect on what and why they are investigating, and to interpret their results in a
context meaningful to them.
• Focus on inquiry skills
It is often said that you have to do science in order to learn science. However, a
major challenge in the classroom is to focus on those inquiry skills that will be of
lasting importance. Learning to use software that may not even exist in a year or
two is not as important as learning how to design an investigation, or how to estimate,
or how to interpret results. These online telescope activities seek to minimize routine
work, allowing more time for the teacher to focus on higher priorities.
• Independent student projects
Because the MicroObservatory telescopes and image archives are easily accessible,
there are many opportunities for additional student projects. Once students have
gained familiarity with how to use the telescopes and how to work with their images,
the sky is the limit for independent student projects.
U S I N G O N L I N E T E L E S CO P E S I N YO U R C L A S S R O O M
Based on workshops with teachers who have used the telescopes and activities, we recommend
the following general approach to using the MicroObservatory telescopes:
Model the use of the telescopes with students first. If you have a video projector and Internet
access in your classroom, it is ideal to demonstrate with students how to access the telescopes
and download images.
Introduction to Online Telescopes Teacher Guide
© Smithsonian Institution.
Page 02 of 11
B E YO N D T H E S O L A R SY ST E M
Expanding the Universe in the Classroom
Have students work in teams. The activities recommend that students work in teams of from
three to six. This minimizes the number of images that must be taken, and allows students to
discuss ideas important to the investigation.
Allow time for students to predict, plan, and reflect. These are integral parts of the activities.
Manage students’ projects. Make certain that students understand how to use the telescopes
before they begin independent student projects. Otherwise, you will be overwhelmed by
individual questions from the students once they begin.
Relate the projects to students. The activities use English units, rather than metric units.
Because many of the ideas about the universe may be new and unfamiliar to students, the
developers chose to use units more familiar to students, so that ideas of size and scale are
easier to grasp. Metric units are used in a few isolated instances where they are essential.
G E T T I N G R E A DY TO U S E T H E AC T I V I T I E S
Follow these easy steps and you'll be ready to use the MicroObservatory telescope activities.
What you'll need
Here is the minimum that you’ll need to get started. Additional materials that may be useful
are listed in the Teacher’s Guide for each activity.
• Computer(s) with access to Internet
• Web browser, such as Netscape or Explorer, installed
• Printer (black-and-white)
• Image-processing software (see download instructions below).
Gaining access to the telescopes
There are two modes of access to the MicroObservatory telescopes:
1. The Guest Observer Portal is freely available to anyone with a valid email address
at this URL: http://www.microobservatory.org/
(We recommend this access for users of the Beyond the Solar System DVD.)
2. The Full Access Telescope Control Center is available on a limited basis through
classroom user accounts obtainable by application. To apply for a Full Access guest
observer account, you must submit a proposal at the following URL:
http://mo-www.harvard.edu/MicroObservatory/Enroll
(This mode of access to the MicroObservatory telescopes allows for more individual
control of the telescope parameters, but also requires more time and effort for students
and teachers to achieve successful observing results. Users whose proposals are
Introduction to Online Telescopes Teacher Guide
© Smithsonian Institution.
Page 03 of 11
B E YO N D T H E S O L A R SY ST E M
Expanding the Universe in the Classroom
approved will receive an access code with instructions by email.)
Download the image-processing program, MOImage
For most of the activities, students will need to use image-processing software. The
MicroObservatory Image Processing Software (MOImage) can be downloaded directly
from this web site:
http://mo-www.harvard.edu/MicroObservatoryImage
Follow the instructions that come with the download. Install the software on the computers
that students will be using when they work on their projects. A link to download the MOImage
User Manual is also available at the website above.
Set aside room on the computer
Students will be downloading many images from the telescope. Decide ahead of time how you
would like students to store these files on the classroom computers. For example, you may
want to set up one or more folders to keep students' work separate from other projects that
share space on the computer.
Try out the telescope and activities yourself
Before using MicroObservatory with your students, make sure that you have successfully taken
images with the telescope, and have tried or examined each activity.
You may wish to print out separate copies of the next several pages for you and your students
to refer to when you first begin using the telescopes.
TA K I N G A N I M AG E
It's easy to use the MicroObservatory telescopes over the World Wide Web. Just follow the
steps below. Steps that are only relevant to users with passwords for Full Access accounts
are indicated.
Important general information
You control the telescope yourself, with no human intervention in the loop. Therefore you must
tell the telescope when and how you want it to take an image. Normally, you access the telescope
site anytime during the day and request that your image be taken that night; to do this you
must go to the Guest Observer Portal (http://www.microobservatory.org), or sign up for one
of the three-minute slots allotted per image (Full Access users only).
Introduction to Online Telescopes Teacher Guide
© Smithsonian Institution.
Page 04 of 11
B E YO N D T H E S O L A R SY ST E M
Expanding the Universe in the Classroom
Full Access users may also control the telescope “live,” but only during the day i.e., from 6
a.m. to 6 p.m. as measured at the telescope site. Among the objects you can see during the
day is the Moon, provided it is above the horizon at that time.
After the telescope takes an image, it e-mails you an alert that your image is ready. The e-mail
contains links to where your image is posted on the Web in the MicroObservatory Image
Directory.
Every image posted on the Web also has a link to an “Info” page that contains information
about the image, including the exact time it was taken, the location of the telescope, exposure
time, etc. The image remains on the Web for one week, and is then deleted. If you wish to keep
your image, you should download it from the Web as soon as possible.
Information you'll be asked for
Before you control the telescope, have the answers to the following questions handy:
• What celestial object do I want to image?
• Which telescope do I want to control? (Full Access users)
• What is my username and password?
(Full Access users; Guest Observer Portal users need only an email address)
• Will I need the coordinates of the object, or will I use the pull-down menu?
(Full Access users)
• When do I want the telescope to take an image? (Images for Guest Observer Portal
users will be taken the night of their request; Full Access users must specify time)
You will be asked for several other parameters, described below.
Access and bookmark the MicroObservatory website
To access the MicroObservatory Guest Observer Portal, go to this Web address:
http://www.microobservatory.org/
Each highlighted Guest Observer Activity offers a different selection of telescope targets from
which to choose, and will guide you through choosing appropriate telescope settings. You may
be asked to choose an exposure time between 0.1 and 60 seconds. The recommended exposure
times for various targets are listed in the Beyond the Solar System activities.
Special Instructions for Full Access Users
(Guest Observer Portal users should skip to the section “Retrieving Images,” below.)
Introduction to Online Telescopes Teacher Guide
© Smithsonian Institution.
Page 05 of 11
B E YO N D T H E S O L A R SY ST E M
Expanding the Universe in the Classroom
Users with Full Access telescope accounts should bookmark the Telescope Control Center:
http://mo-www.harvard.edu/MicroObservatory/ControlCenter
• Check the weather and forecast
You MUST check the weather and forecast at a particular telescope site, before
using that telescope. Simply click on the name of the city where you would like to
use the telescope. A weather map will appear.
• Check the telescope queue
Telescope time is allotted in 3-minute increments. To check whether the time slots
you have in mind are already taken, you can view the telescope queue: Just click on
the telescope you want to use to see the queue.
• Select a telescope on the world map
To select a telescope, just find the site you’d like to access (red dots on the world
map), and click on the red dot. The control panel for that telescope will appear on
your screen.
• Enter your username and password
The username and passwords for you and your students are determined when you
register online to use the telescopes. If you haven’t already enrolled, see “Gaining
access to the telescopes,” above.
• Enter the time you'd like to take an image
To have the telescope take an image at night, select “AM” or “PM,” then use the
pull-down menu to select a time for taking the image. If the time slot is already
taken, the telescope will alert you when you try to take an image.
To take an image during the day (between 6 a.m. and 6 p.m. at the telescope’s site),
you do not have to enter a time. The telescope will take an image as soon as you
send the request. Use this mode if you need to image the Moon when it is above the
horizon during the day.
• Tell the telescope where to point
To observe the Moon, planets, and other popular targets use the handy list: Select
the button “Using list” and then select your target on the list.
To image a target not on the list: Select “Using coordinates” and then enter the
coordinates of your target. All activities in the original From the Ground Up
curriculum list the coordinates of the targets you will need. These coordinates are
the “zip code” of your celestial object on the sky.
The coordinates of a celestial object are written as “Right Ascension” and
“Declination.” Right Ascension (R.A.) is measured in hours and minutes.
(Example: 13 hr 27.5 min). The Declination (Dec) is measured in degrees
and minutes. (Example: -12 deg 14 min). These sky coordinates are similar
to the latitude and longitude coordinates that specify a location on Earth. To
learn more about them, consult any astronomy text or the World Wide Web.
Introduction to Online Telescopes Teacher Guide
© Smithsonian Institution.
Page 06 of 11
B E YO N D T H E S O L A R SY ST E M
Expanding the Universe in the Classroom
• Enter the name of your target
Be sure to enter the name of your target. This will help you find your image when it
is listed in the Image Directory.
• Select “main camera” or “finder camera”
You will normally use the telescope's main camera, which has a field of view of
almost one degree. On occasion you may need to use the finder scope, which has a
field of view of about ten degrees.
• Enter exposure time
You may use any exposure time between 0.1 and 60 seconds. The recommended
exposure time for various targets is listed in the From the Ground Up activities.
• Select a filter
The default selection is “clear filter” which is no filter at all.
For very bright objects such as the Moon, you must use a grey filter
(called a “neutral density” filter). This filter reduces the light that reaches the
camera by a factor of 104(10,000).
The color filters are generally used to reconstruct color images.
• Select “zoom in” or “zoom out”
Normally you should use “zoom out,” which is the default setting. Use “zoom in”
only when trying to image a very small object such as the rings of Saturn or the
Ring Nebula. A zoomed-out image will generally appear sharper than a zoomed-in
image. The zoom settings do not actually change the magnification that the telescope
uses. Regardless of the setting, the telescope takes an image that is 1300 pixels wide
by 1000 pixels high—too much information to return to the user. If you select “zoom
in,” the telescope returns just the center of the image, 650 pixels by 500 pixels; each
pixel represents 2.5 arc-seconds in the field of view. If you select “zoom out,” the
telescope sends the whole image, but compressed to 650 pixels by 500 pixels; each pixel
represents 5 arc-seconds in the field of view. (One arc-second is 1/3600th of a degree.)
• Ignore the focus commands
The telescope focuses automatically. The default focus always produces the sharpest
image. Manual focus is used only for specialized experiments that require the
telescope to be unfocused.
• Select the “take picture” button when ready
After you select this button, the server tells the telescope to take an image at the
time you selected. A screen will automatically appear to confirm your request. If
you have forgotten any required information, the screen will prompt you to re-enter
it. Note: On some browsers, you will have to re-enter all the information again, or at
least your username and password. Take your time when entering your request; it
will save time in the long run.
Introduction to Online Telescopes Teacher Guide
© Smithsonian Institution.
Page 07 of 11
B E YO N D T H E S O L A R SY ST E M
Expanding the Universe in the Classroom
R E T R I E V I N G YO U R I M AG E S
After the telescope takes your image, it will e-mail your account to alert you. Depending on
your e-mail utility, you may be able to access your image directly from your e-mail, by clicking
on the link to your specific image file, which you will see listed. Alternatively, you can copy and
paste the URL from your email message into your web browser.
Retrieving Others Users’ Images
You and your students can also look at (and download) the images taken by all other
MicroObservatory users:
Access the Image Directory page
All recent images taken by the MicroObservatory telescopes are automatically posted on the
website’s Image Directory page, at this URL:
http://mo-www.harvard.edu/jsp/servlet/MO.ID.ImageDirectory
(You can also go to the main MicroObservatory Home Page, at http://mo-www.harvard.edu/
and click on “Get Images.”)
The images you will see listed are those taken within the last 7 to 14 days. There is also a link
to the “Image Archive Directory,” which contains hundreds of past images taken by other
users and filed by category.
Find a specific image file
The image files for all users are listed in the order of when they were taken (most recent
images at the top). To help find a specific image, you can sort the list by username, name of
target, or date taken. To sort the list, click on the appropriate column heading above the list.
Examine your image: Important information
When you find your image, download it immediately to your computer. (Follow the instructions
below.) ALL IMAGES ARE DELETED FROM THE WEBSITE WITHIN 7 DAYS AFTER
THEY ARE TAKEN. Once deleted, they cannot be retrieved.
The MicroObservatory website stores two different versions of your image. The main link to
your image file allows you to view the GIF-format version of your image in your browser. This
version will be satisfactory for images of the Moon, planets, or other very bright objects.
For fainter objects such as galaxies and nebulae, you should download the high-quality FITSformat version of your image. The FITS-format contains all the original information in your
image—more than you can see in the GIF-format version. You should always use the FITSformat image if you plan to process your image, or make measurements from the digital file.
Introduction to Online Telescopes Teacher Guide
© Smithsonian Institution.
Page 08 of 11
B E YO N D T H E S O L A R SY ST E M
Expanding the Universe in the Classroom
The FITS-format images cannot be viewed in your web browser. They must be downloaded
and opened in an application that allows you to view FITS-format images, such as the free,
MicroObservatory Image Processing Software (see instructions below). You may also use the
application Graphic Converter, or other suitable FITS-viewers, if you have them. Adobe
Photoshop does not support viewing FITS-format images.
View the image thumbnail and Image Info page
Every MicroObservatory image is accompanied by a link to its “Image Info” page. Click on
this link to see a small thumbnail of your image, along with all the information about how and
when your image was taken. For some of the telescope activities, you will need to know when
the image was taken, or what telescope settings were used, or what the exposure time was. It
is good practice to print or download this information window when you retrieve your images.
Download your image
For bright images, such as the Moon or Jupiter and its moons, it may be fine to simply
download the GIF-format image that you see in your browser. Do this download as you would
any image in your browser. (Click on the image and hold until the menu appears...)
For fainter objects, or to process the image, you will need to download the original image in its
original FITS-format. To do this, click and hold on the FITS image link at the top of the web
page. The directions for saving files using the common computers and Internet browsers are:
Macintosh - Internet Explorer
• Hold mouse button down.
• Select “Download Link to Disk”
Macintosh - Netscape
• Hold mouse button down.
• Select “Save Link Target as...”
• Make sure to choose Source as the Format when saving the file.
PC (Windows) - Internet Explorer
• Hold right mouse button down.
• Select “Save Target As...”
PC (Windows) - Netscape
• You CANNOT save FITS files with Netscape on the PC.
You can view your FITS images using the MOImage processing program, described below.
Introduction to Online Telescopes Teacher Guide
© Smithsonian Institution.
Page 09 of 11
B E YO N D T H E S O L A R SY ST E M
Expanding the Universe in the Classroom
Save and name your image file
The name of your image file contains the first few characters of the name of the target,
followed by a string of 12 digits that tell you exactly when the image was taken (mo da yr hr
min sec). The time the image was taken is given as Greenwich Mean Time, which is typically 5
hours ahead of Eastern Standard Time.
You can keep this long filename or, if you prefer, you can rename your image. Make sure you
have saved all the information you will need later.
P R O C E S S I N G YO U R I M AG E S
For images of very bright objects (such as the Moon or the planet Jupiter) you can usually
work directly with the GIF image that appears in your browser window.
However, many faint celestial objects (such as galaxies and nebulae) have very low contrast.
You may have difficulty even seeing these objects when you look at the image that appears in
your browser. To enhance these images and bring out the fine details, you must first download the
FITS-format version of the image to your computer, and then use an image-processing program.
The image that appears in your browser is called a GIF-format image. This is an “8-bit”
image, meaning that it is made up of dots each of which can have one of 28, or 256, different
grey-levels, ranging from white to black.
The FITS-format image, which you can download to your computer, is the original image that
comes back from the telescope. It is a “12-bit” image, meaning that each dot in the image can
have any one of 212, or 4096, grey levels. The original FITS-format image therefore contains
much more information—that is, more subtle details—than the GIF-format image you see in
your browser. A FITS (Flexible Image Transport System) file is a special high-quality image
format that astronomers use.
The MicroObservatory Image software enables you to:
• enhance the brightness and contrast of your image
• use different color palettes to colorize the different levels of black,
white and gray
• measure the angular width of an object
• measure the brightness of an object in your image
• create a digital movie from individual images
• create a full-color image from three images taken through color filters
The program is available for download at:
http://mo-www.harvard.edu/MicroObservatoryImage
Introduction to Online Telescopes Teacher Guide
© Smithsonian Institution.
Page 10 of 11
B E YO N D T H E S O L A R SY ST E M
Expanding the Universe in the Classroom
To use the program, follow the instructions in each of the Beyond the Solar System activities,
or refer to the Users Manual, downloadable from the main MicroObservatory Home Page.
P R I N T I N G YO U R I M AG E S
When you print your images, use the landscape format rather than portrait format (i.e.,
horizontal rather than vertical). Make sure that you print your images at full scale (100%).
Astronomical images usually have black backgrounds that can use up your printer’s toner ink.
If this is a problem, a handy solution is to invert your image before printing it. By printing
black against a white background, you will save your toner and also bring out finer details in
your object. You can invert your image using MOImage or similar image-processing program.
Simply find the appropriate menu and choose Invert.
ADDITIONAL RESOURCES
On This DVD
The activities “Portrait of the Universe” and “Measuring Galaxies” in the
“Resources” section of this DVD use images taken with the online telescopes.
The “Classroom Footage” section of this DVD provides an example of how
MicroObservatory images can be used in the classroom.
Other Resources
From the Ground Up! Curriculum:
http://cfa-www.harvard.edu/webscope
MicroObservatory Guest Observer Portal:
http://www.microobservatory.org
MicroObservatory Image Processing Software:
http://mo-www.harvard.edu/MicroObservatoryImage
MicroObservatory Image Archive:
http://mo-www.harvard.edu/jsp/servlet/MO.ID.ImageDirectory
Main MicroObservatory Home Page:
http://mo-www.cfa.harvard.edu/MicroObservatory/
“Telescopes from the Ground Up” from NASA:
http://amazing-space.stsci.edu/resources/explorations/groundup/
This printed material accompanies the Beyond the Solar System DVD, a professional development resource for educators teaching
the Origin and Evolution of the Universe earth and space science standards. Funded by NASA, the DVD was produced by the
Harvard-Smithsonian Center for Astrophysics, and is distributed courtesy of the NASA-Smithsonian Universe Education Forum.
Introduction to Online Telescopes Teacher Guide
© Smithsonian Institution.
Page 11 of 11


