1
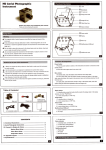
WIRELESS MODULE
USER’S & INSTALLER’S MANUAL
AGRI-ALERT WIRELESS MODULE
AGRI-ALERT WIRELESS MODULE
Manufacturer:
Viatron Electronics
5200, Armand-Frappier
St-Hubert (Quebec)
Canada
J3Z 1G5
WARNINGS
The warranty can be void if this product is used in a manner not specified by the manufacturer.
Every effort has been made to ensure that this manual is complete, accurate and up-to-date. The
information contained in it is however subject to change without notice due to further developments.
2
AGRI-ALERT WIRELESS MODULE rev.03
AGRI-ALERT WIRELESS MODULE
Table of Contents
1. System Overview ................................................................................ 4
1.1 Typical Site .................................................................................... 5
1.2 Typical Installation .......................................................................... 6
2
Connecting the Equipment .................................................................... 7
2.1 Supply Inputs .................................................................................. 7
2.1.1 Master Wireless Module .......................................................... 7
2.1.2 Auxiliary Wireless Modules ...................................................... 8
2.1.2.1 Battery Connection ............................................................................. 8
2.1.2.2 Transformer Connection ...................................................................... 8
2.2 Connecting the Earth Ground ............................................................ 9
3
Serial Bus Interface (SBI) Connections .................................................. 10
3.1 Connecting Devices to the Wireless module ..................................... 10
3.2 End of Line Jumpers ...................................................................... 10
4
Installation ........................................................................................ 11
4.1 Mounting Instructions .................................................................... 11
4.2 Antenna Installation ...................................................................... 12
4.2.1 Antenna Mounting Instructions ............................................... 12
4.2.2 Antenna Placement .............................................................. 14
4.2.2.1 Recommended Placement ................................................................... 14
4.2.2.2 Antenna Height ................................................................................. 15
4.2.2.3 Choosing the Mounting Location ........................................................... 16
4.2.3 Verifying the Received Signal Strength Indicator (RSSI) ............. 18
4.2.3.1 Verifying the Signal on the Auxiliary Wireless Module ............................... 18
4.2.3.2 Verifying the Signal on the Agri-Alert 9600 ........................................... 19
5
Controller’s Operation ........................................................................ 20
5.1 Status LEDs ................................................................................. 20
6
Troubleshooting ................................................................................. 21
7
Technical Specifications ..................................................................... 22
8
Wiring Diagram ................................................................................. 24
8.1 Master Wireless Module Powered by an Agri-Alert 9600 ................... 24
8.2 Auxiliary Wireless Module Powered with a Battery and Transformer ... 25
ANNEXE A
DEFINING THE RF PATH ....................................................... 26
INDEX ................................................................................................... 27
AGRI-ALERT WIRELESS MODULE rev.03
3
AGRI-ALERT WIRELESS MODULE
1. SYSTEM OVERVIEW
The Agri-Alert Wireless module allows transparent wireless communication of the
Agri-Alert 9600 alarm system and its sub-modules between livestock buildings. In all,
up to 10 barns can remotely communicate together without having to bury wires
underground.
Hardwired connections usually offer the highest level of reliability. However, in many
situations where traditional cabling is problematic, wireless networking can provide
an interesting alternative.
Why Choose the Agri-Alert Wireless module ?
•
Easy installation and advanced radio technology will save you
time and money;
•
Overcome the distance and topography problems of hardwire:
- Risky digging situations (presence of buried pipes, cables, gas lines, etc.);
- Obstacles impede the connection between barns (roads, fields, rivers, etc.);
- Barns are a long way apart.
•
Seamlessly integrate wireless communication with current
in-place hardwire.
•
Use wireless communication to connect a remote distance house
to an existing Agri-Alert system.
Key to Symbols in the Manual
Danger. There is a risk of electrical shock or hazard
if the following instructions are not followed.
Pay attention. The following text contains very useful information.
Caution. Carefully read the following text for it contains important information which, if ignored, may
cause the controller to operate improperly.
4
AGRI-ALERT WIRELESS MODULE rev.03
AGRI-ALERT WIRELESS MODULE
1.1
Typical Site
The typical site is composed of a master building and auxiliary buildings. All buildings
(or hardwired subnetworks) have a Wireless module to communicate with each other
using radio frequency (RF) signals. In all, the Agri-Alert Wireless system allows establishing communication between up to 8 buildings (1 master & 7 slaves) at distances
as far as 6,500 feet (2 kilometers).
The following graphic shows a case where the master building is used in combination
with two auxiliary buildings (house & hardwired subnetwork).
HOUSE
MASTER BARN
AUXILIARY BARN
HARDWIRED SUB-NETWORK
Figure 1 Typical Application
There should be only one Master
Wireless module per site installation.
RADIO
To know if your module is a
Master or Auxiliary unit, check if there
is a M sticker on the radio module.
Auxiliary Wireless modules do not
have this sticker on their radio.
M
Figure 2 Master Radio
AGRI-ALERT WIRELESS MODULE rev.03
5
AGRI-ALERT WIRELESS MODULE
1.2
Typical Installation
Master Building & Master Wireless Module:
A site must have one master building that gathers information from other buildings.
The master building is the place where the Master Wireless module can be found; this
type of module has a radio transmitter that is specially configured to achieve this
function. The Master Wireless module is normally used in combination with an AgriAlert 9600 and uses the SBI 28V of the AA9600 system as power source. Hooking up
these two devices allows optimizing the overall wireless communication between
buildings.
Auxiliary Buildings & Auxiliary Wireless Modules:
An auxiliary building is a place where an Auxiliary Wireless module can be found; this
type of module has a radio transmitter configured to transmit information to the
Master Wireless module. In all, up to 10 auxiliary barns (including the house) can be
used on a site. Auxiliary modules are self supplied using a transformer and battery
box; they are also used to power the alarm system’s sub-modules: TP-800, KBP-400,
KP-400, LB-9600 and Relay boxes.
House:
No distinction is made between barns and houses. In most cases the house is an
auxiliary building that has a keypad and an Auxiliary Wireless module. However, it
becomes the master building if the AA9600 alarm system and the Wireless module are
directly located in the house.
HOUSE
MASTER BUILDING
KP-400
BATTERY
BOX
WIRELESS
MODULE
TRANSFO
BOX
BATTERY
BOX
AA9600
WIRELESS
MODULE
SBI
SBI
AUXILIARY BUILDING
BATTERY
BOX
WIRELESS
MODULE
DEVICE
(TP-800)
SBI
Figure 3 Typical Installation
6
AGRI-ALERT WIRELESS MODULE rev.03
AGRI-ALERT WIRELESS MODULE
2 CONNECTING THE EQUIPMENT
When connecting the equipment to the terminals provided on the main board, strip
the wires as little as possible (about 1/4”) to avoid electrical short circuits. Once the
wires are connected, run them through the electrical knockouts provided on the
bottom of the enclosure and use a watertight cable holders. Additional holes made in
the enclosure will void the warranty.
Use adequate wire gauges when the Wireless module is
placed far from the Agri-Alert sub-modules.
2.1
Supply Inputs
2.1.1
Master Wireless Module
The Master Wireless module is generally powered by the 28V SBI of the AA9600 alarm
system. Make sure the battery and transformer boxes are properly connected to the
AA9600. Do not connect an additional battery and transformer to the Wireless module
when the module is hooked up to a AA9600.
MASTER WIRELESS
MODULE
AGRI-ALERT 9600
SUPPLY INPUTS
SUPPLY INPUTS
SERIAL BUS
1
2
3
4
16VAC
BATTERY
+
DO NOT CONNECT A
BATTERY AND TRANSFORMER
TO THE WIRELESS MODULE
WHEN SUPPLIED BY THE
AGRI-ALERT 9600 SYSTEM
SERIAL BUS
1
2
3
4
4
5
6
7
16VAC BATTERY
+
14 15 16 17
BATTERY BOX
REFER TO AA9600’s
WIRING DIAGRAM
TRANSFO BOX
REFER TO AA9600’s
WIRING DIAGRAM
Figure 4 Master Wireless Module’s Supply
AGRI-ALERT WIRELESS MODULE rev.03
7
AGRI-ALERT WIRELESS MODULE
2.1.2
Auxiliary Wireless Modules
Auxiliary Wireless Modules are supplied using
a 16VAC/40V transformer and a battery box.
AUXILIARY
WIRELESS MODULE
2.1.2.1 Battery Connection
The terminals marked BATTERY are used for
the backup battery. The Wireless module
uses a 12VDC/5Ah sealed lead acid battery.
No other type of battery can be used. The
battery wires run through the tube provided
(see figure 5). Make sure the positive wire
of the battery is connected to the positive
terminal.
SUPPLY INPUTS
16VAC
BATTERY
+
BATTERY BOX
+
-
DO NOT CONNECT A BATTERY
AND TRANSFORMER TO THE
WIRELESS MODULE WHEN SUPPLIED BY AN AGRI-ALERT 9600.
+
16VAC, 40VA
TRANSFORMER
+
Figure 5 Auxiliary Wireless Module’s Supply
BATTERY PROTECTION:
The system goes in shutdown mode whenever the battery voltage decreases
below the shutdown battery threshold. This may happen when the system
runs on the standby battery.
The Wireless module does not recharge a battery that has a voltage below
5 Volts or a battery that is connected with reversed polarity.
2.1.2.2 Transformer Connection
The terminals marked 16VAC on the main board are used for connecting the
16VAC/40 VA transformer. It must be plugged into a 120VAC/60Hz outlet. Make sure
there is no switch on the power outlet.
DAMAGE TO THE UNIT MAY OCCUR
IF THE TRANSFORMER IS CONNECTED
TO THE BATTERY TERMINAL
8
AGRI-ALERT WIRELESS MODULE rev.03
AGRI-ALERT WIRELESS MODULE
2.2 Connecting the Earth Ground
Use a rod at least 5/8” (1.6cm) in
diameter at least 10’ (3m) long. The
rod must have a clean metal surface
free of paint, enamel or other nonconducting substances. Drive the rod
at least 10’ (3m) into the ground. If
the bedrock is more than 47” (1.2m)
deep, drive the rod into the ground
to bedrock level and bury any remainder horizontally at least 2’ (600mm)
below ground level. If the bedrock is
less than 47” (1.2m) deep, bury the
rod horizontally at least 2’ (600 mm)
below ground level (ref. article 10702, 3d of the Canadian Electricity
Code C22.10-99).
Use a CSA certified wire of TEW type
or a UL certified wire of type 1015:
Green/yellow, #12AWG, 600V,
105°C insulated wire. We suggest
using a Belden #9912 (color code
#189) or equivalent.
Grounding the
Wireless Module
Grounding the
Lightning Arrestor
(when equipped)
WIRELESS
MODULE
Lightning
Arrestor
(optional)
EARTH
2” copper
braid
3M METAL
ROD
3M METAL
ROD
METALLIC
ROD
2'(0.6M)
10' (3M)
The earth ground terminal of Wireless modules and the grounding connection of lightning arrestors must
be connected to the earth ground.
10'
(3M)
2'(0.6M)
>47"
(1.2M)
<47"
(1.2M)
10' (3M)
BEDROCK
Figure 6 Earth Ground
The rod must be connected to the wire described above. It is recommended to let the
rod going out of the ground to connect it. The wire length must not exceed 50’ (15m).
It is extremely important that the earth ground terminal be connected
to a proper ground to protect the electronic components from damage
due to lightning surges and electrostatic discharges. Do not use the
electrical ground for this purpose.
IF OUTDOOR CONNECTIONS ARE USED, MOUNT THE ENCLOSURE
AS CLOSE AS POSSIBLE TO THE ENTRY POINT OF THE OUTDOOR
WIRING.
AN IMPROPER EARTH GROUND CONNECTION IMMEDIATELY
VOIDS THE SYSTEM WARRANTY WITHOUT FURTHER NOTICE.
AGRI-ALERT WIRELESS MODULE rev.03
9
AGRI-ALERT WIRELESS MODULE
3 SERIAL BUS INTERFACE (SBI) CONNECTIONS
3.1
Connecting Devices to the Wireless module
The serial bus interface is used to connect different Agri-Alert devices together.
A shielded twisted pair cable is recommended for this purpose. Each device includes
four terminals marked SERIAL BUS and numbered from 1 to 4. Connect all the number
1 terminals together, all the number 2 terminals together, etc. as shown in figure 8.
SBI Maximum Load = 500mA.
A maximum of 6 devices (excluding the Wireless Module)
can be connected to the serial bus (SBI).
Maximum distance between a wireless module and any device= 500 ft.
3.2
End of Line Jumpers
Identify the first and the last device
on the communication loop by selecting the “YES” position with the end
of line jumpers. For other devices, place
the jumper at the NO position.
END OF LINE
RADIO
M
COMMUNICATION
TERMINALS
END OF LINE
J8
SBI
Figure 7 Location of the End of Line Jumper
and Communication Terminals
Wireless module
END OF LINE
YES
Serial Bus
1 2 3 4
KPB-400
TP-800
END OF LINE
END OF LINE
NO
Serial Bus
1 2 3 4
NO
Serial Bus
1 2 3 4
LB-9600
END OF LINE
YES
Serial Bus
1 2 3 4
Figure 8 Example of End of Line Jumper Positions and SBI Connections
10
AGRI-ALERT WIRELESS MODULE rev.03
AGRI-ALERT WIRELESS MODULE
4 INSTALLATION
4.1
WIRELESS MODULE
Mounting Instructions
BATTERY BOX
9 3/8” (23.8 cm)
The Wireless module and its
6 3/8”
battery (if applicable) should be
(16.2 cm)
7 3/8”
(18.8 cm)
mounted on a wall (see figure 9).
5 7/8”
Pull the latch located at the bot(14.9 cm)
4 1/2” (11.4 cm)
tom of the boxes to open the enclosures. Use 3/16” diameter
screws to mount each enclosure
cable
cable
holder
holder
on the wall. Fasten the black caps
onto the mounting holes once the
6” (15.2 cm)
screws are tightened. Make sure
plastic tubing
the covers of the two boxes can
be opened easily. The battery en- Figure 9 Wireless Module and Battery’s Mounting Instructions
closure has ventilation openings
on the sides. Make sure they are
not obstructed. Mount the battery enclosure 4½” from the Wireless module enclosure and use the plastic tubing provided to run the wires from the battery to the
module. These wires are provided with the system. The bare end hooks up to the
Wireless module. Electrical knockouts are located on the bottom of each enclosure
for running the tube. Use a screwdriver and a hammer to punch out the holes. Use the
cable holders provided to connect the tube to the enclosure. This prevents water
from seeping into the enclosure.
Make sure the RF signal is properly received on all Auxiliary Wireless
modules before the final fixing of the enclosures on the wall (see
section 4.2.4).
1
2
3
4
5
6
Figure 10 Mounting Instructions of the Battery’s Cable Holder
AGRI-ALERT WIRELESS MODULE rev.03
11
AGRI-ALERT WIRELESS MODULE
4.2
Antenna Installation
4.2.1
Antenna Mounting Instructions
The antenna must be mounted on a rigid PVC pipe. This pipe will then be used to fix
the antenna to the building.
1
Punch a 1/2” hole into the PVC end-cap to let the RF cable connector go out as
illustrated.
2
Insert the washer and tighten the nut to fix the RF cable connector to the end-cap.
3
Seal the PVC end-cap to the rigid PVC pipe with silicone.
WALL CROSS
SECTION
Antenna
PLASTIC
CLAMP
Lightning
Arrestor
(optional)
BUSHING OR
SILICONE
approx. 1 inch
Bolt & Washer
RF CABLE
PVC End-Cap
RF Cable
approx. 6 feet
WIRELESS
MODULE
90° FITTING
1/2” Rigid
PVC Pipe
MIN 6”
Figure 11 Antenna Installation
12
AGRI-ALERT WIRELESS MODULE rev.03
AGRI-ALERT WIRELESS MODULE
4
Run the RF cable through a 1/2” diameter rigid PVC pipe. This pipe will be used as
a support for the antenna. Make sure it is long enough (about 6 feet).
5
If required, connect the optional lightning arrestor to the antenna. This device
protects the system from damage by intercepting flashes of lightning and transmitting their current to the ground. Refer to section 2.2 to ground the lightning
arrestor. If no lightning arrestor is used, connect the antenna directly to the RF
cable.
6
Connect the antenna to the RF cable connector.
DO NOT TWIST THE NON-ROTATABLE
SECTION OF THE RF CONNECTOR!
7
Connect the other end of the RF cable to the Wireless module.
DO NOT KINK OR OVERTIGHTEN
THE RF CABLE
AGRI-ALERT WIRELESS MODULE rev.03
13
AGRI-ALERT WIRELESS MODULE
4.2.2
Antenna Installation
4.2.2.1 Recommended Positions
The best antenna location is at one edge of the top of the roof as illustrated below. In
this situation, the antenna must be at least 2 feet higher than the roof peak.
2’
RF
CABLE
RF
CABLE
M
A
AA9600 &
other devices
SBI
Master Wireless
Module
Devices
SBI
Auxiliary Wireless
Module
Figure 12 Recommended Antenna Position 1
Another possibility is to install the antenna on the roof cornice. However, in this case,
the antenna must be at least 4 to 6 feet higher than the cornice. Make sure the roof
does not impede the RF signal transmission.
4 to 6’
RF
CABLE
Master Wireless
Module + AA9600 &
other devices
RF
CABLE
Auxiliary Wireless Module &
other devices
Figure 13 Recommended Antenna Position 2
14
AGRI-ALERT WIRELESS MODULE rev.03
AGRI-ALERT WIRELESS MODULE
4.2.2.2 Antenna Height
The height of an antenna basically depends of the following factors:
Distance Between Buildings: The longer the link, the higher the antenna needs to be.
Line of Sight (LOS) & RF Path: All antennas must be mounted in order to have a
direct line of sight with the antenna of the master module. This direct line of sight is
only possible when all antennas have about the same height above mean-sea-level. In
addition, the area around the visual line of sight – the RF path – must be clear from
obstacle or else signal strength will be degraded.
Figure 14 RF Path
Antenna Height & RF Path Clearance:
The height of the antennas must ensure a complete clearance of the RF Path. This
path has an elleptical shape and is defined based on the greater distance that separates
any two buildings on site. Take the greater distance between two buildings and then
refer to the table in Appendix A at the end of this manual to see what RF clearance
must be respected. This clearance must be present at the midway point between the
buildings, above and below the line of sight (see picture above). Determine the antenna
height accordingly.
PRECAUTIONS:
Do not install the antenna higher than recommended unless
immovable objects are in the RF path. Support cables may
also be required to fix the antenna pole in place.
The antenna height must not exceed 4 feet above the
roof peak; otherwise, it may become a target for lightning.
If you are unable to meet the recommended antenna height
requirement, please get professional help.
AGRI-ALERT WIRELESS MODULE rev.03
15
AGRI-ALERT WIRELESS MODULE
4.2.2.3 Choosing the Mounting Location
Before attempting to install your antenna, determine where you can best place it to
obtain optimum results. Best performance is achieved when all antennas are close to
each other, mounted at the same height, and in a direct line of sight with no obstruction in the RF Path. Some examples are illustrated on next page.
STEP 1:
Make an overview diagram of the particular site. Include the following elements:
•
•
•
Location and orientation of the buildings;
Distance between buildings;
Obstacles (trees, bins, roads, fields, etc.)
STEP 2:
Determine the antenna location of each building based on the following requirements:
Make sure the RF signal is properly received by all Wireless modules before fixing
any equipment. Refer to section 4.2.3 to verify the received signal strength.
a) Find a mounting place directly above your Wireless module so that the RF
cable can be as short as possible. The provided RF cable has a total length of
25ft (7.6m). If you need to use a longer cable, please contact your retailer.
b) Identify the master building. This building is ideally located in the site’s median
zone, at equal distance from other buildings. Note that the distance between
the Master Wireless module and the Agri-Alert devices must not exceed 500ft
(150m).
c) Identify the location of the AA9600 (it can either be located in the master
building or in the master building’s hardwired subnetwork).
d) Write down the required antenna height (as defined in Appendix A).
e) Make sure the distance between any Wireless building never exceeds 6,500 ft
(2 km).
f) Determine the antenna position for each building. Make sure no obstacle blocks
the RF signal transmission (roof, trees, bins, etc.) It may be required to cut
down trees or to relocate any element that impedes the direct line of sight
between antennas.
If you are unable to meet these requirements,
please get professional help.
16
AGRI-ALERT WIRELESS MODULE rev.03
AGRI-ALERT WIRELESS MODULE
INCORRECT
- No direct Line of sight (LOS)
- Presence of objects in the path
CORRECT
- Direct Line of sight (LOS)
- No object in the path
BAD
CORRECT
BAD
CORRECT
BAD
CORRECT
Figure 15 Examples of Antenna Placement
AGRI-ALERT WIRELESS MODULE rev.03
17
AGRI-ALERT WIRELESS MODULE
4.2.3 Verifying the Received Signal Strength
Indicator (RSSI)
Before making any permanent installation, you must
make sure the radio frequency (RF) signal is properly
received in each auxiliary building. Status leds indicating the received signal strength (RSSI) are located on
the circuit board of each Wireless module. These pilot
lights indicate how well Auxiliary Wireless module communicate with the Master Module.
RSSI LEDS
RSSI
EXCLNT
GOOD
FAIR
WEAK
RADIO
It is also possible to check the communication statistics
directly on the AA9600 system (see section 4.2.3.2).
Figure 16 RSSI LEDs’ Location
4.2.3.1 Verifying the Signal on the Auxiliary Wireless Module
Check the RSSI on the Auxiliary Wireless only
(the signal strength on the Master module is
not suitable).
At least 2 RSSI LEDs must be lit on each
Auxiliary wireless module for the system to
have accept able performances (Fair signal
reception).
M
SBI
MASTER BUILDING
a) Choose a fix location for the Master Wireless
module and its antenna. Antenna positions in
auxiliary buildings will be based on the master
building.
b) Power the Master Wireless module and the
AA9600 unit.
AUXILIARY
BUILDING
c) Mount a second antenna on rigid PVC pipe and
connect it to an Auxiliary Wireless module.
d) Power the Auxiliary module using a battery.
e) Position the antenna next to the auxiliary building and verify the received signal strength.
Permanent antenna installation can be performed
if at least two RSSI LEDs are lit.
18
AGRI-ALERT WIRELESS MODULE rev.03
Figure 17 Verifying the Received
Signal Strength
AGRI-ALERT WIRELESS MODULE
4.2.3.2 Verifying the Signal on the Agri-Alert 9600
(Advanced function)
On the AA9600 :
1. Press the System key.
2. Enter the installer’s password (9601 by default) and press Enter .
3. Select the PROGRAM AUX’S menu and press Enter.
SYSTEM
PROGRAM AUX’S
4. Select the INFORMATION menu and press Enter.
PROGRAM AUX’S
INFORMATION
5. Enter the number associated with the device you want to access from a remote
location and press Enter.
SELECT DEVICE
(1..99): _ _
6. Communication statistics on the selected device are displayed: the Loss value
repesents the number of packet loss and the Total represents the number of sent
packets (the total value automatically goes back to 0 once it reaches 65000 or after
a reset)
KP#02
ZONE 22,23,24,25
LOSS: 0
TOTAL: 0
7. Press the right-arrow key to reset the communication statistics.
KP#02
ZONE 22,23,24,25
LOSS: ##
TOTAL: 500
8. Wait until the total number of packets reaches 500 and check the number of packet
loss at that moment. In an excellent installation, the amount of packet loss would be of
15 out of 500 or less (3% loss). This loss rate is only reached in perfect conditions, an
application can be functional with a higer packet loss rate.
If you want to improve your communication statistics, try relocating the antennas
and make sure the cables are in good working conditions.
AGRI-ALERT WIRELESS MODULE rev.03
19
AGRI-ALERT WIRELESS MODULE
5 CONTROLLER’S OPERATION
5.1
Status LEDs
Pilot lights are located onto the circuit board of the Wireless Module. The following
table gives the meaning of each status LED.
LED
RSSI
(Received
signal
strength
indicator)
MEANING
EXCLNT
Received signal is excellent.
GOOD
Received signal is good.
FAIR
Received signal is fair (m inimum acceptable signal).
W E AK
Received signal is weak.
LOW B AT
Turns on when the battery voltage is lower than 11 Volts
AC ON
Turns on when the controller is powered with a valid 16VAC source.
SBI IN VOLT.
Turns on when the controller is supplied by an Agri-Alert 9600 or
when it runs on the battery only.
SBI OUT VOLT.
Turns on when the controller is supplied by a transformer.
SBI TX DATA
Blink when the controller is sending / receiving data.
SBI RX DATA
RF PRESENT LED in the Master W ireless module:
Turns on when the Master is operating correctly
RF PRESENT
RF PRESENT LED in the Auxiliary W ireless module:
Turns on when the Auxiliary W ireless module detects the presence
of the Master W ireless module.
Table 1 Status Leds
Led Test
To make sure the pilot lights are in working order, unplug and replug the Wireless
module: an automatic LED test is performed when power is applied to the controller.
Make sure all LED light up.
NB. The RF PRESENT led is not tested during the LED test.
20
AGRI-ALERT WIRELESS MODULE rev.03
AGRI-ALERT WIRELESS MODULE
6 TROUBLESHOOTING
PROBLEM
CAUSE
1. Check the wiring between the AA9600 and the W ireless Module's
sub-modules.
TROUBLE between AA9600 and
a sub-module of a W ireless Module
2. Make sure the W ireless module provides sufficient voltage to the
devices: The SBI IN VOLT or SBI OUT VOLT LED located on the circuit
board of each Auxiliary W ireless module
1. Make sure no objects are present in the RF path.
2. Make sure all antennas have a direct line of sight with each other.
Weak received signal (RSSI)
3. Try increasing the height of the antenna.
4. Make sure the antenna, RF Cable, cable connection, and Radio are
in proper working condition.
1. Check the wiring.
2. Make sure the Auxiliary and Master W ireless modules are properly
powered.
No signal is received (RSSI)
on an Auxiliary W ireless module
3. Make sure all antennas have a direct line of sight with each other.
4. Make sure no objects are present in the RF path.
5. Make sure the antenna, RF Cable, cable connection, and Radio are
in proper working condition.
The W ireless Module shuts down
(when AC source is absent)
The battery's voltage decreased below 9.3 Volts.
Make sure the battery is connected properly and is in good working
condition.
The battery voltage decreased below 11V.
LOW B A TT LED turns on and
AC source is ok
The RSSI LED is lit on an Auxiliary
W ireless module while the Master
W ireless module is turned off.
The battery is currently being recharged unless it is improperly
connected. Verify the battery connection and make sure it is in good
working condition.
Other RF signals are emitted in the surrounding area.
Try to find out the source of these signals (wireless phones, routers, or
any devices using the ISM 2.4GHz band).
AGRI-ALERT WIRELESS MODULE rev.03
21
AGRI-ALERT WIRELESS MODULE
7 TECHNICAL SPECIFICATIONS
GENERAL
22
Maximum Power Consumption
5.0V 500 mA (board supply)
16.0V 500 mA (SBI Voltage)
13.8V 600 mA (Current Limited Battery charger)
Total of 34Watts per module
Backup Battery
12V,5AH sealed lead/acid battery
Battery Charging time
10 Hours Maximum (For fully discharged batteries)
Battery autonomy
5 Hours Typical (With maximum load & fully charged battery)
Supply Transformer
16VAC, 2.25A, 40VA, Wall Plug-in Transformer
Onboard Supplies
+5VDC ±2%, ±20 mV ripple (Radio & electronics)
+16VDC ±2%, ±50 mV ripple (SBI Voltage)
+13.8VDC ±2%, ±50 mV ripple (Battery charger)
+23VDC Unregulated ±10%, ±150 mV ripple
Onboard Protection
Gas tube, Spark gap, polyswitch and over voltage protection
SBI Serial Interface
RS-485, 2 wires, half duplex
SBI Serial Interface Data Rate
Single channel at 9600 bps
SBI 28V Supply Output
16 VDC 500mA or Batteries voltage
SBI Bus Maximum Output Range
500 feet range (with 6 SBI loads and 22 AWG wires)
LO Batteries Alarm LED
LO BAT LED ON -> Batteries level under 11V
LO BAT LED OFF -> Batteries level above 11V
Antenna Type
5dBi Whip type, Omni-directional Antenna
With Reverse Polarity TNC connector
Antenna RF Cable
TNC Male Plug to RP-TNC (Reverse Polarity)
Male Jack, 25 feet cable:
1-25 feet LMR-195 (Cable Loss of 4.65dB @ 2.4GHz)
Antenna Lighting Arrestor
RP Male/Female TNC, 30 kA Multiple strike
MAXRAD Model: MLP24RPC
AGRI-ALERT WIRELESS MODULE rev.03
AGRI-ALERT WIRELESS MODULE
RADIO
Frequency Band
US/Canada: 2.402 - 2.478 GHZ
France:
2.448 - 2.457 GHZ
Radio Type
Frequency Hopping Spread Spectrum, ISM Band
Radio Output Power
(At box coaxial connector)
+23 dBm (200 mW typical)
Sensitivity
-90 dBm typical
Wireless Maximum Range
(5 dBi gain antenna &
5 dB loss RF cable)
Outdoor (With Direct Line of Sight): 2 km/ 6562 ft
Indoor (Open Area): 200 m/ 650 ft
RF Transmission Latency
10ms typical (each way)
Radio Architecture
Point to Multipoint with Broadcast support & packet validation
RF Data Rate
80 kbps (Half duplex, with Acknowledge)
Radio model
Aerocomm model: AC4424-200
ENVIRONMENTAL
Operating Temperature
Wireless Module:
0°C to+50°C
Antenna & RF Cable only: -40°C to +50°C
Water Resistant
Yes
AGRI-ALERT WIRELESS MODULE rev.03
23
24
AGRI-ALERT WIRELESS MODULE rev.03
+
16VAC BATTERY
SUPPLY INPUTS
BATTERY BOX
REFER TO AA9600’s
WIRING DIAGRAM
AA9600 TRANSFO BOX
REFER TO AA9600’s
WIRING DIAGRAM
ANTENNA
RF CABLE
SERIAL BUS
1 2 3 4
BATTERY
+
WARNING
NOT USED *
16VAC
SUPPLY INPUTS
MASTER
WIRELESS MODULE
3M METAL
ROD
SERIAL BUS
1 2 3 4
DEVICE
KP-400, KPB-400
LB-9600, TP-800
OR RELAY BOX
DO NOT CONNECT A BATTERY
AND A TRANSFORMER TO THE
WIRELESS MODULE WHEN USED
IN COMBINATION WITH A
AGRI-ALERT 9600 SYSTEM
NOT USED
NC COM NO EARTH
LOW BATTERY
RELAY
Master Wireless Module Powered by an Agri-Alert 9600
AGRI ALERT 9600
SERIAL BUS
1 2 3 4
8.1
8 WIRING DIAGRAM
SERIAL BUS
1 2 3 4
DEVICE
KP-400, KPB-400
LB-9600, TP-800
OR RELAY BOX
AGRI-ALERT WIRELESS MODULE
SERIAL BUS
1 2 3 4
16VAC
40VA
TRANSFORMER
BATTERY
+
SUPPLY INPUTS
16VAC
BATTERY BOX
+
NOT USED
3M METAL
ROD
NC COM NO EARTH
LOW BATTERY
RELAY
SERIAL BUS
1 2 3 4
DEVICE
DEVICE
SERIAL BUS
1 2 3 4
KP-400, KPB-400
LB-9600, TP-800
OR RELAY BOX
KP-400, KPB-400
LB-9600, TP-800
OR RELAY BOX
Auxiliary Wireless Module Powered with a Battery and Transformer
AUXILIARY
WIRELESS MODULE
8.2
AGRI-ALERT WIRELESS MODULE
AGRI-ALERT WIRELESS MODULE rev.03
25
AGRI-ALERT WIRELESS MODULE
ANNEXE A
DEFINING THE RF PATH
The RF path is an area around the visual
line of sight that must be clear from
obstacle or else signal strength will be
degraded. This path has an elleptical shape
and is defined based on the greater distance
that separates any two buildings on site. It
is important to know what the RF Path is
in order to determine the height at which
the antennas must be mounted.
To define the path, take the greater distance
that separates 2 buildings and then refer to
the table below to know what RF Clearance
must be present at the midpoint between
the buildings. The RF Clearance must be
present above and below the line of sigth
as shown below.
Maximum distance
between buildings
Suggested
RF Clearance
1.25 miles (2.0km)
23ft
(7m)
0.93 miles (1.5km)
20ft
(6.1m)
3200 ft
(1.0km)
16.5 ft (5m)
1600 ft
(500m)
13 ft
(4m)
985 ft
(300m)
10 ft
(3m)
165 ft
(50m) and lower
7 ft
(2m)
Table 2 RF Clearance
Figure 18 Antenna Height vs Distance Between Buildings
26
AGRI-ALERT WIRELESS MODULE rev.03
AGRI-ALERT WIRELESS MODULE
INDEX
A
M
Antenna
Mounting instructions 12
Placement
Choosing a right placement 16
Examples 17
Height 15
Recommended placement 14
Received signal strength 18
Auxiliary Wireless
see also Wireless module
Definition & location 6
Identification 5
Received signal strength (RSSI) 18
Supply inputs 8
B
Battery
Connection 7, 8
Mounting instructions 11
Buildings
Auxiliary building 6
House 6
Master building 6
C
Connections 23, 24
D
Master Wireless
see also Wireless module
Definition & location 6
Identification 5
Supply Inputs 7
R
Received signal strength (RSSI) 18
Relay Box see Devices
S
Serial bus interface (SBI) 10
Signal see Received signal strength
Status leds see LEDs
T
TP-800 see Devices
Transformer
Connection 7, 8
W
Wireless module
Earth grounding 9
End of line identification 10
Mounting instructions 11
Wiring diagram 23, 24
Devices (sub-modules)
Connection 10
End of line identification 10
E
Earth Ground 9
End of line identification 10
H
House 6
J
Jumpers
End of line jumpers 10
K
KP-400 see Devices
KPB-400 see Devices
L
LB-9600
LEDs
see Devices
LED Meaning 19
Lightning arrestor
Earth ground connection 9
Location 12
Ligths see Leds
AGRI-ALERT WIRELESS MODULE rev.03
27
M 890-00031
rev. 03
REV. 02