Transcript
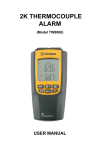
RT8100 Fridge/Freezer Alarm Thermometer
Instrument Operation
The left display (indicated by the T1 and *) shows the current temperature of the
refrigerator. The right display (indicated by the T2 and ***) shows the current
temperature of the freezer.
The RT8100 includes a duration counter that records the length of time that one or both
of the temperature inputs has been in an alarm condition. After 30 minutes in an alarm
condition, the duration of alarm counter can be displayed by selecting MIN/MAX. The
total time since the beginning of the alarm condition will be shown. When viewing the
duration counter the Max reading and counter are displayed for each temperature sensor.
If the temperature exceeds the alarm limits for less than 30 minutes and returns to
normal, the duration counter is not enabled; however, max and min are recorded. A
minimum of 30 minutes is required before the duration counter is enabled and viewable.
After 30 minutes in alarm condition, the duration counter continues to record the duration
time regardless of whether the alarm condition continues.
Setup and Installation
1. Open the battery cover and install the batteries observing the correct polarity.
Replace the battery cover.
2. Select the desired temperature unit (°F or °C) using the slide switch on the back.
3. Fully extend the probe wires.
4. Attach the thermometer to a suitable place outside the fridge/freezer using the
magnets on the back or the flip out desk stand.
5. Clean the surfaces inside the fridge/freezer where the probes will be attached.
6. Press the suction cup with the probe marked * firmly against the cleaned position
inside the refrigerator.
7. Press the suction cup with the probe marked *** firmly against the cleaned position
inside the freezer.
8. Peel the clear protective sheet from the display.
Maximum/Minimum
1. Press MAX/MIN once to display the minimum and maximum readings of the
refrigerator (indicated by T1 and *).
2. Press MAX/MIN again to display the minimum and maximum readings of the freezer
(indicated by T2 and ***).
3. The display will return to normal if MAX/MIN is pressed again or if no buttons are
pressed for at least five seconds.
To Reset the Maximum/Minimum
1. While displaying a maximum/minimum reading, press RESET to reset the memory to
the current reading.
2. Reset the memories before taking new maximum and minimum readings.
To Program the Alarm Limits
1. Press and hold SET for about three seconds to enter the alarm limit setting mode.
The high HI limit value for the fridge will begin flashing.
2. Press i to set the desired value.†
3. Press SET to confirm the input value. The LO limit value of the fridge will begin flashing.
4. Press i to set the desired value.†
5. Press SET to confirm the input value. The HI limit value of the freezer will begin flashing.
6. Press i to set the desired value.†
7. Press SET to confirm the input value. The LO limit value of the freezer will begin flashing.
8. Press i to set the desired value.†
9. Press SET to confirm the input value and return to normal display.
†
Holding down i will increase and recycle the value automatically.
To Set Alarm/Duration Counter
1. Press
/% to select either the light alarm or both the light and buzzer alarm
–
indicators. The visual LED alarm is switched off by selecting OFF.
2. If the reading is outside the alarm limit, then the temperature display, the � symbol,
and the red light will all flash. The buzzer will also sound if it has been selected.
3. Pressing any button will stop the buzzer sounding. However, the temperature display,
the � symbol, and the red light will continue to flash until the temperature is
brought to within the alarm limit.
4. If the alarm period extends beyond 30 minutes, the thermometer will begin to count
the alarm time including those 30 minutes. The temperature display, the � symbol,
and the red light will stop flashing even if the reading is out of the alarm limit.
5. To view the alarm duration time after the first 30 minutes, press the � button. The
left display will show the maximum measured value and the right display will show
the alarm duration time from the beginning of the alarm condition.
To Clear Alarm Duration Indication
1. Press OFF to disable the alarm function.
2. Press the � button to view the maximum temperature and duration time if
recorded.
3. Press RESET to clear the alarm time.
4. Repeat for freezer (T2 and ***).
Batteries
If the low battery symbol
appears, replace with new batteries.
If the thermometer will not be used for a long period of time, remove the batteries to
avoid battery leakage.
If either of the probes is not in use, ignore the related display reading.
Specifications
Measuring Range -40 to 158˚F / -40 to 70˚C
Display Accuracy ±1.8˚F / 1˚C
Display Resolution 0.1˚
Default Alarm Limits Fridge alarm on if reading is outside the range of
32 to 46.4°F / 0 to 8°C
Freezer alarm on if reading is higher than -0.4°F / -18°C.
Display Reading Update 10 seconds
Program Alarm Resolution1.0˚
Alarm Duration Counter 99 hours and 59 minutes (starts after 30 minutes)
Battery 1.5 volt, type AAA
or equivalent x 2 pieces (included)
Probe Cord Length 39.4 inches / 1,000 mm.
Display Size 3.5 (W) x 0.63 (H) inches
90 (W) x 16 (H) mm
Product Size 5.3 (W) x 1.77 (H) x 0.9 (D) inches
135 (W) x 45 (H) x 23 (D) mms
Included Accessories 1) 1.5 volt, type AAA battery x 2 pieces
2) Suction cups x 2 pieces
8100 Fridge/Freezer
Alarm Thermometer
Utah, U.S.A.
Ph: 801-756-7705
Fax: 801-756-8948
www.thermoworks.com
Made in China
