1
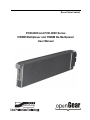
Ross Video Limited
FCM-6800 and FCD-6800 Series
CWDM Multiplexer and CWDM De-Multiplexer
User Manual
FCM-6800 and FCD-6800 Series • CWDM Multiplexer and CWDM De-Multiplexer
User Manual
•
Ross Part Number: 6844DR-004-02
•
Release Date: July 29, 2011. Printed in Canada.
The information contained in this manual is subject to change without notice or obligation.
Copyright
© 2011 Ross Video Limited. All rights reserved.
Contents of this publication may not be reproduced in any form without the written permission of
Ross Video Limited. Reproduction or reverse engineering of copyrighted software is prohibited.
Patents
This product is protected by the following US Patents: 4,205,346; 5,115,314; 5,280,346;
5,561,404; 7,034,886; 7,508,455; 7,602,446; 7,834,886; 7,914,332. This product is protected by
the following Canadian Patents: 2039277; 1237518; 1127289. Other patents pending.
Notice
The material in this manual is furnished for informational use only. It is subject to change without
notice and should not be construed as commitment by Ross Video Limited. Ross Video Limited
assumes no responsibility or liability for errors or inaccuracies that may appear in this manual.
Trademarks
•
is a trademark of Ross Video Limited.
•
Ross, ROSS, ROSS® are registered trademarks of Ross Video Limited.
•
openGear® is a registered trademark of Ross Video Limited.
•
DashBoard Control System™ is a trademark of Ross Video Limited.
•
All other product names and any registered and unregistered trademarks mentioned in
this guide are used for identification purposes only and remain the exclusive property of
their respective owners.
Important Regulatory and Safety Notices
Before using this product and any associated equipment, refer to the “Important Safety
Instructions” listed below to avoid personnel injury and to prevent product damage.
Products may require specific equipment, and/or installation procedures to be carried out to
satisfy certain regulatory compliance requirements. Notices have been included in this
publication to call attention to these specific requirements.
Symbol Meanings
This symbol on the equipment refers you to important operating and maintenance
(servicing) instructions within the Product Manual Documentation. Failure to heed this
information may present a major risk of damage or injury to persons or equipment.
Warning — The symbol with the word “Warning” within the equipment manual
indicates a potentially hazardous situation which, if not avoided, could result in death
or serious injury.
Caution — The symbol with the word “Caution” within the equipment manual
indicates a potentially hazardous situation which, if not avoided, may result in minor
or moderate injury. It may also be used to alert against unsafe practices.
Notice — The symbol with the word “Notice” within the equipment manual indicates
a situation, which if not avoided, may result in major or minor equipment damage or a
situation which could place the equipment in a non-compliant operating state.
ESD Susceptibility — This symbol is used to alert the user that an electrical or
electronic device or assembly is susceptible to damage from an ESD event.
Important Safety Instructions
Caution — This product is intended to be a component product of the DFR-8300
series frame. Refer to the DFR-8300 series frame User Manual for important safety
instructions regarding the proper installation and safe operation of the frame as well
as its component products.
Warning — Certain parts of this equipment namely the power supply area still
present a safety hazard, with the power switch in the OFF position. To avoid electrical
shock, disconnect all A/C power cards from the chassis’ rear appliance connectors
before servicing this area.
Warning — Service barriers within this product are intended to protect the operator
and service personnel from hazardous voltages. For continued safety, replace all
barriers after any servicing.
This product contains safety critical parts, which if incorrectly replaced may present a
risk of fire or electrical shock. Components contained with the product’s power
supplies and power supply area, are not intended to be customer serviced and should
be returned to the factory for repair. To reduce the risk of fire, replacement fuses must
be the same time and rating. Only use attachments/accessories specified by the
manufacturer.
EMC Notices
United States of America
FCC Part 15
This equipment has been tested and found to comply with the limits for a class A Digital device,
pursuant to part 15 of the FCC Rules. These limits are designed to provide reasonable protection
against harmful interference when the equipment is operated in a commercial environment. This
equipment generates, uses, and can radiate radio frequency energy and, if not installed and used
in accordance with the instruction manual, may cause harmful interference to radio
communications. Operation of this equipment in a residential area is likely to cause harmful
interference in which case the user will be required to correct the interference at his own expense.
Notice — Changes or modifications to this equipment not expressly approved by
Ross Video Limited could void the user’s authority to operate this equipment.
CANADA
This Class “A” digital apparatus complies with Canadian ICES-003.
Cet appariel numerique de la classe “A” est conforme a la norme NMB-003 du Canada.
EUROPE
This equipment is in compliance with the essential requirements and other relevant provisions of
CE Directive 93/68/EEC.
INTERNATIONAL
This equipment has been tested to CISPR 22:1997 along with amendments A1:2000 and
A2:2002, and found to comply with the limits for a Class A Digital device.
Notice — This is a Class A product. In domestic environments, this product may
cause radio interference, in which case the user may have to take adequate
measures.
Maintenance/User Serviceable Parts
Routine maintenance to this openGear product is not required. This product contains no user
serviceable parts. If the module does not appear to be working properly, please contact Technical
Support using the numbers listed under the “Contact Us” section on the last page of this manual.
All openGear products are covered by a generous 5-year warranty and will be repaired without
charge for materials or labor within this period. See the “Warranty and Repair Policy” section in
this manual for details.
Important Laser Safety Measures and Notices
Before using this product and any associated equipment, refer to the sections below so as to avoid
personnel injury and to prevent product damage. For further safety information when using fiber
products, consult the following publications:
•
IEC-60825- 2, Safety of Laser Products - Part 2: Safety of Optical Fiber
Communication Systems (OFCS) (for use outside of the U.S.A.)
•
ANSI Z136.2, Safe Use of Optical Fiber Communication Systems Utilizing Laser
Diode and LED Sources (for use in the U.S.A.)
Products may require specific equipment, and /or installation procedures be carried out to satisfy
certain regulatory compliance requirements.
Caution — Before operating or servicing this product, all personnel should be
familiar with laser safety and fiber handling practices.
Safety Measures for Operation
During normal operation of this product, heed the following safety measures:
•
Do not stare at, or into, broken, or damaged, fibers.
•
Do not stare at, or into, optical connectors.
•
Only properly trained and authorized personnel shall be permitted to perform laser/fiber
optic operations.
•
Ensure that appropriate labels are displayed in plain view and in close proximity to the
optical port on the protective housing/access panel of the terminal equipment.
Safety Measures for Maintenance and Servicing
Warning — Do not use optical equipment, such as a microscope or an eye loupe,
to stare at the energized fiber end. Doing so may damage your eyes.
During maintenance and servicing of this product, only properly trained and authorized personnel
shall be allowed to use optical test or diagnostic equipment.
Laser Information
CLASS 1 LASER PRODUCT
IEC 60825-1:2007
Caution — INVISIBLE LASER RADIATION WHEN OPEN. AVOID EXPOSURE TO
THE BEAM.
Environmental Information
The equipment that you purchased required the extraction and use of natural
resources for its production. It may contain hazardous substances that could
impact health and the environment.
To avoid the potential release of those substances into the environment and to diminish the need
for the extraction of natural resources, Ross Video encourages you to use the appropriate
take-back systems. These systems will reuse or recycle most of the materials from your
end-of-life equipment in an environmentally friendly and health conscious manner.
The crossed-out wheeled bin symbol invites you to use these systems.
If you need more information on the collection, reuse, and recycling systems, please contact your
local or regional waste administration. You can also contact Ross Video for more information on
the environmental performances of our products.
Company Address
Ross Video Limited
Ross Video Incorporated
8 John Street
Iroquois, Ontario
Canada, K0E 1K0
P.O. Box 880
Ogdensburg, New York
USA 13669-0880
General Business Office: (+1) 613 • 652 • 4886
Fax: (+1) 613 • 652 • 4425
Technical Support: (+1) 613 • 652 • 4886
After Hours Emergency: (+1) 613 • 349 • 0006
E-mail (Technical Support): [email protected]
E-mail (General Information): [email protected]
Website: http://www.rossvideo.com
Contents
Introduction
1
Overview.............................................................................................................................. 1-2
Features.................................................................................................................. 1-2
FCM-6844 and FCD-6845 Block Diagrams........................................................................ 1-3
FCM-6846 and FCD-6847 Block Diagrams........................................................................ 1-4
FCM-6848 and FCD-6849 Block Diagrams........................................................................ 1-5
Documentation Terms and Conventions.............................................................................. 1-6
Installation
2
Before You Begin ................................................................................................................ 2-2
Unpacking.............................................................................................................. 2-2
Working with Fiber Optic Connectors .................................................................. 2-2
Installing the FCM-6800 or FCD-6800 Series .................................................................... 2-3
Rear Modules for the FCM-6800 Series ............................................................... 2-3
Rear Modules for the FCD-6800 Series ................................................................ 2-3
Installing a Rear Module ....................................................................................... 2-3
Installing the FCM-6800 or FCD-6800 Series ...................................................... 2-4
Removing the FCM-6800 or FCD-6800 Series .................................................... 2-4
Cabling for the FCM-6800 and FCD-6800 Series............................................................... 2-5
Cabling Overview.................................................................................................. 2-5
Installing and Removing Fiber Optic Cables ........................................................ 2-5
Operation
3
Five-Channel CWDM Link ................................................................................................. 3-2
Eight-Channel CWDM Link................................................................................................ 3-3
Nine-Channel CWDM Link................................................................................................. 3-4
Thirteen-Channel CWDM Link........................................................................................... 3-5
Sixteen-Channel CWDM Link ............................................................................................ 3-6
Multiple Channels of Bi-directional Links .......................................................................... 3-7
Specifications
4
Technical Specifications ...................................................................................................... 4-2
Service Information
5
Troubleshooting Checklist ................................................................................................... 5-2
Warranty and Repair Policy................................................................................................. 5-3
FCM-6800 and FCD-6800 Series User Manual (Iss. 02)
Contents • i
ii • Contents
FCM-6800 and FCD-6800 Series User Manual (Iss. 02)
Introduction
In This Chapter
This chapter contains the following sections:
•
Overview
•
FCM-6844 and FCD-6845 Block Diagrams
•
FCM-6846 and FCD-6847 Block Diagrams
•
FCM-6848 and FCD-6849 Block Diagrams
•
Documentation Terms and Conventions
A Word of Thanks
Congratulations on choosing an openGear FCM-6800 or FCD-6800 series CWDM Multiplexer
or CWDM De-Multiplexer. Your FCM-6800 or FCD-6800 series are part of a full line of Digital
Products within the openGear Terminal Equipment family of products, backed by Ross Video's
experience in engineering and design expertise since 1974.
You will be pleased at how easily your new CWDM Multiplexer or CWDM De-Multiplexer fit
into your overall working environment. Equally pleasing is the product quality, reliability and
functionality. Thank you for joining the group of worldwide satisfied Ross Video customers!
Should you have a question pertaining to the installation or operation of your CWDM
Multiplexer or CWDM De-Multiplexer, please contact us at the numbers listed on the back cover
of this manual. Our technical support staff is always available for consultation, training, or
service.
FCM-6800 and FCD-6800 Series User Manual (Iss. 02)
Introduction • 1–1
Overview
The FCM-6800 or FCD-6800 series are used with CWDM transmitters to expand your current
fiber infrastructure from one wavelength to up to 16 wavelengths on a fiber. All devices operate
bi-directional as both a wavelength MUX and DMX.
The FCM-6800 or FCD-6800 series are passive products that fit into a DFR-8321 series frame
while drawing no power. The cards cannot be detected by DashBoard or SNMP as there is
nothing to control or monitor.
There are six types of filters:
•
FCM-6844 — Four channel MUX with an expansion port
•
FCD-6845 — Four channel DMX with an expansion port
•
FCM-6846 — Eight channel MUX, low wavelengths, no expansion port
•
FCD-6847 — Eight channel DMX, low wavelengths, no expansion port
•
FCM-6848 — Eight channel MUX, high wavelengths, with an expansion port
•
FCD-6849 — Eight channel MUX, high wavelengths, with an expansion port
The FCM-6844, FCD-6845, FCM-6848, and FCD-6849 include expansions ports which allow for
cascading for filters. This provides the capability to add additional wavelengths to an existing
configuration.
The filter wavelengths for each port are as follows:
Model
Table 1.1 Filter Wavelengths
Filter Wavelengths
FCM-6844, FCD-6845
1350nm, 1370nm, 1430nm, 1450nm
FCM-6846, FCD-6847
1270nm, 1290nm, 1310nm, 1330nm, 1350nm, 1370nm, 1430nm, 1450nm
FCM-6848, FCD-6849
1470nm, 1490nm, 1510nm, 1530nm, 1550nm, 1570nm, 1590nm, 1610nm
Features
The following features are standard for the FCM-6800 or FCD-6800 series:
1–2 • Introduction
•
Supports up to 16 CWDM wavelengths (ITU-T G.694.2)
•
Bi-directional operation
•
Modular design allows expansion from 4 to 16 wavelengths
•
Supports any protocol and bit rate including 3G/HD/SD SDI, ASI, Ethernet
•
Fully passive design, requiring no power
•
Supports single-mode fiber
•
LC/UPC optical connections
•
Fits DFR-8321 series frames
•
Fully compliant with openGear specifications
•
5-year transferable warranty
FCM-6800 and FCD-6800 Series User Manual (Iss. 02)
FCM-6844 and FCD-6845 Block Diagrams
This section provides functional block diagrams that outline the workflow of the FCM-6844 and
FCD-6845.
Figure 1.1 FCM-6844 — Simplified Block Diagram
Figure 1.2 FCD-6845 — Simplified Block Diagram
FCM-6800 and FCD-6800 Series User Manual (Iss. 02)
Introduction • 1–3
FCM-6846 and FCD-6847 Block Diagrams
This section provides functional block diagrams that outline the workflow of the FCM-6846 and
FCD-6847.
Figure 1.3 FCM-6846 — Simplified Block Diagram
Figure 1.4 FCD-6847 — Simplified Block Diagram
1–4 • Introduction
FCM-6800 and FCD-6800 Series User Manual (Iss. 02)
FCM-6848 and FCD-6849 Block Diagrams
This section provides functional block diagrams that outline the workflow of the FCM-6848 and
FCD-6849.
Figure 1.5 FCM-6848 — Simplified Block Diagram
Figure 1.6 FCD-6849 — Simplified Block Diagram
FCM-6800 and FCD-6800 Series User Manual (Iss. 02)
Introduction • 1–5
Documentation Terms and Conventions
The following terms and conventions are used throughout this manual:
1–6 • Introduction
•
“Frame” refers to DFR-8321 series frame that houses the FCM-6800 or FCD-6800 series
card, as well as any openGear frames.
•
All references to the DFR-8321 series frame also includes all versions of the DFR-8321
series frame and any available options unless otherwise noted.
•
“FCM-6800 series” refers to the FCM-6844, FCM-6846, and FCM-6848 unless
otherwise noted.
•
“FCD-6800 series” refers to the FCD-6845, FCD-6847, and FCD-6849 unless otherwise
noted.
•
“Operator” and “User” refer to the person who uses FCM-6800 or FCD-6800 series
card.
•
“Board”, and “Card” refer to openGear terminal devices within openGear frames,
including all components and switches.
•
“System” and “Video system” refer to the mix of interconnected production and terminal
equipment in your environment.
•
“DashBoard” refers to the DashBoard Control System™.
•
The “Operating Tips” and “Note” boxes are used throughout this manual to provide
additional user information.
FCM-6800 and FCD-6800 Series User Manual (Iss. 02)
Installation
In This Chapter
This chapter provides instructions for installing the FCM-6800 or FCD-6800 series into the
frame, and cabling details.
The following topics are discussed:
•
Before You Begin
•
Installing the FCM-6800 or FCD-6800 Series
•
Cabling for the FCM-6800 and FCD-6800 Series
FCM-6800 and FCD-6800 Series User Manual (Iss. 02)
Installation • 2–1
Before You Begin
Before proceeding with the instructions in this chapter, ensure that your DFR-8321 series frame is
properly installed according to the instructions in the DFR-8300 Series User Manual.
Unpacking
Unpack each FCM-6800 or FCD-6800 series you received from the shipping container and
ensure that all items are included. If any items are missing or damaged, contact your sales
representative or Ross Video directly.
Working with Fiber Optic Connectors
Keep the following in mind when working with fiber optic connectors:
2–2 • Installation
•
Every time you are required to insert a connector into a device or mating sleeve, you must
clean the connector. All exposed surfaces of the ceramic ferrule must be clean. Follow
your facility practices of cleaning fiber optic connectors.
•
Connectors must always be inserted into a device or have a dust cap on.
•
A poor optical connection is often similar to a poor electrical connection. Try removing
the connector, cleaning, and re-inserting the connector. A bad connection can result in
experiencing instability of signal, high loss, or a noisy signal.
FCM-6800 and FCD-6800 Series User Manual (Iss. 02)
Installing the FCM-6800 or FCD-6800 Series
An installed FCM-6800 or FCD-6800 blocks the card slots in the frame so that the modules are
not damaged if a user attempts to slide a card into the slot occupied by the FCM-6800 or
FCD-6800.
This section outlines how to install a rear module, and then the FCM-6800 or FCD-6800 in a
DFR-8321 series frame.
Note — Do not install the FCM-6800 or the FCD-6800 series cards in a DFR-8310
series frame or in a DFR-8320 series frame.
Rear Modules for the FCM-6800 Series
Ensure to use the correct rear module when installing a FCM-6800 series card. Note that the rear
modules are included as part of the FCM-6800.
•
FCM-6844 — Use the 6800AR-001 Full Rear Module.
•
FCM-6846 — Use the 6800AR-002 Full Rear Module.
•
FCM-6848 — Use the 6800AR-002 Full Rear Module.
Rear Modules for the FCD-6800 Series
Ensure to use the correct rear module when installing a FCD-6800 series card. Note that the rear
modules are included as part of the FCD-6800.
•
FCD-6845 — Use the 6800AR-001 Full Rear Module.
•
FCD-6847 — Use the 6800AR-002 Full Rear Module.
•
FCD-6849 — Use the 6800AR-002 Full Rear Module.
Installing a Rear Module
If the rear module is already installed, proceed to the section “Installing the FCM-6800 or
FCD-6800 Series” on page 2-4.
Use the following procedure to install a Rear Module in your DFR-8321 series frame:
1. Locate the card frame slots on the rear of the frame you wish to install the rear module
for.
2. Remove the Blank Plate from the slot you have chosen for the FCM-6800 or FCD-6800
installation.
3. Install the bottom of the rear module in the Module Seating Slot at the base of the
frame’s back plane.
4. Align the top hole of the rear module with the screw on the top-edge of the frame
back-plane.
5. Using a Phillips screwdriver and the supplied screw, fasten the rear module to the back
plane of the frame. Do not over tighten.
6. Ensure proper frame cooling and ventilation by having all rear frame slots covered with
rear modules or Blank Plates.
This completes the procedure for installing a Rear Module in your DFR-8321 series frame.
FCM-6800 and FCD-6800 Series User Manual (Iss. 02)
Installation • 2–3
Installing the FCM-6800 or FCD-6800 Series
All the components are enclosed in a metal box that fits into the frame card guides. The
FCM-6800 or FCD-6800 series latch to the rear module to prevent accidental removal when the
fiber optic cables are installed. This section outlines how to install a FCM-6800 or FCD-6800
series in a DFR-8321 series frame.
Caution — Never attempt to look down the barrel of a connected fiber or device
transmitting an optical signal. The transmitted light is not in the visible spectrum and
may cause permanent eye damage. Turn off all laser sources before disconnecting
devices.
Use the following procedure to install a FCM-6800 or FCD-6800 in a DFR-8321 series frame:
1. Open the frame door.
2. Insert the FCM-6800 or FCD-6800 from the front of the frame until you hear a click
from the latch on the rear module.
3. Ensure that the latch is locked by gently pulling the FCM-6800 or FCD-6800 towards
you.
4. Verify whether your Rear Module Label is self-adhesive by checking the back of the
label for a thin wax sheet. You will need to remove this wax sheet before applying the
label in order that the label can be affixed to the rear module surface.
5. Affix the supplied Rear Module Label to the BNC area of the Rear Module.
6. Remove the dust cap(s) from the LC fiber optic port connectors on the unit end as
needed when attaching the fiber cable(s).
•
Refer to the section “Important Laser Safety Measures and Notices” at the
beginning of this manual for safety information when handling fiber optic
components.
7. Ensure that the exposed surface of the ceramic ferrules of the connectors is clean. Refer
to the section “Working with Fiber Optic Connectors” on page 2-2 for cleaning tips.
8. Cable your rear module as outlined in the section “Cabling for the FCM-6800 and
FCD-6800 Series” on page 2-5.
This completes the procedure for installing a FCM-6800 or FCD-6800 in a DFR-8321 series
frame.
Removing the FCM-6800 or FCD-6800 Series
Use the following procedure to removing a FCM-6800 or FCD-6800 from a DFR-8321 series
frame:
1. Remove all the fiber optic cables from the rear of the frame.
2. Open the frame door.
3. Disengage the FCM-6800 or FCD-6800 from the rear module as follows:
•
From the back of the frame, squeeze the latch on the top of the rear module.
•
Push on the LC connectors to disengage the card from the rear module.
4. Remove the FCM-6800 or FCD-6800 from the front of the frame.
5. Close the frame door.
This completes the procedure for removing a FCM-6800 or FCD-6800 from a DFR-8321 series
frame.
2–4 • Installation
FCM-6800 and FCD-6800 Series User Manual (Iss. 02)
Cabling for the FCM-6800 and FCD-6800 Series
This section provides information for connecting cables to the installed FCM-6800 or FCD-6800
series Rear Modules on the DFR-8321 series frames. Connect the input and output cables
according to the following sections.
Notice — Every time you are required to insert a connector into a device or mating
sleeve, you must clean the connector. All exposed surfaces of the ceramic ferrule
must be clean. Follow your facility practices of cleaning fiber optic connectors.
Connectors must always be inserted into a device or have a dust cap on.
Cabling Overview
The following diagrams provide cabling overviews for the FCM-6800 or FCD-6800 series.
Common
Common
Common
Expansion
Unused
Expansion
1450nm
1330nm
1450nm
1530nm
1610nm
1430nm
1310nm
1430nm
1510nm
1590nm
1370nm
1290nm
1370nm
1490nm
1570nm
1350nm
1270nm
1350nm
1470nm
1550nm
Figure 2.1 Cable Connections for
the FCM-6844 and FCD-6845
Figure 2.2 Cable Connections for the
FCM-6846 and FCD-6847
Figure 2.3 Cable Connections for the
FCM-6848 and FCD-6849
Installing and Removing Fiber Optic Cables
The limited space between connectors and the accumulated fiber optic cables around the rear
modules makes it difficult to gain access to individual connectors. Ross Video supplies an Optic
Cable Tool to assist in the installing and removal of individual fiber optic LC connectors. The
Optic Cable Tool can be used with single-latch, dual-latch, and duplex-latch connectors.
This section provides general instructions for using the Optic Cable Tool to install and remove
fiber optic cables from a DFR-8321 series frame.
FCM-6800 and FCD-6800 Series User Manual (Iss. 02)
Installation • 2–5
Installing a Fiber Optic Cable
Use the following procedure to install a fiber optic cable using the Optic Cable Tool:
1. Ensure the dust caps are removed from the cable connectors and the rear module adapter.
2. Position the bottom lip of the Optic Cable Tool on the connector boot, ensuring that the
top lip makes contact just behind the notch at the end of the latch. (Figure 2.4)
Figure 2.4 Positioning the Optic Cable Tool — Single-Latch Connector
3. Gently squeeze the handles of the Optic Cable Tool to compress the latch.
Caution — Do not apply excess pressure when installing or removing the
connector. Doing so may damage the latch, the connector, or both.
4. Insert the connector into the rear module adapter by gently pushing the connector as far
forward, towards the rear module adapter, as possible.
5. Release the latch.
6. Re-position the Optic Cable Tool so that top lip sits behind the latch. (Figure 2.5)
Figure 2.5 Re-positioning the Optic Cable Tool — Single-Latch Connector
7. Gently push the connector to lock the connector into the rear module adapter.
This completes the procedure for installing a fiber optic cable using the Optic Cable Tool.
Removing a Fiber Optic Cable
Use the following procedure to remove a fiber optic cable using the Optic Cable Tool:
1. Position the bottom lip of the Optic Cable Tool on the connector boot, ensuring that the
top lip makes contact just behind the notch at the end of the latch. (Figure 2.6)
2–6 • Installation
FCM-6800 and FCD-6800 Series User Manual (Iss. 02)
Figure 2.6 Positioning the Optic Cable Tool — Single-Latch Connector
2. Gently squeeze the handles of the Optic Cable Tool to compress the latch.
Caution — Do not apply excess pressure when installing or removing the
connector. Doing so may damage the latch, the connector, or both.
3. Remove the connector from the rear module adapter by slowly pulling the Optic Cable
Tool towards you.
This completes the procedure for removing a fiber optic cable using the Optic Cable Tool.
FCM-6800 and FCD-6800 Series User Manual (Iss. 02)
Installation • 2–7
2–8 • Installation
FCM-6800 and FCD-6800 Series User Manual (Iss. 02)
Operation
In This Chapter
This chapter provides a general overview of the possible configurations available for the
FCM-6800 or FCD-6800 series when used in conjunction with other Ross Video openGear Fiber
cards. Note that this is a brief summary and other configurations are possible.
The following topics are discussed:
•
Five-Channel CWDM Link
•
Eight-Channel CWDM Link
•
Nine-Channel CWDM Link
•
Thirteen-Channel CWDM Link
•
Sixteen-Channel CWDM Link
•
Multiple Channels of Bi-directional Links
FCM-6800 and FCD-6800 Series User Manual (Iss. 02)
Operation • 3–1
Five-Channel CWDM Link
If you have an existing non-CWDM transmitter or none at all, you can use one FCM-6844, one
FCD-6845, and the appropriate number of transmitters and receivers to build a five-channel
CWDM link. The fifth channel uses a standard, non-CWDM FP laser.
FST-6602
Expansion
1350nm
Expansion
1350nm filter
1350nm filter
1350nm
FSR-6601
FSR-6601
FDT-6604-35
1370nm
1370nm filter
1370nm filter
Common
1430nm
1370nm
FSR-6601
Common
1430nm filter
1430nm filter
1450nm filter
1450nm filter
1430nm
FDT-6604-43
FDR-6603
1450nm
FCM-6844
1450nm
FCD-6845
Figure 3.1 Workflow Diagram — Five-Channel CWDM Link
Note — The optical power of the standard FST-6602 may be 7dB lower in this
configuration. This may affect the link budget.
3–2 • Operation
FCM-6800 and FCD-6800 Series User Manual (Iss. 02)
Eight-Channel CWDM Link
You can use one FCM-6846, one FCD-6847, and the appropriate number of transmitters and
receivers to build an eight-channel CWDM link.
1270nm
FDT-6604-27
1290nm
1310nm
FDT-6604-31
1330nm
1350nm
FDT-6604-35
1370nm
1430nm
FDT-6604-43
1450nm
1270nm filter
1270nm filter
1290nm filter
1290nm filter
1310nm filter
1310nm filter
1330nm filter
1330nm filter
Common
Common
1350nm filter
1350nm filter
1370nm filter
1370nm filter
1430nm filter
1430nm filter
1450nm filter
FCM-6846
FCD-6847
1450nm filter
1270nm
1290nm
FDR-6603
1310nm
1330nm
FDR-6603
1350nm
1370nm
FDR-6603
1430nm
1450nm
FDR-6603
Figure 3.2 Workflow Diagram — Eight-Channel CWDM Link
Note — It is not recommended to use the standard FDT-6604 for the 1310nm
wavelength in this configuration as it may interfere with the adjacent channels.
FCM-6800 and FCD-6800 Series User Manual (Iss. 02)
Operation • 3–3
Nine-Channel CWDM Link
If you have an existing non-CWDM transmitter or none at all, you can use one FCM-6848, one
FCD-6849, and the appropriate number of transmitters and receivers to build a nine-channel
CWDM link. Note that the night channel uses a standard, non-CWDM FP laser.
FST-6602
Expansion
1470nm
FDT-6604-47
1490nm
1510nm
FDT-6604-51
1530nm
1550nm
FDT-6604-55
1570nm
1590nm
FDT-6604-59
1610nm
Expansion
1470nm filter
1470nm filter
1490nm filter
1490nm filter
1510nm filter
1510nm filter
1530nm filter
1530nm filter
Common
Common
1550nm filter
1550nm filter
1570nm filter
1570nm filter
1590nm filter
1590nm filter
1610nm filter
FCM-6848
FCD-6849
1610nm filter
FSR-6601
1470nm
1490nm
FDR-6603
1510nm
1530nm
FDR-6603
1550nm
1570nm
FDR-6603
1590nm
1610nm
FDR-6603
Figure 3.3 Workflow Diagram — Nine-Channel CWDM Link
Note — The optical power of the standard FST-6602 may be 7dB lower in this
configuration. This may affect the link budget.
3–4 • Operation
FCM-6800 and FCD-6800 Series User Manual (Iss. 02)
Thirteen-Channel CWDM Link
If you have an existing non-CWDM transmitter or none at all, you can use one FCM-6844, one
FCD-6845, one FCM-6848, one FCD-6849, and the appropriate number of transmitters and
receivers to build a thirteen-channel CWDM link. Note that the thirteenth channel uses a
standard, non-CWDM FP laser.
FST-6602
Expansion
1350nm
Expansion
1350nm filter
1350nm filter
1350nm
FSR-6601
FSR-6601
FDT-6604-35
1370nm
1370nm filter
1370nm filter
Common
1430nm
1370nm
1430nm filter
1430nm filter
1450nm filter
1450nm filter
1430nm
FDT-6604-43
FDR-6603
1450nm
FCM-6844
1470nm
1490nm
1510nm
FDT-6604-51
1530nm
1550nm
FDT-6604-55
1570nm
1590nm
FDT-6604-59
1610nm
1450nm
FCD-6845
Expansion
FDT-6604-47
FSR-6601
Common
Expansion
1470nm filter
1470nm filter
1490nm filter
1490nm filter
1510nm filter
1510nm filter
1530nm filter
1530nm filter
Common
Common
1550nm filter
1550nm filter
1570nm filter
1570nm filter
1590nm filter
1590nm filter
1610nm filter
FCM-6848
FCD-6849
1610nm filter
1470nm
1490nm
FDR-6603
1510nm
1530nm
FDR-6603
1550nm
1570nm
FDR-6603
1590nm
1610nm
FDR-6603
Figure 3.4 Workflow Diagram — Thirteen-Channel CWDM Link
Note — The optical power of the standard FST-6602 may be 7dB lower in this
configuration. This may affect the link budget.
FCM-6800 and FCD-6800 Series User Manual (Iss. 02)
Operation • 3–5
Sixteen-Channel CWDM Link
You can use one FCM-6846, one FCD-6847, one FCM-6848, one FCD-6849 module, and the
appropriate number of transmitters and receivers to build a sixteen-channel CWDM link.
1270nm
FDT-6604-27
1290nm
1310nm
FDT-6604-31
1330nm
1350nm
FDT-6604-35
1370nm
1430nm
FDT-6604-43
1450nm
1270nm filter
1270nm filter
1290nm filter
1290nm filter
1310nm filter
1310nm filter
1330nm filter
1330nm filter
Common
Common
1350nm filter
1350nm filter
1370nm filter
1370nm filter
1430nm filter
1430nm filter
1450nm filter
FCM-6846
FCD-6847
1450nm filter
Expansion
1470nm
FDT-6604-47
1490nm
1510nm
FDT-6604-51
1530nm
1550nm
FDT-6604-55
1570nm
1590nm
FDT-6604-59
1610nm
1270nm
1290nm
FDR-6603
1310nm
1330nm
FDR-6603
1350nm
1370nm
FDR-6603
1430nm
1450nm
FDR-6603
Expansion
1470nm filter
1470nm filter
1490nm filter
1490nm filter
1510nm filter
1510nm filter
1530nm filter
1530nm filter
Common
Common
1550nm filter
1550nm filter
1570nm filter
1570nm filter
1590nm filter
1590nm filter
1610nm filter
FCM-6848
FCD-6849
1610nm filter
1470nm
1490nm
FDR-6603
1510nm
1530nm
FDR-6603
1550nm
1570nm
FDR-6603
1590nm
1610nm
FDR-6603
Figure 3.5 Workflow Diagram — Sixteen-Channel CWDM Link
Note — It is not recommended to use the standard FDT-6604 for the 1310nm
wavelength in this configuration as it may interfere with the adjacent channels.
3–6 • Operation
FCM-6800 and FCD-6800 Series User Manual (Iss. 02)
Multiple Channels of Bi-directional Links
Multiple channels of bi-directional links can be achieved by selecting the appropriate
combination of products. Figure 3.6 illustrates an eight-channel, four in each direction
configuration.
1270nm
FDT-6604-27
1290nm
1310nm
FDT-6604-31
1330nm
1350nm
FDR-6603
1370nm
1430nm
FDR-6603
1450nm
1270nm filter
1270nm filter
1290nm filter
1290nm filter
1310nm filter
1310nm filter
1330nm filter
1330nm filter
Common
Common
1350nm filter
1350nm filter
1370nm filter
1370nm filter
1430nm filter
1430nm filter
1450nm filter
FCM-6846
FCD-6847
1450nm filter
1270nm
1290nm
FDR-6603
1310nm
1330nm
FDR-6603
1350nm
1370nm
FDT-6604-35
1430nm
1450nm
FDT-6604-43
Figure 3.6 Workflow Diagram — Eight-Channel Bi-directional CWDM Link
Note — It is not recommended to use the standard FDT-6604 for the 1310nm
wavelength in this configuration as it may interfere with the adjacent channels.
FCM-6800 and FCD-6800 Series User Manual (Iss. 02)
Operation • 3–7
3–8 • Operation
FCM-6800 and FCD-6800 Series User Manual (Iss. 02)
Specifications
In This Chapter
This chapter includes the technical specifications for the FCM-6800 and FCD-6800 series. Note
that specifications are subject to change without notice.
The following topics are discussed:
•
Technical Specifications
FCM-6800 and FCD-6800 Series User Manual (Iss. 02)
Specifications • 4–1
Technical Specifications
This section provides the technical specifications for the FCM-6800 and FCD-6800.
Table 4.1 FCM-6800 and FCD-6800 Series Technical Specifications
Category
Parameter
Specification
FCM-6844, FCD-6845: 1350nm, 1370nm, 1430nm, 1450nm
Filter Wavelengths (for each
port)
FCM-6846, FCD-6847: 1270nm, 1290nm, 1310nm, 1330nm,
1350nm, 1370nm, 1430nm, 1450nm
FCM-6848, FCD-6849: 1470nm, 1490nm, 1510nm, 1530nm,
1550nm, 1570nm, 1590nm, 1610nm
FCM-6844, FCD-6845a: 2dB channel, 2dB expansion port
Maximum Insertion Loss
FCM-6846, FCD-6847b: 3.1dB channel
FCM-6848, FCD-6849c: 3.1dB channel, 3dB expansion port
Optical
a.
b.
c.
Adjacent Channel Isolation
minimum 30dB
Non-adjacent Channel Isolation
minimum 40dB
Channel Spacing
20nm
Passband Ripple
0.3dB
Channel Passband
+/- 6.5nm
Return Loss
minimum 50dB
Number of slots required per unit
2
Connector Type
Single Mode, LC/UPC
When used as a pair, the FCM-6844 and FCD-6845 have a maximum of 2.9dB combined insertion loss, excluding the
expansion port.
When used as a pair, the FCM-6846 and FCD-6847 have a maximum of 4.1dB combined insertion loss.
When used as a pair, the FCM-6848 and FCD-6849 have a maximum of 4.1dB combined insertion loss, excluding the
expansion port.
4–2 • Specifications
FCM-6800 and FCD-6800 Series User Manual (Iss. 02)
Service Information
In This Chapter
This chapter contains the following sections:
•
Troubleshooting Checklist
•
Warranty and Repair Policy
FCM-6800 and FCD-6800 Series User Manual (Iss. 02)
Service Information • 5–1
Troubleshooting Checklist
Routine maintenance to this openGear product is not required. In the event of problems with your
FCM-6800 or FCD-6800 series, the following basic troubleshooting checklist may help identify
the source of the problem. If the frame still does not appear to be working properly after checking
all possible causes, please contact your openGear products distributor, or the Technical Support
department at the numbers listed under the “Contact Us” section.
1. Visual Review — Performing a quick visual check may reveal many problems, such as
connectors not properly seated or loose cables. Check the card, the frame, and any
associated peripheral equipment for signs of trouble.
2. Clean Fiber Interfaces — Ensure the fiber interfaces are clean with a Fiber Inspection
Scope. Clean the interfaces if necessary.
3. Verify Inputs and Outputs — Verify the power and wavelengths of the inputs and
outputs using a Wavelength Power Meter.
5–2 • Service Information
FCM-6800 and FCD-6800 Series User Manual (Iss. 02)
Warranty and Repair Policy
The FCM-6800 or FCD-6800 series is warranted to be free of any defect with respect to
performance, quality, reliability, and workmanship for a period of FIVE (5) years from the date of
shipment from our factory. In the event that your FCM-6800 or FCD-6800 series proves to be
defective in any way during this warranty period, Ross Video Limited reserves the right to repair
or replace this piece of equipment with a unit of equal or superior performance characteristics.
Should you find that the FCM-6800 or FCD-6800 series has failed after your warranty period has
expired, we will repair your defective product should suitable replacement components be
available. You, the owner, will bear any labor and/or part costs incurred in the repair or
refurbishment of said equipment beyond the FIVE (5) year warranty period.
In no event shall Ross Video Limited be liable for direct, indirect, special, incidental, or
consequential damages (including loss of profits) incurred by the use of this product. Implied
warranties are expressly limited to the duration of this warranty.
This FCM-6800 and FCD-6800 User Manual provides all pertinent information for the safe
installation and operation of your openGear Product. Ross Video policy dictates that all repairs to
the FCM-6800 or FCD-6800 series are to be conducted only by an authorized Ross Video
Limited factory representative. Therefore, any unauthorized attempt to repair this product, by
anyone other than an authorized Ross Video Limited factory representative, will automatically
void the warranty. Please contact Ross Video Technical Support for more information.
In Case of Problems
Should any problem arise with your FCM-6800 or FCD-6800 series, please contact the Ross
Video Technical Support Department. (Contact information is supplied at the end of this
publication.)
A Return Material Authorization number (RMA) will be issued to you, as well as specific
shipping instructions, should you wish our factory to repair your FCM-6800 or FCD-6800 series.
If required, a temporary replacement frame will be made available at a nominal charge. Any
shipping costs incurred will be the responsibility of you, the customer. All products shipped to
you from Ross Video Limited will be shipped collect.
The Ross Video Technical Support Department will continue to provide advice on any product
manufactured by Ross Video Limited, beyond the warranty period without charge, for the life of
the equipment.
FCM-6800 and FCD-6800 Series User Manual (Iss. 02)
Service Information • 5–3
Notes:
Notes:
Contact Us
Contact our friendly and professional support representatives for the following:
•
Name and address of your local dealer
•
Product information and pricing
•
Technical support
•
Upcoming trade show information
PHONE
General Business Office
and Technical Support
613 • 652 • 4886
After Hours Emergency
613 • 349 • 0006
Fax
613 • 652 • 4425
General Information
[email protected]
Technical Support
[email protected]
Ross Video Limited
8 John Street,
Iroquois, Ontario, Canada
K0E 1K0
Ross Video Incorporated
P.O. Box 880,
Ogdensburg, New York, USA
13669-0880
E-MAIL
POSTAL
SERVICE
Visit Us
Please visit us at our website for:
•
Company information
•
Related products and full product lines
•
On-line catalog
•
News
•
Testimonials
Ross Part Number: 6844DR-004-02