1
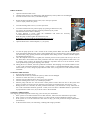
AUTOMATIC FLUSHING (OPTIONAL)
A
B
C
INSTALLATION
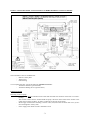
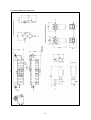
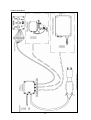
This optional device must be installed between the main freshwater watertank, the reject/production outlet valve
(1) and the low pressure pump.
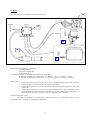
1. Connect the main watertank (if the watertank is situated above the rinsing instrument, you can connect
it direct. Otherwise, you have to connect it to a by-pass of the under pressure fresh water distribution
circuit) to the A inlet fitted with activated charcoal. This filter is used to dischlorinate the water from
the watertank to protect the diaphragm (few resistant to available chlorine).
2. Connect the filter outlet (2) to the B inlet.
3. Connect the C outlet to the low pressure pump.
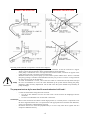
Warning : when installing the automatic flushing kit do respect the installation instructions (see
Main §) and avoid any air trap.
WARNING
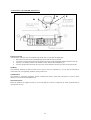
WIRING
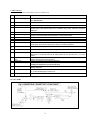
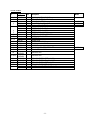
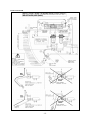
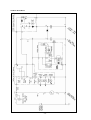
The automatic flushing device is delivered with a 4 wires. The 4 wires are numered (2-), (04), (10) and (12) and
must be connected to the corresponding numbers of the junction box..
OPERATIION
It was designed to simplify stopping procedures. For a Plastimo low pressure watermaker fitted with this
optional device maintenance procedures are as follows :
STOPPING THE SYSTEM
The stopping procedure depends on how long you won't use your watermaker.
1. If the system is to be left unused for less than 48 hours, follow the basic maintenance procedure.
2. If the system is to be left unused for a 2 days to 15 days period, perform a flushing operation cycle.
3. If the system is to be left unused for more than 15 days, you must perform a storage maintenance
(sterilization).
4. At the end of the season, for winterising : flushing and storage procedure.
BASIC MAINTENANCE
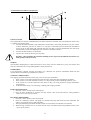
1. Press the « OFF » switch on the control panel.
2. Once the water production is stopped, close the seacock valve (V0) and rotate the reject/production
outlet valve (12) to reject position.
FLUSHING PROCEDURE
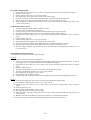
1. Press the « OFF » button on the control panel.
2. Press the « Flushing » button. The pump is activated and pump water from the main watertank. The
change of supplying source is fully automatic.
3. This optional rinsing instrument includes a timer for an automatic cut off after a few minutes.
4. When rinsing operation is over, close the seacock valve (V0) and turn the reject/production outlet valve
(12) to reject position.
-9-