1
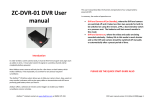
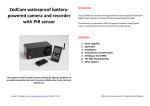
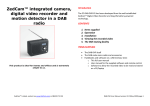
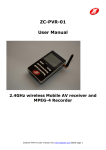
WireFree Camera Module and Remote Control/Trigger Units Introduction In order to hide a covert camera easily, it must be free from any give-away signs such as cables or wires. It must also transmit its signal on a wireless channel and be completely battery powered. Most hidden covert cameras will only last for a few hours on their battery which makes it difficult, if not impossible, to use them for any serious long term surveillance. The ZedCam™ WireFree system allows you to hide your camera hours, days, weeks or even months in advance with no give away cables or transmissions and still have a perfectly good battery when you need it. The remote control handset or other triggers enables your hidden surveillance camera remotely. In summary, the modes of operation are: ZedCam™ Limited, contact via www.ZedCam.com or 08450 175 193 Hibernate, where the camera controller is deeply “asleep” and needs a special command from the remote to “wake it up”. This extends the battery life to well over a year Camera off (or Standby), where the camera controller is on, but the camera is off. It takes less than a second for the camera to be switched on using the remote, a PIR, a door/window switch or a pressure mat. The battery will last several months in this mode Camera on, where the video and audio are being transmitted wirelessly. Life in this mode is measured in hours and so the camera should be switched off manually or automatically as soon as required. User Manual version V1.7 (April 2008) page 1 WireFree Camera Module Technical Specification: The WireFree Camera Module is available with either a PP3 battery for CMOS cameras or AA cells for CCD cameras. Due to the nature of the CCD cameras used, the battery power consumption is three times that used by CMOS camera products and hence the video time is three times less for a CCD camera than a CMOS camera using the same battery. See the previous pages for details of the internal links. CCD products are fitted with six Lithium/Iron Di-sulphide AA batteries which allow the same total “on time” as CMOS camera products have when using the Lithium-Manganese Dioxide PP3 battery. The normal total “on time” is approximately 16 hrs. This can be used over many months of surveillance work. It is important to note that the capacity of the Lithium batteries is several times that of the best alkaline battery types available and therefore, only specified battery types should be used as replacements. The low weight of our Lithium batteries is an important factor in maintaining the realistic feel of many of our products. ZedCam™ WireFree system All ZedCam™ Hidden Camera controller modules can be optimised for a particular surveillance situation. ZedCam™ cameras are generally set to RF channel 4, although any one of the four 2.4GHz ISM channels can be used with the system. The ZedCam™ system is designed to work with all camera standards, however always check local laws before using cameras not supplied by ZedCam™. The power to any one of the cameras can be turned on remotely by using a remote control handset or turned on automatically by movement (using a Passive Infra Red detector), opening a door or window or by stepping onto a special mat hidden under the carpet. The cameras can be turned off by the same devices or can be turned off automatically after a preset period of time. The timer can be preset by using the “Timeout out period” option links, to be one of 30 seconds, 3 minutes, 30 minutes or 3 hours. Features: 4 MHz Crystal controlled microcontroller decoder 13.5 MHz Crystal controlled phase-locked receiver Lithium battery shelf life is over 10 years Constant “camera on” lithium PP3 = 16 hours for CMOS camera Constant “camera on” lithium (6 by AA) = 48 hours for CMOS and 16 hours for CCD Standby (dry conditions)up to 2 years Low RDS trench MOSFET power switch output 6V to 16V DC input – switched to output at 150mA Can be built into movable/fixed hidden covert products. Automatic “camera switch off” in case you forget. Micro-power stand-by consumption = 12µA Plugs directly into a 2.4 GHz mini-covert camera. Internal PP3 or External 6 AA battery pack. Can be used to control any ZedCam™ camera. Up to four modules can operate together. ZedCam™ Limited, contact via www.ZedCam.com or 08450 175 193 The device can also be put into HIBERNATE, which will allow a camera to remain in situ in the HIBERNATE mode for well over a year, waiting to be put into STANDBY mode using the remote/trigger. Remember, the “Camera On”, command will not work until the device has been brought out of HIBERNATE mode via the remote control. User Manual version V1.7 (April 2008) page 2 This figure shows the camera controller PCB, inside the product. When shipped, six links are in use, which are set for: HIBERNATE disabled, (Link 1) Camera timeout enabled, (Link 2) 3 Min timeout, (Link 6) Camera 1, (Links 7 & 8) There are links on the unused positions for your use. Link 1 – Top Link 8 - Bottom LINKS INSIDE a ZEDCAM™ CAMERA NOTE that these links are small and difficult to access in many of our products and so should only be changed if you feel you can handle the task. The links are set by ZedCam™ or are re-sellers to the optimum. It is the responsibility of the user to switch off the camera if the “Camera Timeout On” link is not in place. Otherwise the battery will exhaust rapidly. ZedCam™ Limited, contact via www.ZedCam.com or 08450 175 193 User Manual version V1.7 (April 2008) page 3 Single Camera Remote Control To switch from HIBERNATE to STANDBY, the ON button should be pressed for a longer period – say three seconds. The LED will flash YELLOW, which will continue for at about 30 seconds, after which the camera will be switched on and you will be able to see a picture on your playback device. The camera is now in STANDBY mode and can be switched on/off with a single, short press of the buttons on the remote. Should you experience any problems, please check the following before ringing us: a) The ZedCam single location remote control unit can be used to control any of our camera products. Pressing the either the ON or OFF button for a short time (say less than one second) will switch the camera on or off. The LED briefly flashes GREEN whilst the remote controller transmits a code to the camera controller to switch it on or off. The camera is shipped in STANDBY mode and is ready to use. To try out your new camera, switch on a playback device (such as our ZC-PVR-01), ensure the channel is set to 4 and press ON for a second or so. The LED will flash green and a picture should appear on the PVR or your playback device. If the batteries have been disconnected previously for any reason the ON button may have to be pressed 2 or 3 times to activate the camera. In the basic version, the MODE key is not used and pressing it simply causes the LED to flash green. Pressing the MODE key will interrupt any of the longer functions. HIBERNATE MODE Switch the camera off and access the links on the small controller board. Enable hibernate mode by connecting Link 1 (Top Link) A space link for this will be fund in positions 3 & 4. To switch the camera controller into HIBERNATE, the OFF switch should be pressed and held down for a longer period – say three seconds. The LED will flash YELLOW for a few seconds and the camera will be switched off. It is now in HIBERNATE mode. ZedCam™ Limited, contact via www.ZedCam.com or 08450 175 193 Playback device on and set to channel 4? – this should be displaying a noisy picture (black and white random lines) b) Are the batteries installed in the camera device? c) Are the various links on the camera controller set correctly? – see earlier in this manual, but you should not need to change these d) Try again e) Still having problems – please ring us on 08450 175 193. Always put a camera in to STANDBY/OFF when not in use in order to conserve battery power. This can be set to occur automatically after a period using the links on the camera controller. If HIBERNATE mode is enabled, you may wish to press the OFF button for a few seconds to HIBERNATE the camera. The camera is shipped with the automatic timeout set to 3 mins. This ensures that the battery will not be discharged b accidental activation during transit. The camera is easily switched back on after this time by simply pressing the ON button of the remote. This “timeout” period can be changed to 30 secs, 3 mins, 30 mins or 3 hours by changing the Links 5 & 6 configurations (Refer to previous page). Or deactivated completely by removing Link 2. If the camera is turned off, but still in the STANDBY mode you can expect the battery to last for several months. However, in HIBERNATE mode and dry conditions the battery will last for well over a year – always put the device into HIBERNATE (if enabled) when not in use so that you get the maximum life from your battery. Please note: If you have more than one camera within range of your playback device they will all be activated by the remote signal and this will cause interference t reception. If you wish to use more than one camera in any particular situation please contact us at www.ZedCam.com and we will be able to advise you on the channel settings you can use to prevent this. User Manual version V1.7 (April 2008) page 4 Single location control unit For information only – these links are factory set! 1mW output with up to 10 metre control of camera 1 x 12 Volt 23A type battery WireFree Trigger Units The Trigger unit can be used with three alternative alarm sources: o A pressure mat o A magnetic switch o A PIR sensor When the trigger is used with a pressure mat, the camera will be turned on when someone steps on the mat placed under a carpet. With the magnetic switch, the camera turns on when a door, window or even a desk drawer is opened. And with the PIR sensor the camera turns on when someone approaches the trigger. Several trigger units can be used with one camera controller. The operation of the unit is the same for all three alarm sources, except that the buzzer is not available for the PIR sensor. ZedCam™ Limited, contact via www.ZedCam.com or 08450 175 193 There are 8 selection links on the trigger unit as follows. A - Link On No Link B - Link On No Link CDE - Link On No Link F - Link On No Link G - link H - link Selects 60 second timeout before camera OFF Selects 10 second timeout before camera OFF Enables beep and LED flash when an alarm is detected. No beep or LED flash when alarm is detected Not used Not used Enables Trigger unit to turn camera OFF Trigger unit does not turn camera OFF Enables auto wake when alarm is detected No auto wake when alarm is detected Camera select (see below) Camera select User Manual version V1.7 (April 2008) page 5 LINK A (upper most) This link sets the delay before the camera is turned off when the ‘camera off’ feature is selected with link E. Without the link the delay is 10 seconds, with the link fitted the delay is 60 seconds. LINK G and H (the lower two) These links are used to set the camera address. They should be the same as the corresponding links on the camera controller. The default is with both links fitted to select camera 1. LINK B With this link fitted the trigger unit will flash the LED and sound the buzzer whenever an alarm is detected. Without this link the trigger unit is discrete with no audible/visual indicator. The default is for all links to be not present except the camera being set to camera 1. This means: LINK E Without this link the trigger unit will not turn the camera off, when the alarm is removed. The camera controller must be set with the camera timeout enabled, with the timeout period set to 30 seconds or 3 minutes. Otherwise the camera will stay on until the battery is empty. With the link fitted the trigger unit will transmit the camera OFF command a short time after the alarm has been removed. The delay can be 10 seconds or 60 seconds selected by link F. This allows the ZedCam™ recorder to capture data as the person leaves the area being observed. If only one trigger device is being used it is recommended that this link is fitted, with the desired delay selected by link E. If more than one trigger device is used to control the same camera then this link should not be fitted. The camera controller should always be set to turn the camera off, after a longer timeout (e.g. 3 minutes) so that the battery will not be drained if the alarm remains on (by leaving a door open for example). LINK F Without this link, a camera ON command is transmitted by the trigger unit whenever an alarm is detected, and the camera will be turned on within about one second. If the link is fitted the trigger unit will precede the ON command with the command to switch the camera controller from HIBERNATE to STANDBY. This ensures that the camera will be turned on, but there will be a 30-40 second delay before this happens. Do not send auto wake sequence when triggered Trigger does not turn camera off Do audible/visual indication that trigger has occurred 10 second recording after camera off (not relevant as trigger does not turn camera off) NOTE that these links are small and VERY difficult to access and so should only be changed if you feel you can handle the task. The links are set by ZedCam™ or are resellers to the optimum. The trigger unit is enabled by sliding the ON/OFF switch to ON position. When switched on the trigger unit will transmit a command to the camera controller to switch from HIBERNATE mode into STANDBY mode. This takes approximately 30-40 seconds, and the LED will flash until the command is complete. The TEST button can now be used to simulate an alarm input, and turn on the camera. The trigger unit is switched off by sliding the ON/OFF switch back to the off position. Before powering off, the trigger unit will turn on the camera for the time set by link F. After this, the trigger sends the HIBERNATE command to the camera controller to shut down the system. Turning the trigger back on will restore the camera controller to the STANDBY mode. If more than one trigger is used in the system, and only one is being switched off, then the camera controller should be switched back to STANDBY mode using one of the other trigger units, or with a remote control. When the trigger is not in use always switch it off (by sliding the switch from ON to OFF) to extend the battery life. This is especially true of the PIR version. NOTE that the switch must be slid fully into the ON or OFF position – the battery life is reduced if it is left between these two positions. It is recommended that this link is not fitted, and the auto hibernate feature on the camera controller is disabled. ZedCam™ Limited, contact via www.ZedCam.com or 08450 175 193 User Manual version V1.7 (April 2008) page 6 CAUTION: Risk of electric shock – do not open any ZedCam equipment or related product. Always refer servicing or maintenance to a qualified Engineer. Always read all instructions carefully before using the equipment. Disclaimer THIS IS A DISCLAIMER OF LIABLITY BY ZEDCAM™ LIMITED (WE OR US). YOUR USE OF THIS OR ANY ZEDCAM™ PRODUCT OR ANY ZEDCAM™ SERVICE IS AT YOUR OWN RISK WE SHALL NOT BE LIABLE FOR ANY DAMAGE IN ANY FORM OR INJURY TO ANY PARTIES USING OR COMING INTO CONTACT WITH ANY OF OUR PRODUCTS. OUR PRODUCTS MAY NOT BE USED TO VIOLATE THE PRIVACY OF OTHERS. IN NO WAY WILL ZEDCAM™ LIMITED OR ITS PARTNERS OR SUBSIDIARIES BE HELD RESPONSIBLE FOR ANY INAPPROPRIATE USE OF ITS PRODUCTS. IT IS THE SOLE RESPONSIBILTY OF THE BUYER TO CONSULT LEGAL CONSEL FOR THE INTERPRETATION OF ANY LAWS APPLICABLE TO THE AREA OF INTENDED USE OF THESE PRODUCTS. ZedCam™ Limited, contact via www.ZedCam.com or 08450 175 193 User Manual version V1.7 (April 2008) page 7