1
Auto Run Mode, RGB Mode, Sound Active Mode, and Blackout: In Auto Run the color swill chage
and fade. In RGB mode choose a single color or colors to stay static. In Sound Active mode, the colors will change following the beat of the music.
Auto Run Mode:
Plug the fixture in and put all dipswitches in the “OFF” postion. To adjust the speed of the auto run use dipswitches #7 & #8. Putting these switches in the “ON” position will adjust the speed of the auto run.
RGB Mode:
Plug the fixture in and put dipswitch #1 in the “ON” position for red, dipswitch #2 is green, and dipswitch #3 is blue. To activate strobing and adjust the strobe speed use dipswitches 4-6.
Sound Active Mode:
Plug the fixture in and put dipswitch #9 in the “ON” position.
Blackout Mode:
When the fixture is on put dipswitch #10 in the “ON” position, to go into Blackout mode.
Universal DMX Control: This unit allows you to use any universal DMX-512 controller to control the
different DMX traits. A DMX controller allows you to create unique programs tailored to your individual needs.
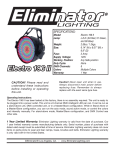
1. The Electro 86™ uses four DMX channels. Channel 1 controls red, channel 2 controls green, channel 3 controls blue, and Channel 4 controls intensity level and strobe speed.
2. To control your fixture in DMX mode, follow the set-up specifications that are included with your DMX controller.
3. Set your DMX address and put dipswitch #10 into the “ON” position.
4. Use the controller’s faders to control the various DMX fixture traits.
5. For longer cable runs (more than a 100 feet) use a terminator on the last fixture.
6. For help operating in DMX mode consult the manual included with your DMX controller.
Master-Slave Operation (Preprogrammed Chases): This function will allow you to link up to 16 units
together and operate without a controller. In Master-Slave operation one unit will act as the controlling unit and the others will react to the controlling units programs. Any unit can act as a Master or as
a Slave. See diagram below.
1. Using standard XLR microphone cables, daisy chain your units together via the XLR connector on
the rear of the units. Remember the Male XLR connector is the input and the Female XLR con nector is the output. For longer cable runs we suggest a terminator at the last fixture.
2. The dipswitch settings for Master/Slave mode is as follows. On the Master unit run you desired mode using the dipswitches. On the Slave unit or units put dipswitches #1 and #10 in the “ON” position.
1 Year Limited Warranty: Eliminator Lighting warranty is valid from the date of purchase. Our
1 year limited warranty covers manufacturing defects only. Serial number, place of purchase with
dated valid receipt must be submitted at time of service. Eliminator Lighting warranty does not cover
items or parts prone to wear and tear: lamps, fuses, brushes and belts. Eliminator Lighting warranty
is only valid with-in the United States.
©Eliminator® Los Angeles, CA. - www.EliminatorLighting.com