Download full Spec Sheet
Transcript
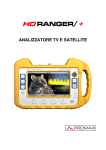
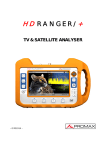
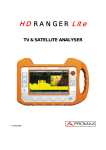
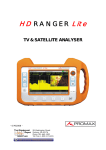
HD RANGER/+
TV & SATELLITE ANALYSER
- 0 MI1914 -
SAFETY NOTES
Read the user’s manual before using the equipment, mainly " SAFETY RULES "
paragraph.
on the equipment means "SEE USER’S MANUAL". In this manual
The symbol
may also appear as a Caution or Warning symbol.
WARNING AND CAUTION statements may appear in this manual to avoid injury
hazard or damage to this product or other property.
INFORMATION NOTE
This is a preliminary version of the RANGER/+ user manual. This version may
change according to new equipment updates or by corrections or suggestions for
improvement.
SAFETY RULES
* The safety could not be assured if the instructions for use are not closely
followed.
* Use this equipment connected only to systems with their negative of
measurement connected to ground potential.
* The AL-103 external DC charger is a Class I equipment, for safety reasons plug it
to a supply line with the corresponding ground terminal.
* This equipment can be used in Overvoltage Category I installations and
Pollution Degree 2 environments.
External DC charger can be used in Overvoltage Category II, installation and
Pollution Degree 1 environments.
* When using some of the following accessories use only the specified ones to ensure
safety.:
Rechargeable battery
External DC charger
Car lighter charger cable
Power cord
* Observe all specified ratings both of supply and measurement.
* Remember that voltages higher than 70 V DC or 33 V AC rms are dangerous.
* Use this instrument under the specified environmental conditions.
* When using the power adaptor, the negative of measurement is at ground
potential.
* Do not obstruct the ventilation system of the instrument.
* Use for the signal inputs/outputs, specially when working with high levels,
appropriate low radiation cables.
* Follow the cleaning instructions described in the Maintenance paragraph.
* Symbols related with safety:
Descriptive Examples of Over-Voltage Categories
Cat I
Low voltage installations isolated from the mains.
Cat II Portable domestic installations.
Cat III Fixed domestic installations.
Cat IV Industrial installations.
TABLE
OF
CONTENTS
SAFETY RULES ................................................................................................. 1
Descriptive Examples of Over-Voltage Categories ........................................... 2
1 INTRODUCTION ......................................................................................... 1-1
1.1 Description....................................................................................... 1-1
2 SETTING UP .............................................................................................. 2-3
2.1 Package Content ............................................................................. 2-3
2.2 Power ............................................................................................ 2-4
2.2.1 First charge................................................................................. 2-4
2.2.2 Charging the battery .................................................................... 2-4
2.2.3 Charge / discharge times .............................................................. 2-5
2.2.4 Smart control battery ................................................................... 2-5
2.2.5 Usage Tips .................................................................................. 2-6
2.3 Equipment Details ........................................................................... 2-7
2.4 Switching On / Off the equipment ...................................................... 2-9
2.5 Screen Icons and Dialog boxes ........................................................ 2-10
2.6 Menu Tree .................................................................................... 2-11
2.7 Controls ....................................................................................... 2-14
2.7.1 Joystick .................................................................................... 2-14
2.7.2 Keyboard shortcuts .................................................................... 2-15
2.7.3 Softkeys ................................................................................... 2-19
3 MEASUREMENT MODE .............................................................................. 3-20
3.1 Introduction ................................................................................... 3-20
3.2 Operation ...................................................................................... 3-21
4 SPECTRUM ANALYSER MODE ..................................................................... 4-24
4.1 Introduction.................................................................................. 4-24
4.2 Mode of operation.......................................................................... 4-24
4.3 Description of the FULL SPECTRUM screen......................................... 4-28
4.4 JOYSTICK Operation in SPECTRUM ANALYSER mode. .......................... 4-29
4.5 Options Menu................................................................................ 4-30
4.5.1 F1: Tuning ................................................................................ 4-31
4.5.2 F2: Signal Parameters ................................................................ 4-33
4.5.3 F3: Tools .................................................................................. 4-33
4.5.4 F4: Advanced ............................................................................ 4-34
4.6 Location of a signal with the SPECTRUM ANALYZER ............................ 4-35
5 TV MODE ................................................................................................ 5-36
5.1 Introduction.................................................................................. 5-36
5.2 Operation ..................................................................................... 5-36
5.3 Menu Options................................................................................ 5-40
5.3.1 ANALOGUE signal ...................................................................... 5-40
5.3.2 Terrestrial / Satellite Digital Signal ............................................... 5-40
5.3.2.1 F1: Number of Channel / Frequency tuned. ................................ 5-40
5.3.2.2 F2: Standard of the tuned signal............................................... 5-40
5.3.2.3 F3: Selected service name. ...................................................... 5-41
5.3.2.4 F4: Language of the selected service. ........................................ 5-41
August 2012
6 TOOLS ................................................................................................... 6-42
6.1 Constellation .................................................................................. 6-42
6.1.1 Description .................................................................................. 6-42
6.1.2 Operation .................................................................................... 6-42
6.1.3 Menu Options .............................................................................. 6-44
6.2 LTE Ingress test.............................................................................. 6-44
6.2.1 Description .................................................................................. 6-44
6.2.2 Operation .................................................................................... 6-45
6.2.3 Options Menu .............................................................................. 6-46
6.3 Echoes .......................................................................................... 6-47
6.3.1 Description .................................................................................. 6-47
6.3.2 Operation .................................................................................... 6-47
6.3.3 Menu Options .............................................................................. 6-49
6.4 Installations Management ................................................................ 6-49
6.5 Installation Manager ........................................................................ 6-50
7 SPECIFICATIONS ..................................................................................... 7-53
7.1 Specifications HD RANGER+............................................................ 7-53
7.2 Specifications HD RANGER .............................................................. 7-61
8 MAINTENANCE ........................................................................................ 8-67
8.1 Considerations about the Screen ....................................................... 8-67
8.2 Cleaning Recommendations .............................................................. 8-67
ANNEX 1 SIGNALS DESCRIPTION ....................................................................... 1
August 2012
TV & SATELLITE ANALYSER
HD RANGER/+
1
1 INTRODUCTION
1.1
Description
The new HD RANGER/+ is the fifth generation of field meters that PROMAX
launches. As each new generation, it represents an evolution from the previous,
since it integrates the latest technological innovations and develops applications
for the new demands and needs that have emerged in recent years.
The new HD RANGER/+ has been created with the aim to make easy the user
experience. From its ergonomic design and stylized lines to the reduction of keys
and the easy use of its interface, everything has been designed so the user has a
simple tool to use but powerful and useful.
Figure 1.
The HD RANGER/+ is a universal field meter that covers TV standards of the
DVB family, as well as formats such as MPEG-2 or MPEG-4 and Dolby audio.
There is also the possibility of an extension to work in fibre optics installations.
1
Trademark of the DVB - Digital Video Broadcasting Project.
August 2012
1-1
Besides the basic functions of TV meter and spectrum analyser for terrestrial and
satellite band, it provides additional tools, such as the detection of 4G signal
interferences (some of its working frequencies are close to the TV bands), the
diagrams constellations or the echoes detection..
The HD RANGER/+ has an application to manage data generated at each
installation.This feature helps the user to manage information generated so he
can access it at any time or download it to a PC for further analysis.
The HD RANGER/+ has been designed and developed entirely in the European
Union. A multidisciplinary team of highly qualified professionals has dedicated
effort and commitment to the development of a powerful, efficient and reliable
tool. During the manufacturing process, all used materials have been subjected
to a strict quality control.
In an effort to facilitate its work to professionals, our long experience ensures an
after sales quality service, which includes updates and upgrades for free.
Figure 2.
1-2
August 2012
2 SETTING UP
2.1
Package Content
Check that your package contains the following elements:
HD RANGER/+ Field Meter.
External DC charger.
Mains cord for external DC charger.
Car lighter charger.
"F" Adapters (3 units).
•
"F" / H - BNC / H Adapter.
•
"F" / H - DIN / H Adapter.
•
"F" / H - "F" / H Adapter.
Support belt and carrying bag.
USB On-the-go (A) Male - Mini USB (B) Male.
USB cable (A) Male - Mini USB (B) Male.
4V / RCA Jack Cable.
Transport suitcase *.
Quick Start Guide.
NOTE: Keep the original packaging, since it is specially designed to protect the
equipment. You may need it in the future to send the meter to be
calibrated.
*
Supplied only with the HD RANGER + model. Optional Accessory on request for
HD RANGER.
August 2012
2-3
2.2
Power
The HD RANGER/+ is powered by a 7.2 V built-in rechargeable Li-Ion battery
of high quality and long duration.
The equipment can operate on battery or connected to the network using a DC
adapter. An adapter is also supplied to use with the power connector car
(cigarette lighter).
2.2.1
First charge
The equipment comes with the battery fully charged. Depending on the time
elapsed from first charge and environmental conditions may have lost some of
the charge. Check the battery level.
2.2.2
Charging the battery
Connect the DC power adapter (2) to the equipment through the power
connector on the left side panel (see figure 3).
Figure 3.
Then connect the DC power adapter to the mains via the mains cord (3).Ensure
that your mains voltage is compatible with the adapter voltage.
For a fast charging of the battery is necessary to switch off the equipment.
If the equipment is ON, the battery charging will be slower, depending on the
type of work you are doing. When connecting the equipment to the mains the
mains connected symbol (
2-4
) appears inside the battery icon.
August 2012
When the computer is connected to the mains, the CHARGER indicator remains
on. This indicator changes its colour according to the percentage of battery
charge:
RED
Less than 80% of charge.
ORANGE
Between 80% and 90% of charge.
GREEN
100% full charge.
If the battery is weak, the battery disconnection circuit will prevent the
equipment starting up. In this case, please charge the battery immediately.
2.2.3
Charge / discharge times
Average charging time with the equipment off (fast charge):
3 hours to achieve an 80% charge.
5 hours to achieve a 100% charge.
With the equipment on (slow charge):
5 hours to achieve an 80% charge.
8 hours to achieve a 100% charge.
Average discharge time (with external supply disabled):
With the equipment full charge the average battery time is 5:30 hours.
With the equipment at 80% charge the average battery time is 4 h.
2.2.4
Smart control battery
The built-in battery of the equipment is of the "smart" type, which means that
reports its state of charge. This information is displayed inside the battery icon in
the form of the average time available. In this way the user can know at any
time the remaining battery level.
The remaining time charge that appears is calculated according to the work that
has been doing. If you activate the external supply of the equipment, the
average time would be reduced according to the increase in consumption that
occurs.
August 2012
2-5
2.2.5
Usage Tips
The battery is losing storage capacity as you go through its life. Contact your
PROMAX distributor when necessary to replace the battery.
To prolong battery life the user should follow these tips:
Proceed to charge the battery preferentially when fully discharged.
In case of providing a long inactivity period of the equipment is advisable
to store it fully charged at temperatures below 25 ° C.
It is advisable in these cases to make every 3 months a charge / discharge
cycle and a subsequent partial charge (50%).
2-6
August 2012
2.3
Equipment Details
Front View
Figure 4.
August 2012
2-7
Lateral view
Figure 5.
Top view
Figure 6.
* Optical Option.
2-8
August 2012
2.4
Switching On / Off the equipment
This field meter is designed for use as a portable equipment and it does not
require any previous installation.
► Switching On:
Slide up for a while the power slide switch located on the left side of the
equipment (approximately one second).
When all indicators light up at once release the switch, which returns to
its rest position.
The starting display picture appears and a progress bar that indicates the
system load.
After the system load the last screen before shutdown appears.
► Switching Off:
Slide up for a while the power slide switch located on the left side of the
equipment (approximately one second).
When the screen goes off release the switch, which returns to its rest
position.
The starting display picture appears and the progress bar showing the
system shutdown progress.
► Reset:
Press the F4 key for 5 seconds. The equipment automatically turns off.
Use only in case of system crash.
(press 1s), APPEARANCE tab, option "Off" you
In the PREFERENCES menu
can activate the automatic shutdown option, selecting a waiting time (time
without pressing any key) after which the meter turns off automatically.
August 2012
2-9
2.5
Screen Icons and Dialog boxes
At the top of the screen there is the status bar. On the right are icons that
provide useful information to the user about the current status of the instrument.
Battery charging.
USB flash drive inserted
Battery not charging.
Yellow
level
indicates
percent charge left
LTE filter enabled.
Battery not charging,
time left indicator
Current installation.
USB in
mode
Joystick multi-function
Enabled Two-letter code
indicates the exact function:
serial
Satellite band.
port
FR Frequency tuning
CH Channel tuning
Terrestrial band.
SP SPAN change
MK Marker moving
2-10
August 2012
2.6
Menu Tree
SPECTRUM ANALYSER MENU
TV MENU
August 2012
2-11
MEASUREMENT MENU
SETTINGS MENU
2-12
August 2012
INSTALLATIONS MANAGEMENT / PREFERENCES MENU
Figure 7.
August 2012
2-13
2.7
Controls
The equipment has been designed to be an easy tool to use. For this reason the
number of keys has been reduced and these are grouped by function.
For measurement and navigation through the menus, the equipment has a
joystick, 4 programmable keys (softkeys) and 6 direct access keys.
Next the use of each one of them is described:
2.7.1
Joystick
Joystick positions are:
Figure 8.
In the SPECTRUM ANALYSER mode, the joystick is multifunctional, that is,
each time you press its function changes. The user can see the active function
according to the icon that is displayed at the upper right of the equipment, as
shown in the image. The functions are:
CH:
Channel tuning.
FR:
Frequency tuning.
SP:
SPAN change.
MK:
Marker moving.
Figure 9.
According to the selected function, the joystick will do a specific action.
2-14
August 2012
2.7.2
Keyboard shortcuts
► Function keys
On the left side of the device are 3 keys to access the most important functions
of the equipment.
Measurement key.
Spectrum analyser key.
TV Mode Key.
Pressing the key provides access to a different view within the same function.
Each view is shown at the top. When reaching the third view it returns to the first
view.
August 2012
2-15
Measurements
Figure 10.- FULL MEASUREMENT
Figure 11.- MEASUREMENT + TV + SPECTRUM
Figure 12.- MEASUREMENT + PARAMETERS
2-16
August 2012
Spectrum Analyser
Figure 13.- SPECTRUM + MEASUREMENT
Figure 14.- SPECTRUM + MEASUREMENT + TV
Figure 15.- FULL SPECTRUM
August 2012
2-17
Modo TV
Figure 16.- FULL TV
Figure 17.- TV + SPECTRUM + MEASUREMENT
Figure 18.- TV + SERVICE DATA
2-18
August 2012
Screenshot key
This key captures the screen currently being displayed and stores it in the
memory of the equipment in PNG format. This screen can be displayed on the
same instrument and if desired, downloaded to a computer.
► Management Keys
There are two Management keys:
Settings. It accesses the menus to configure the
equipment.
Installations Manager. It accesses the menus to
check measurement data.
2.7.3
Softkeys
There are four programmable keys, also called softkeys, numbered F1 to F4.
Each key provides access to a menu. This menu varies depending on the function
the user is working on the meter.
The menu is displayed on each softkey at the bottom of the screen.
Figure 19.
August 2012
2-19
3 MEASUREMENT MODE
3.1
Introduction
At the left side, the equipment have three functions keys, which give direct
access to the three most important functions. One of them is the key
MEASURES (
connector.
) that measures the signal received through the RF input
The user should connect a signal to the input and select the band, whether
terrestrial or satellite. Then the auto stealth function locks the signal and
demodulates it in real time, automatically detecting its characteristic parameters.
Having identified the signal, the equipment measures according to the signal
type. All information about transponders or multiplex is automatically displayed
without introducing any additional parameter identification.
Next there is a list of signals that the equipment can automatically detect and the
characteristics of each one are described: identification parameters,
measurements and recommended values.
Digital Terrestrial Television First Generation (DVB-T)
∗
Digital Terrestrial Television Second Generation (DVB-T2 )
Digital Satellite Television First Generation (DVB-S)
Digital Satellite Television Second Generation (DVB-S2)
Digital Cable Television First Generation (DVB-C)
Digital Cable Television Second Generation (DVB-C2*)
Analogue terrestrial TV
Analogue Cable TV
Analogue Satellite TV
Analogue Terrestrial FM
∗
Available only for HD RANGER +
3-20
August 2012
3.2
Operation
Connect the RF input signal to the equipment.
Select through the Tune Settings menu
satellite).
the frequency band (terrestrial or
Access the MEASURES option by pressing the
Press again
key.
to display the next view.
Views for the digital signal are:
MEASUREMENT 1/3: FULL MEASUREMENT
Figure 20.
Selected installation, date and time.
Number of view / total views.
Selected band, battery level.
Measurement value of the selected parameter.
Graphical measurement of the selected parameter.
Measurement values for the type of locked signal.
Signal status (searching / locked/ multiplex name).
Softkeys menus.
► Joystick up / down: It changes selected parameter.
August 2012
3-21
MEASUREMENT 2/3: MEASUREMENT + TV + SPECTRUM
Figure 21.
Selected installation, date and time.
Image of the locked signal.
Number of view / total views.
Selected band, battery level.
Spectrum of the locked signal.
Measurement values for the type of locked signal.
Signal status (searching / locked / multiplex name).
Softkeys menus.
► Joystick right / left: It changes the selected channel / frequency.
3-22
August 2012
MEASUREMENT 3/3: MEASUREMENT + PARAMETERS
Figure 22.
Selected installation, date and time.
Number of view / total views.
Selected band, battery level.
Demodulation parameters of the locked signal.
Measurement values for the type of locked signal.
Signal status (searching / locked / multiplex name).
Softkeys menus.
► Joystick right / left: It changes the selected channel / frequency.
The following section describes in detail the measurements for each type of
signal.
August 2012
3-23
4 SPECTRUM ANALYSER MODE
4.1
Introduction
At the left side, the equipment has three function keys, which give direct access
to the three most important functions. One of them is the SPECTRUM
ANALYSER key
input connector.
that displays the signal spectrum received through the RF
The Spectrum Analyser mode allows checking the signals on the frequency band,
to visually identify any anomalies and to measure the signal and display the
image tuned.
4.2
Mode of operation
Connect the RF input signal to the equipment.
Select through the Tune Settings menu
or satellite).
the frequency band (terrestrial
Access the MEASURES option by pressing the
Press again
4-24
key.
to display the next view.
August 2012
Views for the digital signal are:
SPECTRUM 1/3: SPECTRUM + MEASUREMENTS
Figure 23.
Selected installation, date and time.
Number of view / total views.
Selected band, battery level.
Measured values of the signal at the frequency / channel where is pointing
the cursor.
Spectrum in the band with the selected SPAN.
Signal status (searching / locked / multiplex name).
Softkeys menus.
► Joystick up / down: It changes the reference level.
► Joystick left / right: It changes SPAN / frequency or channel / marker
position.
August 2012
4-25
SPECTRUM 2/3: SPECTRUM + MEASUREMENT + TV
Figure 24.
Selected installation, date and time.
Number of view / total views.
Selected band, battery level.
Measured values of the signal at the frequency / channel where is pointing
the cursor.
Image of the tuned signal.
Spectrum in the band with the selected SPAN.
Signal status (searching / locked / multiplex name).
Softkeys menus.
► Joystick up / down: It changes the reference level.
► Joystick left / right: It changes SPAN / frequency or channel / marker
position.
4-26
August 2012
SPECTRUM 3/3: FULL SPECTRUM
Figure 25.
Selected installation, date and time.
Number of view / total views.
Selected band, battery level.
Spectrum in the band with the selected SPAN.
Softkeys menus.
August 2012
4-27
4.3
Description of the FULL SPECTRUM screen.
Figure 26.
Horizontal reference line
It indicates the signal level.
Vertical axis
It indicates the signal level.
Vertical reference line
It indicates the frequency.
SPAN
It is the frequency range displayed on the horizontal axis.
The current SPAN value appears at the bottom right of the screen. To
change use the joystick (left, right) in SPAN mode (SP) or change it by the
"SPAN" Tuning menu (F1 key).
SPAN values available are: Full (full band), 500 MHz, 200 MHz, 100 MHz,
50 MHz, 32 MHz, 16 MHz and 8 MHz.
Reference Level
Power range is represented on the vertical axis.
To change use the joystick (up, down; 10 dB steps).
The equipment has an option to activate the automatic adjustment of the
reference level, so it detects the optimal reference level for each situation.
This option can be enabled or disabled through the PREFERENCES menu.
4-28
August 2012
Cursor
Red vertical line that indicates position during the channel or frequency
tuning.
To change use the joystick (left, right) in FR mode (tuning by frequency) or
CH mode (tuning by channel).
Marker
It is a special cursor that can be placed on a given frequency to check the
power in this point.
To change use the joystick (left, right) in MARKER (MK) mode.
This option can be enabled using the "MARKER" option from the Advanced
menu (F4 key).
4.4
JOYSTICK Operation in SPECTRUM ANALYSER mode.
In the SPECTRUM ANALYSER mode, the joystick can make different actions
depending on its active mode.
The active mode of the joystick appears as an icon in the toolbar at the top right
of the screen. Available modes are:
► Frequency tuning.
► Channel tuning.
► SPAN change.
► MARKER moving.
To change the active mode press the joystick.
Figure 27.
Pressing left or right will take appropriate action according to the active mode.
August 2012
4-29
Pressing up or down will change the reference level regardless the active mode.
The frequency or channel tuning mode will appear depending on the selected
tuning type. Access the ADJUST menu to select the type of tuning.
To show the MARKER mode, it must be active.
Access the ADVANCED menu (F4) to activate the MARKER.
Pressing the joystick for 1 second, a box appears explaining the joystick modes
available. From here user can also select the mode.
Figure 28.
4.5
Options Menu
At the bottom of the screen four menus are accessible via the function keys.
It displays the channel where is pointing the cursor
and give access to the tuning menu.
It displays the selected transmission standard and
gives access to the signal parameters menu.
It displays the Utilities menu.
It displays the Advanced menu.
Next each of these menus is described.
4-30
August 2012
4.5.1
F1: Tuning
Access by the function key
, it contains the options to tune a channel.
The tuning menu consists of the following options:
► Channel / Frequency: It displays the channel / frequency pointed by the
cursor.
In channel tuning, it allows selecting a channel from the active channel
plan:
Place over the Channel option and press the JOYSTICK.
A box appears with all channels of the active channel plan and its
frequency.
Move the JOYSTICK on the box to select a channel.
When finished press JOYSTICK to save the selected value or any
function key to exit without saving.
The cursor will place on the selected channel and it will appear on the
F1 option.
In case of tuning by frequency, the frequency can be edited:
Place over the Central Frequency option and press the JOYSTICK
The option is highlighted in yellow to indicate it is in edit mode.
Move the JOYSTICK left / right to move between the figures and up /
down to change the figure.
When finished press JOYSTICK to save the selected value or any
function key to exit without saving.
The Channel can be changed directly with the JOYSTICK in CH mode.
August 2012
4-31
► Central Frequency:
It displays the value of the central frequency on the
screen. To edit:
Place over the Frequency option and press the JOYSTICK.
The option is highlighted in yellow to indicate it is in edit mode.
Move the JOYSTICK left / right to move between the figures and up /
down to change the figure.
When finished press JOYSTICK to save the selected value or any
function key to exit without saving.
The frequency can be changed directly with the JOYSTICK in FR mode.
► Level of reference:
It displays the reference level. To edit:
Place over the Reference Level option and press JOYSTICK.
The option is highlighted in yellow to indicate it is in edit mode.
Move the JOYSTICK left / right to move between the figures and up /
down to change the figure.
When finished press JOYSTICK to save the selected value or any
function key to exit without saving.
The Reference Level can be changed directly with the JOYSTICK up or
down.
► Span:
It shows the SPAN, which is the frequency range displayed on
screen. To edit:
Place over the SPAN option and press the JOYSTICK.
The option is highlighted in yellow to indicate it is in edit mode.
Move the JOYSTICK left / right to move between the figures and up /
down to change the figure.
When finished press JOYSTICK to save the selected value or any
function key to exit without saving.
The SPAN can be changed directly with the JOYSTICK in SP mode.
4-32
August 2012
4.5.2
F2: Signal Parameters
Access by the
function key, it allows selecting the standard transmission and
displays the parameters for signal transmission.
This menu allows selecting the transmission standard:
► Type of signal: It displays the selected standard. It allows selecting another
standard in the same band (terrestrial or satellite):
Place over the Signal Type option and press the JOYSTICK.
It displays a menu at the right with the transmission standards.
Move the JOYSTICK up / down to select a standard.
When finished press JOYSTICK to select the standard or any function
key to exit without selecting.
The remaining transmission parameters are detected through the locked
signal.
4.5.3
F3: Tools
Access by the
key. It access to the Tools menu. This menu can change
depending on the type of selected standard. Tools are:
► Constellation:
It displays the constellation of the locked signal.
► LTE Ingress Test:
► Echoes:
It enables the detection of signal interferences coming
from mobile phones.
It detects the echoes that may appear due to the simultaneous
reception of the same signal from several transmitters.
For more information about these features, see "Tools" chapter.
August 2012
4-33
4.5.4
F4: Advanced
function key, it allows selecting among several parameters to
Access by the
display the spectrum.
The advanced menu consists of the following options:
► Average:
► Spectrum
The user can select the amount of signal values to be used to
set the average signal value to be displayed on screen. The
larger the average value, the more stable the displayed signal
appears.
Line:
It defines the spectrum display. Outline option displays the
spectrum outline. The Solid option displays the contour of the
spectrum with solid background.
► Marker:
It allows enabling / disabling the marker. This marker is
displayed on screen with the shape of an arrowhead, showing
on screen some information about the frequency and power
level where it points. You can move left / right by the
JOYSTICK in MK mode (press the JOYSTICK until the icon
MK appears).
► Max. Hold.:
(Off / Permanent / Curtain). It allows the user to display the
current signal with the maximum values measured for each
frequency. The OFF option disables this function. The
Curtain option displays the maximum values in blue for a
moment with the current signal. The Permanent option
maintains maximum signal on the screen. This option is
especially useful for detecting sporadic noises.
To select a parameter:
Place over the option and press the JOYSTICK.
The data field gets into the edit mode, indicated by the yellow
background.
A menu is displayed at the right with some options or if it is numeric, a
number darkens.
Move the JOYSTICK up / down to select one option. To move
between figures press right / left and to change it press up / down.
When finished press JOYSTICK or any function key to exit.
4-34
August 2012
4.6
Location of a signal with the SPECTRUM ANALYZER
Connect the cable with the input signal to the RF IN input connector.
Press the SPECTRUM key. The spectrum of the signal is displayed.
Adjust the SPAN (recommended value for a terrestrial signal 50 MHz
and for a satellite signal 100 MHz). The current value of the SPAN is
at the right bottom of the screen.
Find the frequency of the signal by moving the JOYSTICK left or right
to move sweeping the entire band.
If you know the channel change the tuning by frequency to tuning by
channel. The channel mode allows you to navigate from channel to
channel, using the selected channel plan.
When the channel is locked information appears at the bottom left of
the screen.
The equipment automatically detects transmission parameters of the
signal and makes the corresponding measurements.
August 2012
4-35
5 TV MODE
5.1
Introduction
On the left side of the front panel there are three functions, which give direct
access to the three most important functions. One is the TV MODE key
displays the resulting image from the decoding the received RF signal.
which
TV MODE demodulates the TV signal received by the RF input, so that the user
can check the signal on the screen. It shows information about the channel and
its services.
5.2
Operation
To access the TV MODE option, press the
.
The screen shows the tuned signal demodulated..
For digital carriers, the first service of the terrestrial multiplex or
satellite transponder appears. In case the signal is encoded the image
will not appear.
In the case of an analogue signal, tuned signal will appear.
To access the next view (if digital signal) of the TV MODE, press the
again. At the end view it will return back to the first.
5-36
August 2012
Views for the digital signal are:
TV 1/3: FULL TV
Figure 29.
Selected installation, date and time.
Number of view / total views.
Selected band, battery level.
Tuned service image.
Signal status (searching / locked / multiplex name).
Softkeys menus.
► Joystick up / down: It changes service.
► Joystick left / right: It changes channel / frequency.
August 2012
5-37
TV 2/3: TV + SPECTRUM + MEASUREMENT
Figure 30.
Selected installation, date and time.
Number of view / total views.
Selected band, battery level.
Tuned service image.
Spectrum.
Measured values of the signal in the frequency / channel the cursor is
pointing.
Signal status (searching / locked / multiplex name).
Softkeys menus.
5-38
►
Joystick up / down: It changes service.
►
Joystick left / right: It changes channel / frequency.
August 2012
TV 3/3: SCREEN TV + SERVICE DATA
Figure 31.
Selected installation, date and time.
Tuned service image.
Tuned service information.
► TYPE:
► FORMAT:
► PROFILE:
► PID:
► 3D:
Encoding type and video transmission rate.
Resolution (horizontal x vertical) aspect ratio and
frequency.
Profile level.
Video program identifier.
Application of 3D technology.
Number of view / total views.
Selected band, battery level.
Tuned service information.
► NETWORK:
► PROVIDER:
► NID:
► ONID:
► TSID:
► SID:
► MHP:
Television distribution network (Terrestrial). Orbital
position (Satellite).
Provider name of the program.
Network identifier where the signal is distributed.
Identifier of the original network where the signal
originates.
Transport stream identifier.
Service Identifier.
Interactive service.
► FREE /
SCRAMBLED:
► DTV/DS/
ANALOG:
August 2012
Free / scrambled emission.
Standard type of transmission.
5-39
Tuned audio information.
► TYPE:
Type of audio encoding and transmission speed
► FORMAT:
► LANGUAGE:
Broadcasting language.
► PID:
ID of the audio program.
Softkeys menus.
►
Joystick up / down: It changes service.
►
Joystick left / right: It changes channel / frequency.
5.3
5.3.1
Menu Options
ANALOGUE signal
Number of channel / frequency tuned.
Parameters of the tuned signal.
5.3.2
5.3.2.1
Terrestrial / Satellite Digital Signal
F1: Number of Channel / Frequency tuned.
It displays the channel.
It allows editing frequency or change channel in the active channel plan.
5.3.2.2
F2: Standard of the tuned signal.
It shows the parameters of the tuned signal.
It displays the menu to select the standard of the channel plan.
5-40
August 2012
5.3.2.3
F3: Selected service name.
It displays the list of services available in the multiplex tuned, with information
about the service type and the identification number.
Icons that appear next to the service name identify the features of the service.
The meaning is given in the following table:
Digital TV
service
High Definition
TV service
Digital radio
Data
Scrambled
service
5.3.2.4
F4: Language of the selected service.
It gives access to the list of available audio tracks in the selected service.
August 2012
5-41
6 TOOLS
6.1
6.1.1
Constellation
Description
The constellation diagram is a graphic representation of the digital symbols
received over a period of time. There are different types of constellation
diagrams according to the modulation type.
In the case of an ideal transmission channel without noise or interference, all
symbols are recognized by the demodulator without errors. In this case, they
are represented in the constellation diagram as well defined points hitting in
the same area forming a very concentrated dot.
Noise and interferences cause the demodulator to not always read the symbols
correctly. In this case hits are dispersed and create different forms which can
visually determine the type of problem in the signal.
Each type of modulation is represented differently. A 16-QAM signal is shown
on screen by a diagram of a total of 16 different zones and a 64-QAM signal is
represented by a diagram of 64 different zones and so on.
The constellation diagram shows in different colours the density of hits and
includes features to zoom, move and delete the display on screen.
6.1.2
Operation
The constellation is available to all DIGITAL signals, both terrestrial and
SATELLITE.
To access the utility CONSTELLATION:
Connect the RF input signal to the equipment.
Tune to a digital signal from satellite or terrestrial band.
Enter the mode MEASURES
and SPECTRUM mode
.
Press the F3 key (Utilities).
Select CONSTELLATION.
CONSTELLATION appears the tuned signal.
6-42
August 2012
The following describes the constellation screen:
Figure 32.
Selected installation, date and time.
Constellation window.
The colour scale placed at the left side indicates the signal quality in a
qualitative way by a gradation of colours proportional to the density of
symbols concentrated in a given area. The colour scale ranges from black
(no symbols) to red (highest density).
Greater dispersion of the symbols indicates higher noise level or worse
signal quality signal. If there is symbols concentration, this is indicative of
good ratio signal / noise or absence of problems.
Banda selected, battery level.
Constellation modulation.
Data Window.
The data shown are first Carrier; end Carrier, Power, C / N and frequency.
Spectrum of the tuned signal.
Spectrum is displayed with the SPAN selected at the SPECTRUM mode.
Signal status (searching / locked / multiplex name).
Softkeys menus.
Joystick Left / Right: SPAN Change
August 2012
6-43
6.1.3
Menu Options
At the bottom of the screen there are four menus accessible via the function
keys.
It displays the channel / frequency where is pointing
the cursor and access the tuning menu.
It displays the selected transmission standard menu
and accesses the signal parameters.
It displays the Tools menu.
It displays the Advanced menu.
In the Advanced menu there are options for the configuration of the
constellation. They are:
► Grid type:
Full Grid:
grid.
The grid where the constellation is displayed is a complete
Cross Grid: The grid where the constellation is displayed is made of
crosses.
► Start Carrier / Stop Carrier:
The transmission of any digital channel consists of about 8,000 carriers, of
which 6,817 are useful. These are divided in signalling carriers and data
carriers. This option allows selecting the range of carriers to be displayed
between the first and last.
6.2
6.2.1
LTE Ingress test
Description
Long Term Evolution is a new standard for mobile networks. This mobile
communication standard uses a frequency band close to the bands used by
television. For this reason it can cause interferences.
The LTE Ingress Test identifies this type of interferences in a television
distribution system, so that they can be compared on the same screen the
reception with LTE filter and without LTE filter and thus if there is any
interference it can be detected and take appropriate action to fix it.
6-44
August 2012
6.2.2
Operation
The LTE Ingress Test input is available to all DIGITAL TERRESTRIAL
signals.
To access the LTE Ingress Test tool:
Connect the RF input signal to the equipment.
Tune a digital signal of the terrestrial band.
Enter the MEASUREMENT mode
or SPECTRUM mode
.
Press the F3 key (Utilities).
Select the LTE Ingress Test mode.
Enable / disable the LTE filter.
This function displays on the same screen measurements obtained with the
LTE filter or without LTE filter. Measuring the signal with filter or without filter
is not done simultaneously, but alternately, by means of the F4 key that
activates or deactivates the filter.
The following describes the LTE display:
Figure 33.
Selected installation, date and time.
Elapsed time with filter ON.
Measurement with filter ON: MER (minimum, maximum) and power
(minimum, maximum).
August 2012
6-45
Signal with LTE filter ON.
Identifier icon of the LTE filter ON.
Selected band, battery level.
Elapsed Time with filter OFF.
Measurement with filter OFF: MER (minimum, maximum) and power
(minimum, maximum).
Signal with LTE filter OFF.
Measurement units / centre frequency / Span.
Signal status (searching / locked / multiplex name).
Softkeys menus.
6.2.3
Options Menu
At the bottom of the screen are four menus accessible via the function keys.
It displays channel / frequency and access the tuning
menu.
It displays the selected transmission standard menu
and accesses the signal parameters.
It displays the Tools menu.
It enables / disables the filter LTE.
6-46
August 2012
6.3
Echoes
6.3.1
Description
The Echoes option shows the response in time of a digital terrestrial channel
and therefore it can detect echoes that can occur due to the simultaneous
reception of the same signal from several transmitters with different delays
and amplitudes.
Another cause that may cause echoes is reflection of the signal on large
objects, as buildings or mountains. This may be the explanation that having a
good C / N and a good signal, the BER does not reach the minimum value.
With the Echo function is possible to know the distance from where the
equipment is to the transmitter or the object that caused the echo. Thus, the
installer can minimise the effect that the echo may cause on the installation,
reorienting the antenna and reducing the effect of received echoes.
This function is only available for DVB-T and DVB-T2. Therefore, previously
have to configure the apparatus for the reception of such signals.
6.3.2
Operation
Echoes function is available to DVB-T and DVB-T2 signals.
Connect the RF input signal to the equipment.
Tune a DVB-T or DVB-T2 digital signal at the terrestrial band.
Enter the MEASUREMENTS mode
and SPECTRUM mode
.
Press the F3 key (Utilities).
Select ECHOES.
The ECHOES function of the tuned signal appears on screen.
August 2012
6-47
The following describes the ECHOES screen:
Figure 34.
Selected installation, date and time.
Selected band, battery level.
Main signal data: Frequency, Power and C / N.
ECHOES Diagram.
The display shows a graphical representation of the echoes. The
horizontal axis of the graph corresponds to the delay in receiving the
echo on the main path (the stronger signal).The vertical axis represents
the attenuation of the echo in dB on the main path.
The area next to the main signal is in a different colour. This area
represents the guard interval. If the echo is found outside this area may
affect the transmission.
Data box with main data regarding echoes.
In the list of echoes it shows the power, the delay in microseconds and
the distance in kilometres to the echoes.
Signal status (searching / locked / multiplex name).
Softkeys menus.
►
Joystick left / right (CHANNEL mode): It changes the channel.
►
Joystick left / right (ECHOES mode): It moves cursor over the echoes
window.
►
Joystick up / down (ECHOES mode): It changes Zoom.
Remember to press the joystick to change the ECHOES mode to CHANNEL
mode.
6-48
August 2012
Menu Options
6.3.3
At the bottom of the screen there are four menus available via the function keys.
It displays the channel / frequency where is pointing
the cursor and access the tuning menu.
It displays the selected transmission standard menu
and accesses the signal parameters.
It displays the Tools menu.
It displays the Advanced menu. The ZOOM option
changes the zoom on the echoes windows. Zooms
are 1x, 2x, 4x and 8x.
6.4
Installations Management
The Installations Management is a program embedded in the equipment that
allows the user to easily create a file (installation) to individually store and
manage data for each installation. Installation measurements are stored in its
corresponding folder. These measures can then be displayed and downloaded to
a PC.
If the user does not create any file installation, the equipment stores
measurements in the installation file that is preinstalled by default.
To access the Installations menu press the
key.
The advanced menu consists of the following options:
Installation
Manager:
It opens a wizard to create a new installation file.
Change to:
It displays a menu with all the installations files created and
allows the user to select the installation to save
measurements. Installation selected appears at the upper left
corner of the screen, next to the time, accompanied by the
symbol
Edit
installation:
Channel Set:
August 2012
.
It opens a window showing all data of the selected installation
and allows editing it (more details in the next section).
It displays a menu with all associated channels set to the
selected installation. The user has to select the one is going
to work with.
6-49
6.5
Installation Manager
When accessing the INSTALLATION MANAGER the following screen appears:
Figure 35.
The window is divided into three fields:
Installation data
It displays information about the installation using the following
fields:
6-50
►
Name:
Name of the installation file.
►
Created:
Date the installation file creation.
►
File:
Number of files which make the installation and current size.
►
TER Channel Sets:
It shows the number of channel sets used in the installation.
►
SAT Channel Sets
It displays the number of channel sets used in the installation.
►
Free Space
It displays the amount of memory available for the selected
installation.
August 2012
List of channel sets and screenshots
It shows all channel sets and / or screenshots available for the selected
installation.
Display area
It is the area where the selected file is displayed, both channel set and
screenshots.
In the case of displaying a channel set file, it shows the name, the band
and the number of channels of the channel set on which the cursor is
placed.
For a screenshot, it shows the full screen, as captured. Screenshots are
saved with PNG extension.
At the bottom there are four function keys. Each one displays a menu. They are
described below.
VIEW
► All:
It displays all available channel sets and screenshots.
► Screenshots:
It shows all available screenshots.
► Channel Sets:
It shows all available channel sets.
FILE
► Mark All:
It marks all files in the list of channel sets screenshots.
► Unmark All:
It deselect all files in the list of channel sets and screenshots.
► Rename:
It renames a selected file.
► Delete:
It deletes all selected files.
► Copy to USB:
It saves selected files on a USB stick connected to the
instrument.
August 2012
6-51
INSTALLATION
► Edit name:
It edits the name of the currently selected installation.
► Delete:
It deletes the name of the currently selected installation.
► Duplicates:
It allows double the currently selected installation.
CURRENT INSTALLATION
The function key displays the name of the current installation.
Pressing the key, a menu displays installations available so the
user can switch installation.
6-52
August 2012
7 SPECIFICATIONS
7.1
Specifications HD RANGER+
CONFIGURATION FOR MEASURING LEVEL AND POWER
TUNING
Digital frequency synthesis. Continuous tuning from 5 to 1000 MHz
MEASURE
and from 950 to 2150 MHz. (Terrestrial and Satellite respectively).
Tuning
Digital frequency synthesis.
Demodulator
Terrestrial TV 45 - 860 MHz.
& FM bands
Terrestrial
5 - 1000 MHz.
tunable range
Satellite TV
950 - 2150 MHz.
band
Tuning modes Channel or frequency (IF or downlink at satellite band). Channel
plan configurable on demand.
Resolution
10 kHz.
RF INPUT
Impedance
75 Ω.
Maximum
130 dBµV.
signal
Maximum input voltage
DC to 100 Hz 50 V rms (powered by the AL-103 power charger).
30 V rms (not powered by the AL-103 power charger).
5 MHz to
140 dBµV. (protected at least for 30 seconds).
2150 MHz
DIGITAL SIGNALS MEASUREMENT
MARGIN OF POWER MEASUREMENT
COFDM:
35 dBµV to 115 dBµV.
QAM:
35 dBµV to 115 dBµV.
QPSK/8PSK:
35 dBµV to 115 dBµV.
MEASUREMENTS
DVB-T
Power, CBER, VBER, MER (up to 35 dB), C/N and Link margin.
(COFDM)
Presentation:
Numeric and level bar.
DVB-T2
Power, CBER, MER (up to 35 dB), C/N, LBER, BCH ESR, LDPC
(COFDM):
Iterations and Wrong Packets.
Presentation:
Numeric and level bar.
DVB-C (QAM): Power, BER, MER (up to 35 dB), C/N and Link margin.
Presentation:
Numeric and level bar.
DVB-C2
Power, CBER, MER (up to 35 dB), C/N, LBER, BCH ESR, LDPC
(COFDM):
Iterations and Wrong Packets.
Presentation:
Numeric and level bar.
DVB-S (QPSK): Power, CBER, VBER, MER (up to 30 dB), C/N and Link margin.
Presentation:
Numeric and level bar.
August 2012
7-53
DVB-S2
Power, CBER, LBER, MER (up to 30 dB), C/N, BCH ESR, Wrong Packets
(QPSK/8PSK): and Link Margin.
Presentación:
Numeric and level bar.
DVB-T SIGNAL PARAMETERS
Carriers
2k / 8k.
Guard Interval 1/4, 1/8, 1/16, 1/32.
Code Rate
1/2, 2/3, 3/4, 5/6, 7/8.
Modulation
QPSK, 16-QAM, 64-QAM.
Bandwidth
6, 7 and 8 MHz.
Spectral
ON, OFF (AUTO).
inversion
Hierarchy
Indicates hierarchy mode.
Cell ID
Detected from transmitter station.
TPS signalling Time slicing, symbol interleave and MPE-FEC.
DVB-T2 SIGNAL PARAMETERS
Carriers
1k, 2k, 4k, 8k, 8k+ EXT, 16k, 16k+ EXT, 32k, 32k+ EXT.
Guard Interval 1/4, 19/256, 1/8, 19/128, 1/16, 1/32, 1/128.
Bandwidth
5, 6, 7 and 8 MHz.
Spectral
ON, OFF (AUTO).
Inversion
Pilot Pattern
PP1-PP8.
Code Rate PLP 1/2, 3/5, 2/3, 3/4, 4/5, 5/6.
PLP
QPSK, 16QAM, 64QAM, 256QAM.
Constellation
PLP
ON / OFF (AUTO).
Constellation
Rotation
PLP ID
0-256.
ID CELL
Detected from transmitter station.
Network ID
Detected from transmitter station.
T2 System ID
Detected from transmitter station.
DVB-C SIGNAL PARAMETERS
Demodulation 16/32/64/128/256 QAM.
Symbol rate
1800 to 7200 kbauds.
Roll-off (α)
0.15.
factor of
Nyquist filter
Spectral
ON, OFF (AUTO).
inversion
7-54
August 2012
DVB-C2 SIGNAL PARAMETERS
Carriers
4k.
Guard Interval 1/64, 1/128.
Bandwidth
6 and 8 MHz.
Spectral
ON, OFF (AUTO).
Inversion
Code Rate PLP 2/3, 3/4, 4/5, 5/6, 8/9, 9/10.
PLP
64QAM, 256QAM, 1kQAM and 4kQAM.
Constellation
Dslice ID
0-256.
PLP ID
0-256.
ID cell
Detected from transmitter station.
Network ID
Detected from transmitter station.
C2 System ID Detected from transmitter station.
DVB-S SIGNAL PARAMETERS
Symbol rate
2 to 45 Mbauds.
Roll-off (α)
0.35.
factor of
Nyquist filter
Code Rate
1/2, 2/3, 3/4, 5/6, 7/8.
Spectral
ON, OFF (AUTO).
inversion
DVB-S2 SIGNAL PARAMETERS
Symbol rate
2 to 45 MSps.
(QPSK)
Symbol rate
2 to 45 MSps.
(8PSK)
Roll-off (α)
0.20, 0.25 and 0.35.
factor of
Nyquist filter
Code Rate
1/2, 3/5, 2/3, 3/4, 4/5, 5/6, 8/9, 9/10.
(QPSK)
Code Rate
3/5, 2/3, 3/4, 5/6, 8/9, 9/10.
(8PSK)
Spectral
ON, OFF (AUTO).
inversion
Pilots
Presence indication.
TOOLS
CONSTELLATION DIAGRAM
Type of signal DVB-T, DVB-T2, DVB-C, DVB-C2, DVB-S and DVB-S2.
Presentation
I-Q graph.
August 2012
7-55
ECHOES ANALYSER MODE (DVB-T / DVB-T2 / DVB-C2)
Measurement Depends on the standard, carrier and guard interval.
range
Delay
0.1 ms to 224 ms. Typical configuration (DVB-T 8K, GI = 1/4)
Distance
0.3 km to 67.2 km. Typical configuration (DVB-T 8K, GI = 1/4)
Power range
0 dBc to –30 dBc. Typical configuration (DVB-T 8K, GI = 1/4)
Time scale
1/3 symbol period
DATALOGGER function2
(Automatic measurement acquisition and storage)
Stored data
Signal type, modulation parameters, all measures available for
the detected signal type, and time stamp.
Timestamp
Date and time at each measured channel.
LTE INGRESS
Type of signal DVB-T, DVB-T2, DVB-C, DVB-C2, DVB-S and DVB-S2.
Presentation
LTE band plus quality parameters for a selected TV channel.
SAT IF TEST Function3
(IF distribution network response for satellite band.)
Test
3 selectable pilots.
frequencies
ATTENUATION TEST Function4
(Function to be used with RP-250 or RP-080 multiple pilot generator).
Test
3 selectable pilots.
frequencies
VIDEO & AUDIO
Format
MPEG-2 (MP@HL) (Main Profile High Level). MPEG-4 AVC H.264.
Aspect Ratio
16 / 9 or 4 / 3.
SI/PSI data
Service list and main PIDs.
HD Video
1080, 720 and 576, progressive or interlaced.
Resolution
Audio
MPEG-1, MPEG-2, HE-AAC, Dolby Digital and Dolby Digital Plus.
ANALOGUE SIGNALS MEASUREMENT
LEVEL MEASUREMENT
Measurement range
Terrestrial TV 15 dBµV to 130 dBµV (3,16 µV to 3,16 V).
& FM bands
Satellite TV
20 dBµV to 130 dBµV (31,6 µV to 3,16 V).
band
2
Using NetUpdate4 software application with a Windows PC platform.
Function to be used with RP-250 or RP-050 IF multiple pilot generator.
4
Function to be used with RP-250 or RP-080 multiple pilot generator.
3
7-56
August 2012
Attenuation
Auto-range.
scale
Numerical
Absolute value according to selected units.
indication
Graphical
Analogue bar on screen.
indication
Measurement 100 kHz.
bandwidth
Audible
Pitch sound. A tone with pitch proportional to signal strength.
indicator
Accuracy
Terrestrial
±1,5 dB (25-120 dBµV, 45-1000 MHz) (22 °C ± 5 °C).
bands
Satellite band ±1,5 dB (35-100 dBµV, 950-2050 MHz) (22 °C ± 5 °C).
Out of range
<, >.
indication
RF MEASUREMENTS
Terrestrial bands
Analogue
Level, Video-Audio ratio, Carrier-Noise ratio.
channels
Digital
Channel power, Carrier-Noise ratio.
channels
Satellite band
Analogue
Level and Carrier-Noise ratio.
channels
Digital
Channel power and Carrier-Noise ratio.
channels
SPECTRUM ANALYSER MODE
Measurement range
Satellite band 10 dBµV to 130 dBµV (3.16 µV to 3.16 V).
Terrestrial
10 dBµV to 130 dBµV (3.16 µV to 3.16 V).
bands
Measurement bandwidth
Terrestrial
100 kHz.
Satellite
100 kHz.
Span
Terrestrial
Full span (full band) - 500 - 200 - 100 - 50 - 20 - 10 MHz
selectable.
Satellite
Full span (full band) - 500 - 200 - 100 - 50 - 20 - 10 MHz
selectable.
Markers
1 with frequency and level indication.
Reference
65 dBµV to 135 dBµV, adjustable in steps of 5 dB.
level
August 2012
7-57
Measurements
Terrestrial bands
Analogue
Level, C/N, V/A.
channels
Digital
Channel power, C/N, MER and BER (according to modulation
channels
type).
Satellite band
Analogue
Level, C/N.
channels
Digital
Channel power, C/N, MER and BER (according to modulation
channels
type).
Spectrum
Span, dynamic range and reference level are variable by means
range
of arrow cursors.
ANALOG TV MONITOR DISPLAY
Monitor
7 inches TFT. Transmissive colour dot matrix type.
Aspect ratio
16:9.
Dot format
800 × (R,G,B) (W) × 480(H).
Brightness
700 cd/m2.
TV STANDARD
Colour system PAL, SECAM and NTSC.
Analogue TV
M, N, B, G, I, D, K and L.
standard
supported
Analogue TV
40 dBµV for a correct synchronism.
sensibility
BASE BAND SIGNAL
VIDEO
Codecs Video
DVB: MPEG-2 (MP@HL) (Main Profile High Level). MPEG-4 AVC H.264
(High Profile Level 4.1).
V/A input
Multipole jack (75 Ω).
Sensibility
1 Vpp (75 Ω) positive video.
V/A output
Multipole jack (75 Ω).
SOUND
Input
Same V/A multipole jack (75 Ω).
Outputs
Built in speaker, same multipole jack.
Codecs Audio
MPEG-1, MPEG-2, HE-AAC, Dolby Digital and Dolby Digital Plus.
Demodulation According to the TV standard.
Analogue TV
50 µs, 75 µs (NTSC).
de-emphasis
Sound
Digital frequency synthesis according to the TV standard.
subcarrier
USB
“USB On-the-go” for remote control and file transfer.
INTERFACE
Mass Storage Host: The equipment can read / write on Flash
drives.
USB CDC: (Communications Device Class).
7-58
August 2012
EXTERNAL UNIT POWER
SUPPLY (Through the RF input connector).
Terrestre
External or 5/12/ and 24 V.
Satélite
External 13/15/18 V (up to 500mA).
22 kHz signal (Selectable in satellite band)
Voltage
0,65 V ± 0,25 V.
Frequency
22 kHz ± 4 kHz.
Maximum
At least 6 W for 13/15/18/24 V and 2.5 W for 5 V.
power5
DiSEqC
According to DiSEqC 1.2 standard.
GENERATOR6
POWER SUPPLY
Internal
7.2 V 13 Ah Li-Ion intelligent battery.
Batteries
Autonomy
> 5 hours in continuous mode (no EXT supply active).
Recharging
3 hours up to 80% (instrument off).
time
External
12 V DC (using only PROMAX supplied accessories).
Voltage
Consumption
35 W.
Auto power off Programmable. After the selected amount of minutes without
operating on any control. Deactivable.
OPERATING ENVIRONMENTAL CONDITIONS
Altitude
Up to 2000 m.
Temperature
From 5 to 45 °C (Automatic disconnection by excess of
range
temperature).
Max. relative
80 % (up to 31°C),decreasing lineally up to 50% at 40 °C.
humidity
MECHANICAL FEATURES
Dimensions
290 (W) x 185 (H) x 65 (D) mm.
Weight
1.9 kg.(Total size: 3.487 cm3).
5
6
If you select 5V, the maximum power shall not exceed 2.25 W (450 mA).
DiSEqCTM is a trademark of EUTELSAT.
August 2012
7-59
INCLUDED ACCESSORIES.
1x CC-046
CABLE JACK 4V/RCA.
1x CC-041
Connection USB Cable On-the-go (A) Male – Mini USB (B) Male.
1x CC-045
USB Cable (A) Female – Mini USB (A) Male.
1x AA-103
Car lighter charger.
1x AL-103
External DC charger.
1x AD-055
"F"/H-BNC / H adapter.
1x AD-056
"F"/H-"DIN"/H adapter.
1x AD-057
"F"/H-"F"/H adapter.
1x CA-005
Mains cord.
1x CB-083
Batería recargable Li+ 7,2 V 13 Ah.
1x DC-300
Transport belt and small accessory bag.
1x DC-230
Transport suitcase.
RECOMMENDATIONS ABOUT THE PACKING
It is recommended to keep all the packing material in order to return the
equipment, if necessary, to the Technical Service.
7-60
August 2012
7.2
Specifications HD RANGER
CONFIGURATION FOR MEASURING LEVEL AND POWER
TUNING
Digital frequency synthesis. Continuous tuning from 5 to
MEASURE
1000 MHz and from 950 to 2150 MHz. (Terrestrial and Satellite
respectively).
Tuning
Digital frequency synthesis.
Demodulator
Terrestrial TV 45 - 860 MHz.
& FM bands
Terrestrial
5 - 1000 MHz.
tuneable
range
Satellite TV
950 - 2150 MHz.
band
Tuning modes Channel or frequency (IF or downlink at satellite band). Channel
plan configurable on demand.
Resolution
10 kHz.
RF INPUT
Impedance
75 Ω.
Maximum
130 dBµV.
signal
Maximum input voltage
DC to 100 Hz 50 V rms (powered by the AL-103 power charger).
30 V rms (not powered by the AL-103 power charger).
5 MHz to
140 dBµV. (protected at least for 30 seconds).
2150 MHz
DIGITAL SIGNALS MEASUREMENT
MARGIN OF POWER MEASUREMENT
COFDM:
35 dBµV to 100 dBµV.
QAM:
45 dBµV to 110 dBµV.
QPSK/8PSK:
44 dBµV to 114 dBµV.
MEASUREMENTS
DVB-T
Power, CBER, VBER, MER.
(COFDM)
Presentation:
Numeric and level bar.
DVB-C (QAM): Power, BER, MER, C/N and Link margin.
Presentation:
Numeric and level bar.
DVB-S (QPSK): Power, CBER, VBER, MER (up to 30 dB), C/N and Link margin.
Presentation:
Numeric and level bar.
DVB-S2
Power, CBER, LBER, MER (up to 30 dB), C/N, BCH ESR, Wrong Packets
(QPSK/8PSK): and Link Margin.
Presentation:
Numeric and level bar.
August 2012
7-61
DVB-T SIGNAL PARAMETERS
Carriers
2k / 8k.
Guard Interval 1/4, 1/8, 1/16, 1/32.
Code Rate
1/2, 2/3, 3/4, 5/6, 7/8.
Modulation
QPSK, 16-QAM, 64-QAM.
Bandwidth
6,7 and 8 MHz.
Spectral
ON, OFF (AUTO).
inversion
Hierarchy
Indicates hierarchy mode.
Cell ID
Detected from transmitter station.
TPS signalling Time slicing, symbol interleaver and MPE-FEC.
DVB-C SIGNAL PARAMETERS
Demodulation 16/32/64/128/256 QAM.
Symbol rate
1800 to 7000 kbauds.
Roll-off (α)
0.15.
factor of
Nyquist filter
Spectral
ON, OFF.
inversion
DVB-S SIGNAL PARAMETERS
Symbol rate
2 to 45 Mbauds.
Roll-off (α)
0.35.
factor of
Nyquist filter
Code Rate
1/2, 2/3, 3/4, 5/6, 7/8.
Spectral
ON, OFF (AUTO).
inversion
DVB-S2 SIGNAL PARAMETERS
Symbol rate
2 to 45 MSps.
(QPSK)
Symbol rate
2 to 45 MSps.
(8PSK)
Roll-off (α)
0,20, 0,25 and 0,35.
factor of
Nyquist filter
Code Rate
1/2, 3/5, 2/3, 3/4, 4/5, 5/6, 8/9, 9/10.
(QPSK)
Code Rate
3/5, 2/3, 3/4, 5/6, 8/9, 9/10.
(8PSK)
7-62
August 2012
Spectral
ON, OFF (AUTO).
inversion
Pilots
Presence indication.
TOOLS
DATALOGGER function7
(Automatic measurement acquisition and storage).
Stored data
Signal type, modulation parameters, all measures available for
the detected signal type, and time stamp.
Timestamp
Date and time at each measured channel.
SAT IF TEST Function8
(IF distribution network response for satellite band).
Test
3 selectable pilots.
frequencies
ATTENUATION TEST Function9
(Function to be used with RP-250 or RP-080 multiple pilot generator).
Test
3 selectable pilots
frequencies
VIDEO & AUDIO
Format
MPEG-2 (MP@HL) (Main Profile High Level). MPEG-4 AVC H.264.
Aspect Ratio
16 / 9 or 4 / 3.
SI/PSI data
Service list and main PIDs.
HD Video
1080, 720 and 576, progressive or interlaced.
Resolution
Audio
MPEG-1, MPEG-2, HE-AAC, Dolby Digital.
ANALOGUE SIGNALS MEASUREMENT
LEVEL MEASUREMENT
Measurement range
Terrestrial TV 15 dBµV to 130 dBµV (3.16 µV to 3.16 V).
& FM bands
Satellite TV
20 dBµV to 130 dBµV (31.6 µV to 3.16 V).
band
Attenuation
Auto-range.
scale
Numerical
Absolute value according to selected units.
indication
Graphical
Analogue bar on screen.
indication
Measurement 100 kHz.
bandwidth
Audible
Pitch sound. A tone with pitch proportional to signal strength.
indicator
7
Using NetUpdate4 software application with a Windows PC platform.
Function to be used with RP-250 or RP-050 IF multiple pilot generator.
9
Function to be used with RP-250 or RP-080 multiple pilot generator.
8
August 2012
7-63
Accuracy
Terrestrial
±1.5 dB (25-120 dBµV, 45-1000 MHz) (22 °C ± 5 °C).
bands
Satellite band ±1.5 dB (35-100 dBµV, 950-2050 MHz) (22 °C ± 5 °C).
Out of range
<, >.
indication
RF MEASUREMENTS
Terrestrial bands
Analogue
Level, Video-Audio ratio, Carrier-Noise ratio.
channels
Digital
Channel power, Carrier-Noise ratio.
channels
Satellite band
Analogue
Level and Carrier-Noise ratio.
channels
Digital
Channel power and Carrier-Noise ratio.
channels
SPECTRUM ANALYSER MODE
Measurement range
Satellite band 10 dBµV to 130 dBµV (3.16 µV to 3.16 V).
Terrestrial
10 dBµV to 130 dBµV (3.16 µV to 3.16 V).
bands
Measurement bandwidth
Terrestrial
100 kHz.
Satellite
100 kHz.
Span
Terrestrial
Full span (full band) - 500 - 200 - 100 - 50 - 20 - 10 MHz
selectable.
Satellite
Full span (full band) - 500 - 200 - 100 - 50 - 20 - 10 MHz
selectable.
Markers
1 with frequency and level indication.
Reference
65 dBµV to 135 dBµV, adjustable in steps of 5 dB.
level
Measurements
Terrestrial bands
Analogue
Level, C/N, V/A.
channels
Digital
Channel power, C/N, MER and BER (according to modulation
channels
type).
Satellite band
Analogue
Level, C/N.
channels
Digital
Channel power, C/N, MER and BER (according to modulation
channels
type).
Spectrum
Span, dynamic range and reference level are variable by means of
range
arrow cursors.
7-64
August 2012
ANALOG TV MONITOR DISPLAY
Monitor
7 inches TFT. Transmissive color dot matrix type.
Aspect ratio
16:9.
Dot format
800 × (R,G,B) (W) × 480(H).
Brightness
700 cd/m2.
TV STANDARD
Colour system PAL, SECAM and NTSC.
Analogue TV
M, N, B, G, I, D, K and L.
standard
supported
Analogue TV
40 dBµV for a correct synchronism.
sensibility
BASE BAND SIGNAL
VIDEO
Codecs Video
DVB: MPEG-2 (MP@HL) (Main Profile High Level). MPEG-4 AVC
H.264 (High Profile Level 4.1).
V/A input
Multipole jack (75 Ω).
Sensibility
1 Vpp (75 Ω) positive video.
V/A output
Multipole jack (75 Ω).
SOUND
Input
Same V/A multipole jack (75 Ω).
Outputs
Built in speaker, same multipole jack.
Codecs Audio
MPEG-1, MPEG-2, HE-AAC, Dolby Digital.
Demodulation According to the TV standard.
Analogue TV
50 µs, 75 µs (NTSC).
de-emphasis
Sound
Digital frequency synthesis according to the TV standard.
subcarrier
USB
“USB On-the-go” for remote control and file transfer.
INTERFACE
Mass Storage Host: The equipment can read / write on Flash
drives.
USB CDC: (Communications Device Class).
EXTERNAL UNIT POWER
SUPPLY (Through the RF input connector).
Terrestrial
External or 5/12/ and 24 V.
Satellite
External 13/15/18 V (up to 500mA).
22 kHz signal (Selectable in satellite band)
Voltage
0,65 V ± 0,25 V.
Frequency
22 kHz ± 4 kHz.
Maximum
At least 6 W for 13/15/18/24 V and 2.5 W for 5 V.
power10
DiSEqC
According to DiSEqC 1.2 standard.
GENERATOR11
10
11
If you select 5V, the maximum power shall not exceed 2.25 W (450 mA).
DiSEqCTM is a trademark of EUTELSAT
August 2012
7-65
POWER SUPPLY
Internal
Batteries
Autonomy
Recharging
time
External
Voltage
Consumption
Auto power off
7.2 V 13 Ah Li-Ion intelligent battery.
> 5 hours in continuous mode (no EXT supply active).
3 hours up to 80% (instrument off).
12 V DC (using only PROMAX supplied accessories).
35 W.
Programmable. After the selected amount of minutes without
operating on any control. Deactivable.
OPERATING ENVIRONMENTAL CONDITIONS
Altitude
Up to 2000 m.
Temperature
From 5 to 45 °C (Automatic disconnection by excess of
range
temperature).
Max. relative
80 % (up to 31°C),decreasing lineally up to 50% at 40 °C.
humidity
MECHANICAL FEATURES
Dimensions
290 (W) x 185 (H) x 65 (D) mm.
Weight
1.9 kg.(Total size: 3.487 cm3).
INCLUDED ACCESSORIES.
1x CC-046
CABLE JACK 4V/RCA.
1x CC-041
Connection USB Cable On-the-go (A) Male – Mini USB (B) Male.
1x CC-045
USB Cable (A) Female – Mini USB (A) Male.
1x AA-103
Car lighter charger.
1x AL-103
External DC charger.
1x AD-055
"F"/H-BNC / H adapter.
1x AD-056
"F"/H-"DIN"/H adapter.
1x AD-057
"F"/H-"F"/H adapter.
1x CA-005
Mains cord.
1x CB-083
Rechargeable Li+ battery 7.2 V 13 Ah.
1x DC-300
Transport belt and small accessory bag.
OPTIONAL ACCESSORIES
1x DC-229
Optional Transport case.
RECOMMENDATIONS ABOUT THE PACKING
It is recommended to keep all the packing material in order to return the
equipment, if necessary, to the Technical Service.
7-66
August 2012
8 MAINTENANCE
8.1
Considerations about the Screen
This paragraph offers key considerations regarding the use of the colour screen,
taken from the specifications of the manufacturer.
In the TFT display, the user may find pixels that do not light up or pixels that are
permanently lit. This should not be regarded as a defect in the TFT. In
accordance with the manufacturer quality standard, 9 pixels with these
characteristics are considered admissible.
Pixels which are not detected when the distance from the surface of the TFT
screen to the human eye is greater than 35 cm, with a viewing angle of 90°
between the eye and the screen should not be considered manufacturing defects
either.
It is advisable a viewing angle of 15 ° in the 6.00 o’clock direction in order to
obtain the optimum visualization of the screen.
8.2
Cleaning Recommendations
CAUTION
To clean the cover, take care the instrument is disconnected.
Do not use scented hydrocarbons or chlorized solvents. Such products may
attack the plastics used in the construction of the cover.
The cover should be cleaned by means of a light solution of detergent and water
applied with a soft cloth.
Dry thoroughly before using the system again.
Do not use for the cleaning of the front panel and particularly the viewfinders,
alcohol or its derivatives, these products can attack the mechanical properties of
the materials and diminish their useful time of life.
August 2012
8-67
8-68
August 2012
ANNEX 1
A1.1
SIGNALS DESCRIPTION
DIGITAL signals
A1.1.2
Digital Terrestrial Television First Generation (DVB-T / COFDM)
A1.1.2.1
DVB-T Parameters
►
Channel Bandwidth
This parameter affects the frequency separation of the carriers. Its value is
6 MHz, 7 MHz or 8 MHz.
►
Spectral inversion
It detects if the input signal has been inverted.
►
FFT Mode
It defines the number of modulation carriers between values 2k, 4k and 8k.
►
Guard Interval
This parameter is the dead time between symbols; its purpose is to detect
problems due to multipath echoes. This parameter is expressed in terms of
the symbol duration: 1/4, 1/8, 1/16, 1/32.
►
Constellation
Modulation used by the carriers. It also defines the noise immunity of the
system (QPSK, 16-QAM and 64-QAM).
►
Code rate
Also known as Viterbi ratio. It defines the ratio between the number of data
bits and the total number of bits transmitted (the difference corresponds to
the number of control bits for the detection and recovery of errors).
►
TS Hierarchy
The DVB-T standard gives the possibility of TDT transmissions with
hierarchical levels, that is, the simultaneous transmission of the same
program with different image qualities and levels of protection to different
noises, so the receiver can switch to a signal of lesser quality when reception
conditions are not optimal.
August 2012
1
A1.1.2.2
DVB-T Measurements
Power
Channel power, assuming that power spectral density is uniform over the
entire bandwidth of the channel.
C/N
Carrier / Noise ratio, where C is the received power of the modulated carrier
signal and N is the received noise power. To measure it correctly the channel
should be tuned at its centre frequency.
MER
Modulation error ratio with link margin (LM).The link margin indicates the
safety margin respect to the MER level , measured for the degradation of the
signal up to the QEF (Quasi Error Free) value. MER represents the ratio
between the average power of the DVB signal and the average noise power
of the signal constellation.
BER (VBER / CBER)
It is the system error rate. In a system of digital terrestrial signal reception,
after the COFDM decoder two methods of error correction are applied. Each
time an error correction is applied on the digital signal, the error rate
changes, so if the error rate is measured at the demodulator output or after
Viterbi or at the Reed-Solomon decoder output, different error rates are
obtained.
CBER
BER measurement for digital signal before the error correction (BER before
FEC).
VBER
BER measurement for digital signal after error correction (BER after Viterbi).
In order to have a reference about the image quality, it is considered that a
system has good quality when it produces less than one un correctable error
per hour of transmission. This border is called QEF (Quasi-English ErrorFree,) and corresponds to one error rate after Viterbi equal to 2x10 4, or
2 bit errors per 10,000.
This value is marked on the BER measurement bar. This the BER for
acceptable signals should be to the left of this mark.
2
August 2012
Digital Terrestrial Television Second Generation
(DVB-T2 standard / COFDM modulation)
A1.1.3
A1.1.3.1
DVB-T2 Parameters
►
Channel Bandwidth
This parameter affects the frequency separation of the carriers. Its value is
6 MHz, 7 MHz or 8 MHz.
►
Spectral inversion
It detects if the input signal has been inverted.
►
FFT Mode
It defines the number of modulation carriers between values 1k, 2k, 4k, 8k,
8k + EXT, 16k, 16k + EXT, 32k, 32k + EXT.
►
Pilot Pattern
There are several pilot patterns available from PP1 to PP8, which offer
different features depending on the type of channel. Each pattern supports
time and frequency variations up to the Nyquist limit. Limits depend on
certain characteristics such as the receiver operation, if the interpolation is in
frequency and time or just in time, and so on.
►
Guard Interval
This parameter is the dead time between symbols; its purpose is to detect
problems due to multipath echoes. This parameter is expressed in terms of
the symbol duration: 1/4, 19/256, 1/8, 19/128, 1/16, 1/32, 1/128.
►
Constellation
COFDM modulation with constellations QPSK, 16QAM, 64QAM, 256QAM.
►
Constellation rotation
It detects if the constellation is rotated (ON) or not (OFF).
►
Code rate
Also known as Viterbi ratio. Defines the ratio between the number of data
bits and the total number of bits transmitted (the difference corresponds to
the number of control bits for the detection and recovery of errors).
►
PLP id
It is the PLP identifier. In the case of PLP Single mode identifies the input
stream (0-255).In the case of PLP Multiple mode clients can choose the PLP
ID to view.
August 2012
3
A1.1.3.2
DVB-T2 Measurements
Power
Channel power, assuming that power spectral density is uniform over the
entire bandwidth of the channel.
C/N
(Carrier / Noise) where C is the received power of the modulated carrier
signal and N is the noise power received. To measure it correctly the channel
should be tuned at its centre frequency.
PLP id
It is the PLP identifier. In the case of PLP Single mode identifies the input
stream (0-255).In the case of PLP Multiple mode clients can choose the PLP
ID to view.
MER
Modulation Error ratio with indication of Link Margin(LM).The link margin
indicates the safety margin respect to the MER level , measured for the
degradation of the signal up to the QEF (Quasi Error Free) value. MER
represents the ratio between the average power of the DVB signal and the
average noise power of the signal constellation.
BER (CBER / LBER)
It is the bit error rate. There are two measurements related to BER:
CBER (Channel Bit Error Rate):
BER of the signal after the COFDM demodulator and before applying the
error correction or FEC (Forward Error Correction).
LBER (LDPC Bit Error Rate):
BER after been applied the LDPC (Low-density parity-check) error
correction.
In a digital signal reception (DVB-T2), after the COFDM decoder two methods
of error correction are applied. DVB-T2 uses two codes to correct errors that
are the LDPC (Low Density Parity Check) combined with the BCH (BoseChaudhuri - Hocquengham) to protect against high levels of signal noise and
interferences. Next to the measurement LBER is shown the number of
iterations LDPC, that is, the number of times the LDPC error correction
decoder has to pass through the signal and the ESR (Error Second Ratio)
after 20 seconds of the BCH decoder. This measure indicates the percentage
of time with errors after the BCH. Error correction is internal with BCH and
external with LDPC. The internal gives basic error correction with minimum
load while the external gives error correction with a correction additional
charge.
4
August 2012
Digital Satellite Television First Generation
(DVB-S / QPSK modulation)
A1.1.4
A1.1.4.1
DVB-S Parameters
►
Channel Bandwidth
It displays the channel bandwidth from 1.3 MHz to 60.75 MHz. This
parameter affects the frequency separation of the carriers.
►
Spectral inversion
It detects if the input signal has been inverted.
►
Symbol Rate
It represents the number of times that the signal status changes in a period
of time. The bandwidth is related to this parameter.
►
Roll-Off Factor
Roll-off factor of Nyquist filter. It indicates the excess of bandwidth over the
ideal bandwidth
►
Constellation
COFDM Modulation with QPSK constellations.
►
Code rate
Also known as Viterbi ratio. It defines the ratio between the number of data
bits and the total number of bits transmitted (the difference corresponds to
the number of control bits for the error detection and recovery). This value
should be between 1/2, 2/3, 3/4, 5/6 and 7/8.
August 2012
5
A1.1.4.2
DVB-S Measurements
Power
Channel power, assuming that power spectral density is uniform over the
entire bandwidth of the channel.
C/N
(Carrier / Noise) where C is the received power of the modulated carrier
signal and N is the noise power received. To measure it correctly the channel
should be tuned at its centre frequency.
PLP id
It is the PLP identifier. In the case of PLP Single mode identifies the input
stream (0-255).In the case of PLP Multiple mode clients can choose the PLP
ID to view.
MER
Modulation Error ratio with indication of Link Margin(LM).The link margin
indicates the safety margin respect to the MER level , measured for the
degradation of the signal up to the QEF (Quasi Error Free) value. MER
represents the ratio between the average power of the DVB signal and the
average noise power of the signal constellation.
BER (CBER / VBER)
It is the error rate. There are two measurements related to BER:
CBER (Channel Bit Error Rate):
BER of the signal after the COFDM demodulator and before applying the
error correction or FEC (Forward Error Correction).
VBER (Viterbi Bit Error Rate):
Measurement of the BER for the digital signal after error correction (BER
after Viterbi).
In a system for receiving digital satellite signals (DVB-S) after the QPSK
decoder two methods of error correction are applied. Each time an error
correction is applied on a digital signal its error rate changes, so if we
measure the error rate at the output of the QPSK demodulator or after
Viterbi or after the Reed-Solomon output decoder, the error rates obtained
are different.
6
August 2012
Digital SATELLITE television signal of SECOND generation
(DVB-S2 standard / QPSK/8PSK modulation)
A1.1.5
A1.1.5.1
DVB-S2 Parameters
►
Channel Bandwidth
It displays the channel bandwidth from 1.3 MHz to 60.75 MHz. This
parameter affects the frequency separation of the carriers.
►
Spectral inversion
It detects if the input signal has been inverted.
►
Symbol Rate
It represents the number of times the signal status changes in a period of
time. The bandwidth is related to this parameter.
►
Roll-Off Factor
Roll-off factor of Nyquist filter. It indicates the excess of bandwidth over the
ideal bandwidth.
►
Constellation
COFDM modulation with constellation QPSK, 8PSK.
►
Code rate
Also known as Viterbi ratio. It defines the ratio between the number of data
bits and the total number of bits transmitted (the difference corresponds to
the number of control bits for the error detection and recovery). The value
will be between 1/2, 2/3, 3/4, 5/6 and 7/8.
A1.1.5.2
DVB-S2 Measurements
Power
Channel power, assuming that power spectral density is uniform over the
entire bandwidth of the channel.
C/N
(Carrier / Noise) where C is the received power of the modulated carrier
signal and N is the noise power received. To measure it correctly the channel
should be tuned at its centre frequency.
August 2012
7
MER
Modulation Error ratio with indication of Link Margin(LM).The link margin
indicates the safety margin respect to the MER level , measured for the
degradation of the signal up to the QEF (Quasi Error Free) value. MER
represents the ratio between the average power of the DVB signal and the
average noise power of the signal constellation.
Next to the MER appears the Link Margin (LM) measurement. The LM is
equivalent to MR and indicates the distance to the QEF (usually defined as a
one lost packet per hour).The LM is measured in dB and its value
corresponds to the safety margin that separates from the QEF. The greater is
the LM better the quality signal. LM of negative values implies no reception or
that video errors are starting to appear in the video or audio so clear. LM of 0
(zero) value will display a service and occasionally some artefact.
BER (CBER / LBER)
It is the bit error rate. There are two measurements related to BER:
CBER (Channel Bit Error Rate):
BER of the signal after the COFDM demodulator and before applying the
error correction or FEC (Forward Error Correction).
LBER (LDPC Bit Error Rate):
BER after applying error correction LDPC (Low-density parity-check).
This standard makes use of two codes to correct errors that are the LDPC
(Low Density Parity Check) codes combined with BCH (Bose-Chaudhuri Hocquengham) to protect against high levels of signal noise and interference.
Each time you apply an error correction to the digital signal, the error rate
changes, so if we measure the error rate at the output of the QPSK/8PSK
demodulator or after LDPC (Low Density Parity Check) decoder or at the BCH
decoder output, error rates obtained are different.
Next to the LBER measure appears ESR (Error Second Ratio).This measures
indicates the percentage of time with errors after BCH. The error correction is
internal with BCH or external with LDPC. The internal error correction
provides basic minimum load while the outer error correction is an additional
correction with load. It also measures the PER, which is the number of
erroneous packets, that is packets received during the measurement time
not correctable by the demodulator.
8
August 2012
Digital CABLE television signal of FIRST generation
(DVB-C standard / QAM modulation)
A1.1.6
A1.1.6.1
DVB-C Parameters
►
Bandwidth channel
This parameter affects the frequency separation of the carriers.
►
Spectral inversion
It detects if the input signal has been inverted.
►
Symbol Rate
It represents the number of times the signal status changes in a period of
time. The bandwidth is related to this parameter.
►
Roll-Off Factor
Roll-off factor of Nyquist filter. It indicates the bandwidth excess over the
ideal bandwidth.
►
Constellation
Modulation used by the carriers. It also defines immunity to the system noise
(16QAM, 32QAM, 64QAM, 128QAM and 256QAM).
August 2012
9
A1.1.6.2
DVB-C Measurements
Power
Channel power, assuming that power spectral density is uniform over the
entire bandwidth of the channel.
C/N
(Carrier / Noise) where C is the received power of the modulated carrier
signal and N is the noise power received. To measure it correctly the channel
should be tuned at its centre frequency.
MER
Modulation Error ratio with indication of Link Margin(LM).The link margin
indicates the safety margin respect to the MER level , measured for the
degradation of the signal up to the QEF (Quasi Error Free) value. MER
represents the ratio between the average power of the DVB signal and the
average noise power of the signal constellation.
BER (CBER)
It is the system error rate. In a digital signal reception via cable, after the
QAM demodulator an error correction method is applied, called ReedSolomon. The error rate after correction is less than the error rate at the
output of the QAM demodulator. For this reason the BER is given prior to
error correction.
CBER
BER measurement for digital signal before the error correction (BER before
FEC)
10
August 2012
Digital CABLE television signal of SECOND generation
(DVB-C2 / QAM modulation)
A1.1.7
A1.1.7.1
DVB-C2 Parameters
►
Channel Bandwidth
It is the channel bandwidth between 6 MHz, 7 MHz and 8 MHz. This
parameter affects the frequency separation of the carriers.
►
Spectral inversion
It detects if the input signal has been inverted.
►
Guard Interval
It corresponds to the dead time between symbols; its purpose is to detect
echoes due to multi-paths. This parameter is expressed in terms of the
symbol duration: 1/64 or 1/128.
►
Constellation
QPSK COFDM modulation with constellations, 16QAM, 64QAM, 256QAM,
1024QAM, 4096QAM. The constellation refers to all the selected PLP data.
►
Code rate
It defines the ratio between the number of data bits and the total number of
bits transmitted (the difference corresponds to the number of control bits for
the error detection and recovery): 2/3, 3/4, 4/5, 5/6, 8/9, 9/10.
►
DSLICE id
Identifier a DSLICE is a data packet containing a group of several LPDs.
►
PLP id
PLP (Physical Layer Pipes) identifier. Layers are used by the system to
transmit compressed data such audio, video and more.
August 2012
11
A1.1.7.2
DVB-C2 Measurements
Power
Channel power, assuming that power spectral density is uniform over the
entire bandwidth of the channel.
C/N
(Carrier / Noise) where C is the received power of the modulated carrier
signal and N is the noise power received. To measure it correctly the channel
should be tuned at its centre frequency..
MER
Modulation Error ratio with indication of Link Margin(LM).The link margin
indicates the safety margin respect to the MER level , measured for the
degradation of the signal up to the QEF (Quasi Error Free) value. MER
represents the ratio between the average power of the DVB signal and the
average noise power of the signal constellation.
BER (CBER/LBER)
System error rate. In DVB-C2 makes use of two codes to correct errors that
are the LDPC (Low Density Parity Check) codes combined with BCH
(Bose - Chaudhuri - Hocquengham) to protect against high levels of signal
noise and interferences. On screen, under LBER measurement the number of
iterations LDPC is shown, that is, the number of times the LDPC decoder for
error correction has to pass through the signal and the ESR (Error Second
Ratio) that indicates the percentage of time with errors after the BCH. Error
correction is internal with BCH or external with LDPC. The internal error
correction provides basic minimum load while the outer error correction is a
correction with additional load. Also the PER measurement is displayed,
which is the number of erroneous packets, that is, packets received during
the measurement time and not correctable by the demodulator.
CBER (Channel Bit Error Rate)
BER of the signal after passing through the COFDM demodulator and before
applying the error correction or FEC (Forward Error Correction).
LBER (LDPC Bit Error Rate)
BER of the signal after applying the correction errors LDPC (Low-density
parity-check).
12
August 2012
A1.2
ANALOGUE signals
Terrestrial band
A1.2.1
A1.2.1.1
Analogue TV
In the measurement of analogue signals in terrestrial band, measurements
available are:
►
LEVEL
Indication of the carrier level of the tuned video.
►
C/N
Ratio between the modulated signal power and noise power for the same
bandwidth (depending on TV standard).The modulation error ratio (MER),
used in digital systems is analogue to the Signal-Noise (S / N) ratio in
analogue systems. T Carrier level is measured by a quasi-peak detector
(230 kHz BW).The noise level is measured with an average detector and
corrected to refer it to the bandwidth equivalent to channel noise (according
to its definition for the TV selected standard).
►
Video / Audio
Ratio between levels of the video carrier to audio carrier.
►
FM Deviation
A measure of the instantaneous frequency deviation of audio carrier
modulated in FM. On screen instantaneous peak frequency deviation are
monitored. Thus it is possible to see if they exceed the limits allowed by the
receiver and specified by the emitter in the transmission system.
A1.2.1.2
Analogue FM
In the analogue FM measurement mode signal, the display acts as an analogue
indicator of signal representing the signal at the input. The equipment also
demodulates the FM carrier (radio) and can be listened through the speaker.
August 2012
13
Satellite band
A1.2.2
A1.2.2.1
Analogue TV
In the measurement mode of analogue signals in the satellite band, measures
available are:
►
Level
Measurement of the tuned carrier level.
►
C/N
Ratio between the modulated signal power and noise power equivalent to the
same bandwidth (as TV standard).The modulation error ratio (MER), used in
digital systems is analogue to the Signal-Noise (S / N) ratio in analogue
systems. The carrier level is measured by a quasi-peak detector
(4 MHz BW).The noise level is measured with an average value detector
(230 kHz) and corrected to refer it to the channel bandwidth .
►
Video / Audio
Ratio between levels of video carrier and audio carrier.
v1.0.0
14
August 2012


