1
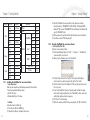
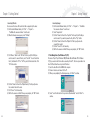
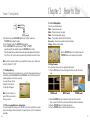
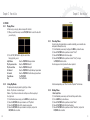
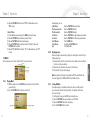
Englisch
User Guide
32
33
34
1.
Audio Player
Plays MP3 or WMA audio files
2.
Video Player
Plays ASF video files
3.
Photo Viewer
Displays JPG images
4.
Clock and Calendar
Provides real-time clock and electronic calendar
5.
Removable Storage Function
Provides built-in USB flash memory and can be used as removable disk
6.
Voice Recording
Records voice input as WAV files
7.
LINE-IN Encoding
Encodes audio source from external audio player such as
CD player/MD player into MP3 files
8.
Games
Play Tetris World and Snake games
9.
Display pictures on an external monitor such as a TV
10.
SD/MMC memory card support
Access up to 1GB of SD/MMC memory card via the card slot
Englisch
Features
35
Table of Content
In the interests of safety, please read the following safety precautions before operation.
Do not subject the device to severe shocks or drop it from a great height.
Chapter 1 Getting Started ...................................................................... 39
1.1 System Requirements ............................................................................ 39
1.2 Accessories .......................................................................................... 39
1.3 Description of buttons ........................................................................... 39
1.4 Installing the battery ............................................................................. 40
1.5 Using the DC adapter ............................................................................ 40
1.5.1
To charge the battery ................................................................. 40
1.5.2
To power the device ................................................................... 40
1.6 Inserting/Removing a memory card ........................................................ 41
1.7 Switching on/off .................................................................................. 41
1.8 Converting Videos/Images ..................................................................... 41
1.8.1
Installing the CineWalker file conversion software ........................... 42
1.8.2
Using the CineWalker file conversion software ............................... 43
1.9 Installing Driver (for Windows 98/SE) ..................................................... 45
1.10 Connecting to the PC and downloading files .............................................. 46
1.11 Disconnecting the device from the PC safely .............................................. 47
1.11.1
For Windows 2000/XP/ME ....................................................... 47
1.11.2
For Win98/SE .......................................................................... 47
1.12 Connecting to a TV ................................................................................ 47
1.13 Locking the keys .................................................................................. 48
1.14 Use as a removable mass storage device .................................................. 48
Do not subject the player to extremes of heat or cold, or to dusty or damp conditions. Do not expose it to direct
sunlight.
Back up data frequently in case of accident data loss.
Keep the player away from strong magnetic fields.
Keep the device away from water or other liquids. In the event that the device is exposed to water or other liquids,
switch the power off immediately, take out the battery and clean the device.
To avoid corrosion, do not use chemical solution to clean the device. Clean it with a dry cloth.
No responsibility is assumed for damage or data loss caused by malfunction, misuse or repair of the device or
by replacement of the battery.
Any attempt to dismantle, repair or modify the product shall void the guarantee.
Important Information on using “DirStructure”
This program enables you to transfer the file structure of the takeMS CineWalker to the SD/MMC Cards
without any data loss.
Connect the SD/MMC Card from a card reader or your CineWalker toyour computer and copy the file
“DirStructure“ to the root directory of the Card.
Launch the “DirStructure” file by double clicking it. After this youshould be able to see two new folders:
“MP3“ and “DCIM“. In the DCIM folder, a subfolder named “100Media“ should be located.
You will now be able to use your CineWalker with the aid of these three folders. All music files must
be stored in the “MP3“ folder. All photos and movie files must be stored in the “100Media“ folder.
Englisch
Safety Precautions
Chapter 2 How to Use ........................................................................... 49
2.1 Select Working Mode ............................................................................ 49
2.2 Using the menu ................................................................................... 49
2.3 VIDEO ............................................................................................... 50
2.3.1
Playing Videos .......................................................................... 50
2.3.2
Setting Play Modes .................................................................... 50
2.3.3
Protecting Videos ...................................................................... 51
2.3.4
Deleting Videos ......................................................................... 51
Enjoy using your CineWalker.
36
37
Table of Content
Chapter 1 Getting Started
2.4
2.4.1
2.4.2
2.4.3
2.4.4
2.4.5
2.5
2.5.1
2.5.2
2.5.3
2.5.4
2.6
2.6.1
2.6.2
2.6.3
2.6.4
2.7
2.7.1
2.7.2
2.8
2.8.1
2.8.2
2.9
1.1 System Requirements
• Hardware: IBM PC & Compatible PC, Note Book with USB port
• Operating System: Windows 98/SE, Windows 2000 Service Pack 4, Windows XP,
Windows ME etc.
Chapter 3 Technical Support .................................................................. 60
3.1 Troubleshooting .................................................................................... 60
3.2 Technical Specifications .......................................................................... 62
3.3 Important Notice ................................................................................... 63
1.2 Accessories
• USB Cable
• Audio/Video Cable
• Earphone with neck strap
• CineWalker file conversion software CD
• LINE-IN Cable
DC Adapter
Rechargeable Lithium Battery
Carrying Case
Warranty Card
User Manual
1.3 Description of buttons
a.
b.
c.
d.
e.
f.
g.
h.
i.
j.
38
•
•
•
•
•
Englisch
MUSIC ............................................................................................... 52
Playing Music ........................................................................... 52
Displaying Lyrics ........................................................................ 53
Setting EQ Mode ....................................................................... 53
Setting Play Mode ..................................................................... 54
Deleting ................................................................................... 54
VOICE ............................................................................................... 55
Setting Audio Source .................................................................. 55
Voice Recording ......................................................................... 55
LINE-IN Recording ...................................................................... 55
Playing Recordings ..................................................................... 55
PHOTO ............................................................................................... 56
Browse Photos/Images .............................................................. 56
Slide Show ............................................................................... 56
Delete Image ........................................................................... 56
Set Boot-up Screen .................................................................... 57
GAME ............................................................................................... 57
Tetris World .............................................................................. 57
Snake ...................................................................................... 57
ACCESSORIES ....................................................................................... 58
Calendar .................................................................................. 58
System Information ................................................................... 58
SETTINGS ............................................................................................ 58
USB Port: Connect to USB cable
Memory Card Slot: Insert SD/MMC card
Power Jack: Connect to DC adapter
Power Switch: Power On/Power Off
MENU button: Display menu items
ESC button: Return or Exit
Speaker
Power Indicator: Turns green when you
power on the device
Charge Indicator: Turns red when you recharge
the battery
Display
k.
PLAY/NAVI Button: Play/Pause
Volume up/down
Previous/Next
Fast forward/Rewind
Select/Confirm
l. Audio Output/Earphone Jack: Connect to
earphone jack, audio cable or microphone
m. Video Output/LINE-IN Jack: Connect to video
cable or LINE-IN cable
n. Hold Switch: Locks keys against being pressed
accidentally
o. Battery cover
39
Chapter 1 Getting Started
1.4 Installing the battery
The device comes with a rechargeable lithium-ion battery. Please install the battery as
shown below:
(1) Press the point embossed with an arrow sign, and slide the battery cover as shown below
to remove it.
Chapter 1 Getting Started
1.6 Inserting/Removing a memory card
The device contains a card slot for a memory card. Memory cards can be inserted according
to the procedure below:
(1) On the left side of the machine, there is a card slot.
(2) Insert the memory card face-down into the slot.
The display shows the memory card symbol “ ” on the top bar.
Card symbol
(2) Place the battery into the battery compartment, making sure it is correctly aligned.
(3) Close the battery cover.
Note:
a. The charge indicator turns red during charging. When the battery is fully charged,
the charge indicator switches off.
b. You can still operate the machine while the battery is being charged.
1.5.2
40
To power the device
The DC adapter can be used not only to charge the battery but also to supply power to
the device. To conserve the battery’s charge, you can remove the battery and just use
the DC adapter to power the device.
When the DC adapter is connected, the power indication “ ” appears at the upper
right of the screen.
To remove the card, press it first and then pull it out.
Note: Make sure the device is powered off before you insert or remove a memory card. Never
insert or remove a card when the device is working, as the card or the device may be damaged.
Englisch
1.5 Using the DC adapter
1.5.1 To charge the battery
After installing the battery, you need to charge it using the DC adapter. Charging the
battery fully takes about 3.5 hours. To charge the battery, follow these steps:
(1) Connect one end of the adapter to the power jack.
(2) Connect the other end to the electrical outlet.
1.7 Switching on/off
To switch on the device, press and hold the Power Switch until the power indicator lights up.
To switch off the device, press and hold the Power Switch until the screen is off.
1.8 Converting Videos/Images
Before you download a video or image from a PC to the device, please convert into a supported
file type by using the included Transcording Tool on the CineWalker file conversion software CD.
The device supports MP3/WMA audio, ASF video and JPG image files.
The following tables show which file types can be converted:
41
Chapter 1 Getting Started
Video
Image
Audio
1.8.1
File Type
.mov
.mpg
.avi
.asf
wmv
.rm
.jpg
.bmp
.tiff
.gif
.pcx
.wma
.mp3
.ogg
.wav
Convertible
Yes (Some)
Yes
Yes
Yes
Yes (Some)
No
Yes
Yes
Yes
Yes
No
Yes (Some)
Yes
Yes
Yes
MPEG-1
MPEG-2
MPEG-4
Etc.
V1
MSMPEG4
V2
V3
3
DivX
4
5
8
WMV
9
10
Motion JPEG
Huffyuv
Yes
Yes
Yes
Yes
Yes
Yes
Yes
Yes
Yes
Yes
No
Yes
Yes
Installing the CineWalker file conversion software
- System Requirement
Make sure your computer meets the following requirements before installing.
If not, please upgrade your Windows system:
a. DirectX 9.0 or above
b. Windows Media Player 9.0 or above
- Installation
Follow these steps to install the tool:
(1) Place the driver CD in the CD-ROM tray.
(2) Navigate to the CD drive, and double click to open it.
42
(3) Open the“CineWalker file conversion software” folder, where there should be
two folders named as ”Win2000&XP” and “Win98&ME”. For Windows 2000 or
Windows XP OS, open the “Wind2000&XP” folder; for Windows 98 or Windows ME,
open the “Win98&ME” folder.
(4) Run the Setup.exe file, and then install the tool following the on-screen instructions.
(5) The software is named “PMP Transcoding Tool“.
ENCODING
1.8.2
Using the CineWalker file conversion software
- Converting Audio/Video Files
Video files can be converted as follows:
(1) On the bottom Windows taskbar, click “Start” → ”Programs” → “CineWalker file
conversion software” to run the tool.
(2) When you see the following screen, select ”Media Mode”.
Englisch
Category
Chapter 1 Getting Started
(3) Click the “Browse” button for the “Input File” field to specify the file that you
want to convert. If you want to preview the file, click the “Play” button.
(4) Click the “Browse” button for the “Output File” field to specify where the converted
file is to be saved.
(5) In the “Audio Sample Rate” column, set the audio quality. The higher the sample
rate the better the audio quality will be; in the “Video Quality” column, set the video
quality. Higher quality needs more storage space.
(6) Click “Convert” to start converting.
(7) Wait for the conversion to finish. When you are prompted, click “OK” to finish finish.
43
- Converting CD tracks
You can convert tracks on a CD to audio files that are supported by the device:
(1) On the bottom Windows taskbar, click “Start” → ”Programs” →
“CineWalker file conversion software” to run the tool.
(2) When the following screen appears, select ”CD Mode”.
(3) Click “Browse” button for the “CD Tracks” field to specify the CD that you
want to convert. To convert all tracks, select “Select All”. To select tracks from
the list, hold down the “Ctrl” or “Shift” key and click the desired tracks. Click
“Ok” after selection.
(4) Click the “Browse” button for the “Output Directory” field to specify where
the converted tracks will be saved.
(5) Click “Convert” to start converting.
(6) Wait for the conversion to finish. When you are prompted, click “OK” to finish.
44
Chapter 1 Getting Started
- Converting Images:
(1) On the bottom Windows taskbar, click “Start” → ”Programs” → “CineWalker
file conversion software” to run the tool.
(2) Select ”Image Mode”.
(3) Click the “Browse” button for the “Input File” field to specify the file that you
want to convert. If you want to preview the file, click the “Play” button.
(4) Click the “Browse” button for the “Output File” field to specify where the
converted file is output.
(5) Click the “Convert” to start converting.
(6) Wait for the conversion to finish. When you are prompted, click “OK” to finish.
1.9 Installing Driver (for Windows 98/SE)
This device is Plug & Play for Windows 2000, Windows ME and Windows XP. For Windows
98/SE, you need to install a driver before connecting it to the PC. The driver is provided on the
driver CD. Please follow these steps to install the driver:
(1) Insert the driver CD into the CD-ROM of the computer.
(2) Power on the device and connect it to the PC.
(3) When you are prompted by the following message, click “Next” to continue.
Englisch
Chapter 1 Getting Started
(4) Select “Search for the best driver for your device (Recommended)” and click “Next” to
continue.
45
(5) Click the “Browse” button to specify the location of the driver CD and click “Next” to
continue.
(6) Click “Next” to continue.
(7) Click“Finish” to finish the installation.
1.10 Connecting to the PC and downloading files
To connect the device to the PC and download files:
(1) Insert a memory card (optional).
(2) Switch on the device.
(3) Connect one end of the USB cable to the PC’s USB port, and connect the other end to
the device’s USB interface.
(4) Double-click “My Computer” on the desktop and should see up to two new disk drives
indicated as removable disks. The first one is the internal flash memory of the device,
and the second one is any external memory card you have inserted in the device.
46
Chapter 1 Getting Started
(5) Double-click one of the two removable disk drives and two folders called “DCIM” and
“MP3” should be displayed (if not, you need to create these folders manually). Copy
audio files such as MP3, WMA or WAV files to the “MP3” folder, and copy video files
such as photos, movies, or video clips to the “DCIM/100MEDIA” folder.
Note:
(1) Before connecting to a PC, make sure the battery charge is sufficiently charged or the
DC adapter is connected. Any sudden disconnection during data transfer may cause data
loss.
(2) For Windows 2000, if the system cannot identify the memory card,
please install Service Pack 4.
1.11 Disconnecting the device from the PC safely
In order to avoid data loss, please remove the device from the PC as follows:
1.11.1 For Windows 2000/XP/ME:
(1) Left-click the icon at the right hand corner of the taskbar.
(2) Click the pop-up mini-window containing the message “Stop the USB Mass
Storage Device – Drive (X)”.
(3) When you are prompted to remove the device, disconnect it.
1.11.2 For Win98/SE
Please make sure that data transfer has ceased before you disconnect the device.
Englisch
Chapter 1 Getting Started
1.12 Connecting to a TV
The device comes with an audio output port and a video output port. With these ports, you can
connect the device to a TV and display pictures on the TV screen. Follow these steps to connect
the device to a TV:
(1) Power on the device.
(2) Remove the audio/video cable from the package. Connect the end with two connectors
to the device, connecting the yellow connector (the Line-in jack) to the video port and
the black connector (the earphone jack) to the audio port. Connect the other end to the
TV, connecting the yellow connector to the video port and the two black connectors to
the audio port.
47
(3) On the main menu, push the PLAY/NAVI button to select “Settings” and press the
PLAY/NAVI button to display the settings.
(4) Select “Video Out” and press the PLAY/NAVI button to confirm.
(5) Move the PLAY/NAVI button up or down to select “TV-PAL” or “TV-NTSC”
depending on the TV/video standard, and press the PLAY/NAVI button to confirm.
When the settings have been adjusted as shown above the operating window will be transferred
to the TV screen. You can use the keys to operate the device and view the result on the TV screen.
Note: To leave TV mode and switch the screen output back to the device, go to Settings mode
and set the “Video Out” to “LCD”.
1.13 Locking the keys
When you are listening to music or playing a movie, you can lock the keys against being pressed
accidentally by using the Hold Switch. Slide the Hold Switch to the left to lock the keys. A lock
indication will appear on the top bar (see below).
To re-enable the keys, slide the
Hold Switch to the right. The
lock indicator will disappear.
Note: You can still power on or
power off the device even when
the keys are locked.
1.14 Use as a removable mass storage device
The device has built-in flash memory of up to 128MB. It can be used as a portable mass storage
device to store all types of files and documents. Just connect the device to a PC, and download or
upload data.
48
Chapter 2 How to Use
2.1 Select Working Mode
This device has six Working Modes:
Video – Play and manage videos.
Audio – Play music and record voice input.
Photo – View and mange photos/images.
Game – Play fun games including Tetris World and Snake.
Accessories – View electronic calendar and system information.
Setting – Customise system settings.
Move the PLAY/NAVI button to Select mode and press the
PLAY/NAVI button to enter the working mode selected.
2.2 Using the menu
To use menu items when you are in the appropriate working mode:
(1) Press the MENU button on the screen that appears first when you enter the selected
mode.
(VIDEO mode)
(MUSIC mode)
Englisch
Chapter 1 Getting Started
(PHOTO mode)
(2) Move thePLAY/NAVI button up and down to the select item from the menu list.
(Note: an arrow to the left of the menu item means that item is divided into submenus).
(3) Move the PLAY/NAVI button left to display the submenus.
(4) Press the PLAY/NAVI button to confirm the selected menu item.
49
Chapter 2 How to Use
Chapter 2 How to Use
2.3 VIDEO
2.3.1 Playing Videos
In Video mode, you can play, delete or manage ASF video files:
(1) When you enter Video mode, move the PLAY/NAVI button to select the video that
you want to play.
2.3.3
2.3.2
50
Setting Play Modes
This option provides two play modes to play all types of video:
Normal – Play all videos in order and repeat
Random – Play all videos in random order and stop once all have been played
To set play mode:
(1) In the thumbnail preview mode, press the MENU key to show the menu.
(2) Move the PLAY/NAVI button up and down to select “Play Mode”.
(3) Move the PLAY/NAVI button left to show play mode options.
(4) Move the PLAY/NAVI button up and down to select option, and press the
PLAY/NAVI button to confirm.
Englisch
(2) Press the PLAY/NAVI button to play the selected video.
During playback, you can:
Adjust Volume
Move the PLAY/NAVI button up and down
Play the previous video
Move the PLAY/NAVI button left
Play the next video
Move the PLAY/NAVI button right
Fast forward
Move the PLAY/NAVI to the right and keep it pressed down
Fast rewind
Move the PLAY/NAVI to the left and keep it pressed down
Pause/Resume
Press PLAY/NAVI
Stop
Press the ESC button
Protecting Videos
To protect a video from being deleted or overwritten accidentally, you can make the video
write-protected following these steps:
(1) In the thumbnails preview mode, shortly press the MENU key to show the menu.
(2) Move the PLAY/NAVI button up and down to select “Protect”.
(3) Move the PLAY/NAVI button left to show options.
(4) Move the PLAY/NAVI button up and down to select “Protect”, and press
the PLAY/NAVI button to confirm.
A lock icon appears on the top bar when the video is protected.
To disable write-protection, select “Protect” and then “Unprotect” from the menu.
2.3.4
Deleting Videos
- Delete Single Video:
(1) In the thumbnails preview mode, select the video that you want to delete.
(2) Press the MENU key to show the menu.
(3) Move the PLAY/NAVI button up and down to select “Delete”.
(4) Move the PLAY/NAVI button left to show the options.
(5) Move the PLAY/NAVI button up and down to select “Delete One”, and press the
PLAY/NAVI button to confirm.
51
Chapter 2 How to Use
During playback, you can:
Adjust Volume
Play the previous track
Play the next track
Fast forward
Fast rewind
Switch EQ mode
Pause/Resume
Stop
(6) Move the PLAY/NAVI button left to select “YES” to confirm deletion or select
“NO” to cancel.
- Delete All Videos:
(1) In the thumbnails preview mode, press the MENU key to show the menu.
(2) Move the PLAY/NAVI button up and down to select “Delete”.
(3) Move the PLAY/NAVI button left to show the options.
(4) Move the PLAY/NAVI button up and down to select “Delete All”, and press the
PLAY/NAVI button to confirm.
(5) Move the PLAY/NAVI button left to select “YES” to confirm deletion or select “NO”
to cancel.
2.4.2
2.4 MUSIC
On the main menu, select “Audio” and then “Music” to enter music mode.
Move the PLAY/NAVI button up and down
Move the PLAY/NAVI button left
Move the PLAY/NAVI button right
Move the PLAY/NAVI to the right and keep it pressed down
Move the PLAY/NAVI to the left and keep it pressed down
Press the MENU button
Shortly press the PLAY/NAVI button
Press the ESC button
Displaying Lyrics
Music mode supports synchronous lyrics display. You can display the current track’s lyric
following these steps:
(1) Download the lyrics file for current track to the device. Make sure the lyrics file and
the track are in the same directory.
(2) Rename the lyrics file with the same name as the track name.
(3) Play the track. The lyrics will be displayed.
Note: Synchronous lyrics display is only available for MP3 files with fixed bit rates.
You cannot display lyrics for WMA and MP3 files with variable bit rates.
2.4.1
52
Playing Music
(1) Within the playlist, move the PLAY/NAVI up and down to select the track that
you want to play.
(2) Press the PLAY/NAVI button to play the selected track.
2.4.3
Englisch
Chapter 2 How to Use
Setting EQ Mode
The Equaliser setting is only available in Music mode. There are six EQ modes for
you to choose from: Normal, Classical, Pop, Rock, Jazz and Bass. The EQ mode
can be set as follows:
(1) On the playlist screen, press the MENU key to show the menu.
(2) Move the PLAY/NAVI button up and down to select “EQ Mode”.
(3) Move the PLAY/NAVI button left to show options.
(4) Press the PLAY/NAVI button to confirm.
53
2.4.4
Setting Play Mode
This option provides four play modes to play all music files:
Rep One – Repeat the current track
Rep All – Repeat all tracks
Random – Play all tracks randomly
Normal – Play all tracks in order and stop when all have been played
The play mode can be set as follows:
(1) On the playlist screen, press the MENU key to show the menu.
(2) Move the PLAY/NAVI button up and down to select “EQ Mode”.
(3) Move the PLAY/NAVI button left to show options.
(4) Press the PLAY/NAVI button to confirm.
2.4.5
Deleting
- Delete Single Track:
(1) On the playlist, select the track that you want to delete.
(2) Press the MENU key to show the menu.
(3) Move the PLAY/NAVI button up and down to select “Delete”.
(4) Move the PLAY/NAVI button left to show the options.
(5) Move the PLAY/NAVI button up and down to select “Delete One”, and press the
PLAY/NAVI button to confirm.
(6) Move the PLAY/NAVI button left to select “YES” to confirm deletion or select “NO”
to cancel.
- Delete All Tracks:
(1) On the playlist screen, press the MENU key to show the menu.
(2) Move the PLAY/NAVI button up and down to select “Delete”.
(3) Move the PLAY/NAVI button left to show the options.
(4) Move the PLAY/NAVI button up and down to select “Delete All”, and press
thePLAY/NAVI button to confirm.
(5) Move the PLAY/NAVI button left to select “YES” to confirm deletion or
select “NO” to cancel.
54
Chapter 2 How to Use
2.5 VOICE
In voice mode, you can record voice input into WAV audio files. To record voice input, select “Audio”
and then “Record” from the main menu. Then press the PLAY/NAVI button to enter voice mode.
2.5.1 Setting Audio Source
Before recording, make sure the audio source is set to “MIC”. The audio source can
then be set as follows:
(1) Press the MENU key to show the ”Audio Source” menu.
(2) Move the PLAY/NAVI button left to display two options – MIC and Line-in.
(3) Select ”MIC” and then press the PLAY/NAVI button to confirm.
2.5.2 Voice Recording:
(1) Press the PLAY/NAVI button to start recording.
(2) Press the PLAY/NAVI again to stop recording.
2.5.3 LINE-IN Recording
You can also make digital audio recording from a line level audio source (Line-in)
such as a cassette player, CD player or the line output of your home stereo system.
Follow these steps to make LINE-IN recording:
(1) Set Audio Source to “Line-In” (refer to section 2.5.1 – Set Audio Source).
(2) Connect one end of the line-in cable to an audio port, such as the earphone jack,
of another audio player. Connect the other end to the Line-in jack of the device.
(3) Play audio files on an audio player.
(4) Press the PLAY/NAVI button on the device to start recording.
(5) Press the PLAY/NAVI button to stop recording.
2.5.4 Playing Recordings
The recorded content is automatically saved in the same directory as the music files,
i.e. \MP3. To play the content, you have to be in Music mode:
(1) Enter MUSIC mode. The recordings will be listed at the top of the playlist.
(2) From the playlist, select the recording that you want to play.
(3) Press the PLAY/NAVI button to play the recording.
To delete a recording, see the steps in the “2.4.5 - Delete Track” section.
Note: Make sure the device has enough power to record. If the device shuts down
abruptly during recording, the recorded content will not be saved.
Englisch
Chapter 2 How to Use
55
2.6 PHOTO
In the PHOTO mode, you can view and manage photos and still images. On the main menu, select
“PHOTO” and press the PLAY/NAVI button to use the photo viewer.
2.6.1 Browse Photos/Images:
(1) When you enter PHOTO mode, thumbnails of all images will be displayed.
(2) Move the PLAY/NAVI button to select photo/image.
(3) Press the PLAY/NAVI button to blow up the selected picture to full-screen size.
(4) When the picture is displayed in full-screen, you can:
View the previous image
Move the PLAY/NAVI button left
View the next image
Move the PLAY/NAVI button right
Zoom In
Move the PLAY/NAVI up
Zoom Out
Move the PLAY/NAVI down
Return/Exit
Press the ESC button
2.6.2 Slide Show
You can view photos in slide show mode. Follow these steps to display them as a slide show:
(1) On the thumbnails screen, shortly press the Menu key to show the menu.
(2) Select “Slide” and press the PLAY/NAVI button to start slide show.
(3) During the slide show, you can press the MENU button to increase the speed.
(4) When the slide show has finished, press the ESC button to exit.
2.6.3 Delete Image
- Delete Single Image:
(1) In the thumbnail preview mode, select the image that you want to delete.
(2) Press the MENU button to show the menu.
(3) Move the PLAY/NAVI button up and down to select “Delete”.
(4) Move the PLAY/NAVI button left to show the options.
(5) Move the PLAY/NAVI button up and down to select “Delete One”, and press the
PLAY/NAVI button to confirm.
(6) Move the PLAY/NAVI button left to select “YES” to confirm deletion or select “NO”
to cancel.
56
Chapter 2 How to Use
- Delete All Images:
(1) In the thumbnail preview mode, press the MENU key to show the menu.
(2) Move the PLAY/NAVI button up and down to select “Delete”.
(3) Move the PLAY/NAVI button left to show the options.
(4) Move the PLAY/NAVI button up and down to select “Delete All”, and press the
PLAY/NAVI button to confirm.
(5) Move the PLAY/NAVI button left to select “YES” to confirm deletion or select
“NO” to cancel.
2.6.4 Set Boot-up Screen
You can specify a photo or image to be shown as a boot-up screen when you start up the device:
(1) In the thumbnail preview mode, select one image.
(2) Press the MENU button, and select “Logo”. Then press the PLAY/NAVI button to confirm.
2.7 GAME
The device offers two interesting games: Tetris World and Snake. Follow these steps to play the games.
2.7.1 Tetris World:
(1) From the main menu, select “Game” and then “Tetris World”. Then press the PLAY/NAVI
button to enter the play screen.
(2) Press the PLAY/NAVI button to start the game.
(3) Move the PLAY/NAVI button left, right and down to move the block. Move the PLAY/NAVI
button up to rotate the block. Press the PLAY/NAVI button to pause or resume.
(4) Press the ESC button to end the game.
Englisch
Chapter 2 How to Use
2.7.2 Snake:
(1) From the main menu, select “Game” and then “Snake”. Then press the PLAY/NAVI
button to enter the play screen.
(2) Press the PLAY/NAVI button to start game.
(3) Aim at the red dot. Move the snake by pushing the PLAY/NAVI button in one of the
four directions to eat the dot. Press the PLAY/NAVI button to pause or resume.
(4) Press the ESC button to end the game.
57
Chapter 2 How to Use
Chapter 2 How to Use
Storage
WARNING!
“PC-DEVICE” option is to
be used only for firmware
upgrades. Do not use this option
unless a firmware upgrade is
required. Any other use will
cause a system error when
the device is connected to a
computer.
2.8.2 System Information
Gives the software version number and the capacity of the current active storage (Note:
if you are using a memory card, it shows the capacity of the memory card. Otherwise,
it shows capacity of the in-built flash memory).
2.9 SETTINGS
The following settings can be adjusted:
(1) Move the PLAY/NAVI button up and down to
select option.
(2) Move the PLAY/NAVI button left to select
“YES”.
(3) Press the PLAY/NAVI button to confirm.
Format
Formats the memory card or in-built
flash memory.
Power Off
Sets the length of time after which the (1) Move the PLAY/NAVI button up and down to
player switches off automatically when it
select option.
is not being used.
(2) Press the PLAY/NAVI button to confirm.
Sleep Off
Sets the length of time after which the
LCD turns off automatically during audio
playback.
Enables or disables keytones.
(1) Move the PLAY/NAVI button up and down to
select “Screen” or ”Key-press Tone”.
(2) Move the PLAY/NAVI button left and right to
switch Off and On.
(3) Press the ESC button to return.
Setting
Function
Steps
Clock
Sets the system clock and date.
(1) Move the PLAY/NAVI button left and right to
select Year, Month and Day.
(2) Move the PLAY/NAVI button up and down to
adjust value.
(3) Press the PLAY/NAVI button to confirm.
Language
Sets the display language.
(1) Move the PLAY/NAVI button up and down to
select option.
(2) Press the PLAY/NAVI button to confirm.
(1) Move the PLAY/NAVI button up and down to
select option.
(2) Press the PLAY/NAVI button to confirm.
Default
Restores default system settings.
(2) Move the PLAY/NAVI button left to select “YES”.
(3) PLAY/NAVI button left to select “YES”
(3) Press the PLAY/NAVI button to confirm.
Video Out
58
Sets the storage medium used.
(1) Move the PLAY/NAVI button up and down to
Internal Memory: uses the built-in
select option.
flash memory.
(2) Press the PLAY/NAVI button to confirm.
Memory Card: uses the memory card.
PC-DEVICE: upgrades firmware.
Selects video output media.
TV-PAL: video output to TV with PAL
standard.
TV-NTSC: video output to TV with NTSC
standard.
LCD: video output to the device’s LCD
Englisch
2.8 ACCESSORIES
2.8.1 Calendar
Move the PLAY/NAVI button to indicate the date.
59
Chapter 3 Technical Support
Chapter 3 Technical Support
3.1 Troubleshooting
60
Possible Cause
Solution
The device cannot be switched
on.
· Battery charge is too low.
· The battery is not inserted
correctly.
· The DC adapter is not properly
connected.
· Charge the battery.
· Reinsert the battery.
· Reconnect the DC adapter.
The player cannot be switched
on even when the battery is
replaced.
· The FAT table in the flash memory may be corrupted if it has
been exposed to a strong mag
netic field or static electricity or if
it has been unplugged incorrectly.
· Other (unknown)
Please contact your vendor for help.
Keys do not respond.
Keys are locked by the Hold Switch.
Slide the Hold Switch to unlock
keys.
The lyrics are not displayed
synchronously.
· The LRC file is not synchronised
with the track.
· For VBR tracks, fast-forwarding or
rewinding can cause the problem.
· Re-download the lyrics file.
· Do not fast-forward or
rewind when you are
playing a VBR track.
No sound during playback
· The audio file is corrupted.
· The volume is too low.
· Turn the volume up.
· Skip or delete the file.
The image is not displayed.
· The image format is not supported.
· The image data is corrupted.
· Make sure the image is of a
supported file type (JPEG). If
not, use the CineWalker file
conversion software to convert it.
· Download the image again.
Noise is heard on A WMA track
the track skips intermittently.
Bit rate of the track is not supported.
Make sure the bit rate of the track
is within the 32kbps - 160kbps
range.
Some MP3 files do not play
properly.
The MP3 file is compressed according to a · Delete the unsupported
standard, e.g. the device does not support.
MP3 files.
· Use MPEG I Layer 3 standard to compress unsupported
MP3 files.
A video does not play.
· The video format is not supported.
· The video data is corrupted.
· Make sure the video is a
supported file type (ASF). If
not, use the CineWalker file
conversion software to convert it.
· Download the video again.
The memory card cannot be
read by the computer.
· Service Pack 4 has not been
installed in Windows 2000.
· The memory card type is not
supported or the card is corrupted.
· Install Windows 2000 SP4.
· Replace the memory card.
The device is unresponsive.
· Reconnect the adapter.
· Remove the battery and
reinsert it.
Cannot delete a file
The file is write-protected.
· Disable write protection.
Cannot connect to the PC
· The Windows 98 driver is not
installed.
· The USB interface is not supported by the PC’s motherboard.
· Install or reinstall the driver
provided with the device.
· Update or replace the PC’s
motherboard.
PC displays an error message
when the device is plugged in
or unplugged.
The device loses connection from the PC
abruptly whilst transferring files.
Do not disconnect the player from
the PC whilst transferring files.
Englisch
Problem
Total memory displayed on the Part of the memory is used to store
player is not in accordance with programs and display characters.
the amount displayed.
61
Chapter 3 Technical Support
Chapter 3 Technical Support
62
3.3 Important Notice
Component
Description
USB Port
USB2.0 Full Speed
LCD
2.5 inch, 320 x 240 pixels TFT
Internal Memory
128MB
Memory Card
MMC, SD
Video Format
ASF
Audio Format
MP3, WMA, WAV
Image Format
JPEG
Bit Rate
MP3: 32kbps – 320kbps; WMA: 32kbps – 160kbps
Recording Quality
WAV: 8KHz, 32Kbps; MP3: 48KHz, 64Kbps
Language
German, English
Recharge Time
3.5 hours
Recording Time
Varies depending on the storage capacity
Battery Type
Rechargeable Lithium-ion battery (3.7V, 850mAh)
Battery Life
3 hours
Signal Noise Ratio
> 80dB
Frequency Response
20Hz – 20KHz
Operating Current
<380mA
Storage Temperature
-20ºC ~ +55ºC
Ambient Temperature
0ºC ~ +55ºC
Relative Humidity for Operation
20% ~ 93% (40ºC )
Relative Humidity for Storage
20% ~ 93% (40ºC )
Dimensions
L x W x H: 103mm x 64mm x 20mm
Weight
81.3g
When you download files, you must copy videos/images to DCIM/100MEDIA, and copy audio
files to MP3. Otherwise, these files cannot be played or viewed. If you delete the “DCIM” or
“MP3” folder accidentally, please recreate it or restart the device.
For WMA track, ID3 information such as artist and album is not displayed. For MP3 tracks,
the ID3 information should be no longer than 15 characters.
For WMA tracks, please ensure that the bit rate is between 32kbps and 160kbps.
When the battery level is low, please ensure that you charge it promptly.
Make sure that videos or images are of a supported file type (ASF/JPEG). The Huffyuv codec is
not supported. If the files are not supported you will need to convert them unsing the Transcording
Tool included on the CineWalker file conversion software CD.
To ensure that your Line-in recordings are of high quality, keep audio sources from audio players
at a moderate volume.
Englisch
3.2 Technical Specifications
The system clock will be reset after the battery is reinserted, so will need to be reset manually.
Ensure that the battery is sufficiently charged before formatting.
63