1
RetroActive
User Manual
AAccqquuaassyyss
RetroActive
Introduction .......................................................................................................................... 3
Key features........................................................................................................................ 3
Installation Requirements ................................................................................................... 4
Trial Version....................................................................................................................... 4
Part I – RetroActive ............................................................................................................. 5
Creating a Journal File........................................................................................................ 5
Changing Views ................................................................................................................. 5
Using the Preview Pane...................................................................................................... 8
Time Elapsed Indicators ..................................................................................................... 8
Entry Fields ........................................................................................................................ 8
Adding Entries.................................................................................................................. 10
Using the Quick Entry Form ............................................................................................ 12
Recording Phone Calls Automatically ............................................................................. 13
Viewing and Editing Entries............................................................................................. 13
Removing Entries ............................................................................................................. 13
Using the Entry Timer ...................................................................................................... 14
Working with Attachments............................................................................................... 14
Using Entry Templates ..................................................................................................... 15
Using Filters ..................................................................................................................... 16
Creating and Viewing Stories........................................................................................... 17
Tracking Activities ........................................................................................................... 18
Creating a Journal Reminder ............................................................................................ 18
Sending Entries by E-mail................................................................................................ 18
Charts................................................................................................................................ 19
Exporting Data.................................................................................................................. 20
Program Settings .............................................................................................................. 21
Keyboard input ................................................................................................................. 22
Part II – RetroActiveSync.................................................................................................. 24
Synchronization Settings .................................................................................................. 24
Outlook Security Manager ............................................................................................... 29
Using the Custom Form.................................................................................................... 30
Working with Multiple Journals....................................................................................... 33
Synchronizing with Blogger............................................................................................. 34
Entry Form (Desktop)....................................................................................................... 34
Handling Stories in Outlook ............................................................................................. 35
Audio Conversions ........................................................................................................... 36
Program Updates .............................................................................................................. 36
2
AAccqquuaassyyss
RetroActive
RetroActive
Introduction
Pocket PC devices come with mobile counterparts for all Microsoft
®
Outlook modules (Contacts,
Appointments, Tasks and Mail), except for one: the Journal module.
On your PC, Outlook Journal stores information about daily activities, events and thoughts, and can
be used equally well for professional tracking or as a personal diary. In the other hand, a mobile
device like a Pocket PC would be ideal for this kind of application, because it is with you all the
time, everywhere, when and where things happen.
RetroActive is a powerful journal/diary application for Pocket PC devices, which, among many
other features, can automatically synchronize entries with Microsoft® Outlook and with
Blogger.com, one of the most famous weblog sites.
Key features
Can be used as a full stand-alone journaling application or as an Outlook/Blogger
companion, using an exclusive triple-sync mechanism
All Outlook Journal fields are available and synchronized
Four view modes available: Calendar, Date Tree, Story Tree and Full List, including Preview
pane
Story mode: Entries can be linked in a predecessor/successor relationship, and grouped in
the “Story Tree” view
Powerful filter/search feature (filters can be saved for reuse)
Reusable custom templates for easy data entry
Full support for entry attachments (pictures, voice notes, documents etc), with picture
auto-reduction and built-in audio recorder
Optional conversion of voice recordings to many audio formats during synchronization
using external command-line encoders
Support for custom entry types
Multiple categories per entry
Entry timer (works even in stand-by mode)
Activity tracking with Billable and Billed fields and basic cost calculation
Quick Entry form (add multiple entry titles at once, for further detailing)
Desktop Entry Form (add entries directly from your PC, without using Outlook)
Random entry display at startup
Auto-journaling for phone calls (WM 5.0 Phone only)
Entries can be sent by e-mail, including their attachments (WM 5.0 only)
Bar/line charts (number of entries by month/year, best and worst months/years, duration,
costs) for the current filter
Powerful export engine, based on customizable templates (HTML, CSV, XML etc)
Support for multiple journals (personal and work, for example)
Compressed and encrypted journal files
Password protection with auto-lock mechanism
Storage card support (program and journal files)
3
AAccqquuaassyyss
RetroActive
HTTP Proxy support
Automatic journal cleaning (removes old or not important entries)
Dual interface (Windows Mobile “classic” / Windows Mobile 5.0 with soft keys support)
Keyboard-friendly operation
Installation Requirements
Pocket PC
Pocket PC device running Windows Mobile 2003, 2003 SE or 5.0
Microsoft® Compact Framework 2.0 (free download from Microsoft®)
1Mb of free space in main memory or storage card for program files
Additional space for journal files and attachments
Desktop PC (for synchronization with Outlook or Blogger.com)
PC computer running Windows 98, 98 SE, ME, 2000, Server 2003 or XP
Microsoft® .NET Framework 2.0 (free download from Microsoft®)
Microsoft® Outlook 2000 or later
1Mb of free hard disk space
Trial Version
Acquasys RetroActive is a shareware application, distributed freely for evaluation purposes. In trial
(unregistered) mode, all product features are fully functional, but the trial period ends in 30 days
after installation. To continue using the product after this period, you must purchase a registration
code, directly from Acquasys (www.acquasys.com) or from authorized resellers.
Once you get the registration code, enter it in the appropriated field in the Registration screen
(accessible via Menu/Tools/Register menu) and tap Unlock. RetroActive will stop showing the
Registration screen at startup and the time expiration will be removed.
Keep your registration code in a safe location. If you replace your device or if it suffers a hard
reset, the program will enter Trial mode, and you will have to enter the code again to register it.
Note that the code becomes invalid if you change your device’s Owner Name.
Try the unregistered version in your Pocket PC fully before purchasing it to ensure that it meets
your expectations and that the program works as expected with your device and with your Outlook
version. If it does not, please let us know.
4
AAccqquuaassyyss
RetroActive
Part I – RetroActive
This documentation shows RetroActive running under Windows Mobile 5. You will notice a
few interface differences if your device uses Windows Mobile 2003 or 2003 SE, mostly of them
in the main screen (menus and toolbar), due to WM 2005 “soft keys” support. All
functionalities, however, are identical in both versions.
You may also find minor differences between the screenshots and the real version, due to last
minute changes.
Creating a Journal File
RetroActive uses compressed and encrypted files to store your journal entries and attachments.
When RetroActive starts, it looks for the last journal file and asks you for its location if it cannot be
found. If you have not created a journal file yet, tap “No” and RetroActive will create one for you.
You can create a journal file anywhere in your device’s main memory or in a storage card. If you
decide later to move the file to another place, RetroActive will simply ask for the new location next
time it runs.
If possible, it is recommended to store the journal file in a Storage Card to save your main
memory, especially if you are a heavy journal user or if your entries contain attachments.
Changing Views
RetroActive has four visualization modes (Views) for journal entries:
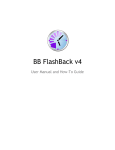
Calendar: In this view, entries are shown for the day currently selected in a monthly calendar.
Days containing entries appear in bold. To select a day, tap over it. To change the month currently
displayed, tap on it or use the calendar arrows. In the same way, tap on the year to change it. You
can also type a date directly in the text area at the top-right of the screen, and tap “Go”.
5
AAccqquuaassyyss
RetroActive
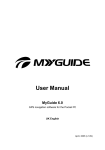
Date Tree: In this mode, entries are shown in a “tree” similar to Windows Explorer, organized by
year, month and days. Note that only dates containing entries will appear in the tree.
Story Tree: In this mode, related entries are grouped sequentially in a tree (see Story Mode).
6
AAccqquuaassyyss
RetroActive
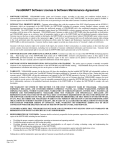
Full List: In this view all entries are shown together, regardless of their date.
All views display only entries that satisfy the current filter. If you cannot find a specific entry,
review the current filter criteria.
To change the current view:
7
AAccqquuaassyyss
RetroActive
1. Use Menu/View in the main menu or
2. Tap on the “calendar” or “tree” button in the main toolbar (WM 2003 only).
Using the Preview Pane
If the Preview Pane is active, you can see the description of the currently selected entry in a panel
at the bottom of the main screen. You can resize the pane area dragging the splitter bar located
between the entry list and the preview pane.
Due to screen space limitations, the Preview Pane is not available on devices with square
(240x240) screens.
To show/hide the Preview Pane:
1. Use Menu/View/Preview in the main menu. A checkmark appears when the panel is
active.
Time Elapsed Indicators
At the right of the calendar (or date tree), you will see two time indicators.
The first indicator shows the time elapsed from the date currently selected to the current date, in
years, months and days. This is the “age” of the event currently selected.
The next indicator shows the time elapsed from your birth date (if defined) to the date currently
selected. This information helps you to locate in which point of your life a given event occurred.
Entry Fields
Each journal entry contains several fields that may be filled as needed. If you are an Outlook
Journal user, you will recognize most of them, and will also notice some new fields.
8
AAccqquuaassyyss
Field
RetroActive
Remarks
Start
Outlook
Equivalent
Start Time
Type
Entry Type
All Outlook types are supported, and new types may be
entered
Title
Description
Subject
(Note)
Duration
Categories
Duration
Categories
Values for duration are fixed in Outlook
As in Outlook, more than one category may be entered
9
AAccqquuaassyyss
RetroActive
Contacts
Company
Billable
Contacts
Company
-
Billed
-
Importance
Importance
Impact
-
Private
Blog
Private
-
Favorite
-
Draft
-
Attachments
(Note)
As in Outlook, more than one contact may be selected
Use to indicate that the entry is a billable activity, for
filtering and report purposes. This field does not exist
originally in Outlook.
Use to indicate that an activity was already billed, for
filtering and report purposes. This field does not exist
originally in Outlook.
This field is not shown in Outlook by default, but values are
the same: Low, Normal or High
Possible values are Negative, Neutral and Positive. This
field does not exist originally in Outlook.
Mark the entry as Private, for filtering purposes
Indicates that the entry will be posted to Blogger. This field
does not exist in Outlook.
Mark the entry as a favorite, for filtering purposes. This
field does not exist in Outlook.
Marks the entry as incomplete, for further editing. This field
does not exist in Outlook, but is available in Blogger posts.
In Outlook, attachments are inserted into the entry
description.
All entry fields, including those not originally available in Outlook, are synchronized between
RetroActive and Outlook. If there is a need to overwrite journal entries in your device with Outlook
counterparts, extra fields are copied as well.
Adding Entries
You have several ways to input data in your RetroActive journal:
•
•
•
•
You can
You can
You can
You can
entries.
create entries from scratch;
use custom templates;
input several entries at once using the Quick Entry Form;
use data from appointments, tasks, phone calls and other sources as sources for your
To add a journal entry from scratch:
1. Select Entry/Add… in the main menu;
2. Fill the desired entry fields.
To add a journal entry from a contact:
1. Select Entry/Add From/Contact… in the main menu;
2. Select the desired contact;
3. Fill the remaining fields as needed.
Fields imported
Set as Type
Contacts
Phone Call
10
AAccqquuaassyyss
RetroActive
To add a journal entry from a previous phone call (Pocket PC Phones only):
1. Select Entry/Add From/Phone Call… in the main menu;
2. Select the desired phone call;
3. Fill the remaining fields as needed.
Fields imported
Set as Type
Date, Start, Duration, Contacts
Phone Call
To add a journal entry from an appointment:
1. Select Entry/Add From/Appointment… in the main menu;
2. Select the desired appointment;
3. Fill the remaining fields as needed.
Fields imported
Set as Type
Date, Start, Duration, Title, Description, Contacts
Meeting
To add a journal entry from a task:
1. Select Entry/Add From/Task… in the main menu;
2. Select the desired task;
3. Fill the remaining fields as needed.
Fields imported
Set as Type
Date, Start, Duration, Title, Description, Contacts
Task
To add a journal entry from a voice note:
1. Select Entry/Add From/Voice Note… in the main menu;
2. Enter your voice note (recording will start automatically) and press stop when finished;
3. Fill the remaining fields as needed.
Fields imported
Title, Note
Set as Type
Note
To add a journal entry from a picture (WM 5.0 only):
1. Select Entry/Add From/Picture… in the main menu;
2. Select an existing image using the Picture dialog or
3. If you device is equipped with a camera, choose Camera as the image source to capture a
new image;
4. Fill the remaining fields as needed.
Fields imported
Set as Type
Attachments
Note
To add a journal entry from a file:
1. Select Entry/Add From/File… in the main menu;
2. Select any file in your device (a picture or a document, for example);
3. Fill the remaining fields as needed.
11
AAccqquuaassyyss
Fields imported
Set as Type
RetroActive
Attachments
Document
To add a journal entry from a voice note:
1. Select Entry/Add From/Voice Note in the main menu;
2. A recording session will start immediately. Press Edit/Attachments/Stop Recording to
finish recording and to add the new voice file to the list of attachments;
3. Fill the remaining fields as needed.
Fields imported
Set as Type
Attachments
Document
When a template is active, it is used as a model for the new entry, but the values for the fields
listed above will be overridden if another source (as an Appointment) is used also.
Using the Quick Entry Form
Sometimes you may want to add many entries at once, as they come into your mind, and then fill
their details later. For these cases, a Quick Entry form is provided.
To use the Quick Entry Form:
1. In the main menu, select Entry/Add From/Quick Entry;
2. Type the entry date, followed by a colon or space, and then the entry title (if only the title
is entered, the current date is assumed);
3. Repeat step 2 for as many entries as you want, keeping one entry per line;
4. Tap “OK”;
5. If needed, fill entry details (descriptions, categories etc) individually later.
12
AAccqquuaassyyss
RetroActive
The current template is used as the basis for all new entries, including those generated by the
Quick Entry Form. Be sure to select the correct template (or the Blank template) before using this
feature.
Entries added using the Quick Entry form are automatically marked as “drafts”. You can easily
locate them later creating a filter for the “Draft” field.
Recording Phone Calls Automatically
If you own a WM 5.0 Phone device, RetroActive can register automatically all incoming and
outgoing phone calls in your journal. To use this feature, just go to Menu/Tools/Settings and
turn on the corresponding settings.
This feature works only when RetroActive is active (or running in background). To register a call
that was made or received when the program was not active, see “To add a journal entry from a
previous phone call”.
Currently the audio of the conversation is not recorded due to an architectural limitation present
in Pocket PC devices, which prevents the other person’s voice from being recorded satisfactorily.
Viewing and Editing Entries
To view or update details from an existing entry:
1. Select the desired entry in the entry list;
2. In the main menu, select Entry/Edit… (you can also tap twice on the entry title, or tap
and hold it and use the corresponding context menu).
3. Update the desired fields as needed.
Removing Entries
To remove a single journal entry:
1. Select the desired entry in the entry list;
2. In the main menu, select Entry/Remove (or tap and hold the entry and use the
corresponding context menu).
To remove multiple entries using a filter:
1. Select an existing filter (Filter menu) or create a new filter containig the entries that you
wish to remove (for example, entries older than 3 months and of low importance);
2. In the main menu, select Tools/Remove Filtered.
13
AAccqquuaassyyss
RetroActive
Using the Entry Timer
RetroActive includes a timer that can be used to track the time spent in an event or activity.
While the timer is running, the Duration field is updated automatically.
To start the Timer:
1. Create or edit an entry;
2. In the Edit Entry screen, select Edit/Timer/Start. You will notice a notification led
blinking in your device while the timer is active.
To stop the Timer:
1. While the timer is active, select Edit/Timer/Stop to pause it;
2. Select Edit/Timer/Start again to resume the timer.
To pause and resume the Timer:
1. While the timer is active, select Edit/Timer/Reset to reset the time count;
Once started, the timer works even when the device enters stand-by mode, therefore it is not
necessary to leave your Pocket PC turned on to use this feature.
Working with Attachments
RetroActive supports an unlimited number of file attachments for each journal entry. You can, for
example, attach a voice recording or a picture taken with your device camera directly to an entry.
Just like any other entry fields, attachments are also synchronized (they are transported from your
device to Outlook and vice-versa).
Attachments affect directly the size of your journal file, and the time it takes to open,
decompress and decrypt its contents. For this reason, try to keep only small attachments (or no
attachments at all) in your device, once they were already transferred to Outlook. See
RetroActiveSync settings for more details.
To add a generic file as an attachment (all devices):
1. While in the Edit Entry screen, go to “Attachments” tab;
2. Select Edit/Attachments/Add Other… to insert a file into the current entry.
When a file is attached, a copy is created and inserted into the journal file. You may delete the
original file if you desire.
To add a picture as an attachment (Windows Mobile 5.0 and later):
1. While in the Edit Entry screen, go to “Attachments” tab;
2. Select Edit/Attachments/Add Picture;
14
AAccqquuaassyyss
RetroActive
3. From the Picture dialog, select and existing picture or click on the camera icon to directly
shot a picture and add it as an attachment.
By default, RetroActive creates reduced copies of your pictures before adding them as
attachments, to prevent your journal file from growing too fast (your original pictures are not
changed). You can choose the size of the copies (320x240 or 640x480) in the program settings.
To add a voice note as an attachment (all devices):
1. While in the Edit Entry screen, go to “Attachments” tab;
2. Select Edit/Attachments/Add Voice Note to start recording. You will hear a beep and a
notification led will start blinking in your device while the recording is in progress;
3. Select Edit/Attachments/Stop Recording (or simply save the current entry) to stop
and save your voice note.
RetroActive records a maximum of 10 minutes of audio per voice note. Note however that voice
recording takes much storage space, and your journal file can become large quickly. You will learn
later in this documentation how RetroActiveSync can compress your audio recordings using external
encoders.
To remove an attachment:
1. Select the desired attachment in the Attachments list;
2. Select Edit/Attachments/Remove
To open an attachment:
1. Select the desired attachment in the Attachments list;
2. Select Edit/Attachments/Open (or tap twice on the attachment title)
Using Entry Templates
Entry Templates are pre-filled entry models, which can be created to make data entry more fast
and consistent.
You can, for example, create a template representing a typical meeting, pre-filling these fields:
Title
Type
Company
Duration
Billable
Save Template As
Staff Meeting
Meeting
Acme Inc.
2 hours
Yes
Meeting
When you need to input a new meeting, just select Menu/Template/Meeting in the main menu,
and then add a new entry, filling only additional fields, if needed.
Entries added using the Quick Entry form also receive data from the current template.
15
AAccqquuaassyyss
RetroActive
To create a template:
1. Select Menu/Template/Edit… in the main menu;
2. Fill the available fields as desired;
3. Provide a name for the template in the last tab.
To activate a template:
1. Select it in the Template menu. It will remain active until you select another template or
“(none)” in the Template menu.
To edit a template:
1. If the template is not selected, select it in the Template menu;
2. Open the Template menu again and select Edit…;
3. Edit the fields as desired
To create a new template from an existing one:
1. Modify the existing template following the above instructions;
2. In the last tab (Template), give the template a new name.
To remove a template:
1. If the template is not selected, select it in the Template menu;
2. Open the Template menu again and select Edit…;
3. In the last tab (Template), uncheck “Save Template As”
Using Filters
Filters are one of the most important features in RetroActive. Using filters, you can easily find and
select journal entries that match a combination of almost any entry fields.
Filters affect all areas where entries are displayed, like in the entry list, reports and data export.
Filters can be created for a single use (for example, if you are searching for the last time you called
a customer), or saved for later reuse, like Templates (for example, to generate a monthly activity
report for the “Acme” Company).
Filters can also be “inverted”. For example, if you create a filter for “Billable” entries for the “Acme”
Company and then invert it, only entries that are NOT billable and NOT for the “Acme” Company
will be selected.
To create a filter:
1. Select Filter/Edit… in the main menu;
2. Fill the fields according to your filter criteria;
3. (optional) If you intend to reuse the filter later, check and provide a filter name in the field
Save Filter As, found in “Options” tab.
To activate a filter:
16
AAccqquuaassyyss
RetroActive
1. Select it in the Filter menu. It will remain active until you select another filter or “Reset” in
the Filter menu.
To edit a filter:
1. If the filter is not selected, select it in the Filter menu;
2. Open the Filter menu again and select Edit;
3. Edit the fields as desired
To invert a filter:
1. Create or edit a filter;
2. Turn on Invert Filter in the last tab (Options).
To create a new filter from an existing one:
1. Modify the existing filter following the above instructions;
2. In the last tab (Options), give the filter a new name.
To deactivate a filter:
1. Use Filter/Reset.
To remove a filter:
2. If the filter is not selected, select it in the Filter menu;
3. Open the Filter menu again and select Edit;
4. In the last tab (Options), uncheck Save Filter As.
Creating and Viewing Stories
In RetroActive, a story is a group of related entries, in a “predecessor/successor” relationship.
Using special commands, you can link entries sequentially and view then grouped in the Story Tree
view.
To create a successor from an existing entry:
Instead of creating a new entry using Entry/Add, do the following:
1. Navigate to the entry from which you want to create a successor;
2. In the main menu, select Entry/Story/Continue;
3. Fill the entry details as usual.
To assign a predecessor to an existing entry:
1.
2.
3.
4.
Select the entry;
In the main menu, select Entry/Story/Set Predecessor;
Select the predecessor entry;
Select Entry/Story/Confirm Link.
To remove the link between entries:
17
AAccqquuaassyyss
RetroActive
1. Select the entry that has a predecessor;
2. Use Entry/Story/Remove Link.
To find the predecessor of an entry:
1. Select the entry that has a predecessor;
2. Use Entry/Story/Find Predecessor.
To find the successor of an entry:
1. Select the entry that has a successor;
2. Use Entry/Story/Find Successor.
To find the successor of an entry:
3. Select the entry that has a successor;
4. Use Entry/Story/Find Successor.
Tracking Activities
In addition to Company, Contacts, Duration etc, RetroActive provides additional fields for activity
tracking, especially useful for consultants and professionals whose job nature is hourly-based.
These fields are: Billable, Billed and Default Hourly Rate (Program Settings). Using these fields
in a filter, in combination with the Activity Report, you can quickly obtain information like:
1) Billable activities for a specific period and company
2) Billed activities in a period
3) Total billing cost for a period etc
Creating a Journal Reminder
Even the most sophisticated of the journaling solutions soon becomes useless if you don’t get the
habit of constantly feeding it with fresh entries. However, in most cases it is not possible to create
an entry at the same time when something that deserves a note occurs, and is very common for us
to forget to do it later also.
RetroActive can help you to remember to enter your precious thoughts and moments in your
journal, creating a daily reminder (this function requires Windows Mobile 5.0 or later).
To create a Journal Reminder:
1.
2.
1.
2.
From the main menu, select Menu/Tools/Settings;
Click on the Set Reminder button to create a reminder in your Tasks list;
Select Edit to adjust the time you would like to be reminded;
If you decide later to cancel the reminder, just delete the task from your Tasks list.
Sending Entries by E-mail
18
AAccqquuaassyyss
RetroActive
If you are using Windows Mobile 5.0 or later and would like to share some of your entries,
RetroActive can send them by e-mail from your device, including their attachments (like pictures or
videos) *.
To send an entry by e-mail:
1.
2.
3.
4.
to
From the main screen, select the desired entry in the entry list;
Select Entry/Send;
Select the person who will receive the e-mail and his/her e-mail address;
Depending on the program settings, a preview will be shown and you will have a chance
make changes to the message or select more recipients before sending it.
*If you do not want to send attachments along with your entries, turn off the option Include
attachments in Menu/Tools/Settings.
Charts
RetroActive provides four charts that may help you to analyze your journal entries:
Number of Entries: This chart shows the amount of entries for each month or year given the
current filter.
Impact x Importance: This chart represents graphically how good or bad were your last months
or years, according to the impact and importance assigned to each entry, and considering the
current filter.
Duration: This chart represents the amount of time spent in the filtered entries (activities).
Cost: This chart represents the amount of money earned for the filtered entries (activities), based
on your hourly rate (defined in the program settings).
Note that the two last charts are suitable for tracking billable entries. If the current filter does
not specify billable entries, a warning will be shown.
Charts can be represented in Bar or Line formats, and in months or years. To change these
settings, use the Menu option.
19
AAccqquuaassyyss
RetroActive
Due to screen size limitations, only the last 12 months or 8 years can be displayed in the chart.
Exporting Data
RetroActive can export journal entries to HTML, XML, CSV or any text-based format, using predefined templates, which you can customize using any text editor. If you wish, you can even create
new templates from the existing ones.
20
AAccqquuaassyyss
RetroActive
RetroActive templates are installed in your device’s Templates folder, usually located in “My
Documents” folder. The following templates are provided:
RA_Simple.html: For HTML reports containing date, time and entry titles
RA_Detailed.html: For HTML reports containing all entry fields
RA_Activity.html: For HTML reports containing date, time, titles, durations and total duration –
suitable for work activities
RA_Detailed.csv: All fields in CSV (Comma Delimited Values) format;
RA_Detailed.xml: All fields in XML format.
HTML reports are automatically launched in Pocket IE when the process is complete, and can also
be printed after synchronized with your desktop PC.
Pocket IE may show pages previously displayed from a cache. If you suspect that the report
currently shown is not updated, tap on “Refresh” toolbar button.
The same report may look different when viewed on your Pocket PC and on your desktop
computer.
CSV and XML files can be easily opened/imported in many applications like Microsoft® Excel, and
used to generate charts, reports etc.
Although this function may be adequate for most export needs, remember that Outlook has an
advanced Export feature. See Outlook documentation for details.
To export journal entries:
1. (Optional) Create a filter (or select a pre-defined filter) for the entries that will be exported;
2. (Optional) If you prefer to export your entries in a different order than the current one
(ascending/descending), change it in the Settings screen (Menu/Tools/Settings);
3. In the main menu, select Menu/Tools/Export;
4. Select the desired template;
The output file will be saved to the same folder and with the same name of your journal file,
followed by the template extension (ex: MyJournal.xml).
Program Settings
You can change RetroActive settings choosing Menu/Tools/Settings in the main menu.
Your Birth Date: RetroActive uses this information to show the time elapsed from your birth to
the event currently selected in the calendar or date tree.
Display all entries for same day: Turn this setting on if you wish to see entries from previous
years in addition to the entries for the date currently selected. For example, if 01-11-2006 is
selected in the main calendar, you will see entries from 01-11-2006, 01-11-2005, 01-11-2004 and
so on. This way you can recall at a glance, for example, what you were doing today or in your
birthday in the past years.
21
AAccqquuaassyyss
RetroActive
Hide single entries from Story view: Turn this option on to prevent single entries (entries that
are not part of a story) from appearing in the story tree.
Reverse order: As default, the entry list shows entries in ascending order based on their dates.
Using this option, you can reverse this order, listing newer entries first. Note that this option does
not have effect in the Story View mode.
Remember view configuration: When this option is active, RetroActive starts with the last view
configuration used.
Show random entry at startup: When this setting is active, one of your journal entries will be
selected and shown every time RetroActive starts.
Password: If you wish to protect your journal file with a password, enter it here.
Auto-lock: When this setting is active, RetroActive locks the current journal file (if it has a
password assigned) whenever the device is turned off.
Picture Reduction: RetroActive uses reduced copies of your pictures (320x240 or 640x480 pixels)
when adding them as attachments, to prevent your journal file from growing too fast. It is highly
recommended to leave this setting active, unless you really need to keep the original picture size
and quality in your journal file.
Play voice notes when opening entries: Turn this option on if you wish to hear the first voice
note recorded for each entry when it is edited.
Include attachments in e-mail: Select this option to include all the attachments found in an
entry when sending it by e-mail.
Default Hourly Rate: Enter here the hourly rate used to calculate the total cost in the Activity
Report.
Record phone calls automatically (WM 5.0 Phone only): Use this option if you want to
automatically register all incoming and outgoing calls originated from your Pocket PC Phone in your
journal, as they occur. See “Recording Phone Calls Automatically” for details.
Known contacts only (WM 5.0 Phone only): Use this option in combination with the above to
prevent RetroActive from registering calls from callers not present in your contacts list.
Show e-mail preview: When this option is active, a preview is shown before an entry is sent by
e-mail, giving you an opportunity to change its text, recipients or attachments.
Journal Reminder: Click on the Create button if you would like to be reminded daily to update
your journal (see Journal Reminder).
Keyboard input
RetroActive is optimized for data entry using internal and external keyboards, in Portrait or
Landscape modes.
22
AAccqquuaassyyss
RetroActive
Depending on your keyboard configuration, you may be able to move between fields using the TAB
key, and use menu/soft keys to control RetroActive.
Some devices also automatically change the screen orientation when a keyboard is in use. In this
case, RetroActive instantly adapts itself to the new layout. You can also manually change the
screen orientation at any time accessing Start/Settings/System/Screen.
23
AAccqquuaassyyss
RetroActive
Part II – RetroActiveSync
RetroActiveSync is a Windows program that takes care of the journal synchronization with
Microsoft® Outlook and Blogger (Triple-Sync), and is installed in your Desktop PC along with the
Pocket PC module.
Depending on its configuration, RetroActiveSync can start automatically and work in background
when your device connects to the desktop, or you can control the process manually using the “Sync
Now!” button. While the synchronization occurs, a little red indicator appears next to RetroActive’s
icon, in the system tray.
To avoid data conflicts, close RetroActive if it is running on your device before the
synchronization starts.
Synchronization Settings
Several synchronization aspects can be configured in RetroActiveSync. Among other things, you can
for example define the journal location in your device, the maximum size for attachments and your
Blogger account settings, and also set RetroActiveSync to start automatically when your device
connects.
•
Skip private entries: If this setting is active, entries marked as “Private” will not be
transferred from the device to the desktop PC and vice-versa.
24
AAccqquuaassyyss
RetroActive
•
Start automatically: When this setting is active, RetroActiveSync will start as soon as the
Pocket PC connects to the PC, and the synchronization then begins.
•
Close when finished: This setting will cause RetroActiveSync to close if the
synchronization finishes without errors and the program is minimized (running in
background). If the program window is open or if errors occur, RetroActiveSync will stay
active and you will have a chance to check the synchronization log or start the process
again.
•
Create Log File: As default, RetroActiveSync always generates a text log when the
synchronization occurs. The synchronization log contains information about what happened
during the process, including the action performed in each entry and any errors that might
occur. Note that the previous data is cleared when a new synchronization starts.
•
Check for Updates Periodically: If this option is active, RetroActiveSync will search for
program updates about once a week, when a connection is available, and download the
new version if desired. You can also manually check for new versions using the
Tools/Check Updates menu.
•
Journal File Path: Type in this field the full path to the journal file in your device. The
journal file may reside anywhere in your device, including Storage Cards. Possible values
for this field include “\My Documents\Journal.raj”, “\Storage Card\My Journals\Work.raj”
and so on.
25
AAccqquuaassyyss
RetroActive
If the specified file does not exist when the synchronization starts, RetroActiveSync will ask
you if it should be created.
•
Journal Password: If your journal file is password-protected in your device, you must
provide the same password in this field to allow synchronization.
•
Overwrite device entries: If this option is active, journal entries in the device will be
erased and replaced with Outlook Journal entries. Filters and templates are preserved.
•
Remove after synchronization:
o
Attachments larger than XXX Kbytes: This setting defines the maximum size
for attachments kept in the journal file after the synchronization finishes (a value of
zero means that the attachment will be removed. Note that this option affects only
local (device) attachments. Attachments in Outlook entries are not removed.
It is recommended to set a low value (or even zero) for this field to improve performance and to
prevent your journal file from growing very fast.
o
Not important entries: If this setting is active, entries whose “Importance” field
is lower than “High” will be removed from the device after the synchronization
finishes.
o
Entries older than XXX days: This setting controls the range of entries keep in
the device after the synchronization finishes, based on their ages. Use this setting
according to your needs and the number of records in your Outlook journal. If it
contains too many entries, you can limit this range to one year or less, for
example.
Remember: Clean-up settings affect only the journal file in your device. All entries remain
intact in Outlook, except if you have defined an archive/delete rule in Outlook (see its
documentation for details).
26
AAccqquuaassyyss
•
RetroActive
Journal Folder: As default, RetroActiveSync synchronizes data with Outlook’s default
Journal folder. However, you can select any other Journal folder to be synchronized,
clicking on the “…” (ellipsis) button at the right of this field.
Publish RetroActive Custom Form: Checking this option, RetroActiveSync will publish its
custom form to the selected Journal folder on its first synchronization (see Using the Custom
Form later in this document for details)
27
AAccqquuaassyyss
RetroActive
o
Link existing entries to RetroActive Custom Form: If this setting is active,
existing records will use the custom form instead of the default Journal form.
•
Add custom types created in device to Outlook: If this setting is active, any custom
types (non-default Outlook Journal types) that you enter in RetroActive, like “MSN Session”
and so on, are added to Outlook’s type list. If you don’t turn on this setting, custom types
can still be assigned to your entries, but they will not show in the Type field in Outlook.
•
Synchronize with Blogger: Check this option to activate Blogger synchronization.
o Blog Title: Your Blog title, exactly as shown in Blogger (example: “Johnny’s Blog”)
o Login Name /Password: Your login information
28
AAccqquuaassyyss
•
RetroActive
Use HTTP Proxy: If your desktop PC connects to the Internet through a proxy server,
configure it here.
Outlook Security Manager
Depending on your Outlook version, Outlook Security Manager may display the following alert
during the synchronization process, indicating that RetroActiveSync is trying to read Outlook data.
Choose “Allow access for 10 minutes”, and the synchronization will continue.
This behavior is normal and expected, because it is a defense mechanism against misuse of your
Outlook data, but you may find it cumbersome at times.
Although it is not possible to turn off this checking in Outlook, there are third-party utilities that
may help you to bypass this dialog. For this purpose, we recommend Advanced Security for
Outlook, from MAPILab. Installing this free utility, you can allow permanent access to Outlook data
for legitimate programs, while keeping the security available for unexpected cases.
29
AAccqquuaassyyss
RetroActive
When RetroActiveSync runs for the first time while the utility is active, you will see the following
dialog:
All you have to do is select “Allow access” and check “Always perform this action for this
file”. This should prevent the warning message from appearing again.
Using the Custom Form
In addition to Outlook Journal standard fields, RetroActive uses additional fields that are not
originally available for viewing or editing in Outlook, although they are fully synchronized with it.
You can however gain access to such fields using a special custom form that can be installed and
published in Outlook Journal folder by RetroActive. In addition to the standard Journal fields, the
new custom form includes a new tab (“Advanced”), containing the extra fields.
30
AAccqquuaassyyss
RetroActive
The custom form is published when the first synchronization occurs, only if “Publish RetroActive
Custom Form” option is enabled. If you do not enable this setting, you will still have access to
your journal entries as before, but not to the extra fields.
Once this option is enabled and a synchronization occurs, the custom form is published and
cannot be removed anymore by RetroActiveSync. If you wish to remove it later, you must do it
directly in Outlook (see Outlook documentation for details).
You can also manually publish (or re-publish) the form later, using Tools/Publish Custom Form
menu.
It is recommended to (re)publish the custom form manually whenever a new program version is
installed, because the form layout may change to accommodate new fields, for example. You can
publish it as many as you want, without negative effects.
Once the custom form is published, RetroActiveSync will link all existing and new journal entries to
it, only if the option “Link all entries to RetroActive Custom Form” is active. If this option is
disabled, the custom form will be used only for new entries created manually from it in Outlook.
Existing entries and entries created during the synchronization process will still use the default form
in this case.
This process cannot be undone by RetroActiveSync. If you wish to re-link entries to the default
form, you will have to remove the custom form from Outlook.
31
AAccqquuaassyyss
RetroActive
In Outlook, you can create a new entry from the custom form using the “Actions” menu (a
command called “New RetroActive Entry” will be available there). However, you can set the
custom form as the default form for the Journal folder. This way, you just need to click on the first
toolbar button (“New”) to create entries based on the new form.
To set the custom form as the default form:
1. Right-click on a journal folder;
2. Set “When posting to this folder, use” to “RetroActive Entry”.
32
AAccqquuaassyyss
RetroActive
Working with Multiple Journals
In most cases, a single journal file is created on the device and synchronized with Outlook’s default
Journal folder on a desktop PC. However, you may want to synchronize your journal entries with
different PCs, or with a special Journal folder you have created.
For example, if you use Outlook Journal in your company and in your home PC, you can use
RetroActive to keep both your personal and work-related entries. In such cases, you should create
two separated journal files and synchronize each one with its respective desktop counterpart.
To use RetroActive with two or more computers:
1. Install RetroActive on the first PC (this will install RetroActive on the Pocket PC and
RetroActiveSync on the desktop PC);
2. Create a journal file in your device (for example, “Home.raj”) using RetroActive
(alternatively, you may let RetroActiveSync do it for you on the first synchronization)
3. Configure RetroActiveSync to work with the file created in step 2.
4. Repeat step 1 for the next PC (when prompted to reinstall RetroActive in your device, just
press “No”)
5. Repeat steps 2 and 3, creating a different journal file (for example, “Work.raj”)
6. Repeat steps 4 and 5 for additional computers.
33
AAccqquuaassyyss
RetroActive
Once this configuration is finished, you will have distinct journal files that synchronize
independently with each of the desktop PCs.
Do not synchronize the same journal file with two PCs. This may cause data loss or undesired
results.
Synchronizing with Blogger
RetroActiveSync can automatically publish your journal entries in Google’s Blogger
(www.blogger.com), one of the most popular web log sites.
This brings you some advantages:
1. You have an unique place were you can keep all your personal and business related
entries, and use them directly as a source for your blog posts.
2. You can enter posts in your device when your are away, and have them automatically
uploaded when you are back to your computer.
3. You can edit your posts in Outlook and use its features, like the spell-check.
4. You have an automatic backup of your posts.
If enabled, Blogger synchronization occurs after journal entries have been synchronized with
Outlook, as follows:
1.
2.
3.
4.
Journal entries marked as “Blog” are sent to Blogger;
Posts created directly in Blogger are imported as journal entries in RetroActive;
Updates are synchronized in both sides;
Entries removed from your journal or whose “Blog” mark were removed are removed from
Blogger;
5. Posts removed from Blogger have their “Blog” mark removed in their corresponding journal
entries.
Acquasys is not affiliated in any way with Blogger, and therefore cannot guarantee the
availability or continuity of its services or of this synchronization service.
Entry Form (Desktop)
RetroActiveSync provides a convenient entry form that you may use to quickly add one or more
entries to your journal while your device is connected to your PC. Besides being more comfortable
when adding multiple entries, this tool is also very useful when you may not have access to Outlook
(in your office, for example).
34
AAccqquuaassyyss
RetroActive
This form is accessible from Tools/Add Entries menu.
Attachments and linked entries (story mode) are not supported by the Desktop Entry Form. You
may, however, create entries first using your desktop and then add attachments and links later in
your device.
Your device must remain connected to your desktop computer while using this tool, and
RetroActive must no be running in your device.
Handling Stories in Outlook
Story links are transported to/from Outlook Journal during the synchronization process. In Outlook,
a journal entry has its predecessor entry (if existent) linked as an attachment. This allows you to
create and modify stories directly in Outlook, and not only on your Pocket PC.
To link an entry to its predecessor in Outlook:
1. Select the predecessor entry in Outlook Journal’s entry list and use Edit/Copy
command;
2. Open the successor entry;
3. Put the cursor in the entry description (body field) and use Edit/Paste command to
create an attachment to the predecessor entry. Alternatively, you can drag the
predecessor entry from the entry list to the successor entry.
35
AAccqquuaassyyss
RetroActive
Remember that every journal entry attached to another one in Outlook Journal will be
considered as a predecessor entry on the next synchronization with RetroActive.
To remove the link between entries in Outlook:
1. Open the successor entry;
2. Click on the attachment representing the predecessor link and delete it.
Audio Conversions
RetroActive lets you capture voice recordings in your device in native WAVE (.wav) format only,
which usually results in large files.
When entries are being transferred to Outlook, however, RetroActiveSync can optionally use an
external encoder program to convert each of your recordings to compressed formats (MP3, WMA,
SPEEX etc), greatly reducing the space required to store such files both in your device and in
Outlook.
To use an audio encoder with RetroActiveSync
1. Choose an audio format and then look for an appropriated audio encoder that uses a
command-line interface;
2. Look at the encoder documentation and take note of the command-line format that will
produce the desired output file;
3. In RetroActiveSync settings, enter the command-line replacing the input file argument with
“{1}”, and the output file with “{2}” (these special marks tell RetroActiveSync where to put
the source and the target file names when passing the command to the encoder program);
4. Enter the target file extension for the format you chose (ex. “mp3”, “wma” and so on).
For example, you may want to use the well-known LAME encoder (http://www.mp3dev.org) to
convert your recordings to MP3 mono format in 32Kbps. In this case, you command-line will look
like this (notice that you must specify the full path for the program):
C:\LameFolder\lame.exe -m –b 32 {1} {2}
You can find command-line encoders for almost any audio format available. A good place to
start is Rarewares - www.rarewares.org
Depending on the audio format you choose, you may need additional software to play your
converted recordings on your Pocket PC.
Program Updates
RetroActiveSync can check for program updates using the Tools/Check Updates menu, when an
Internet connection is available.
To install a new version:
36
AAccqquuaassyyss
1.
2.
3.
4.
5.
RetroActive
If available, download the new version from Acquasys website;
Synchronize your journal file with Outlook (and with Blogger, if this is the case);
Exit RetroActive and RetroActiveSync it they are running;
Install the new version;
Try to open your last used journal file in RetroActive. If you receive an error message,
the journal file structure may have changed in the new version. In this case, proceed
with the following steps:
a. Exit RetroActive and delete the current journal file from your device;
b. Run RetroActiveSync and turn on “Overwrite device entries”;
c. Start a synchronization (the journal file will be recreated in your device).
37
AAccqquuaassyyss
RetroActive
Acquasys RetroActive is a trademark of Acquasys Informática Ltda.
Microsoft, Outlook, and Windows are either registered trademarks or trademarks of Microsoft
Corporation in the United States and/or other countries.
Microsoft product screen shot(s) reprinted with permission from Microsoft Corporation.
Blogger is a trademark of Google Inc.
Advanced Security for Outlook is a trademark of MAPILab Ltd.
38