1
DMT
DenMed Technologies, Inc.
1531 W. Orangewood Avenue
Orange, CA 92868
Copyright © 1998 by DenMed Technologies, Inc.,
All rights reserved
030-1024 Rev. A
Table of Contents
PRODUCT PRESENTATION.............................................................3
PRODUCT LABELS ............................................................................4
TABLE OF SYMBOLS ........................................................................4
SAFETY INSTRUCTIONS..................................................................5
PRODUCT DESCRIPTION ................................................................7
INSTALLATION ..................................................................................7
OPERATION ........................................................................................9
STANDARD WHITENING INSTRUCTIONS ................................13
AUTOMATED WHITENING INSTRUCTIONS............................13
ORTHODONTIC BONDING INSTRUCTIONS.............................14
STERILIZATION OF THE APOLLO 95E TIPS............................14
CARING FOR THE APOLLO ..........................................................15
TROUBLESHOOTING .....................................................................16
MAINTENANCE ................................................................................16
SPECIFICATIONS.............................................................................17
WARRANTY STATEMENT.............................................................18
030-1024 Rev. A
Page2
Product Presentation
5
8
1
2
3
4
7
1.
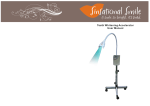
Apollo 95E plasma arc lamp
2.
Liquid light guide
3.
Interchangeable handpiece tip
4.
Footswitch Jack
6
5.
Front panel, status indicator
6.
Curing or whitening mode selector.
7.
Timing selection
8.
« ON « and « OFF » switch
030-1024 Rev. A
Page3
Product Labels
Label # 1
Identification Label
Location: Bottom
DMT
DenMed Technologies,
Inc.
1531 W. Orangewood Ave.
Orange, CA 92868
TEL: 714-532-1107
FAX: 714-532-2063
Apollo 95E
020-1245
Apollo 95E
UL2601-1/
CAN/CSA C22.2
No.601-1
61AK
NHXXXXXX
100-240V ~
50-60hz 6.3A
Label # 2
Important Label
Location: back
E202233
IMPORTANT
This device is a precision medical instrument capable of
emitting high output visible energy. It is intended to be
used by a qualified trained dental professional. It is
imperative to read and understand the User’s Manual
before using this device.
Label # 3
Dangerous Voltage Label
Location: Lamp Door
Table of Symbols
Protective Earth
Type BF Applied Part
Attention See Instructions
For Use
Foot Switch
AC Voltage
Fuses
030-1024
Rev. A
Page4
Safety Instructions
Warning:
Before connecting the Apollo, please carefully read the safety
instructions. Safety measures involve the trained users' knowledge and common
sense as well as more specific indications mentioned in this manual.
1.
This instrument must be used according to the instructions in this manual.
2.
This instrument should be operated only from the type of power source
indicated on the marking label. If you are not sure of the type of power
supplied to your location, consult your Apollo 95E dealer or local power
company.
3.
The light rays produced by the instrument can be harmful and should
never be directed towards the eyes even if the protective glasses are
being worn. The light rays are for treatment inside the mouth only.
4.
Condensation inside the Apollo 95E can be dangerous. If the instrument
is transported from a cold area to a warm area, allow adequate time to
attain the new room temperature.
5.
Lamp should only be replaced by factory trained personnel.
6.
Do not use the instrument near a flammable liquid, anaesthetic, or
oxygen.
7.
Do not introduce metal objects into the instrument. Do not overload wall
outlets as this can result in a risk of fire or electric shock.
8.
Do not use near any heat source. Do not use solvent or flammable
products on this instrument as this could cause damage.
9.
Do not use any liquid or detergent on the instrument for cleaning or any
other purpose as this could cause a short circuit.
10.
Any person who has been advised to operate small electrical instruments
with care must apply the same caution when using the Apollo 95E.
11.
Any instrument used for polymerization or whitening, including the Apollo
95E, must not be used on or by any person who presents or has
presented in the past, photo biological reactions (including urticaria solaris
or protoporphyrie erythropetique).
Or any person under medical
030-1024 Rev. A
Page5
treatment with photosensitive medicine (including methoxypsorales or
dimethylchlortetracycline).
12.
Any person who has previously suffered from a retina or crystalline
ailment or who has undergone eye surgery including treatment of
cataracts, should consult an eye specialist before using the instrument or
before undergoing treatment with the instrument. Carelessness could
lead to an incidence due to the light intensity. It is highly recommended to
use protective ultra violet and light-filtering glasses at all times.
13.
Any variation in the voltage of the power supply or in the electromagnetic
field, could cause the lamp to come on automatically, or interfere with it's
functioning.
14.
Before each use verify that the light power is sufficient for a complete
polymerization. We recommend that you proceed as described in the
chapter ‘Caring for the Apollo 95E”.
15.
The instrument has EN 60601-1-2 approval for both Emission (electric
field rays, and supply voltage interference) and Immunity (electric field
rays, intermittent bursts on the supply, electrostatic discharges and supply
shock waves).
16.
Slots in the bottom and the back of the instrument are provided for
ventilation, and to ensure reliable operation of the instrument, as well as
protecting it from overheating. These openings must not be blocked or
covered, and the unit must be placed in an area with adequate ventilation.
17.
This instrument is equipped with a polarized alternating current line plug
( a plug which has one blade wider than the other). This plug will fit into
the power outlet only one way. This is a safety feature. If you are unable
to insert the plug fully into the outlet, try reversing the plug. Do not
modify the plug, this may defeat the safety purpose of the polarized
plug.
18.
Other than to replace the fuse, do not attempt to service this instrument
yourself. Opening or removing covers may expose you to dangerous
voltage or other hazards. Refer all servicing to qualified service
personnel.
19.
Always switch off the power before connecting or disconnecting the foot
switch.
20.
Do not operate the unit with the fiber optic cable disconnected.
21.
Remove the instrument from the wall outlet and refer servicing to
qualified service personnel under the following conditions.
•
•
•
When the power supply cord is damaged.
If liquid has been spilled, or objects have fallen into the instrument.
If the instrument has been dropped.
030-1024 Rev. A
Page6
•
When the instrument exhibits a distinct change in performance, this may
indicate a need for service.
22.
Caution: Federal (USA) law restricts this device to sale by or on the order
of a dentist or any other practitioner licensed by the law of the State in
which they practice to use or order the use of the device.
23.
Whenever you are stacking or transporting your instrument please ensure
that the temperature is between 0°C and 70°C and that the humidity is
between 10% and 100%.
24.
Be sure to insert the tip onto the handpiece before using the Apollo 95E.
25.
The Apollo 95E has been manufactured with respect to electric shock, fire
and mechanical hazards only in according with UL 2601-1/CAN/CSA
C22.2 No. 601-1.
Product Description
The Apollo 95E produces visible light for the polymerization of dental materials
and for tooth whitening. It consists of a handpiece with a light guide that delivers
the light to the intraoral area of interest. The Apollo 95E Supply Unit contains a
high intensity light source, power supply, and control electronics. The light
emanates from the tip of the handpiece via a flexible light guide cable connected
to the supply unit. An activation switch connected to the supply unit is used to
initiate the delivery of light.
The front control panel controls which mode the instrument is in: Curing or Tooth
Whitening. When the unit is in the Curing mode the user can select the exposure
time options of 1, 2, or 3 seconds, or SC for 2 seconds at low intensity followed by
4 seconds at high intensity.
The unit is supplied with one removable 8-mm diameter curved tip for curing and
one removable 8-mm straight tip for whitening. These tips may be disinfected or
sterilized between uses.
The Apollo 95E can be installed in a mobile cart or wall mounted.
Installation
1.
Please make sure the following items are in the shipping package and
found in good condition:
•
The Apollo 95E console
•
The optical liquid guide
•
The 8mm handpiece (curved and straight)
•
The activation switch
•
The AC power cable
•
The user's manual
030-1024 Rev. A
Page7
If any of the above are missing or appear damaged, please inform the
transporter and contact DMT immediately.
Retain all packaging
materials in case the unit has to be returned for service.
2.
All the parts in contact with the patient:
•
The handpiece must be sterilized.
•
The liquid light guide must be disinfected with a non-abrasive
product without detergent.
3.
After sterilizing, insert the handpiece onto the liquid light guide (it is
maintained magnetically, enabling simple rotation for treatment of the
upper and lower maxillary).
4.
To avoid any damage, place the handpiece onto the handpiece holder.
5.
Plug the foot switch on the right of the light guide plug.
6.
Plug one end of the power cord into the back of the unit and the other end
into the power outlet. Make sure that the power switch of the instrument
is in the OFF position.
7.
Avoid overheating the Apollo by keeping the fan slots free of obstructions
and coverings. Do not turn the instrument on if the fan slots are
obstructed.
8.
Turn on the instrument.
9.
All the LED lights on the front panel light up for a few seconds.
10.
Test the lamp by pressing the activation switch
11.
•
The yellow action light on the front panel will light during the time
that the foot switch is pressed.
•
The lamp on indicator lights up
•
After the lamp has gone off, the timer light comes on indicating
the cooling time. At this point use of the lamp is impossible.
•
An audible tone will alert the user when the unit is ready for use.
Repeat the action for 1 second, 2 seconds 3 seconds and SC (step
curing: 2 seconds at half power, followed by 4 seconds at full power).
The instrument is ready for use.
Note: A beep will be heard as each step is carried out. In particular it beeps each
time that the light goes on and each time the timer times out.
030-1024 Rev. A
Page8
If there is a defect, the instrument will beep rapidly. The whitening and curing
control lights will flash simultaneously.
APOLLO
DMD
CURING
WHITENING
Timer
Lamp On
TIME
Power on
Curing
Whitening
Action
Time Selection Quadrant
Variation in line voltage has no effect on the lamp intensity. The exposition time
can be selected for 1 second, 2 seconds, 3 seconds or SC (step curing: 2
seconds at half power, followed by 4 seconds at full power).
The next cycle is activated by pressing the foot switch:
•
The activation switch indicator (action) comes on when the foot switch is
pressed
•
The lamp indicator (lamp on) comes on during the time the lamp is on
•
The timing indicator (timer) comes on indicating time out for cooling
The lamp output can be interrupted at any time by simply pressing the foot
switch a second time.
Operation
1.
Turn the instrument on using the switch on the back of the instrument
2.
Select the mode
•
curing (hardening of dental composites)
•
whitening
3.
Select the time for curing
•
to 2 seconds per mm for light colored composites
•
to 3 seconds per mm for darker composite
Note 1: It is advised to choose 1 or 2 seconds and expose the composite
zone twice or to vary the exposure angle slightly.
Note 2: After 2 seconds of exposure it is advised to increase the distance
between the lamp and the composite to 5mm.
030-1024 Rev. A
Page9
4.
When using SC (step curing: 2 seconds at half power, followed by 4
seconds at full power) it is recommended to keep the handpiece close to
the composite.
5.
Press the foot switch to light the lamp. You will hear a beep sound. (You
can also use the foot switch to turn the lamp off before the time is up).
6.
When the timer times out there is another beep.
Note 1: You can leave the instrument on all day.
Note 2: Do not touch the composite with the fiber end, as this would
cause considerable damage to the fiber and decrease it's efficiency.
7.
When curing a large cavity preparation, where the cusp to pulpal floor
distance approximates 7mm, (.27 inches) it is advisable to use one half
the recommended curing layer thickness on the first layer. The reduced
volume of composite will produce a lower exothermic reaction available
for pulpal absorption.
NOTE: A change in probe size or distance to sample may require volume
and or energy adjustments.
030-1024 Rev. A
Page10
Various Curing Parameters Illustrated
Chart 1
Conventional Time
APOLLO 95E Time
45 Sec
30 Sec
15 Sec
3 Sec
2 Sec
1 Sec
8.
Polymerization curing cycles may vary from one manufacturer of
restorative material to another. Chart 1 lists recommended exposure time
conversions. These settings are only approximate and compare to a
recommended curing time typically based on a conventional curing light
with a power density of 500mW/sq.cm. (200mW) and an 8mm probe.
9.
NOTE: It is strongly recommended to verify the curing ability of any
specific material. Expressing a 3.0mm thick sample of material on a
mixing pad can do this. Expose the sample with the desired Energy
setting; the underside of the sample should be hard when scratched with
an explorer.
10.
Curing techniques will vary from operator to operator. In general, it is
related to the amount of energy needed and the technique of placement.
11.
For example: In addition to curing the occlusal, you may cure a threelayer composite by curing through the tooth. This may initiate bonding
along a lingual or buccal wall. You may also choose to cure the
composite with one exposure per layer from the occlusal.
030-1024 Rev. A
Page11
Shown below is a drawing illustrating curing techniques.
Class 1 cavity preparation 4mm depth, and a composite with a recommended
curing time of 3 seconds.
10.
Oral safety parameters for pulpal temperature elevation should be
calculated by the sum of the exposure energy per layer.
030-1024 Rev. A
Page12
Standard Whitening Instructions
Note: The Apollo is available with 2 modes of operation; one marked “Curing” and
the other marked “Whitening” either mode may be used for the whitening
application depending on the whitening materials manufacturers’ directions for
use and the desired results for the application. The “Whitening” , a 3 second
power output mode is activated by the activation switch, depressing it once turns
the Apollo 95E on and depressing it a second time turns it off.
The Apollo 95E is provided with 2 tips. The Whitening Tip is the clear straight tip.
If sensitivity develops it is recommended you switch to the curing tip to
finish the procedure.
Application:
Note: Observe all Apollo 95E safety precautions and the manufacturer’s cautions
for use of the Whitening chemistry.
1.
2.
3.
Attach the whitening tip to the handpiece.
Select the whitening mode.
Follow directions provided by the manufacturer of the whitening materials.
Automated Whitening Instructions
Note: The Apollo is available with 2 modes of operation; one marked “Curing” and
the other marked “Whitening”. Selecting “Whitening” mode activates the
automated whitening cycles. The cycle starts when pressing the activation switch
and last about 12 minutes. A typical whitening procedure should use 3 cycles.
The light output pattern is as follows: 2 minutes ON, 2 minutes OFF, 2 minutes
ON, 2 minutes OFF, 2 minutes ON and 2 minutes OFF.
The Automated Whitening Apollo 95E comes with a stand and a multi-arch
whitening tip.
1.
2.
3.
Remove curing tip from handpiece.
Attach the Multi-Arch to the handpiece.
Position the multi-arch just above the activation switch and tighten the plastic
screw.
4. Follow instructions provided by the manufacturer of the Whitening materials
st
to apply the 1 pass of whitening gel onto patient’s teeth.
5. Place the handpiece onto the holder and stand.
6. Position the multi-arch tip about 0.25 – 0.50 inch from patient’s teeth.
7. Select the “Whitening” mode.
8. Activate the automated whitening cycle by pressing the activation switch on
handpiece.
9. The whitening cycle will stop at 12 minutes.
nd
10. Apply the 2 pass of whitening gel on patient’s teeth.
11. Repeat the whitening cycles for 2 more time to complete the procedure.
030-1024 Rev. A
Page13
Orthodontic Bonding Instructions
1.
2.
3.
Turn the Apollo 95E light on using the switch on the back.
Select the Curing Mode
Select the Time for curing
•
seconds recommended for ceramic and metal brackets
•
seconds recommended for bands
4.
Bonding Brackets:
Ceramic brackets require a total curing time of 2 seconds and metal brackets
require a total curing time of 4 seconds.
Ceramic brackets using APC™ appliances or Transbond™ Adhesive
•
Hold the light guide perpendicular to the ceramic appliance surface at a
distance of 2-3 mm and cure the light cure adhesive for 2 seconds.
Metal brackets using APC™ Appliances or Transbond™ Adhesive
•
Hold the light guide 2-3 mm away from the adhesive-bracket interface
on the mesial and distal edges. Expose the light cure adhesive for 2
seconds on the mesial adhesive-bracket interface and for 2
seconds on the distal adhesive-bracket interface, for a total of 4
seconds.
•
A technique tip for metal brackets for faster curing is to place the light
guide interproximal to two brackets and cure for 2 seconds. This would
cure the mesial of one bracket and the distal of another bracket at the
same time. However, to fully cure the adhesive under the bracket, both
the mesial and distal sides of each bracket must be exposed to the
light.
5.
Banding Appliances:
Orthodontic bands require a total curing time of 6 seconds.
Bands using Unitek™ Multi-Cure Glass Ionomer Orthodontic Band Cement
or Transbond™ Plus Light Cure Band Adhesive.
•
Hold the light guide 2-3 mm above the mesial adhesive-band interface
on the occlusal surface of the tooth and cure the light cure adhesive
for 3 seconds. Repeat by placing the light guide 2-3 mm above the
distal adhesive-band interface on the occlusal surface of the tooth and
cure for 3 seconds.
Sterilization of the Apollo 95E tips
-6
To obtain a sterility assurance level of 10 using a gravity steam sterilizer, an
exposure time of 15 minutes at a minimum temperature of 132°C is required. The
minimum dry time is ‘0’ minutes, and the use of a sterilization pouch to hold the
tips is required.
030-1024 Rev. A
Page14
Caring for the Apollo
Warning: For day to day caring of the unit, make sure that the instrument is off
before removing the end piece, the foot switch or the liquid light guide for
cleaning. Unplug the instrument before using a disinfectant that could penetrate
the cover.
1.
Disinfect the handpiece before using the instrument for the first time.
2.
Disinfect the handpiece before use on each patient with usual
disinfectants. Never use abrasive solvents on the fiber protection sheath.
Do not use phenol-based compounds.
3.
The whole instrument and accessories can be disinfected using normal
surface disinfectants. Make sure that the instrument is unplugged before
disinfecting and do not use abrasive products on the plastic or painted
parts.
4.
Make sure that the light guide is not stretched or bent, as this could
damage the liquid fiber.
5.
Verify that after each use no trace of composite remains on the endpiece.
Any composite must be removed immediately and the endpiece replaced
(if it has become marked) as the power could be reduced up to 30 %.
6.
The power of the plasma source does not vary with fluctuation in the
power supply as with ordinary lamps.
7.
The following performance test can be carried out:
•
Place a Mylar dental matrix on a white sheet. Fill a 5mm
(diameter) x 2mm (thickness) form with composite. (Note: A 2
mm section of a plastic straw may be used to create the form)
•
Expose the composite for 3 seconds to the lamp.
•
Wait for 30 seconds.
8.
Remove the two matrixes. The surfaces must appear glazed and be
resistance to the dental probe. If this is not the case, repeat a second
time. If this is still not the case please refer to Troubleshooting.
9.
Any other part should be examined and maintained by Customer Service
at DMT.
10.
If the lamp assembly needs to be changed we advise that you send the
unit to the Service Department at DMT.
030-1024 Rev. A
Page15
Troubleshooting
In case of a defect you may hear a double beep sound or see the control lights
blink. This section has information that should help you solve these problems. If
after trying the suggested solutions, your instrument symptoms remain the same,
please contact your authorized service center or DMT.
Symptoms
Possible Solutions
The instrument is switched on but the
power on lamp does not light
Check the power cable is properly
connected
Check the fuses at the back of the
instrument (6.3 amps slow blow)
Check that the foot switch is properly
connected
Check the AC voltage. It may be
different to the manufacturer’s
indications
Let the lamp cool for 30 minutes.
Check it’s functioning
Send the instrument to your
authorized service center or DMT
(see maintenance section).
Check that the optical lightguide is
not damage
OR
Send the instrument to your
authorized service center or DMT
(see maintenance section).
The lamp on light and the plasma do
not come on when the foot switch is
pressed
The lamp on light comes on but the
plasma lamp does not. A double
beep sound is heard.
The lamp produces low light
Maintenance
If you experience difficulty in this or any other operational issues, please call
DMT Technical Support at (714) 532-1107.
030-1024 Rev. A
Page16
Specifications
Model:
Apollo 95 E
Power supply voltage:
Frequency:
100 to 240 Volts AC
50 - 60 Hz
Power:
Fuse:
6.3A
MDL7
Wavelength of light emission
Curing Mode:
Whitening Mode:
460 – 490NM
400 – 500 NM
Light power (average value)
Curing mode:
Whitening mode:
1.600 W / cm2 (TYP)
2.900 W / cm2 (TYP)
Dimensions:
Length:
Width:
Height:
300 mm
240 mm
100 mm
Liquid optical fiber
Length
1800 mm
Weight:
5500 g
Operating Environment
Maximum one activation every
30 seconds
Operating Temperature
5°C to 35°C
Operating Humidity
20% to 80% (non-condensing)
Storage Temperature
0°C to 70°C
Storage Humidity
10% to 100% (non-condensing)
Atmospheric Pressure
500hPa and 1060hPa
Protection against electric shock (5.1, 5.2)
Ordinary
Type BF applied part: Light Guide
Protection against harmful ingress of water (5.3)
Ordinary
Approves:
Europe
North America
Manufacturer:
CE, EN60601, IEC-601-1
UL, CSA
DenMed Technologies, Inc.
1531 W. Orangewood Ave.
Orange, CA 92868
(Curing Light)
With respect to electric shock, fire and
Mechanical hazards only
In accordance with UL2601-1/CAN/CSA
C22.2 No. 601-1
61AK
030-1024 Rev. A
Page17
DENMED TECHNOLOGIES, INC.
1531 West Orangewood Avenue
Orange, CA 92868
714-532-1107
Warranty Statement
DMT warrants the Apollo 95E product as distributed by DMT against defects in
craftsmanship and materials for one year from the date the product was delivered
to the original purchaser. DMT, at its discretion, will repair or replace any parts
of the products (other than users manuals, software and computer related
hardware) that are defective in craftsmanship or materials if the product is proven
faulty within the one year warranty, provided DMT is given notice in a timely
manner. DMT will be responsible for shipping costs of any repair/replacement
parts for the first 30 days after receipt of a system. The customer will be
responsible for shipping costs for any replacement or repair of defective parts
thereafter.
If products are to be returned to DMT, the original customer must obtain an RMA
(Return Merchandise Authorization) number from DMT via telephone. If a return
is made after the first 30 days of delivery, the customer must include the RMA
number on the package and the customer must prepay all freight charges to
return any product to a DMT designated location. DMT will ship replacements
freight collect on an exchange basis to the customer. Products will become
property of DMT that are returned to DMT under this warranty. Only the
warranty given by the manufacturer will apply in respect to any system or part
thereof not manufactured by DMT, if any.
This limited warranty does not cover damage which is due to: 1) any defects in
any product or part not supplied by DMT as part of the system; 2) fine tuning,
relocation, modification or repair by other than DMT authorized personnel; 3)
improper maintenance or installation, carelessness, or negligence or any cause
other than ordinary applications, industrial, commercial or personal; 4) any
statements made about DMT products by regional offices, dealers, distributors,
agents or salespeople unless confirmed in writing by a DMT Officer, or; 5)
damage which occurs in shipment to or from Customer.
DMTs’ liability shall not exceed price of the individual piece whose loss or defect
is the basis of the claim. DMT is not liable for loss of use of facility, loss of
profits, loss of use of equipment or other incidental consequential damages.
DMT is free of obligation beyond its standard warranty with regards to changes
made in system component hardware by the manufacturer of that hardware.
Without prior notice DMT serves the right to make changes in its system
hardware at any time. This limited warranty shall constitute the entire limited
warranty and is granted by DMT instead of any or all other written, oral, implied
or statutory warranties.
030-1024 Rev. A
Page18