Download 5.8 ASManager
Transcript
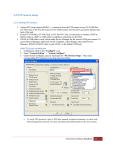
5.8 ASManager 5.8.1 Introduction ASManager is the main access control software that stores the card and card holder database. The software also receives the status and events from each ASController (AS100/AS110, AS200, and AS400) for up to 255 controller connections. From ASManager, user may configure each door on each panel to operate according to certain schedule and input status. ASRemote is a remote application that connects to ASManager for remote control and viewing. ASWeb is a remote application that connects to ASManager for remote event log browsing. TA Web is a remote application that manages time and attendance of each employee. VM Web is a remote application that provides visitor management capability. Basic ASManager can connect to one access controller without additional license. The ASManager USB key must be upgraded in order to accommodate more controllers (up to 255 controllers max). ASManager software can be installed from Access Control Installation Disk. 5.8.2 System Requirements GeoVision Technical Handbook 90 5.8.3 Main Features GeoVision Technical Handbook 91 5.8.4 Software Installation 1. Insert “Access Control Installation Disk” into DVD-ROM. 2. In the menu, select “1. Install or Remove GeoVision GV-Series Driver”, then select “Install GeoVision USB Devices Driver”. 3. Click and install “2. Install DirectX 9.0c” then follow on-screen instructions. 4. Click and install “3. Install Microsoft DirectX End-User runtimes (November 2008)” then follow on-screen instructions. 5. Click and install “4. Install Microsoft .NET Framework 3.5 (Not compatible with Windows 2000)” then follow on-screen instructions. 6. Select “6. Install GeoVision Access Control System”. 7. Select “GeoVision Access Control System” then follow on-screen instructions to disable UAC and install ASManager software. GeoVision Technical Handbook 92 5.8.5 Initialize Database 1. On Windows desktop, click on “Start”, “All Programs”, “Access Control”, “ASManager”. 2. If ASManager is installed for the first time, create a default set of ID, Password, Password Confirmation, and Hint. Check “Auto Login” to allow ASManager to automatically login using the default set of ID and password whenever ASManager starts. Check “Allowing removing password system” to enable PassUninstall.exe in case user may lose the supervisor ID and password to the system. If the option was not checked and user cannot retrieve his/her supervisor ID and password, the only option to remove password database would be to reformat system hard drive and reinstall Windows operating system. 3. Click “OK” to proceed. 4. Click “Yes” to setup or upgrade database. 5. Select “ASManager Database Setting” icon. GeoVision Technical Handbook 93 6. Select “Setup MDB / MSSQL Database for ASManager”. To upgrade a previous ASManager version, select “Upgrade to latest database version” 7. Select “Microsoft Office Access Database”. 8. Click “OK”. 9. Click “OK” when setup database connection successfully message comes up. 10. Select “Upgrade to latest database version”. 11. Click “OK” when upgrade database successfully message comes up. 12. Click “Exit”. GeoVision Technical Handbook 94 13. Select “Re-login” to start ASManager. Alternatively, ASManager can be started by going “Start”, “All Programs”, “Access Control”, “ASManager”. For detail instruction, refer to p.IV of ASManager User Manual GeoVision Technical Handbook 95 5.8.6 Controller Setup 1. Under ASManager, select “Devices”. 2. Click “Add” under Controller List. 3. Enter Controller ID. For AS100/110 ID, refer to section 5.4.6 For AS400 ID, refer to section 5.5.7 By default, ASController has ID of 1. 4. Name the controller, if necessary; then select controller Model. 5. Click “OK”. 6. Under General Setup tab, define time zone. GeoVision Technical Handbook 96 7. Select “COM Port” if ASController is connected via RS485. Otherwise, select “Network” for Ethernet connection. 8. Enter the IP address, Port, User ID, Password, and Crypto Key of ASController. By default, ASController has IP of 192.168.0.100. By default, ASController has Port of 4000. By default, ASController has User ID and Password of admin and admin. By default, ASController has Crypto Key of 12345678. 9. Under Gate A tab, name the door if necessary; then define a password for the door. Door password is valid under “Card or Common Mode” only 10. Set Lock Reset Time to designate door unlock period. 11. Set Held Open Time to designate grace time period before Held open alarm is triggered. GeoVision Technical Handbook 97 12. If GV-Fingerprint Reader is installed to open this door, check “GeoFinger” option. 13. Select Authentication Schedule and designate the door operation schedule by selecting the corresponding color and drag over desired time period. Check “Release By Card” to activate Release Mode by a card. Otherwise door will unlock at the designated time schedule automatically 14. Click “OK” to return to Controller Setup. 15. If a physical alarm is installed as an output, check the conditions to trigger the alarm under Alarm Event and designate Alarm Continuous Time. 16. Check “Set Camera Mapping” to map cameras to this door, and click the green arrow next to First Camera. 17. Under DVR List window, click “Search” then select “Search DVR and NVR” to scan for GVNVR/DVR within the network. Alternatively, select “Search IP Device” to scan for GV-IP Devices 18. Click “Search” to start scanning. 19. Check the desired DVR/NVR system and click “Add”. 20. Highlight the DVR/NVR then select “Modify”. 21. Enter the IP address, ID, and Password for the DVR/NVR to ensure access to the camera. 22. Click “OK”. GeoVision Technical Handbook 98 . 23. Under DVR List window, select the corresponding camera to be mapped and click “OK”. 24. Repeat steps 9 to 23 to enable multiple doors, if available. 25. Under Controller Setup window, click “OK” to add the controller under ASManager. Under Device View, if connection icon shows a yellow dot, then the connection is successful. Under Device View, if connection icon shows a red x, then the connection is NOT successful. Repeat steps 1 through 8 and make sure the parameters are correct. For detail instruction, refer to p.21 of ASManager User Manual GeoVision Technical Handbook 99 5.8.7 Time Zone Setup 1. Under ASManager, select “Time Zones”. 2. Click “Add”. 3. Name the time zone then click “OK”. 4. Click on the start time, and drag until end time to define the duration. 5. Repeat steps 2 to 4 to define more time zones. 6. Click “OK” when finished. For detail instruction, refer to p.31 of ASManager User Manual GeoVision Technical Handbook 100 5.8.8 Weekly Schedule Setup 1. Under ASManager, select “Weekly Schedule”. 2. Click “Add”. 3. Name the schedule then click “OK”. 4. Define daily access schedule by selecting the time zones created in section 5.8.7. 5. Repeat steps 2 to 4 to define more weekly schedules. 6. Click “OK” when finished. For detail instruction, refer to p.33 of ASManager User Manual GeoVision Technical Handbook 101 5.8.9 Access Group Setup 1. Under ASManager, select “Access Groups”. 2. Click “New”. 3. Name the access group and select the weekly schedule to be applied on each door for this group according to schedules created in section 5.8.8. 4. Repeat steps 2 to 3 to define more groups. 5. Exit the window when finished. For detail instruction, refer to p.36 of ASManager User Manual GeoVision Technical Handbook 102 5.8.10 Cards Setup 1. Under ASManager, select “Cards”. 2. Click “New”. 3. Select Code Type then enter Card Number (numbers only). a. Wiegand 26 allows 8-digit card number (default) b. HID 37 allows 11-digit card number ASManager supports Wiegand 26 ~ 64 frequency. However, only Wiegand 26 and 37 are defined by default. If a third-party reader with non-default frequency is used, it is necessary to first define the Wiegand parameters so that ASManager can read the card numbers properly. Such configuration can be done under Personnel, “Code Format Settings” 4. Enter the Privilege level for this card and assign it to an Access Group in the drop-down list as defined in section 5.8.9 Pin Code is valid under “Card and Pin Code Mode” only 5. Click “OK” when finished. GeoVision Technical Handbook 103 Alternatively, to enroll multiple cards with consecutive card numbers, use “Batch New” option. 6. Click “Batch New”. 7. Select Code Type then enter Card Number Range (numbers only). 8. Enter the Privilege level for the batched cards and assign them to an Access Group in the dropdown list as defined in section 5.8.9 9. Click “OK” when finished. The third option to create a card database would be to import from Microsoft Excel or Access. 10. Click “Import” then select file type. 11. Indicate File Path to locate database file. 12. Click “OK” when finished. For detail instruction, refer to p.26 of ASManager User Manual GeoVision Technical Handbook 104 5.8.11 Cardholders Setup 1. Under ASManager, select “Cardholders”. 2. Click “New”. 3. Enter First Name, Last Name, and Employee ID (if applicable). 4. Click “Select Photo” and locate a picture to associate with the cardholder. 5. Click “Add” to add a card that belongs to this cardholder. 6. Double-click on the card number to assign the card to the card holder. 7. Repeat steps 5 and 6 to add more cards for the same cardholder. 8. Go to Home and Business tabs to add in additional personal information regarding the card holder, if applicable. GeoVision Technical Handbook 105 9. Click “OK” when finished. Alternatively, a cardholder database can also be imported from Microsoft Excel or Access. 10. Click “Import” then select file type. 11. Indicate File Path to locate database file. 12. Click “OK” when finished. For detail instruction, refer to p.38 of ASManager User Manual GeoVision Technical Handbook 106 5.8.12 Fingerprint Enrollment In order to enroll fingerprint in ASManager, it is required to connect GV-GF1901 to ASManager directly via GV-COM or GV-Net Card. 1. Under ASManager, select “Cardholders”. 2. Under Cardholder list, select the desired card holder. 3. Under Fingerprint tab, click “Search” to locate the GV-Fingerprint reader connected to ASManager. If a GV-Fingerprint reader is not found, verify COM port and RS485 connection as shown above in the connection diagram. GeoVision Technical Handbook 107


