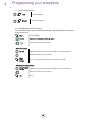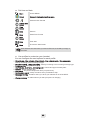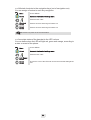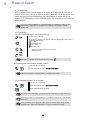
1
Other Alcatel-Lucent 500 DECT Handset Alcatel-Lucent OmniPCX Office User manual 8AL90841USAA ed02 User manual how Thank you for choosing an Alcatel-Lucent phone.. The availability of certain functions described in this guide may depend on the version or configuration of your system. If your phone works on GAP mode, some features are not available. If in doubt, consult the person responsible for your system. Alcatel-Lucent, Lucent, Alcatel-Lucent and the Alcatel-Lucent logo are trademarks of Alcatel-Lucent. All other trademarks are the property of their respective owners. The information presented is subject to change without notice. Alcatel-Lucent assumes no responsibility for inaccuracies contained herein. Copyright © 2011 Alcatel-Lucent. All rights reserved How to read this guide R CLR On hook/Off hook key Keys to validate or select a menu or option Navigation keys: used to navigate the menus or in a text field when entering characters Use the keypad to enter digits and letters. Important information These symbols can be supplemented by small icons or texts. All default or customized function codes are given in the table of codes in the appended sheet. 2 Contents Your telephone . . . . . . . . . . . . . . . . . . . . . . . . . . . . . . . . . . . . . . . . . . . . p. 6 Toc 1. Getting started . . . . . . . . . . . . . . . . . . . . . . . . . . . . . . . . . . . . . . . . . . . . . 1.1 Installing the battery in the telephone . . . . . . . . . . . . . . . . . . . . . . . . . 1.2 Charging your telephone battery . . . . . . . . . . . . . . . . . . . . . . . . . . . . . 1.3 Switching on your telephone . . . . . . . . . . . . . . . . . . . . . . . . . . . . . . . . 1.4 Install a bluetooth device (pairing) . . . . . . . . . . . . . . . . . . . . . . . . . . . 1.5 Installing the memory card . . . . . . . . . . . . . . . . . . . . . . . . . . . . . . . . . p. 7 p. 7 p. 7 p. 8 p. 8 p. 10 2. Using your telephone. . . . . . . . . . . . . . . . . . . . . . . . . . . . . . . . . . . . . . . . 2.1 Access MENU . . . . . . . . . . . . . . . . . . . . . . . . . . . . . . . . . . . . . . . . . . . 2.2 Making a call . . . . . . . . . . . . . . . . . . . . . . . . . . . . . . . . . . . . . . . . . . . . 2.3 Receiving a call . . . . . . . . . . . . . . . . . . . . . . . . . . . . . . . . . . . . . . . . . . 2.4 Answering an internal call in intercom mode. . . . . . . . . . . . . . . . . . . . 2.5 Calling from your personal directory (Individual number) . . . . . . . . . . 2.6 Programming your personal directory . . . . . . . . . . . . . . . . . . . . . . . . . 2.7 Speed dial . . . . . . . . . . . . . . . . . . . . . . . . . . . . . . . . . . . . . . . . . . . . . . 2.8 Calling your correspondent by name (company directory) . . . . . . . . . 2.9 Requesting automatic callback if internal number is busy. . . . . . . . . . 2.10Calls log . . . . . . . . . . . . . . . . . . . . . . . . . . . . . . . . . . . . . . . . . . . . . . . 2.11Activate / Deactivate voice frequency . . . . . . . . . . . . . . . . . . . . . . . . p. 11 p. 11 p. 11 p. 11 p. 12 p. 12 p. 13 p. 13 p. 14 p. 14 p. 15 p. 15 3. During a conversation . . . . . . . . . . . . . . . . . . . . . . . . . . . . . . . . . . . . . . . 3.1 Introduction . . . . . . . . . . . . . . . . . . . . . . . . . . . . . . . . . . . . . . . . . . . . . 3.2 Activate/deactivate loudspeaker . . . . . . . . . . . . . . . . . . . . . . . . . . . . . 3.3 Mute, so that your correspondent cannot hear you. . . . . . . . . . . . . . . 3.4 Make a second call . . . . . . . . . . . . . . . . . . . . . . . . . . . . . . . . . . . . . . . 3.5 Receiving a second call . . . . . . . . . . . . . . . . . . . . . . . . . . . . . . . . . . . 3.6 Switching between two calls (Broker call) . . . . . . . . . . . . . . . . . . . . . . 3.7 Transferring a call . . . . . . . . . . . . . . . . . . . . . . . . . . . . . . . . . . . . . . . . 3.8 Setting up a conference . . . . . . . . . . . . . . . . . . . . . . . . . . . . . . . . . . . p. 16 p. 16 p. 16 p. 16 p. 16 p. 16 p. 17 p. 17 p. 17 4. Programming your telephone . . . . . . . . . . . . . . . . . . . . . . . . . . . . . . . . . 4.1 Lock/unlock keypad. . . . . . . . . . . . . . . . . . . . . . . . . . . . . . . . . . . . . . . 4.2 Adjusting the audio functions . . . . . . . . . . . . . . . . . . . . . . . . . . . . . . . 4.3 activate/deactivate silent mode . . . . . . . . . . . . . . . . . . . . . . . . . . . . . . 4.4 Activate/Deactivate the vibrating ringer. . . . . . . . . . . . . . . . . . . . . . . . 4.5 Selecting language . . . . . . . . . . . . . . . . . . . . . . . . . . . . . . . . . . . . . . . 4.6 Set time and date . . . . . . . . . . . . . . . . . . . . . . . . . . . . . . . . . . . . . . . . 4.7 Use profiles to customize your handset . . . . . . . . . . . . . . . . . . . . . . . 4.8 Customize the handset display . . . . . . . . . . . . . . . . . . . . . . . . . . . . . . 4.9 Configure the keys to answer a call . . . . . . . . . . . . . . . . . . . . . . . . . . 4.10Call duration and number of messages . . . . . . . . . . . . . . . . . . . . . . . 4.11Call screening. . . . . . . . . . . . . . . . . . . . . . . . . . . . . . . . . . . . . . . . . . . 4.12Configure your phone during charging . . . . . . . . . . . . . . . . . . . . . . . . 4.13Affected shortcuts to the navigation keys (out of navigation use) . . . 4.14Associate states of the handset to the LED colours. . . . . . . . . . . . . . p. 18 p. 18 p. 18 p. 19 p. 19 p. 19 p. 20 p. 20 p. 21 p. 22 p. 22 p. 23 p. 23 p. 24 p. 24 5. Keep in touch. . . . . . . . . . . . . . . . . . . . . . . . . . . . . . . . . . . . . . . . . . . . . . 5.1 Introduction . . . . . . . . . . . . . . . . . . . . . . . . . . . . . . . . . . . . . . . . . . . . . 5.2 Redialling . . . . . . . . . . . . . . . . . . . . . . . . . . . . . . . . . . . . . . . . . . . . . . 5.3 Immediate forward to a number . . . . . . . . . . . . . . . . . . . . . . . . . . . . . 5.4 Diverting your calls to your voice message service. . . . . . . . . . . . . . . 5.5 Deactivate forward . . . . . . . . . . . . . . . . . . . . . . . . . . . . . . . . . . . . . . . 5.6 Initializing your voice mailbox . . . . . . . . . . . . . . . . . . . . . . . . . . . . . . . 5.7 Consulting your voice mailbox . . . . . . . . . . . . . . . . . . . . . . . . . . . . . . 5.8 Customising your voice greeting . . . . . . . . . . . . . . . . . . . . . . . . . . . . . 5.9 Modify the password for your voice mailbox . . . . . . . . . . . . . . . . . . . . 5.10Additional services . . . . . . . . . . . . . . . . . . . . . . . . . . . . . . . . . . . . . . . 5.11Text mail. . . . . . . . . . . . . . . . . . . . . . . . . . . . . . . . . . . . . . . . . . . . . . . p. 25 p. 25 p. 25 p. 25 p. 26 p. 26 p. 26 p. 26 p. 27 p. 28 p. 28 p. 28 6. Registering the telephone . . . . . . . . . . . . . . . . . . . . . . . . . . . . . . . . . . . . p. 29 6.1 Subscribing the handset to a DECT system . . . . . . . . . . . . . . . . . . . . p. 29 6.2 Selecting your telephone system . . . . . . . . . . . . . . . . . . . . . . . . . . . . p. 30 3 Contents 7. Utilities . . . . . . . . . . . . . . . . . . . . . . . . . . . . . . . . . . . . . . . . . . . . . . . . . . . 7.1 Calendar . . . . . . . . . . . . . . . . . . . . . . . . . . . . . . . . . . . . . . . . . . . . . . . 7.2 Calculator . . . . . . . . . . . . . . . . . . . . . . . . . . . . . . . . . . . . . . . . . . . . . . 7.3 Stopwatch . . . . . . . . . . . . . . . . . . . . . . . . . . . . . . . . . . . . . . . . . . . . . . 7.4 Wake up services . . . . . . . . . . . . . . . . . . . . . . . . . . . . . . . . . . . . . . . . p. 31 p. 31 p. 32 p. 32 p. 33 8. Accessories . . . . . . . . . . . . . . . . . . . . . . . . . . . . . . . . . . . . . . . . . . . . . . . 8.1 Characteristics of the mains power adapter . . . . . . . . . . . . . . . . . . . . 8.2 Headphone / external microphone . . . . . . . . . . . . . . . . . . . . . . . . . . . 8.3 Cleaning your telephone . . . . . . . . . . . . . . . . . . . . . . . . . . . . . . . . . . . 8.4 Transporting and protecting your telephone . . . . . . . . . . . . . . . . . . . . p. 34 p. 34 p. 34 p. 34 p. 34 9. Precautions for use / Declaration of compliance . . . . . . . . . . . . . . . . . . . p. 35 4 Contents 5 Your telephone Status icons Call icons Battery charge level Programmed call-back time Radio reception quality Set is locked Filtered calls Missed calls Incoming call Outgoing call Loudspeaker activated Silent mode activated Silent mode activated (Loudspeaker vol) Silent mode activated (Microphone) Back-lit screen The screen switches off automatically after a few seconds of inactivity. To turn it back on, press the key Light The LED settings depend on the configuration of the set (see Associate states of the handset to the LED colours) Apply Navigate (up, down, left, right) Affected shortcuts to the navigation keys (out Adjust audio volume of navigation use) Activate/deactivate loudspeaker Access your personal directory Switch the screen on again Red key : Alarm call (Option) Activate/deactivate loudspeaker Calls log (Redial) Lock/unlock keypad Apply Access MENU : Message service, Personal directory , Settings menu items , Calls log , Erase a character Lift the receiver Company directory Headset socket Switch on / off Hang up Return to first screen / return to previous menu Switch off ringer Silent mode (long press) Microphone 6 1 Getting started Other 1.1 Installing the battery in the telephone • Installing the battery in the telephone 3 Before inserting the battery module into the phone, make sure that its lock is in the unlocked position While maintaining the battery module in position, slip the lock to the locked position Check that the battery module is properly installed in its housing • To remove it 3 Slip the lock to the unlocked position 1.2 Lift the battery module from the bottom You can then remove the battery module Charging your telephone battery It is important to fully charge your phone before using it for the first time. Connect the charger and place the telephone in the charging holder. The battery charger LED lights. The battery LED is in charging mode on the phone screen. If the battery is completly discharged, a charging time of several minutes is required before the set will light up again. 7 A charging location in the back of the charger is dedicated for loading an extra battery : • Open the protection cover in the back of the charger • Place the battery in the dedicated location • An LED indicates that the battery is properly installed and is charging Battery charge Battery fully charged (75% 100%) Battery half charged (33% - 75%) Low battery (0% - 33%) Battery completely discharged (0%) Recharge your telephone battery regularly. The telephone can be on or off when recharging the battery. If the telephone is to remain unused or out of its charger for several weeks, remove the battery and store it separately.. Time and date are reset when you switch off the set, the battery is empty or removed. 1.3 CLR Switching on your telephone Long press • Press the switch on/off key (long press). • Wait a few seconds (about 3s). • Your telephone is switched on Press on the same key (long press) to switch off the handset. 1.4 Install a bluetooth device (pairing) Before using a Bluetooth device with your phone, you must install the Bluetooth module in your phone. For more information, contact your installer or administrator. Install the Bluetooth module You must be in possession of the Bluetooth module for your phone • Turn off the handset • Slip the lock to the unlocked position • Lift the battery module 8 • Insert the Bluetooth module (You should hear a click when the module is in place) • Installing the battery in the telephone • Turn on the handset Enable Bluetooth Menu Access MENU Select Access to the handset settings menu Select the tab: Connectivity Bluetooth Select Yes Enable Bluetooth To disable Bluetooth, follow the same procedure by selecting No If the module is not installed, the Bluetooth menu is not accessible Install a bluetooth device (pairing) To use your Bluetooth device, it must be paired to the set. To manage the pairing, the Bluetooth device must be in detectable mode. Refer to your Bluetooth device documentation to find out how to activate detectable mode. Your Bluetooth device is ready to be paired Menu Access MENU Select Access to the handset settings menu Select the tab: Connectivity Search for devices Select The set scans for available Bluetooth devices Select Select the Bluetooth device to be paired Ok Enter the devices PIN code Bluetooth device connected 9 1.5 Installing the memory card 2 You must be in possession of the memory card for your phone • Turn off the handset • Slip the lock to the unlocked position • Lift the battery module • Slide in the memory card from under the two small crescents and press it as shown in figure • Installing the battery in the telephone • Turn on the handset When an empty memory card is inserted, the configuration of the handset is copied to the memory card. Note that the DECT subscriptions of the handset are also moved to the memorycard. Therefore, when you remove the memory card from the handset you wont be able to make or receive calls with your handset Dropping the handset may cause the memory card to dislodge inside the handset. When this happens, the user will be warned via an audible warning signal every 5 seconds, and the message "Check memory card" is given. Please insert the memory card correctly in the handset. 10 2 Using your telephone Other 2.1 Access MENU Menu Select a function in the MENU It provides access to all the functions available on your system.. Select Navigate in the menus and select the menu of your choice Messaging : consult and send voice and text messages. Calls : from the call log, select one of the last numbers dialed Contacts : access your personal directory Calendar : manage your appointments, your meetings , program a call-back time. Accessries : access to the calculator, countdown or wake up features Settings : adjust contrast, activate or deactivate the beeps, lighting, etc. 2.2 Making a call R dial Send the call You are connected Hang up, to terminate a call CLR To make an external call, dial the outside line access code before dialling your correspondents number. (0 by default). For the operator, dial "0" (by default). 2.3 Receiving a call R You are receiving a call : lift the receiver You are connected Hang up, to terminate a call CLR You can also configure your handset to answer a call by pressing any key or automatically without pressing any key ; (see: Configure the keys to answer a call). Switch off ringer Silence Your phone does not ring anymore but you can answer the call at any time 11 Reject call Reject OR CLR Answering an internal call in intercom mode In the interphony, calls are automatically answered on the handset activate intercom mode 2.4 Menu Access MENU Select Access to the handset settings menu Select the tab: Calls Answer mode Select Auto answer Select The interphony mode stays activated after the end of the communication. The interphony mode stays activated as long as the handset profile is not modified by user. 2.5 Calling from your personal directory (Individual number) Menu Access MENU Select Access your personal directory R • Select the name of the person you wish to call • Send the call quick access (by default) : Up navigation key If you have access to directories (personal and company), you must select the personal directory. If not, the personal directory is automatically displayed. You can search for a name in your contacts list by entering the first letter of the name.. 12 2.6 Programming your personal directory Without a memory card, your personal directory can contain up to 20 contacts (200 with a memory card).. A contact can contain up to 4 numbers.. • • • • There are 4 different number types: Home Mobile Work Other Menu Access MENU Select Access your personal directory New contact Place on cursor (highlight) Select the type of contact (Home , Mobile , Work , Other) Add Save Enter the number Save Enter the name Yes Apply To key in the name: the keys in the keypad include letters that you can display by pressing them successively. Example: press "8" twice to display the letter "U". When entering text, you can switch to the upper case mode, lower case and the numeric keypad by pressing successively on the # key. 2.7 Speed dial This feature allows you to associate a contact to a key on the keypad. Therefore, pressing and holding on this key will automatically start the call to the associated contact. This feature allows to associate a contact or a feature code to a key on the kepypad. Pressing and holdingon this key will automatically start the call to the contact or will activate the associated feature 13 Menu Access MENU Select Access your personal directory More Speed dial Select Add Replace Delete select the key to programme (0 to 9). As appropriate, you can add, replace or delete the number or feature associated with the key. Back to homepage CLR 2.8 Select one of your contacts Calling your correspondent by name (company directory) This feature is available only if supported by your communication system. Contact your administrator to determine if you can use this feature. R Access to the company directory R Enter the letters of the name of your correspondent (1) consecutive presses Select the name of the person you wish to call 0 Display more information about the current name (number) # Send the call (1) To enter the name, press successively on the keys containing the letters to enter for the name. The system display all matching names found in the directory. For example, you are searching "Smith", press the key 7 for the "S", key 6 for the "m", key 4 for the "i", key 8 for the "t" and key 4 for the "h". Requesting automatic callback if internal number is busy The telephone of the internal correspondent you are trying to contact is busy, and you want the person to call you back as soon as they are free. 2.9 Enter the feature code: Automatic callback When a correspondent requests a callback, you can consult by hooking off the set and dialing the correspondents callback requests consultation code. This feature is available only if supported by your communication system. Contact your administrator to determine if you can use this feature.. 14 Calls log All incoming, outgoing or missed calls are displayed in the call log. 2.10 Call Access to the calls log All incoming, outgoing or missed calls are displayed in the call log Select the desired log: all calls answered calls sent calls missed calls Select the recipient from the call log To see your correspondent details More From the call log, you can save the correspondant in your contacts, send a message to the correspondant, etc. The call log can also be accessed from the menu . Activate / Deactivate voice frequency During a conversation you sometimes have to send DTMF signals, such as with a voice server, an automated attendant or a remotely consulted answering machine. 2.11 During a conversation Press the star key (hold down for a few seconds). The function is automatically cancelled when you hang up. 15 3 During a conversation Other Introduction Your system offers a wide range of services and features. To activate a feature while in communication, enter the feature code directly. For information on the features codes list, contact your installer or administrator. 3.1 3.2 Activate/deactivate loudspeaker You are in conversation Spk on Activate loudspeaker Spk off Deactivate loudspeaker Mute, so that your correspondent cannot hear you During the call, you do not wish your caller to hear you. 3.3 You are in conversation 3.4 Mute "Mute" mode is activated. Your caller can no longer hear you Unmute Your correspondent hears you again. Make a second call You are in communication with a first correspondent Dial directly number the first call is on hold You can call the second correspondent from the directory using the keyboard shortcuts. 3.5 Receiving a second call You are in conversation and a correspondent is trying to contact you: display the correspondents identity You wish to take the call immediately: Enter the feature code: On hold call consultation first call is automatically placed on hold 16 Switching between two calls (Broker call) You are in communication with the first correspondent and the secont is on hold. You are in conversation with the first correspondent and the second is on hold. You want to switch from one correspondent to the other. 3.6 Enter the feature code: Switching between calls (Broker call) You are in conversation with the second correspondent and the first one is on hold. You are in conversation with the second correspondent and the first is on hold Enter the feature code: Switching between calls (Broker call) You are in conversation with the first correspondent and the second is on hold. You are back in conversation with the first correspondent and the second is on hold. Transferring a call After dialling the destination number, you can transfer the call directly without waiting for your correspondents reply by validating the "Transfer" option.You can initiate the transfer by using the icon or the "Transfer" text.The transfer between two external correspondents and the transfer by pressing the hang-up key depend on the system configuration. 3.7 You are in communication with a first correspondent • Calling a second person during a conversation CLR 3.8 • Hang up the ongoing call the two correspondents are connected Setting up a conference You are in communication with a first correspondent. A second correspondent is on hold. Enter the feature code: Three-way conference You are in conference mode Use the same procedure to cancel the conference and recover the first call. 17 4 Programming your telephone Other 4.1 Lock/unlock keypad Lock Lock the keypad Unlock Unlock your phone Adjusting the audio functions Your handset allows you set different melody rings depending on the type of incoming call. 4.2 Menu Access MENU Select Access to the handset settings menu Select the tab: Sounds & alerts • Choose the tune Select Select the type of call to which the ringing is to be associated Select the melody of your choice Play Stop Select You can : play/stop the melody and select the melody • Adjusting the ringer volume Ring volume Select Select the type of call to which the ringing is to be associated Select the volume of your choice Ok Apply 18 4.3 activate/deactivate silent mode Menu Access MENU Select Access to the handset settings menu Select the tab: General Profiles Select Select profiles Select Silent Select Silent mode activated Quick access : # (long press) This key lets you switch from normal mode to silent mode and vice versa 4.4 Activate/Deactivate the vibrating ringer Menu Access MENU Select Access to the handset settings menu Select the tab: Sounds & alerts Vibrator Select Select 4.5 • • • • Off : vibration deactivated Vibrate then ring : the handset vibrates and then rings Vibrate only : the handset vibrates and doesnt ring Vibrate and ring : the handset vibrates and rings alternately Selecting language Menu Access MENU Select Access to the handset settings menu Select the tab: General Language Select Select Select the language of your choice 19 4.6 Set time and date Menu Access MENU Select Access to the handset settings menu Select the tab: General Time & date Select Time Select Save Set time More Select Time Format Date Select Save Enter date More Choose the date format Time and date are reset when you switch off the set, the battery is empty or removed. Use profiles to customize your handset You can configure the next options for each profile: 4.7 • Ring volume , Ring external , Ring internal , Ring unknown calls , Ring emergency : Melody according to the incoming call type • Ring normal msg. , Ring urgent msg. : Melody according to the incoming message type • Increasing ring : Progressive ringing • Alert volume , Alert tone , Increasing alert : Volume and type of melody alert • Vibrator : Buzzer (Mobile 200) • Key sound : The phone bleeps each time you press a key • Confirmation sound : A beep sounds at every confirmation step • Coverage warning : An alarm warns you when your handset is out of the DECT coverage • Charger warning : An alarm warms you that your phone is charging 20 Select a profile Menu Access MENU Select Access to the handset settings menu Select the tab: General Profiles Select Select profiles Select Select Select a profile • Modify a profile Menu Access MENU Select Access to the handset settings menu Select the tab: General Profiles Select Edit profile Select Select Select and modify the desired function (follow information displayed on the screen) You can reset the defaults values by selecting Reset profiles. 4.8 Customize the handset display Menu Access MENU Select Access to the handset settings menu Select the tab: Display Change the wallpaper: Wallpaper Select Select You can choose between displaying an image, using the active theme or leaving the screen empty Themes Select Select Select the desired new theme from the list Startup screen Select Select You can choose between displaying an image, using the active theme or leaving the screen empty Change the theme of your phone: Define the startup screen: Configure the screen saver: Power save Select Save • First value: enter the duration in seconds before screen light fades • Second value: enter the duration in seconds before screen light turns off (after the duration of the first and second values the screen light turns off) 21 4.9 Configure the keys to answer a call By default, you answer a call by pressing the off hook key. You can also configure your handset to answer a call by pressing any key or automatically without pressing any key. Menu Access MENU Select Access to the handset settings menu Select the tab: Calls Answer mode Select Select 4.10 You answer a call • Normal : pressing the off hook key • Any key : by pressing any key • Auto answer : the phone automatically answers the call Call duration and number of messages Your phone allows you to see the time of outgoing calls and the number of sent messages. Menu Access MENU Select Access to the handset settings menu Select the tab: Calls Unit Select Reset Yes Reset of all counters 22 Call screening You can choose to accept or reject the callers identified in the list of filtered calls 4.11 Menu Access MENU Select Access to the handset settings menu Select the tab: Calls Caller filter Select Mode Select List Select Add More • Accept list : accept calls in the list of filtered calls • Block list : reject calls in the list of filtered calls. A specific tab is visualized for automatically rejected incoming calls. Rejected calls details are displayed in the missed calls log. • Filter off : disable filtering Define the list of filtered calls Add a number to the list from your personal directory or by entering the number • Edit : change the selected filtered number • Delete : remove the selected filtered number • Delete all : remove the complete list Configure your phone during charging You can define the phone behavior while charging. 4.12 Menu Access MENU Select Access to the handset settings menu Select the tab: Calls Silent charging Select Mode Select • Off : disable the feature • Discon. : All incoming calls are automatically rejected • Silent : ringer and vibrate are disabled during charging 23 Affected shortcuts to the navigation keys (out of navigation use) You can assign a feature to each key navigation. 4.13 Menu Access MENU Select Access to the handset settings menu Select the tab: Calls Shortcuts Select Select a shortcut and assign a feature to it Select Select Select a shortcut and assign a feature to it Shortcuts only work out of communication. Associate states of the handset to the LED colours You can define when the LED will light red, green and orange, according to a state or event of the phone. 4.14 Menu Access MENU Select Access to the handset settings menu Select the tab: Calls LED Signal Select Select Select Choose the color of the LED and choose the event that will light the LED 24 5 Keep in touch Other Introduction Your system offers a wide range of services and features. To activate a feature when you are not in communication, take the set off the hook and enter the feature code followed by the parameters to associate to the feature. For information on the features codes list, contact your installer or administrator. 5.1 You can program a feature on a speed dial key by entering the feature code followed by parameters associated to the feature. Consult the chapter: Speed dial. Redialling You can call back from your phone call log. 5.2 Call R OR Access to the calls log All incoming, outgoing or missed calls are displayed in the call log Select the desired log: all calls answered calls sent calls missed calls • Select the recipient from the call log • Send the call Call The call log can also be accessed from the menu . Redialling the last number dialled (redial) You are not connected R Enter the feature code: Redial last number Code to associate to a speed dial key: Redial last number. 5.3 Immediate forward to a number You are not connected R Enter the feature code: Immediate forward Enter the destination number When the set is forwarded, you hear a specific tone after hooking off the set. Code to associate to a speed dial key: Immediate forward + No. of diversion telephone. Your set allows you to program other types of forward depending on the entered code: Call forward duration if no reply, Selective forward. 25 5.4 Diverting your calls to your voice message service You are not connected R Enter the feature code: Enter the desired forward code Enter the voicemail number When the set is forwarded, you hear a specific tone after hooking off the set. Code to associate to a speed dial key: Forward + Voicemail number. 5.5 Deactivate forward You are not connected R Enter the code of the forward to cancel If you have defined a forward on a speed dial key, you can cancel this forward by a long press on this key A diversion can also be cancelled by programming another type of diversion. 5.6 Initializing your voice mailbox You are not connected R Enter the feature code: Message service Enter your password and record your name in accordance with the spoken instructions 5.7 Consulting your voice mailbox A voice prompt indicates the presence of messages when you hook off the phone. You are not connected ; R Enter the feature code: Own voice mail Password Follow the instructions of the voice guide Code to associate to a speed dial key: Own voice mail + personal code 26 Define the voicemail number Menu Access MENU Select Access to the messaging menu Access to the voicemail configuration Voicemail number Select Enter number Select Save Enter the feature code: Own voice mail You can add your password just after the feature code to access your voice mail directly Consulting your voice mailbox Menu Access MENU Select Access to the messaging menu Access to your Inbox Listen to voice mail Select Select message Follow the instructions of the voice guide Customising your voice greeting You can replace the greeting message by a personal message. 5.8 You are not connected Enter the feature code: Programming mode R 1 Voice mail 1 Record voice greeting # # End of recording Apply 27 5.9 Modify the password for your voice mailbox You are not connected Enter the feature code: Programming mode R 4 GHI 1 Apply # 5.10 Options Password Old code (4 digits) New code (4 digits) Additional services This manual describes the main services allowed by your set. Do not hesitate to consult the feature codes table to access to these main services. 5.11 Text mail This feature is not available. 28 6 Registering the telephone Other Subscribing the handset to a DECT system You must subscribe the handset to at least one DECT system before you can use the handset to make a call.. 6.1 You have to contact the system administrator to configure the company directory access. The handset can operate with a maximum of four DECT systems When the handset is not yet subscribed to a system, the following message appears on the display screen: Register. Before you subscribe to a DECT system, obtain the following information from your system administrator: • PARK code: Use a PARK code system ID only if more than one DECT system overlaps in your location. • DECT system name: The name of the system to which you subscribe. After you enter the system name, it appears on the idle display. • Phone number: The local phone number assigned to your DECT handset. When entering text, you can switch to the upper case mode, lower case and the numeric keypad by pressing successively on the # key. To subscribe your handset to a DECT system, perform the following steps. Menu Access MENU Select Access to the handset settings menu Select the tab: Connectivity Register Select Place on cursor (highlight) : Register Ok Enter the PIN Code (0000 by default) Select Select an empty slot or an existing system which will be replaced If there are no more free slots, you have to replace an existing system to add a new one. Park code Save OR Skip PIN code Ok Network name Save Use a PARK code system ID if more than one DECT system overlaps in your location. If only one DECT system is available, make no entry, and press the Skip soft key. If only one system is available Enter the PIN Code (0000 by default) Enter the system name Save Enter the phone number assigned to your handset Caller info Save Enter the value: "0" Once recording is complete, the set automatically switches to idle mode. 29 Selecting your telephone system You can switch from one registered system to another. 6.2 Menu Access MENU Select Access to the handset settings menu Select the tab: Connectivity Register Select Place on cursor (highlight) : Register Ok Enter the PIN Code (0000 by default) Select Select a system 30 7 Utilities Other Calendar You can consult and manage an agenda on your phone. 7.1 Menu Access MENU Select Access the agenda menu Modify the agenda format More Select Access to the agenda • View week : View of the week • View month : View of the month Select a date More Go to date Access to the agenda Select Enter date Select View the agenda for the selected date You can select a date with the navigation keys Programming an appointment reminder Menu Access MENU Select Access the agenda menu Select New appointment Add Continue Enter date Continue Enter the beginning time Select Choose the term of appointment Continue Enter the subject of the appointment Continue Enter the place of the appointment Select ; Define when the reminder will be activated before the appointment Define when the reminder will be activated before the appointment Menu Access MENU Select Access the agenda menu Select Select a date View the agenda for the selected date More Select the appointment Change the appointment by filling in the fields as described in the creation of appointments 31 Copying an appointment reminder Menu Access MENU Select Access the agenda menu Select Select a date View the agenda for the selected date Copy Select the appointment Change the appointment by filling in the fields as described in the creation of appointments Delete an appointment reminder 7.2 Menu Access MENU Select Access the agenda menu Select Select a date View the agenda for the selected date Delete Yes Select the appointment Calculator Menu Access MENU Select Access to the calculator, countdown or wake up features Calculator Select Enter a digit (keys 0 to 9) Select the operation Select Display the results Select 7.3 Stopwatch Menu Access MENU Select Access to the calculator, countdown or wake up features Stopwatch Select Start Start the stopwatch Lap Make an intermediate step (the last 2 measures are displayed) Stop Stop the stopwatch Continue Restart the stopwatch after stopping Reset Reset the stopwatch 32 7.4 Wake up services Menu Access MENU Select Access to the calculator, countdown or wake up features Alarms Select Alarm Select Save Enter wake up hour Turn off Deactivate a programmed wake up Program a recurring alarm Menu Access MENU Select Access to the calculator, countdown or wake up features Alarms Select Recurrent alarm Select Continue Enter wake up hour Mark Ok Mark the days when the alarm sounds and validate Turn off Deactivate a programmed wake up To modify a wake up alarm, select it and change the values 33 8 Accessories Other 8.1 Characteristics of the mains power adapter Entry: 100/240 V - 50/60 Hz Exit: 12 V DC - 500 mA The mains power socket used must be close to the charger/holder and easily accessible, so that it can be used as an "on/off" facility. Headphone / external microphone The side of the telephone features a headphone / external microphone socket. Contact your retailer to find out the characteristics of the various headphone models. Your headset must be 2.5mm jack type. Make sure to deactivate the Bluetooth feature if it is activated. 8.2 Cleaning your telephone Your telephone does not require any particular servicing. However, it may be cleaned using a soft, damp cloth. 8.3 Do not use soap or detergent that would risk altering the colours or damaging the surface of the telephone. Transporting and protecting your telephone To avoid losing your telephone, get into the habit of clipping it onto your belt. Your telephone can also be carried in a protective case. 8.4 Various models of carrying case are available. Ask your installation technician for information. It is vital to use the special protective carrying case if your telephone is to be used in an industrial environment (presence of dust, filings, vapours of diverse origins and risk of being dropped). If the telephone is used with a carrying case, the belt clip must be removed. 34 9 Precautions for use / Declaration of compliance • Safety Instructions Other Changes or modifications to the equipment not expressly approved by the party responsible for compliance could void the users authority to operate the equipment.. To limit the risk of interference, people with pacemakers must keep the wireless telephone away from their equipment (minimum distance of 15 cm).. It is recommend to follow the standard acceptance procedures before using this equipment in human safety critical areas (hospitals...).. DECT equipment can only be used to establish links between fixed points if these links are temporary and the equivalent isotropically radiated power at the antenna is less than 250 mW. The conditions of access to a DECT equipment telepoint network shall be stipulated by contract with the operator of the authorized telepoint network concerned. Do not expose your telephone to severe conditions (rain, sea air, dust, etc.). You must not switch on or use your telephone near gas or inflammable liquids. No guarantee is given concerning possible interference affecting DECT equipment, due to other authorised utilisation of the radio frequencies concerned. The headset includes magnetic elements that may attract sharp metallic objects.. There is a danger of explosion if the battery is replaced incorrectly - use only the battery with the reference 3GV28041AB (1.2V 1500 mAh) 3BN67202AA (3.7V 650mAh). Battery charge : Charge the battery for about 6 hours before initial use. • Regulatory Statements EU/EFTA This equipment is in compliance with the essential requirements of R&TTE Directive 1999/ 5/EC.. The Declaration of Conformity may be obtained from your installer. USA and Canada This device complies with Part 15 of the FCC Rules and with RSS-210 of Industry Canada.. Operation is subject to the following two conditions : (1) this device may not cause harmful interference, and (2) this device must accept any interference received, including interference that may cause undesired operation.. This equipment has been tested and found to comply with the limits for a class B digital device, pursuant to Part 15 of the FCC Rules and ICES-003 of Canada. These limits are designed to provide reasonable protection against harmful interference in a residential installation. This equipment generates, uses and can radiate radio frequency energy and, if not installed and used in accordance with the instructions, may cause harmful interference to radio communications. However, there is no guarantee that interference will not occur in a particular installation. If this equipment does cause harmful interference to radio or television reception, which can be determined by turning the equipment off and on, the user is encouraged to try correct the interference by consulting the dealer.. 35 Precautions for use / Declaration • Exposure to Radio Frequency Signals. This device has been designed and manufactured not to exceed the SAR (Specific Absorption Rate) radio frequency power transmission limits established by the different countries concerned. The SAR value is 0.09 W/kg (the globally accepted maximum limit being 1.6 W/kg). • User Instructions Only use the handset in temperatures between -5 C to +45 C (23 F to 113 F). This apparatus is Hearing Aid Compatible (HAC). Acoustic shock protection The acoustic level of the signal generated by the handset earpiece is less than 130 dBspl for a transient signal (123 dBspl for Australia) and less than 118 dBspl (rms) for a continuous signal (120 dBA for Australia). Directive 2003/10/EC specifying the risks inherent in noise at work The ring contributes towards overall daily noise; at its maximum setting, the level is 105 dBA at 60 cm from terminal. To reduce the level, the following is recommended: - reduce the setting (9 levels of 5 dB) - program a progressive ring. This device can be used for indoor operation in all the countries; you must consult your installer for an outdoor usage. Privacy Privacy of communications may not be ensured when using the handset or any additionnal BluetoothR device. •Disposal The equipment must be returned to a collection point for electronic equipment waste disposal. Defective batteries must be returned to a collection point for chemical waste disposal.. 36 9